
How to paint Hibiscus And Bird's Of Paradise Flowers
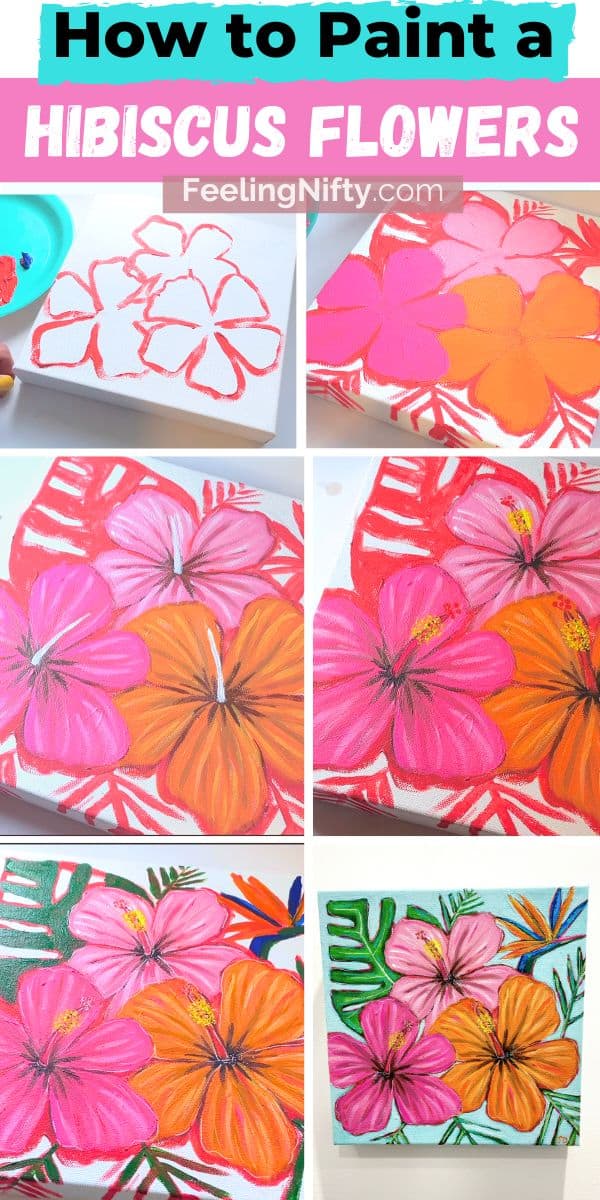
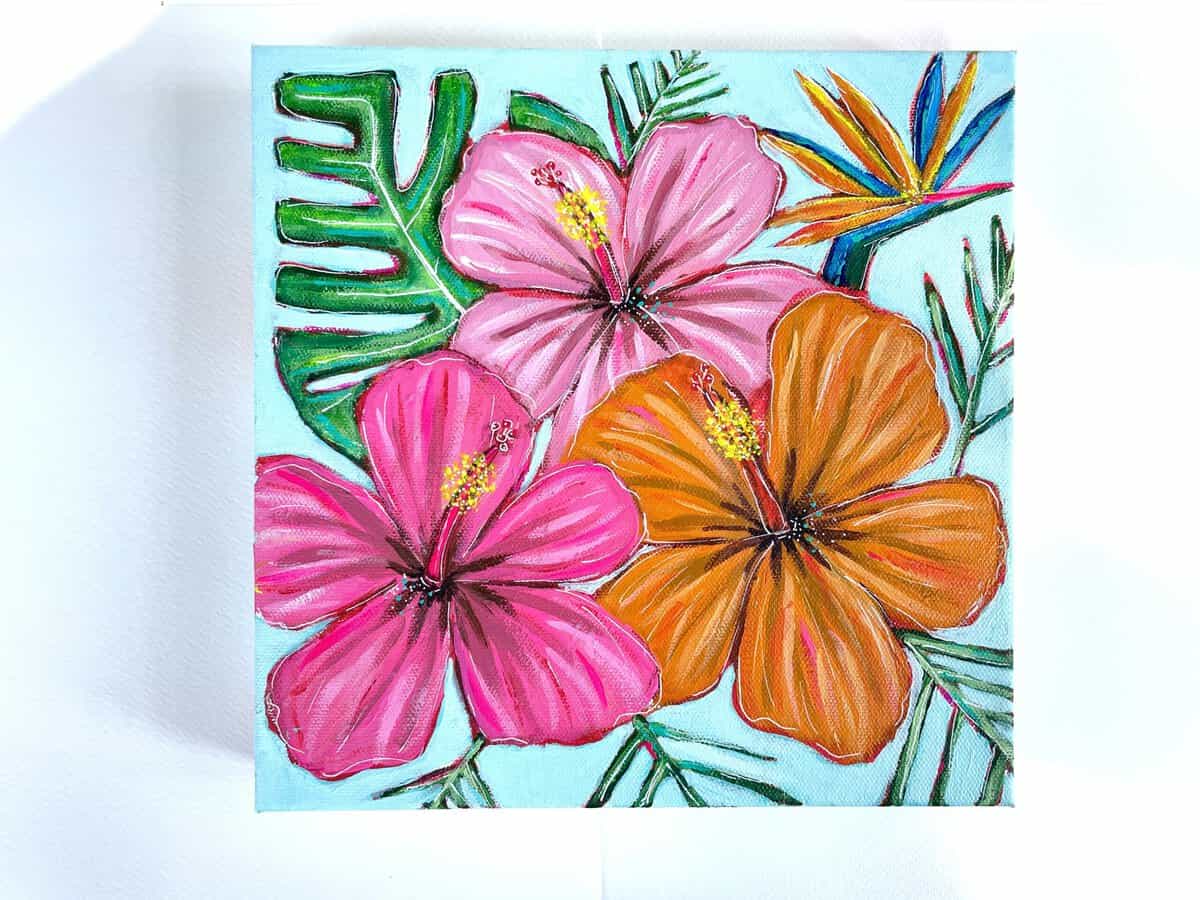
This tutorial will guide you through easy steps to paint hibiscus flowers and bird's of paradise. Using a stencil, simple paint colors (using color mixes) and basic steps, you'll enjoy painting on canvas, stress-free! This summer inspired painting is perfect all year around to help infuse some warm, sun shiny vibes into your life.
If you're looking for more flower painting ideas, you can check out this 53 flower painting ideas post
Let the zen vibes begin...
Hibiscus Flowers
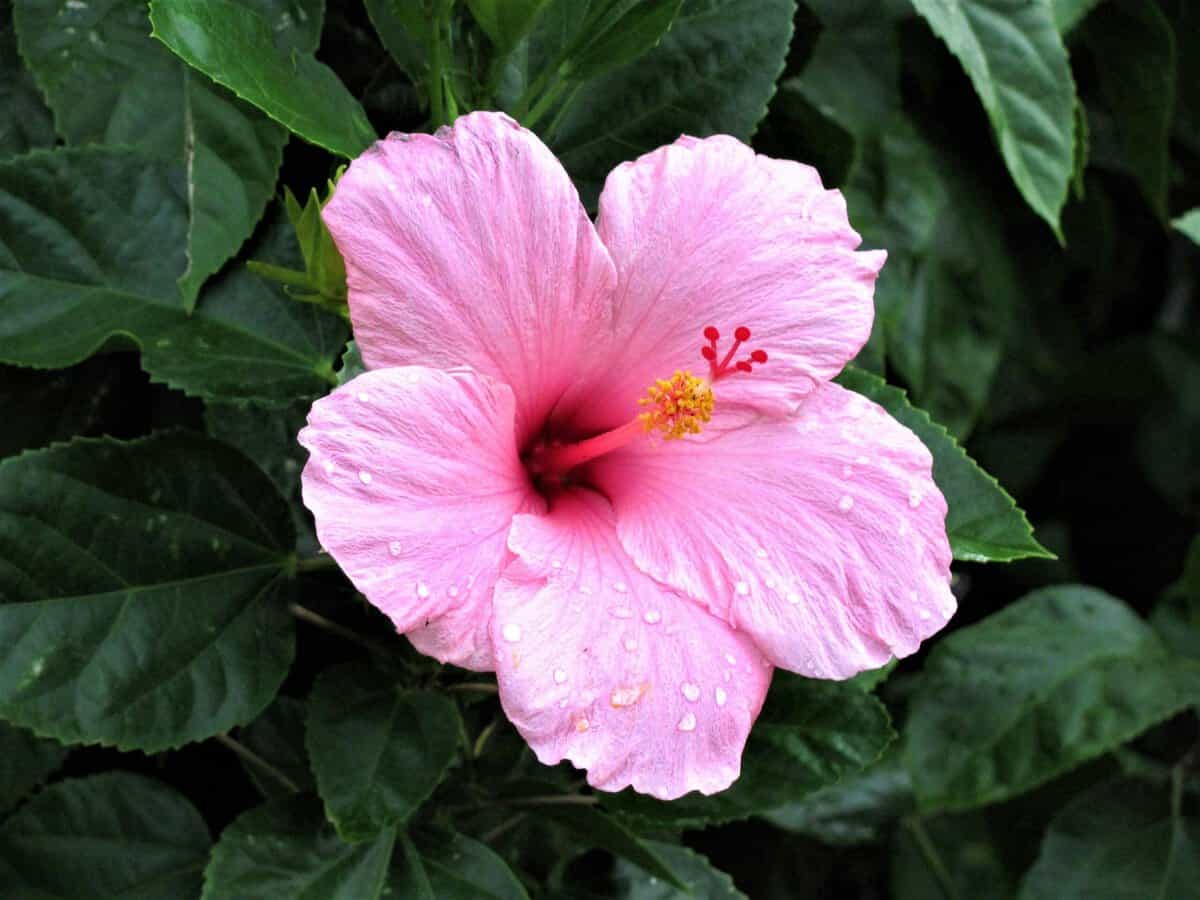
Hibiscus flowers are a beautiful and delicate tropical bloom that is native to tropical Asia and the Pacific Islands (including Hawaii). It comes in a variety of colors like red, pink, orange, yellow, white blue and purple. In the tutorial below we'll be painting magenta, light pink and orange blooms (but you can change the color to whatever speaks to you).
The anatomy of the hibiscus is very fascinating. Hibiscus flowers have 5 very delicate and big petals. They look a bit wrinkly because they are so thin. In the centre of the bloom is the pistil which is the signature feature of this bloom. Pillar like, with 5 red anthers at the top (the part that catches the butterfly and hummingbird pollen from other flowers) and the cheerful yellow anthers (produces its own pollen to attach onto passing butterflies/birds to to hitch a ride to the next flower).
Birds Of Paradise
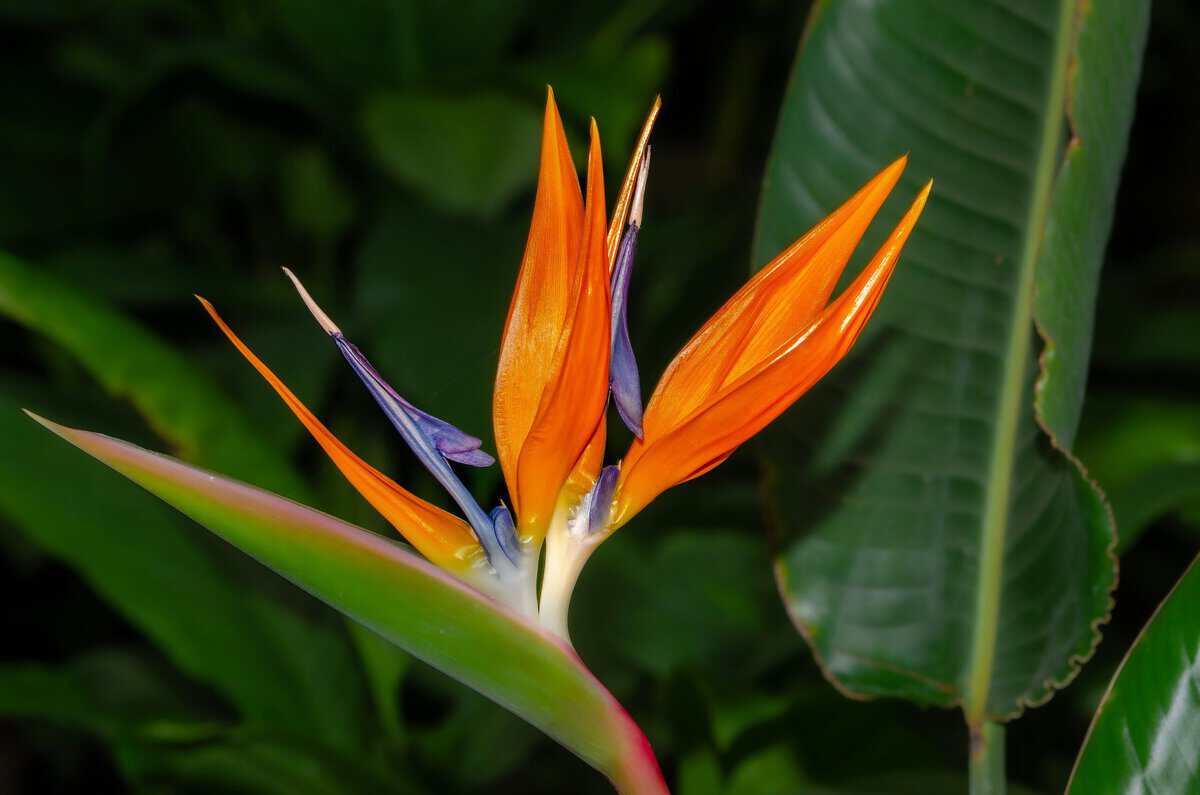
The Birds of Paradise flower (not to be confused with the actual bird) is another interesting floral. It's shape is very unique and looks more like a sculptural art piece than a traditional petaled flower. It's sharp and structured petals are very reminiscent of a bird taking flight, hence it's name.
The Bird of Paradise flower features a unique lever-like "trapdoor" mechanism: when a pollinating bird lands on the fused blue arrow-shaped petals to reach the deep nectar reserves, its weight depresses the petals, springing open a hidden chamber that forcefully dusts the bird's feet and chest with sticky pollen
Monstera Leaf
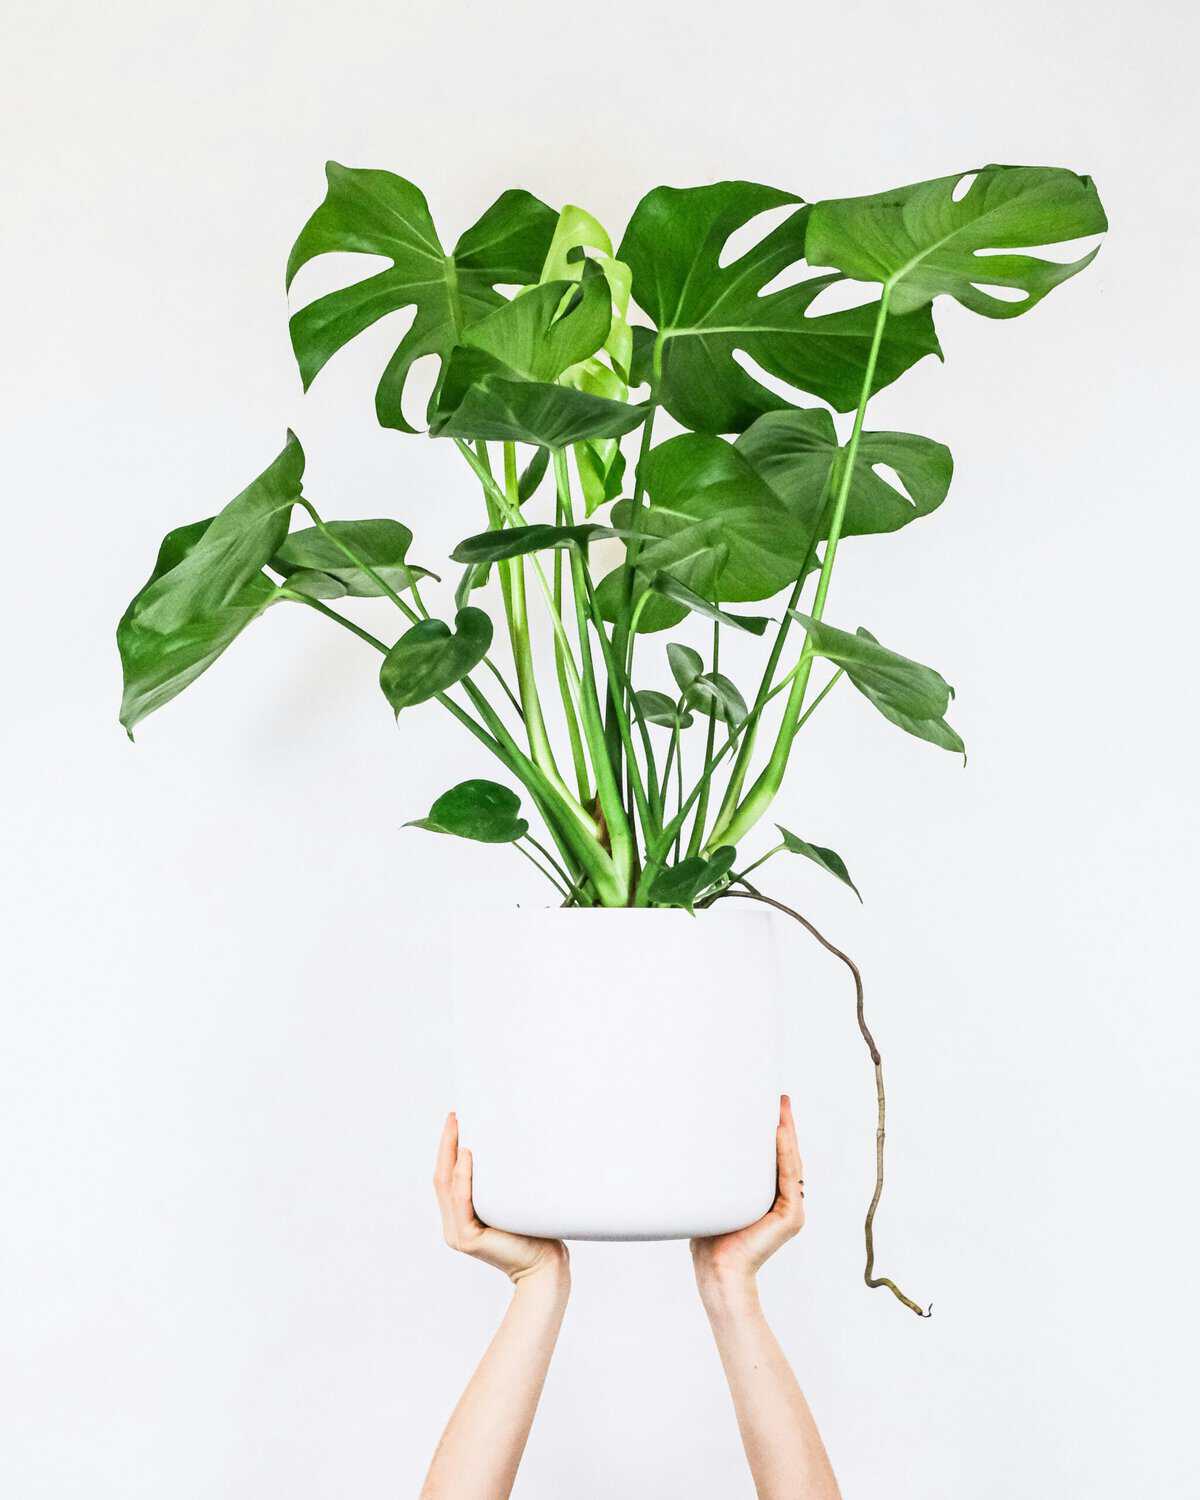
The last element of this painting is the monstera leaf. When researching about all three plants the leaf stood out to me the most. I was humbled when I learned the (possible) reason why monstera leaves have those quintessential slits in them.
It's a process called fenestration, and current scientific theory goes that the leaves at the top of the plant become so large that without the slits the leaves below would get very little sunlight and not thrive. In order for the whole plant to thrive equally (and not hoard all the light) the top leaves do the right thing and form slits. By the way, this happens in year 2-3 in the plants life.
Nature is so interesting to take cues from.
Underpainting
Now that we're armed with some facts about this amazing natural florals, let's bloom into our art.
The painting is divided into parts.
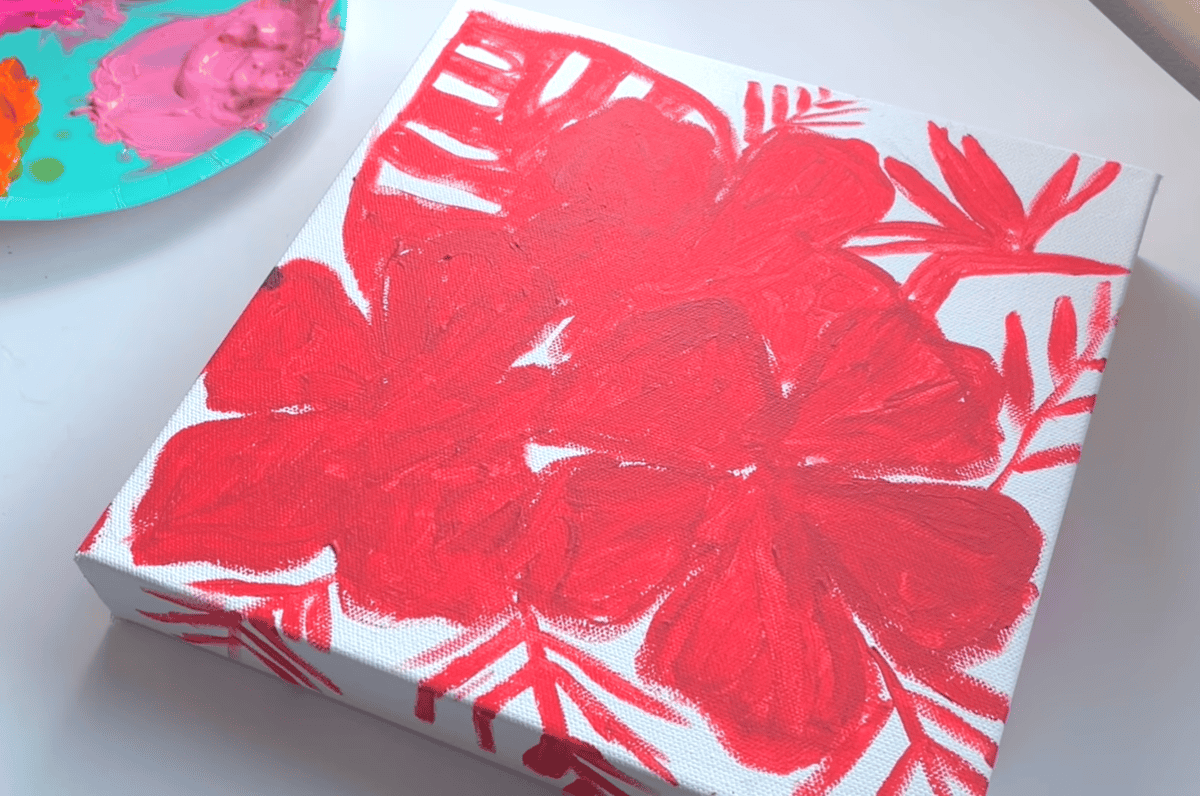
The first part is doing the underpainting. I look at it like the blueprint (or in this case 'redprint') of the painting. With a solid structure at the beginning, the the rest of the painting becomes less stress and more joyful. That being said you can do the underpainting in ANY color you'd like.
Some artist choose brown, others choose red, pink, blue.
The reason I like red is because my personal style is to allow specks of the underpainting show through in the final piece, and the red adds a electric zest of vibrancy against the rest of the colors.
Background Last- Untraditional but Stylistic
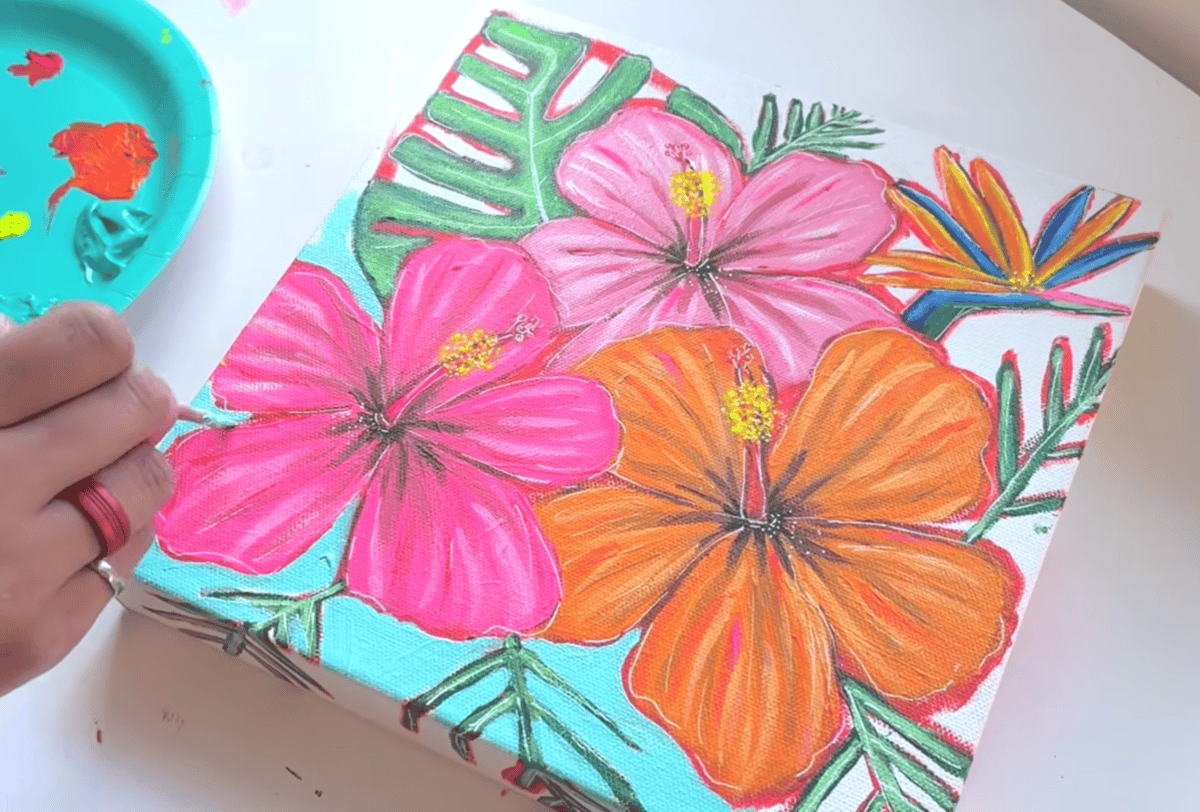
We will be painting in the background last, which many have noted as untraditional in painting. This is true, usually painting rules dictate background goes first. Except when they don't. And this painting is where we're breaking the rules.
But this act of rebellion has a cause.
And style is the reason.
Painting in the background last gives the painting an impressionistic style.
My inspiration behind this style is by a Canadian artist named Tom Thompson. His painting "Jack Pine" captures this style. You can see the amber brown underpainting through the edges of the tree branches, the mountains and the ground. You can also see how the sky (background) has been painted in with thick brush strokes in the final steps.
Now let's talk color mixing...
Color Mixing Chart
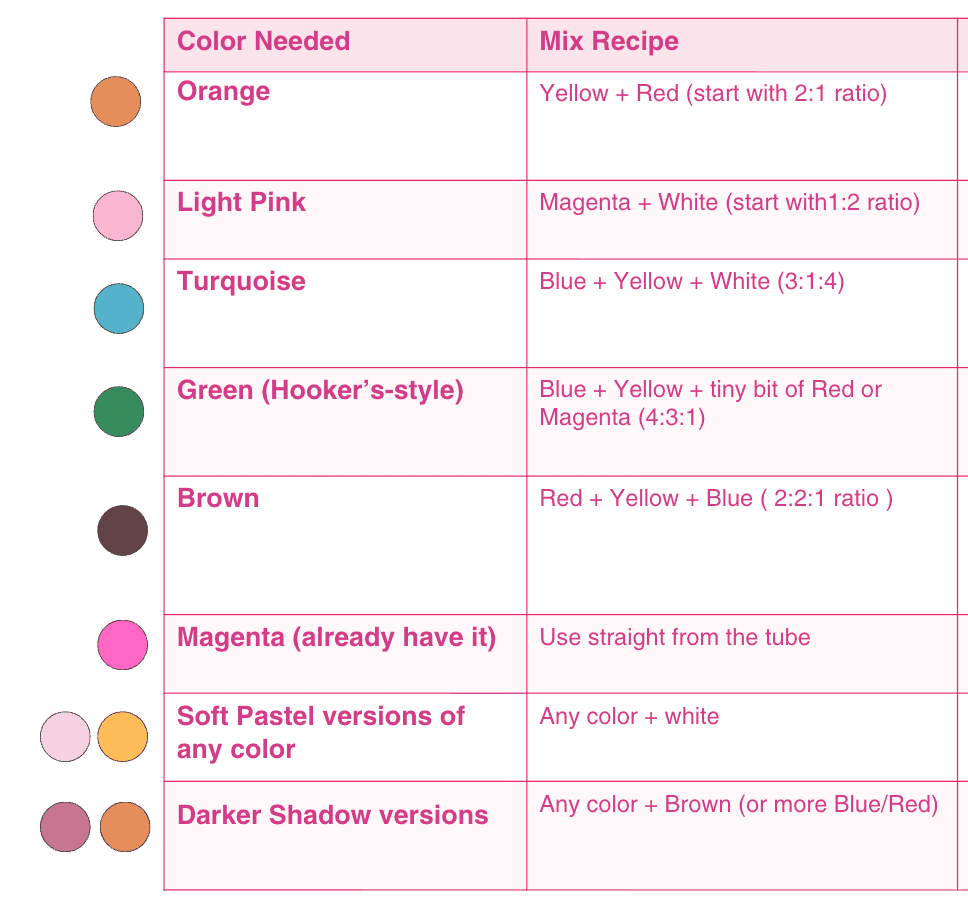
There are 10 paint colors used for this painting. In the name of keeping things simple, I'll show you how you can paint this with just 5 colors: white, blue, red, yellow and magenta.
The other 5 colors can be created and mixed with the recipe below.
Please refer to this chart while going through the steps if you choose color mixing over buying each tube of paint individually.
How To Paint Hibiscus And Bird's Of Paradise Flowers

In this tutorial you'll learn, step-by-step, how to paint hibiscus and birds of paradise flowers on canvas. Through easy mixing techniques and simple steps this process will be fun and at your own pace.
Materials
- Titanium White
- Yellow
- Red
- Blue
- Magenta
- Turquoise (can mix)
- Orange (can mix)
- Light Pink (can mix)
- Brown (can mix)
- Green (can mix)
- ½" flat brush
- Medium Round Brush
- Small Detailing Brush
- 8"x8" canvas
- Palette
- stencil print out (below) & graphite paper
Tools
- For all the colors above that state "can mix" please refer to the color mixing chart graphic in the post above.
Instructions
- Follow along with the Youtube tutorial here
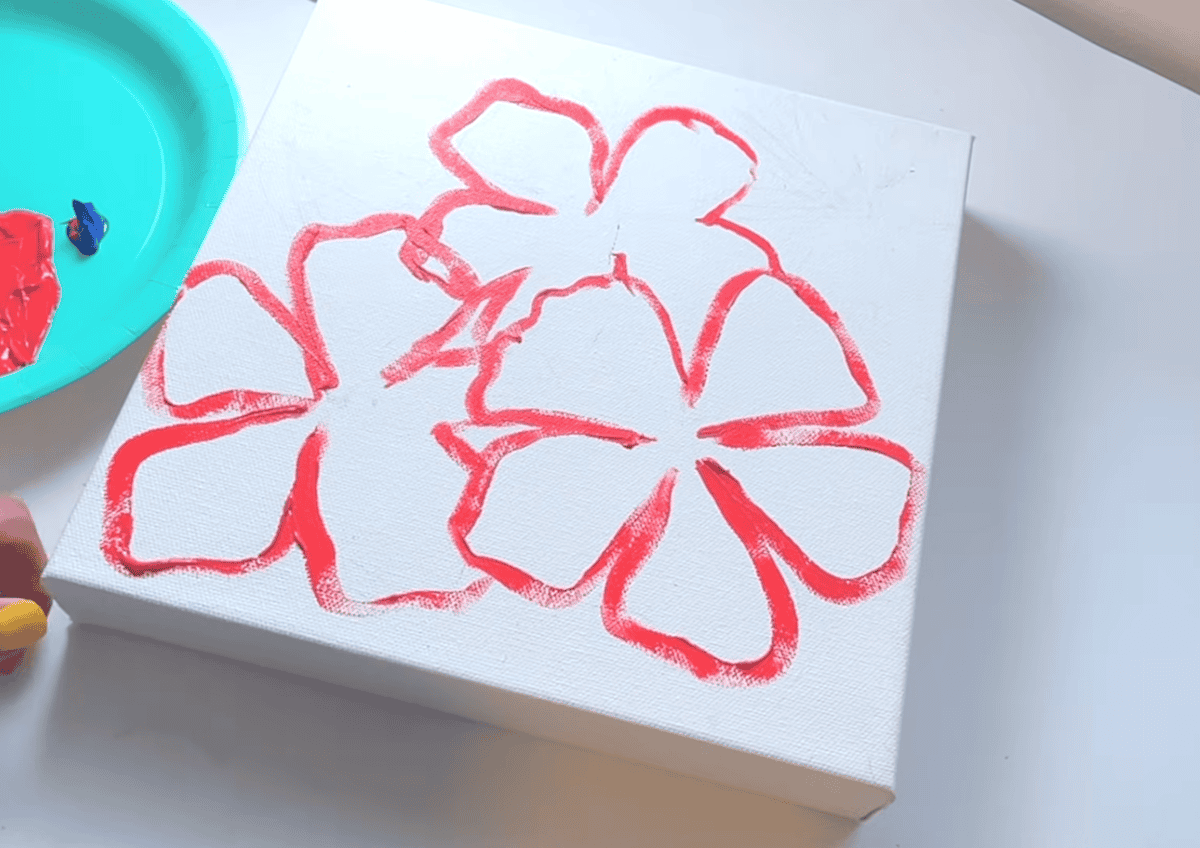
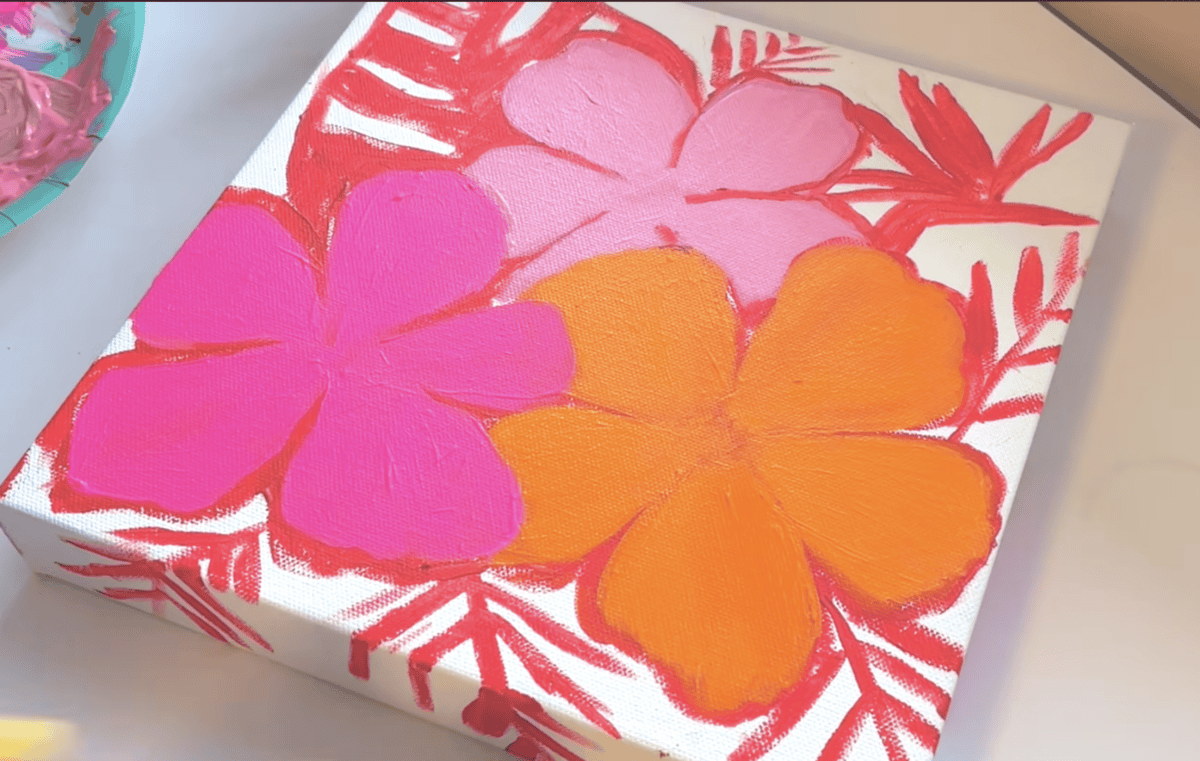
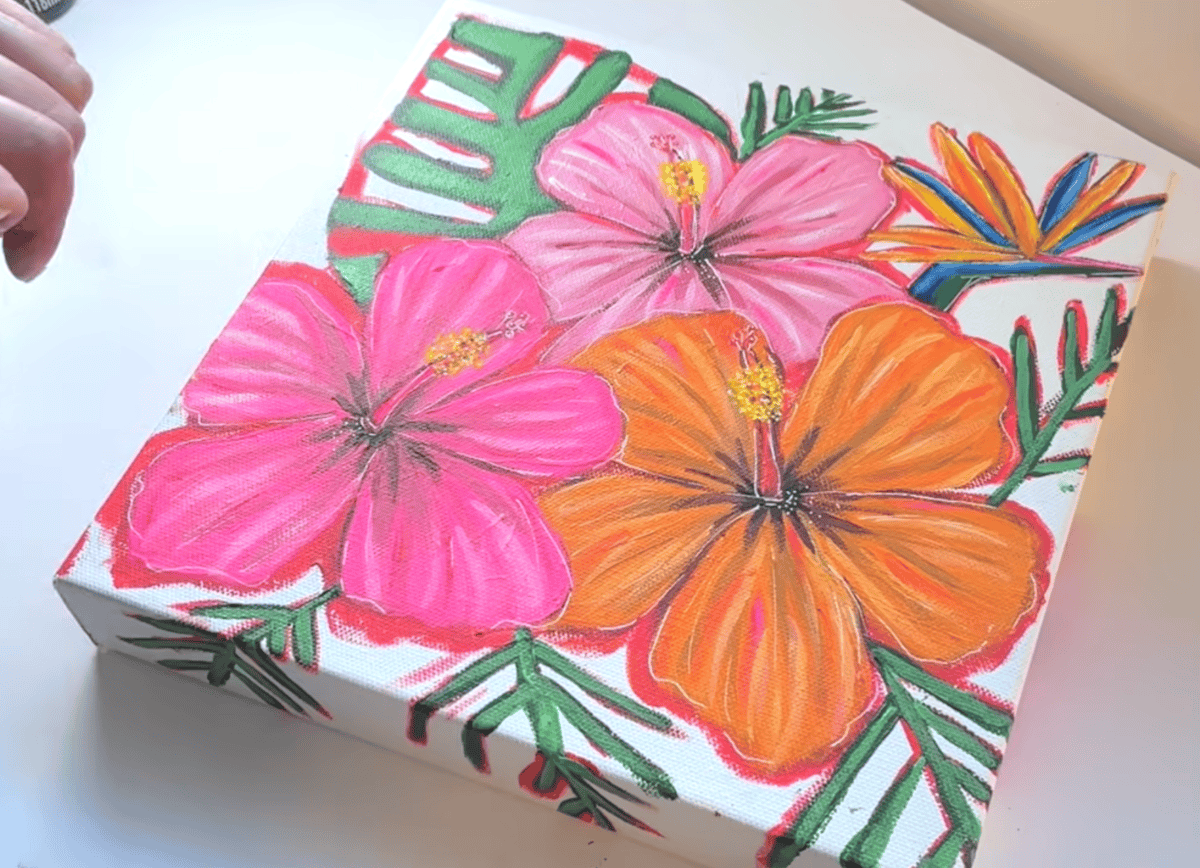
- UNDERPAINTING — Paint the underpainting of the hibiscus, birds of paradise, and monstera/foliage with red paint. Extend patterns to the sides of the canvas if desired. Leave to dry. Optional: Use the free stencil as a guide to paint the shapes or to transfer directly with carbon transfer paper

 .
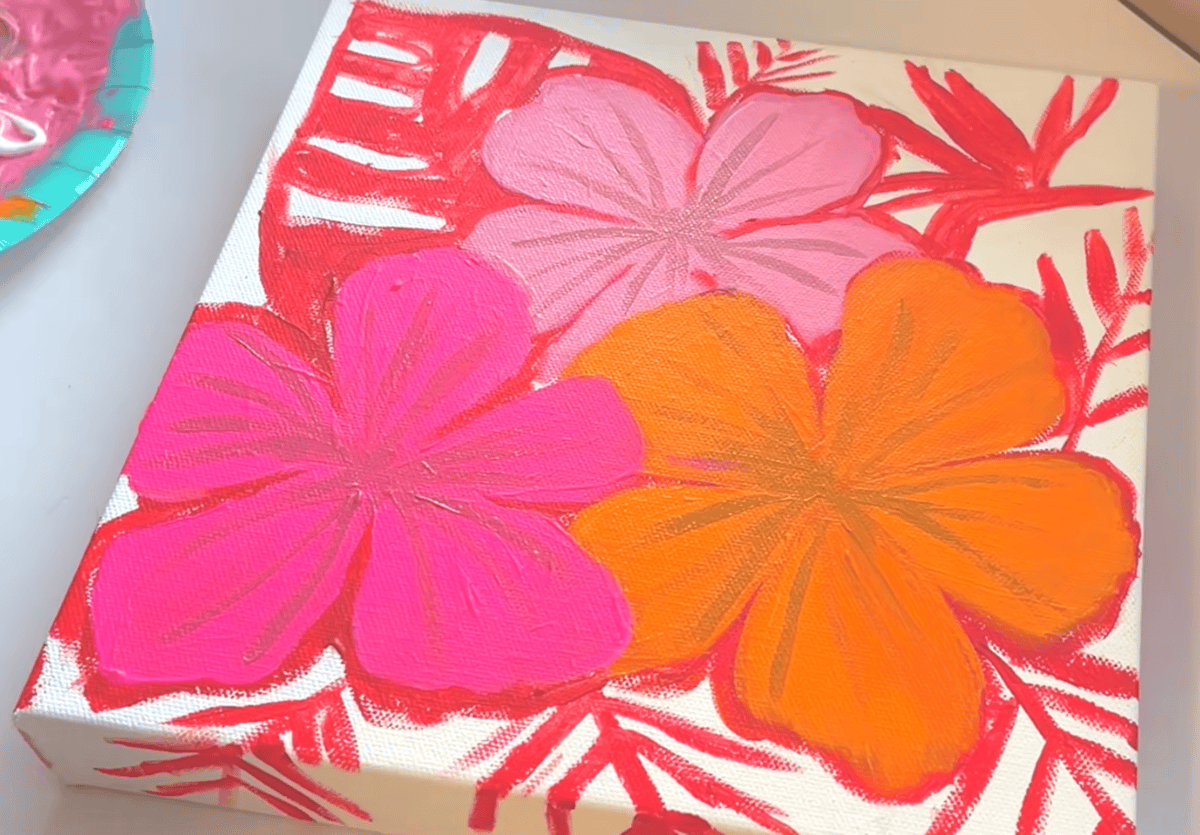
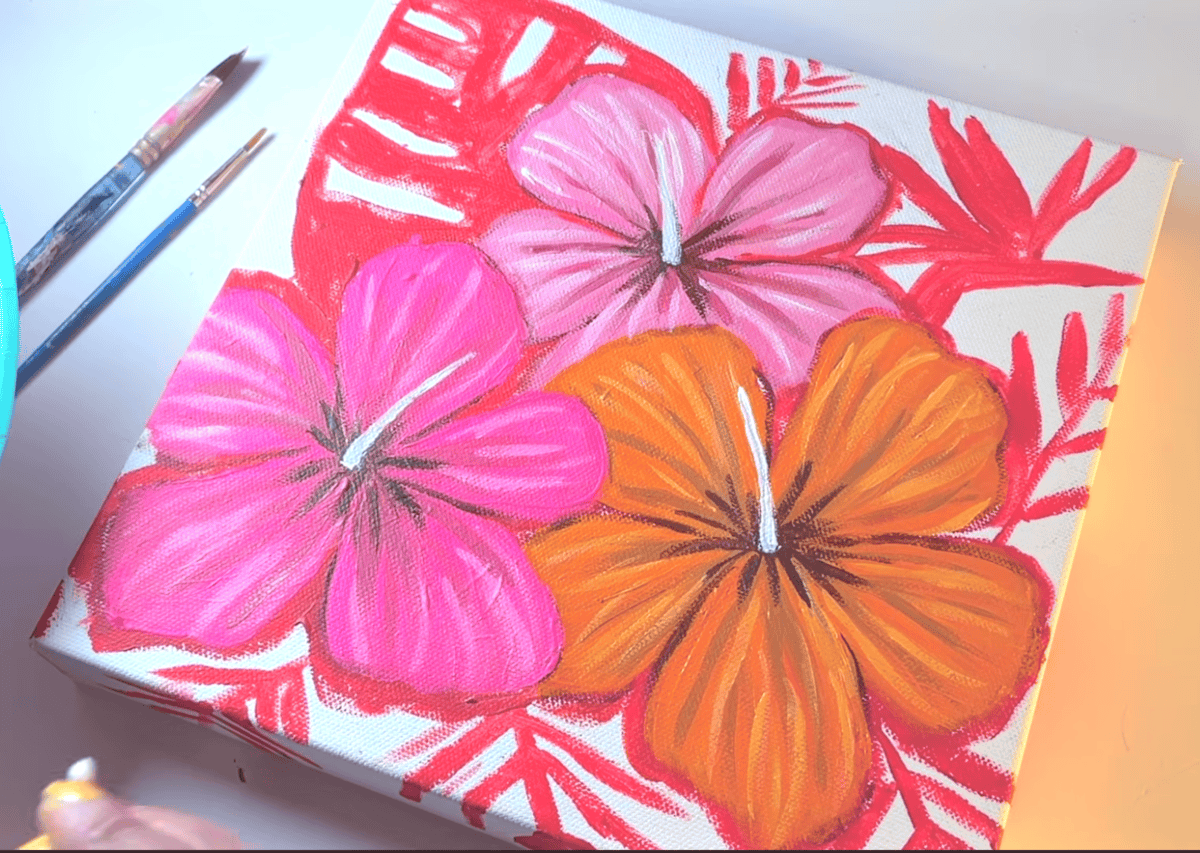
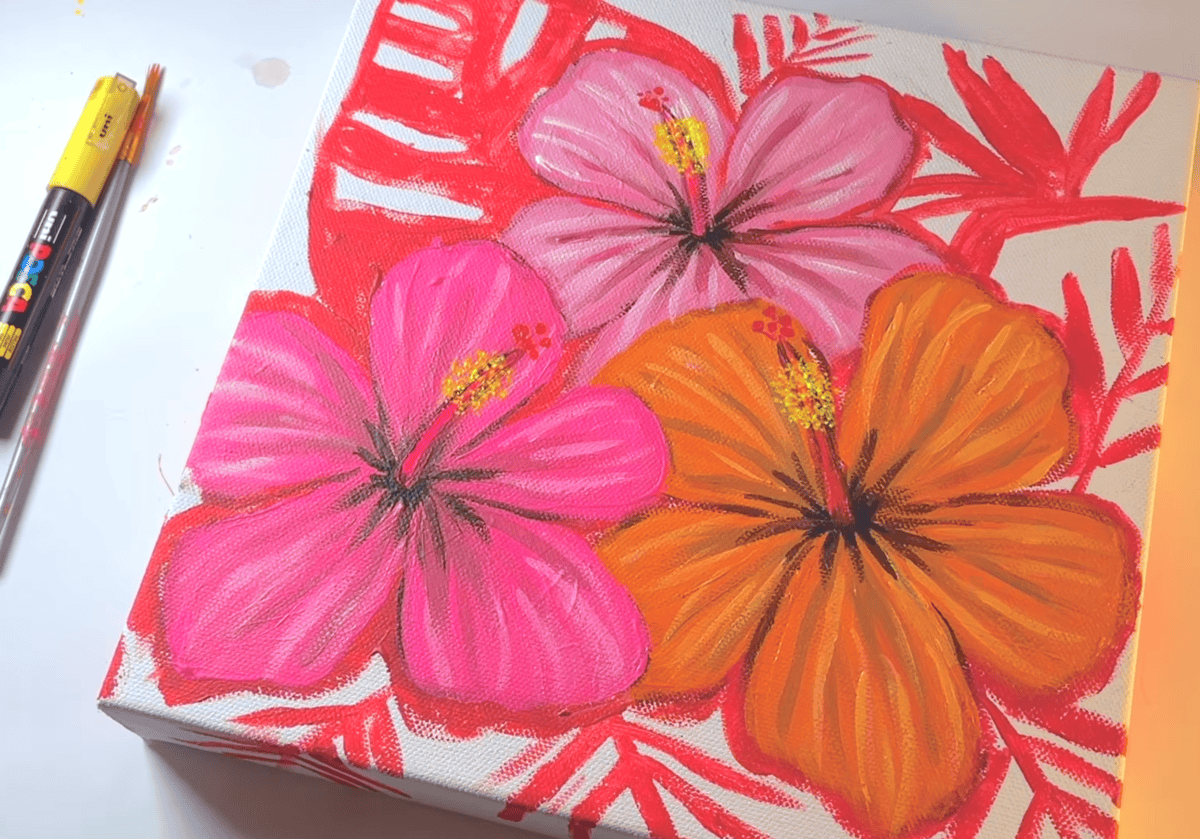
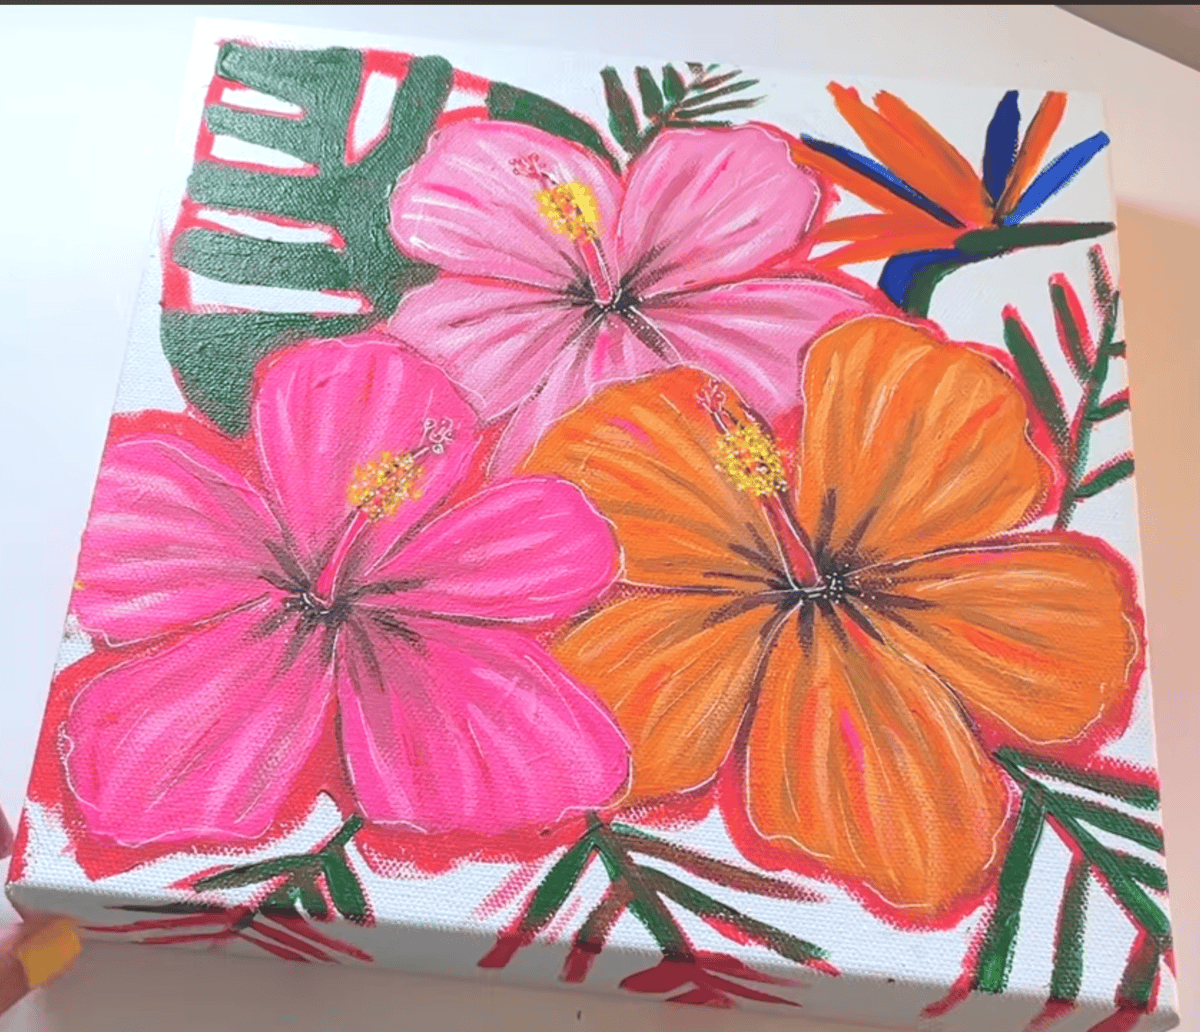
. - HIBISCUS BASE COLORS — Paint the first layer of the hibiscus flowers using three colors: magenta, light magenta (light pink), and orange. Leave to dry.

- PETAL SHADOWS — Mix dark brown into a portion of each of the three hibiscus colors using a 3:1 ratio (3 parts base color : 1 part brown). Leave some pure base color unmixed. Use a small round brush to paint curved shadows on each petal. Let dry completely.

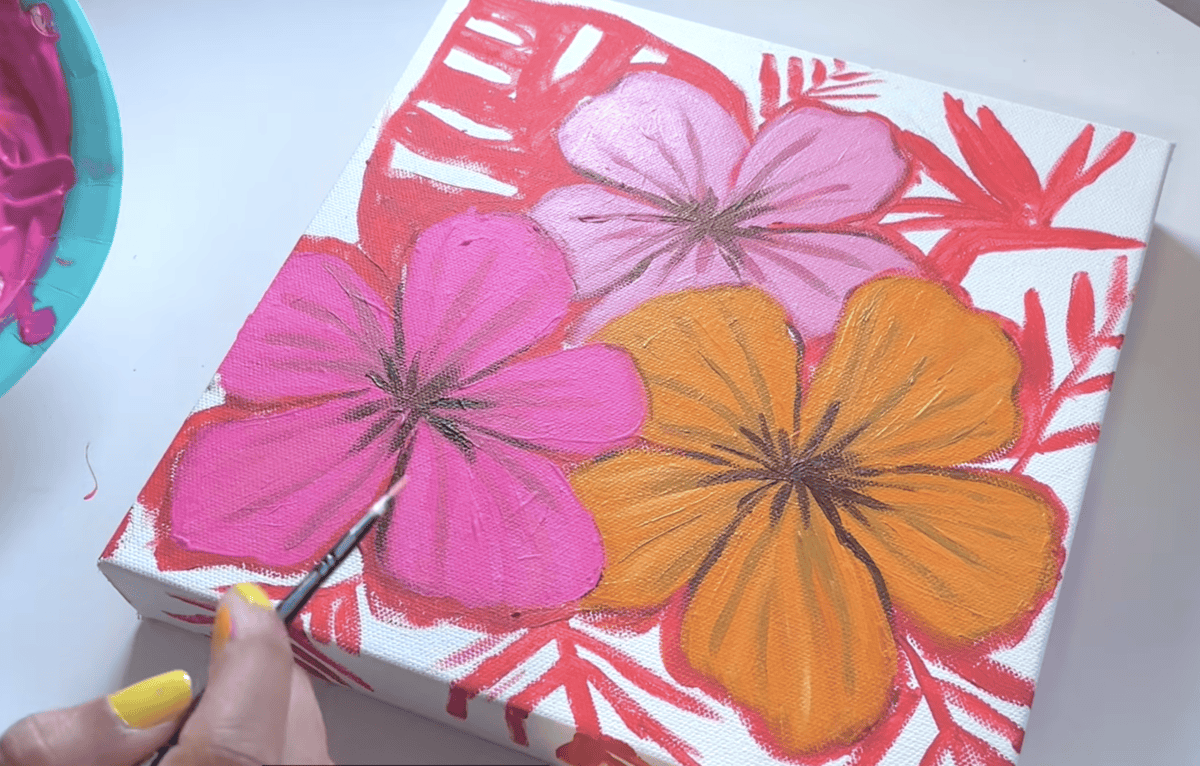
- DARKER SHADOWS — With dark brown and a detailing brush, add deep shadows to all flower centers and select petal edges. Paint centers to look like small spiders and add varied borders on some petals. Do not wait for paint to dry before the next step.

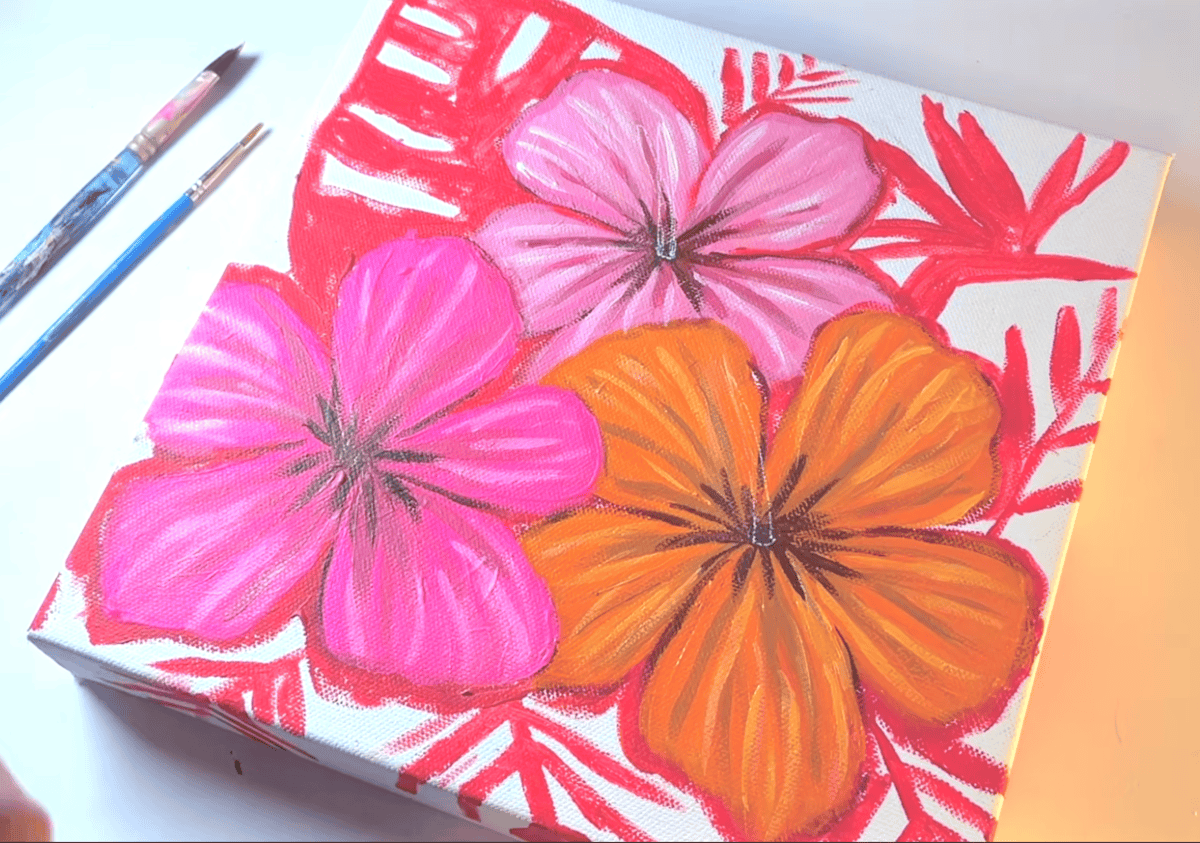
- HIGHLIGHTS — Mix remaining base colors with white in a 1:1 ratio to create soft pastel highlight shades. Use a detailing brush to paint 4–5 curved highlight lines on each petal. Move to the next step while paint is still wet.

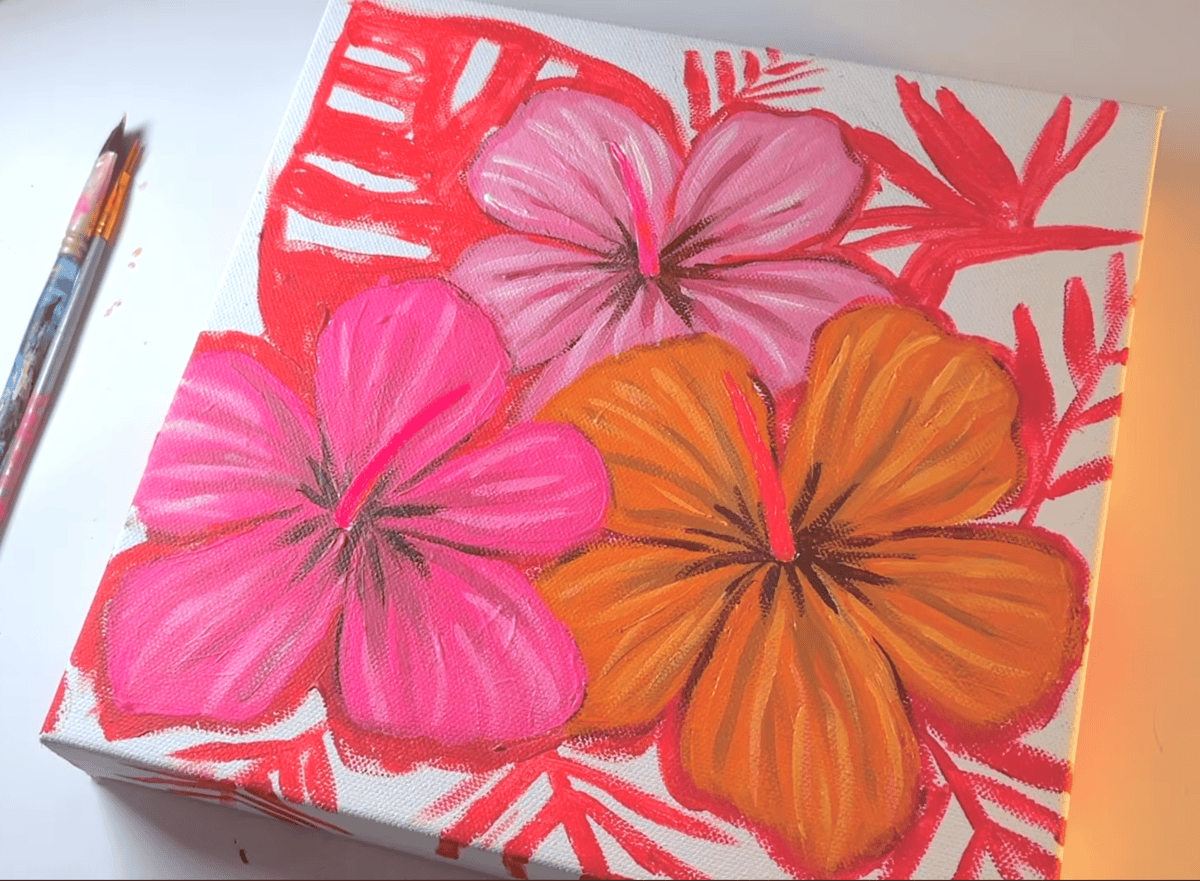
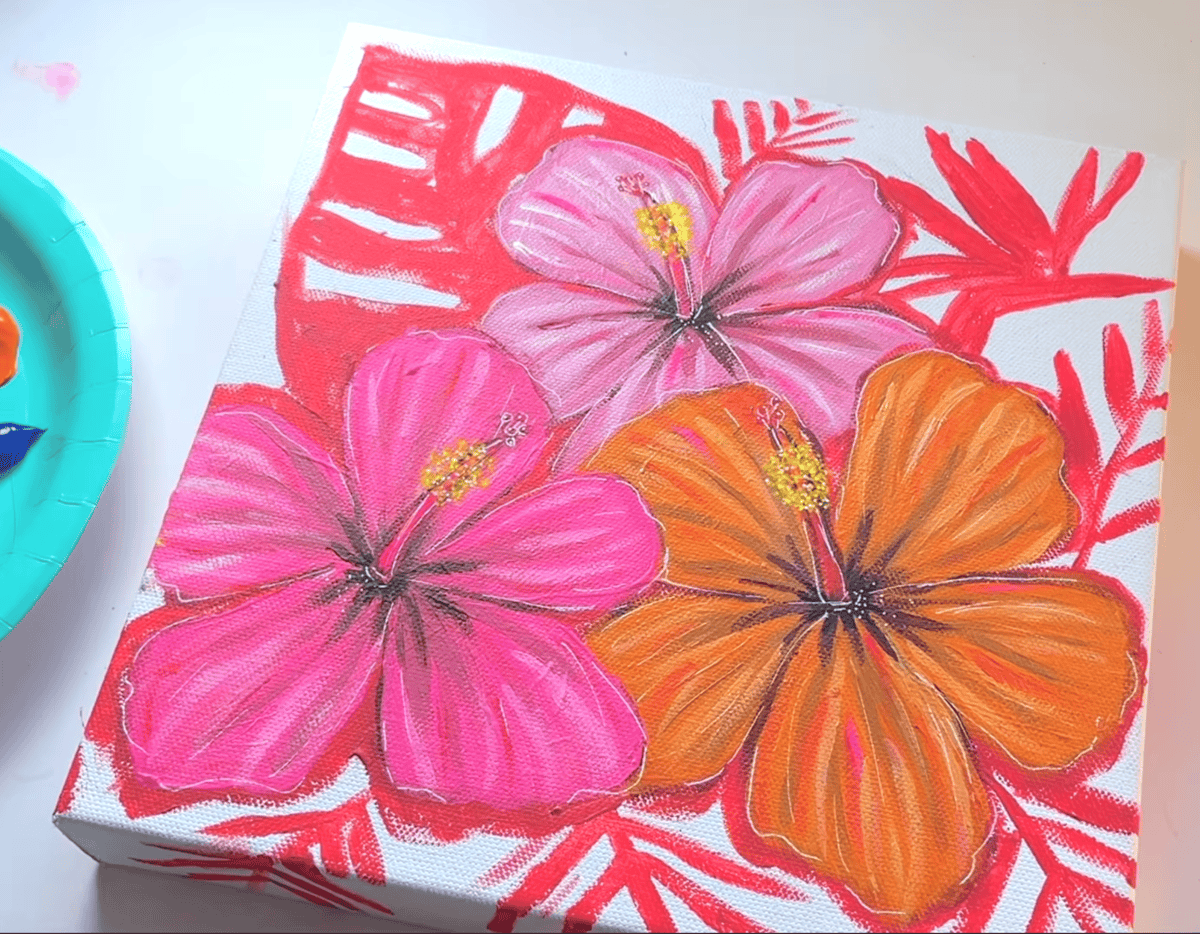
- PISTILS (WHITE) — Using white paint and a detailing brush, paint the long columnar pistil (female part) in the center of each hibiscus. Wait for this layer to dry.

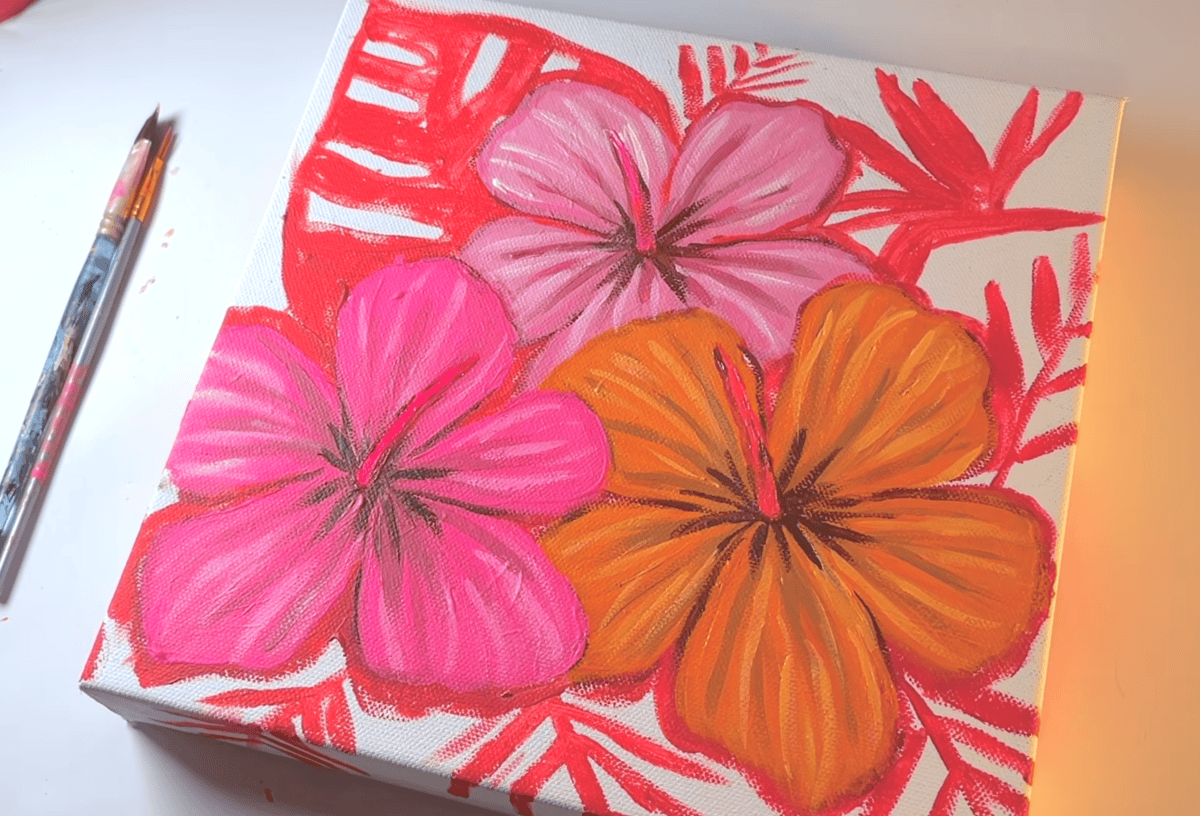
- PISTIL COLOR — Paint the pistils of both pink hibiscuses with magenta. For the orange hibiscus, use bright orange (orange mixed with magenta). Do not wait for the layer to dry.

- PISTIL BORDER SHADOW — While pistil paint is still wet, paint a thin dark brown border around each pistil with a detailing brush for definition. Wait for layer to dry.

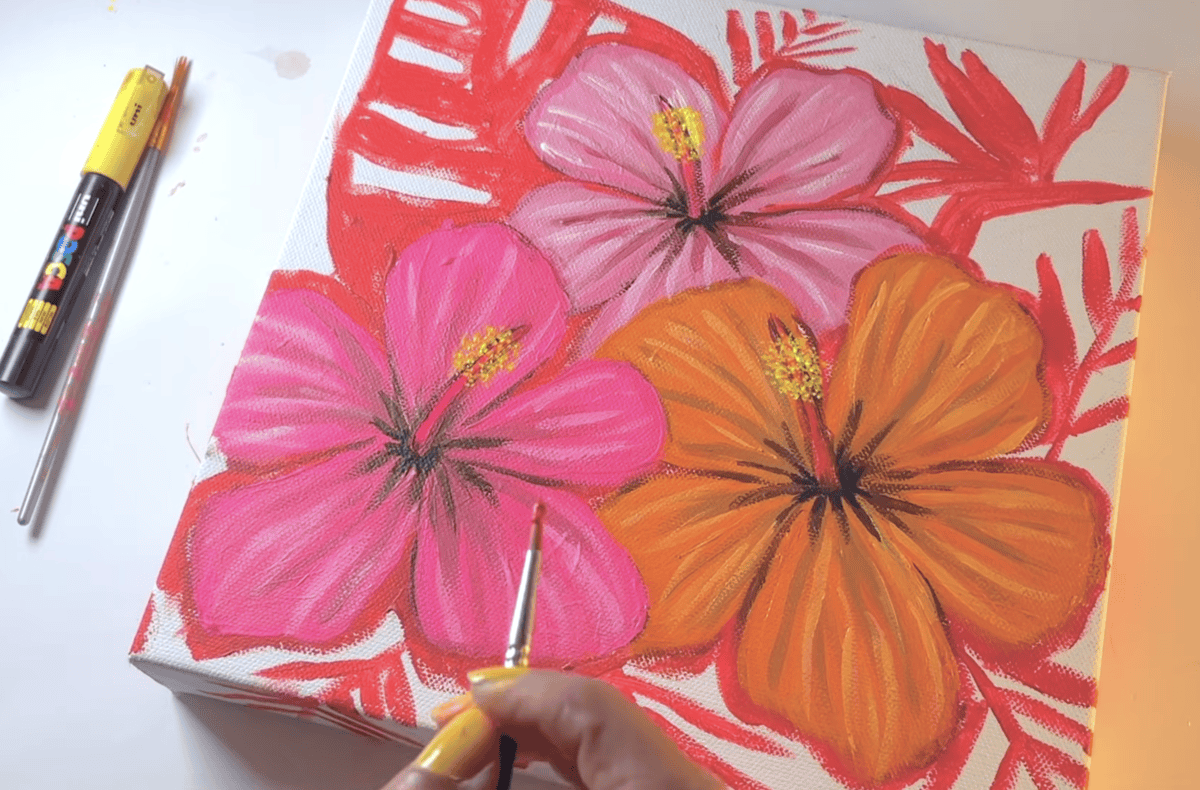
- YELLOW ANTHERS — Use yellow paint (or a yellow Posca marker) and a detail brush to dot the anthers (male part) onto the top third of each pistil, leaving the very tip exposed. Using red paint and your detailing brush paint 5 red dots (stigma) and lines that connect it to the top of the pistil. Move immediately to the next step while wet.


- OPTIONAL WHITE BORDER — Using white paint (or white Posca marker) and a detailing brush, paint a thin white border around each hibiscus petal for extra definition.

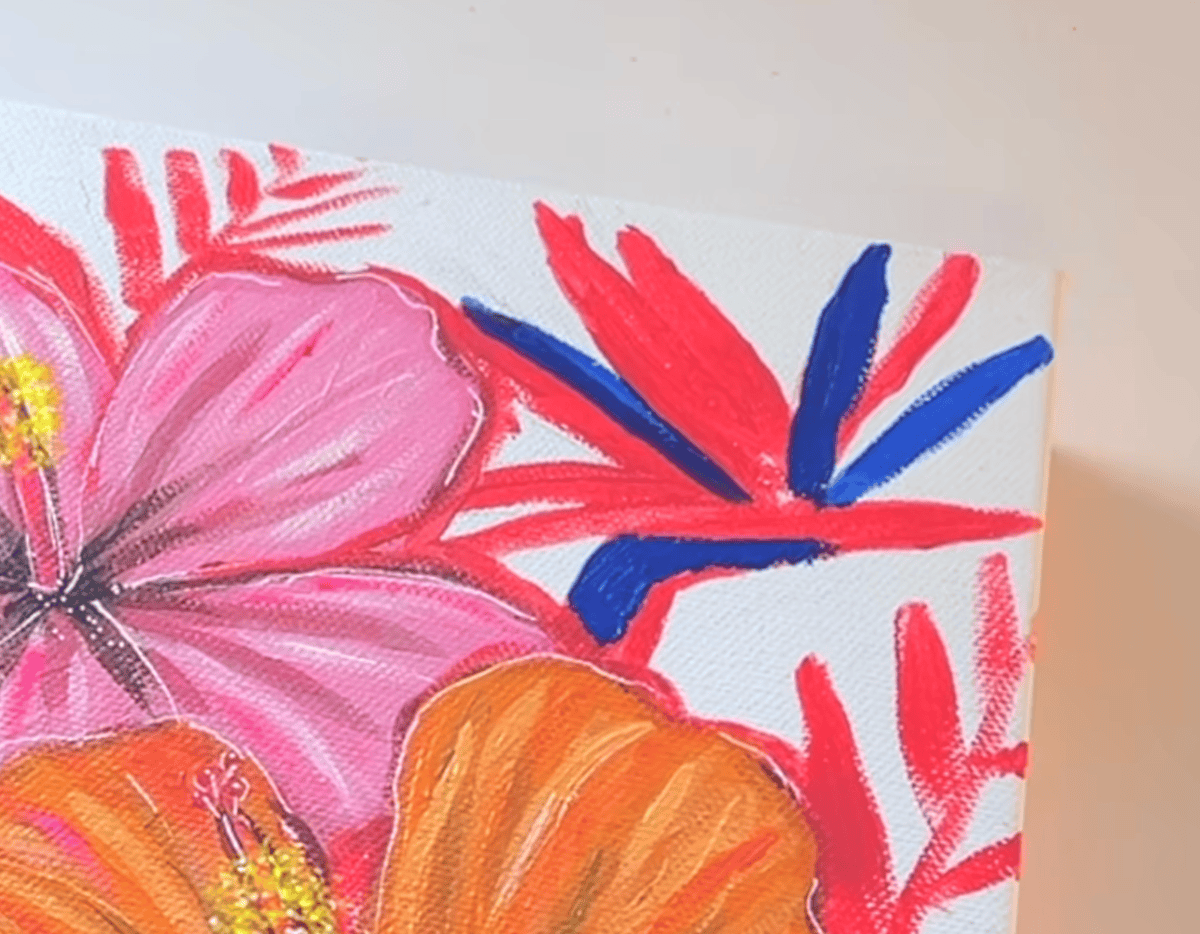
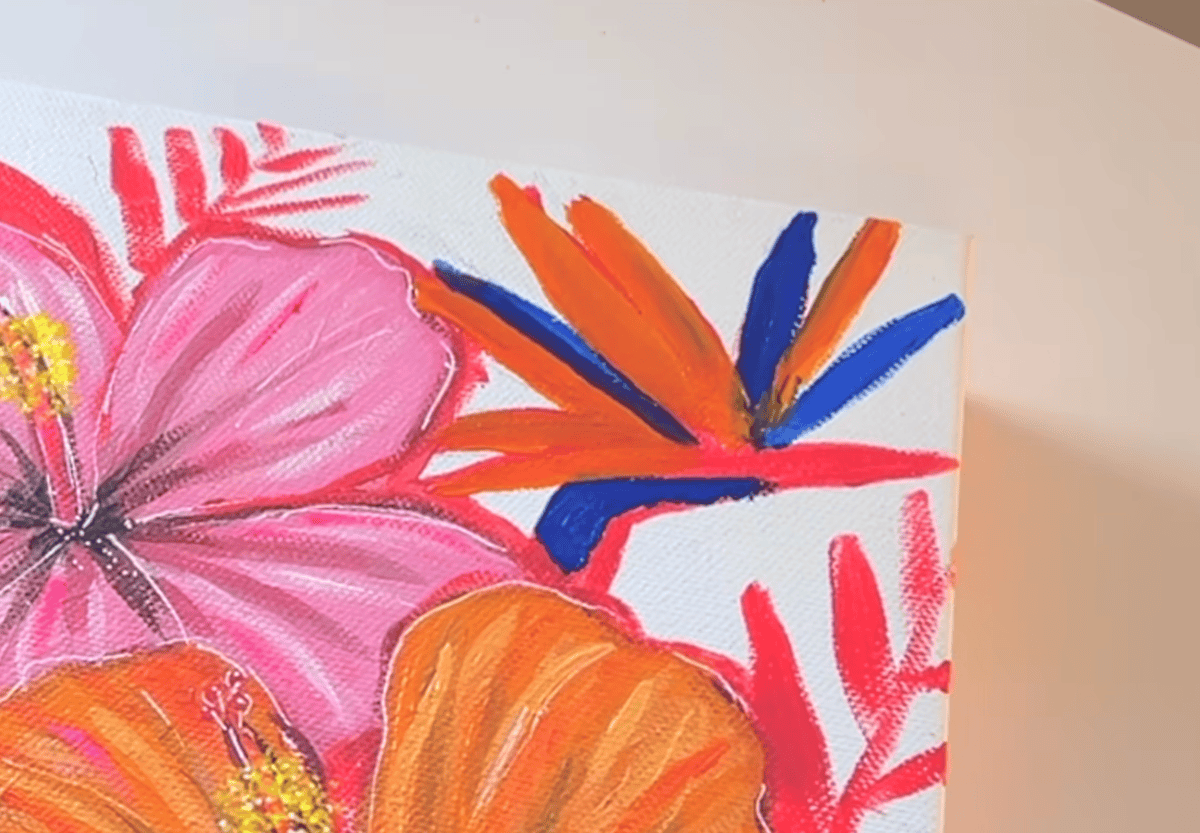
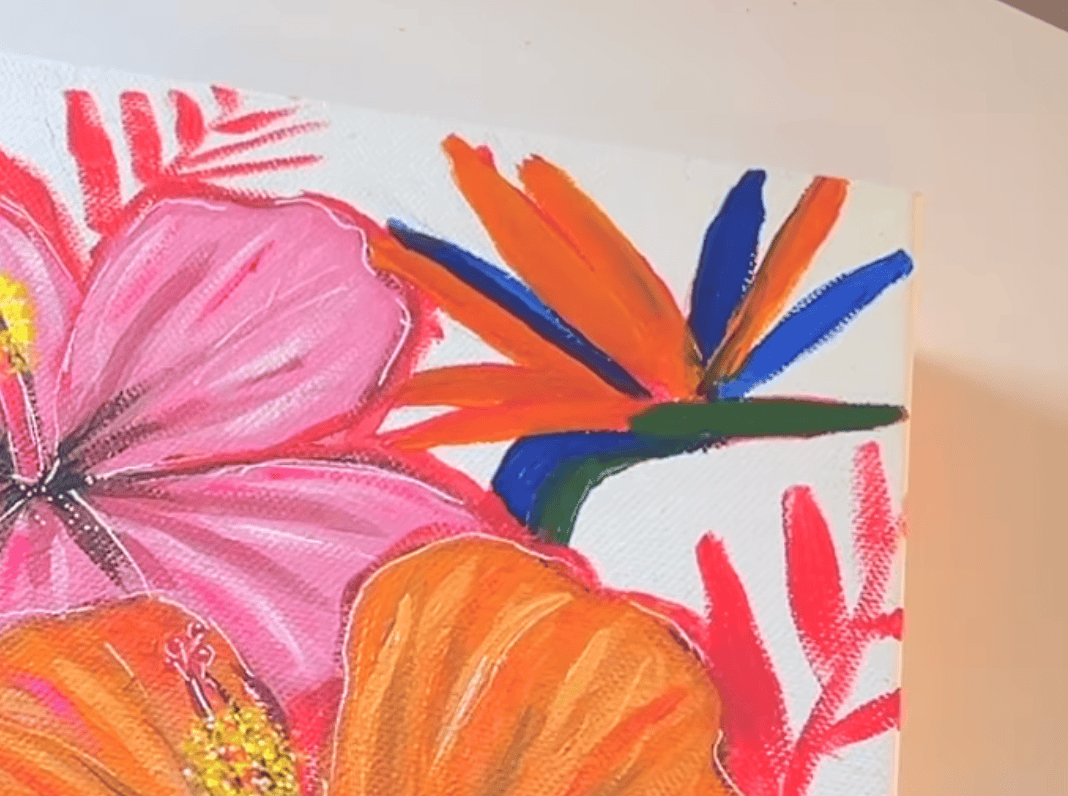
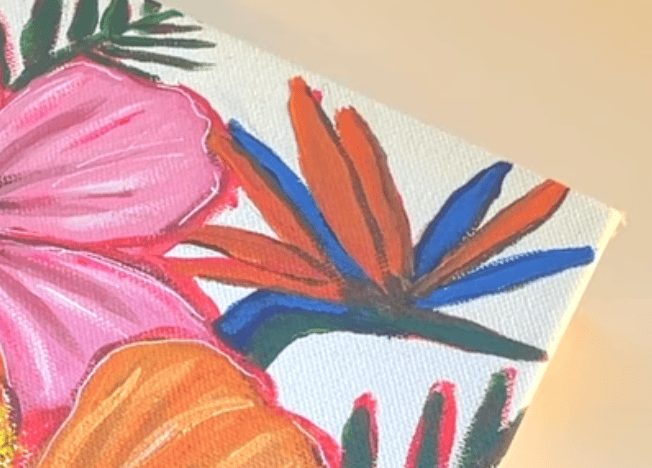
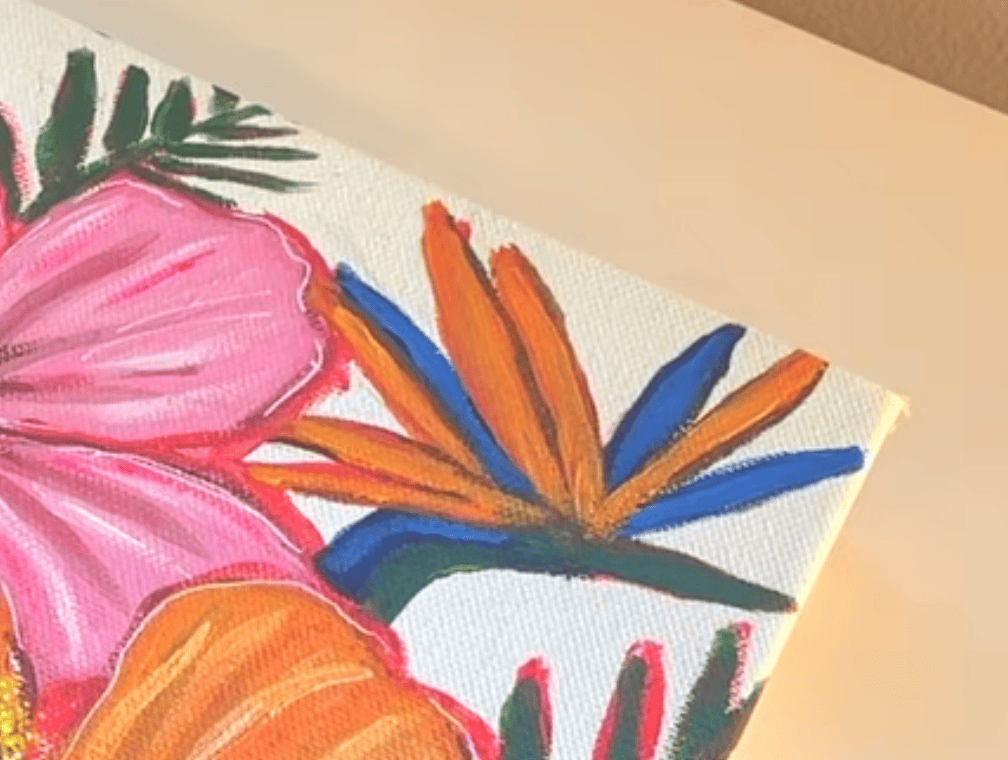
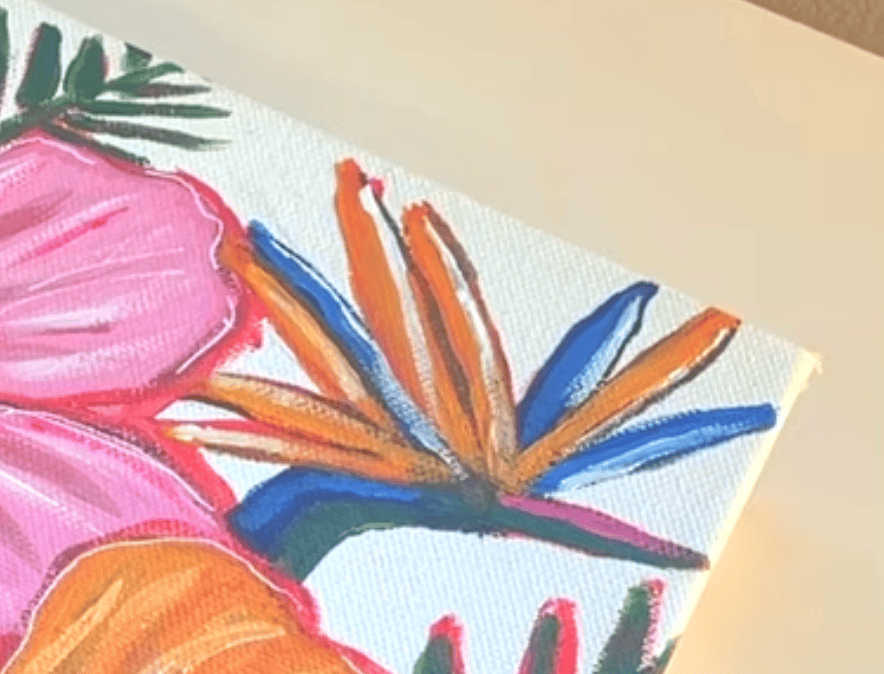
- BLUE PETALS & STEM — With blue and a medium round brush, paint the 3 blue petals and the left side of the flower stem. Let dry.
- ORANGE PETALS — With orange paint and medium round brush, paint the remaining 6 petals. Let dry.

- GREEN STEM — Using green and medium round brush, paint the rest of the stem. Move to next step while this layer dries.

- GREEN MONSTERA & FOLIAGE (first layer) — Use medium round brush and Green to fill the monstera leaf and the five fern-like plants. Leave gaps along the edges so the red underpainting shows through (impressionistic effect). Paint the canvas sides if extended. Move to next step while paint dries.

- ORANGE PETAL SHADOWS — While leaves dry, return to the birds of paradise (now dry). With brown paint and detailing brush, paint a thin brown border around the orange petals. Wait for layer to dry.
 .
. - BLUE HIGHLIGHTS — Add 1 part white to blue. Paint highlights on each blue petal and the blue stem using a medium round brush.Move to next step while paint dries.

- ORANGE HIGHLIGHTS — Add 1 part white to orange paint. Paint highlights on each orange petal. Wait for layer to dry.

- FINAL BOP DETAILS — With white paint and detailing brush, add a thin white highlight on the right side of each petal. Finish with a stroke of magenta pink on the top “beak” portion of the stem.

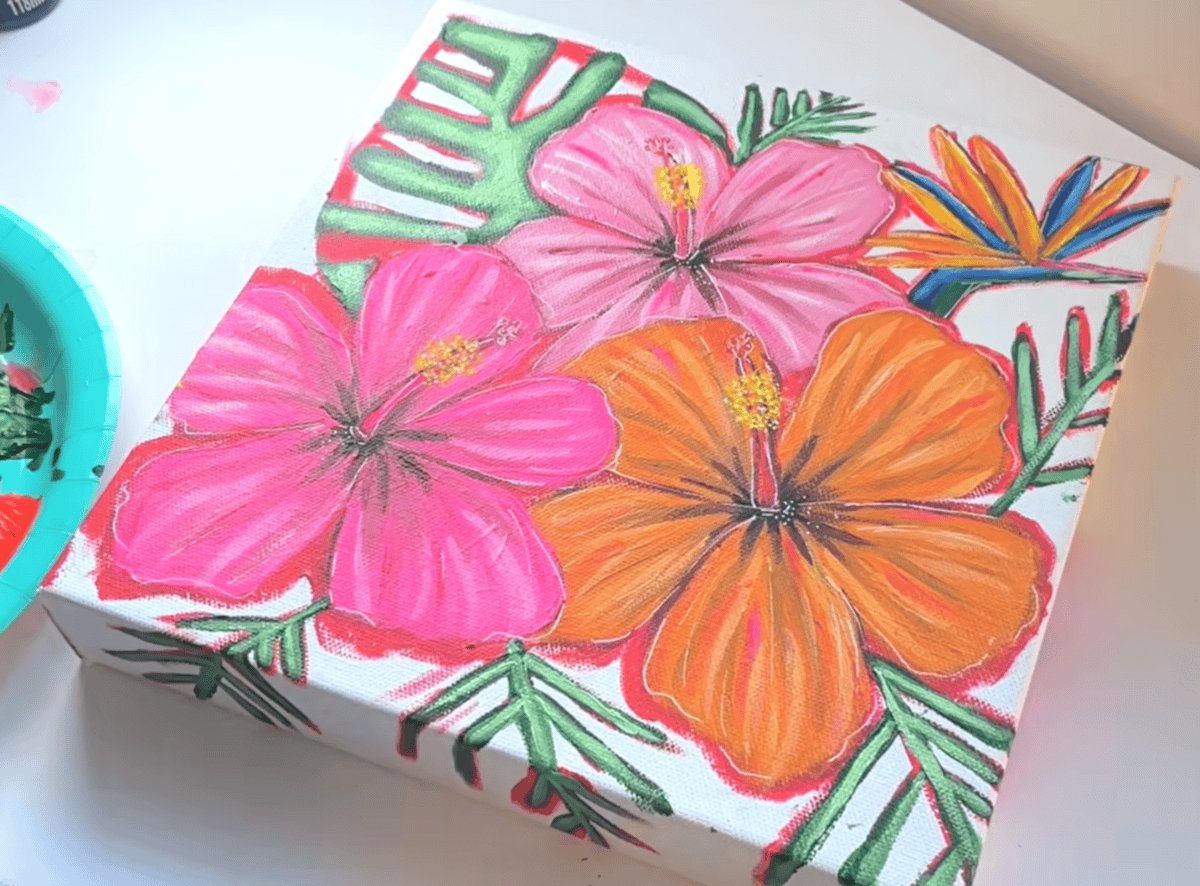
- GREEN MID-TONES — Mix two parts Green + one part white to create a matcha green. With medium round brush, paint the monstera and five ferns, leaving a border of the previous dark green exposed around all edges. Wait for layer to dry.

- GREEN LIGHT TONES — Mix one more part white into the matcha green mixture for a light green. Paint the center of the monstera leaf and each fern, leaving previous green layers visible to create a three-toned gradient. Let the painting dry completely.

- BACKGROUND — Use turquoise + 1 part white to create a mint-blue background. With medium round brush, paint the background space around the plants and flowers. Leave some red underpainting exposed (impressionistic style) and cover the canvas sides.

- SIGN & SEAL — Sign your painting! Optional but recommended: seal/varnish with an acrylic sealer/clear coat (Liquitex satin varnish works beautifully) to protect colors from fading or scratching.
 .
.
Recommended Products
As an Amazon Associate and member of other affiliate programs, I earn from qualifying purchases.
-
 SuFly Carbon Paper for Tracing, Black Graphite Paper for Drawing, 50 Sheets
 -
Professional Artist Paint Brush Set of 12 - Painting Brushes Kit for Kids, Adults Fabulous for Canvas, Watercolor & Fabric - for Beginners and Professionals - Great for Water, Oil or Acrylic Painting
-
Liquitex BASICS Acrylic Paint, 118ml (4-oz) Tube, Cadmium Yellow Medium Hue
-
Liquitex BASICS Acrylic Paint, 250ml Tube, Cadmium Red Medium Hue, 8.45 Fl Oz (Pack of 1)
-
Liquitex BASICS Acrylic Paint, 118ml (4-oz) Tube, Ultramarine Blue
-
Liquitex BASICS Acrylic Paint, 118ml (4-oz) Tube, Quinacridone Magenta
-
PHOENIX White Blank Cotton Stretched Canvas Artist Painting - 8x8 Inch / 7 Pack - ⅝ Inch Profile Triple Primed for Oil & Acrylic Paints
-
Liquitex BASICS Acrylic Paint, 118ml (4-oz) Tube, Titanium White


Tropical Flower Painting Stencil
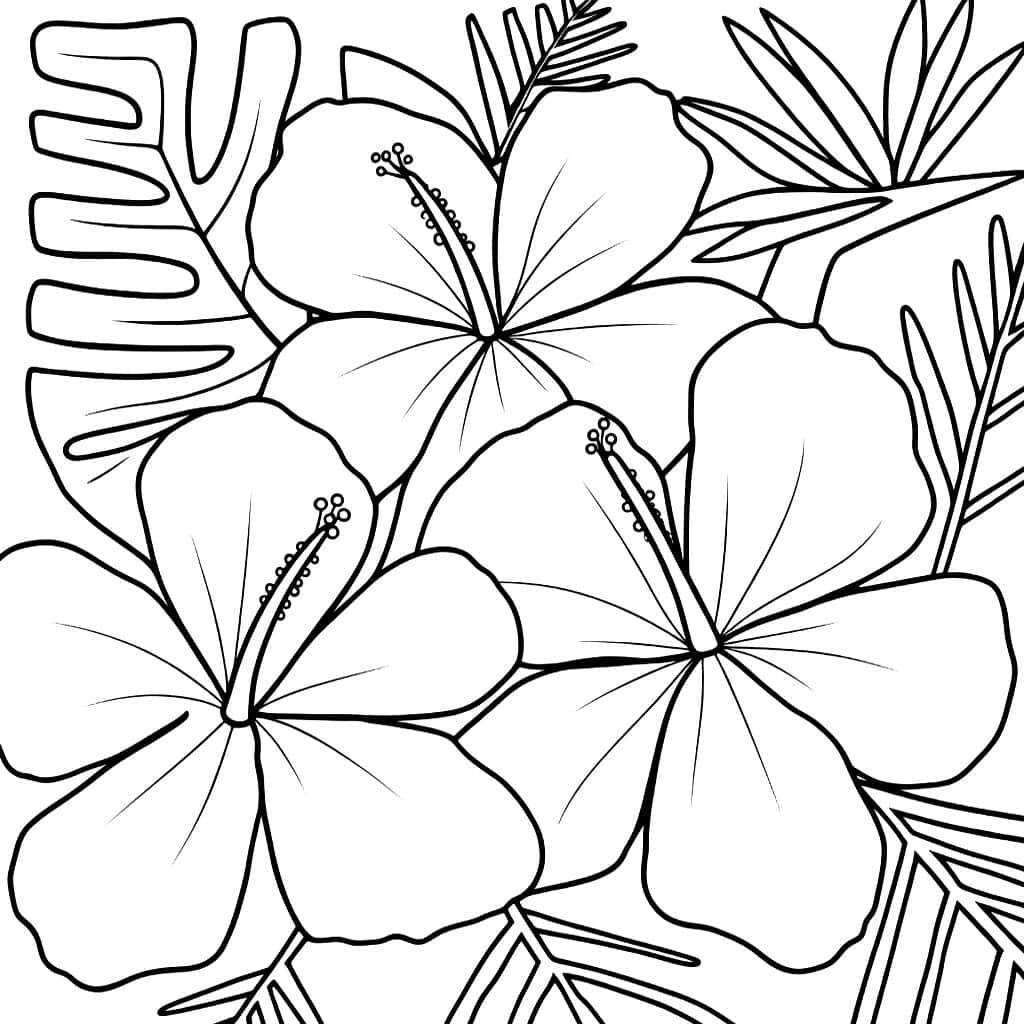
The following stencil can be printed on regular 8.5x11" printer paper and scales to a 8"x8" canvas. Right click on the image below and select "Save Image As", then choose where you want to save it onto your device. The file can then be opened and printed on your device.
If you like this step by step tutorial feel free to share it on Pinterest