Painting on CDs: How to Create a Clear CD & 7+ Aesthetic Ideas!
Give your old CDs a creative makeover with these easy and budget-friendly CD painting ideas! I’ll walk you through 5 simple and aesthetic DIY designs, plus techniques to turn unused discs into stunning art ideas. This fun up-cycled craft is beginner-friendly, affordable, and makes use of materials you likely already have at home.
You’ll learn the best types of paint for CDs, how to remove the label to create clear CD designs, and step-by-step instructions for 5 unique painted designs.
Paint them for a fun paint-and-sip night with friends! They also make adorable room decor (displayed as a gallery) and thoughtful birthday gifts—my daughter made one for her friend’s birthday, and it was a huge hit!

How To Make Clear CD's
You’ve probably noticed CD's have a label on one side and that shiny metallic surface on the other. It might look tricky to remove, but it’s actually super easy!
A lot of people love painting on clear CDs because it gives the design a totally different vibe. If you scroll through Pinterest, you’ll see a mix of clear CD art and designs painted right over the label. I’ll show you how to paint over the label later, but first, let’s go over how to remove it properly so you get a nice, clear surface to work with.
Step 1
Use scissors or a blade to make a small slit in the label—this creates a starting point to peel it off more easily.
Step 2
Grab a piece of packing tape (or duct tape if you have it—it works even better) and press it firmly over the slit. Smooth it down with your fingers, then pull it off in one quick motion away from you—kind of like waxing your legs! Repeat "waxing" your CD label until the entire label is gone.
Step 3
If your CD has a blue film on it, no worries—you can easily wipe it off with some nail polish remover and a cotton pad. Just soak the pad with remover and rub it over the surface of the CD. Only one side will have the film, and not all CDs come with it, so if yours doesn’t, you can skip this step!

Step 4
Your clear CD is now ready to paint, design and enjoy crafting with!
CD Painting Ideas

Get inspired with these 5 easy beginner CD painting ideas that you can make with simple acrylic paint.
Materials
- Old CDs you no longer use or need
- acrylic paints (Dollar store craft paints work too)
- paint brushes and other painting tools
- Qtips
Instructions
- Watch the Youtube tutorial here.
- Make sure your CD is clear (using the steps above).
- Take some blue paint and create your first "matisse" styled abstract flower. Start with a circle in the middle, then draw "loose" petals around the centre. The paint might look transparent in this step, that is okay.

- Pickup some pink paint and repeat making another flower beside the blue one.

- Using the colors of your choice, repeat making these abstract flowers around the CD, until you fill the entire CD.


- Wait for the paint to dry. Add a second coat of paint over the first one. This will make the paint opaque (and not transparent) and not streaky. You can add a 3rd coat if you want punchier colors. I was happy with 2 coats.


Recommended Products
As an Amazon Associate and member of other affiliate programs, I earn from qualifying purchases.
-
 Q-tips Cotton Swabs For Hygiene and Beauty Care Original Cotton Swab Made With 100% Cotton 625 Count
 -
Transon Artist Paint Brush Set of 12 for Watercolor Acrylic Gouache Oil and Tempera Painting
-
DecoArt Crafter’s Acrylic Paint Set, 18 (2 fl oz/59 ml) Assorted Matte Finish Colors, DIY Arts And Crafts Acrylic Paint, 36 Fl Oz(Pack of 1)
-
50pcs Clear CDs for Decoration Aesthetic, Transparent Round Clear Blank Discs for Painting, Plain CD for Decoration Party Supplies Writing Wall Ornament DIY Craft


7 CD Painting Ideas
Need some inspiration for painting on your CDs? Check out these fun ideas! You’ll find step-by-step instructions for most of these designs in the YouTube tutorial. From an easy butterfly design (with a printable stencil below) to Q-tip lavender flowers and playful bubbles on a black background, the possibilities are endless
1. Monarch Butterfly Design

2. Bubbles on Black Background

3. Matisse Abstract Flowers

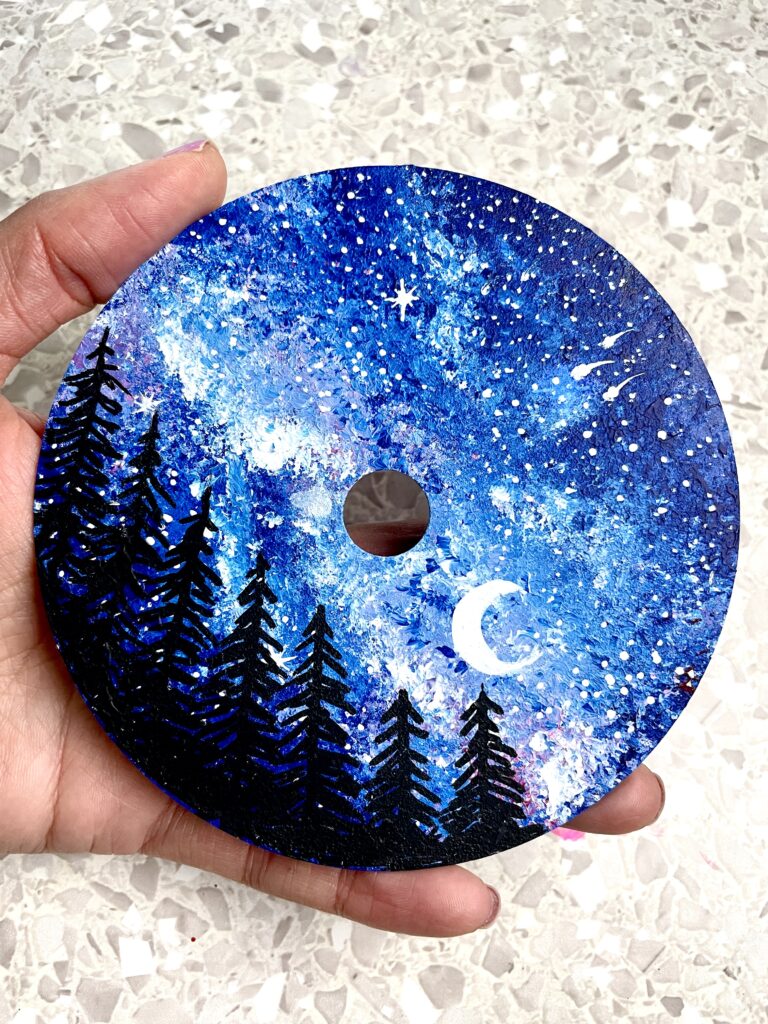
4. Milky Way Galaxy Night Sky
5. Easy Pink Donut Design

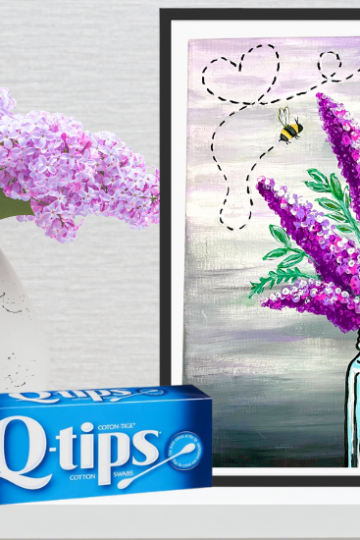
6. Qtip Lavender Flowers

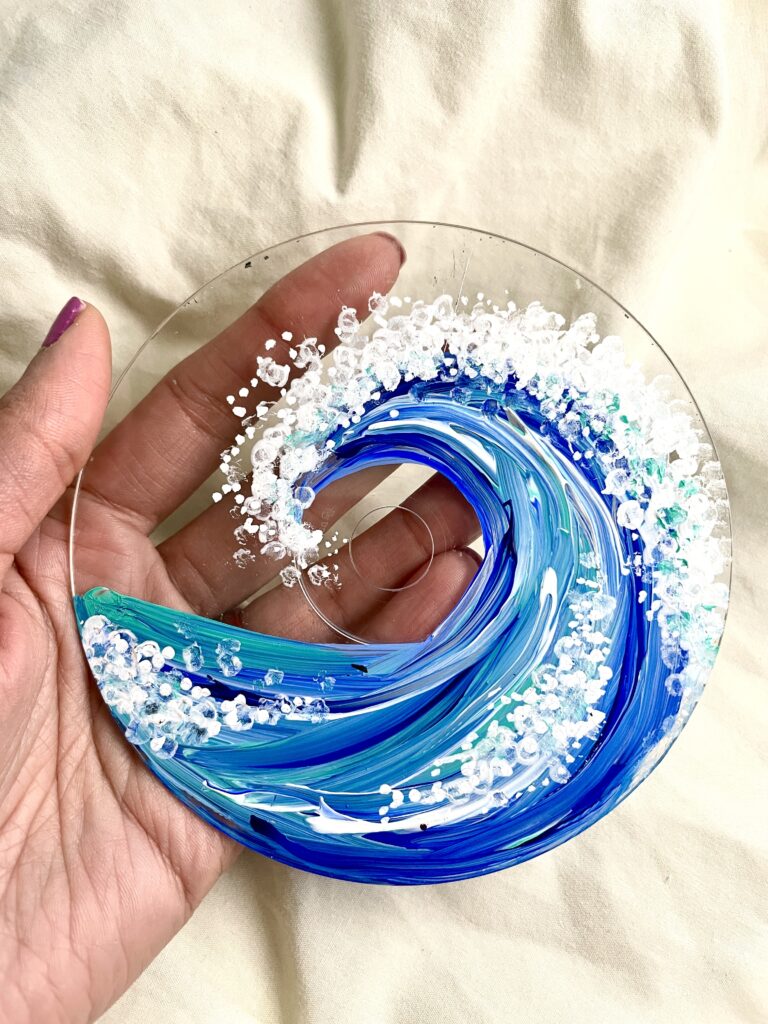
7. Blue Ocean Wave Design
8. Kawaii Cute Characters

FREE Butterfly Printable Stencil
Right-click the image below to save it to your device, then print it using any standard printer. Cut it to match the shape of your CD, place it underneath a clear CD, and paint directly over it—no need for transfers!

If you liked this post please pin it on Pinterest