Tissue Paper Bleeding Art - For Beginners
Tissue paper bleeding art is an easy and fun craft for all ages. It's simple, cheap and super cool!

I love painting with paints, but when I came across some gorgeous tissue paper bleeding art, I was blown away and had to try it out.
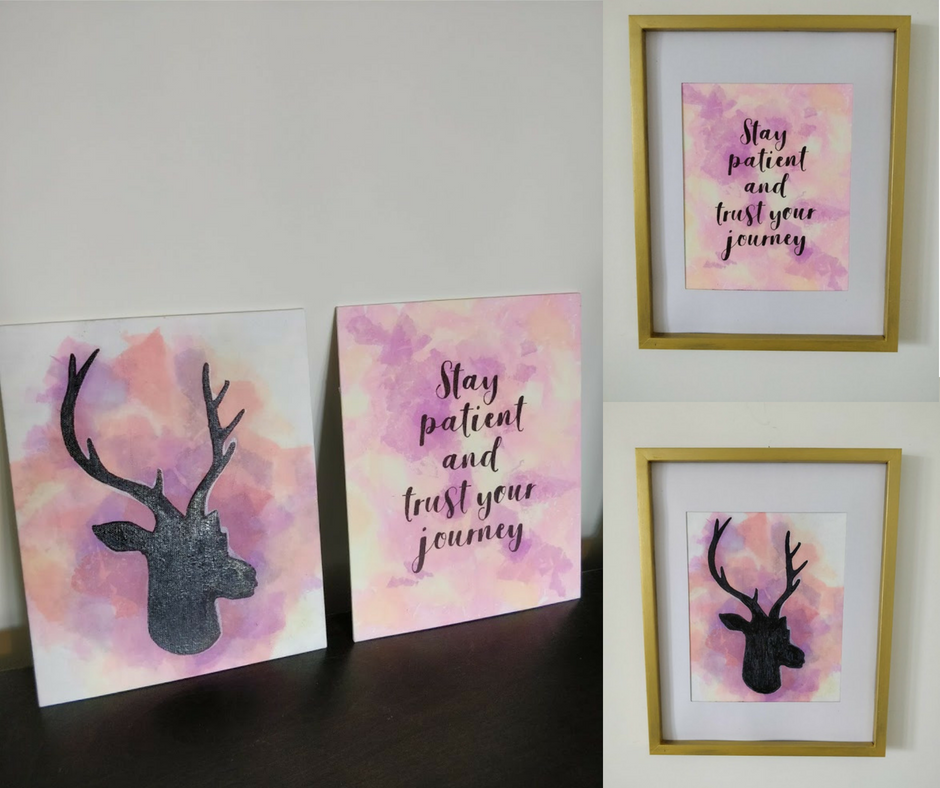
I loved the tissue art technique so much I made 3 projects. I'll provide instructions on each, since they were done slightly different.
If you've never heard of tissue paper art before, your in for a treat. Here's the basics...
What is Tissue Paper Bleeding Art?
You know that tissue paper you use in gift bags? Well, you take those colorful pieces of tissue, place them on a wet canvas and like MAGIC, the dye's from the tissue transfer to the canvas!
Your canvas will have a cool watercolor-like design that so easy to do and my favorite part, hardly any cleanup!
Thisis also a great activity/craft to do with the kids -instead of the quote they can doodle any drawing they want over top, or just leave it as is!
Tissue Art Project #1
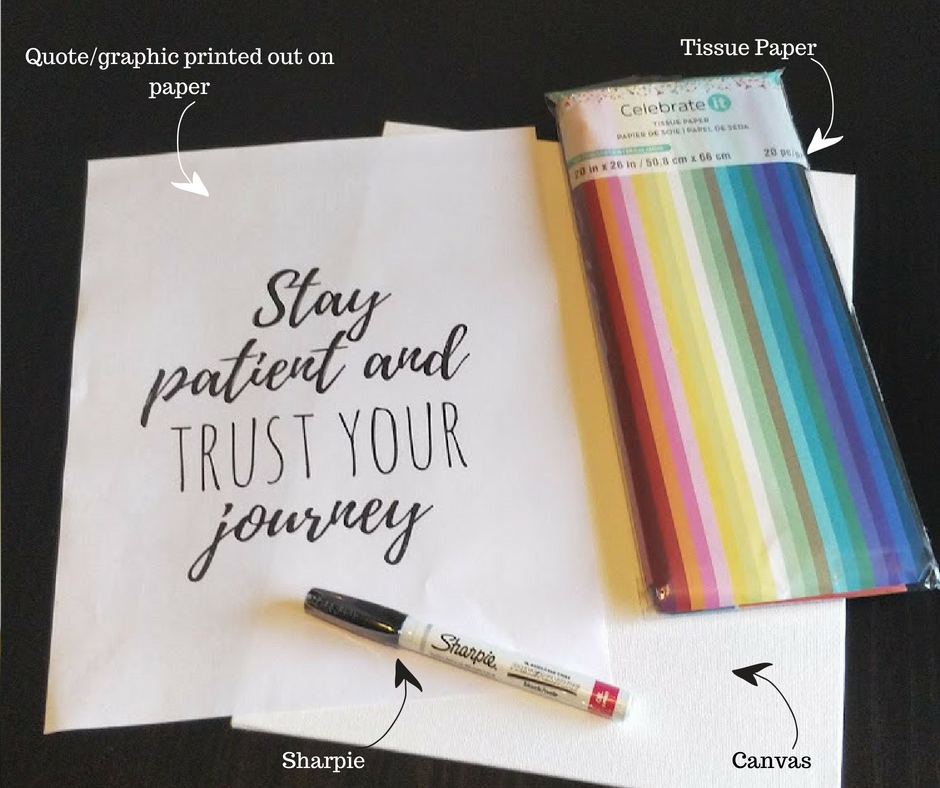
Materials
1. Tissue paper. I got mine from Michael's ( "Celebrate it!" Brand). I tried the Dollarstore kind but it didn't bleed. If you buy online I have heard this particular brand works well.
2. Canvas board
3. FREE Printables at the end of post.
Steps:
1. Transferring words/designs onto canvas (or many other materials) without a fancy machine or stencil is actually very simple. Here's the step by step instructions on how to transfer your image to canvas, if you want more detail. For this project, on the BACKSIDE of your printout go over your design with a pencil, like in the images below.
4. Take your Sharpie and fill in the design on the canvas. A gold leaf pen would also be cool, haven't tried it but I want to one of these days!
![]()
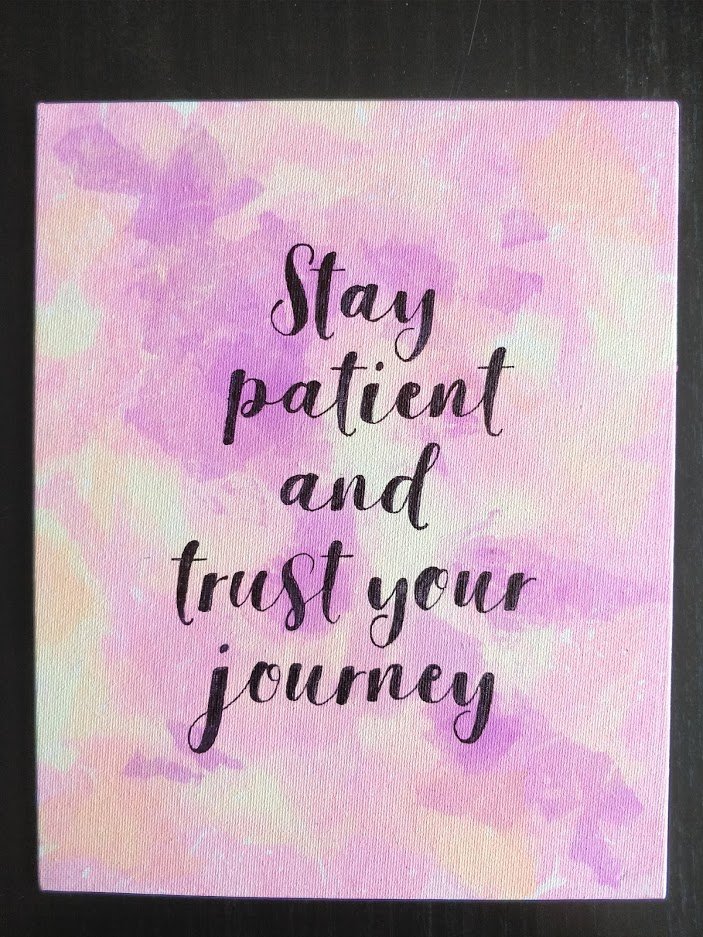
5. Once Sharpie quote is dried, lightly wet your canvas with water (not too much water, otherwise your colors wont be as vibrant).
Take your desired colored tissue (I used dark pink, orange, yellow and purple), tear them into random pieces and place them over wet canvas. Try not to think too much in this part and lay your tissue in random places. This was my favorite part of the project!


Tissue Art Project # 2
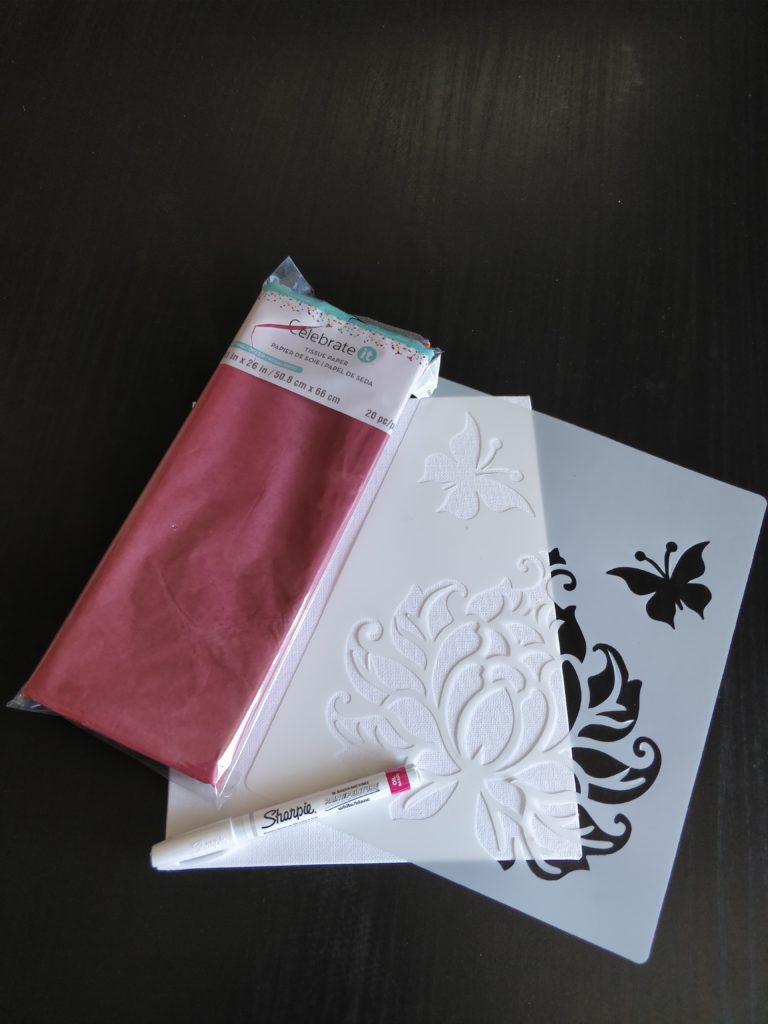
Materials
1. Tissue paper that bleeds
2. White Oil based Sharpie marker
3. Canvas board
4. Stencil
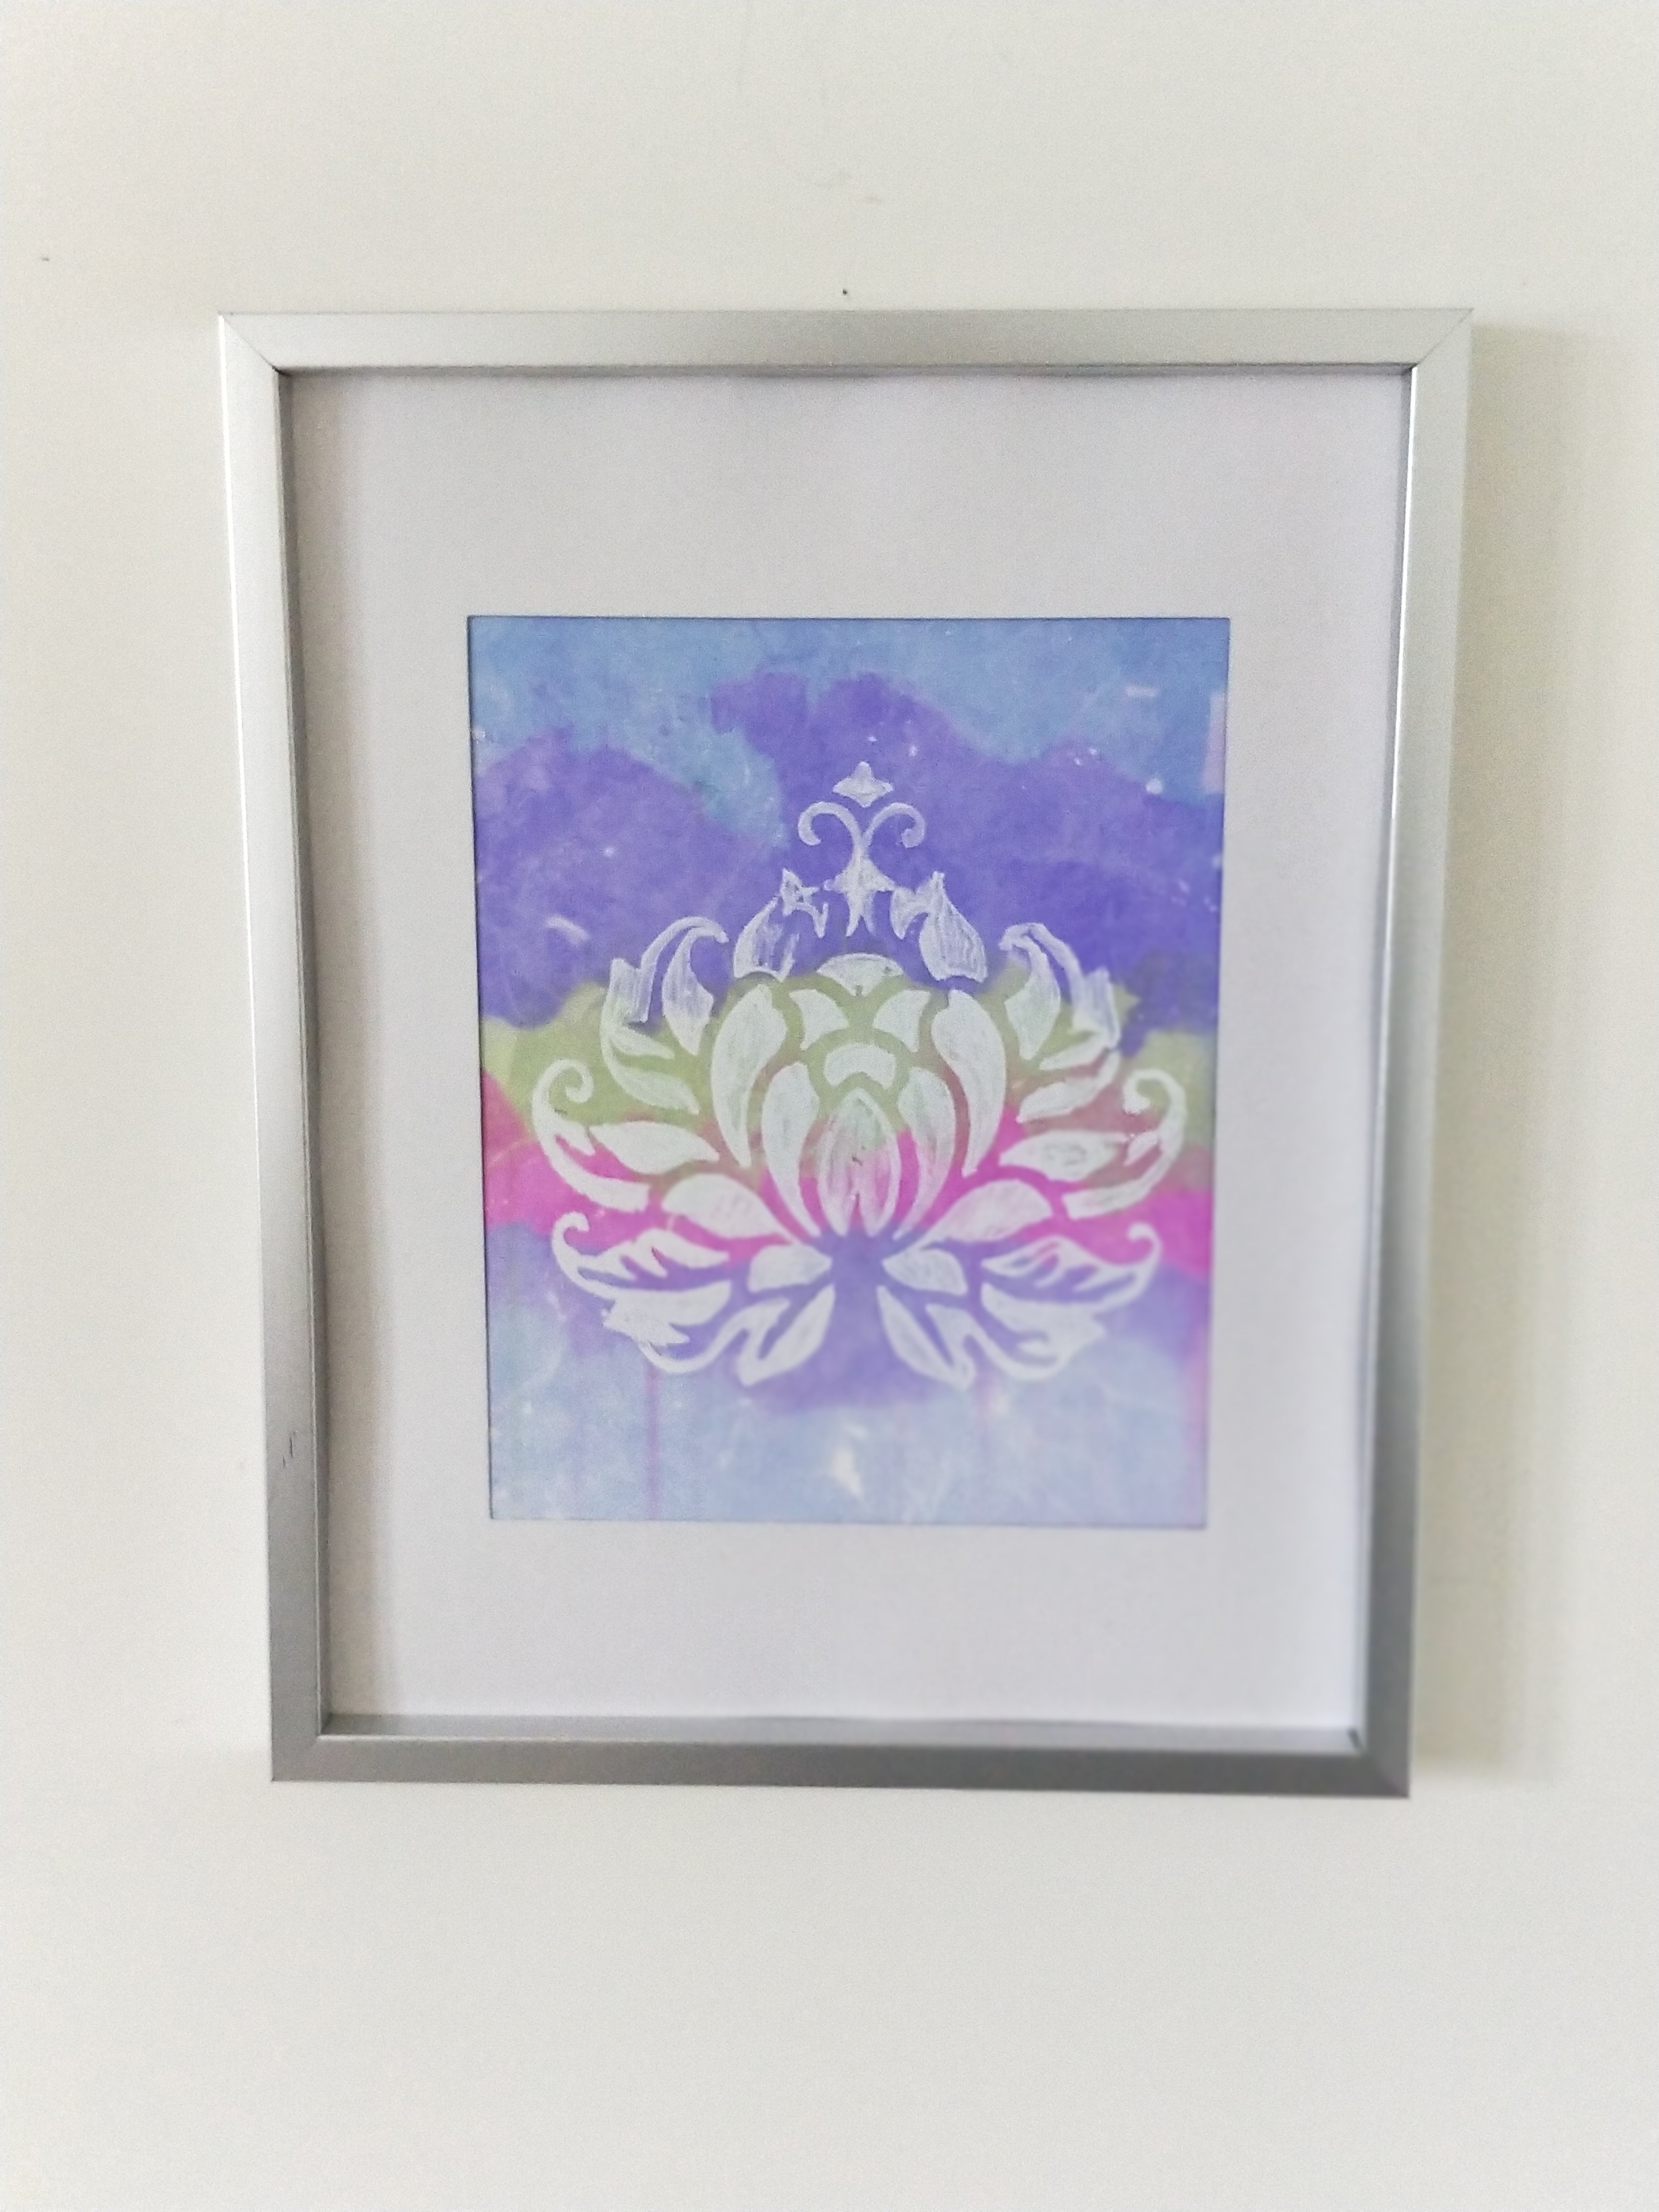
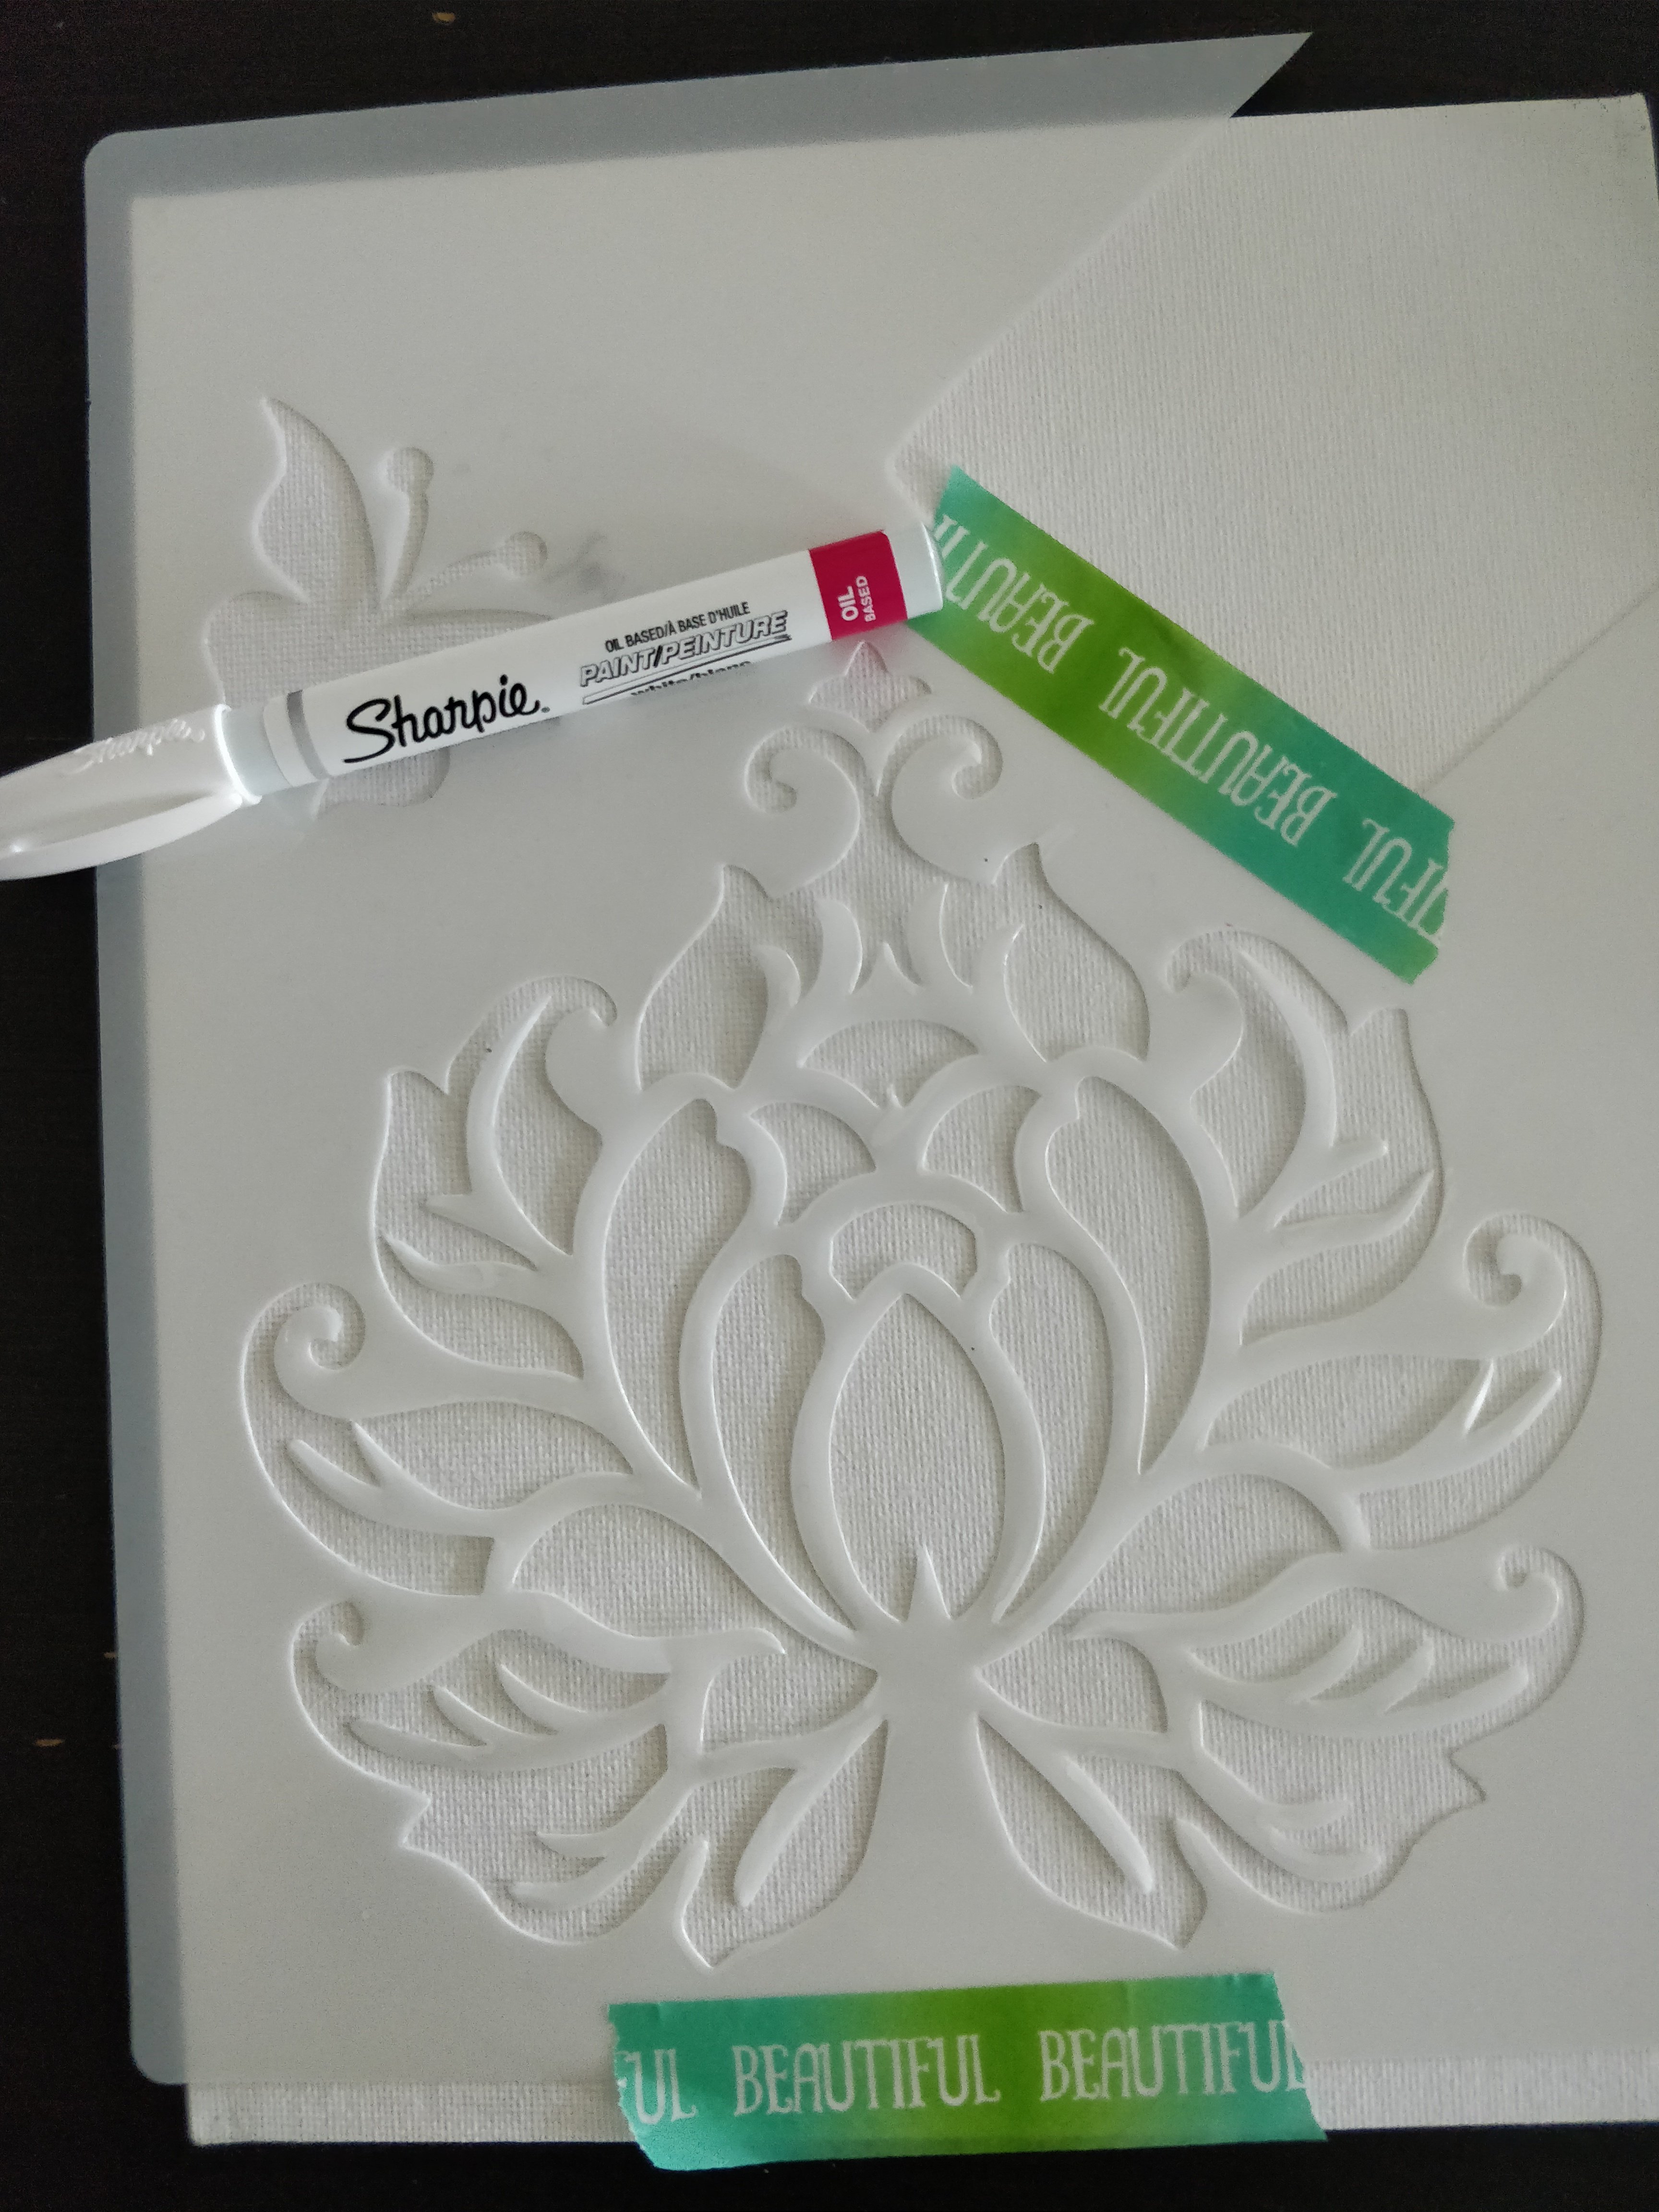
Tissue Paper Art Technique
1. Take your white Oil based Sharpie and color in your stencil onto the canvas board. It's important you use the oil based Sharpie , since the tissue paper color will resist the Oil and the white color of the marker
It might be hard to see the white Sharpie on the white canvas board, just do your best - doesn't have to be perfect.
2. Like in the previous project, wet your canvas lightly with water.
Take your torn up tissue paper pieces and put them on your wet canvas.
To make sure the tissue paper is evenly wet, lightly wet the top of the tissue paper once on the canvas ( with a brush or paper towel)
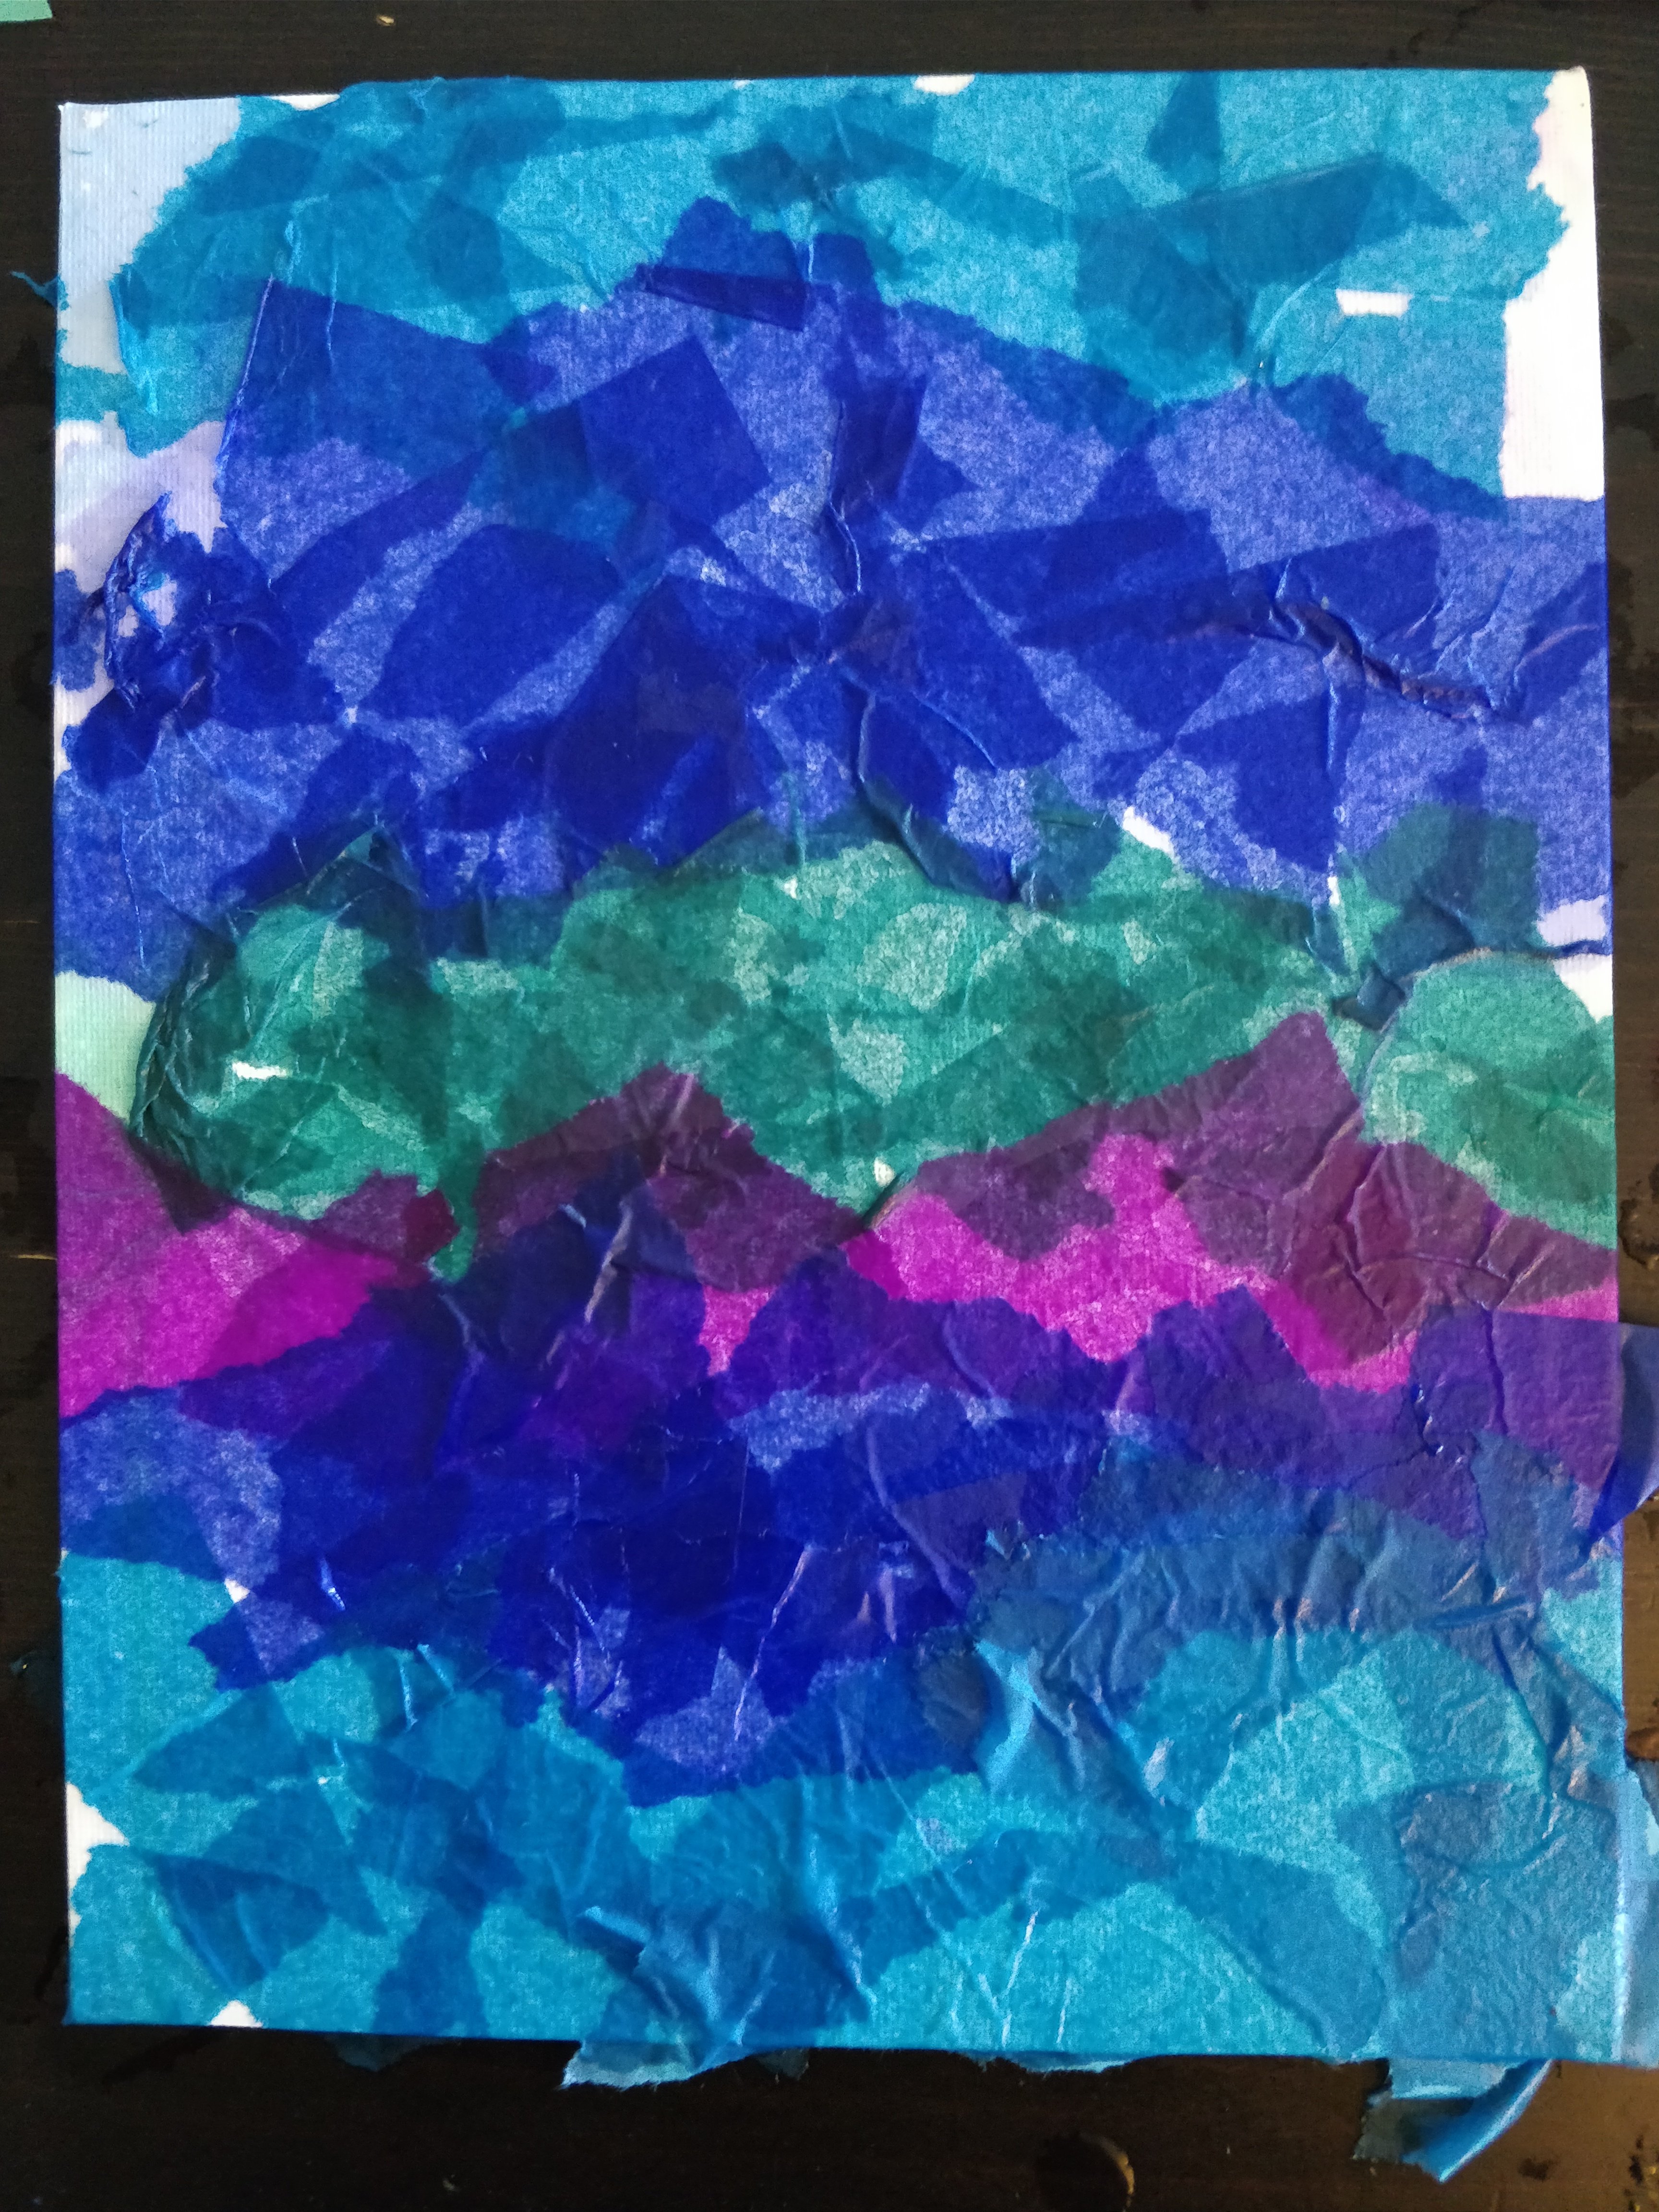
3. Let the tissue paper dry at least 5 Minutes ( completely dry to get the most vibrant color).
4. Once tissue is dry , peel off the tissue paper and your left with a cool tissue bleeding resist art. The pattern/ stencil work with your white Sharpie is now visible.
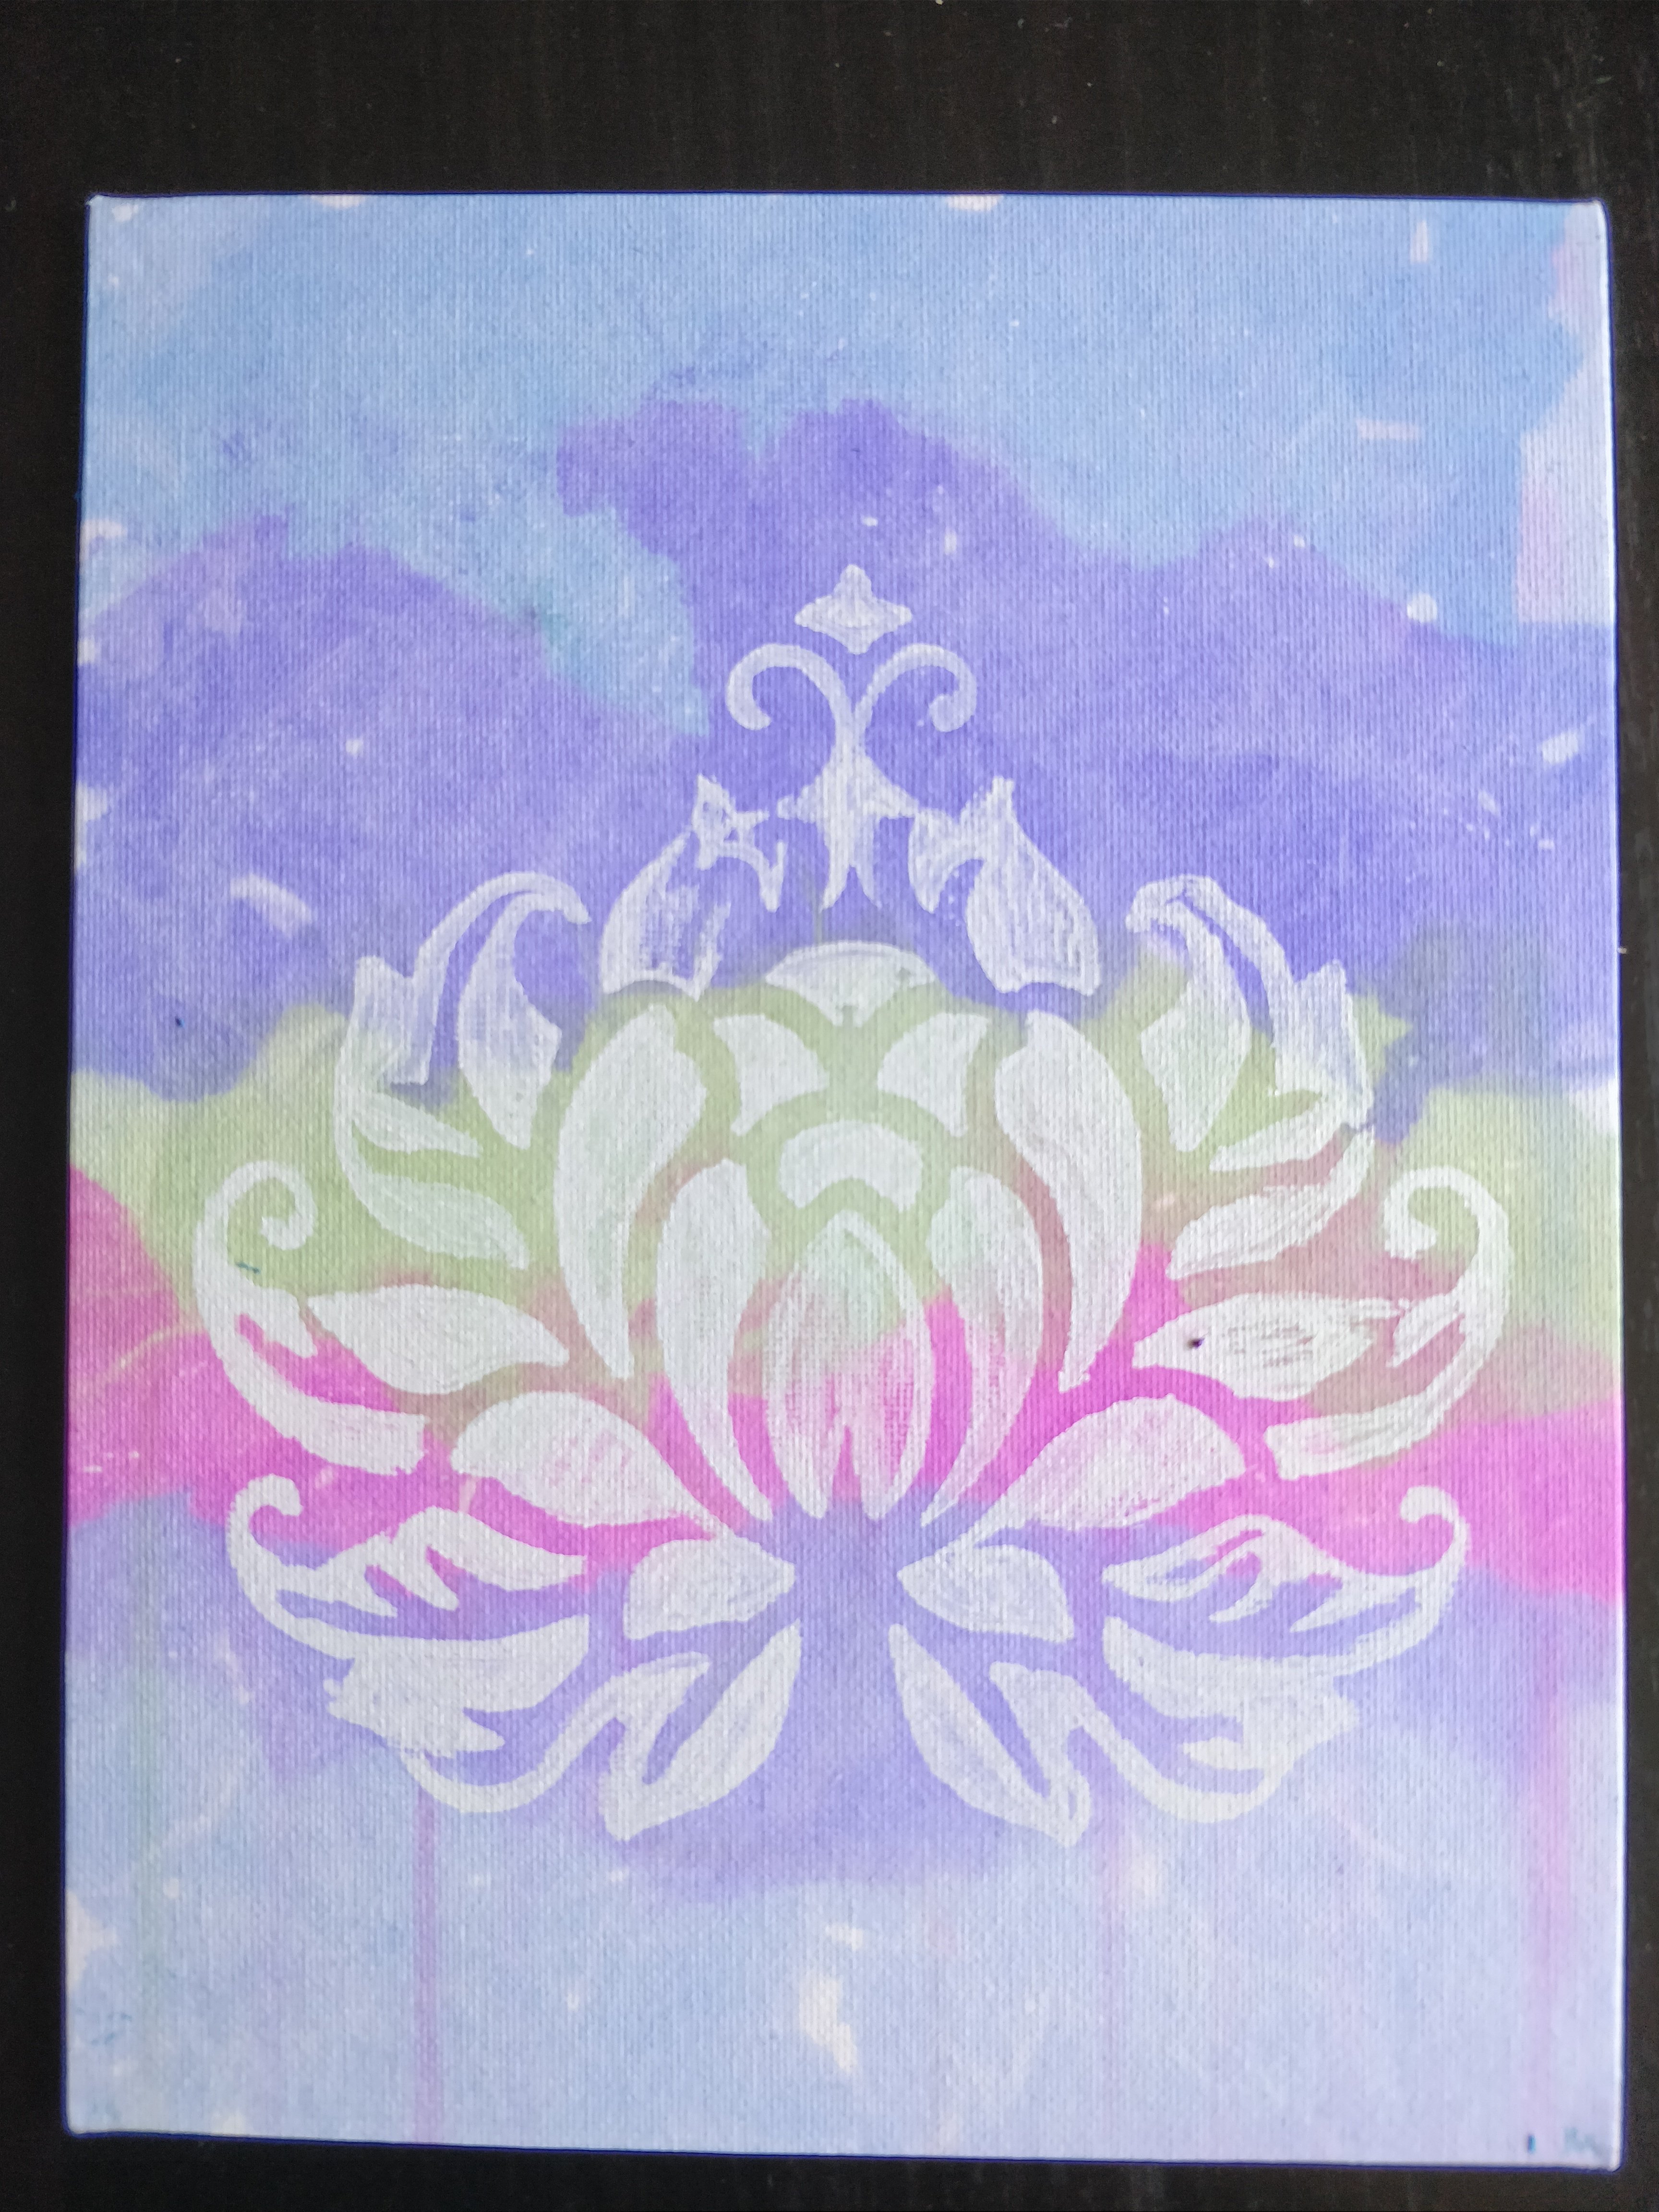
There you you have it, 2 easy peasy tissue paper bleeding art projects for you to try.
If you liked this tissue paper art step by step guide, please pin it.

Until next time time, stay Nifty!


Cool! Going to try tissue paper art! When u wet the canvas do u wet whole thing or just where your pic is?
Hi Susan,
I would just wet the canvas where you want to apply the tissue. There is no harm in wetting the entire canvas if you want to also. Enjoy making it, it's a fun project!
Jasmine
I love this ideal.I’ve already stenciled a design on my canvass board, can I go back & do the letters.
Hey Annie, you can absolutely go back and do the letters. You can even do the letters once you've painted the canvas too, it will just be easier to see if you do it on white canvas. Goodluck, and would love to see it once you're done!
Great article! We will be linking to this particularly great content on our site. Keep up the great writing.|
I tried this and waited till everything was dry. My tissue didnt bleed any idea why?
Hi Jennifer, sorry to hear the tissue paper didn't bleed, some brands don't unfortunately. I tested my local Dollarstore variety and that didn't work. However, as mentioned in the post, the "Celebrate it!" brand from Michael's definitely works and we got some beautiful results (the blues, and purples worked especially well). And there is also a brand from amazon which I researched that works really well too (HYGLOSS Tissue Assortment Bleeding Sheets). I hope your art turns out next time, it really is fun and quite amazing!
Do you have to use a canvas board or can you use a stretched canvas on a wooden frame?
Hey Ellen, I used canvas board but you can most definately use stretch canvas too. Enjoy!!
Can you do this on a painted wood surface (TV tray table)? I painted it, but I would love to apply this technique as well as words.
Hi Majorie, great question! I have never tried to do this technique on a wood surface, so not 100% sure. However, if you coated the wood with a layer of paint ( I am assuming its a water based paint?), then the tissue paper bleeding art technique should work (in theory). The word transfer will definitely work, as I have done this myself on wood (painted with a coat of white acrylic paint).
Hope that helps answer your questions! And enjoy creating your project, sounds like a fun one 🙂
Cheers,
Jasmine
Think this will be a great project. Really liked the font you used for your quote. What is it?
Thank you Catherine! It was a fun project. The script's called "Salmela"
Cheers,
Jasmine
Is this technique done the same way on say pallet wood? I may be jumping the bun if already mentioned, I’m reading your stuff and trying to get ready for work 😉
Hi Toni,
You should be able to stain the palette wood with tissue paper granted it’s light enough ( is the wood painted white?). Fair warning though, I’m not 100% sure how vibrant or effective the technique will turn out on palette wood as I’ve never tried it.I would try it on a small sample and see if you like it before trying on a larger piece.
Cheers,
Jasmine
I'm curious why you used an oil based sharpie for the white, but not for the black? Also, where did you buy your stencil?
I love the project and will be trying it this weekend 🙂
Thank you!!
Hi Stephanie,
I used the black non-oil sharpie because it had a very fine point, which I couldn’t find with the oil based markers, and I was using it for writing on top of the tissue art (non-resist). The white was oil based since I was using the resist method, and put the tissue overtop of it.
I hope that makes sense and enjoy making it this weekend! Let me know if you have any more questions.
Cheers,
Jasmine
i dont understand how you do the stencil paart..im nor seeing how you could ee threw the canvus board to trace the letters..? i feel like its a simple thing im missing lol
Hi Shawna,
Thank you for your question. The same transfer method I used to transfer the quote onto the canvas board has full step by step instructions in this post (method #2) https://feelingnifty.com/transfer-drawing-from-paper-to-canvas/. I also have a youtube tutorial that walks you through it here: https://youtu.be/zCEkW2RNGZw. Hope that helps! If you need any other info or help please feel free to reach out again.
Cheers,
Jasmine
Can u use this idea on wood or just canvas?
Hi Rose,
I haven't tried doing this technique on wood. Not sure how well the ink from the tissue would show up on the wood, especially if it's a darker wood. If you coat it with a layer of white paint before, it might help make the colors pop more. Hope that helps.
Cheers,
Jasmine
Will this work if you have painted (in acrylic paint) a background color on your canvas or canvas board?
Hi Marta,
I haven't personally tried doing the tissue paper on top of the acrylic, but in theory it could work with a caveat(below). First, the acrylic paint should be a light color -since the color transferred from the tissue paper is very light and needs a pale background to see it. Also, the acrylic paint might not be as porous like canvas and the color from the tissue paper might fade or wipe off easier (again not tested, just something to keep an eye out for).
Hope that answers your question and enjoy making your art!
Cheers,
Jasmine
This looks amazing, I will have to try this with my Students!
Thank you Helen, glad you'll be doing this with your students - hope everyone enjoys!
Thank you,
Jasmine
Where do you write and print the letters? Any website where you can write your quotes with the desired font and then print out?
I use an application called Canva (http://www.canva.com). There's a bunch of fonts you can use and can download them to print out. Hope that helps!
Cheers,
Jasmine
Have you tried this on hollow core wooden doors? I bought an older house (1962) and made one of my bedrooms into a dressing/walk in closet but it has these ugly white sliding doors for the old closet doors. I have been looking for a cool idea to “camouflage” them & really likes this technique.
Hi Betsy,
I haven't tried this technique on doors. One thing to keep in mind is that the paint on doors have a glossy finish which might prevent the ink in the tissue from being absorbed into the wood. For this technique to work really well the surface needs to be porous. You could try on a tiny portion of the door to see if it takes. Hope that helps and gluck!
Cheers,
Jasmine
Hi I was looking for the free printable link at the end of the post. Did I miss it? Do you mind giving the link again?
Hi Yvette,
Here are the 2 printables for the project. Hope it helps and enjoy :
1. https://feelingnifty.com/wp-content/uploads/2018/06/Deer-Head-image-transfer-stencil.png.webp
2. https://feelingnifty.com/wp-content/uploads/2018/06/Inspirational-Quote-Image-transfer-icon.png.webp
Cheers,
Jasmine
I thoroughly enjoyed your tutorial. Thank you for sharing.
That’s great to hear Erma, so glad you enjoyed the tutorial 🙂
Cheers,
Jasmine
Hmm. Could you do this on a light colored canvas bag? May need to seal it somehow to keep the colors but... I LOVE this!!
That's a great question! I think it would definately transfer some of the ink from the tissue paper to a white tote bag. I'm just not sure if it would wash out if you put in the washing machine- but a fabric sealer could do the job! Also thank you for your kind words!!
Cheers,
Jasmine