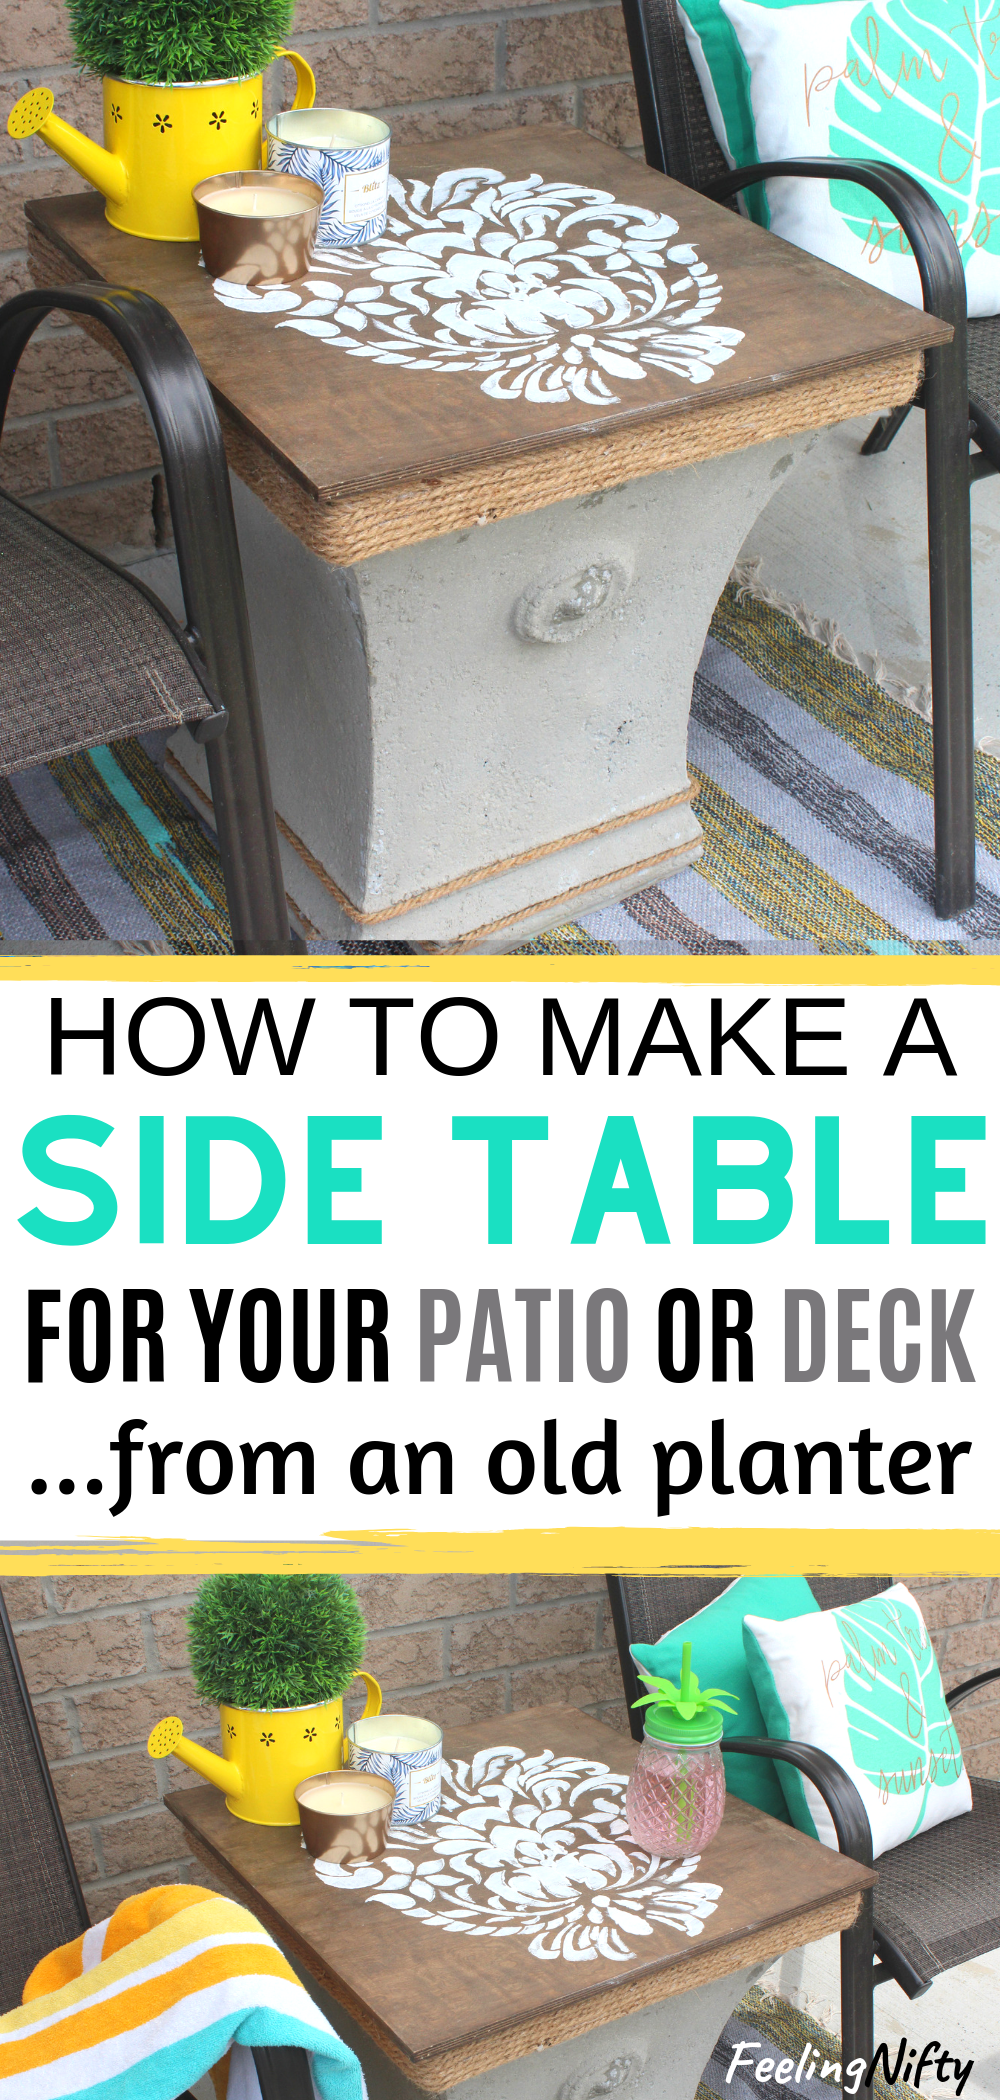
DIY Outdoor Side Table with Storage - Upcycled from an Old Planter
Learn how to make an easy DIY outdoor side table with an old planter, perfect for your patio, deck or porch!
If you're looking for an easy way to make a chic DIY outdoor side table that also has storage, then you're going to love this hack!
The best part of this DIY/ hack? You don't need any power tools.
No side table plans needed either...
Why?
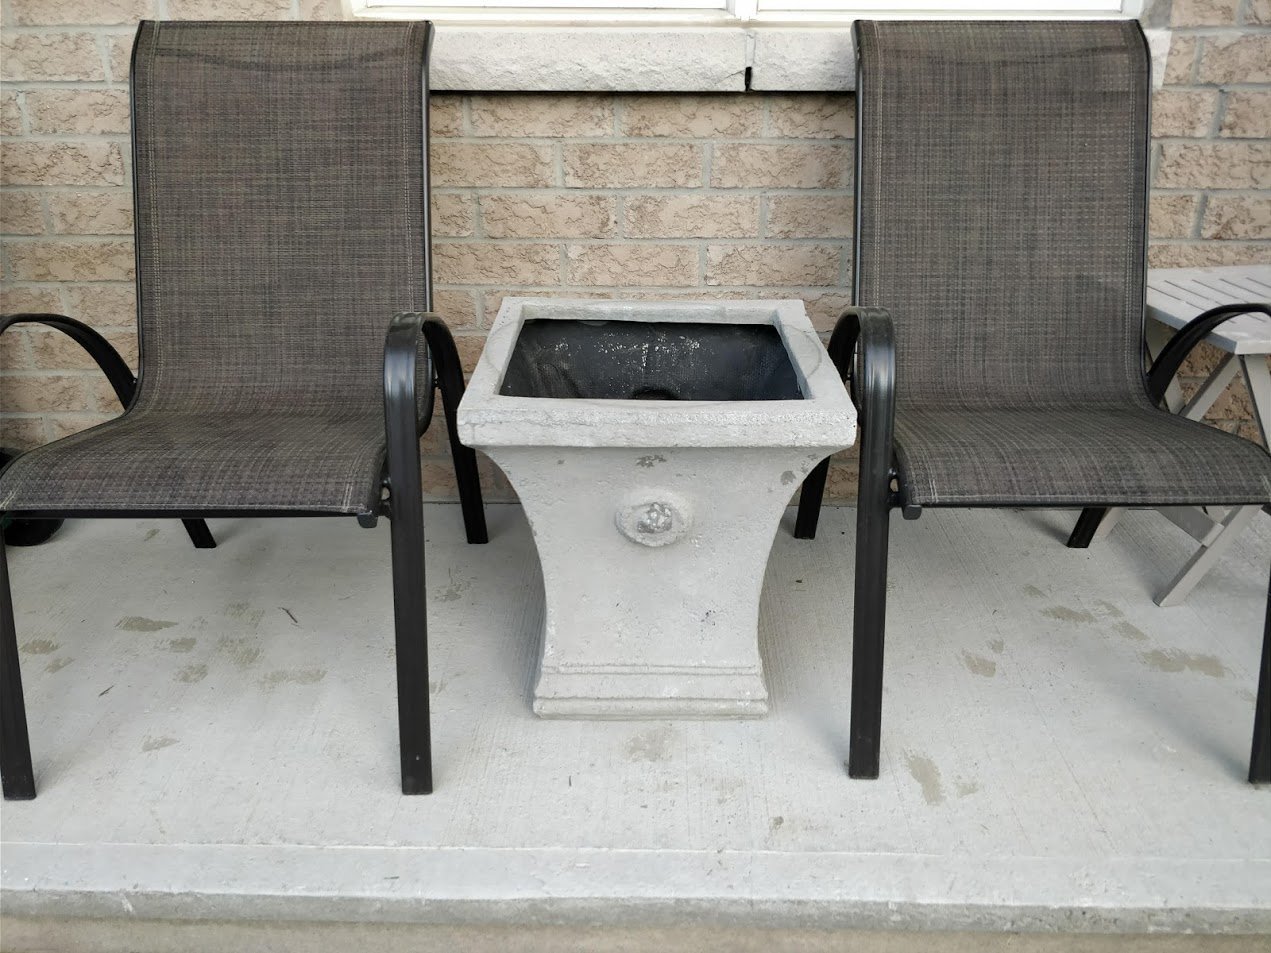
I repurposed another outdoor item for the table base (so you don't have to build one from scratch). It's something that you might already have in your outdoor space...
a giant planter!
Yup, if you're like me, and bought a planter but no longer have a use for it, you can use it in this table hack!
Even if you don't have one, they are pretty easy to find at garage sales in the summer, at flea market, or even ask a member of your local buy-nothing group if anyone is giving one away!
If you want to buy it brand new here's a giant planter on amazon that would make a great base.
Side Table with Storage
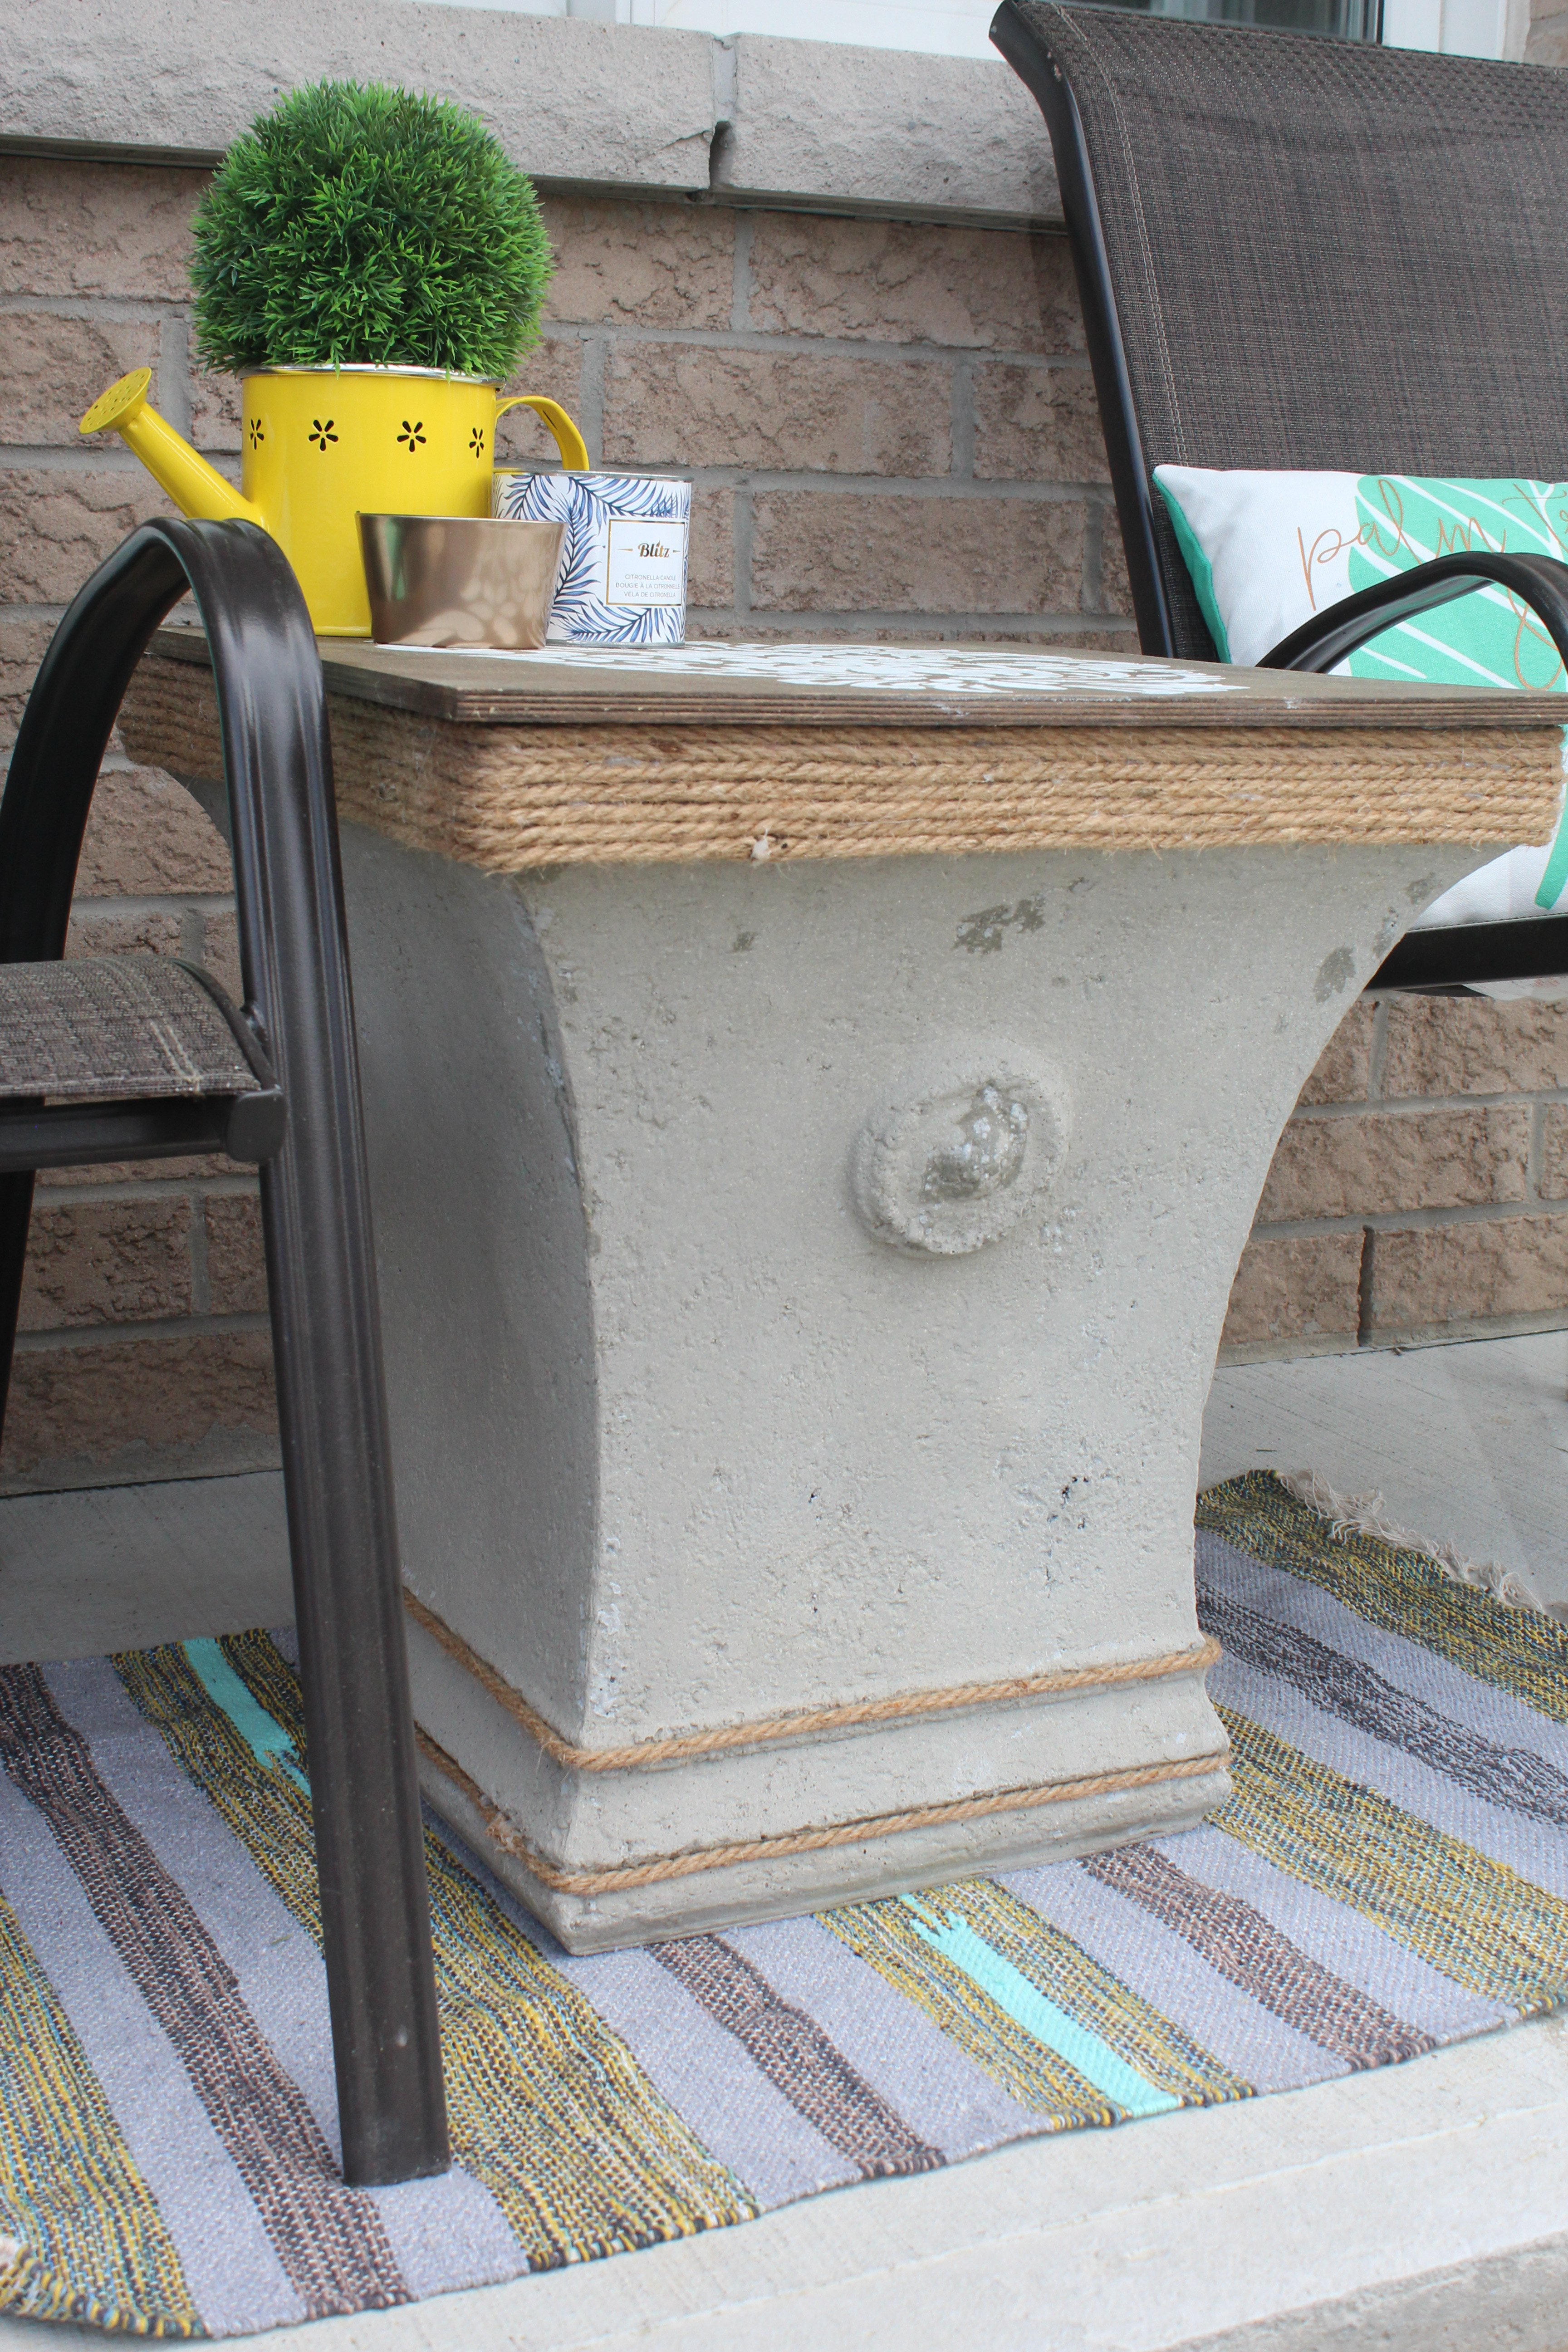
Since the base of this table is a planter (it's hollow inside), and the tabletop will be a simple piece of stained wood(that's not attached to the base), you can use the inside of the planter for storage for outdoor items.
Extra pillows, gardening supplies, poolside necessities, patio accessories, the planter base can store quite a bit of extra stuff!
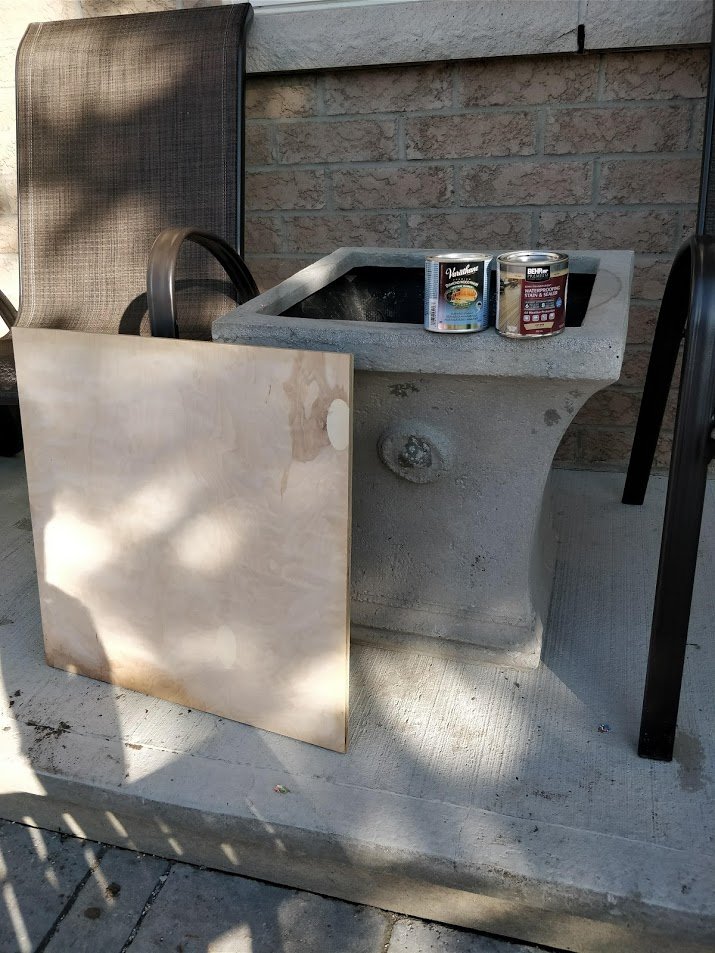
How to Cut and Stain the Wooden Table Top
As I mentioned above you don't need any power tools to make this table, BUT you need to have a cut piece of wood as your tabletop.
One extremely useful tip I've learned from doing my own simple DIY's is that most (big) hardware store have a saw on-hand in their stores. And they will usually cut your piece of wood for you (to exact measurements) for a dollar or two, and sometimes even for free (especially if you buy it there).
You just have to ask.
I haven't had to use any big power tools for any of my projects yet- even these Ikea hacks I did.
I'm not hating on power tools, it just makes projects simpler (and more doable for more people!

How to stain wood - tips and tricks
I have to admit, this was the second time I've ever stained anything. The first time was when I was 17 and helped my family stain a wooden fence in our backyard!
And trust me when I say it's easy!
The hardest part is the stinky fumes from the stain. So make sure you do it outside in a well-ventilated area!
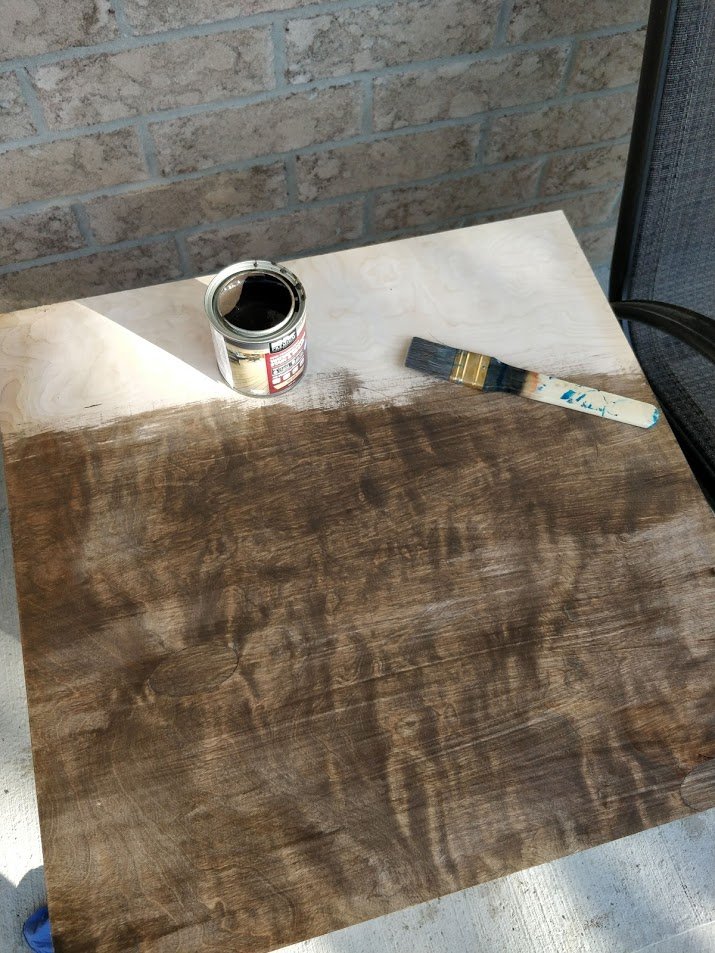
I used a simple painters brush to paint on the stain. You don't need a lot of stain on your brush while doing it either. Keep the coats light, and do multiple of them.
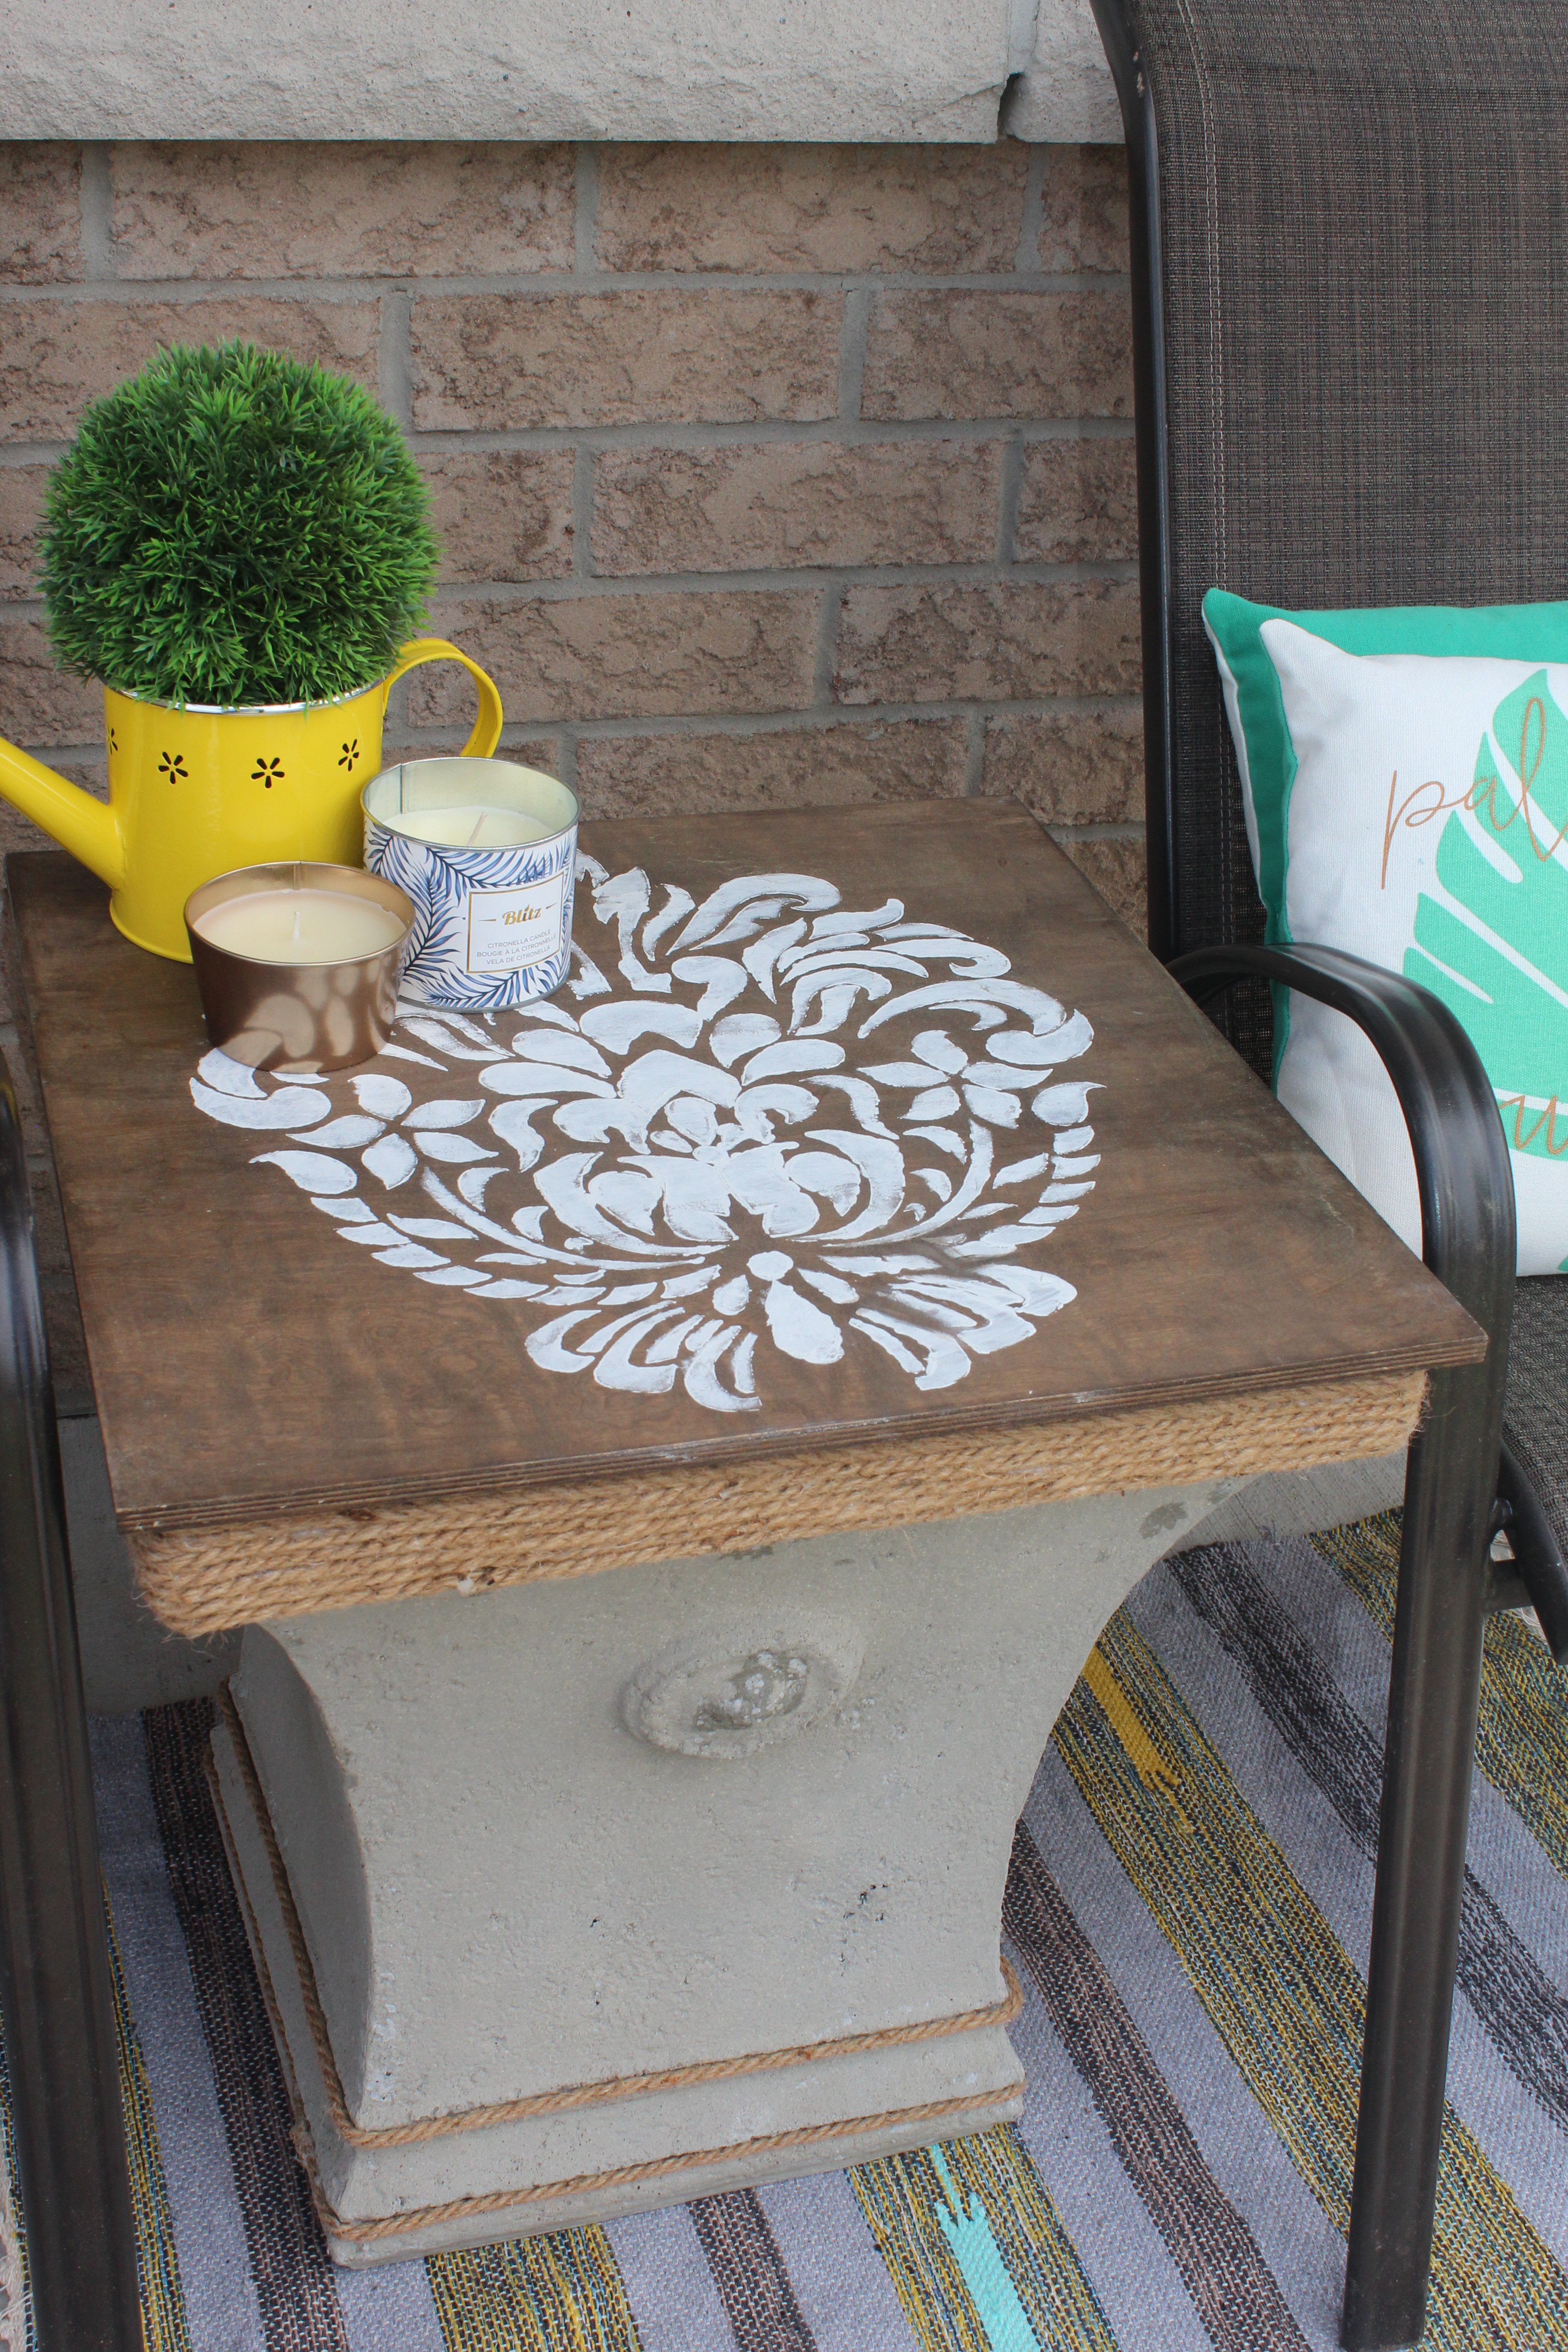
To get the gorgeous deep walnut color I painted 3 coats of the stain, in thin even layers. and let each coat dry for about 10 minutes before doing the next.
Since I made sure I bought my stain with a built-in protective coating on it- meaning it's weatherproof and rainproof- I didn't need the sealer. If you want to save an extra step (and money) lookout for a stain that has a sealer in it.
Now on to the tutorial! Enjoy!
DIY Outdoor Side Table Tutorial
Materials
- Giant Planter base, like this one
- Outdoor Stain for Wood (with built-in sealer)
- Painter's Brush
- Square piece of wood (½" thick) for the tabletop (you can get it cut from Home Depot or Lowes so you don't need to cut it).
Optional:
- Stencil (Optional)
- White Chalk paint (Optional)
- Thick Jute Rope (Optional)
- Glue gun (optional)
Steps:
Step 1
Stain your piece of wood with a paintbrush. Do 2-3 even and thin coats. Don't forget to let each coat dry in between. Follow the instructions on the can of stain
Step 2
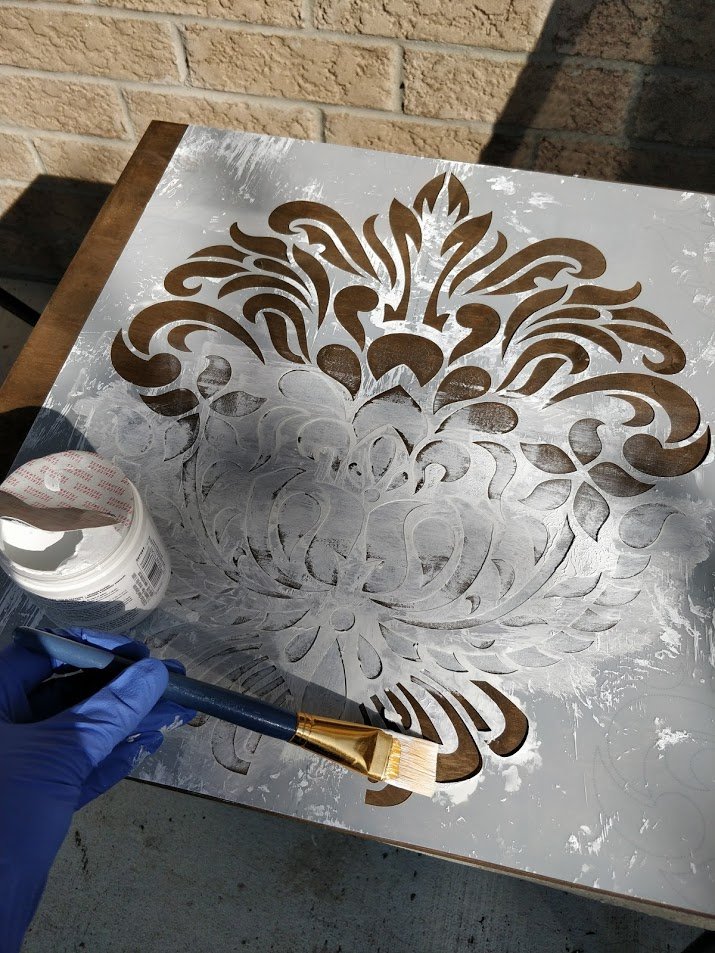
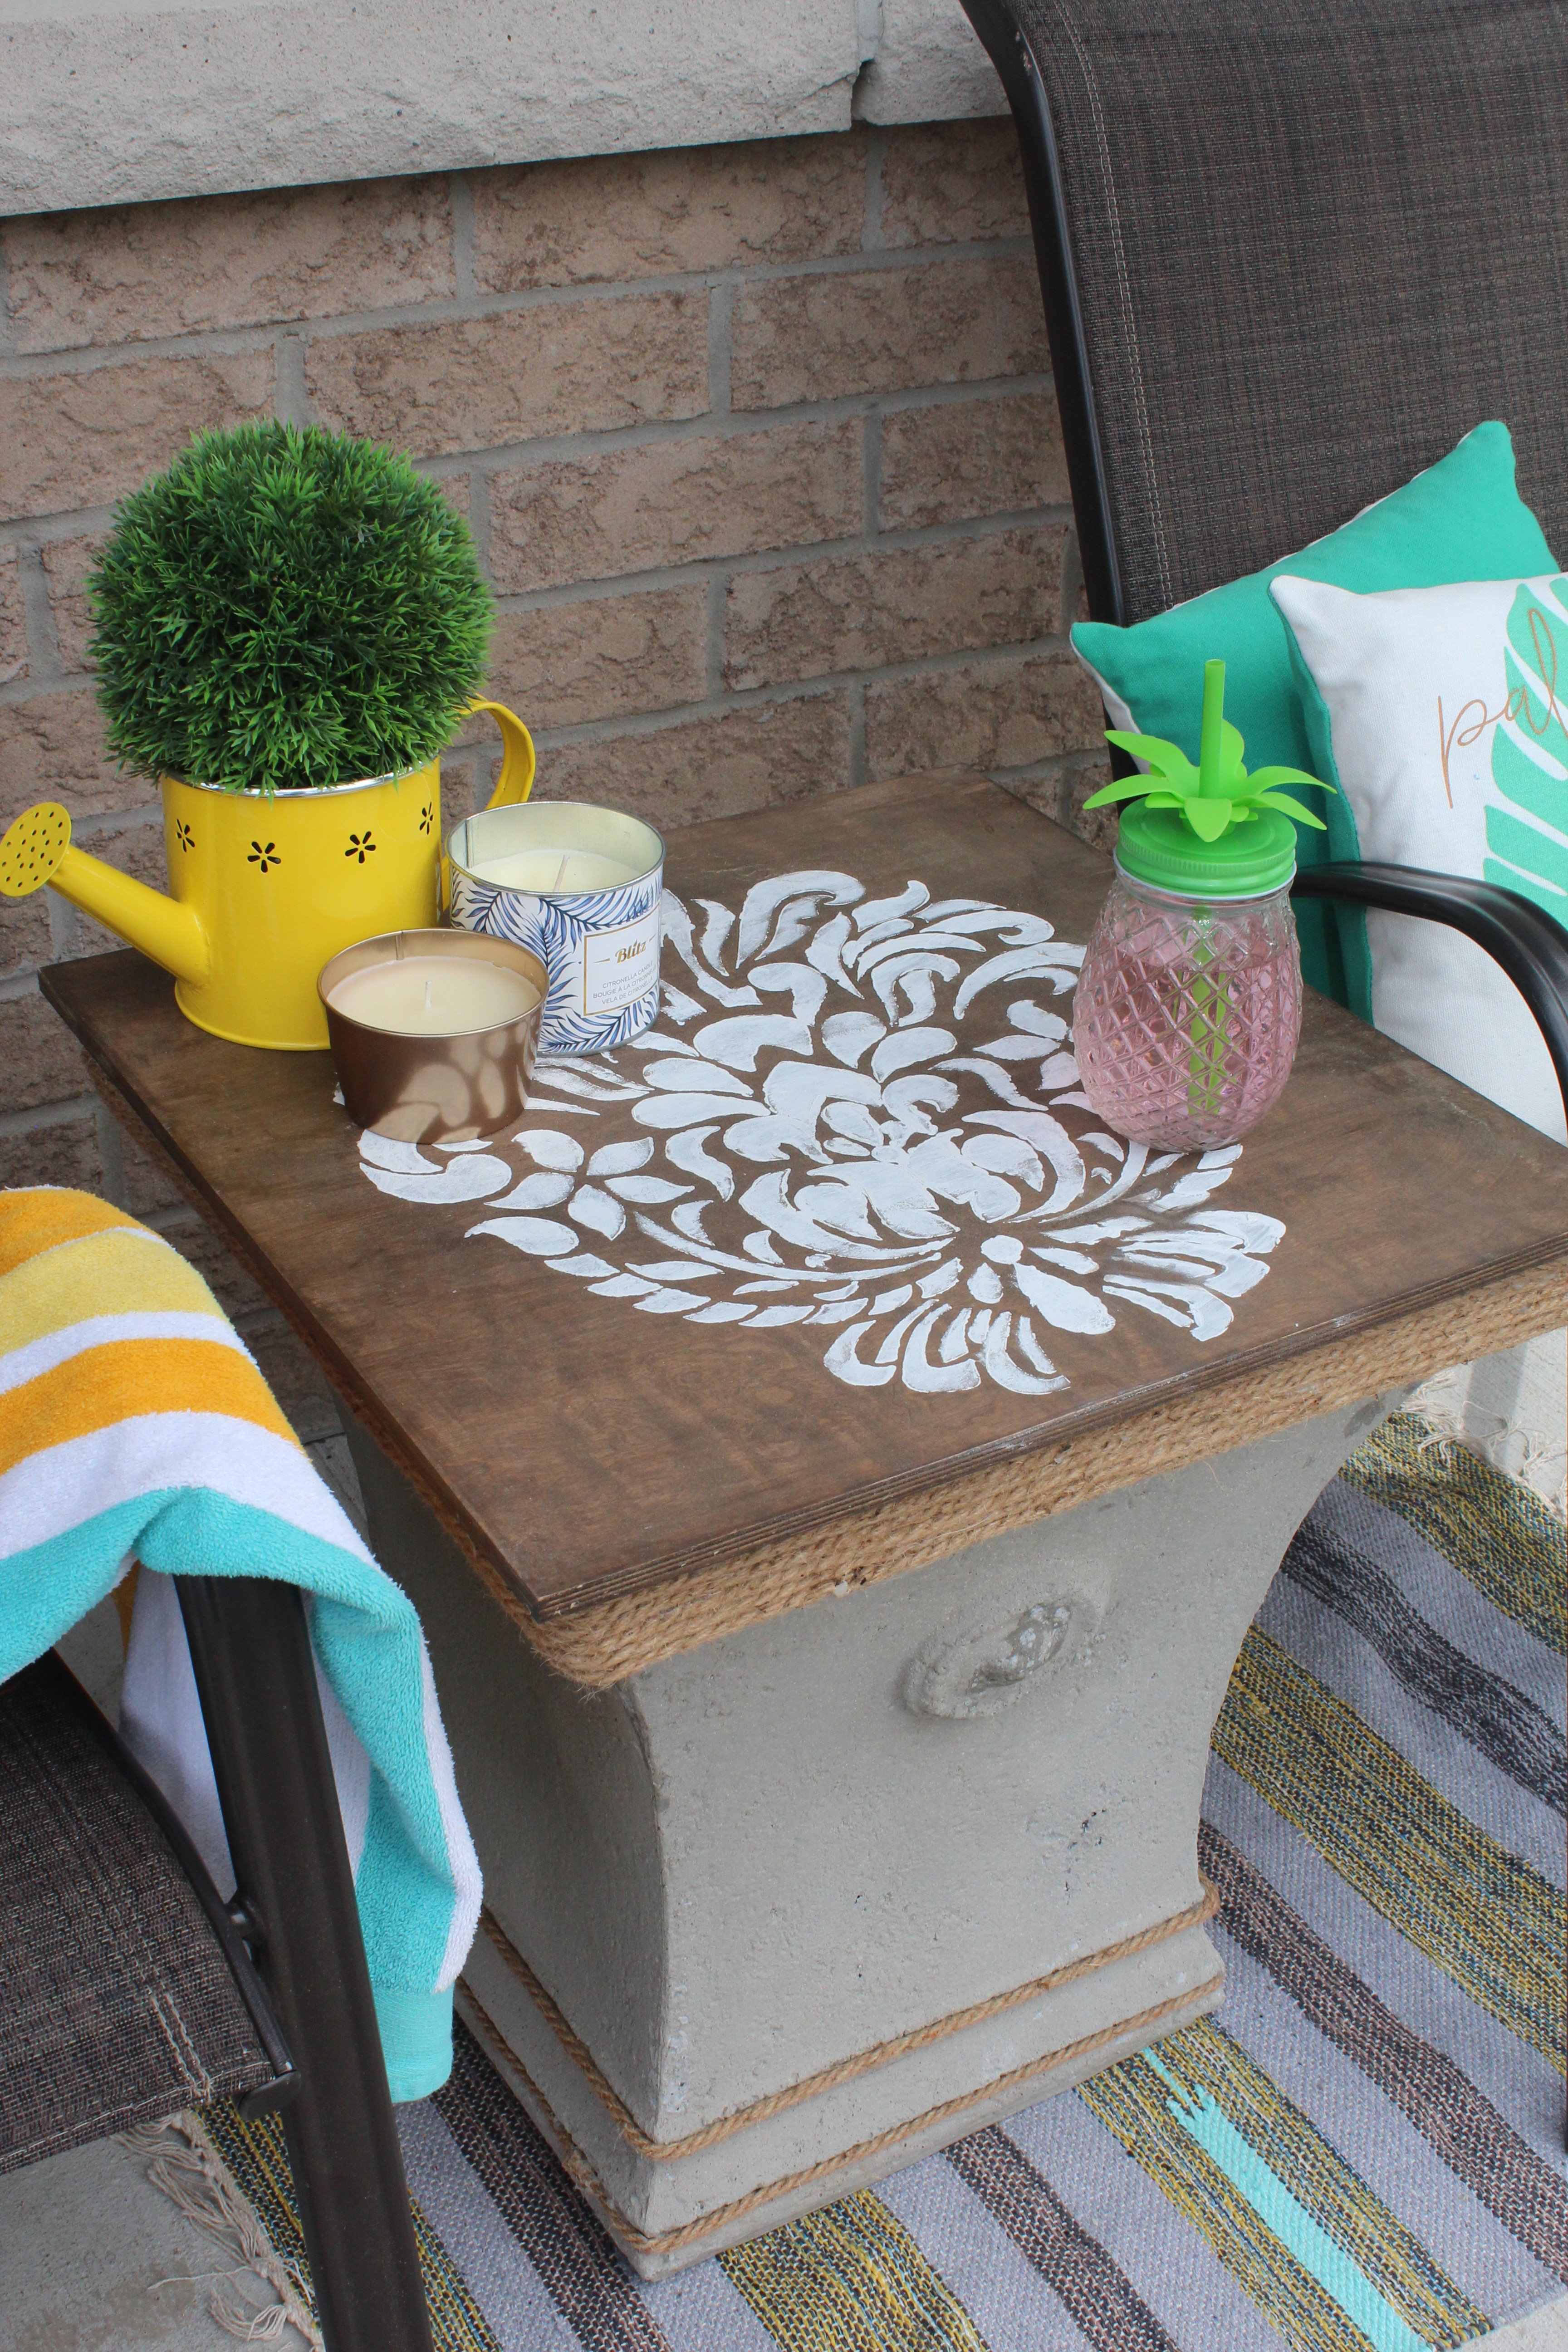
(Optional) If you want to add a design on top of the stained wood. Take your stencil and place it over top the dried stained wood (from step 1)
Now take a dab of the white chalk paint ( you don't want too much paint on brush otherwise the paint might seep under the stencil pattern and will cause bleeds in the paint).
Remove the stencil once complete
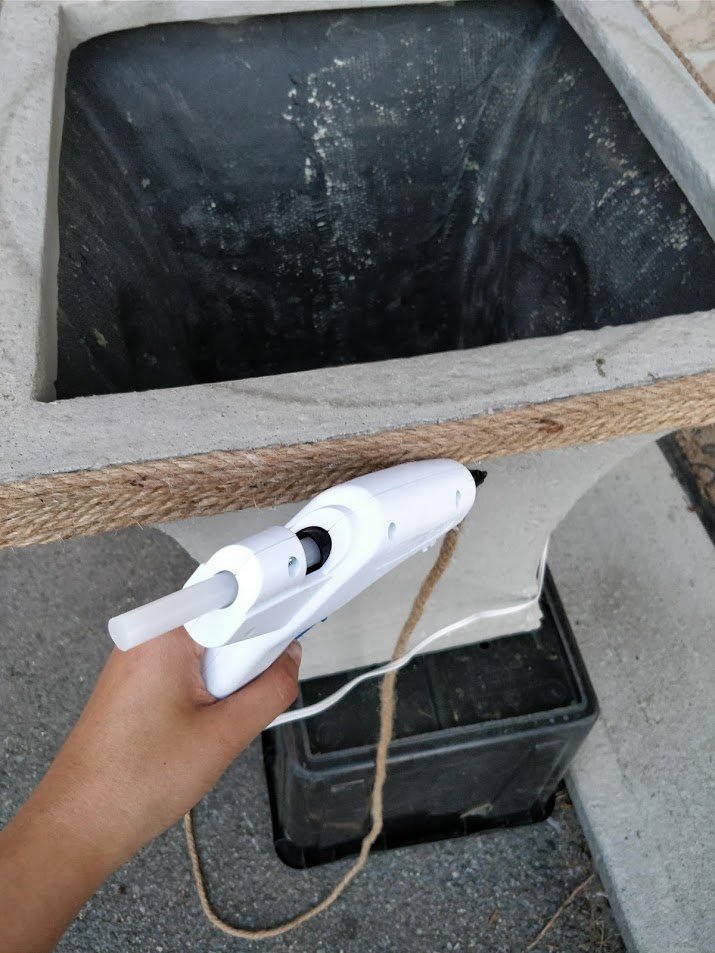
Step 3
(Optional)
Take some thick jute rope and glue it around areas of the planter with a hot glue gun.storageTake some thick jute rope and glue it around areas of the planter with a hot glue gun.
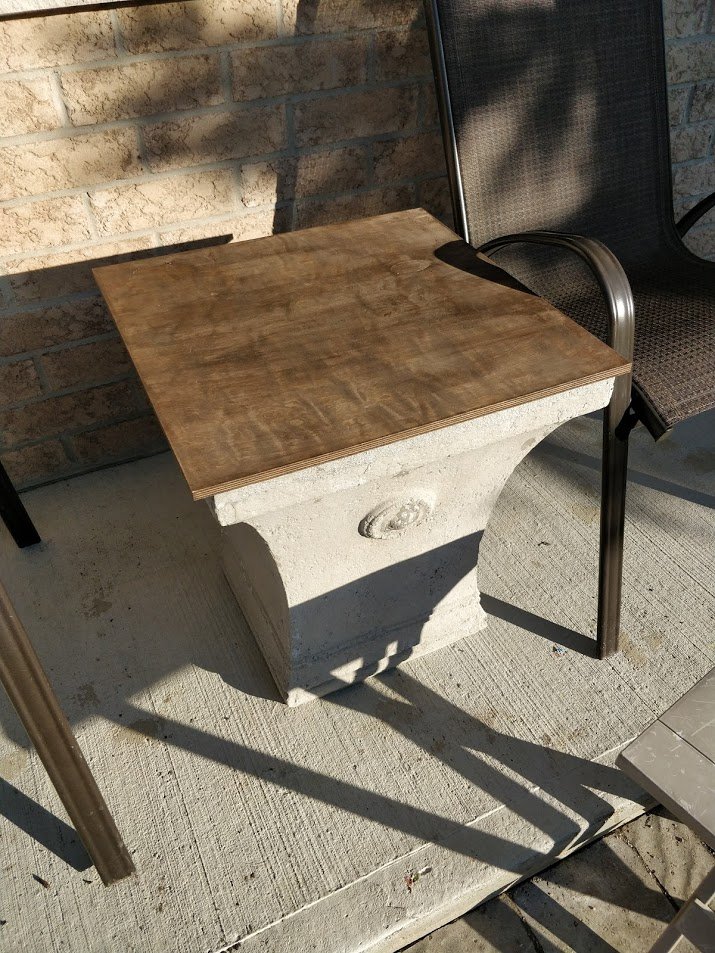
Step 4
To assemble, place the tabletop over the planter base! And you're done! IF you would like to use the planter base for extra storage, don't glue the tabletop to the base. That way you can lift up the tabletop and store things inside the planter (since it's hollow).
If you don't care for storage and want the tabletop stuck to the base, take some heavy duty glue and stick the tabletop to the base.

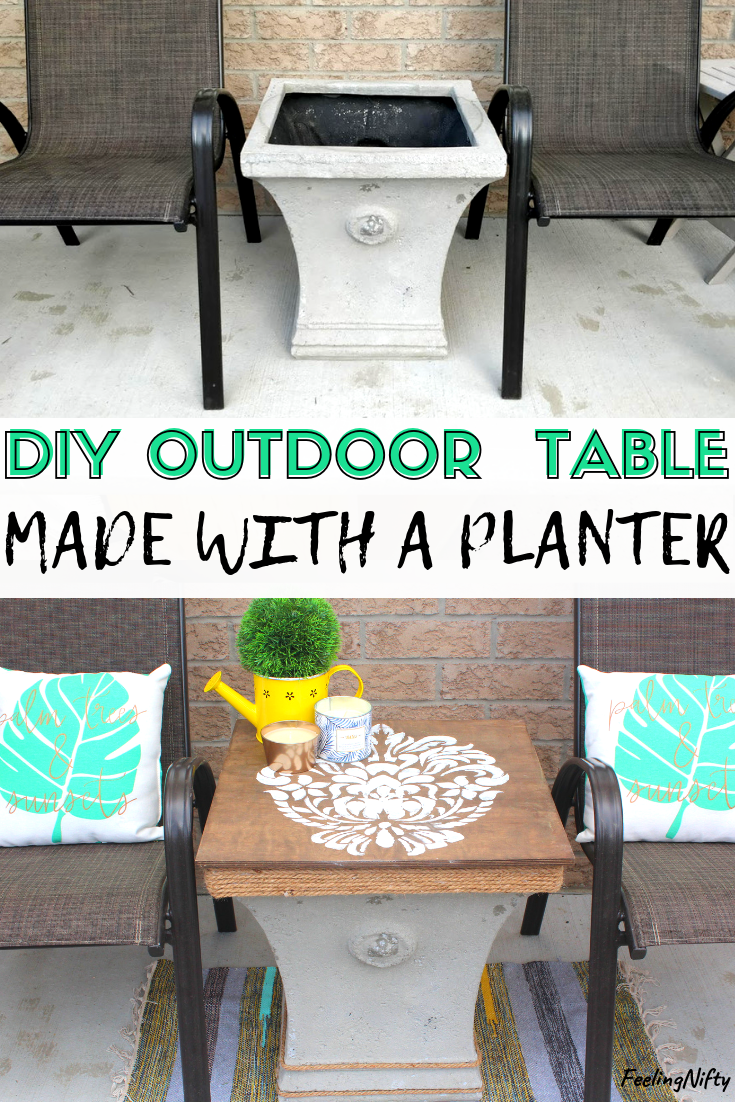
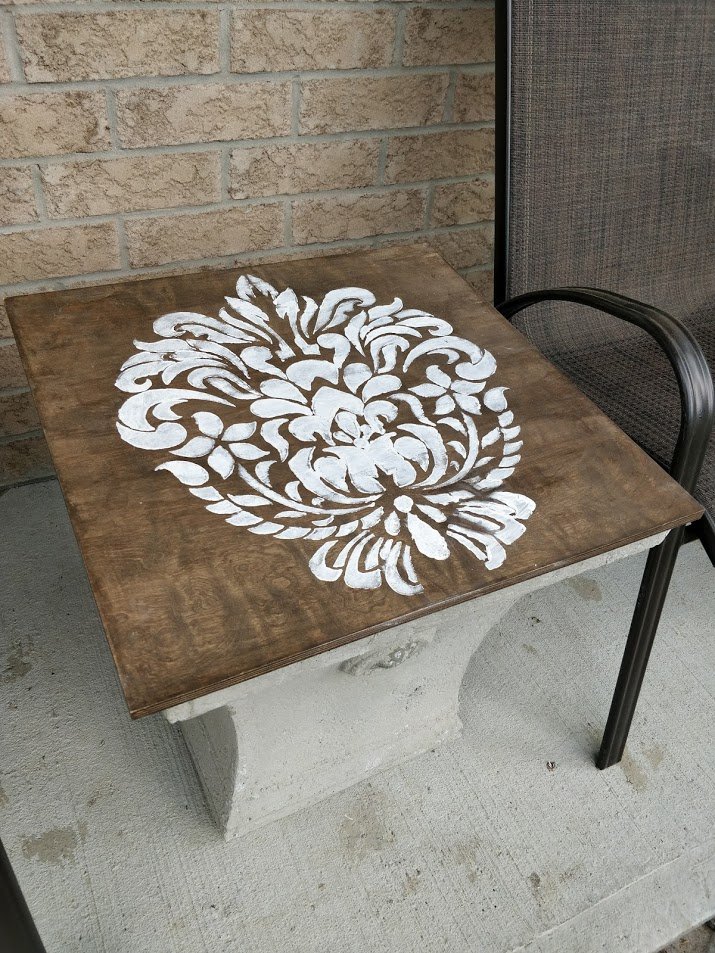
Here are some additional pictures of the outdoor end tables I made, along with some before and after shots of our patio /porch.
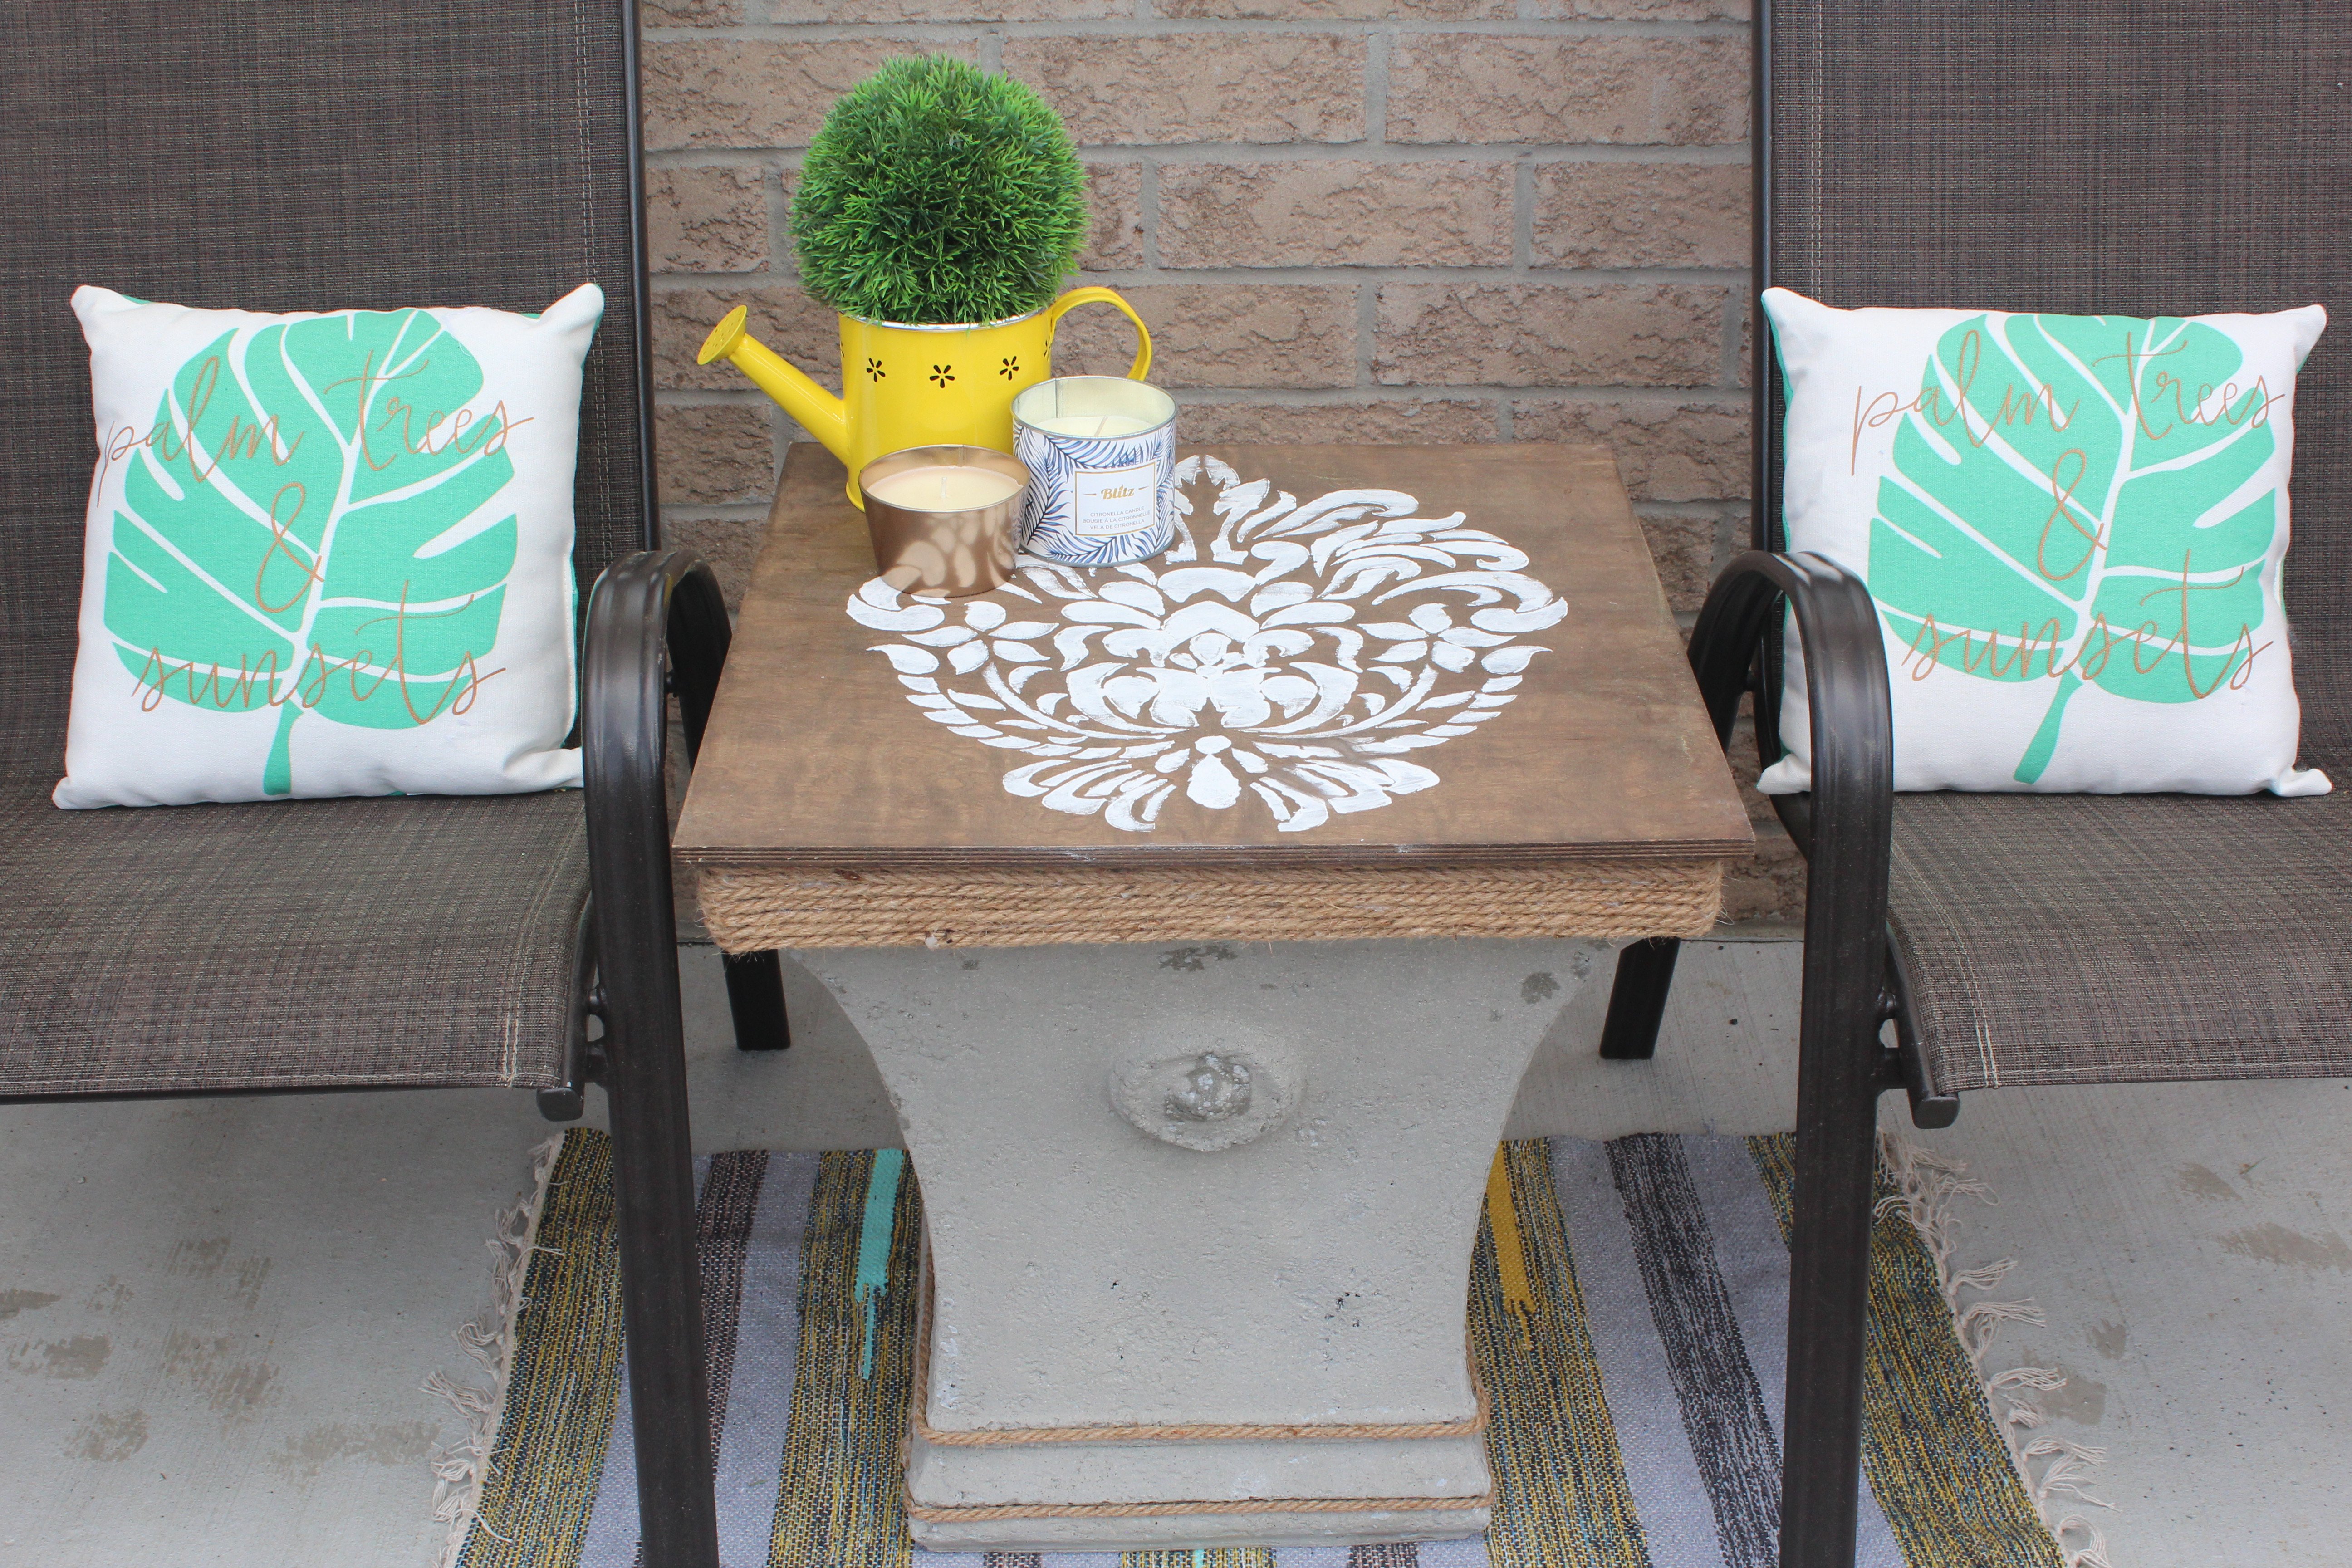
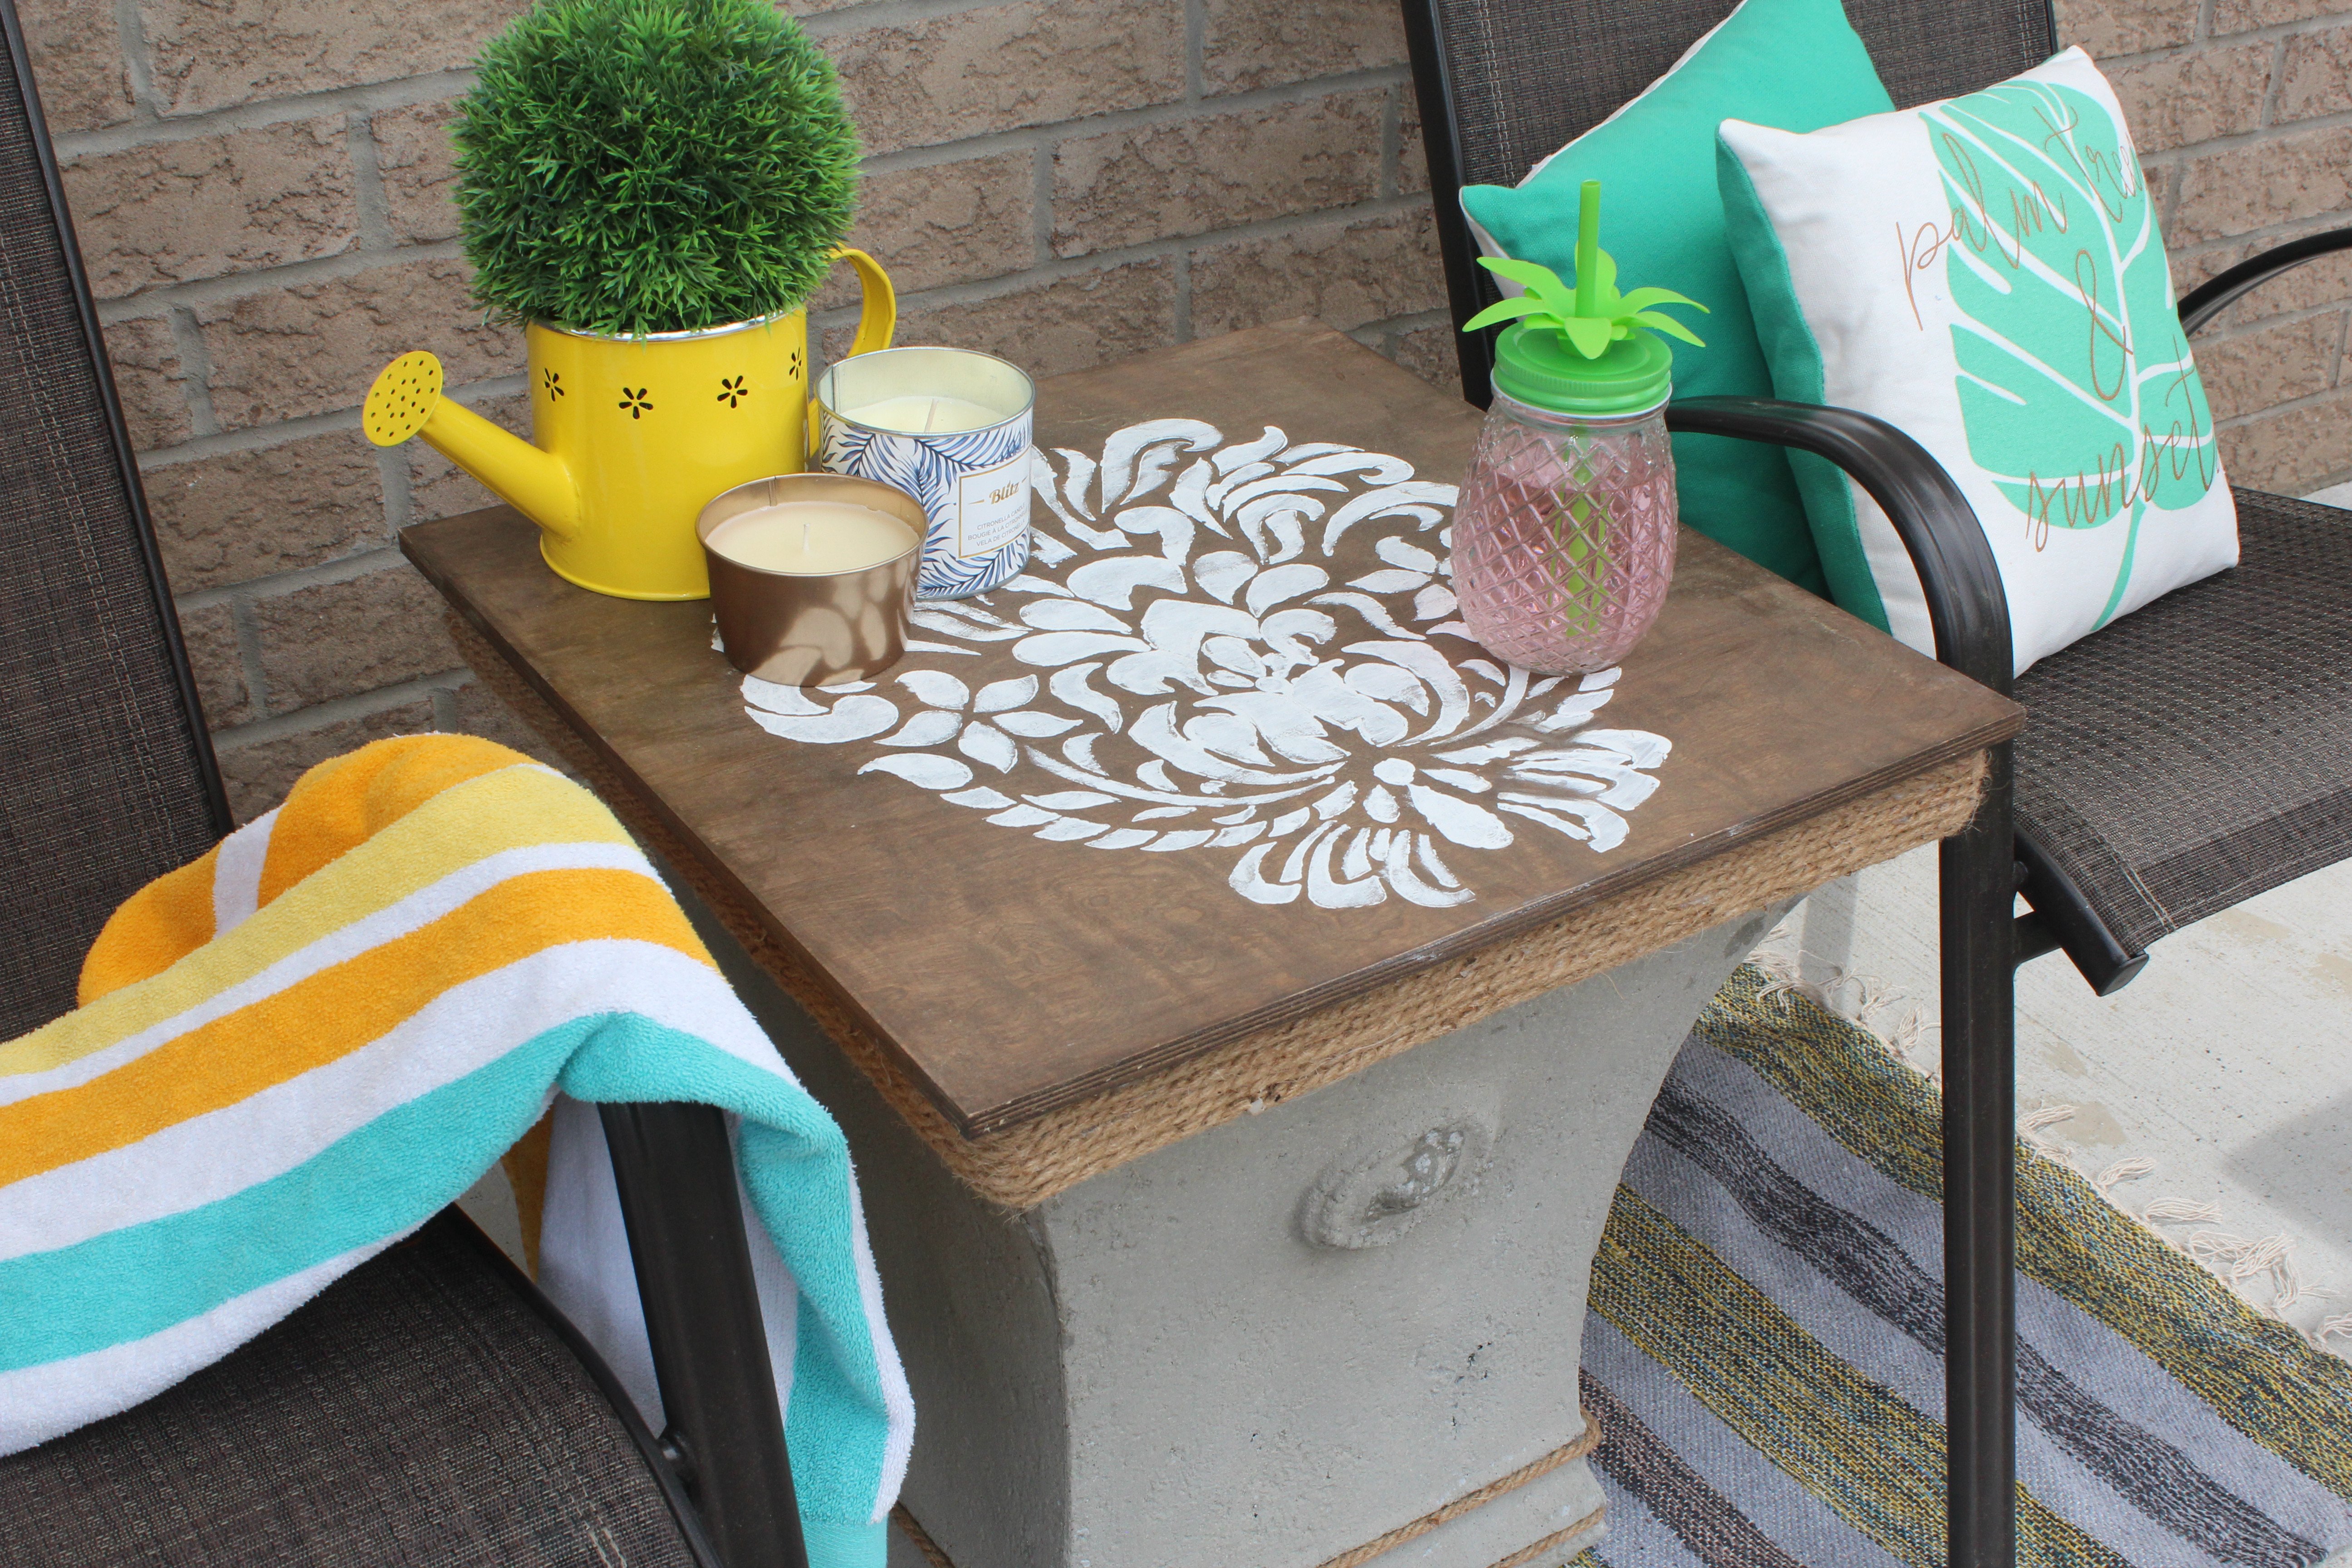
You're done! I hope you enjoy your DIY outdoor DIY side table with storage- made out of a giant planter. Enjoy your time outdoors, and until next time, stay Nifty!
Jasmine
Oh and if you like this post, please Pin It!