DIY Stockings Made From Old Flannel Shirts {Free Pattern, No-Sew}
Learn how to make DIY stockings using your old flannel shirts or even sweaters. No sewing experience required!
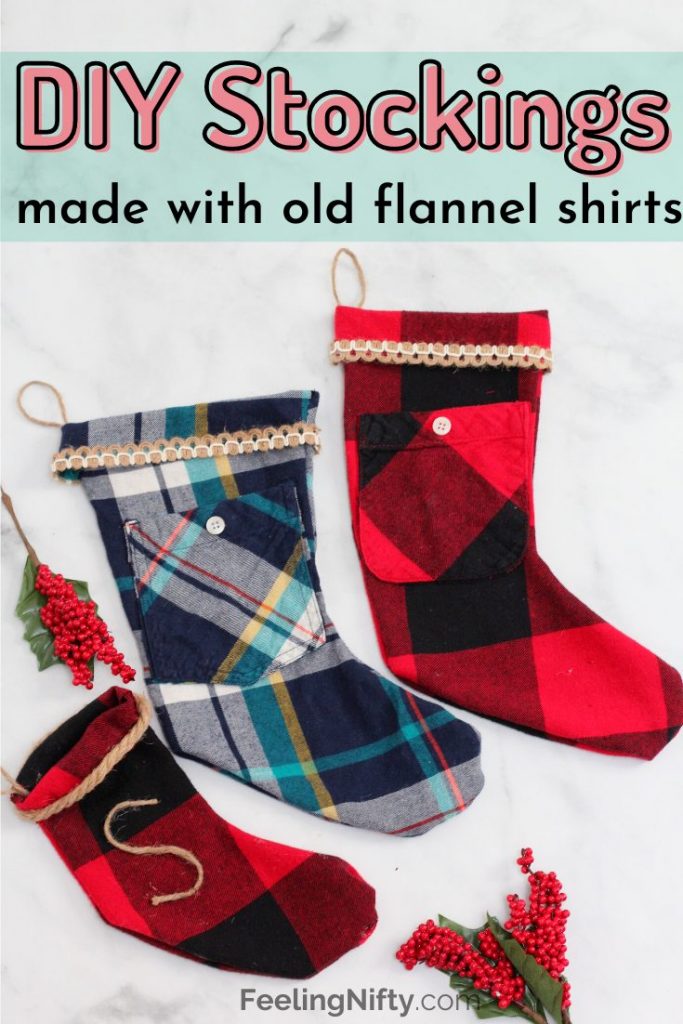
No-sewing skills? No problem! Learn how to make these cute DIY stockings out of old flannel shirts, no needle and thread needed. Includes a free printable stocking pattern below.
I took a little break from some painting projects to do something a bit different and not up my alley : a sewing project. Well, it started out a sewing project and then it quickly turned into the no-sew variety. I admit sewing is my crafting achilles heel. One day I'd really like to dedicate some time to learn this amazing skill and art, but until then I'll stick to the no-sew projects (my first one was this DIY no-sew bunny).
In this tutorial you'll learn everything you need to make these cute DIY stockings, including you free pattern (end of post), how to use fabric glue, and nifty customization ideas for your stockings.
Best Glue To Use For No-Sew Stockings
The beauty of the stocking pattern below is that you can use it for both sewing or no-sew projects. If you're going the no-sew route, you can use nifty fabric glue to make your seams.
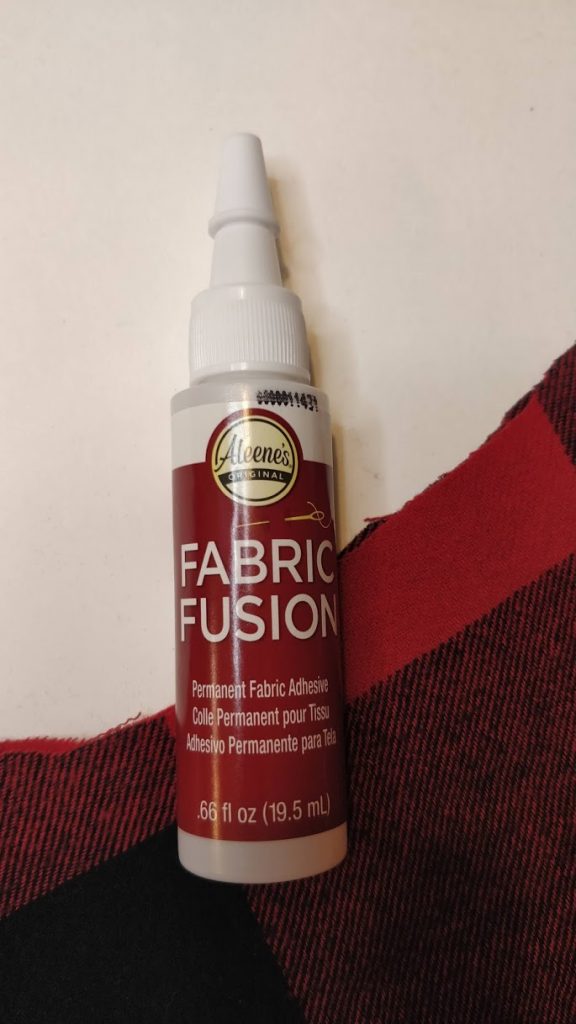
The fabric glue I used is from my favorite brand in glues - Aleene's. I've used their regular tacky glue which I totally love. It's strong but non-toxic at the same time which is why I love it.
The nice thing with fabric glue is the bond is permanent even when washed.
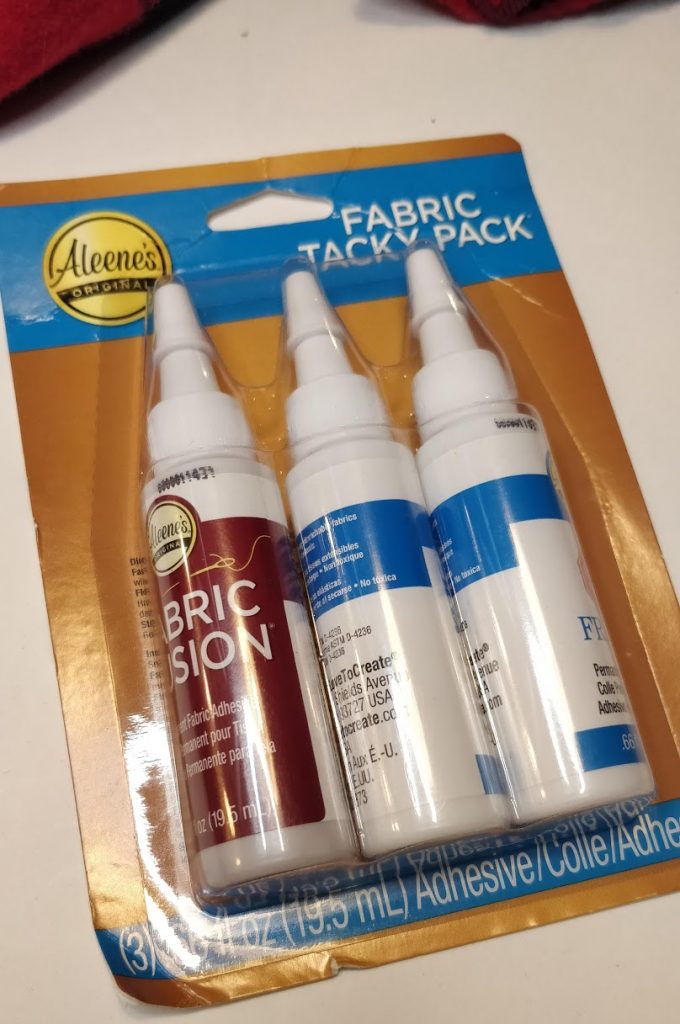
This was my first time using the Aleene's Fabric Fusion glue, but it was easy to use. The applicator tip was the perfect size to apply the thin line of glue at the edge of the stockings. If you apply too thick a line of glue, the clean edges of the stocking might get affected. So Aleene's applicator tip made it super easy to make nice thin lines.
Upcycled Old Shirt/Sweater
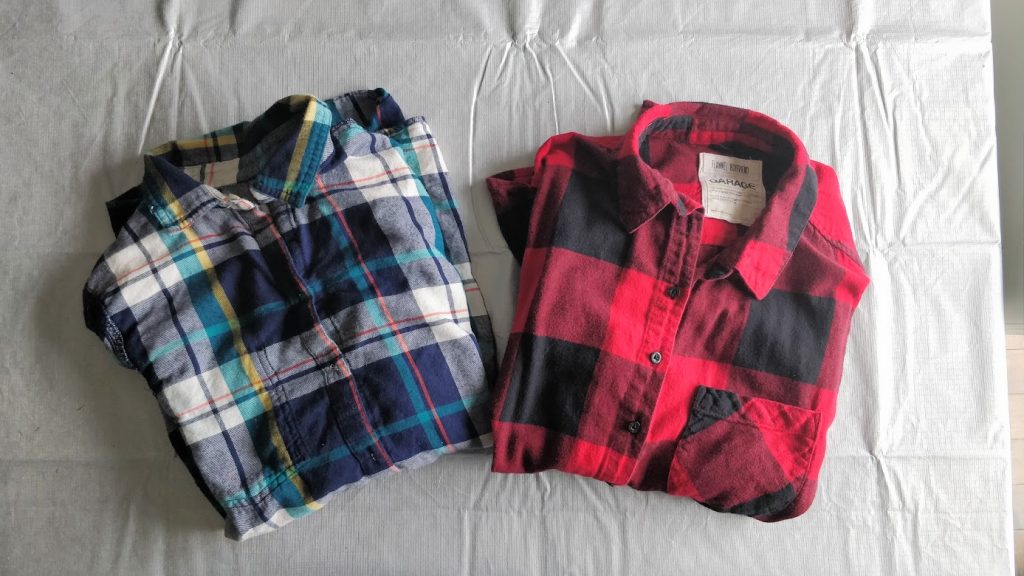
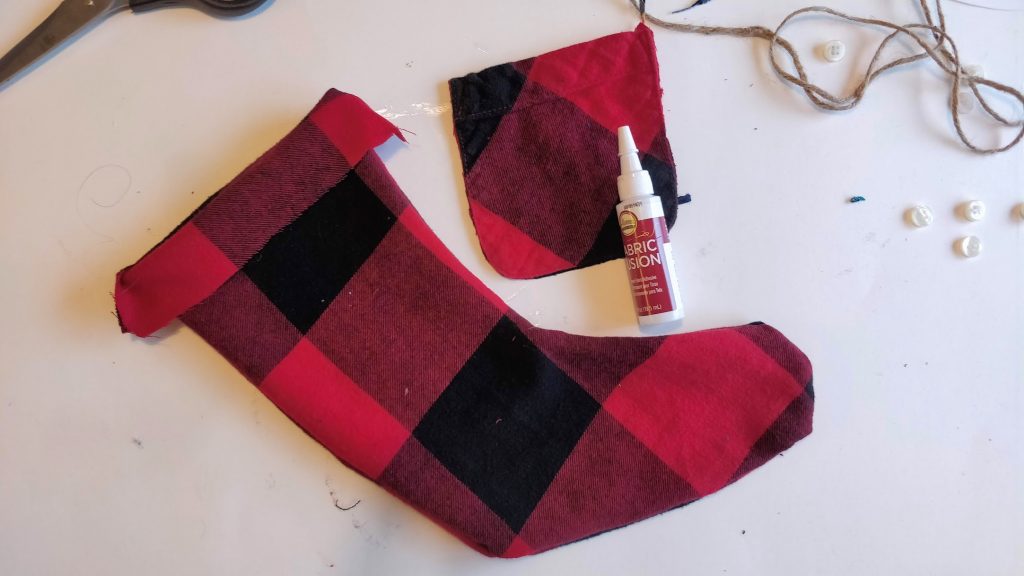
I had a couple old flannel shirts that no longer fit me, so instead of tossing them out I decided to use them for this DIY stockings project. Because fabric isn't cheap, here are some other ideas on things you can re-use in-lieu of fabric:
- old sweater
- old t-shirt
- dress shirt
- flannel scarf
- old fleece blanket/sheets
- old fleece baby blankets
- a trip to the thrift store for any of the above
How to Make A Christmas Stocking
This Christmas DIY stocking was a perfect project to try the no-sew route because the pattern is straightforward and simple.
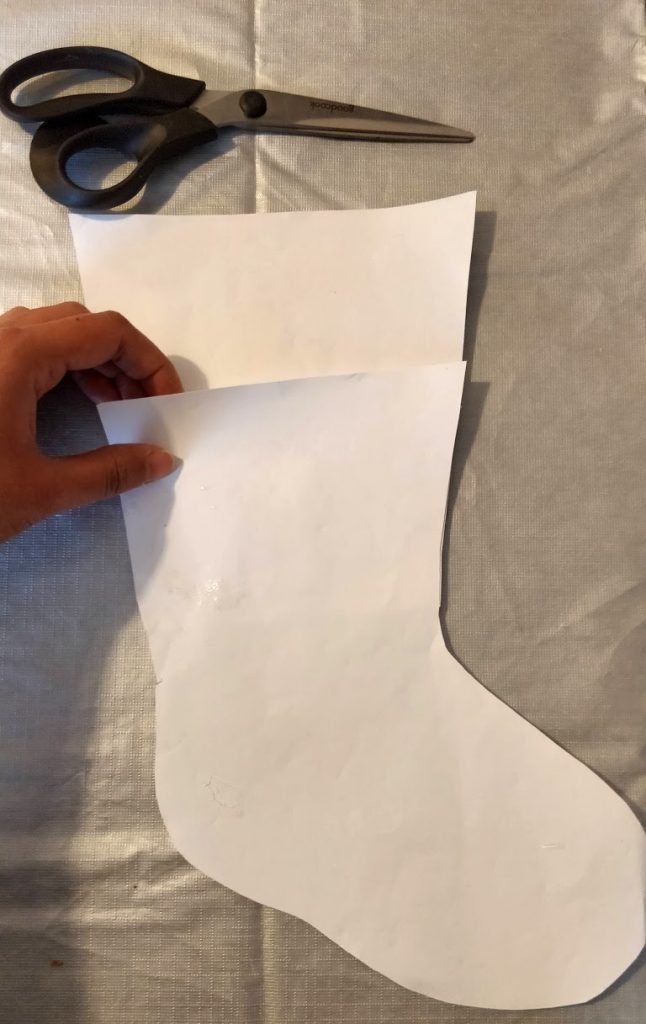
Simply print out the pattern ( at the end of this post) on any standard printer. The pattern includes the stocking and the cuff. Cut both out and tape them together so that you have a full size stocking.
Note: You can use the same pattern if you 're sewing the stocking with a sewing machine or free hand. I've included both the stocking and the cuff separately for both cases.
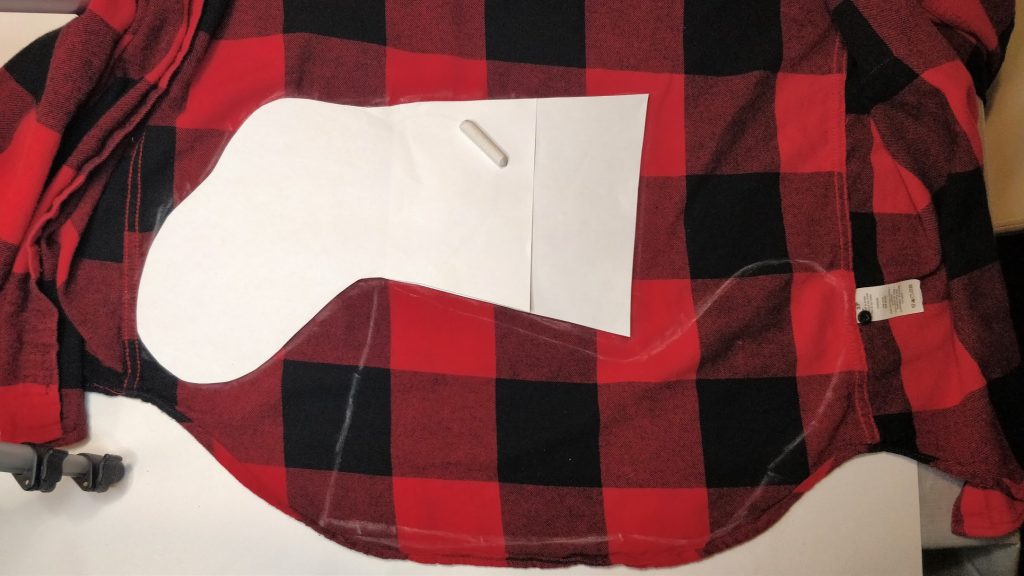
Once your paper pattern is cut and ready, lay it on your shirt and trace out 2 identical stocking shapes. I used white chalk for the tracing. Alternatively you can pin the pattern to the fabric and cut without tracing.

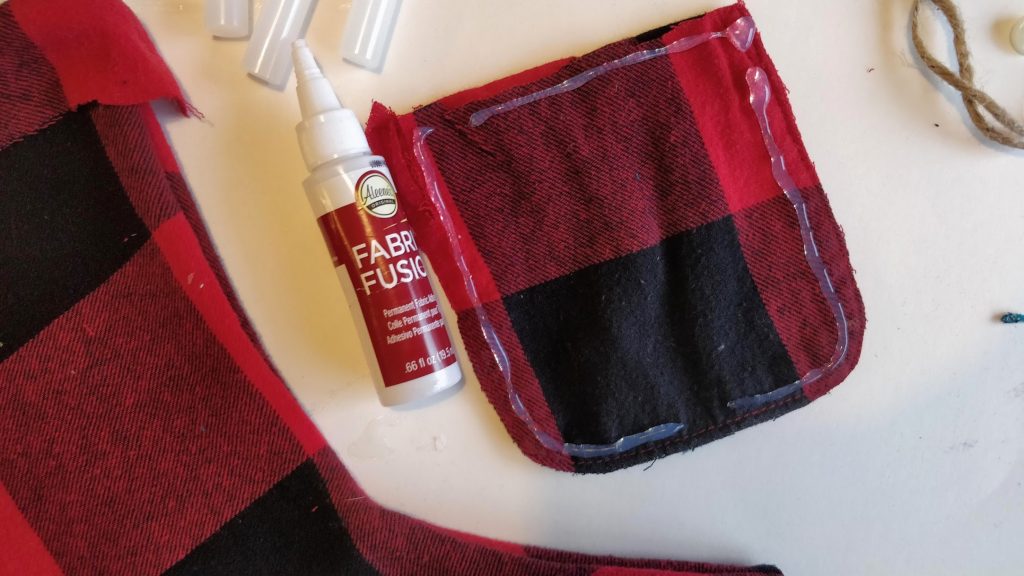
Next, using your Aleene's fabric glue, squeeze out a thin layer of glue along 1 stocking's edge. Don't glue the top straight edge (that will be the opening of the stocking).

Take your second stocking cut-out (the one with no glue on it), and carefully place it over top the glue.
In hindsight, it would have been easier to glue a bit at a time and carefully place the top cut-out over the glue as you go. Doing it all in one go with wet glue, was a bit challenging. It took steady-hands and a bit of re-shifting of the material to make sure both stocking cut-outs aligned perfectly.
Once the stocking is glued, wait for the glue to dry. My glue said 2-3 hours, but I let it dry overnight.
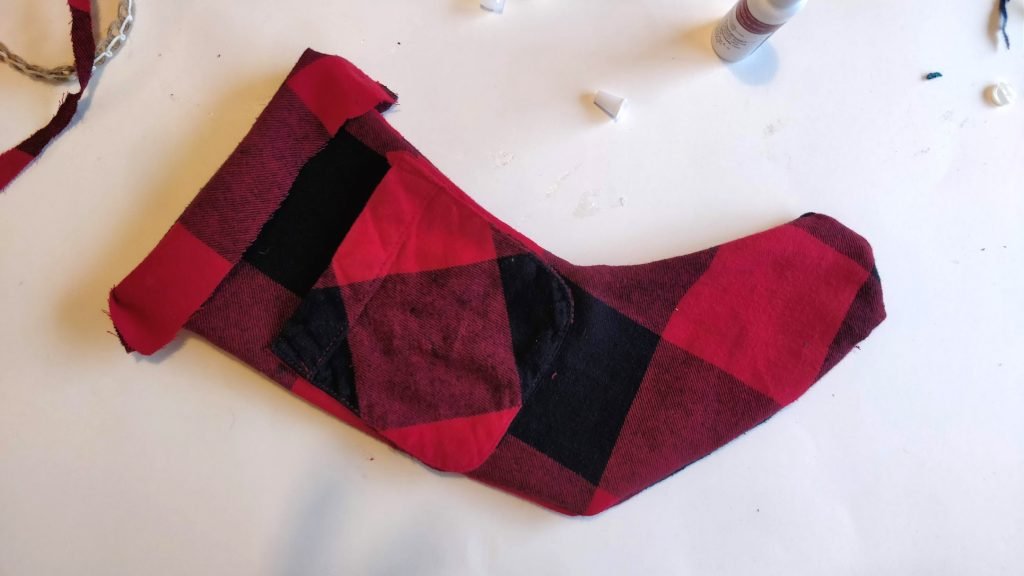
Once your glue is dried, turn your stocking inside out. You can do that by reaching inside your stocking with your hand and pulling the material inside.
Your final stocking shape should be nice and clean with the glued seam on the inside of your stocking.
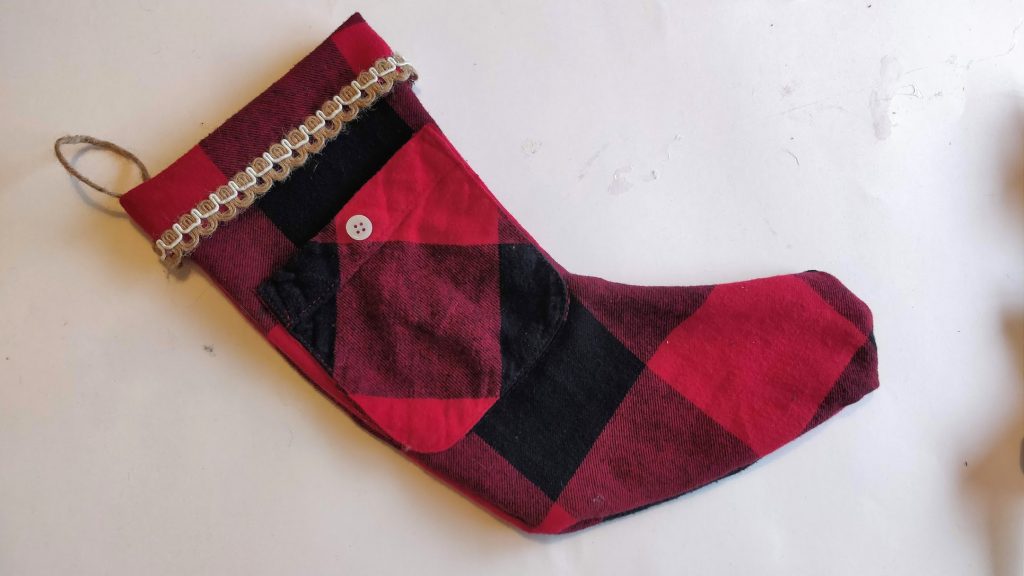
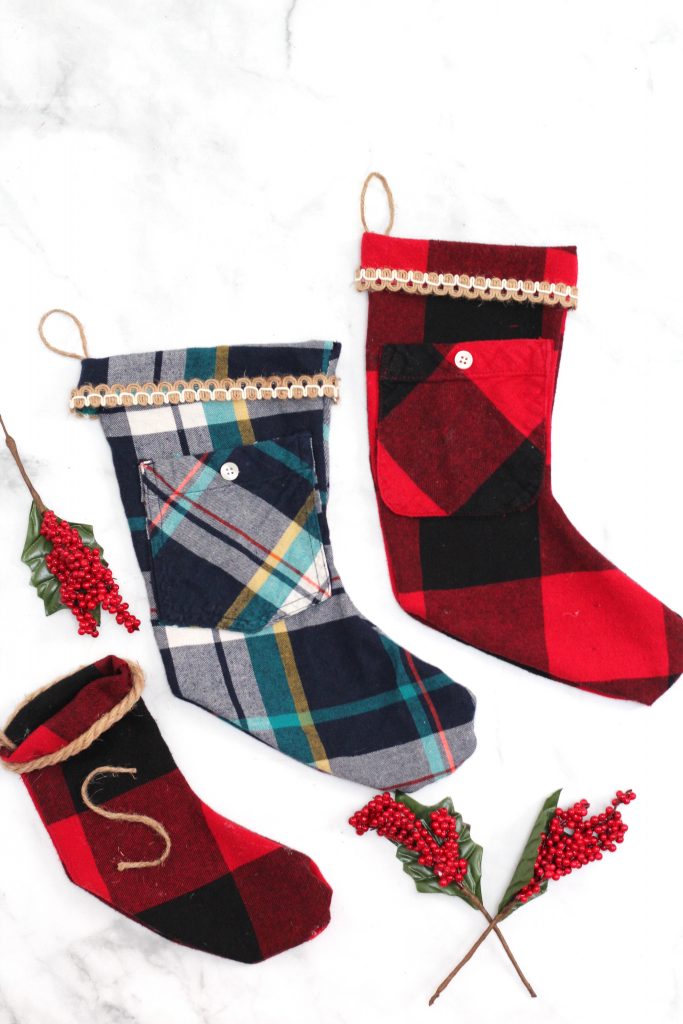
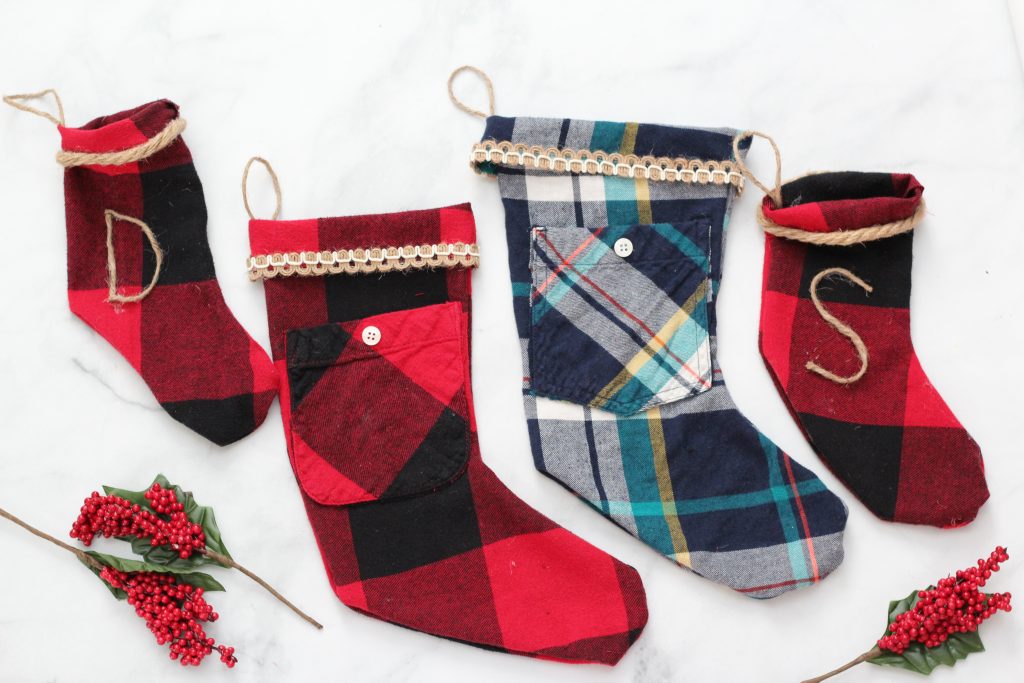
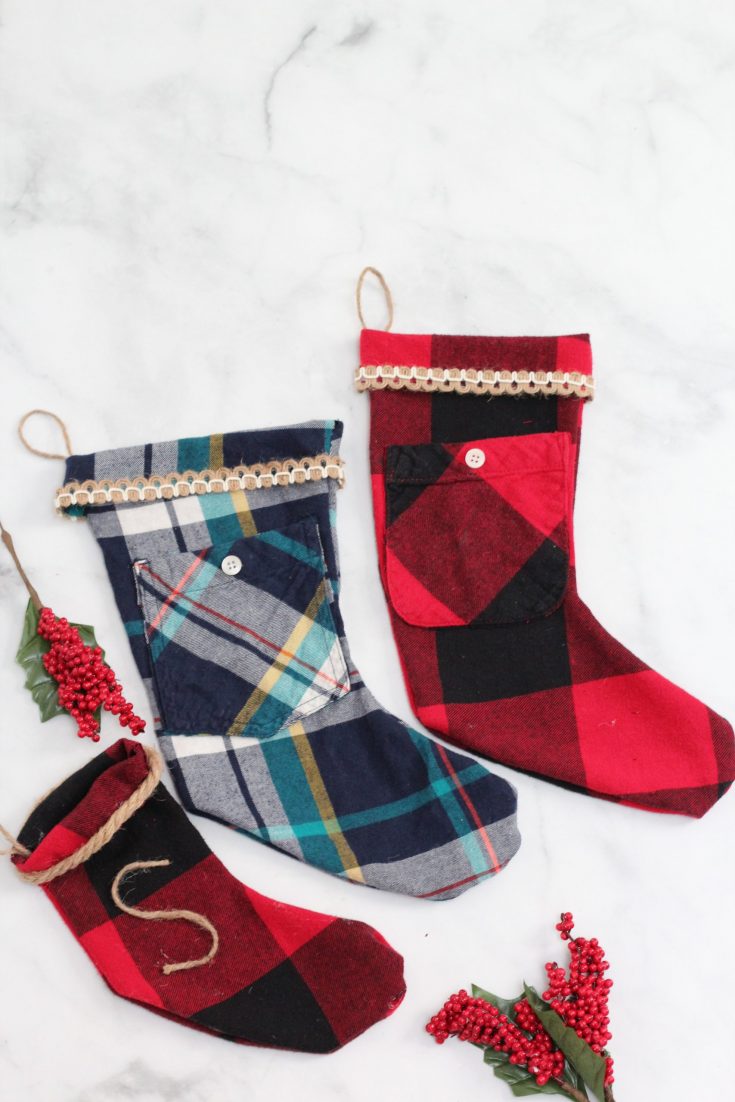
DIY Stocking Decorating Ideas #1 - Pocket
Since I used old flannel shirts, I thought it would be a cute idea to glue on the shirts pockets on the stockings front. This would also make a nifty extra pocket for stocking stuffers like like money, gift cards and trinkets!
First cut-out your pocket from your shirt with the backing still on.
Use your fabric glue on the back side of the pocket then place the pocket (glue side down) on the front of your stocking. Leave your pocket to dry according to the instructions on your glue
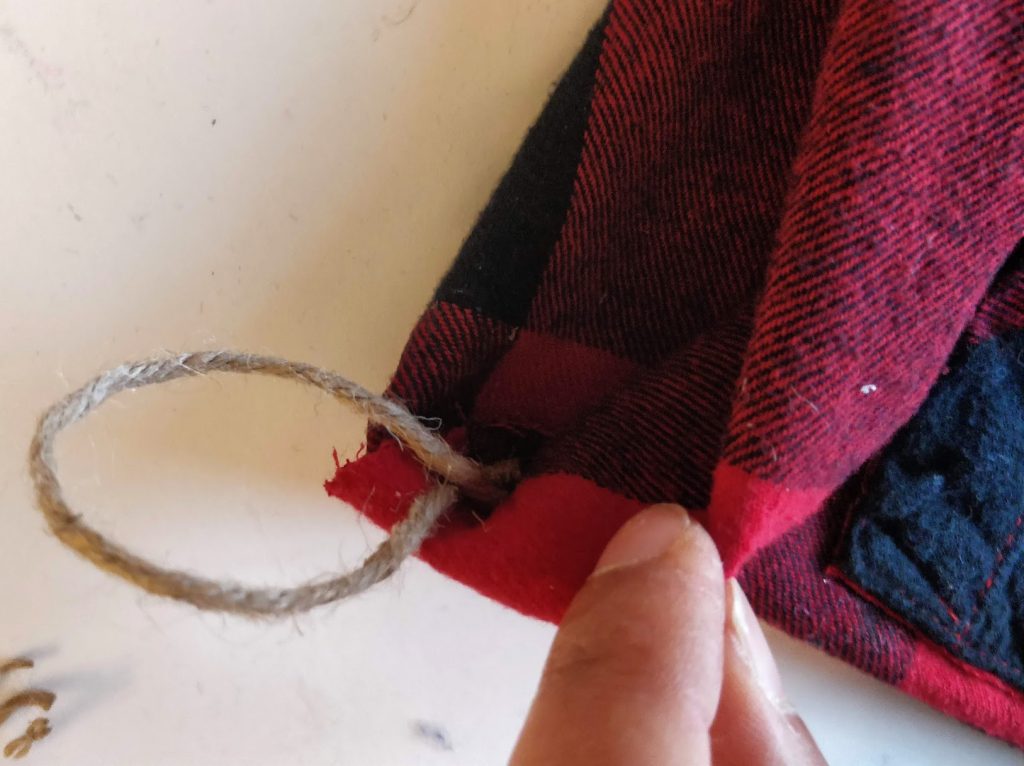
DIY Stocking Decorating Idea #3 - Twine Hook Loop
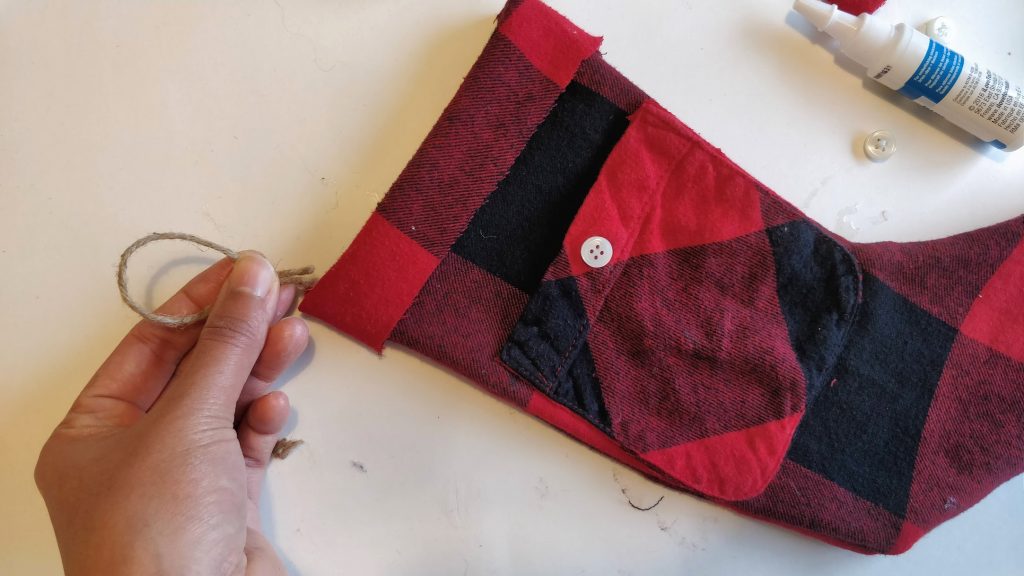
If your stocking is going to be hung, you'll want a loop attached on the top inside corner of your stocking.
You can use any ribbon to do this or even baker's twine- which is what I did. I like the rustic and earthy look of the twine paired with the plaid.
Cut a 4 inch piece of string, form into a loop shape with your fingers. Glue the bottom edges using hot glue or fabric glue on the inside top corner of your stocking
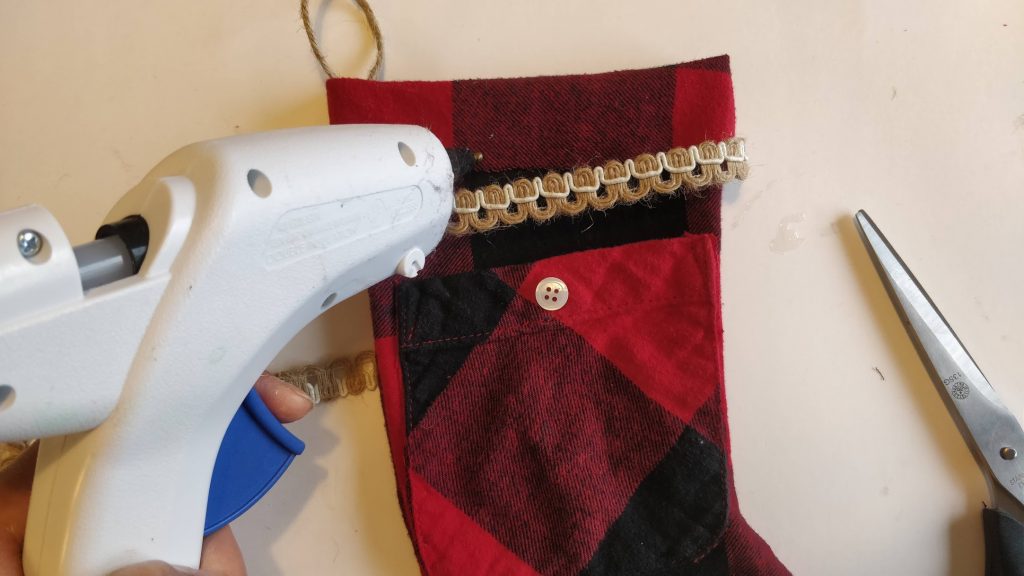
DIY Stocking Decorating Ideas #2 - Cuff with Ribbon Embellishment
Another idea is to fold over your cuff 1 inch or 2 then glue on a ribbon on the cut edge. This makes the cut edge of the stocking cleaner. Since we cut it with a scissor, it will prevent the edges from fraying.
You can use your fabric glue or even a hot glue gun for this step.
DIY Stocking Decorating Ideas #4 - DIY Personalized Stockings
Another idea is to personalize and put names on stockings or initials on the front. I did this with my mini stockings. I took some hot glue and squeezed the glue out in a letter "s" shape then lay down a a piece of the twine rope over it. It was easy and I think it looks cute!
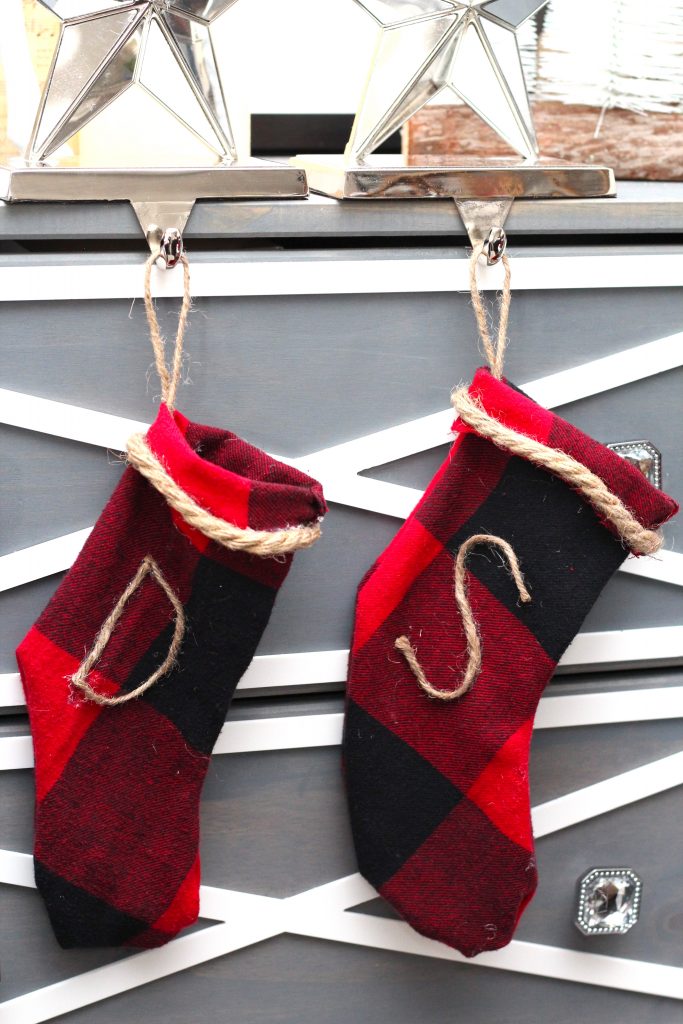
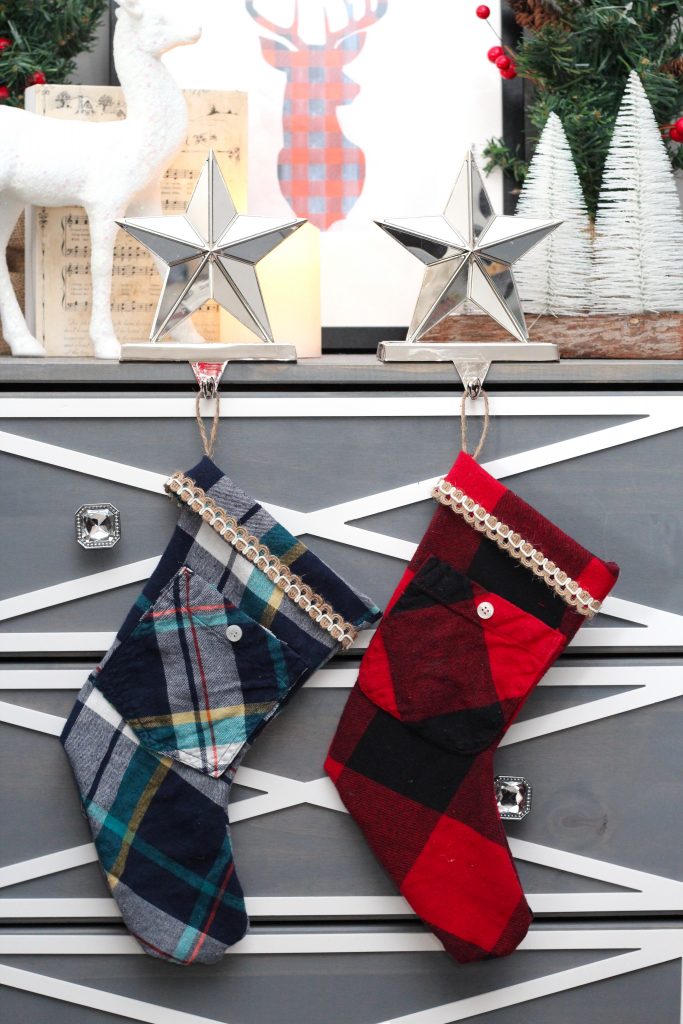
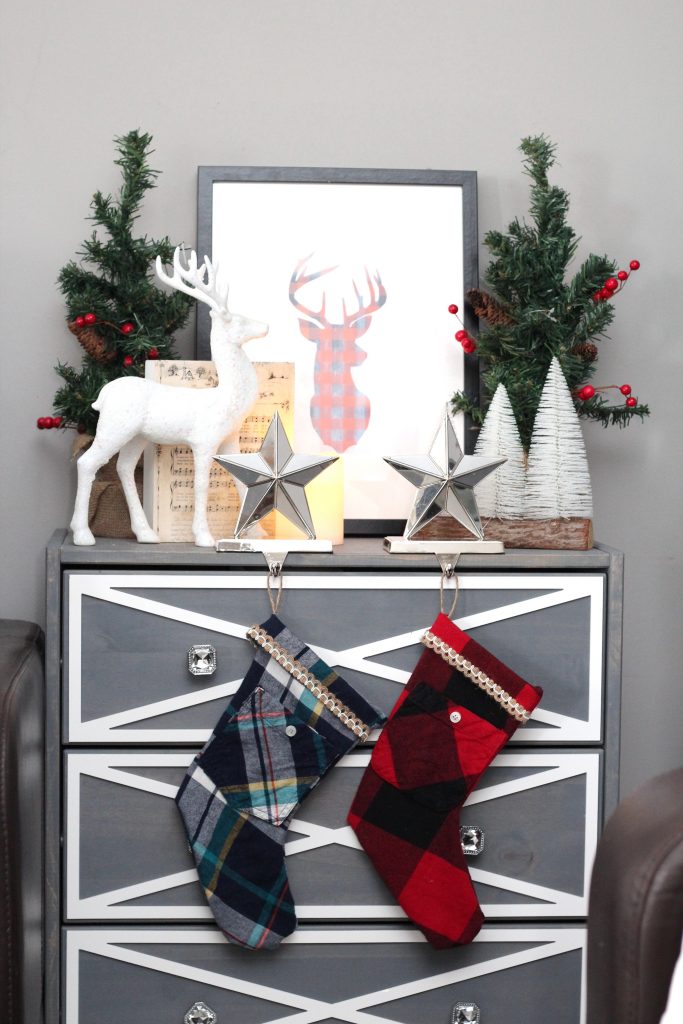
Pictures of the Finished Stockings
DIY Christmas Stockings Pattern Download
Click on each picture and then right click to download it to your computer. Print out both the stocking pattern and the cuff pattern on a 8.55" x11" sheet of paper. Cut the shapes out. If making the no-sew stocking, tape the cuff to the top of the stocking shape to make a full length stocking. The cuff should extend the stocking by 2.5 inches. I left 0.5 inch at the bottom to tape or glue it to the stocking shape).
The end pattern when taped together should look like this:

How to Make DIY Stockings No-Sew
Make these no-sew DIY stockings with an old flannel shirt and some simple fabric glue.
Materials
- Old flannel shirt, sweater or any fabric
- Aleene's fabric glue
- Twine
- Stocking pattern and cuff (download below tutorial)
Tools
- Scissors
Instructions
- Print, cut out, and assemble the stocking pattern (download below)
- Take your shirt/sweater or fabric and lay it on a flat, even surface. Place your pattern over top the fabric and trace the outline of the stocking using a piece of chalk or fabric marker. Trace 2 stocking shapes
- Using your scissors, cut-out your 2 stocking shapes.
- Take your fabric glue and apply a thin line on the edge of 1 stocking shape. Remember not to apply glue at the top edge (this is the opening of your stocking). To make it easier you can glue a little at a time and move to step 5 instead of glueing it all in one go.
- Take your second (non-glued) stocking shape and lay it over top the glued piece.
- Once the 2 pieces are glued to each other, leave to dry (read your bottle of glue for instructions).
- Once dried, turn the stocking inside out. Your finished stocking will be ready with the glued edges now on the inside of the stocking
- fold over 1-2" of fabric on the top cuff and make a fold. Using fabric glue or hot glue, glue on some nice ribbon trim to the bottom of the cuff.
- cut a piece of twine, form into a loop with your hands and glue it to the inside corner of your stocking (with glue gun or fabric glue)
- (Optional) If your flannel shirt had a pocket. cut it out and glue it to the front of your stocking as an extra storage for small stocking stuffers like gift cards, money and trinkets.
- (Optional) If you want to add a name or initial to the front of your stocking, Use hot glue or fabric glue to trace the letter you desire (thin line of glue). Take some twine and place is overtop of the glue to form your initial or name.
Recommended Products
As an Amazon Associate and member of other affiliate programs, I earn from qualifying purchases.
-
 BUYGOO 30Pcs Burlap Flowers Set Natural Rustic Burlap Flowers Craft Burlap Lace Bowknot Lace Burlap Ribbon Rolls and Twine Ribbon for Wedding Party Decor Home Embellishment DIY Crafts
 -
KINGLAKE 328 Feet Natural Jute Twine Best Arts Crafts Gift Twine Christmas Twine Durable Packing String
-
Aleene's 23473 Fabric Fusion Permanent Fabric Adhesive ,Clear,4oz


Love this tutorial? Please pin it for later!