How to Paint a Christmas Tree And A Magical Winter Scene
Learn how to paint a Christmas tree on canvas/wood. A giant blue winter moon completes this Christmas painting with a bit of Christmas painting magic!

There's plenty of magic hidden in this Christmas tree / winter scene painting tutorial ✨. You'll learn an easy one-stroke technique how to paint Christmas trees that everyone can do (even kids). And the magical moon painting technique will dazzle you and leave you feeling like a cross between Houdini and Picasso.
And as always, the full step-by-step painting tutorial is at the end of this post, with a link to the full length YouTube tutorial. It will guide through the entire painting from the beginning to the end.
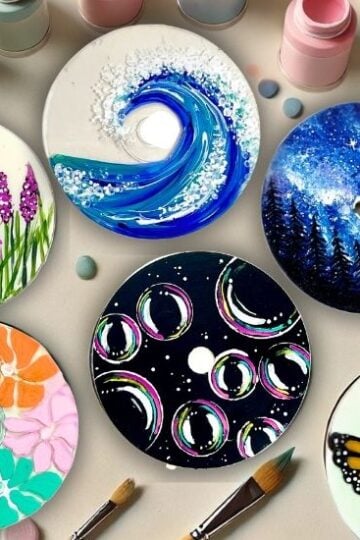
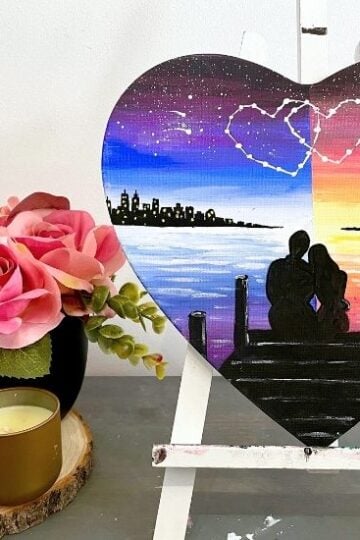
Looking for more ideas to paint? Check out this list of 65+ Painting Ideas that any beginner can tackle. And if you're looking for more Winter/ Christmas paintings check out these 65+ Christmas Painting Ideas or 65 Easy Winter Painting Ideas For All Ages.
Before the tutorial I've added a few in-depth sections below, on how to paint a Christmas tree and the giant winter blue moon since there was more to explain for those 2 methods.
Oh and before you begin, if you're looking for another fun Christmas painting ideas checkout these out:
- How To Paint a Snowman {Paint and Sip}
- How to Paint a Cardinal on a Snowy Branch
- DIY Christmas painted ornaments tutorial
- How To Paint Wood Slice Ornaments
Let's start this magical Christmas painting scene....
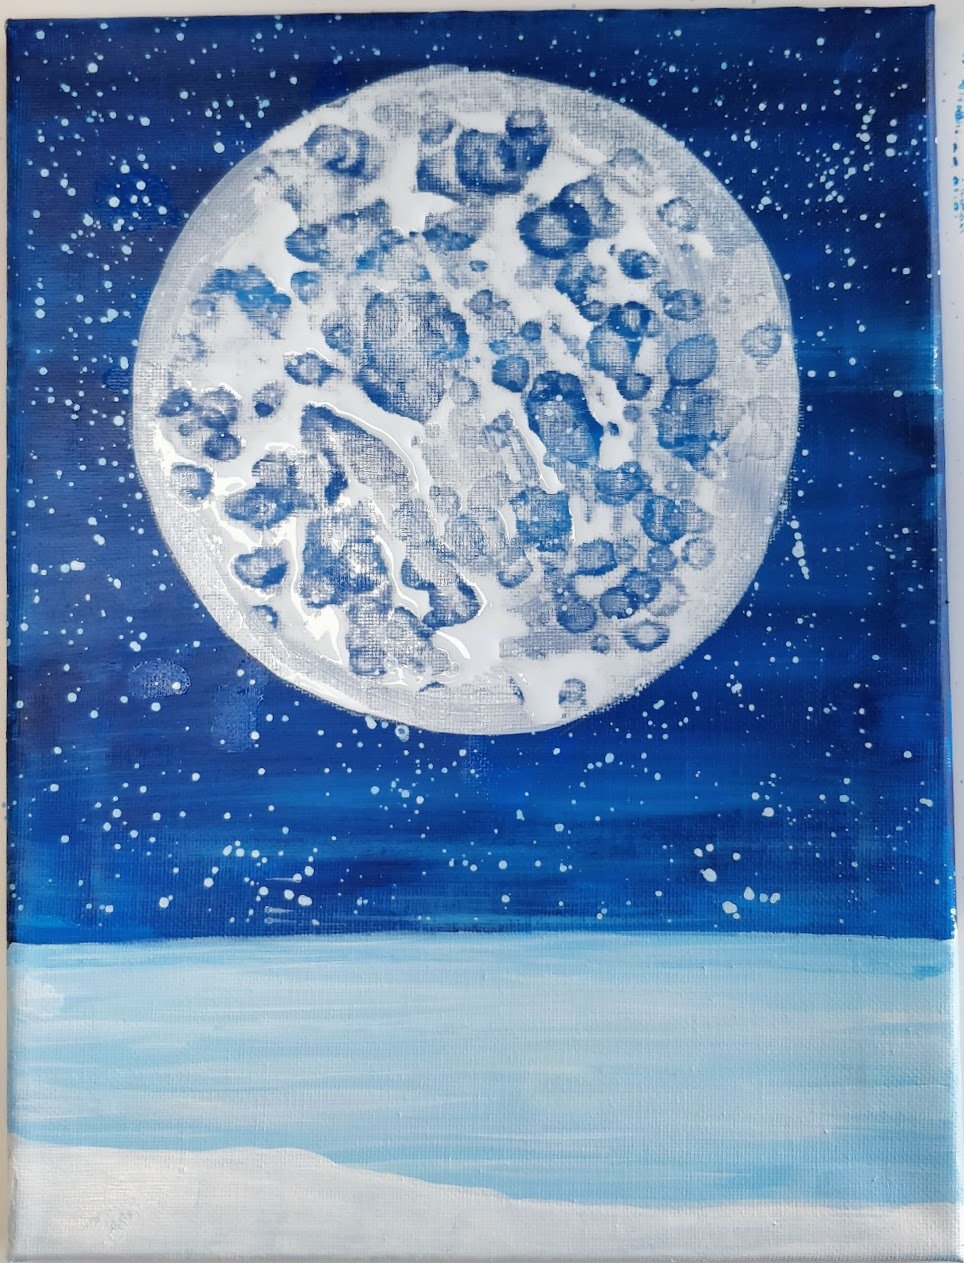
How to Paint a Giant Winter Blue Moon
Painting this giant blue moon felt like pure magic!
The trick behind the magic is using a common household item that reacts with acrylic paint (or water based paint).
It's isopropyl alcohol.
Isopropyl alcohol ( I used 50%, but higher concentrations work too) acts as a solvent when it touches acrylic paint and dissolves it on contact.
Note: check out the step-by-step tutorial at the end of this post for the full painting from beginning to end
Essentially, we're going to paint the moon with a layer of very thin white ( important that it's thin enough), then add drops of alcohol overtop. The alcohol drops will dissolve the white paint on contact, leaving the blue background show beneath it.
These drop shapes will be your moon craters.
Winter Blue Moon: Step-By-Step
The first step is to make sure your blue background is fully dried (including stars). Once the background is dried, you don't have to worry about drop of alcohol dissolving your background, even if it gets onto it.
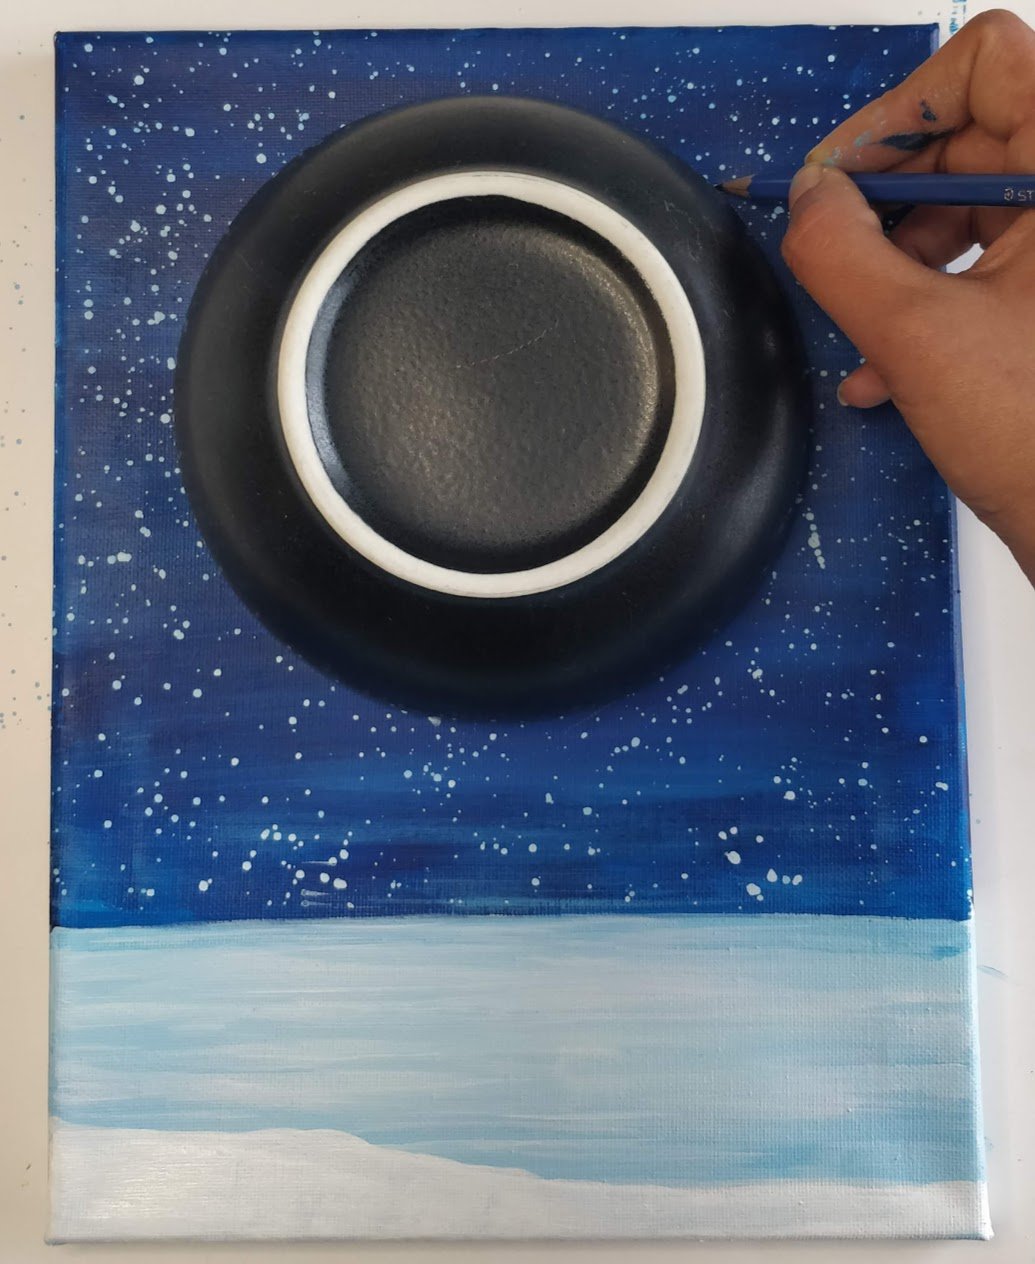
Take something round (like a large bowl) and trace your moon shape with a pencil


Now for the thinned down paint. This is super important step. If your paint is not thin enough, the technique won't work as well.
I used ¼ teaspoon of water and added ⅛ teaspoon (or a dollop) of white paint and mixed it. The white paint should be a thin liquid consistency and very transparent when painted on canvas.

Fill in the moon with a very thin layer this white paint using a ½" wide wash/flat brush.
Adding the Isopropyl Alcohol
You'll have to work fairly fast in the next step because you don't want the white paint to dry. The alcohol effect won't work on dried paint (read tips below). Use a pipette (for maximum control) or your brush handle and drip Isopropyl alcohol drops over the wet white paint.
As the alcohol drops hit the white moon. you should see the white paint being dissolved in drop like shapes.
Magic!
Oh, and you don't have to worry about the blue background getting dissolved since it's dry. If you get some alcohol outside the moon shape no worries, just wipe away.
Moon Painting Tips
- Ensure background is fully dry before starting
- White paint should be very thin - looks transparent on canvas
- Use 50% (or higher) concentrated Isopropyl Alcohol
- Work in a well ventilated room as the alcohol has a strong smell
- If your white paint is drying too fast, mist with water to revive it
- Paint your moon in sections, and do the alcohol drops as you go
- Use a pipette to get maximum control of your alcohol drops
- Once dried go over areas with blue/white paint to add extra texture and moon craters
This youtube video inspired this technique.
IMPORTANT: the smell of isopropyl alcohol can be a bit strong, so make sure to work in a well ventilated area.

Blue Moon Finishing Touches
Once dried, take a small angled brush (I used ¼" wide) and use the white paint to outline ½ of the moon.
I outlined the left half.
This will create the illusion of the moon being illuminated by the sun on one side of the moon and a shadow on the other.
You don't have to do this step, but I find it brings the moon to life.

How To Paint a Christmas Tree: Step By Step
Once your moon is dried, you can move on to some magical Christmas trees using a one-stroke technique.
This one-stroke brush technique can be used on canvas, wood or any other surface.
To make this technique stress-free, outlining your tree shape with a pencil really helps. That way you don't have to worry about the shape of the tree and just focus on the brush strokes and filling it in.
In the picture below I've used pencil/chalk to outline my Christmas tree shape.
I also marked the middle of the tree with a vertical line. This will help you angle your strokes toward the middle- if you want a more rounded looking tree.

Next, let's paint it in!
You'll need a round brush (size 4 or ½" diameter wide) and hooker's green paint.
Load the brush in a rotating twisting motion. This helps load your brush properly and evenly, keeping the pointed end staying sharp.

Starting at the bottom of the tree, point the paint brush tip down on the canvas. Apply heavy pressure on the brush and sweep up to create your one-stroke tree branch. Repeat this stroke across the entire bottom row of your tree.
To make your tree look more dimensional, angle your stroke so its angled toward the center line of the tree. Your branches will look more flared out and the tree will look more dimensional.

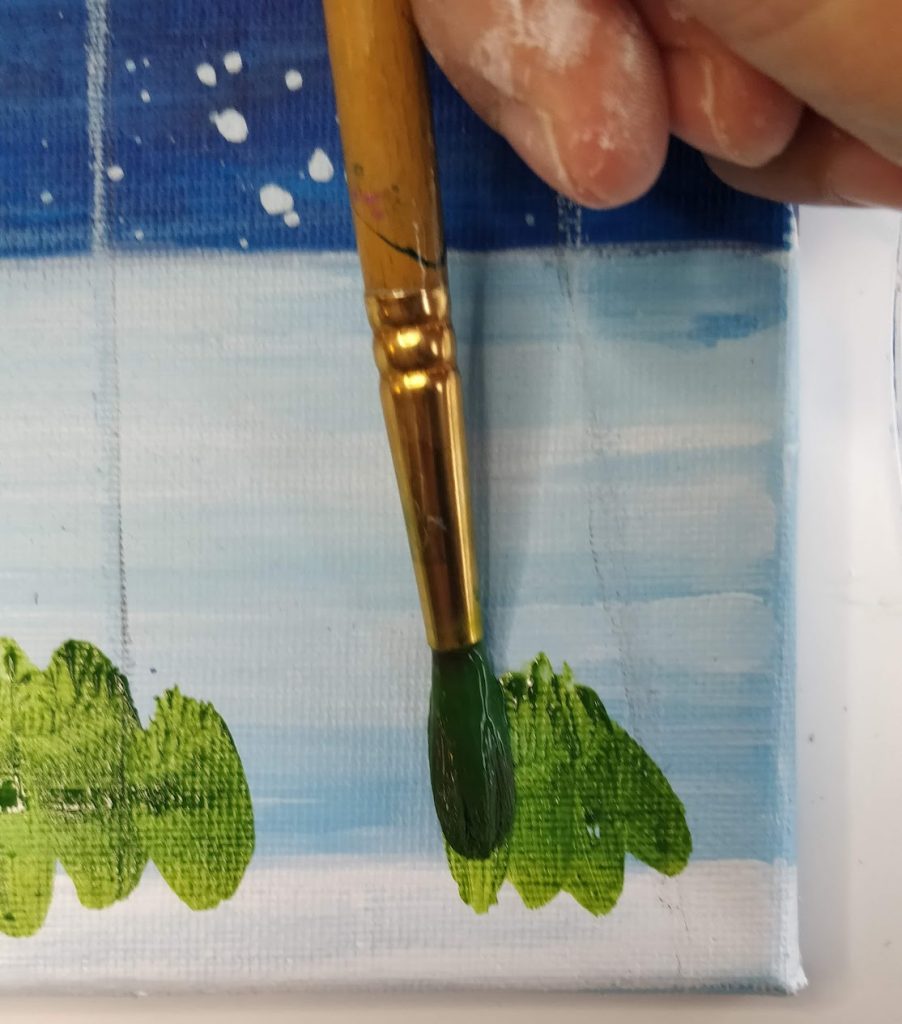

Once your first row of branches is complete, repeat the same steps on you second row. Make sure you overlap the first row. This will make it look like the branches are sitting on top of each other.
Also, you don't have to wait for the paint to add a new row.
It's so hard waiting for paint to dry, so I made sure this technique worked with wet paint.

Now repeat this one-stroke technique on the remaining rows all the way up your tree. Using your pencil tree sketch to guide you where to start and end each row.


Once you're done, if your green is transparent like mine, you'll need a second coat.
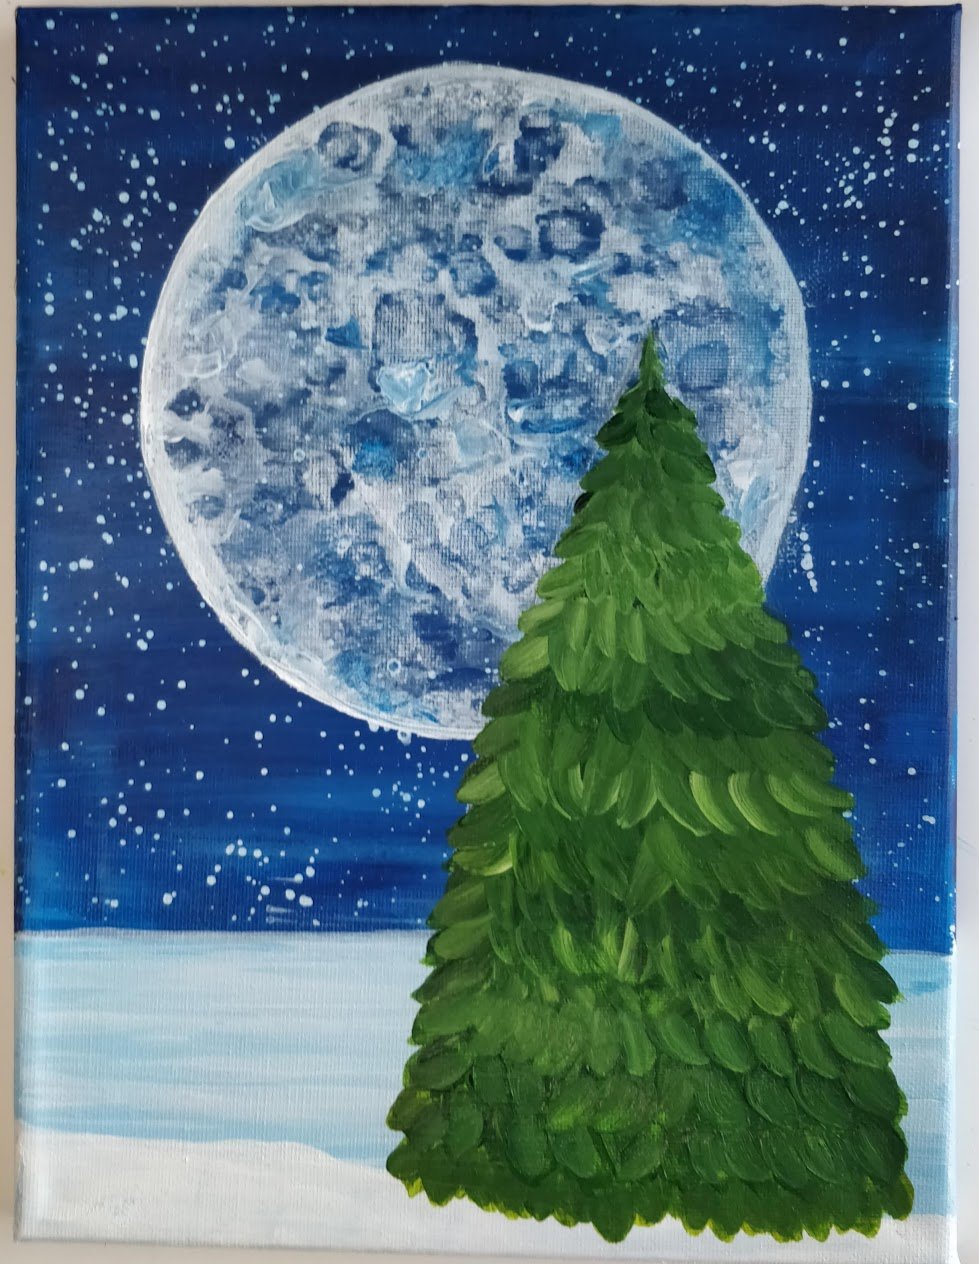
Add a Second Coat and Highlights
If you want to bring more dimension to your tree, you can use 2 colors in this step. Your hooker's green and a lighter green color (add a little bit of yellow with hooker's green).
When filling in your second coat of branches, randomly alternate using both colors (green, and lighter green) across the tree. The more random the better.


How To Paint Trees in the Background
To paint silhouetted trees in the background use the same technique as above. Except you'll use a smaller round brush (I.e.size 1 or 2) and use a darker colored paint.
Since all shadows in real life have a natural blue tone to them, I decided to use prussian blue. Initially, I used black for the trees, but it looked too harsh with the blues of the painting (sky, moon, snow). So using a deep/dark blue just made the painting look more cohesive.
If you don't have prussian blue, there's an alternative. Mix your phthalo blue with some black to darken it up.
The blue will be dark enough that you don't need 2 coats on the background tree.


Christmas Tree Scene Completed Pictures
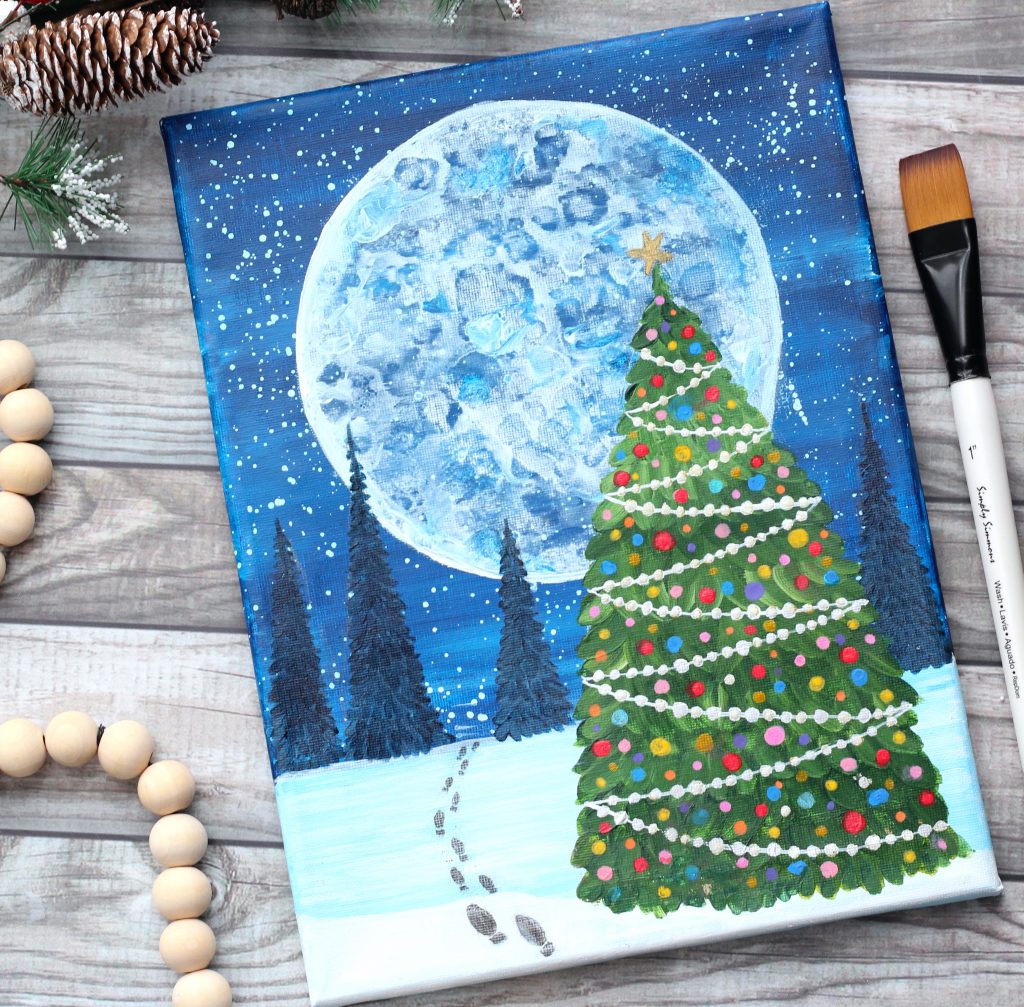


Christmas Tree + Winter Scene Painting Tutorial
How To Paint a Christmas Tree Scene on Canvas
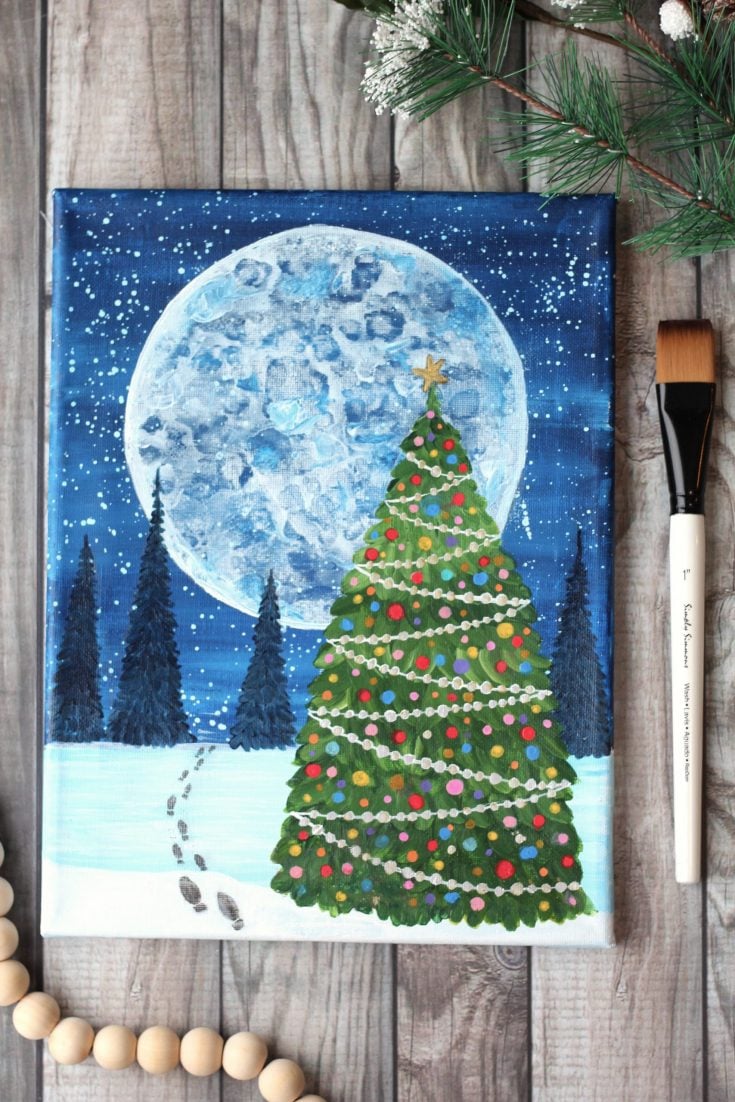
Learn how to paint a Christmas tree in the magical Christmas scene painting complete with a giant blue winter moon.
Materials
- 9"X12" Stretched Canvas
- Isopropyl Alcohol (50% concentration or more)
- Titanium White
- Prussian Blue
- Phthalo Blue
- Hookers Green
- Cadmium Yellow
- Your choice of colors for the ornaments
- ½" flat brush
- Size 4 Round brush (or ½" wide)
- ¼" angled brush
- Rigor/liner brush
- Dotting tool of choice( Examples: mandala dotting brushes, q-tip, back of your brush handle, eraser top of a pencil)
Instructions
- Check out my full length video YouTube tutorial.
- Mix 2 blue colors. The first with phthalo blue with a tiny bit of prussian blue. The second color using the same blue with some white added to it. Paint the top ⅔'s of the canvas with the dark blue, and the bottom ⅓ with the light blue. Use a ½" flat brush.


- Now you'll create some cool splatter stars! Mix ¼ teaspoon of water with ⅛ teaspoon of white paint. The white paint should be a liquid/watery and flow down when palette is tilted. Dip any brush into the liquid white paint to coat the bristles. Hold the paint brush in one hand and pick up your pencil in the other hand. With both hands over your painting, gently tap the paint brush on the pencil ( to make it easier hold the pencil parallel to the painting). The harder you tap the more paint will fly out. Use this technique over your entire night sky. Once done, save the left over paint for step 5 (the moon) Tip: use paper towel to cover the bottom snow portion
 .
. - Using white paint and your flat brush, paint in an edge of snow at the bottom of your painting.

- Once the stars are dried, trace a giant circle in the middle of your night sky using a bowl, or something else that's round.


- Using the leftover liquid white paint from step 2, fill in your moon. Using a pipette or the back of a paint brush, drop drops of isopropyl alcohol onto your moon while paint is still wet. This will create the cool round "craters". You'll have to work fast so the white doesn't dry while dropping the alcohol, otherwise this technique won't work well. As a tip, apply the white + alcohol drops in smaller sections as you go. IMPORTANT: the smell of isopropyl alcohol is strong, make sure to work in a well ventilated area.


- Wait for moon to dry, then taking some white paint and your angled brush, paint along the border of the moon, but only half of it. I painted the left half. Leave the other half as-is to create the illusion of depth and highlights.

- Once moon is dry, on to the Christmas trees! Trace your tree shape on canvas with a pencil. Using the one-stroke technique explain in the post above, fill in your pine tree using your round brush and hookers green paint.

- Apply a second coat to your tree with same technique. To give the illusion of depth, use 2 green colors(hookers green and hookers green+yellow) in random order.

- Follow the same one-step stroke for the background pine trees. Use your smaller round brush + prussian blue paint.

- Once your tree is dried. Use your rigor/liner brush and using a thinned down white paint (use the paint from step 2) and create thin lines down your tree.


- Using you preferred dotting tool(examples: mandala dotting brushes, q-tip, back of your brush handle, eraser top of a pencil) dip into your white paint to create lights down your white lines.

- Add 3-4 of your favorite colors on your palette and using the same "dotting" tool you used in step 11, dot on some colorful Christmas ornaments on your tree. Tip: use different size dotting tools to create different size ornaments for more interest.

- Optional: Paint in some foot prints in the snow with a small round brush and some prussian blue paint.


 .
.


Recommended Products
As an Amazon Associate and member of other affiliate programs, I earn from qualifying purchases.
-
 100pcs 3ML Plastic Disposable Transfer Pipettes - Set of Eye Dropper Graduated Dropper Resin Eye Droppers for Essential Oils & Science Laboratory
 -
AIT Art Mini Liner Detail Paint Brushes, Size 2, Pack of 3, Handmade in USA for Trusted Performance Painting Small Details with Oil, Acrylic, and Watercolors
-
ZEM Brush Student Golden Synthetic Rounds Brushes Set Sizes 2,4,6,8,10
-
Princeton Artist Brush Select Synthetic Brush Angular Shader ¼" Width
-
Princeton Artist Brush Select Synthetic Brush Flat Wash ½" Width
-
37PCS Mandala Dotting Tools Set, Pen Dotting Tools Brushes Mandala Stencil Ball Stylus Paint Tray for Rocks Painting, Nail Dotting, Drawing and Drafting Art Supplies. …
-
Liquitex BASICS Acrylic Paint, 8.45-oz tube, Cadmium Red Medium Hue, 8 Fl
-
Liquitex BASICS Acrylic Paint, 8.45-oz tube, Cadmium Yellow Medium Hue
-
Liquitex BASICS Acrylic Paint, 4-oz tube, Hooker’s Green Hue Permanent, 4 Fl
-
Liquitex BASICS Acrylic Paint, 8.45-Oz Tube, Titanium White
-
Liquitex 1046316 BASICS Acrylic Paint, 4-oz tube, Phthalocyanine Blue
-
Liquitex BASICS Acrylic Paint, 4-oz tube, Prussian Blue
-
Swan Isoprophyl Alcohol, 70% 16 oz


Hope you enjoyed this easy Christmas painting tutorial and learned an easy way how to paint a Christmas tree on canvas. And hope you loved the magic of making the giant winter blue moon. The step by step tutorial took you through all the steps to recreate this Christmas scene, with some extra tips in the post.
If you liked this post please pin it!


This has given me some ideas to use at work.
thank you
So glad to hear that Kaf!! Hope the Christmas tree painting went well at work 🙂
Cheers,
Jasmine