How To Paint A Cat And A Night City Skyline
Looking for an easy way how to paint a cat with acrylics? This guide will show you a cat silhouette painting using simple shapes that you can use a part of any painting, art project, etc. The full tutorial will take you through an entire "cats and a city skyline" painting complete with a beautiful full moon and night sky.
This cat painting tutorial is purrr-fect for artists of all ages from kids, teens and adults. Check out these 65+ painting ideas for more inspiration. It makes a fun and easy Halloween / fall painting idea, or any time of year.
Let's leap right in!
How To Paint Or Draw A Cat Easy
One of the easiest ways to paint a cat is painting it's silhouette. Breaking down the cat's body into simple shapes like ovals, circles and triangles makes this cat drawing easy enough for anyone to tackle.
You can use the steps below in a painting or a fun drawing activity with the kids. The applications are limitless!
Check out the infographic below to learn how to draw a cat in 6 easy steps.
For the complete "cats and a city skyline" painting, check out the full tutorial at the end of this post.

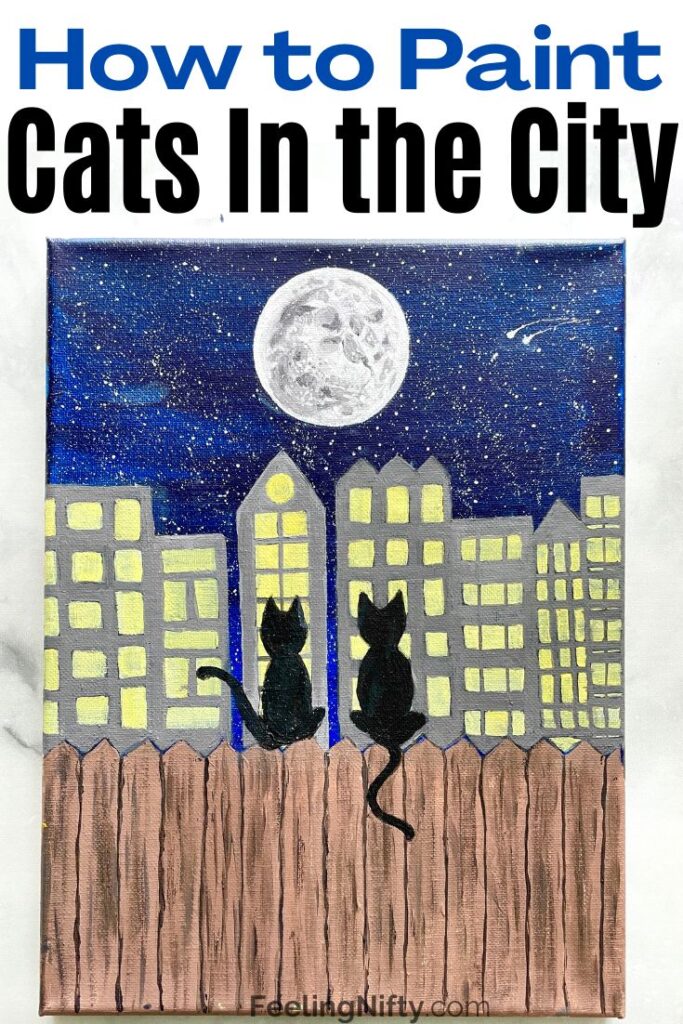
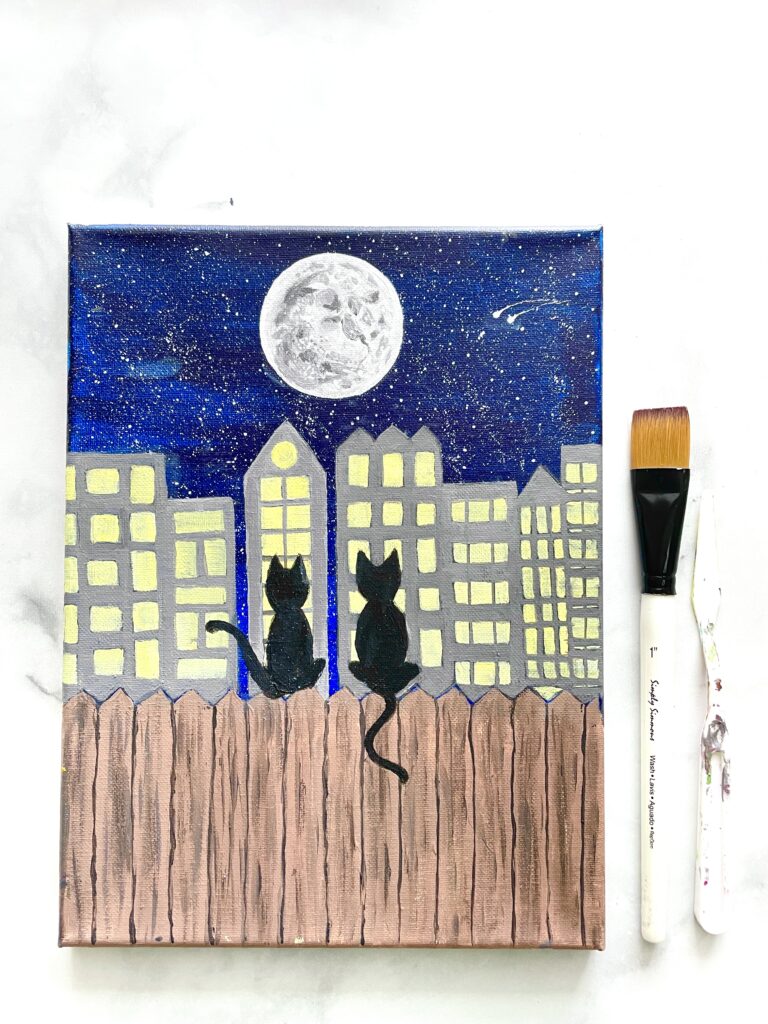
How to Paint Cats and a Night City Skyline

Learn how to paint cats and a night time city skyline painting this step by step tutorial.
Materials
- Canvas 9"x12"
- Mars Black
- Titanium White
- Ultramarine Blue
- Cadmium Yellow Medium Hue
- Cadmium red medium hue
- ¾" flat wash brush
- small round brush (size 5)
- ¼" angled brush
- paint palette
- jar of clean water
- rag/paper towel
- pencil
- ruler
- small round object (to trace moon shape)
- Optional: white paint marker
Instructions
- Check out the full YouTube painting tutorial here.
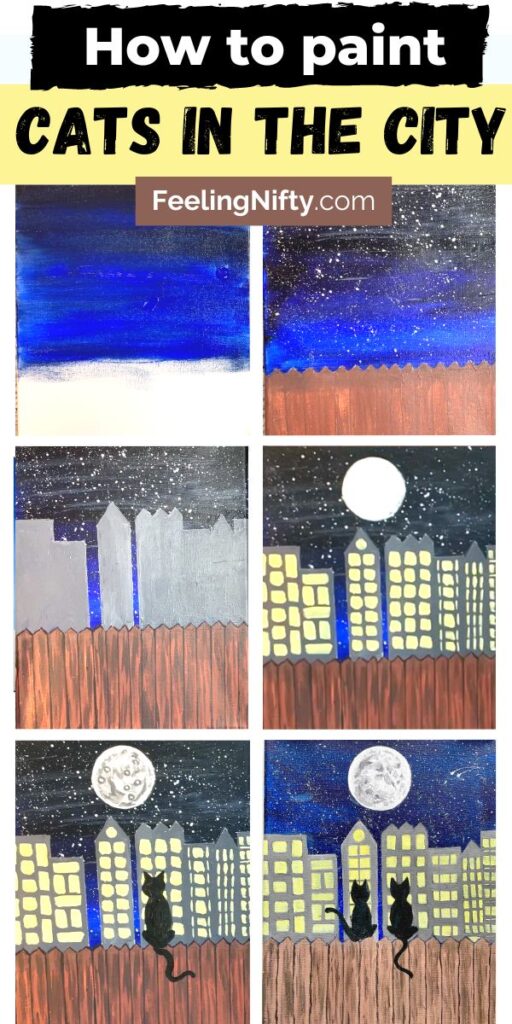
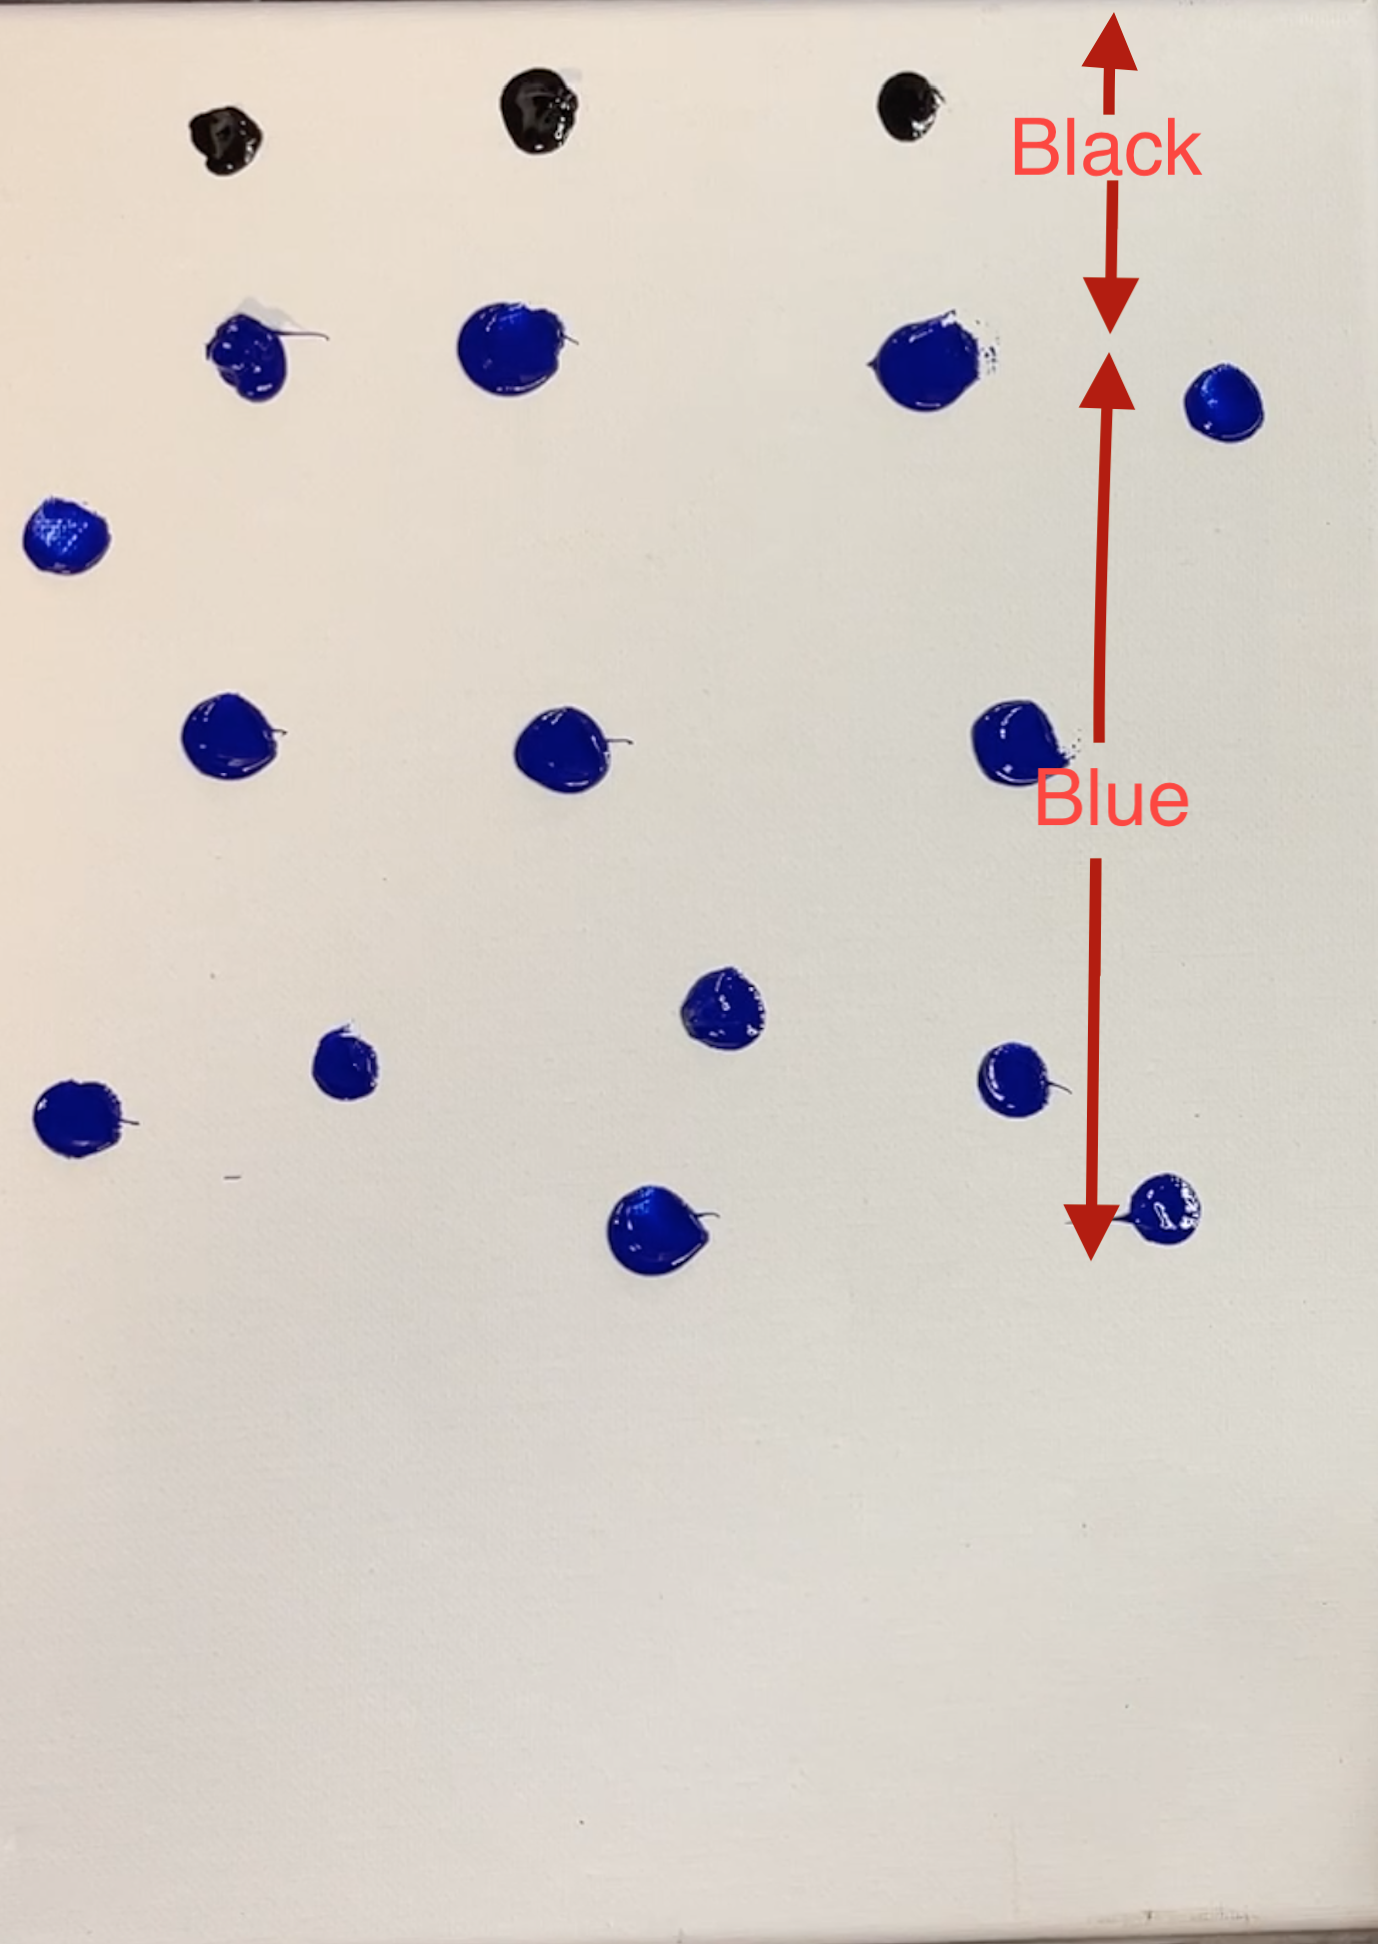
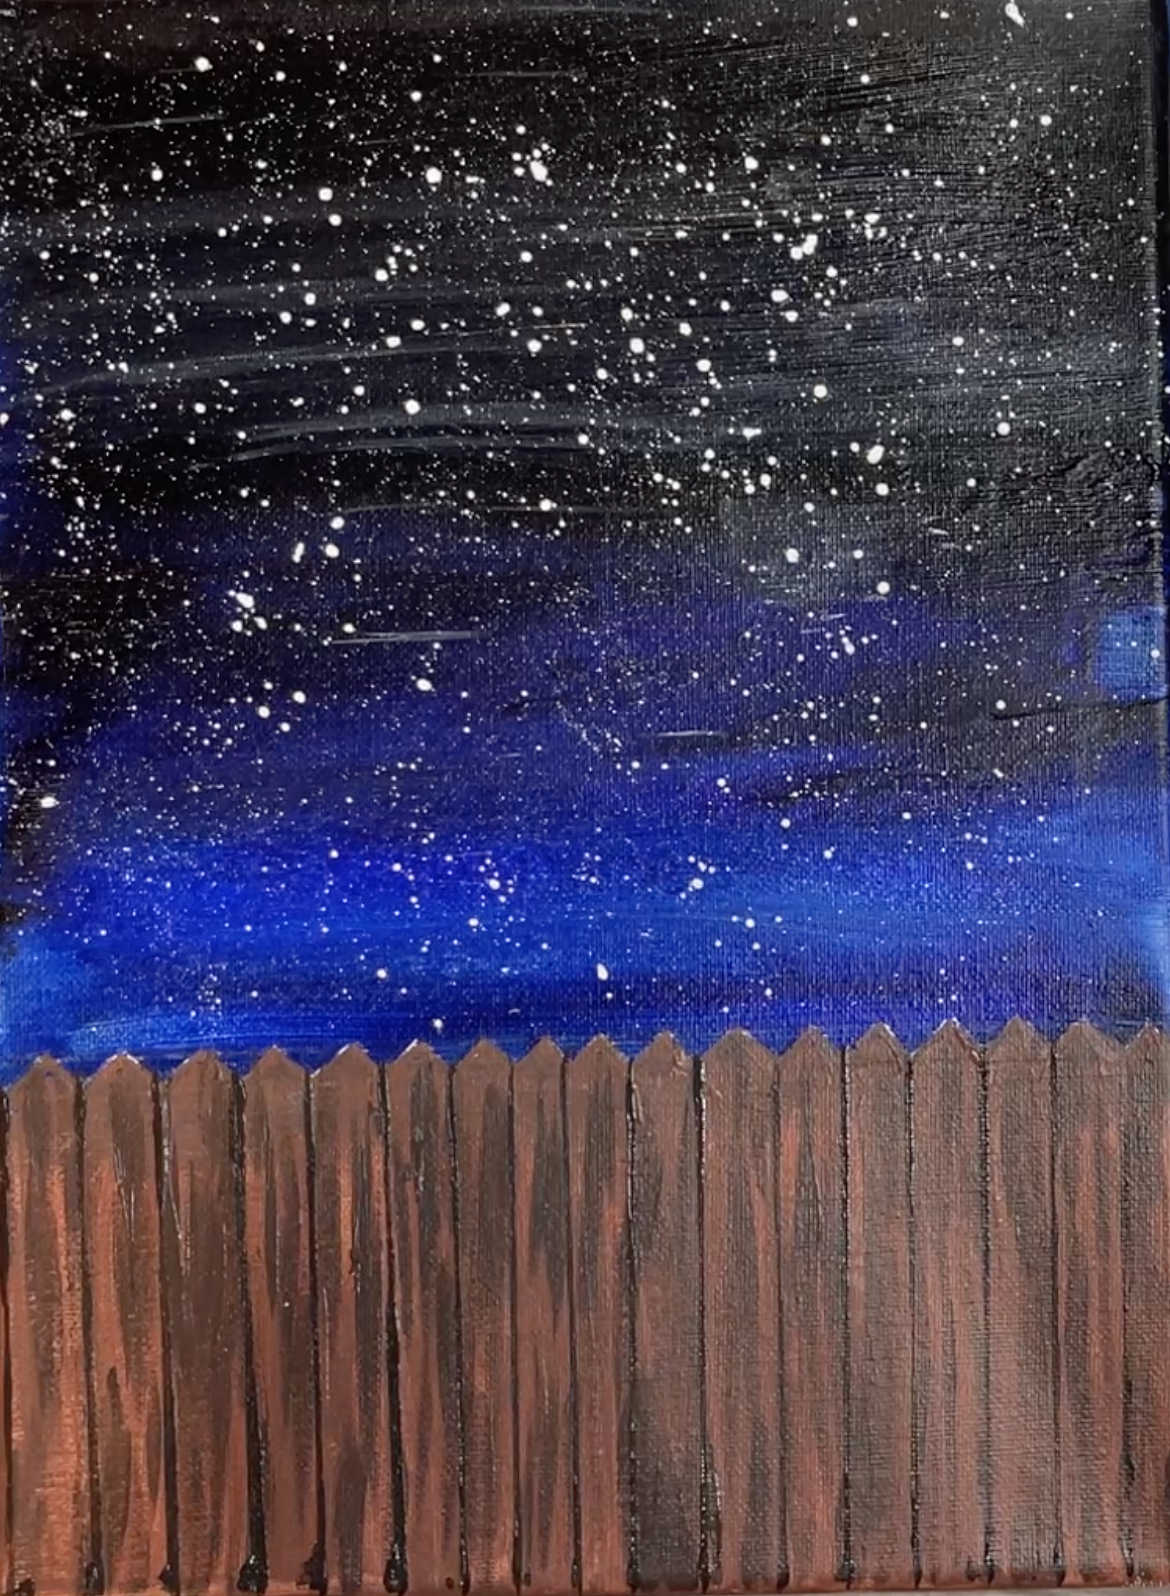
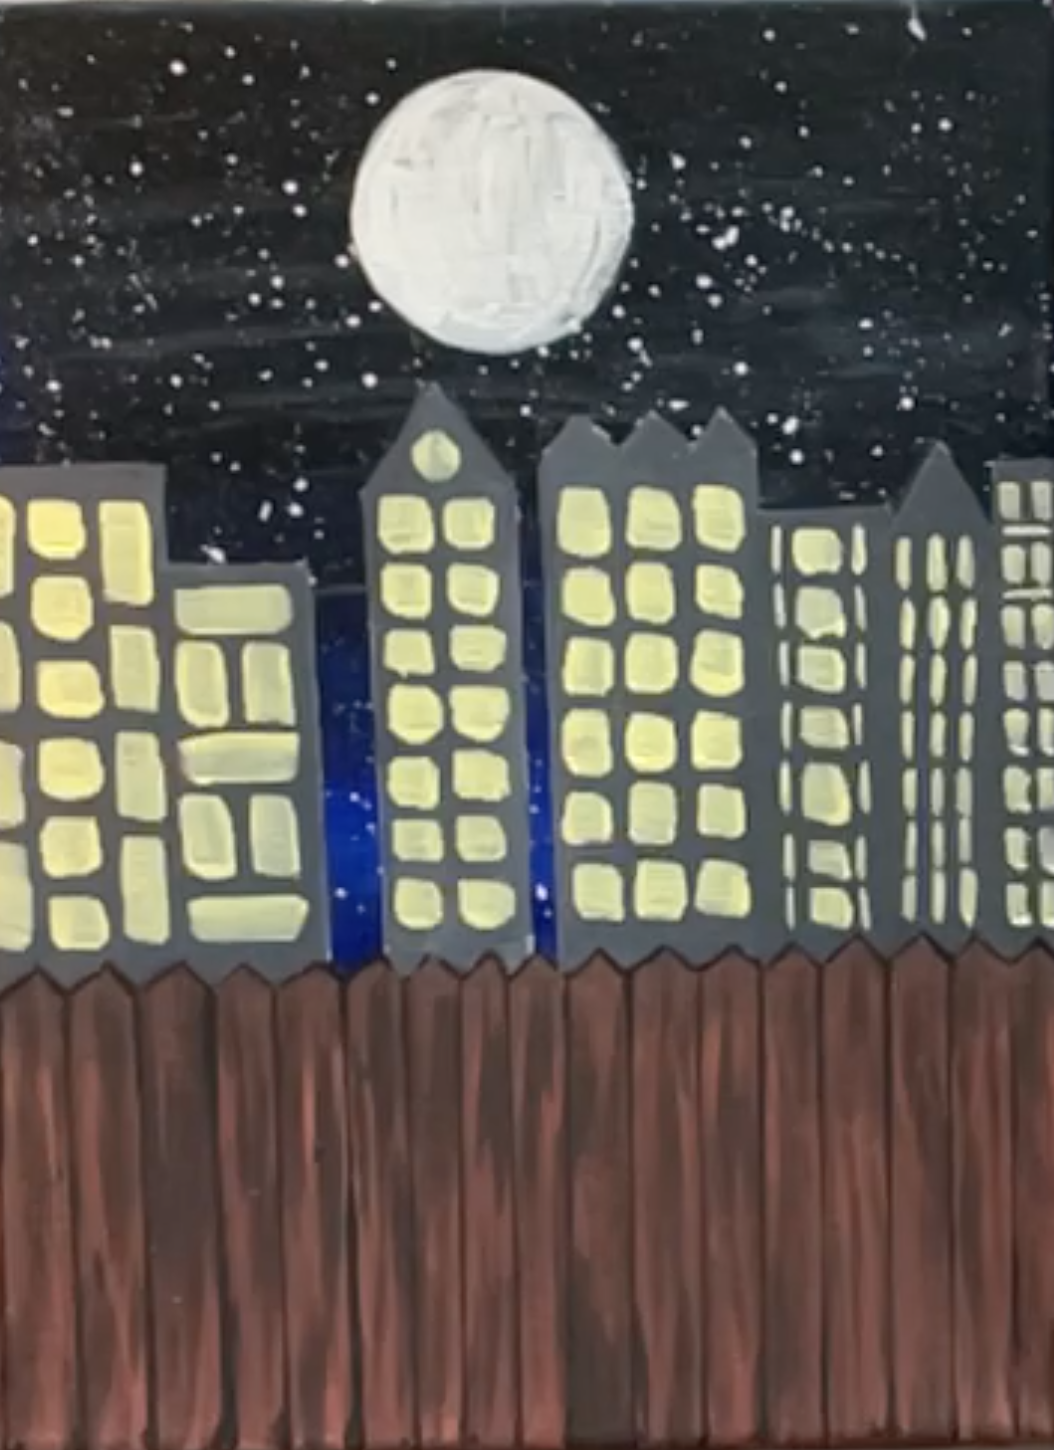
- Add a few drops of black on the top ¼ of the canvas, and a few drops of blue in the middle section of the canvas. Leave bottom ¼ canvas blank.

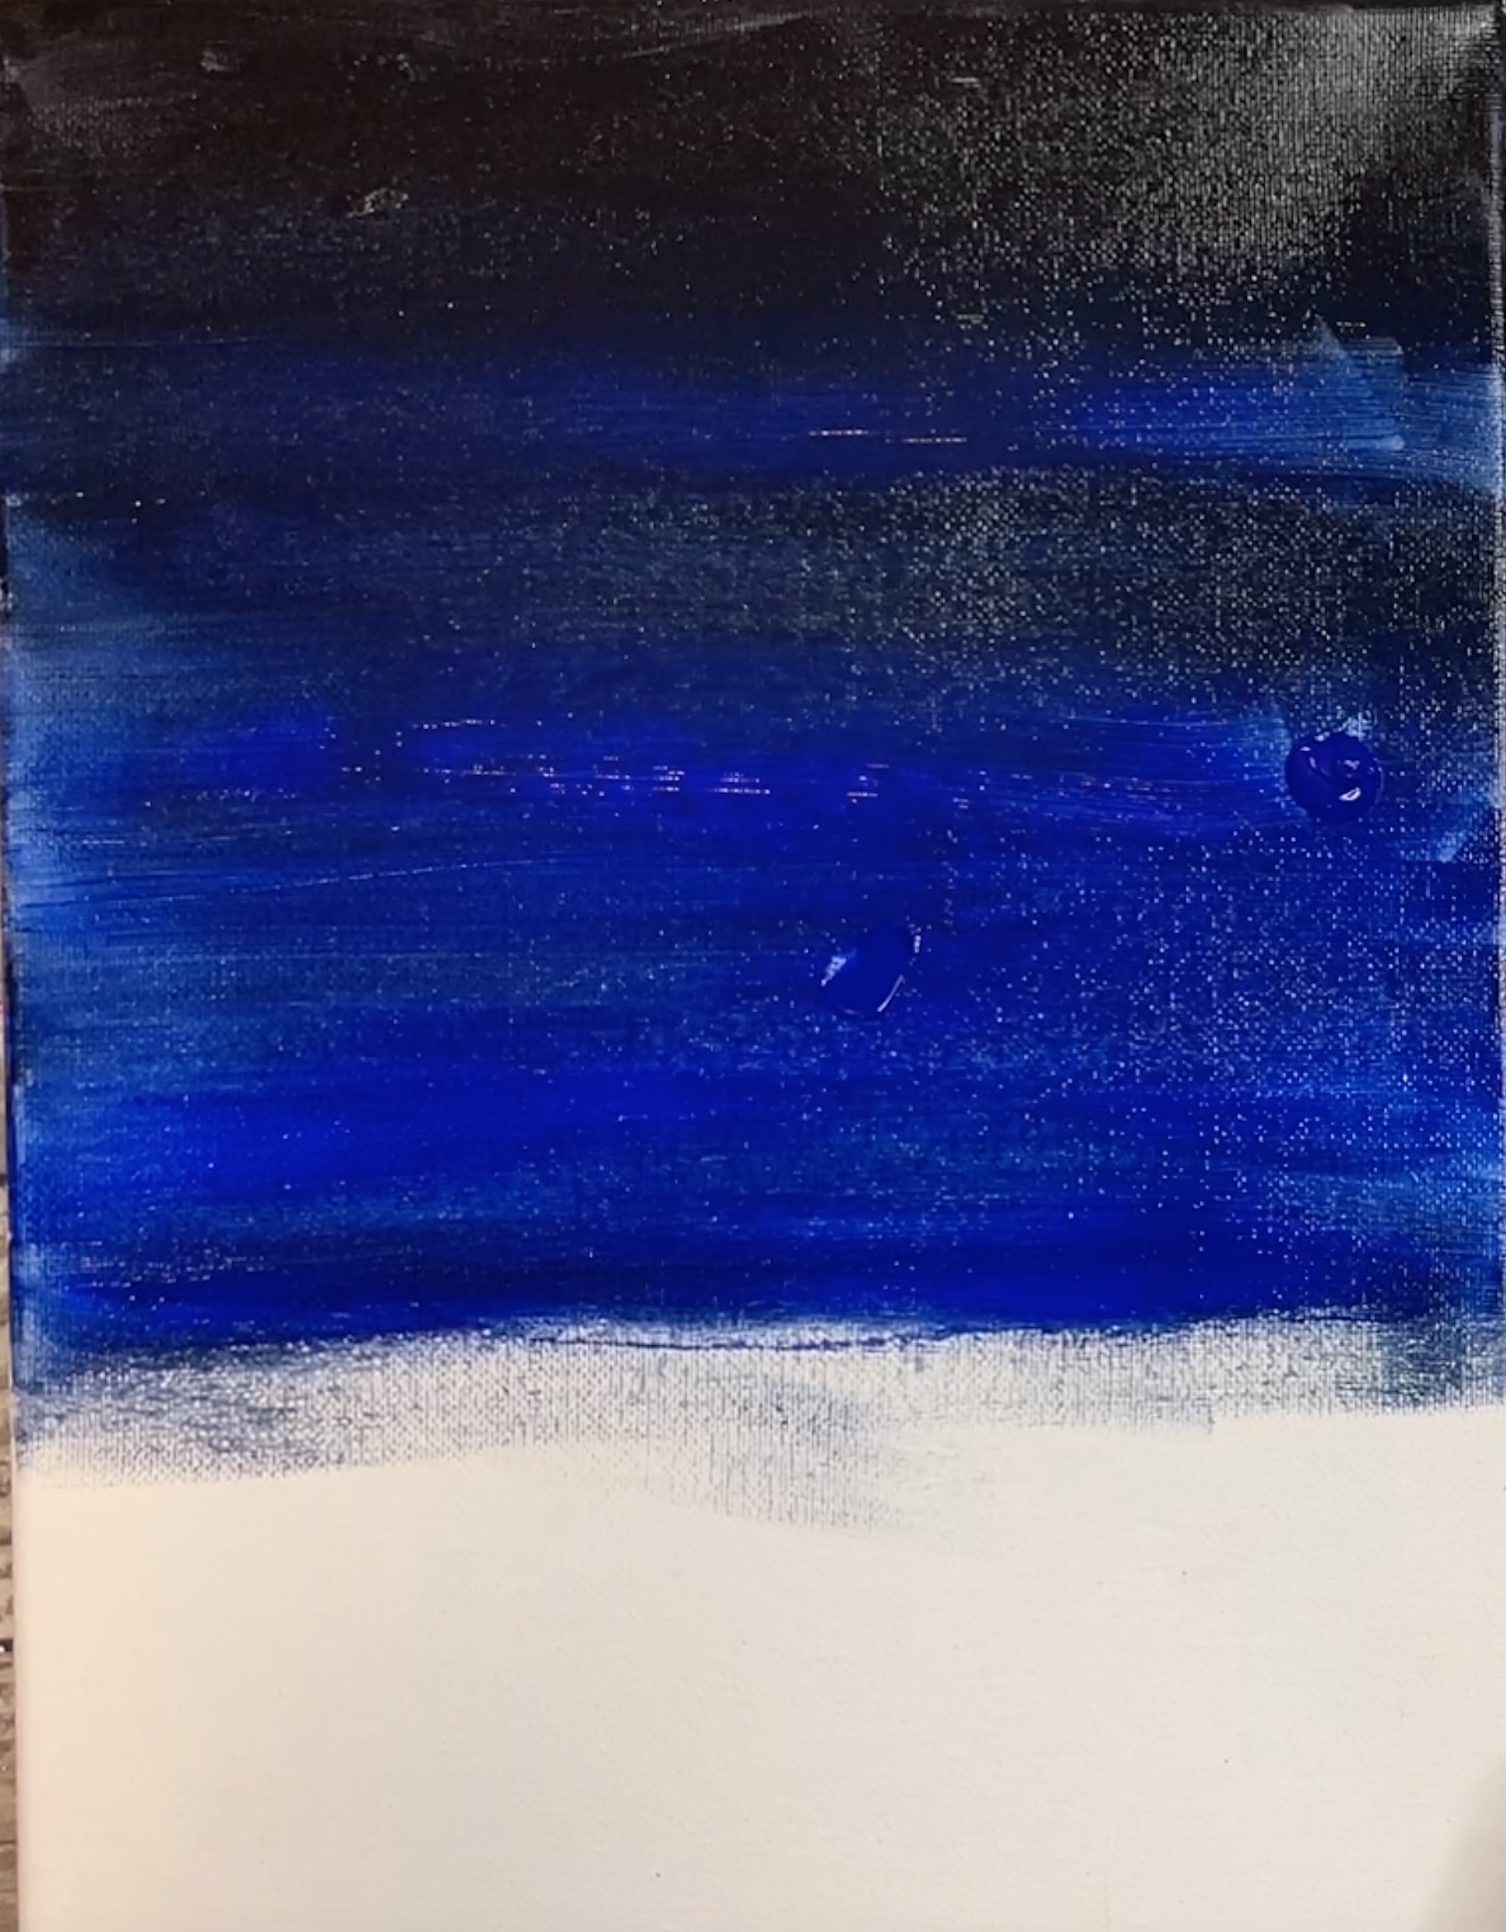
- Using your ¾" flat wash brush, blend the paint on your canvas using horizontal back and forth strokes. Leave the bottom ¼ of the canvas blank. When done blending the top of the canvas should be darker and gradually gets lighter towards the bottom. Let dry (3-5 minutes) or use a hairdryer for faster drying time.

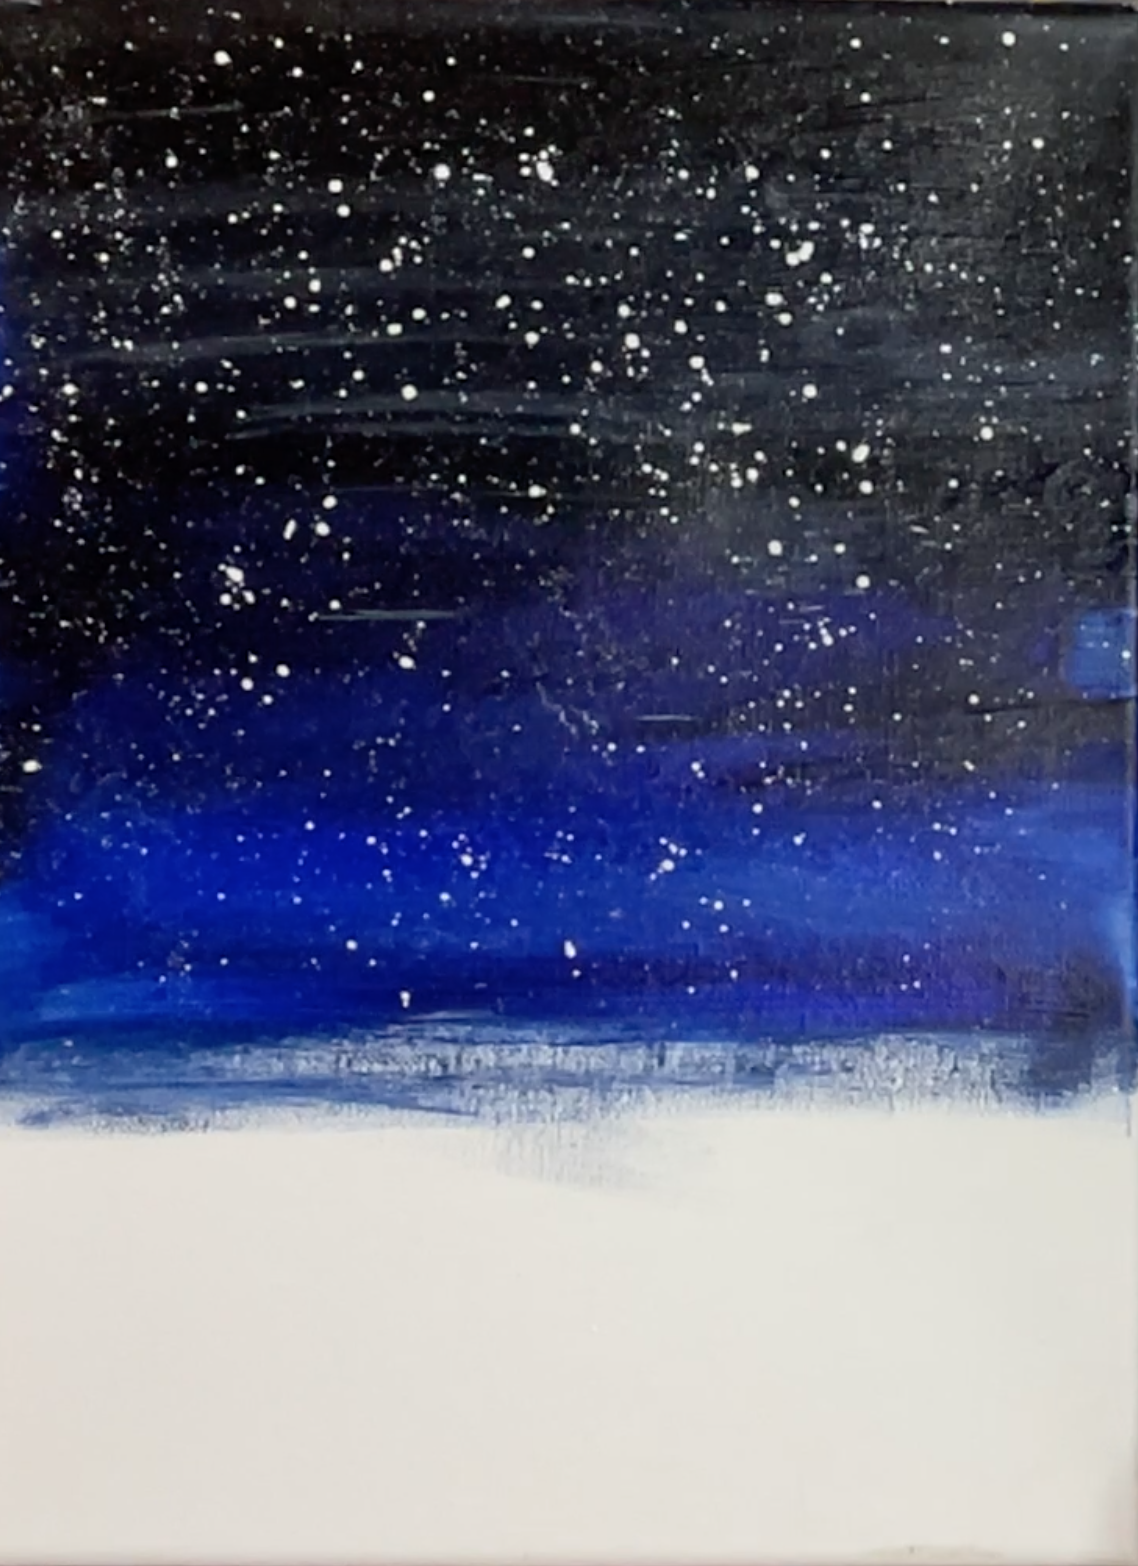
- Thin down some white paint with water so that it's a liquid consistency. Grab some liquid paint on any brush then start tapping it on the handle of another brush to create splatter stars. Move the brush around the canvas to fill the entire night sky.

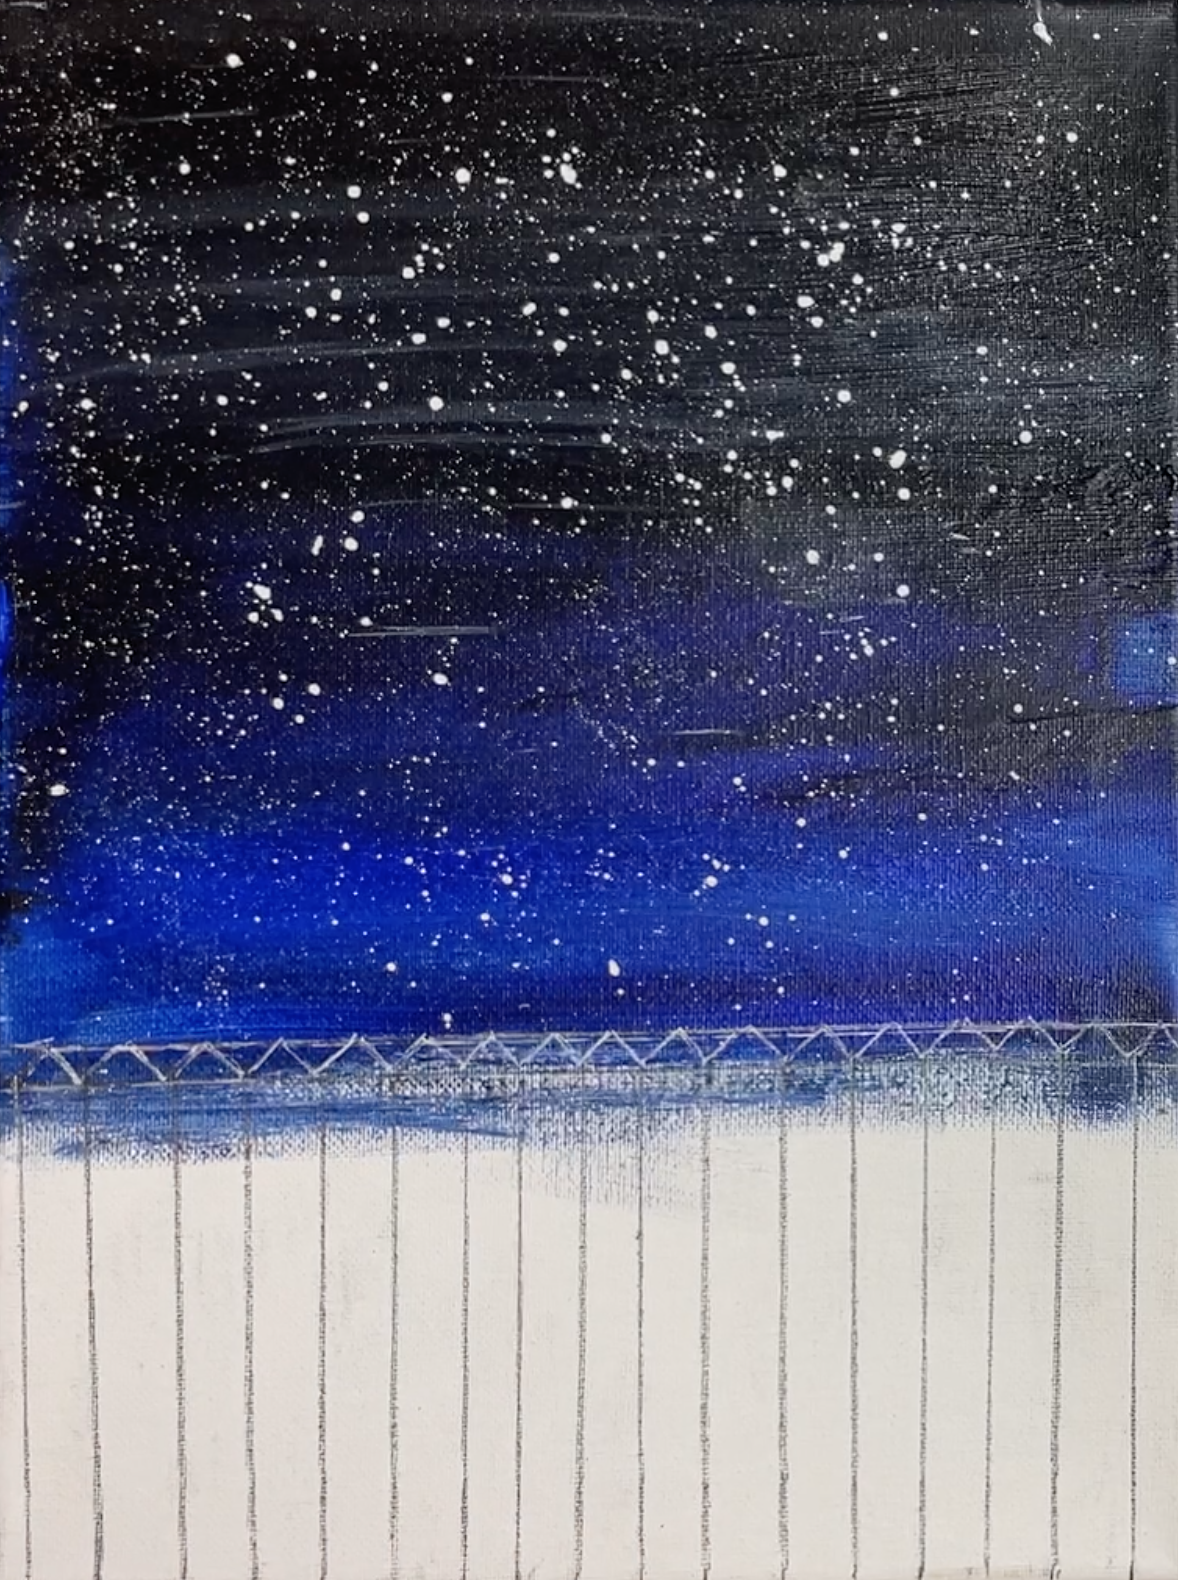
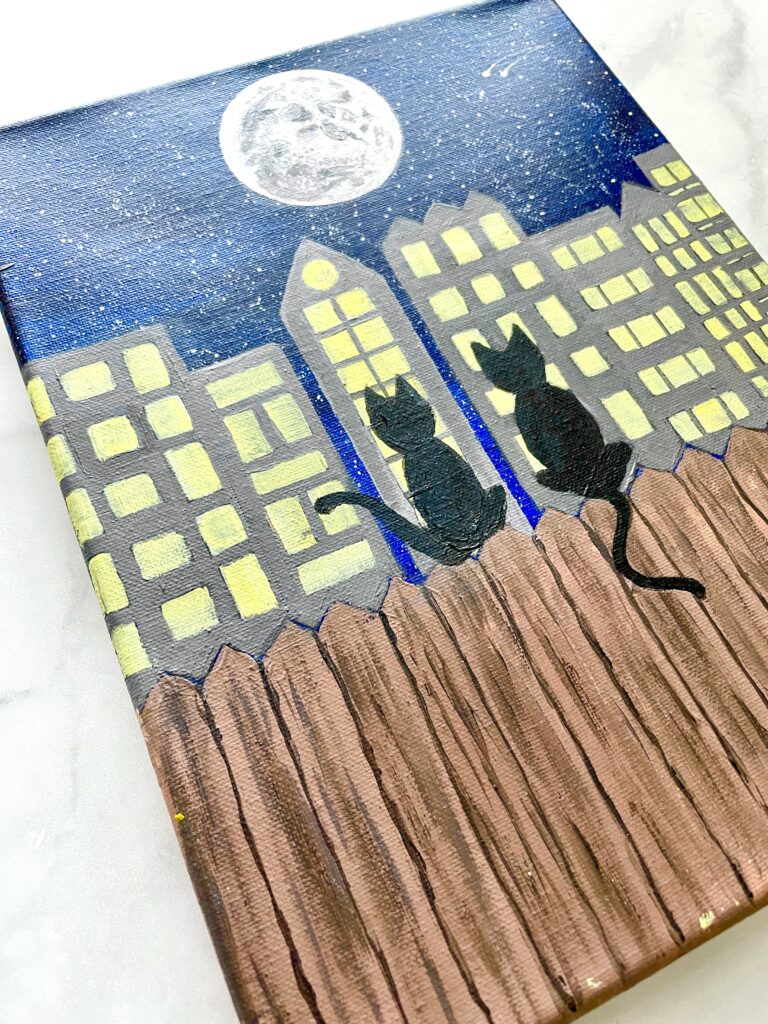
- Using a pencil and ruler trace in a fence shape on the bottom ¼ of the canvas. You can also skip this step and just free-hand the fence design in the next step.

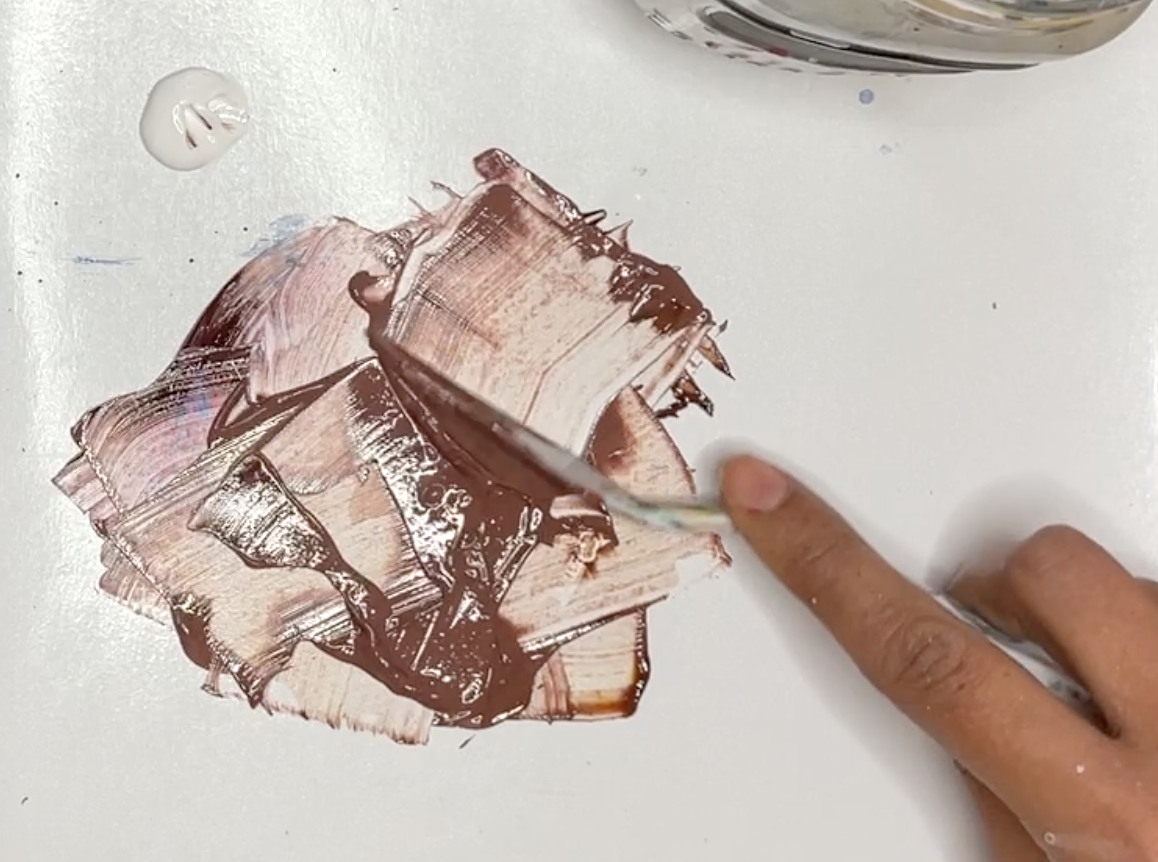
- Mix brown paint by mixing equal parts yellow, red and blue to get a dark brown. Then mix in a bit of titanium white until you get a nice chocolate brown color.


- Using the angled brush, apply the brown paint to the fence portion of the painting.

- Add a tiny amount of black to the brown paint to make a darker brown for the wood grain pattern on the fence. Black is a highly pigmented paint so a little goes a long way. This darker shade of brown should have contrast to the brown in the last step. As long as you can see the contrast it works.
- Using your angled brush, pick up some of the darker brown paint. Using the chiseled edge of the brush use light sweeping vertical strokes along the fence to create the wood grain pattern.

- Mix an even darker shade of brown by adding a bit more black to the mix. Using the same angled brush add vertical lines to separate each fence panel. Optional: you can also add a top border to each of the triangular fence posts to give extra dimension. You can move to the next step while paint dries.

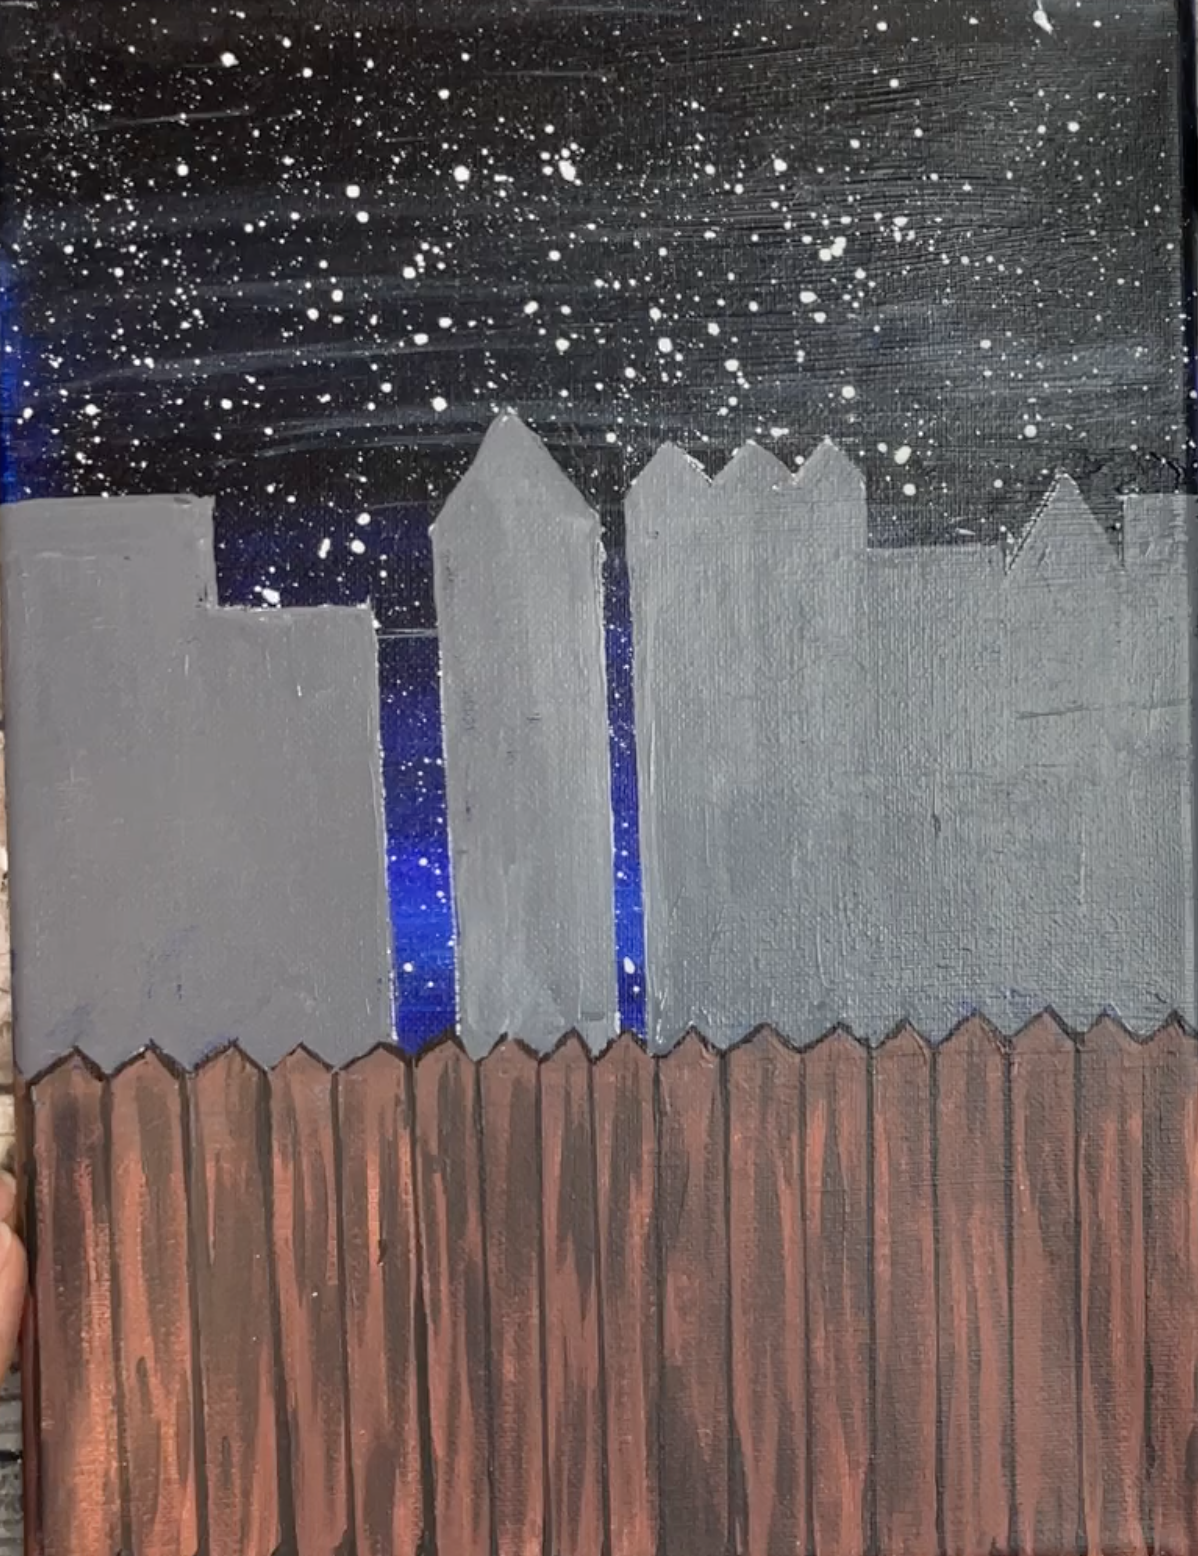
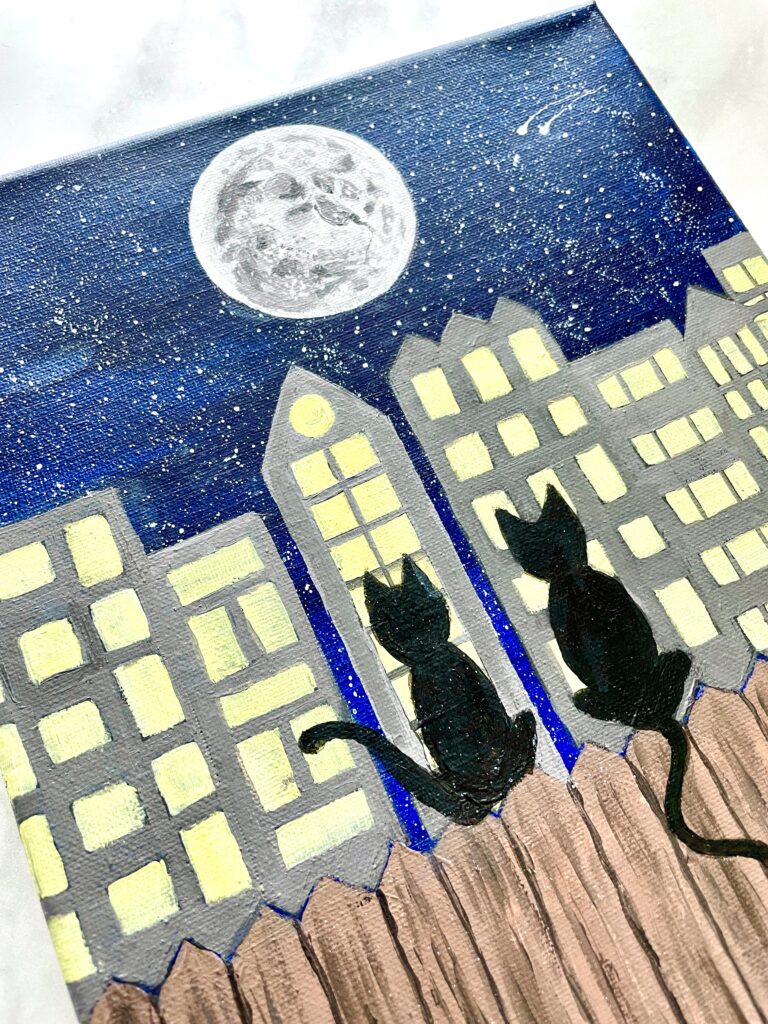
- Using a pencil and a ruler trace in the shapes of the city skyline/buildings. A fun idea would be to find pictures of your own cities skyline and add in your cities building shapes.

- Mix a medium grey paint by mixing 2 parts black to 1 part white. Using your angled brush fill in the building shapes with the grey paint.

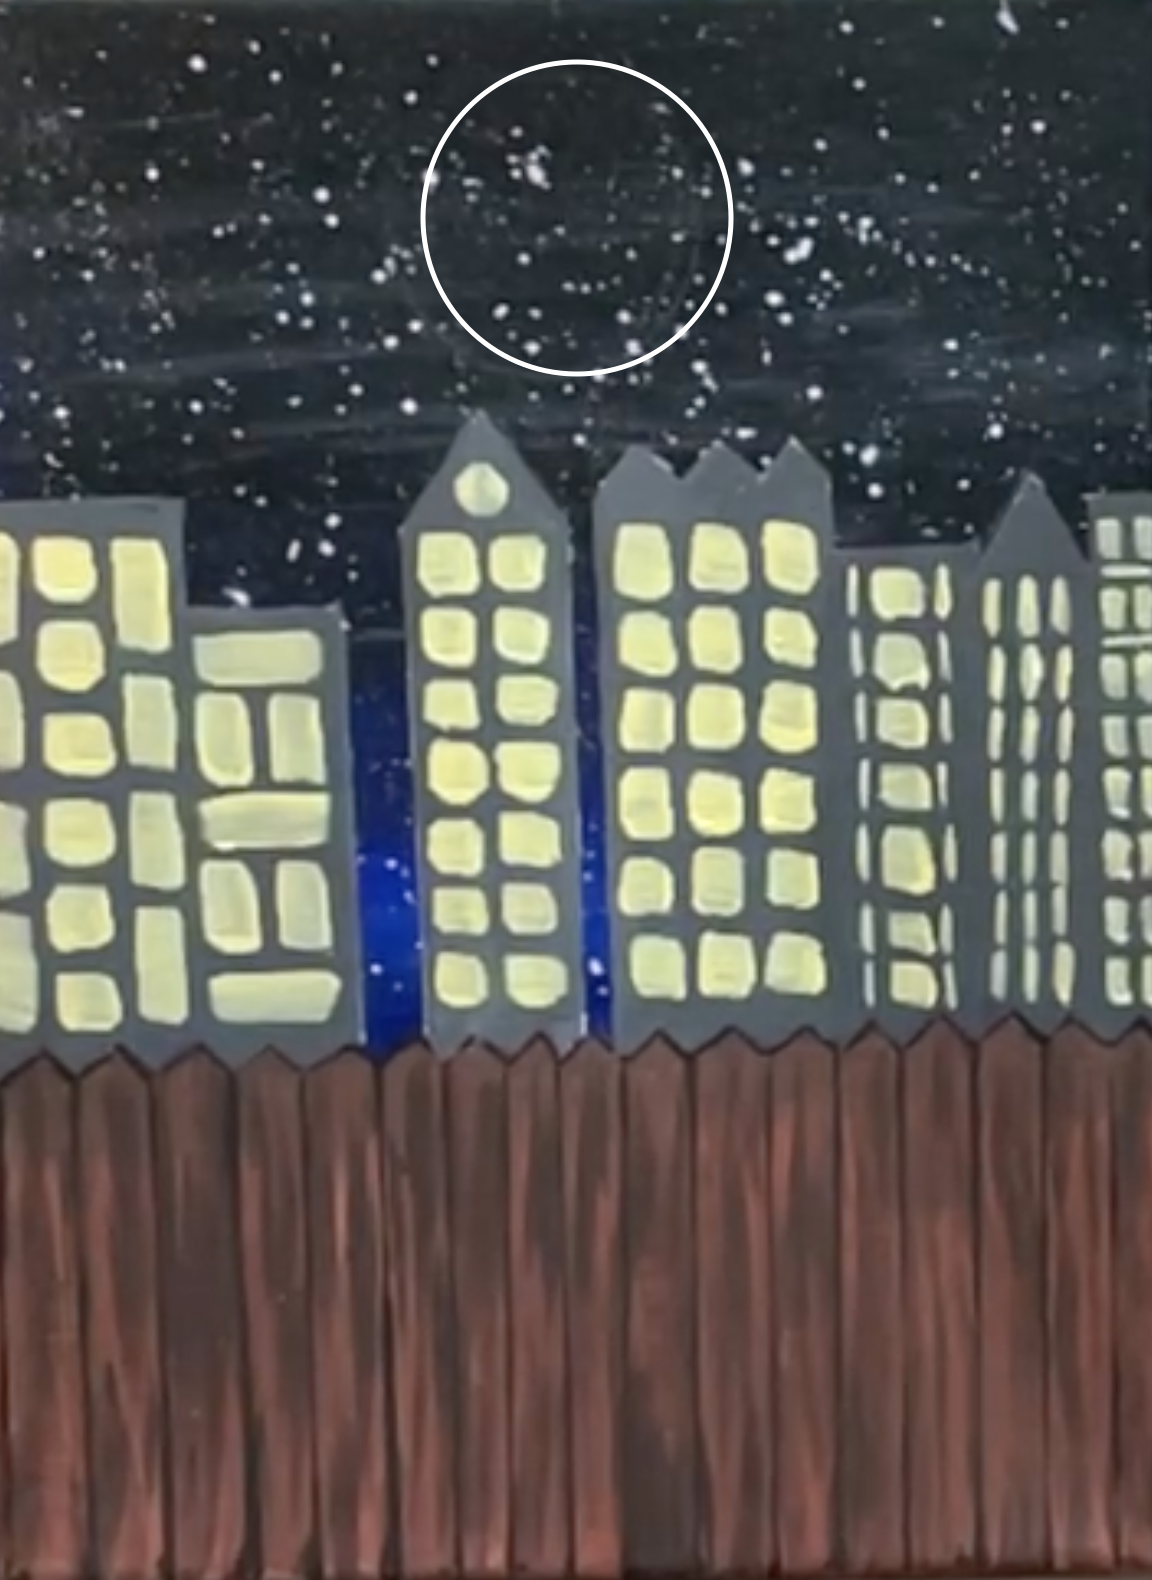
- Mix a pale yellow paint by mixing 3 parts white to 1 part yellow. Using your angled brush paint in the windows of the building. You can have fun here and paint in different window shapes. In fact, the more variation in window shapes you have the more interesting the painting looks also. Use squares, rectangles, circles, thin lines as some inspiration to your window shapes. And don't worry about making them perfectly straight/angular - just enjoy painting them :). You can move to the next step without paint fully drying.

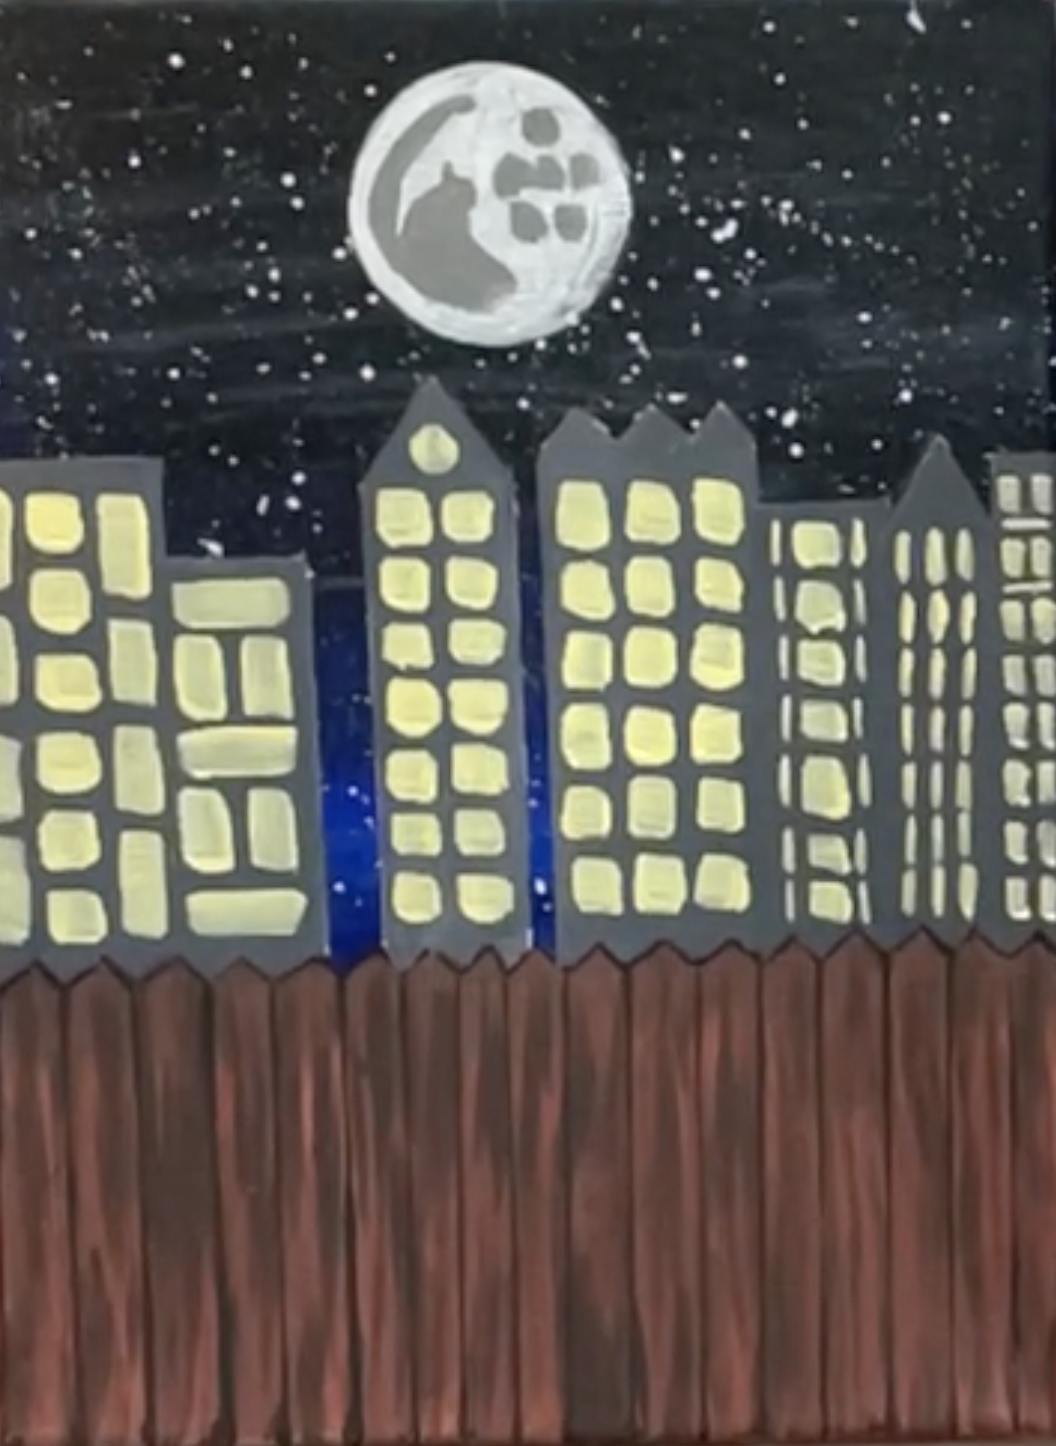
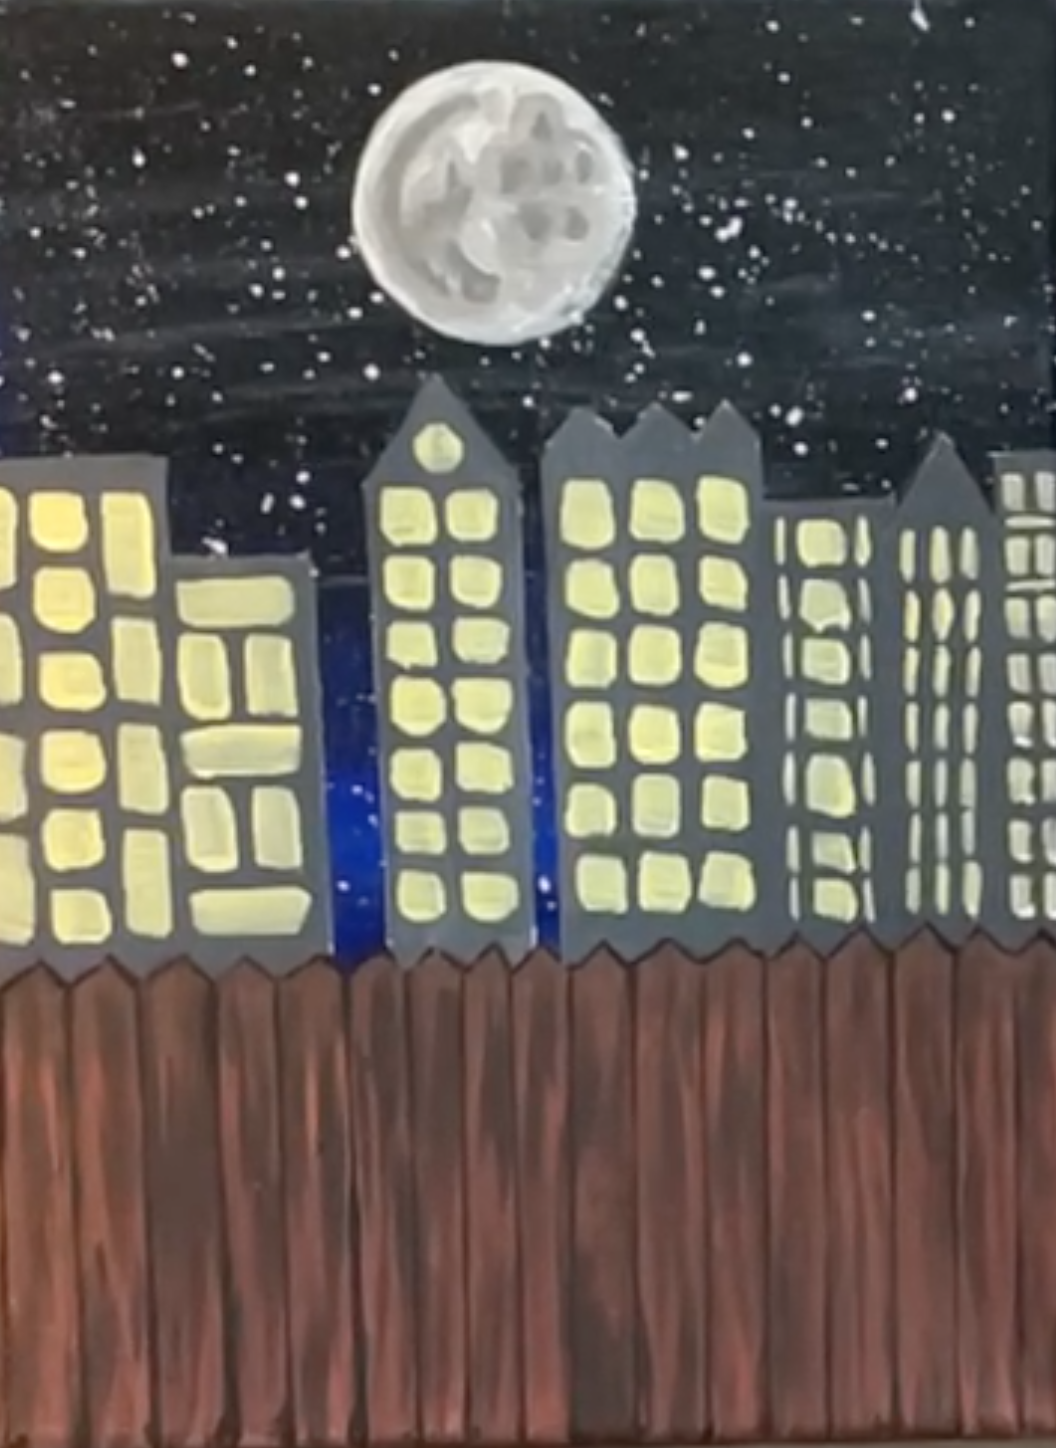
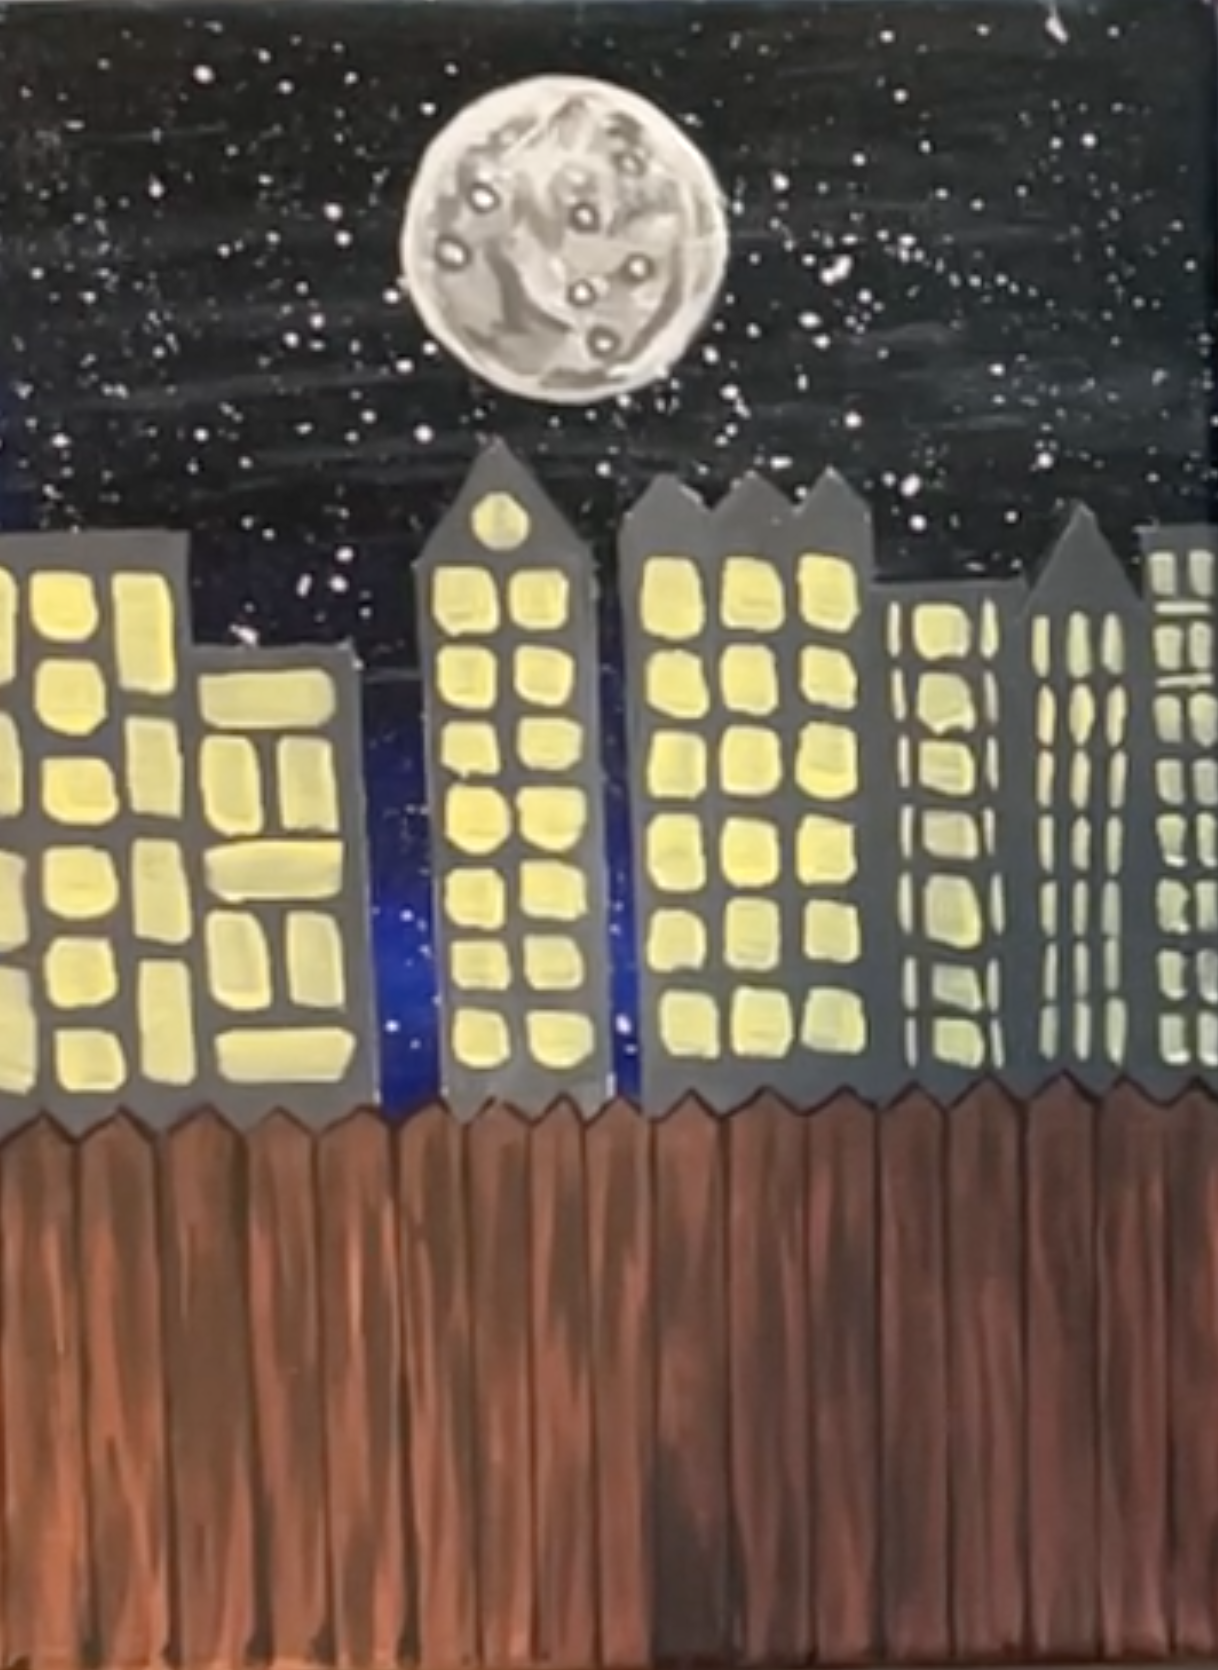
- The following 6 steps, you'll be painting the moon. For a detailed tutorial, check out this how to paint the moon post.
- Trace a circular moon shape in the sky using a round object and a pencil. Alternatively you can skip this step and freehand painting in the moon.

- Fill in the moon shape with white paint using the small round brush.

- Mix some dark grey paint by mixing 2 parts white with 1 part black. Using the small round brush paint in the shapes in the picture below.

- Mix a lighter grey paint by adding a small amount of white into the dark grey paint from above. Use a small round brush and use the light grey paint to outline around all the dark grey shapes (it’s okay if the all the paint is still wet, as it helped with blending). Wait for the paint to dry before the next step.

- Paint some small speckled dots over the whole moon surface, using white paint on your smallest round brush. These will be your smallest craters.

- Mix some more dark grey paint if you don’t have any left from step 15. This should be the darkest grey you’ve used for the moon. Using your small round brush paint rings around the “white specs” from the step above. You can also add some more of this dark grey paint in other parts of the moon in varying shapes/sizes. The more variations of grey you have, the more realistic the moon will look. The paint can still be wet to move onto the next step.

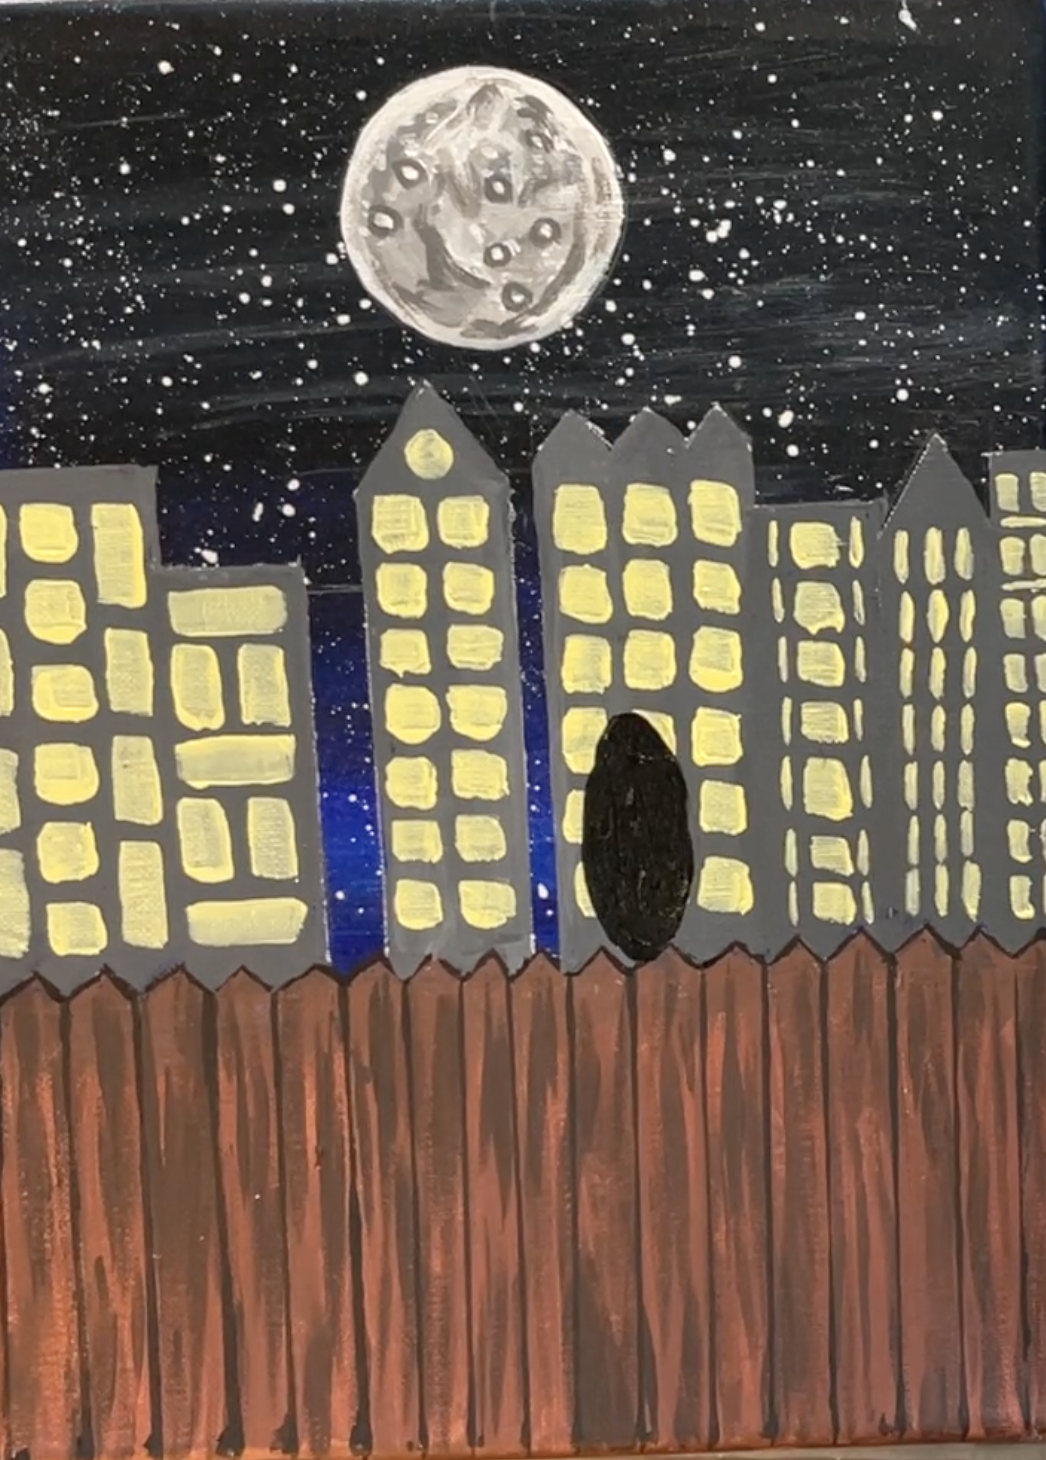
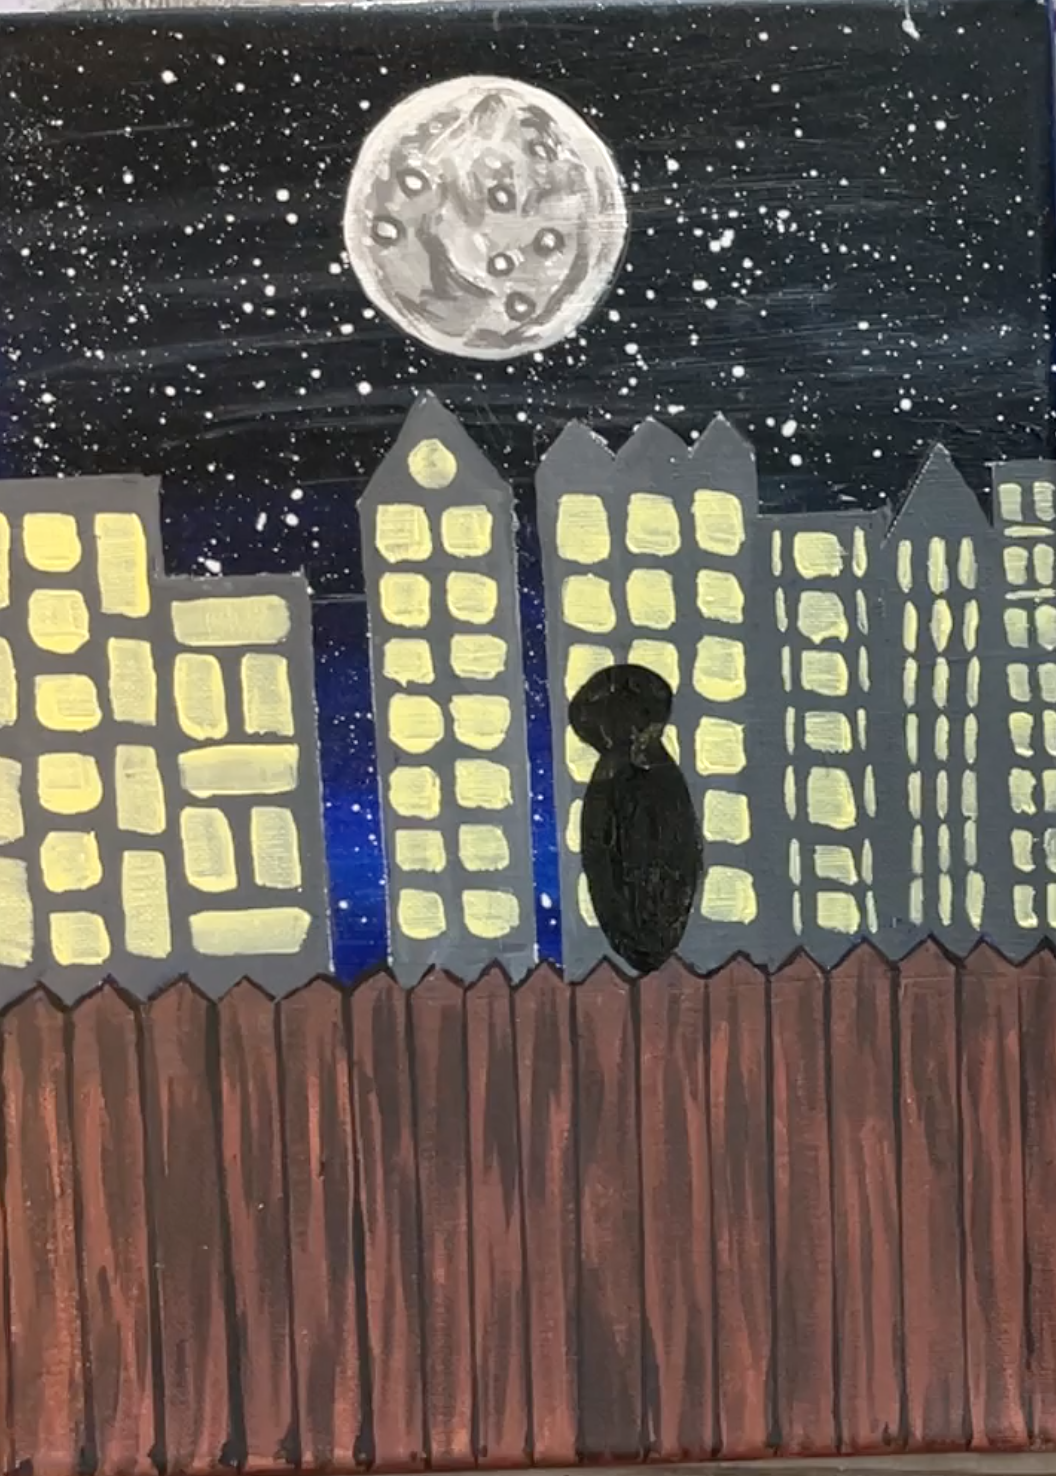
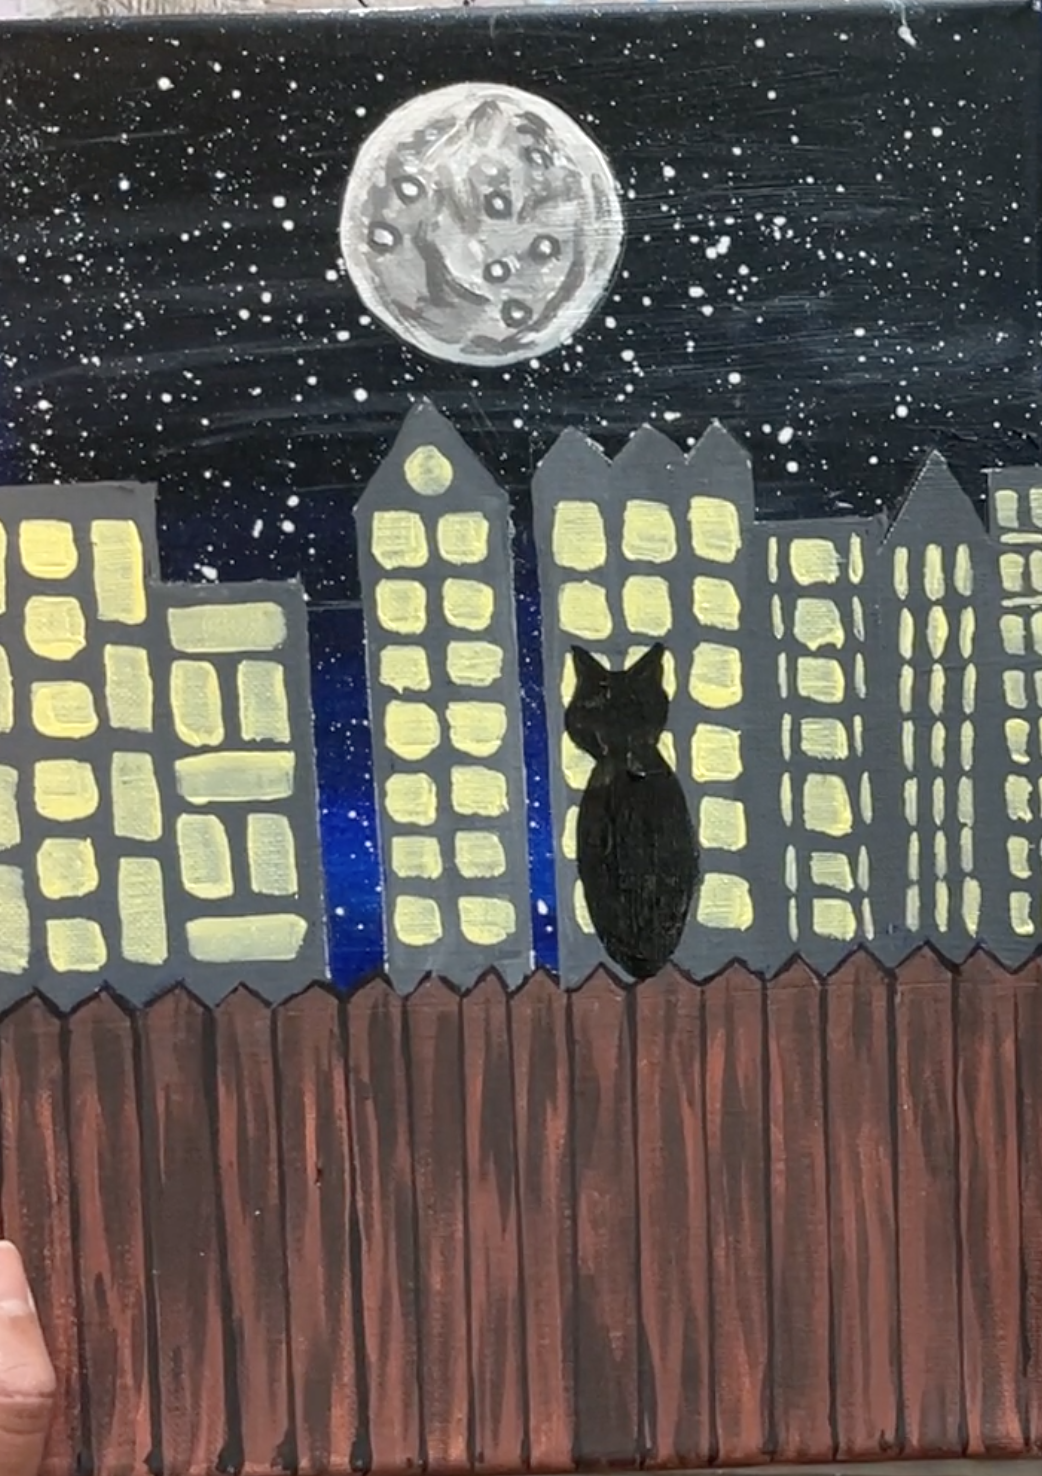
- Now for the cats! Paint in an oval shape for the right cat’s body, using black paint and your small round brush.

- Continuing with the black, paint in a circle shape on top of the oval - the cats head.

- Paint 2 triangle shapes for the cats ears.Now for the cats legs! Paint in 2 ovals on either side of the bottom of the larger oval.

- Now for the cats legs! Paint in 2 ovals on either side of the bottom of the larger oval.

- Finally, paint in the cats tail in a fun squiggly shape. Cat #1 is done!

- For cat #2 repeat steps 19-23. You can also add in a couple of shooting stars into the sky as an optional touch, Use a white paint pen or a small round brush and white paint.

- All done! Below is a quick infographic on the steps to paint a cat.


Recommended Products
As an Amazon Associate and member of other affiliate programs, I earn from qualifying purchases.
-
 White Paint Pen, 6 Pack 0.7mm Acrylic White Permanent Marker White Paint Pens for Wood Rock Plastic Leather Glass Stone Metal Canvas Ceramic Marker Extra Very Fine Point Opaque Ink
 -
Strathmore 300 Series Palette Paper Pad, Tape Bound, 9x12 inches, 40 Sheets (41lb/67g) - Artist Paper for Adults and Students
-
FIXSMITH Stretched White Blank Canvas - 9x12 Inch, Bulk Pack of 8, Primed,100% Cotton, ⅝ Inch Profile of Super Value Pack for Acrylics,Oils & Other Painting Media.
-
Transon Artist Paint Brush Set of 12 for Watercolor Acrylic Gouache Oil and Tempera Painting
-
Liquitex BASICS Acrylic Paint, 118ml (4-oz) Tube, Cadmium Red Medium Hue
-
Liquitex BASICS Acrylic Paint, 118ml (4-oz) Tube, Cadmium Yellow Medium Hue
-
Liquitex BASICS Acrylic Paint, 118ml (4-oz) Tube, Ultramarine Blue
-
Liquitex BASICS Acrylic Paint, 118ml (4-oz) Tube, Mars Black
-
Liquitex BASICS Acrylic Paint, 118ml (4-oz) Tube, Titanium White


Inspiration For This Painting
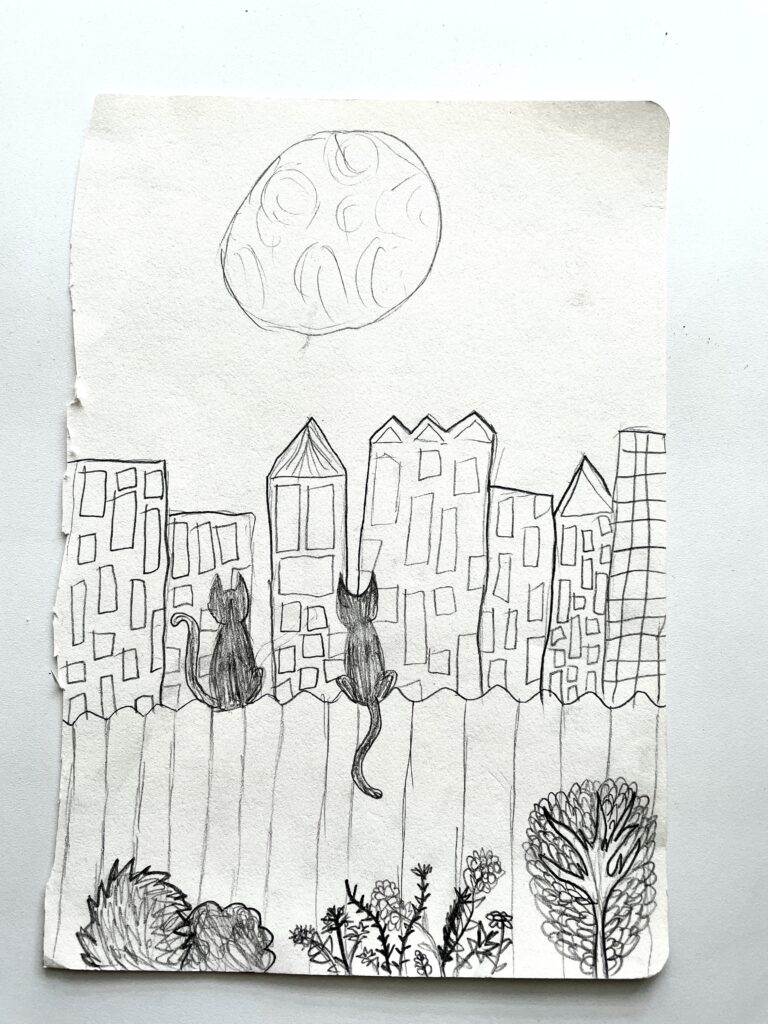
This painting was inspired by my daughter. She loves all-things cats and drew an awesome drawing last year. We worked together to convert her drawing into the painting in this post. A big thank you to my creative and inspiring daughter!
Below you'll find her original sketch of the cats under the moon watching a night city skyline she came up with. <3
Cute and Easy Cat Painting Ideas
Get inspired by more cat painting ideas that are both easy and cute.
- Check out Tracie Kiernan's awesome how to paint a cat and a moon tutorial that's great for Halloween and fall paintings.
- Another Halloween kid friendly cat on a pumpkin tutorial.
- Check out Angela's cute cat painting tutorial that's perfect for kid birthday parties and crafts.
- Art Sherpa's realistic black cat painting is great for beginners.
- Paint a cat and moon on a rock for an easyYouTube rock painting tutorial.
- Painting with watercolor? Follow this Youtube tutorial to learn how to draw and paint a watercolor cat
- In the mood for abstract? Check out Suraj's super cool abstract cat painting YouTube tutorial
Finished Cats Painting
If you liked this post please pin it!