How To Paint The Moon For Beginners (Realistic Full Moon with Acrylics)
How To Paint the Moon
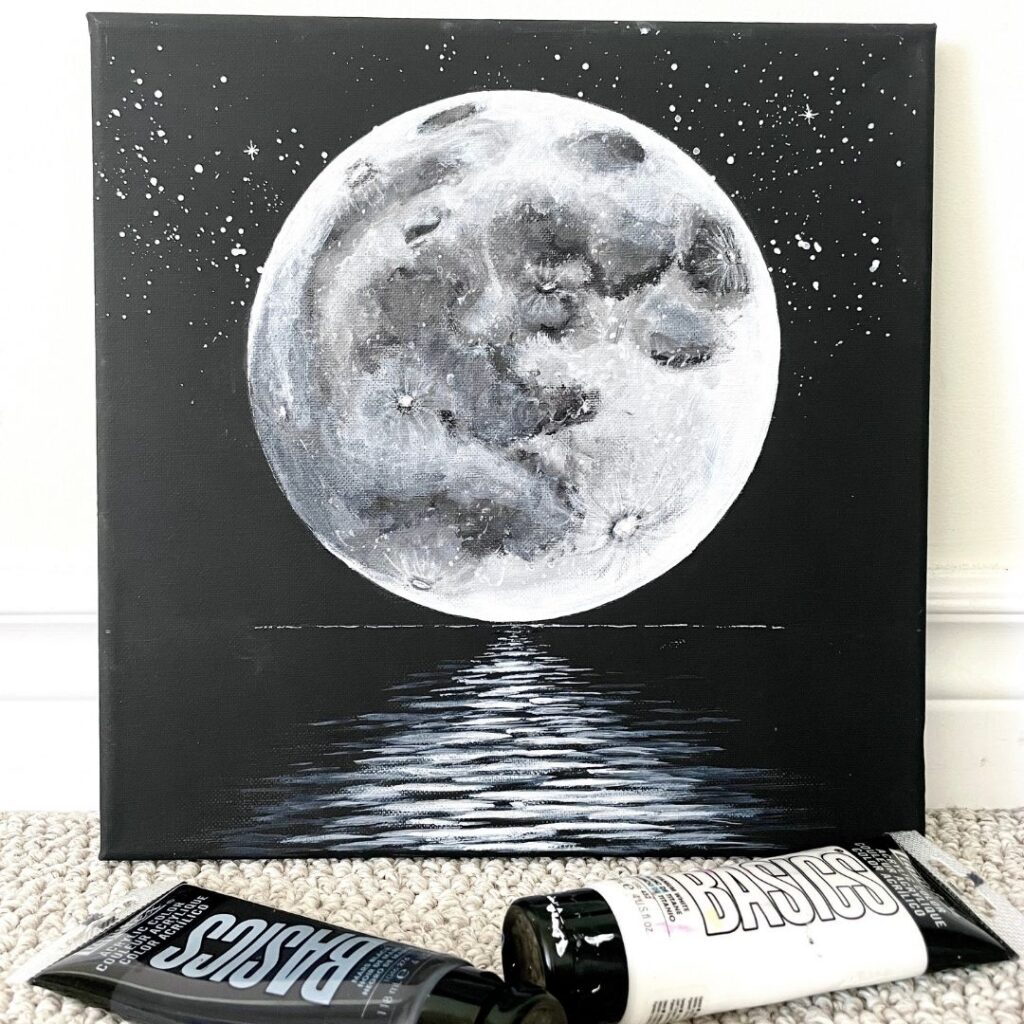
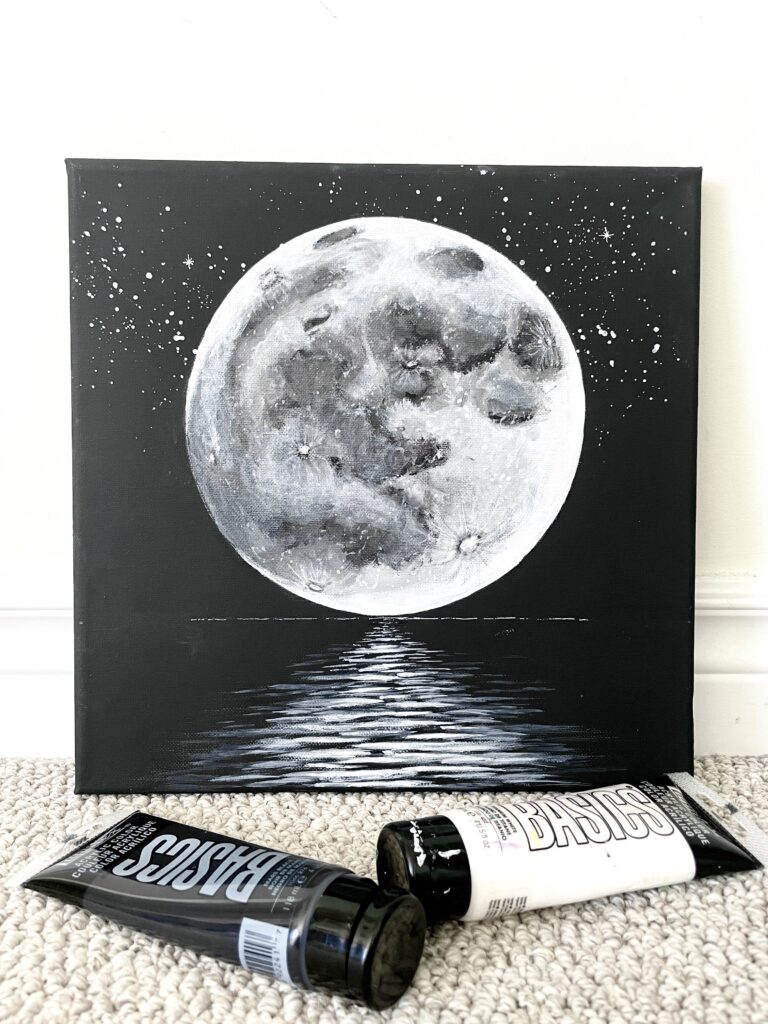
Ever wanted to learn how to paint the moon thats both easy for beginners and realistic looking? Then look no further because this DIY moon painting tutorial will teach you how to draw a moon on a black canvas and then how to paint it in with some easy beginner techniques.
To paint a moon on canvas you'll need a square black canvas, a circular object to trace, a couple of brushes, and black & white acrylic paint. You'll first trace the circle on your canvas, then draw the moon with some basic shapes. You'll finish off by filling in the shapes/craters with white paint then different shades of grey paints, in layers. The instructions below will go over the steps in detail.
Black canvas alternative : If you don't have a black canvas you can use any white canvas and just paint it with black acrylic paint (matte finish) or black gesso before you begin.
Moon Painting - Step By Step
You can follow either the YouTube video tutorial or the step by step written instructions below to learn how to paint the moon.
Moon Painting YouTube Tutorial
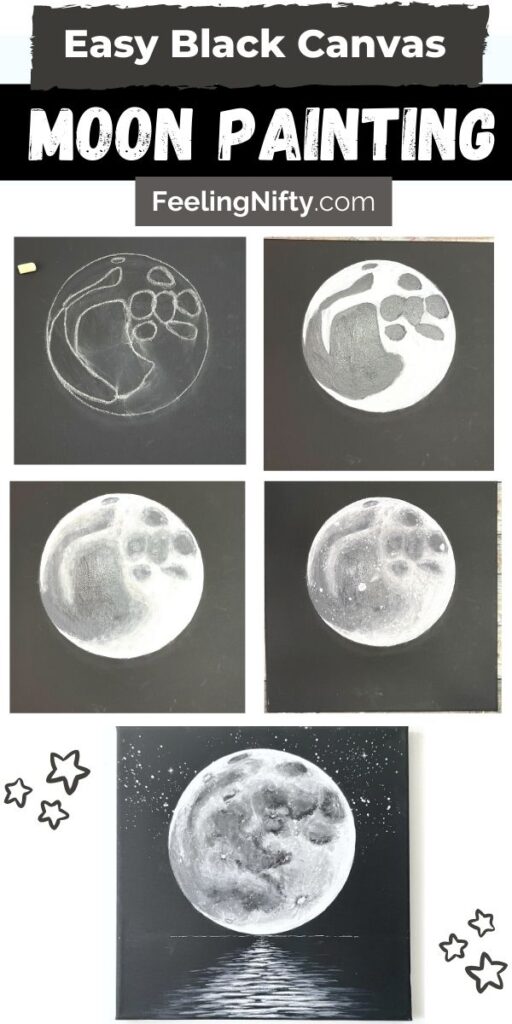
How to paint the moon step by step instructions
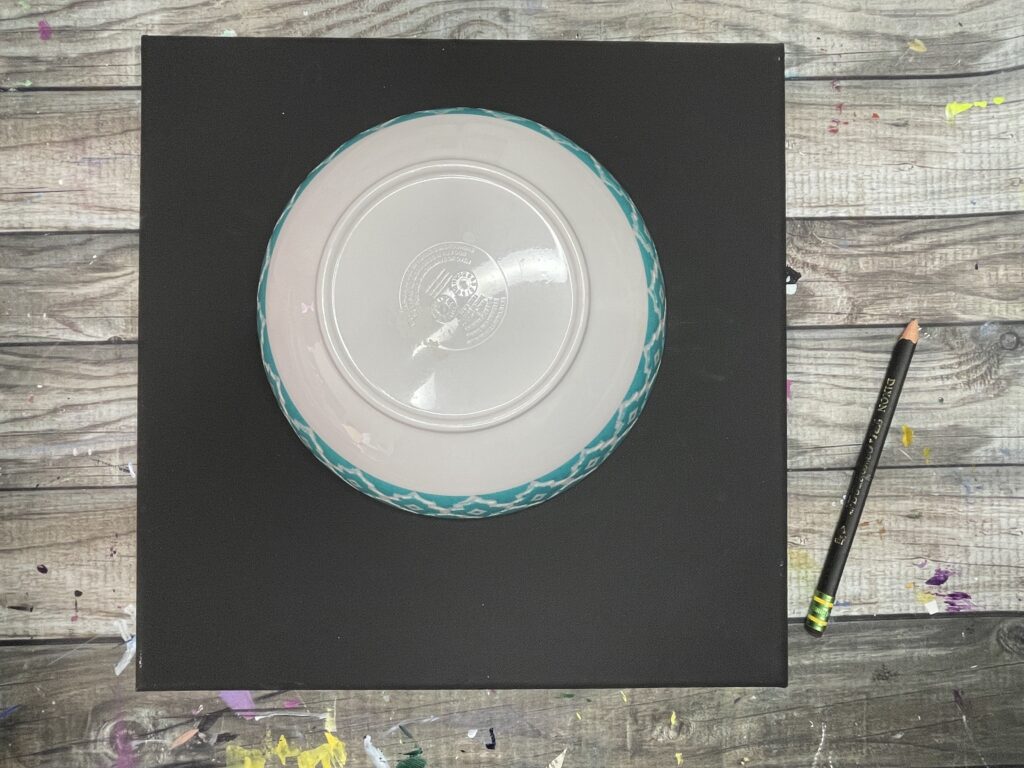
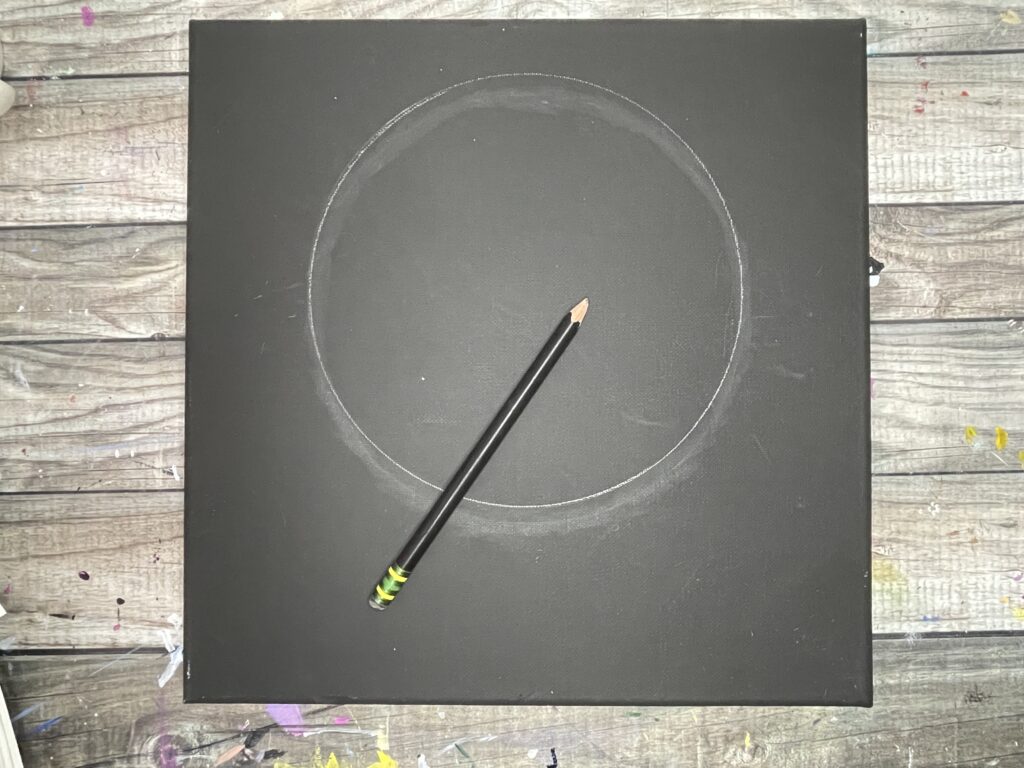
Step 1
Take a large bowl or a compass to trace in your moon shape with a pencil or piece of chalk. If you're using a 12x12 canvas, place the moon 1" from the top and 2.25" from either side of the canvas. The diameter of this moon is 7.5" wide. If you'll be painting the water reflection at the bottom leave a couple inches at the bottom of canvas, otherwise just try to centre the moon on canvas as best as you can.
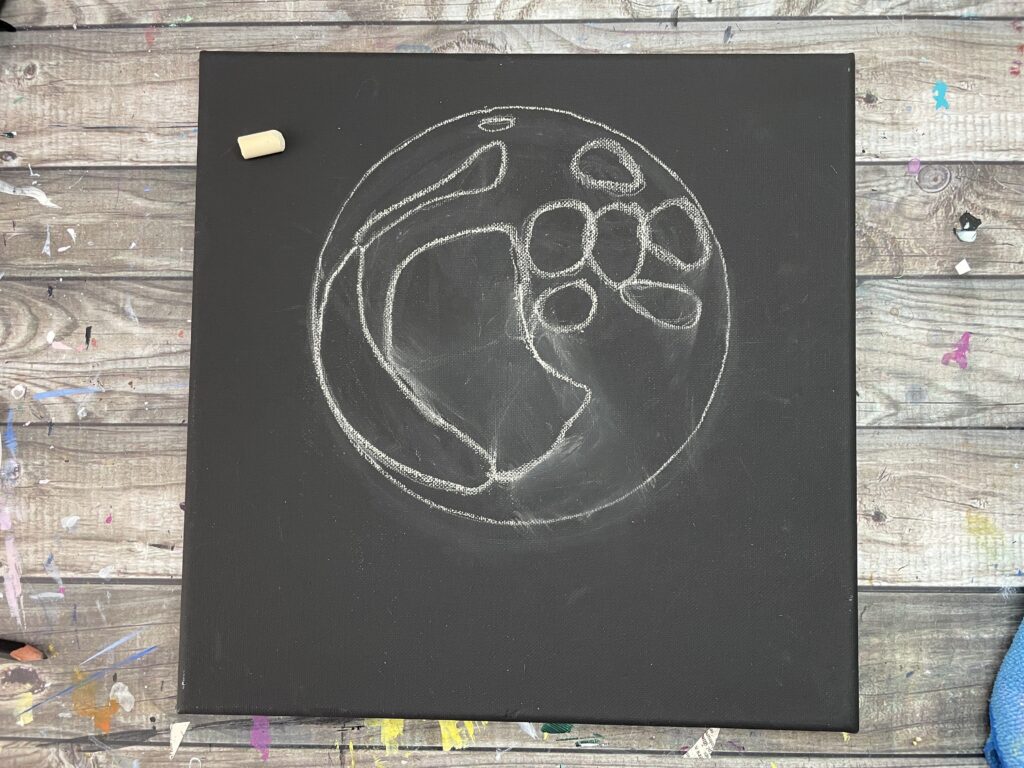
Step 2
Using your pencil/chalk trace in the dark areas of the moon. You can use my sketch below as a reference or use the moon reference photo download (scroll down to bottom for the download).
Step 3
Paint around the shapes with white acrylic paint (using your medium flat brush, size ⅝). Tip: to get nice crisp edges, gently sweep the chiseled edge of the flat brush along the inside border of the moon. It also helps to work with a thin paint consistency. Use water the thin down your paint so its like a gravy consistency because it flows better when a bit thinner.
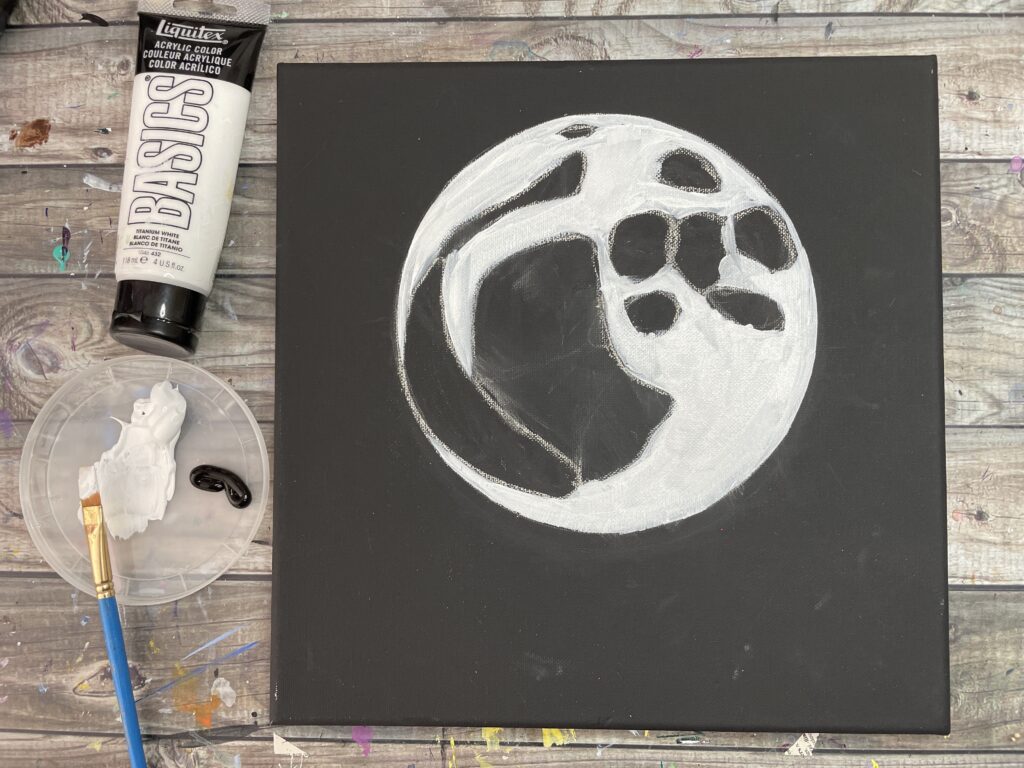
Step 4
Paint in the shapes you traced with dark grey paint (mix black with some white paint), using a medium round brush (size 8). Tip: it's okay if the white and grey paint mix at edges, this will work out nicely in the end.
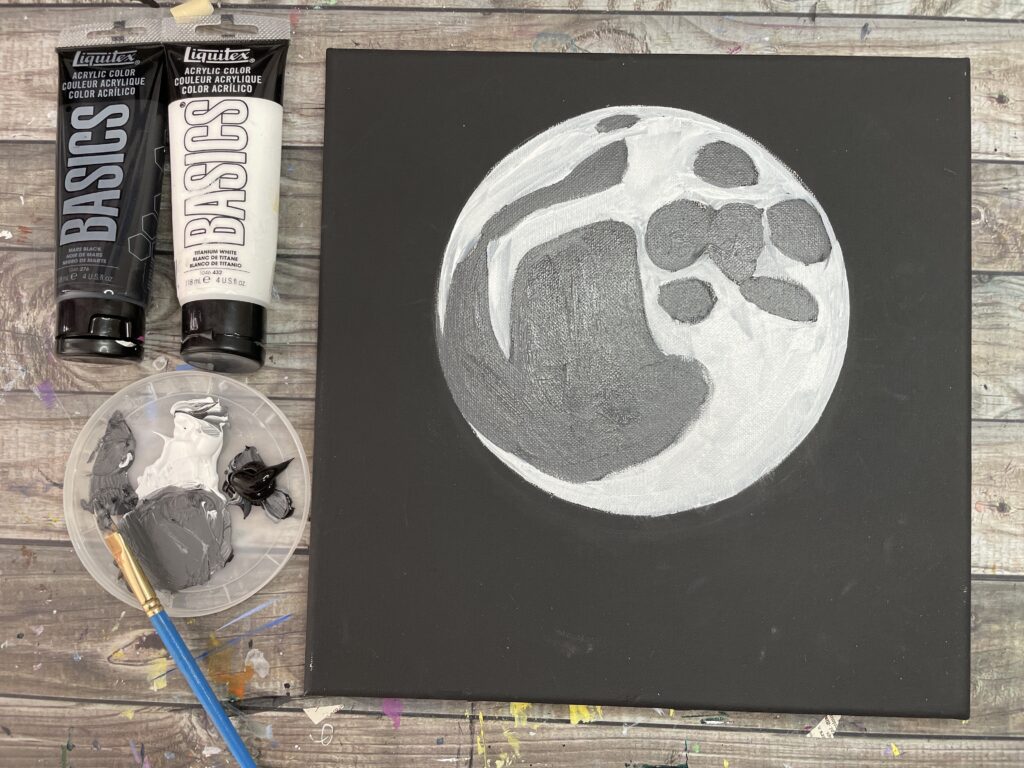
Step 5
Using a circular motion dab some white paint along all the edges of all the shapes, using dry and clean round brush (size 8) - dry brushing technique. The goal of this step is to soften all the edges between the white and the dark grey shapes, so the edges become blurred and not sharp. So if some of the grey gets on the brush and mixes this is fine and actually ideal. It's also best to work with a dry brush for this technique to work best.
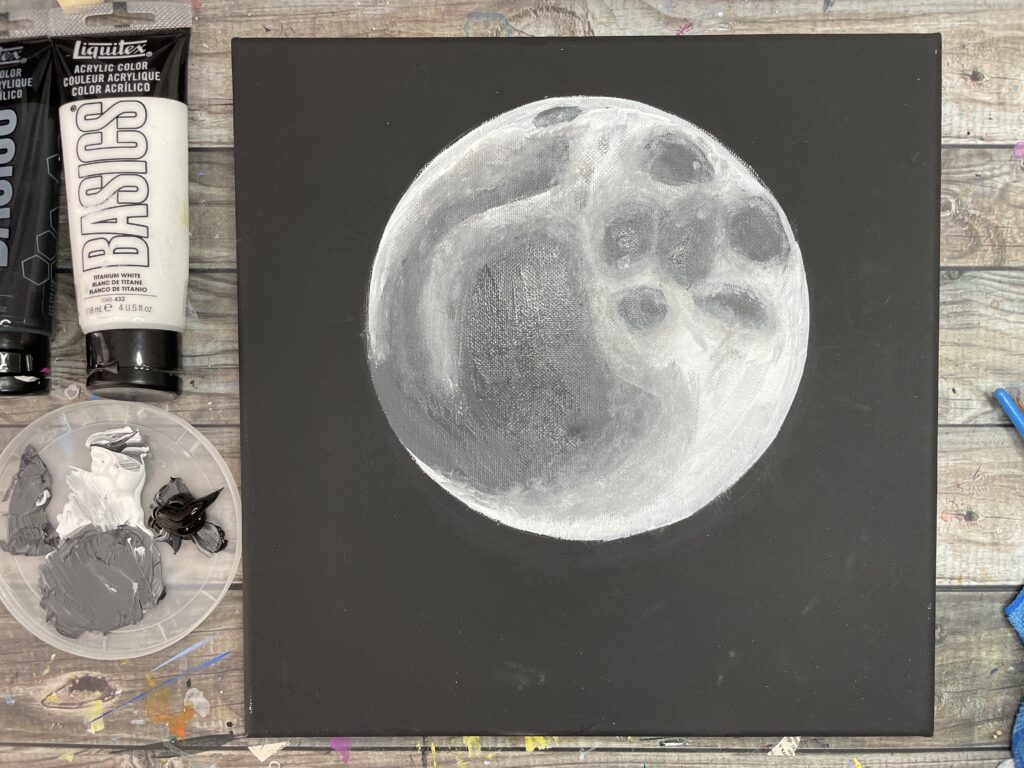
Step 6
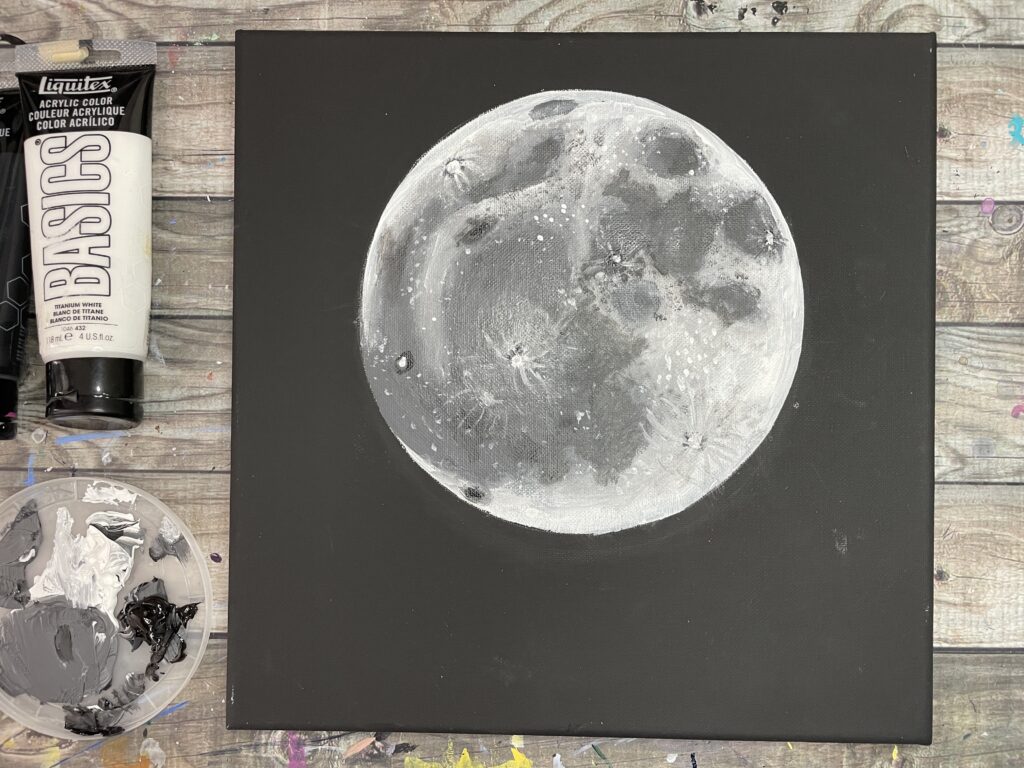
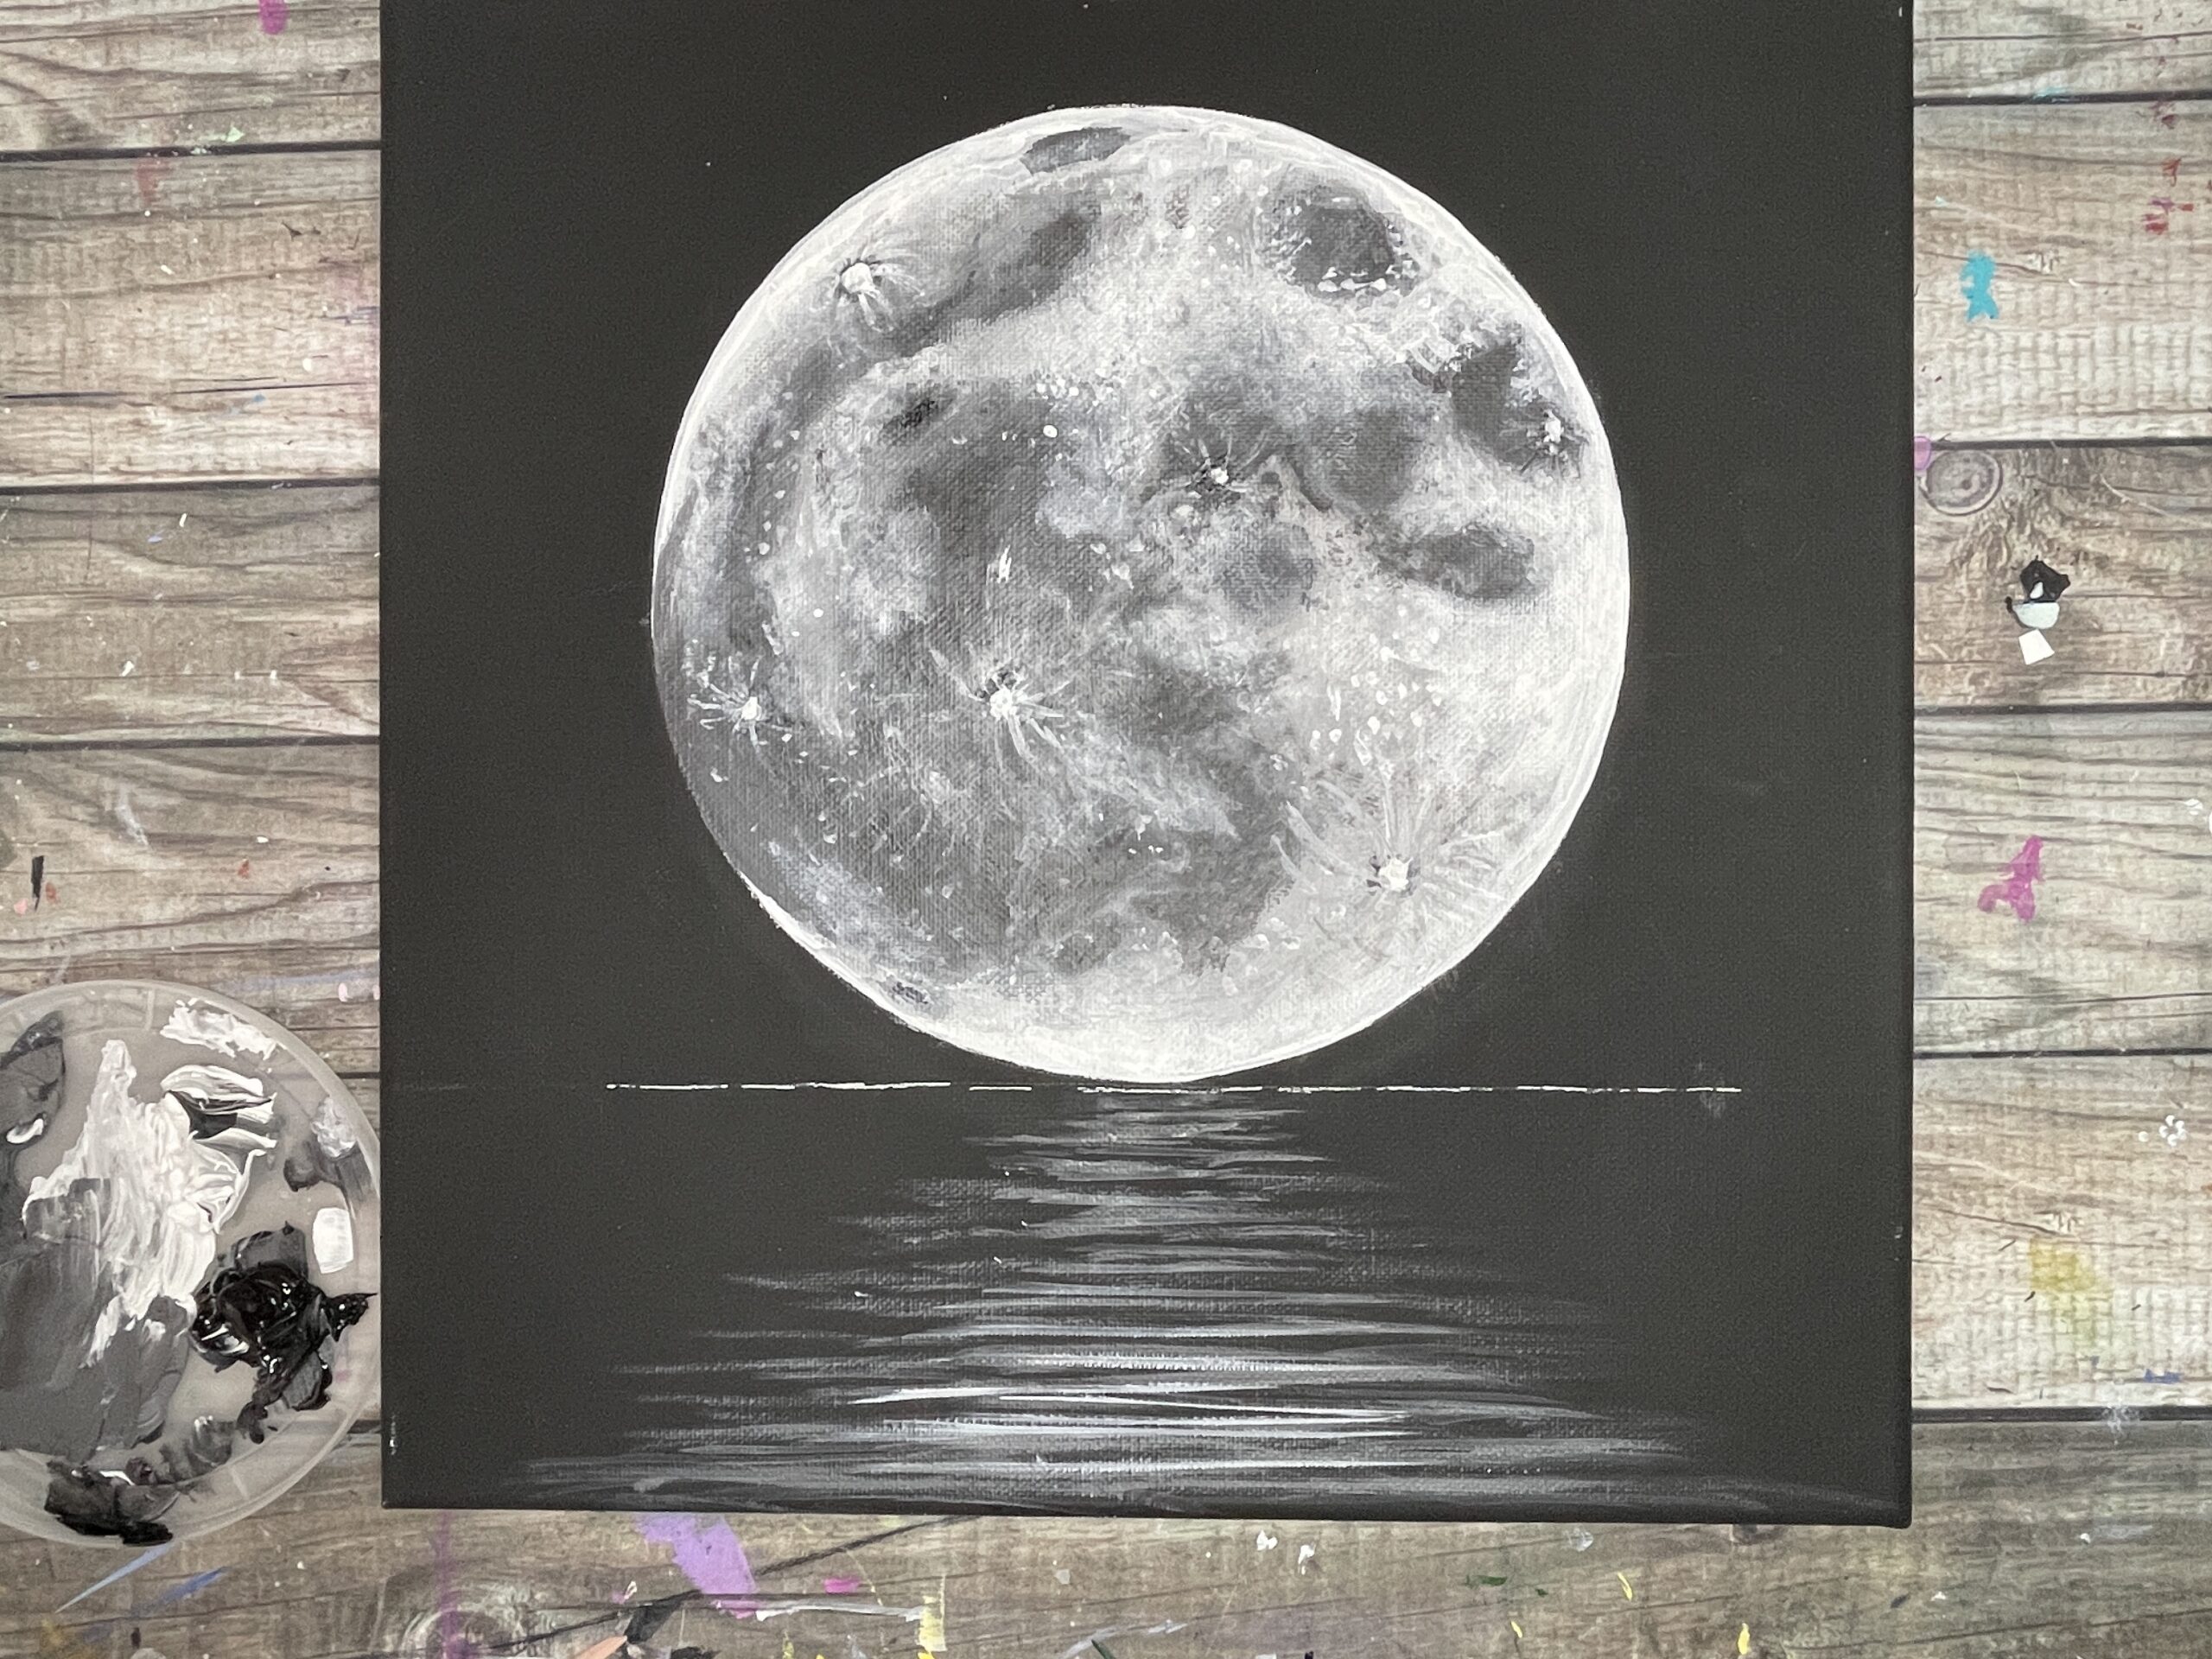
Paint in the moon craters with white paint with small dots and larger ones (using small detailing brush 2/0). Look at the moon reference picture to see where the big and small moon craters are, or follow along with my painting picture below.

Step 7
Paint in the darkest areas of the moon using your detailing brush and some dark grey paint. You want this grey color to be darker than the one you mixed in step 4 above. Take a look at the reference moon picture for the darkest areas, or look at picture below
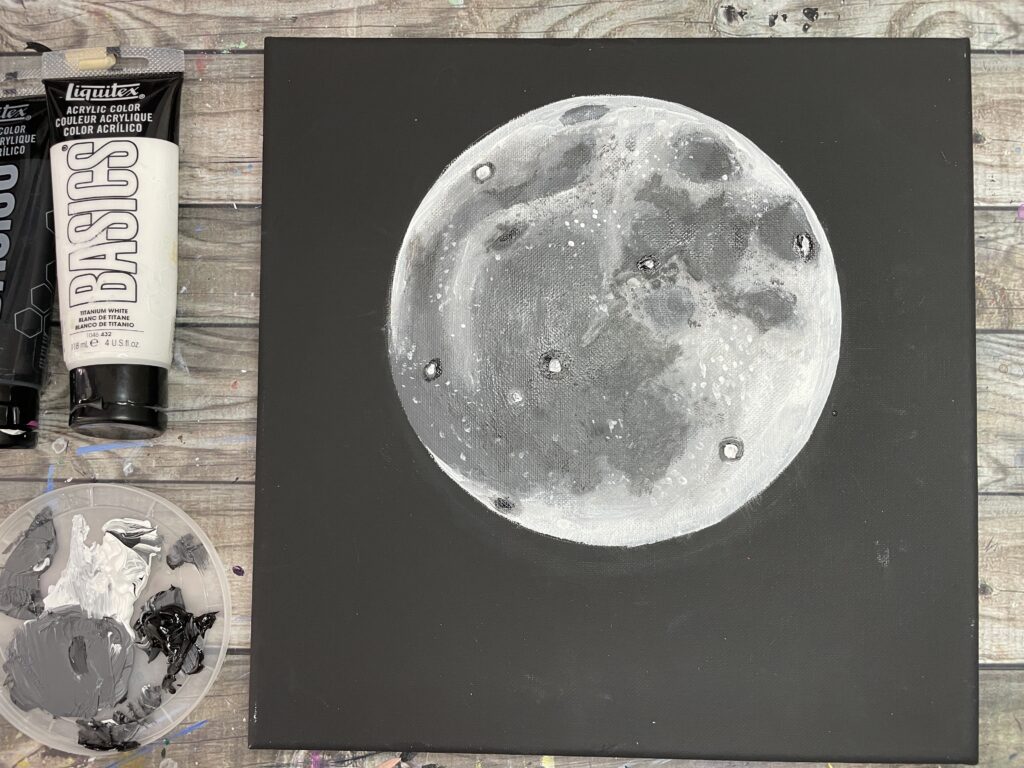
Step 8
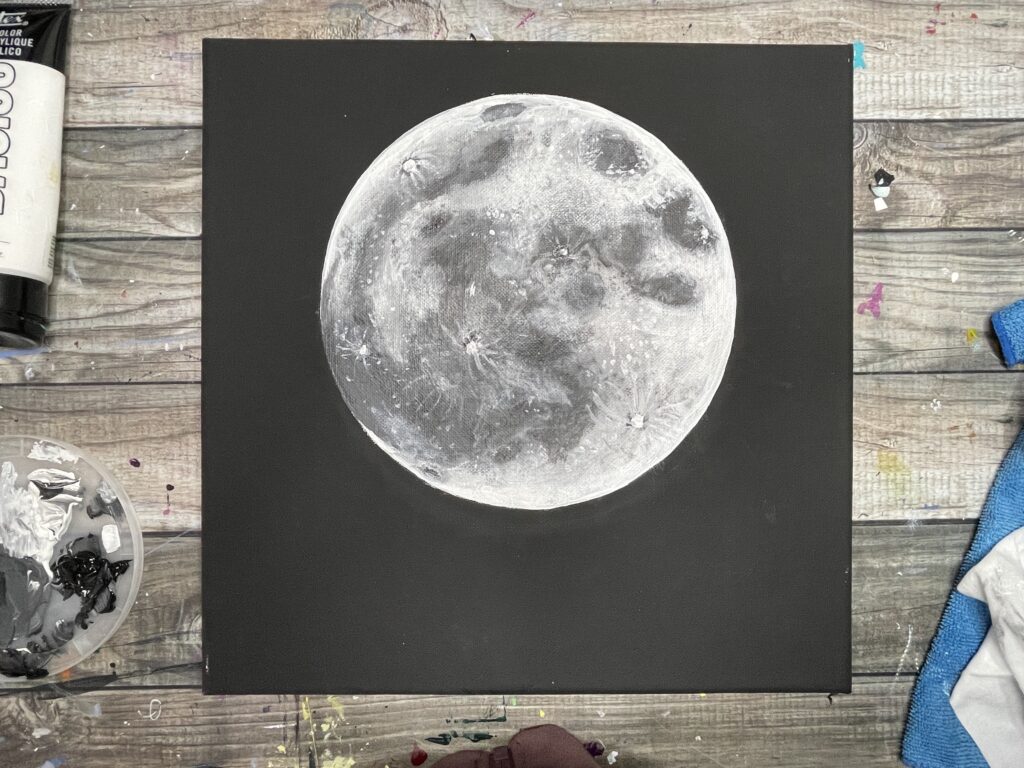
Paint in the ejecta rays around the craters (spoke-like thin lines that shoot out from the circular craters), with thinned-down white paint and your detail brush. To soften the white lines (so they blend and disappear into the moon surface), dab them with a q-tip or your finger while the lines are still wet.
Step 9 (Optional)
Take the time here to take a step back from the moon painting and see if there are any areas that are too dark. If there are any, mix some light grey paint and paint in the areas to lighten them up. It also helps to blend the paint into the background using your finger (or use a q-tip).

Step 10
Take your flat brush and white paint then paint the inner border of the moon so that it's bright white and opaque. This will give the moon glowing appearance and will look more realistic in the end
Realistic Moon Reference Picture (DOWNLOAD)
Click the image of the moon below and save it to your computer. You can view on any device or print it out and use it as a moon reference picture.
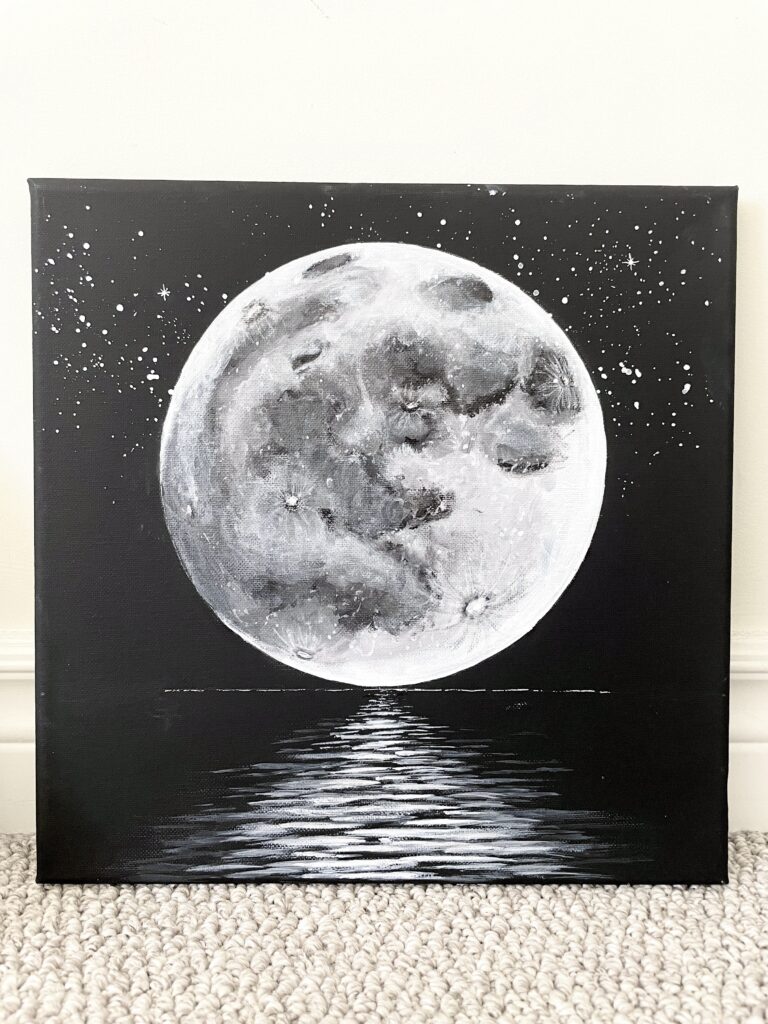
How to paint the moon for beginners
How To Paint The Moon For Beginners (Realistic Full Moon)

Learn how to paint a moon in this easy step by step tutorial with black and white acrylic paint and a black canvas.
Materials
- 12x12 square black canvas (or white canvas painted black)
- white acrylic paint
- black acrylic paint
- medium flat brush ( size ⅝)
- medium round brush (size 8)
- small detailing brush (size 2/0)
- palette
- jar of clean water
- rag/paper towel
- pencil/ piece of chalk
- 1 Qtip (optional)
- white ink pen (optional)
- large bowl (optional)
- ruler (optional)
Instructions
- Watch the YouTube moon tutorial
- Using a black canvas (or a white canvas thats painting black with black acrylic paint or black gesso), paint in your moon with the instructions above

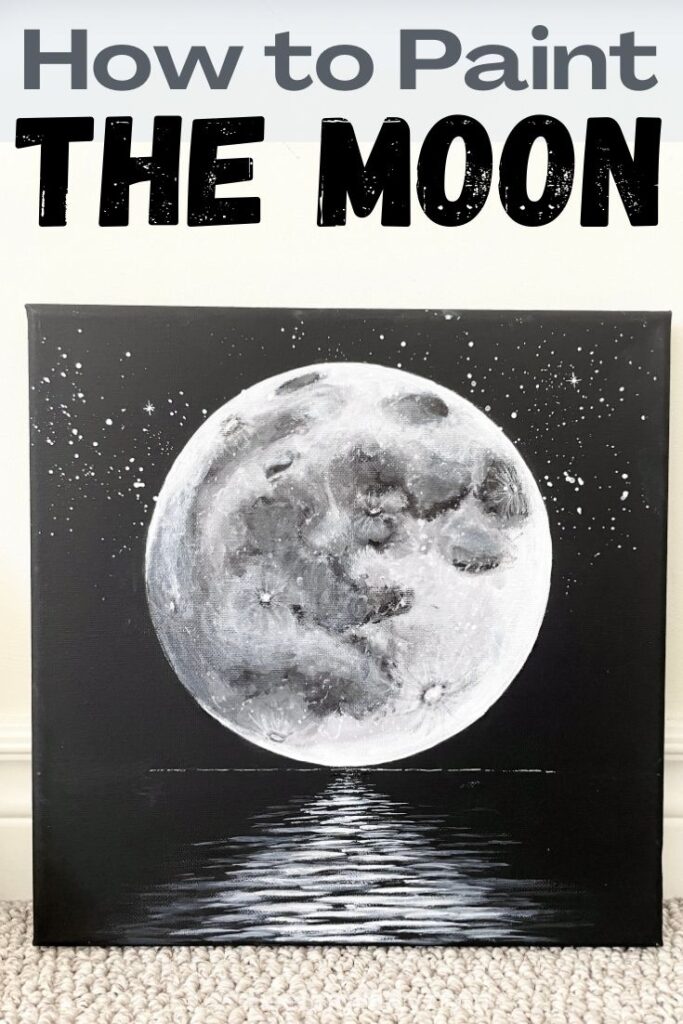
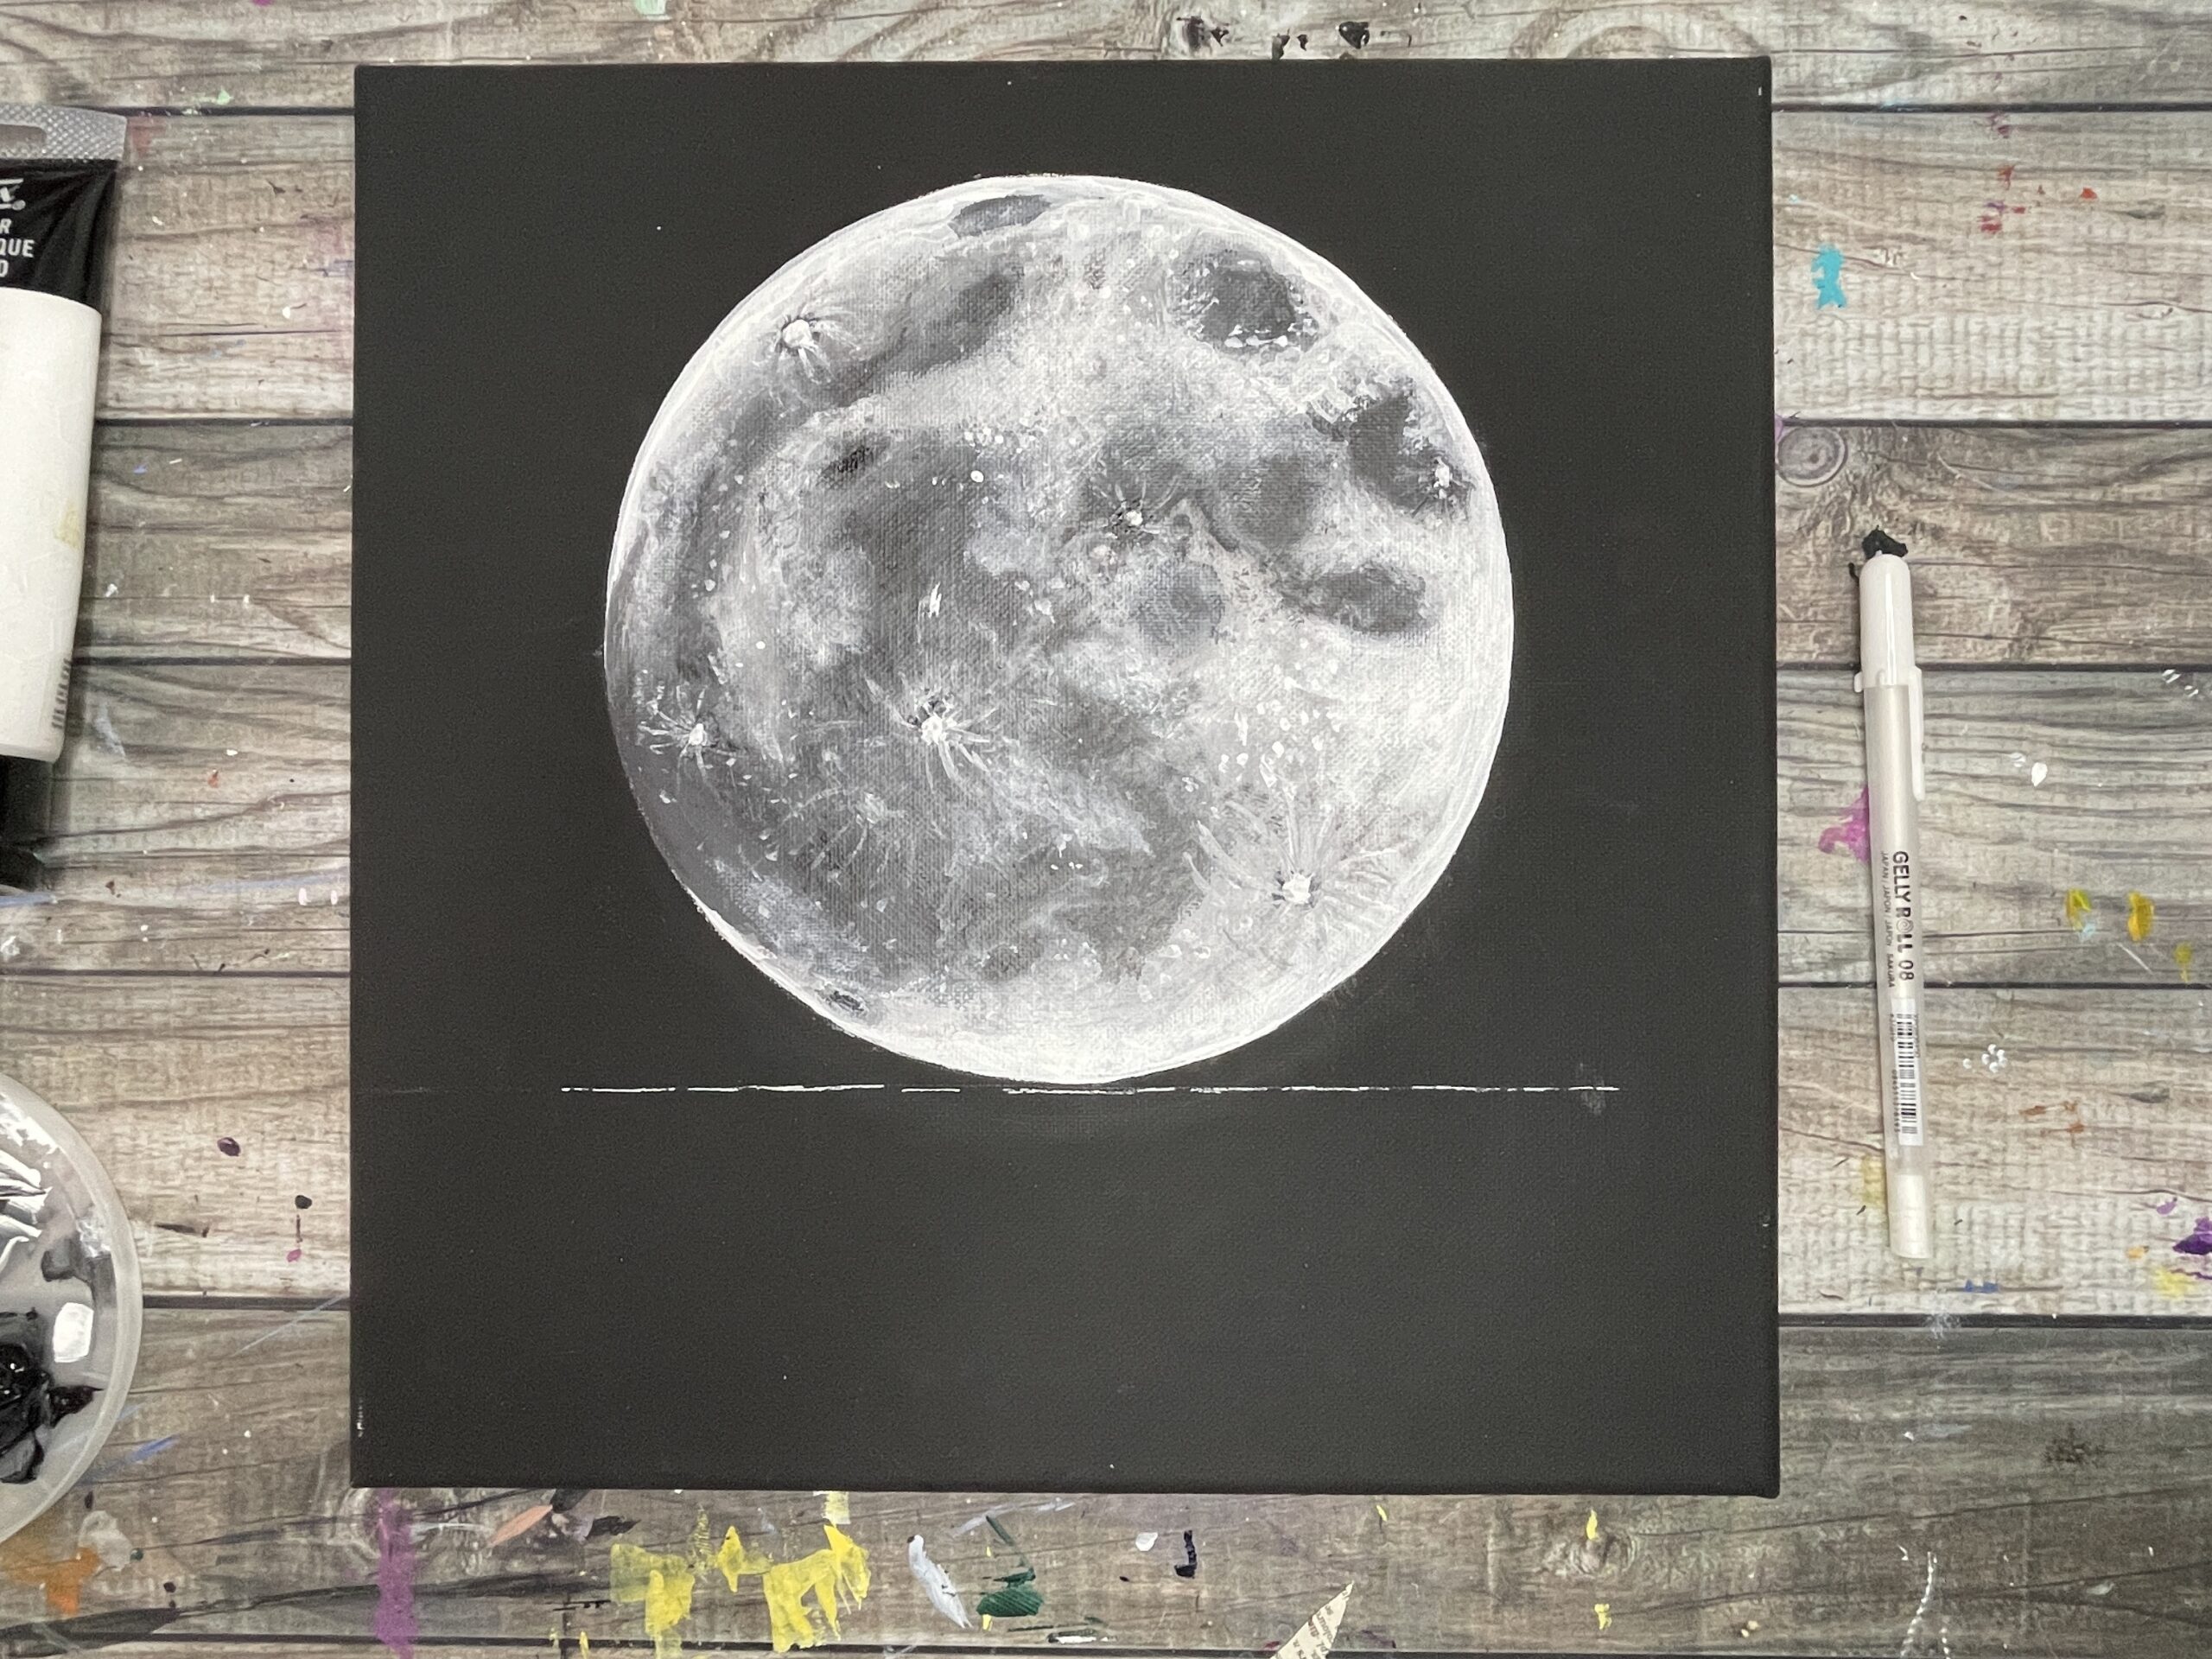
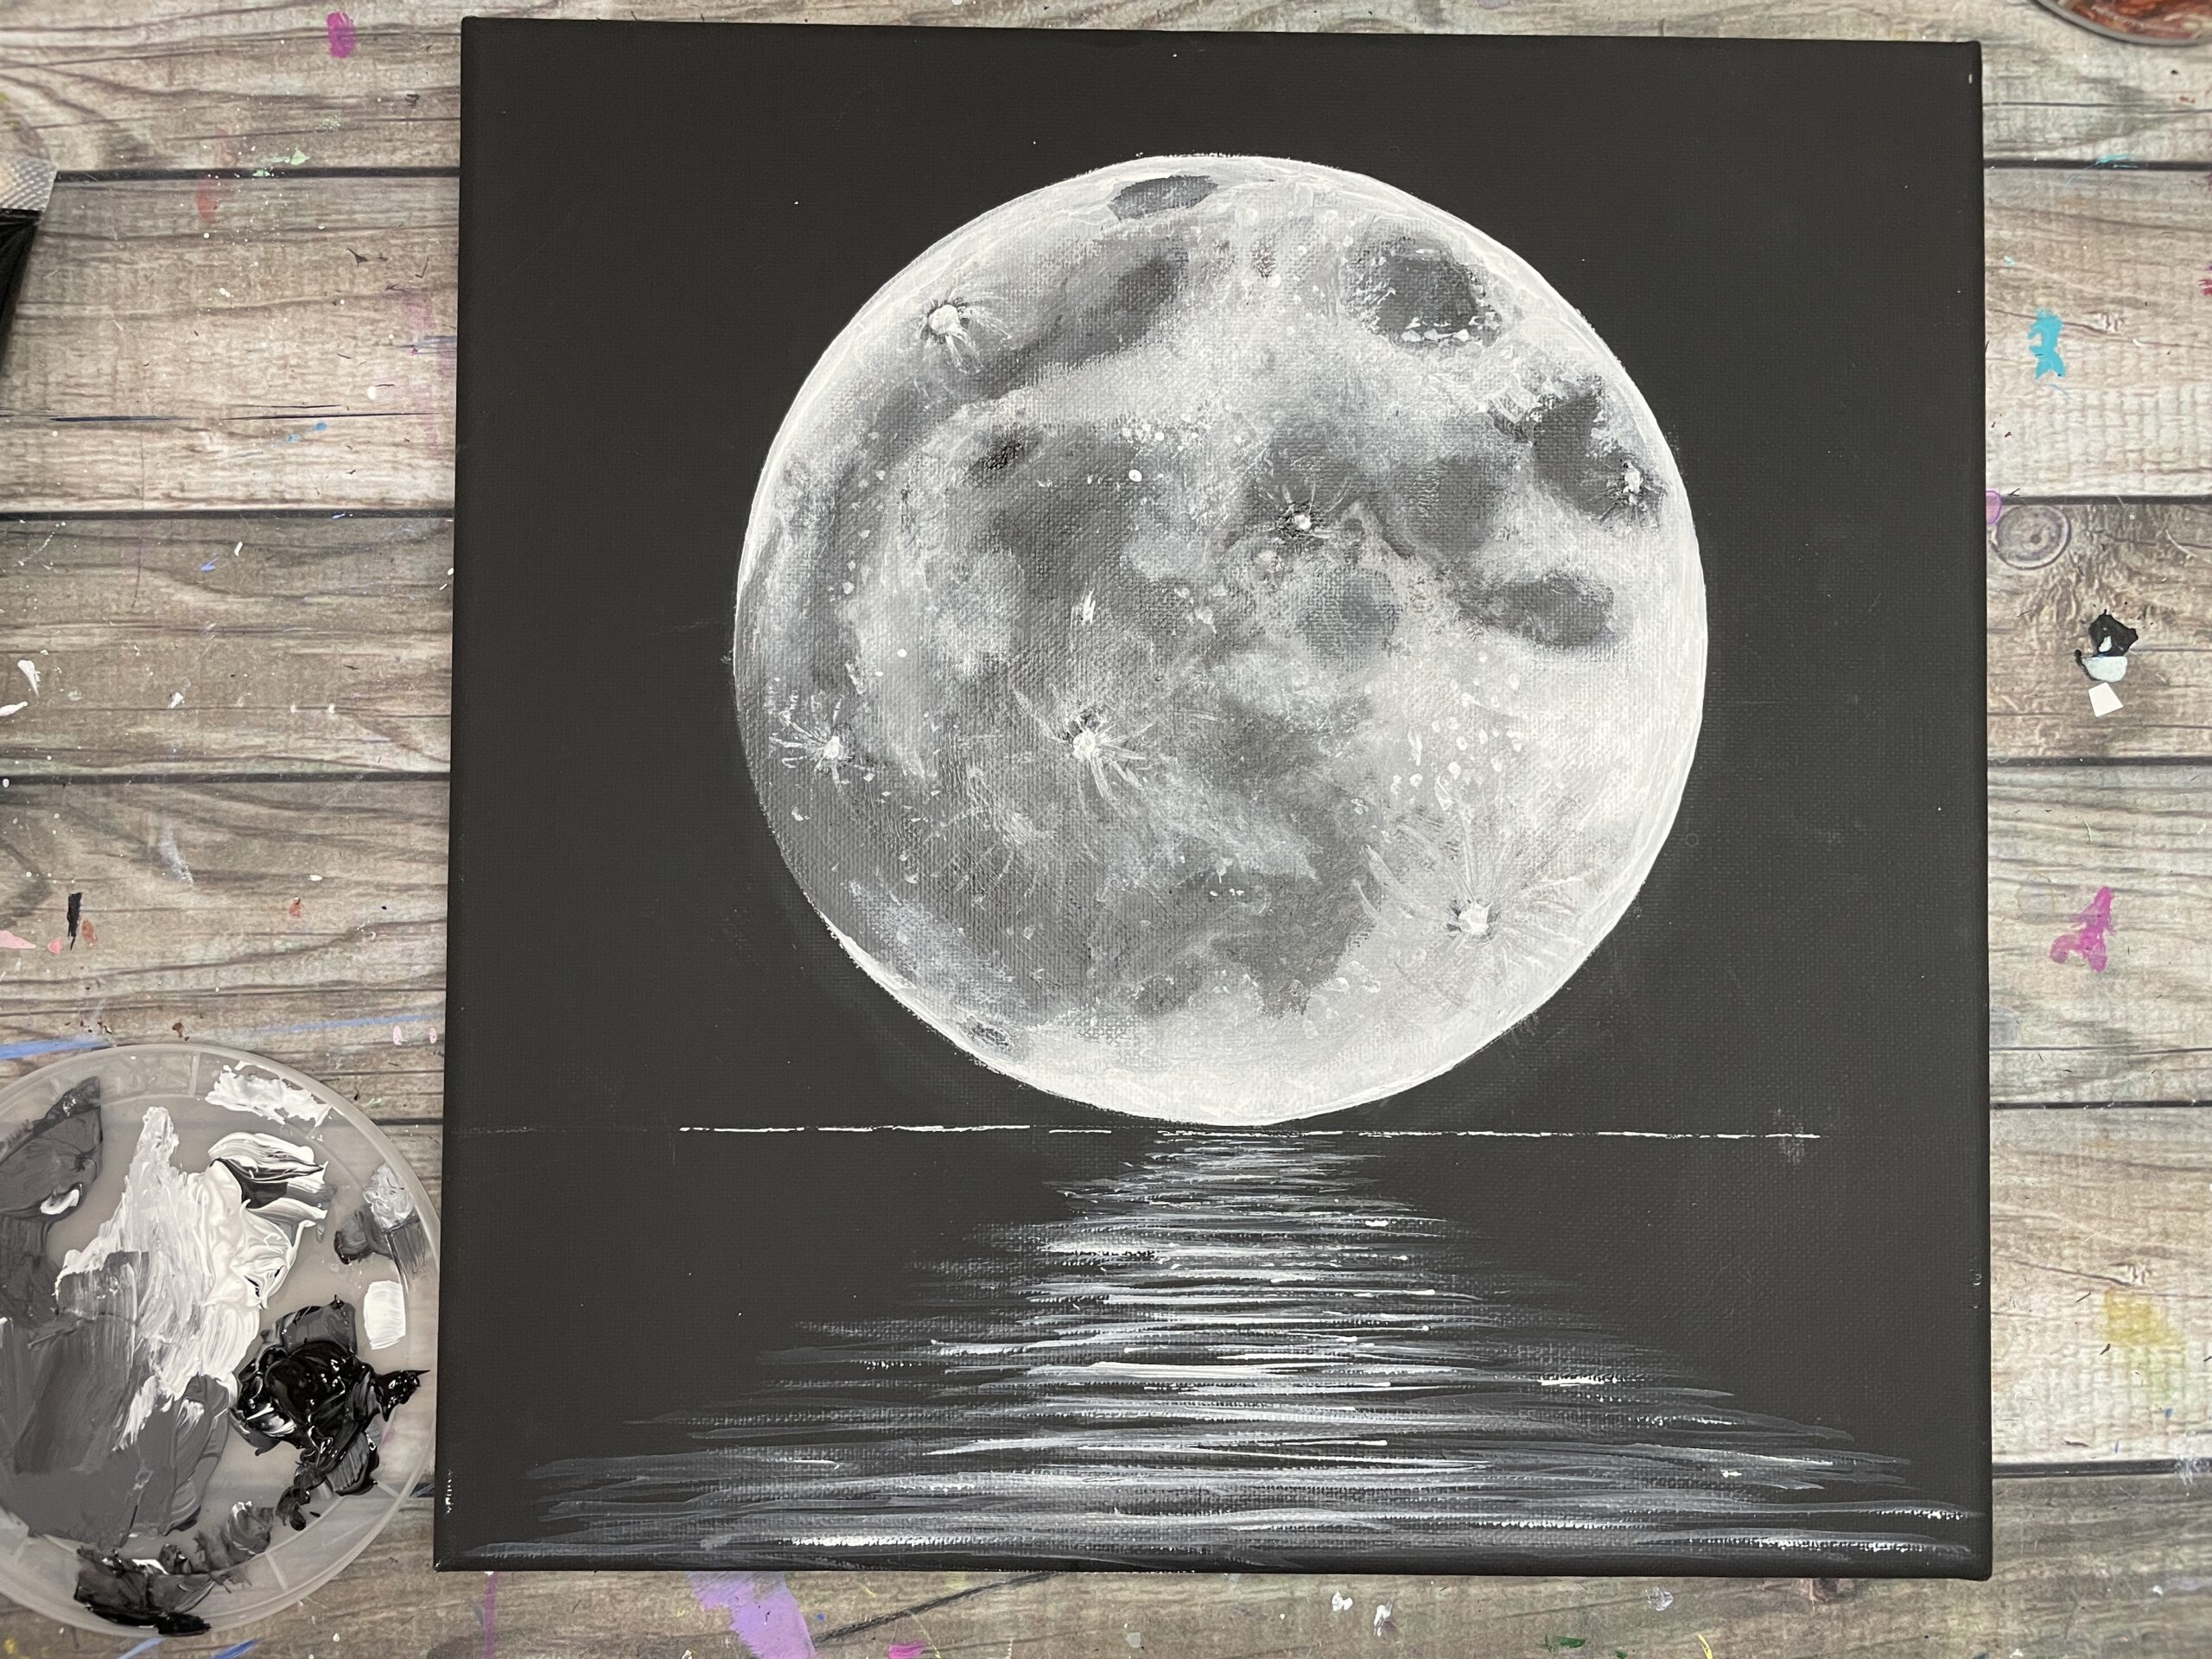
- Once moon in painted, draw a horizon line with either a white gel pen, or your detail brush loading with thin white paint
- Mix some light grey paint by mixing white with a. tiny amount of black. Use your flat brush to paint in fine horizontal lines as your moon reflection on the water. The water reflection will be line the shape of a triangle: narrow top and wider at the base.
- Use some pure white paint to paint over some of the water reflection lines. Focus the white in the centre of the triangle, so that the water lines are more grey at the edges, and lighter towards the centre.
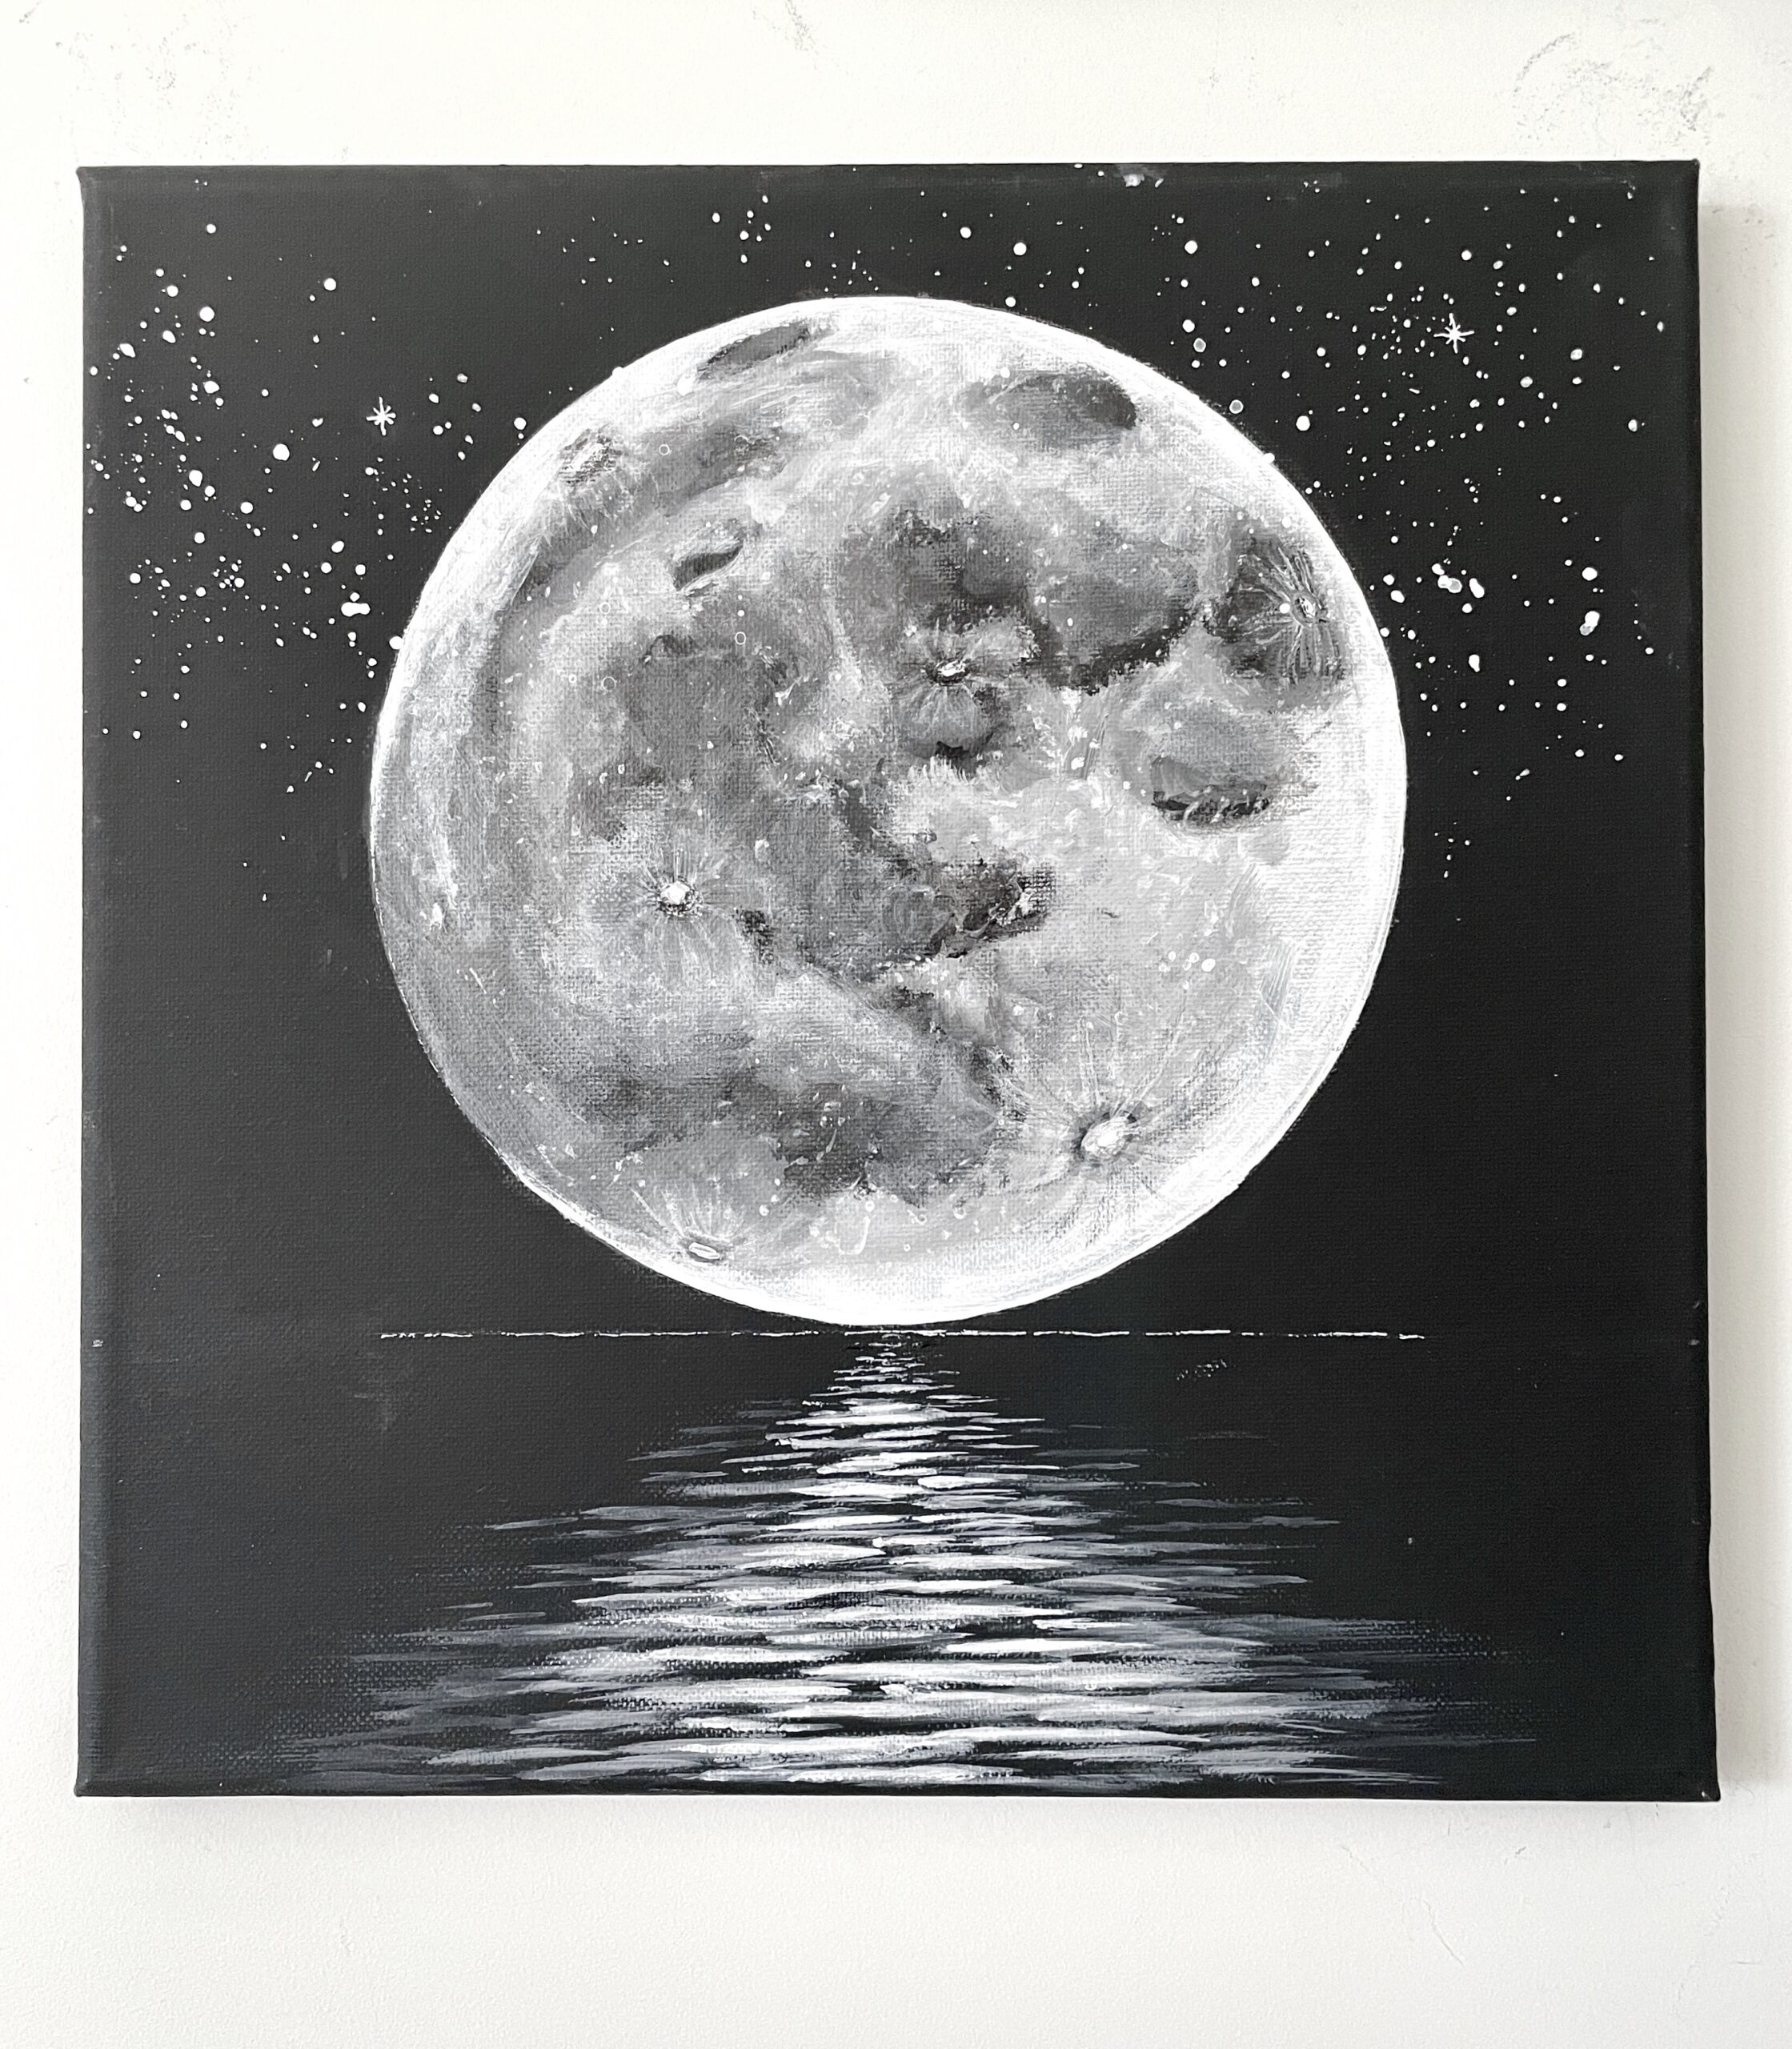
- Add Some splatter stars in the top part of the sky. To make splatter stars, thin down some white paint with water until it is a runny liquid consistency. Load up any brush this with thin paint and gently tap it on another brush (handle) over top where you want the stars to go in your painting.


Recommended Products
As an Amazon Associate and member of other affiliate programs, I earn from qualifying purchases.


6 Tips to make your moon painting on canvas look more realistic
If you're looking to make your moon painting look more realistic then the tips below will help you out.
- Precision in your initial moon drawing
- Large range of values: from darkest darks to lightest lights, a larger range in values will make the moon appear more realistic
- Soften all edges: make the transitions between all shades of grey/white more gradual and blended/blurred
- The more layers the better
- Blend layers of paint while still wet. Blending is easier between the different shades of grey while the paint is still wet
- The final pure white highlight around the rim of the moon will add brightness to the moon
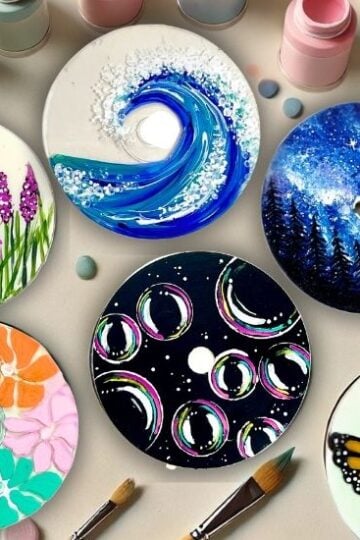
12 DIY Moon Painting Ideas
Below are a few ideas on how to customize your moon painting.
- Paint a landscape moon painting with trees
- Make a sun and moon painting
- Paint in the moon into a galaxy painting
- Make the moon in a sunset painting
- Paint a fun halloween cat and moon painting
- Add the moon to a mermaid night scene painting
- Paint the moon in a aesthetic cloud painting
- Create the moon on a wall, like this youtube video
- Paint a moon on your water bottle
- Use the moon as a part of a landscape painting
- Paint the moon on a stone or rock
- Trace, then paint a silhouette of a wolf in front of a full moon, like this tutorial
- Paint a Christmas blue winter moon/ red harvest moon


I keep having issues with my white and the grey paint drying to fast. So when I go to blend with white it's kind of blending. What can I do to help blend this process when dried?
Hi Wendy,
That's a great question! Acrylic paints dry quite fast which is both a blessing and a curse! It's great when working with layers, but can be a challenge when you want to blend paints. The thing you mentioned is that the paint is already dried? The thing with acrylic, once dried it cannot be reactivated unfortunately, like watercolor paints can. But you can re-layer on-top of the dried paints with the same color and try to blend. Next time to keep your paints workable, you can mist them lightly with water (this acts like a retardant) or you can add some Liquitex glazing liquid in the paint which works better than the water and will keep acrylic paints wet for extended periods. Hope that helps, and you can do it! Let me know if you have any questions
Cheers,
Jasmine