Let’s paint a mermaid and mermaid tail (friends) poking through a magical moonlit ocean night scene.
In this easy step by step acrylic painting tutorial for beginners, you’ll learn how to paint a mermaid and other nifty painting techniques like:
- How to draw/sketch a simple mermaid
- Easy recipe for skin color paint (create any skin color)
- How to paint the scales on mermaid’s tail
- Paint the ocean at night
- How to paint a big moon with glowing effects
- splatter stars
- and more!
If you’re looking for more mesmerizing and beginner friendly night sky painting ideas check out this beautiful moon painting (with only black and white paint) and this pretty galaxy painting for beginners.
Oka, now let’s get ready to paint some mermaids!

How to Draw a Mermaid
The full step by step tutorial for this mermaid painting is at the end of this post but let’s first go over how to draw and paint a mermaid in detail.
For a summary of the drawing follow the infographic below. For more detailed step by step instructions, you can follow this how to draw a mermaid tutorial.

How Do You Paint a Mermaid?
Once you have your mermaid drawing sketched out, painting in your mermaid will be easy-peasy, using the following steps.
1. Paint in the mermaid’s torso and arms with skin color paint.
To mix skin color all you need are the 3 primary colors: red , blue and yellow. To make it easier/cheaper for you for this painting use quinacridone magenta, cadmium yellow medium and ultramarine blue as your primary colors (instead of having to buy new primaries). Check out this post for more details on how to make skin color paint.
Using your skin color paint, paint in the mermaids torso and arms.

2. Paint in the mermaid’s tail
Paint the tail with phthalo green paint, using a small round brush. You might need 2 layers of phthalo green if you can still see your chalk/pencil marks below.

3. Paint tail scales with lighter green
Mix in a lighter green paint by adding a tiny bit of titanium white with your pthalo green. Using your small round brush paint in little lines (mermaid tail scales) with the lighter green color. For the fin of the mermaid use your round brush to make a few downward streaks down the fin with this color

4. Paint highlighted scales on tail
Mix an even lighter green (more titanium white) and paint in the mermaid scales in the middle fo the tail (sparing the outter edges of tail). For the fin of the mermaid use your round brush to make 3-4 downward streaks down the fin with this color

5. Paint final highlighted scales in the middle of tail
Mix a pale green color with even more titanium white in with your mix. Paint in mermaid scales in the middle of your tail only. You’ll only be painting 2-3 scales along the middle of your mermaids tail. This will be the light reflecting off your mermaid’s tail and make the tail look 3D and dimensional. For the fin of the mermaid use your round brush to make 2-3 downward streaks down the fin with this color
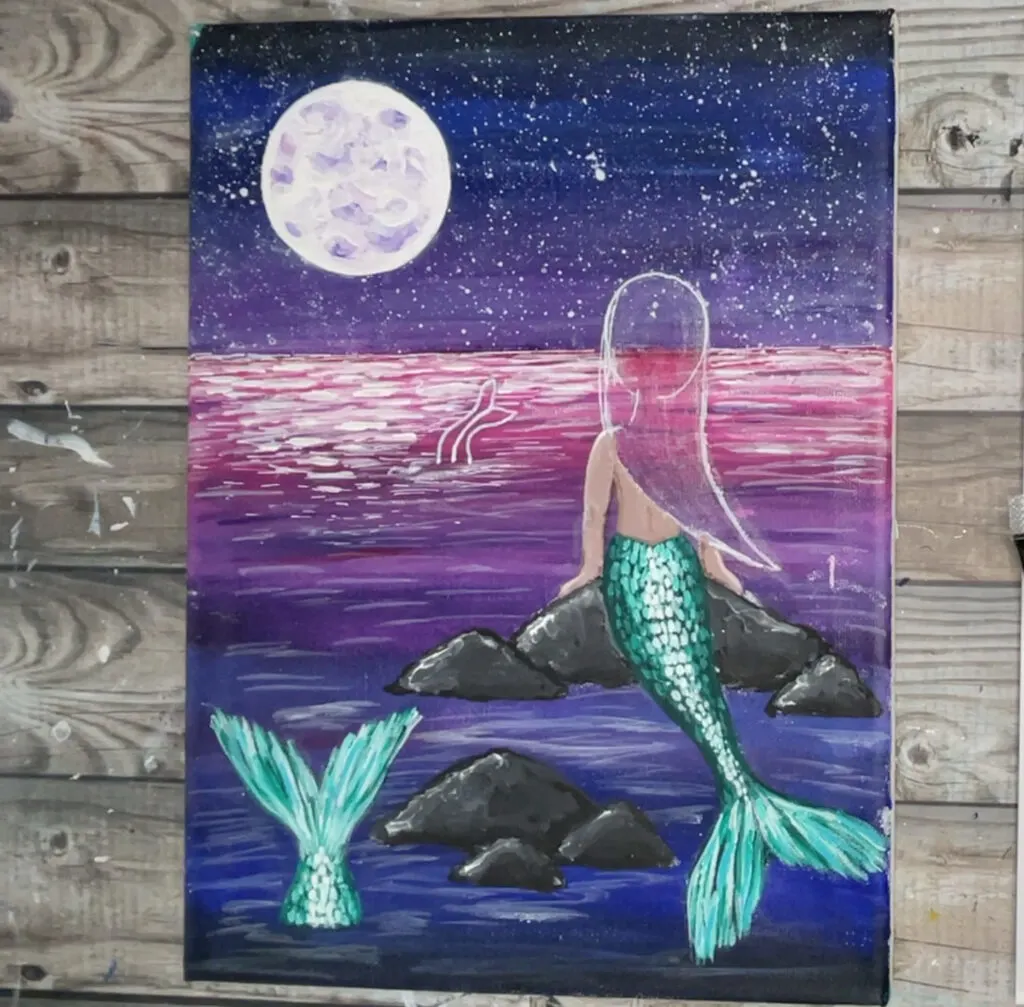
6. Paint in the mermaids hair
Using a mix of some orange, pink, yellow, and burgundy paint, paint in mermaid’s hair. Use your small round brush and create lines (hair tendrils) that flow to the bottom right of the mermaid. Tip: when switching to a new color, let the layer dry below to dry to avoid paint from blending and mixing too much. We want the streaky look which will look more like hair tendrils.
Hair color paint mixes:
- orange paint: mix 3 parts cadmium yellow to 1 part quinacridone magenta.
- pink paint: mix 2 parts white to 1 part quinacridone magenta.
- Burgundy: pure quinacridone magenta
- yellow paint: 1 part cadmium yellow. 2 parts titanium white

How To Paint A Mermaid YouTube Video
How To Paint a Mermaid
Paint a Mermaid and Mermaid Tail in Night Ocean Scene

Paint a mermaid, mermaid tails and night ocean scene in this easy step by step acrylic painting for beginners.
Materials
- 9X12 canvas
- Titanium White
- Mars Black
- Ultramarine Blue (or any dark blue)
- Quinacridone Magenta (or any magenta)
- Cadmium Yellow Medium (or any yellow)
- Phthalo Green
- 3/4" flat wash brush
- 1/4" flat brush
- Size 6 round brush
- 1 Q-tip
- pencil
- white chalk
- water jar
- palette
- paper towel
- Optional: Silver paint marker, white paint marker, round object to trace the moon shape.
Instructions
- Sketch in horizon line using your pencil about 3 inches down from the top of the canvas.
- Add a small line of mars black to the top of the canvas using your 3/4" flat brush

- Without cleaning off your brush pick up some ultramarine blue and apply it below the black paint using back and forth strokes. Blend between the black and blue too.

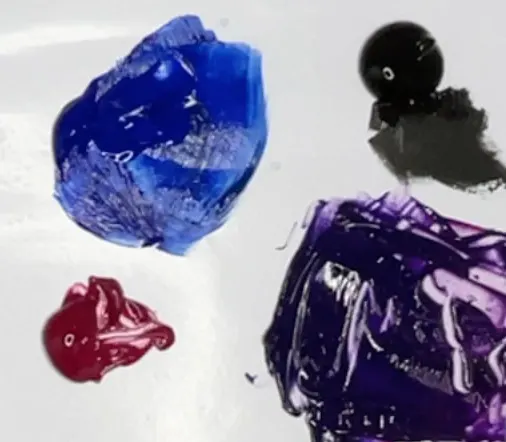
- With a clean brush mix some purple paint by mixing 1 part ultramarine blue 1 part quinacridone magenta. Apply this purple below the blue (using horizontal strokes)
 Check out this guide If you want a more info on how to make the perfect purple. Purple paint mix picture:
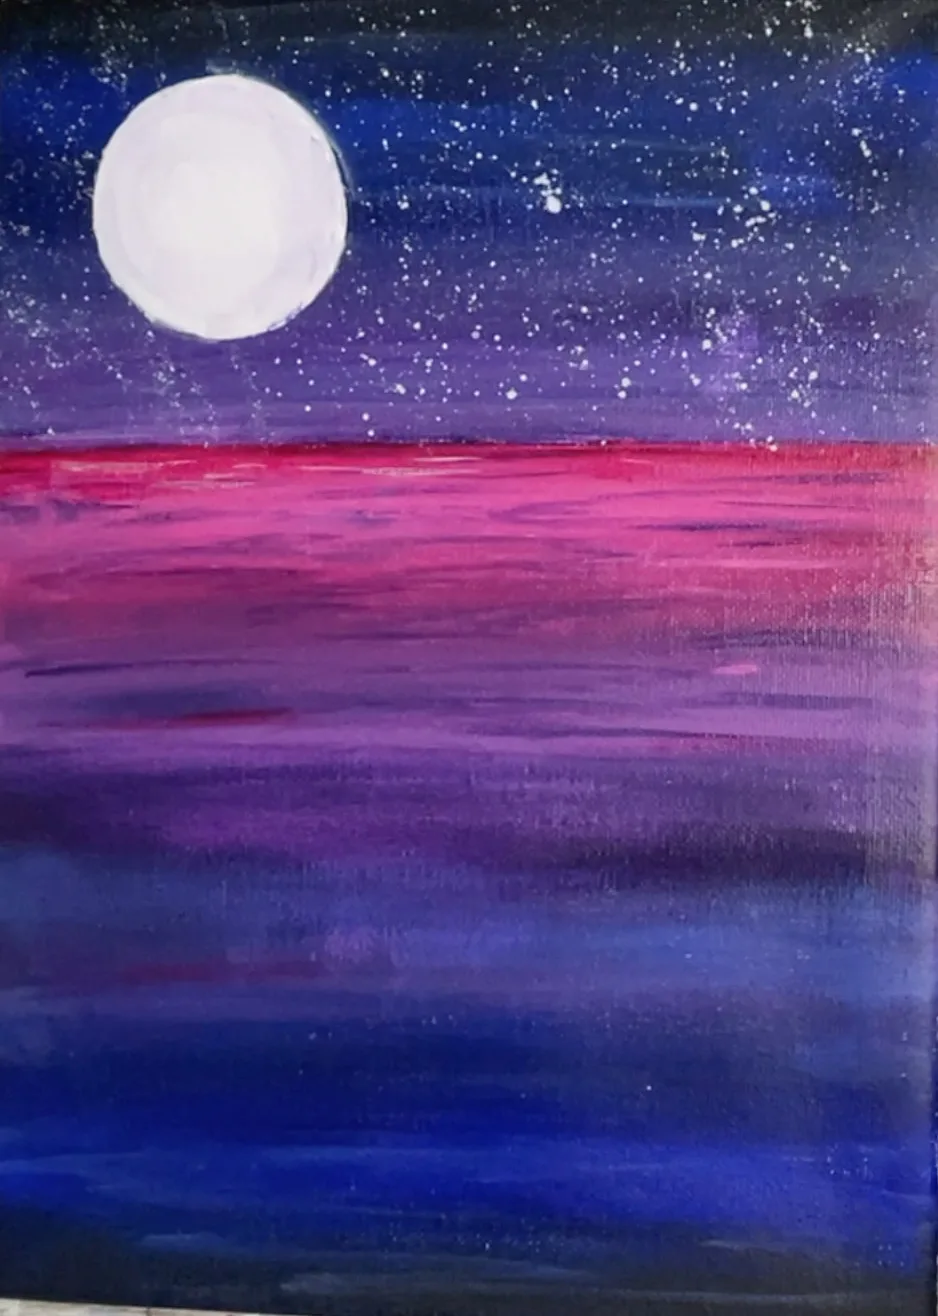
- Without cleaning off your brush pick up some titanium white, and paint it below the purple you painted above, and all the way to the horizon line. This should mix to create a light purple at the horizon.

- Clean off your brush. Pick up some quinacridone magenta and paint the top part of your ocean with the magenta

- Without cleaning off your brush, pick up white on your brush and paint it over top the pink to lighten it a bit.
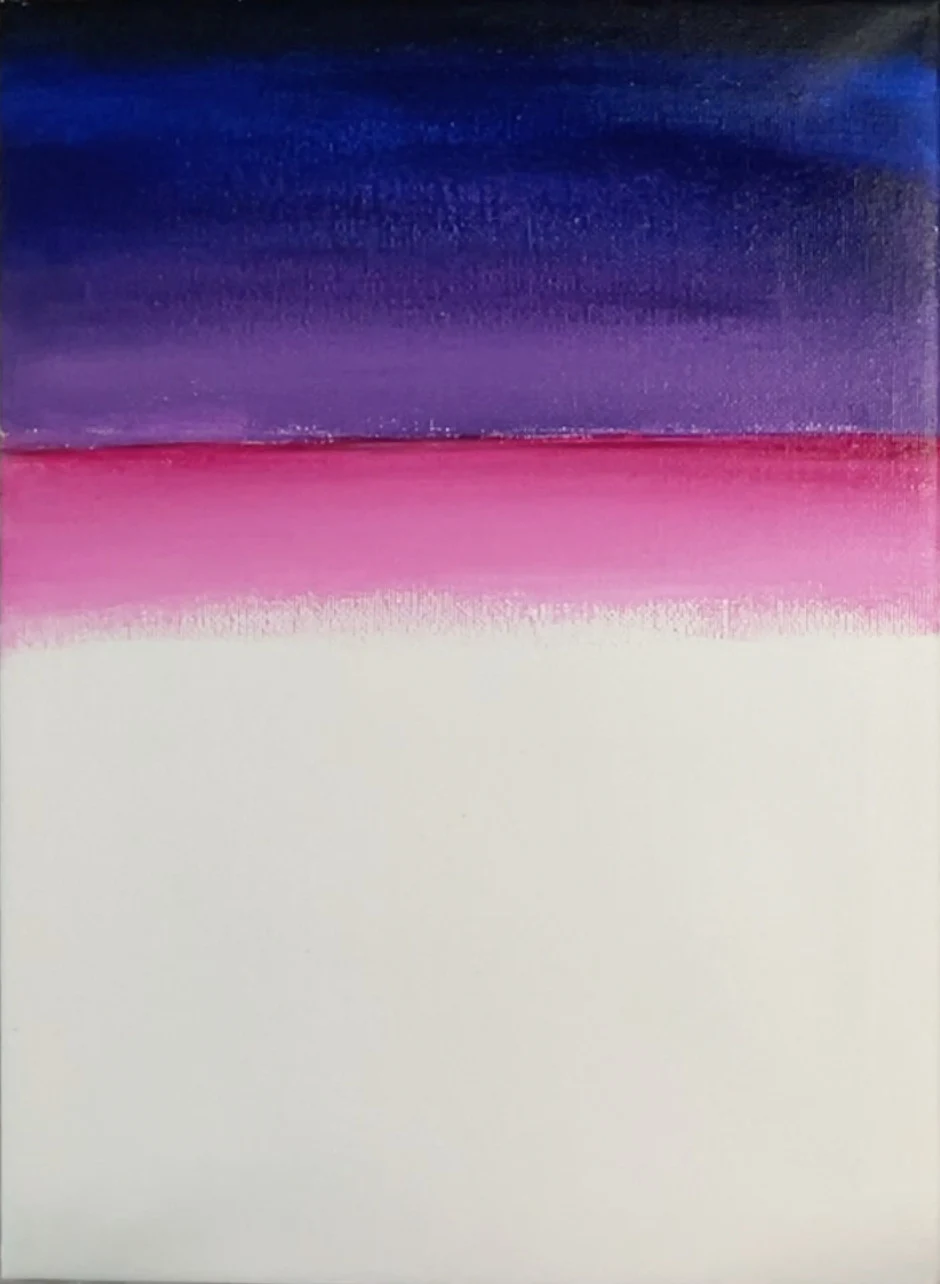
- Using your purple (from step 4), paint in your ocean below the pink (making sure to blend the transition between the purple and pink too).
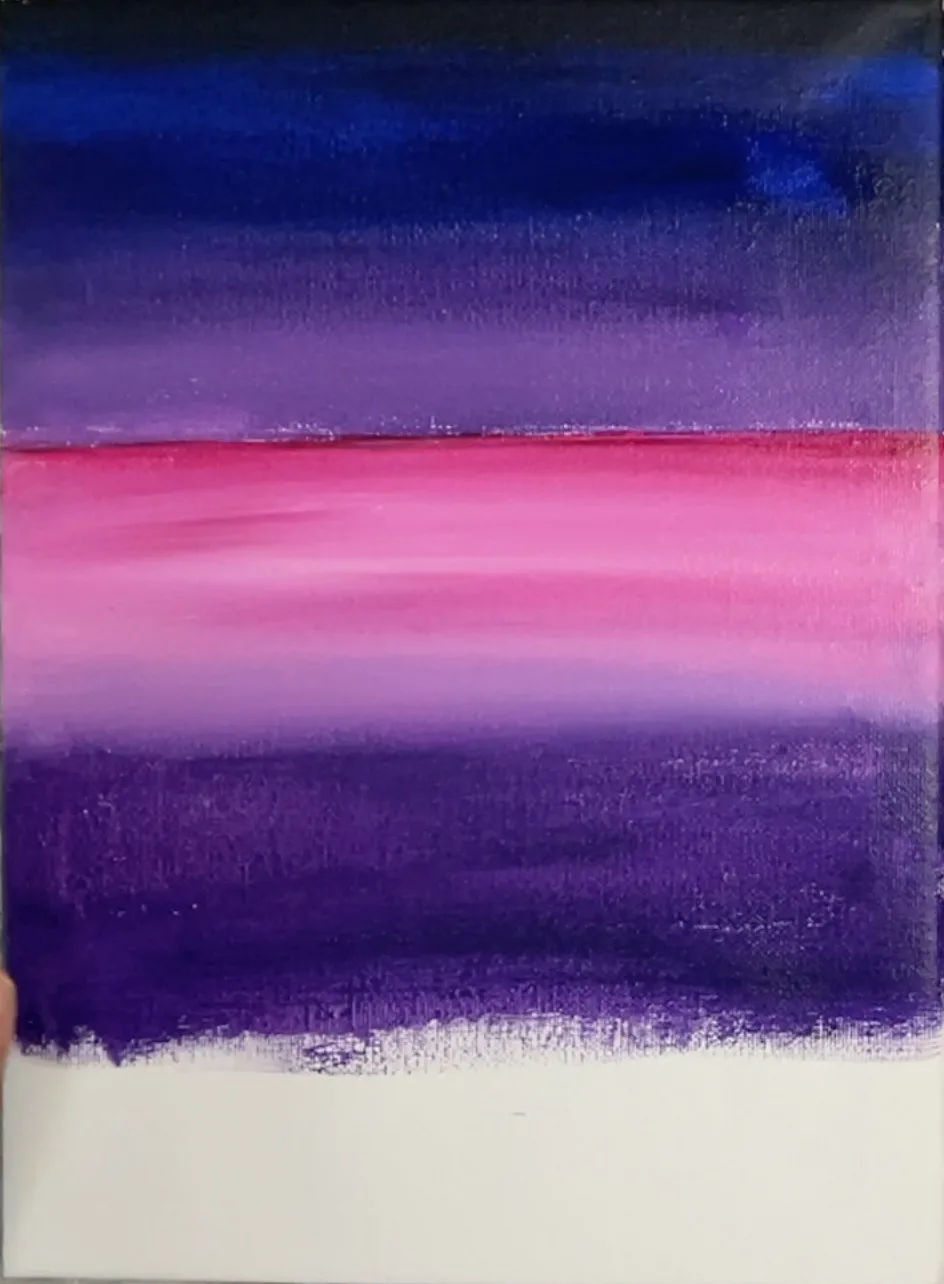
- Pick up some ultramarine blue and paint below the purple all the way to the bottom of canvas (blend between purple and blue too).

- Pick up a tiny amount of black and add it to the bottom of the canvas ( the blue and black will mix on canvas to create a dark blue)

- Using your small flat brush (1/4"), pick up some purple paint add some small horizonal lines (waves) throughout the pink/purple part of the ocean.

- Leave paint to dry on canvas (5-7 minutes)
- Take a small round object and trace in your moon with pencil. Using your small round brush and white paint, paint in your moon.
- While white paint is still wet, pick up some purple on your brush and create small moon craters. (mix some purple if you need).

- Create splatter stars: mix a few drops of water into a small pile of white paint so its a liquid consistency (should flow down if you tilt palette). Pick up some of this liquid white paint on one of your brushes, and tap that brush on the handle of another brush to create splatter marks (stars). You can protect the ocean from the splatters by laying a piece of paper over the ocean.
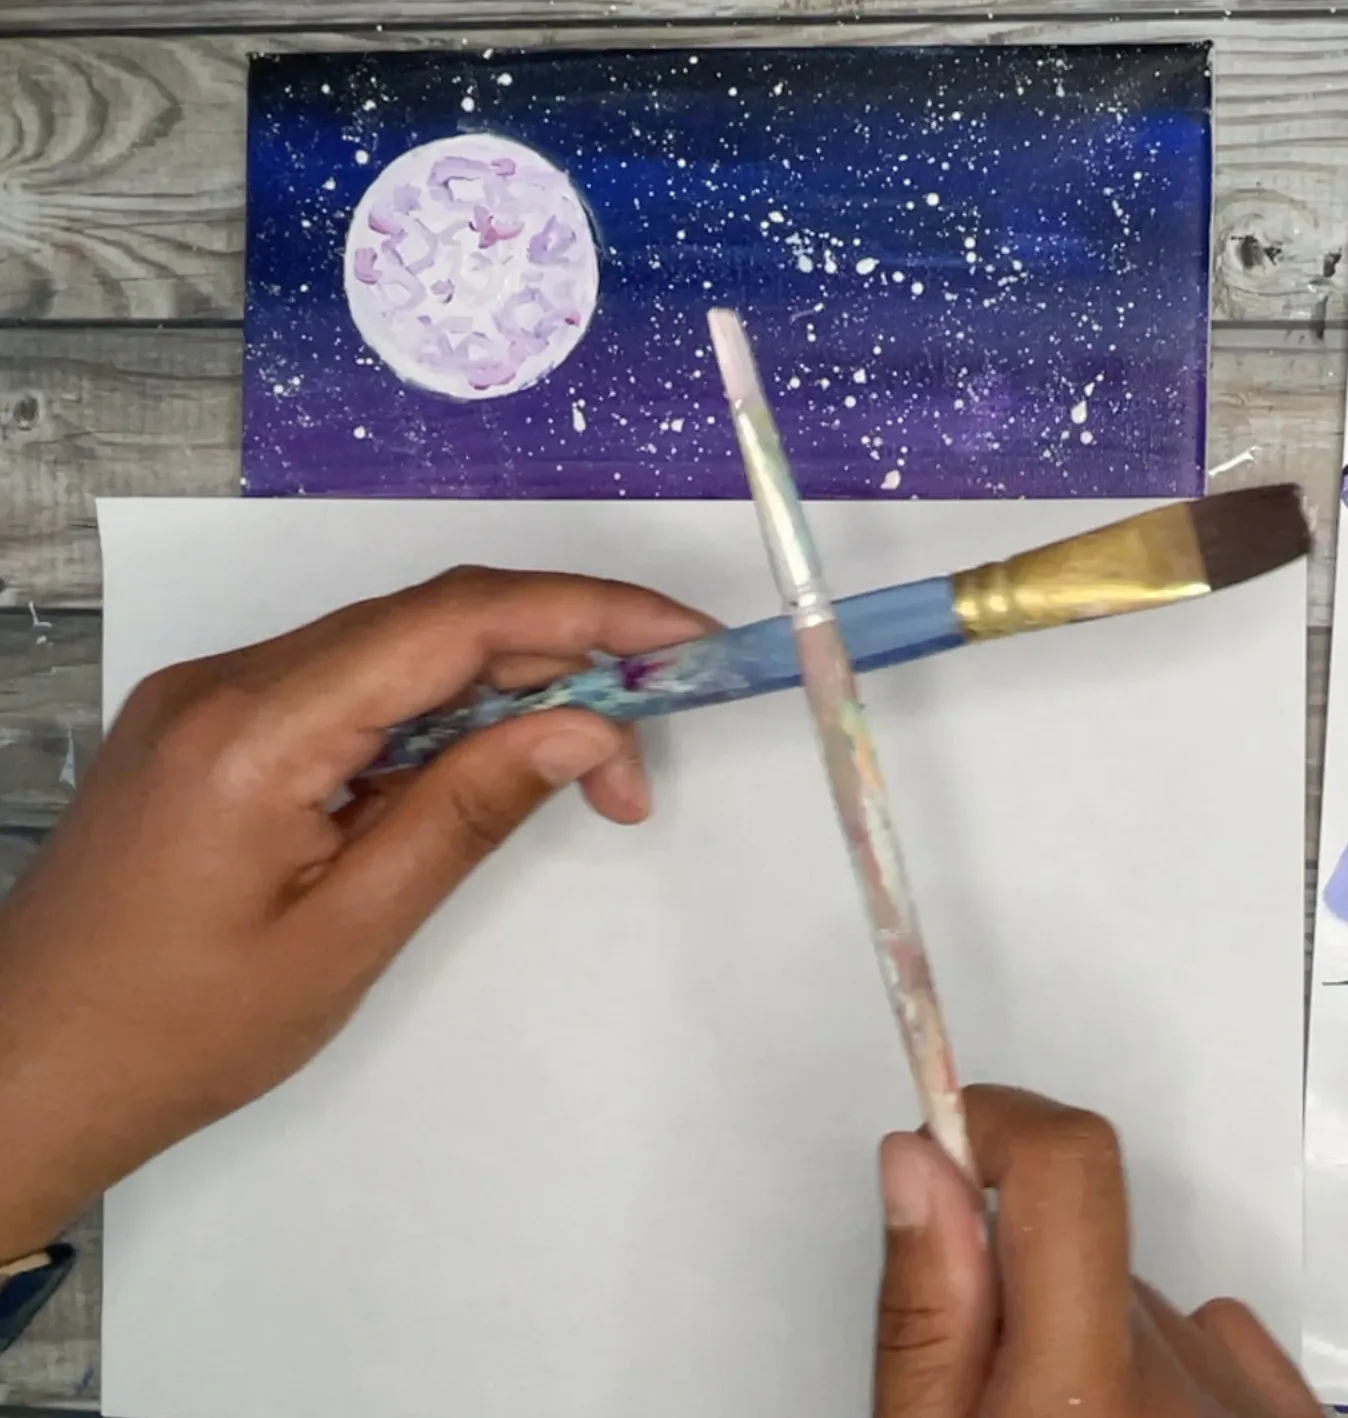
- Leave stars to dry (3-4 minutes)
- Draw your mermaid and mermaid tails, rocks using white chalk, or a pencil or a fine tipped acrylic paint marker. Check out this quick mermaid drawing video.Alternatively you can print the FREE mermaid stencil below and transfer the drawing on canvas using graphite paper (instructions how to transfer drawings to canvas here)

- Using your small flat brush and a tiny amount of white paint paint some white waves (small horizontal lines) on the ocean directly below the moon. This will be the moonlit waters. Make sure to use the round shape of the moon to guide the shape of the water reflections.

- Paint in the rocks, using black paint. Then mix a bit of white with black to create a dark grey color and paint this grey in random areas over your black rocks (this will add more dimension to your rocks). Do this step for all your rocks.

- Mix a skin color of your mermaid. Mix equal amounts of cadmium yellow, quinacridone magenta and ultramarine blue ( you might need to add more magenta and/or yellow to get a warmer skin tone). Then add in small amounts of white to lighten the mix to the desired skin color. You can also refer to this how to make skin color paint blog post for more info. Paint in the mermaids torso, arms and hands with the skin color paint using your small round brush.


- Paint in the full mermaid tail and tail at the bottom left with pure phthalo green using your small round brush. If your paint is thin, you might need to add 2 coats of green. Do this step also for the mermaid "friend" tale diving back into water (bottom left). Wait for your paint to dry.

- Mix a lighter green (1 part white 2 parts phthalo green). Using the tip of your small round brush paint in the scales on the mermaid's tail. For the fin portion, paint in a few lines sweeping down through the fins. Do this step also for the mermaid "friend" tale diving back into water (bottom left).

- Mix an even lighter green (2-3 parts white to 1 part phthalo green). Paint overlapping scales (over top the scales from last step), leaving a 1-2 cm around the border of the tail without these scales.For the fin portion, paint in 2-3 lines sweeping down through the fins with this color. Do this step also for the mermaid "friend" tale diving back into water (bottom left).

- Mix the lightest green (pale green), by mixing a tiny dab of phthalo green with white (should be almost white). Paint in overlapping scales just in the center of the tale (you should be only adding 2-3 scales per row in this step).For the fin portion, paint in a 1-3 lines sweeping down through the fins with this color. Do this step also for the mermaid "friend" tale diving back into water (bottom left).

- Paint in the hair of your mermaid with 2-3 different colors. I used orange, pink, yellow and burgundy. Please see section at the top of this post for the paint mix recipes. You'll use your small round brush to create lines of hair (tendrils of hair) that's flowing down the bottom right of the mermaids back. Tip: leave your paint color dry before moving on to next color of hair. This will prevent the paint colors from blending on canvas and avoid removing the texture.

- Once mermaid's hair paint is fully dried. Add in a few pure white streaks of hair on the top left of her head. This will be the moon light reflection off of her hair.
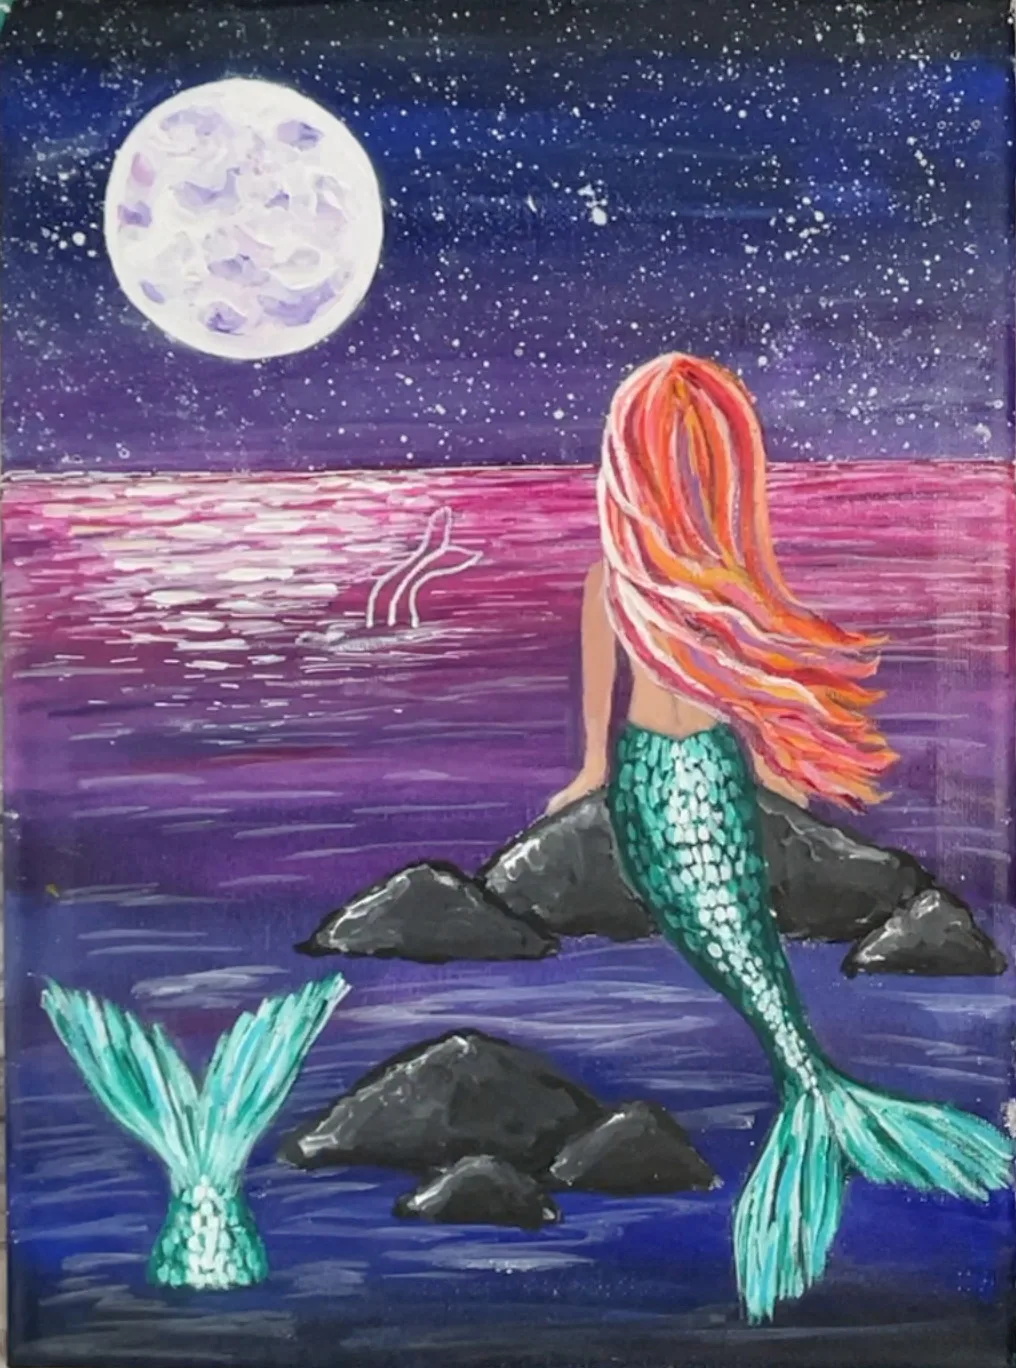
- Taking a silver/gold/metallic paint pen dot in a tiara at the back of the mermaids head. You can also use the back of your paint brush handle, that's been dipped in white paint for a similar effect.

- Paint in the mermaid silhouette tail in the distance with black

- For the glowing moon, paint in a thin layer of thinned down white (like we mixed for the splatter stars) around the moon. Use your q-tip to blend the paint into the sky. If you want a stronger glow effect, repeat adding more white around the moon and blending with your Q-tip

- Using your Q-tip dot dipped in your thin white paint from the last step, dot in 3-4 stars in your sky. The dots should be translucent (I.e. you should still see some of the sky below it). If your paint is too opaque, remove excess paint with q-tip. Once the dots are dry, paint in some detailed star bursts through them, using a fine tipped white paint marker or your smaller round brush/detail brush.


- Optional: add in some extra sparkles in your ocean water where the moonlight is reflecting.
- Optional white highlights: Add pure white highlight to the top left of each rock, top left of mermaid's shoulder, some water splashes around rocks and mermaids tails, and top side of the silhouetted mermaid tail in distance.

Recommended Products
As an Amazon Associate and member of other affiliate programs, I earn from qualifying purchases.
-
 Liquitex 1046317 BASICS Acrylic Paint, 4-oz tube, Phthalocyanine Green
 -
 Liquitex BASICS Acrylic Paint, 4-oz tube, Cadmium Yellow Medium Hue
 -
 Liquitex BASICS Acrylic Paint, 4-oz tube, Quinacridone Magenta
 -
 Liquitex BASICS Acrylic Paint, 4-oz tube, Mars Black
 -
 Liquitex BASICS Acrylic Paint, 4-oz tube, Ultramarine Blue
 -
 Liquitex BASICS Acrylic Paint, 8.45-Oz Tube, Titanium White
 -
 PHOENIX White Blank Cotton Stretched Canvas Artist Painting - 9x12 Inch / 8 Pack - 5/8 Inch Profile Triple Primed for Oil & Acrylic Paints
 -
 Acrylic Paint Pens for Rock Painting, Stone, Ceramic, Glass, Wood, Fabric, Canvas, Metal, Scrapbooking. (6 Pack) Set of 3 Gold & 3 Silver Acrylic Paint Markers Water-Based Extra-Fine Tip 0.7mm
 -
 Paint Pens White Marker 6 Pack,0.7mm Acrylic White Permanent Marker,White Paint Pens for Rock Painting Stone Ceramic Glass Wood Plastic Glass Metal Canvas Water-based Extra Fine Point


Mermaid FREE Stencil Download
Right click on the image below and click “save as” to download and save the stencil to your device. Once downloaded you can print out the stencil then transfer the drawing to canvas.

Like this mermaid painting tutorial? Please pin it!

