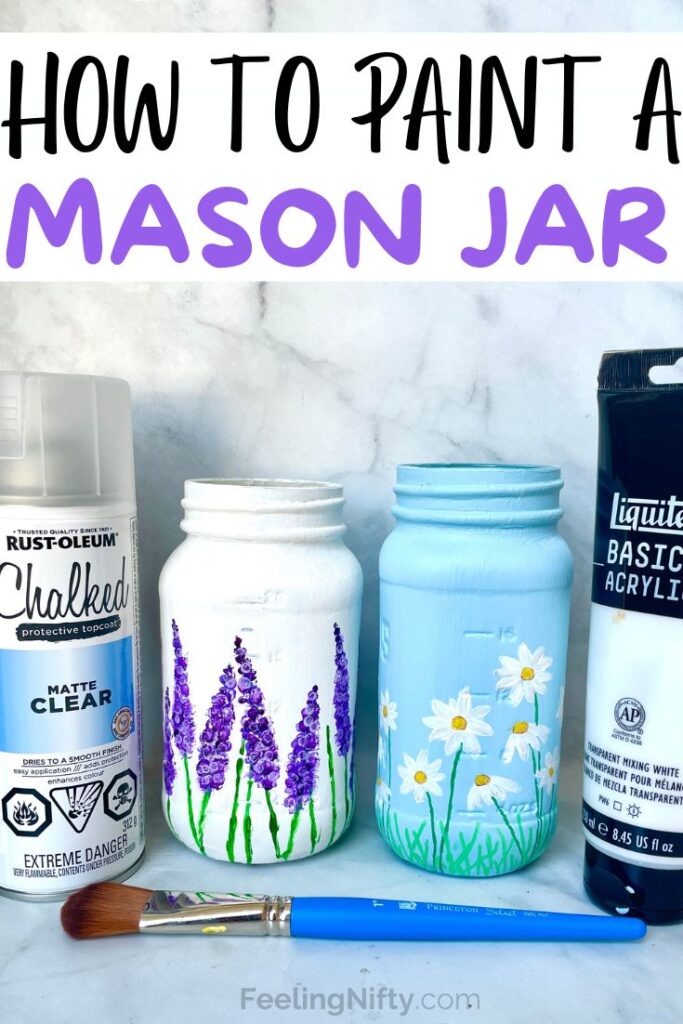
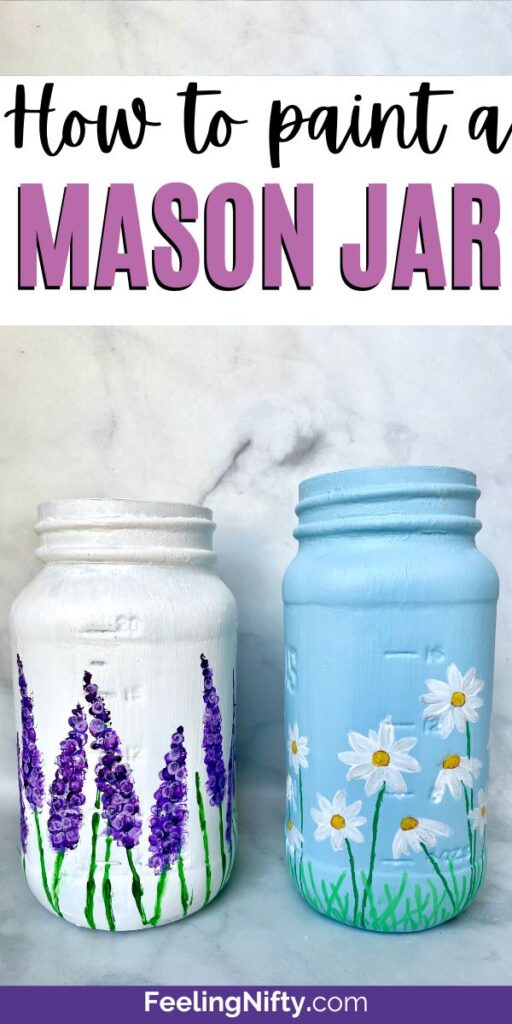
How to Paint Mason Jars: Step-by-Step Guide for Stunning Results
Ready to embark on a step by step journey and learn how to paint mason jars like a pro? We've got you! If you've been wondering how to transform a simple mason jar into a stunning piece of home decor, this guide will unlock all the mason jar painting secrets. Then grab your jars, paints and materials and get ready to achieve some stunning results that will leave your guests in awe.
In this article you'll be guided through all the steps with tips and techniques along the way. From selecting designs, prepping the surface, choosing the right paint, and adding perfect finishing touches that make your mason jar as unique and beautiful as you!
We'll also dive into different creative ideas for displaying these beauties and share important maintenance tips to ensure their longevity.
So whether you're a passionate crafter or have never touched paints before, get ready to be inspired.
Let's explore the world of painted mason jars together and discover how you can easily turn a simple glass jar into a remarkable work of art and enjoyable painting idea.
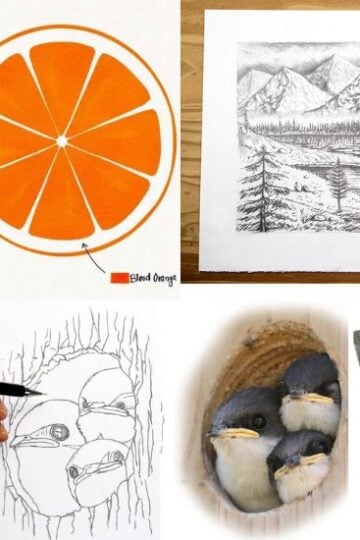
Before we begin, if you're looking for more home-decor friendly craft projects, then head over to this 71+ easy crafts for adults post.
Why Paint Mason Jars ?
Mason jars have become a beloved trend with DIY enthusiasts and in the world of interior design. These charming jars add a lovely blend of rustic style and artfulness making them perfect for adding that personal touch to your home decor.
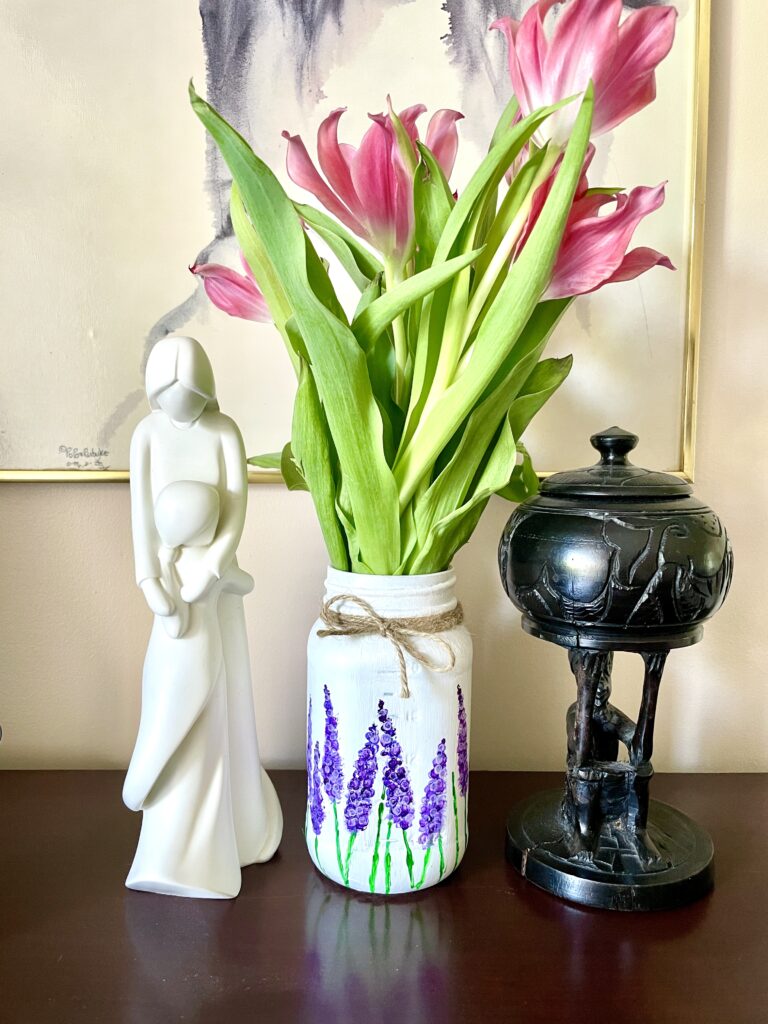
Looking at the gazillion ideas online you'll see they're used as enchanting centrepieces, stylish storage solutions, one-of-a-kind flower vases and more!
The allure to the painted mason jar is in their simplicity, cost and accessibility. Many people often have them already at home and don't even realize it.
You know those glass jars of pasta sauce you add to your weekly grocery list?
Yup- they're mason jars!
Simply remove the paper label with some warm water and soap and you're off to the races.
If you don't have any laying around then you might be able to score one for free in your local buy nothing group (that's how I got both of mine).
Materials Needed for Painting Mason Jars
Another benefit of painted mason jars is the materials list is very basic.
You might be thinking you need a special type of paint that sticks to glass but your everyday acrylic paint will work. I'll share some tips further down this article that will give you a way to seal the paint onto the glass, but it's not needed especially if your jars won't be handled much.
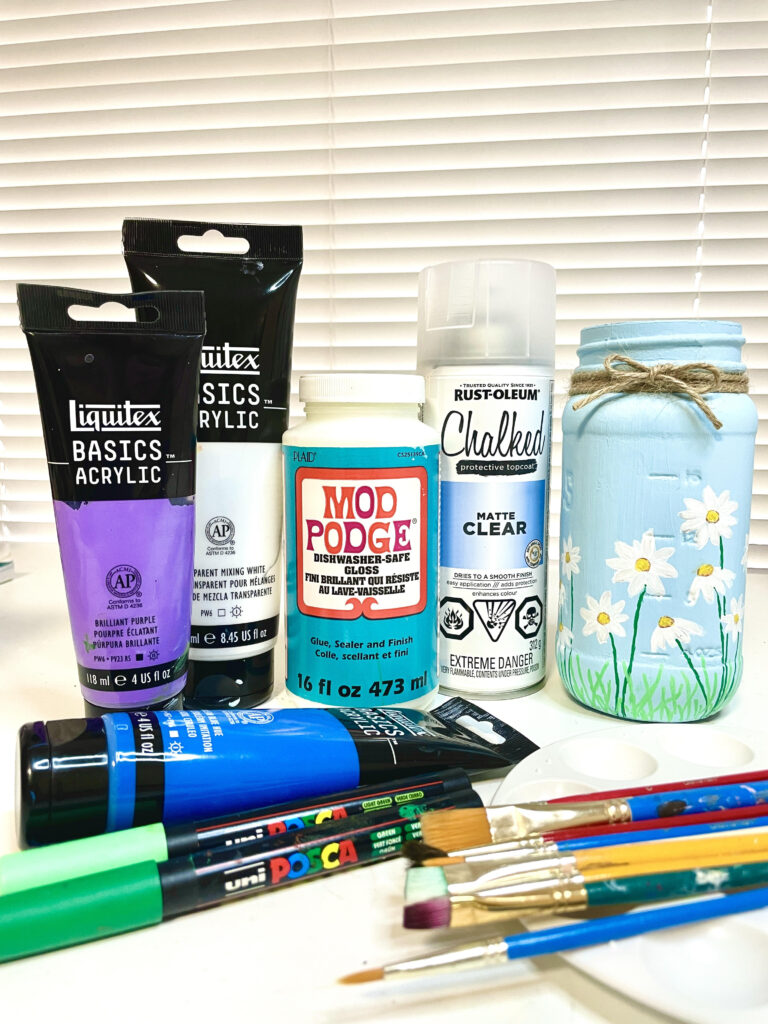
Here's the list of essential supplies for the painting process.
- Mason Jar
- Rubbing alcohol and cotton balls (optional)
- Acrylic paints or chalk paints
- Paint Palette for pouring paint onto and grabbing with brush
- Paint brushes
- Hair dryer (for faster drying time between coats)
- Paint markers for fine details (optional)
- Spray-on or brush-on sealer
Preparing Mason Jars for Painting
In order for the paint to adhere properly to the glass surface you'll need to clear your jar so it's free from any oily residue (food, finger prints, etc.). The easiest and most effective way to clean your jar is with warm water and soap. Then leave jar to dry completely before painting.
Another option that I've seen crafters do is to clean the glass with some rubbing alcohol which has the same effect of soap and water. If you have any of that laying around the home that never gets used, then this is the perfect excuse!
Choosing the Right Paint for Mason Jars
With your squeaky clean mason jar in hand you then might be asking yourself: what kind of paint do you use on a mason jar?
There are a few options out there, and the type of paint will depend on your project.
If you're painting your mason jar and it will be washed or handled often (like a vase of flowers) you could you a specialized Enamel Glass and Ceramic Paint like this one from Folkart.
The benefit of using a specialized glass paint is it's often one step and done. There's no need to do a base coat, prime or apply a sealer at the end. Also, once cured (letting air dry or baking it for extra durability) it is top rack dishwasher safe.
Just remember to avoid painting anything that will have direct contact with food (even with a glass paint and sealer).
That being said, if your DIY project is not going to be handled a lot, like if will sit on a shelf as a piece of home decor, simple acrylic paint will do. The same acrylic paint you use for your canvas paintings, or painting projects.
If you don't have any acrylic paints at home, then you can buy some simple craft paints at your local Dollar Store. The only caveat with the thinner liquid style craft paint (often sold in bottles) is you may need extra coats to get full coverage.

Another type of paint you can use on mason jars is chalk paint. Chalk paint gives a very matte finish that looks great for shabby chic looking projects (you can even use sandpaper on it to get an extra "worn" look).
The benefit of chalk paint is it's thicker consistency compared to acrylic paint which results in less layers. However, crafters have noted that because of the thicker consistency it may leave brush marks if not applied properly.
The tips for the smoothest finish with chalk paint is to use a foam brush and apply the thinnest layers of paint, and letting each layer dry completely before the next.
Does paint stick on mason jars?
Once you pick the right paint for your project, you'll need to figure out if you need to seal it or not. If you're using a glass enamel paint, simply follow the instructions and it should be permanently bonded to the glass (top rack dishwasher safe). However, if you're using regular acrylic paints, craft paints or chalk paint you have the option to seal it.
If your projects are going to be on a shelf or used as decor with minimal handling, you don't have to seal your jars.
I you do decide to seal the jars, you can use a brush-on or a spray-on sealer. Read next for instructions on how to seal your mason jars.
Curing and Sealing Painted Mason Jars
Sealing or curing your mason jars is an important step if you want to preserve your jar art over a number of years. Sealing them make them scratch and chip resistant, water resistant, and prevent the colors from fading over time. It also adds a professional and polished touch to your pieces if you'll be gifting or selling them.
If you're using an enamel speciality glass paint, the instructions on the label will most likely tell you how long it will take for the paint to cure. They usually give you 2 options: the first is to leave it to air dry for x number of days, the second is to bake it in the oven for faster curing time (for projects you need completed asap). Once cured, you should be able to wash them or top-rack dishwasher safe in some cases.
If you're using a normal acrylic paint or chalk paint and want to make sure the paint doesn't scratch or chip off, then sealing it is a good idea. The first step is to make sure your paint is fully dried before sealing it.
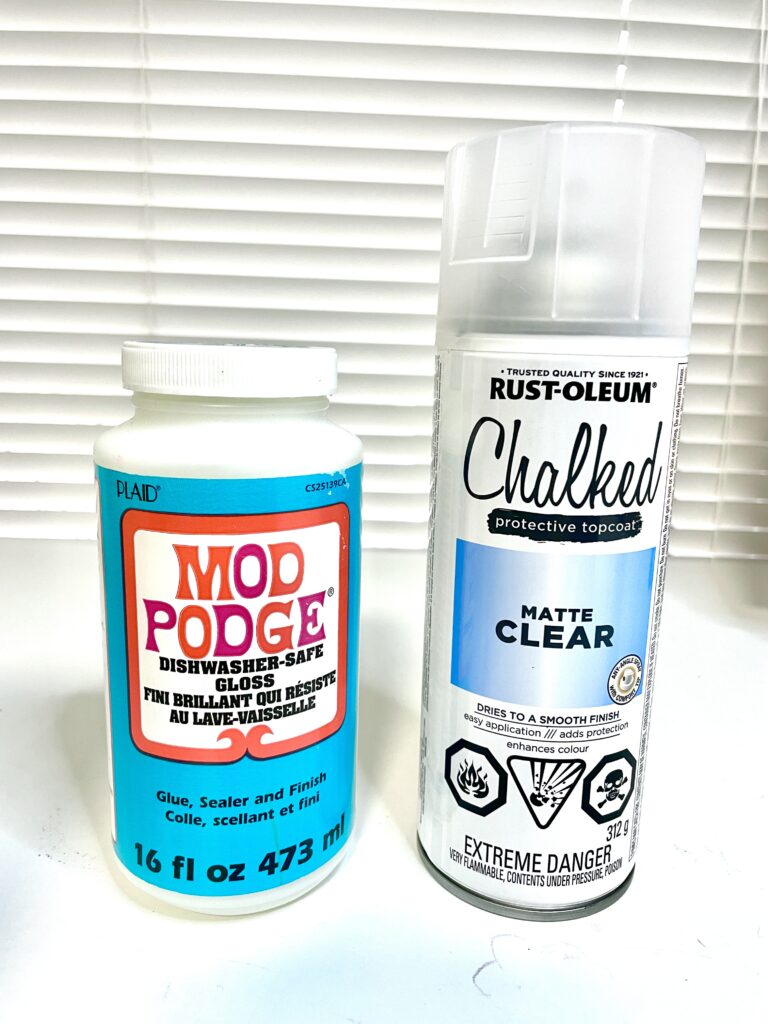
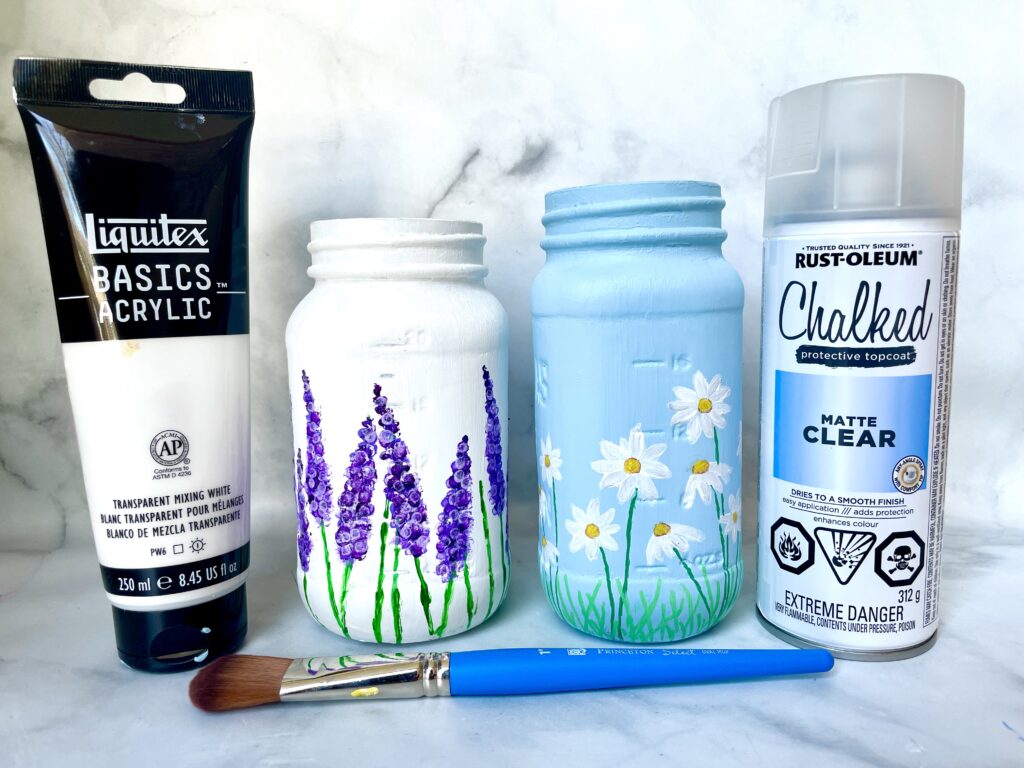
Once fully dried you can use your choice of sealer. For the project below I used the Rust-Oleum Chalked spray-on sealer in a matte clear finish and it was very fast, effective and easy to use.
The benefit of the spray-on sealer compared to the brush on (example: Mod Podge Dishwasher Safe Sealer) is that it doesn't leave brush marks. Another benefit is that it's very fast and you can seal multiple pieces at once.
The drawback for the spray-on sealer is that you need to spray outside with proper ventilation as the fumes are very strong. The brush-on sealer you can do indoors and you have more control as to where you apply it. The drawback of the brush-on sealer is if applied too thickly or with a rougher brush, it can dry with brush marks.
As a benefit, sealers can also brighten up the color of your paint which works great for vibrant /punchy pieces! Read the label of your sealer for more information.
Selecting a Design or Theme
Now that you know all the technicalities of how to paint a mason jar, it's time to have some fun and use your creativity! Picking a design on your mason jar is a bit like starting out with a blank canvas before you paint something. For some people this can be a welcome activity, but for some it can be overwhelming and nerve-racking.
Regardless if you have a dozen ideas already swimming around in your head or you have none, the ideas below will help inspire you. This will help you start of your project with clear direction and confidence which makes it more enjoyable.

Tip #1 : Check out Ideas Online
Curated lists that are thoughtfully put together, like ModPodRocksBlog's list of 75+ mason jar painting ideas is a great place to start.
Tip # 2 : Keep It Simple and Solid
Instead of overcomplicating the design, why not just pick 1 solid color? Some ideas for solid colors : white, robin-egg blue, pastel colors, or try some vibrant punchy colors like yellow, purple and pink!
If you like farmhouse style then use a piece of sandpaper and scratch off some paint to make it look worn.
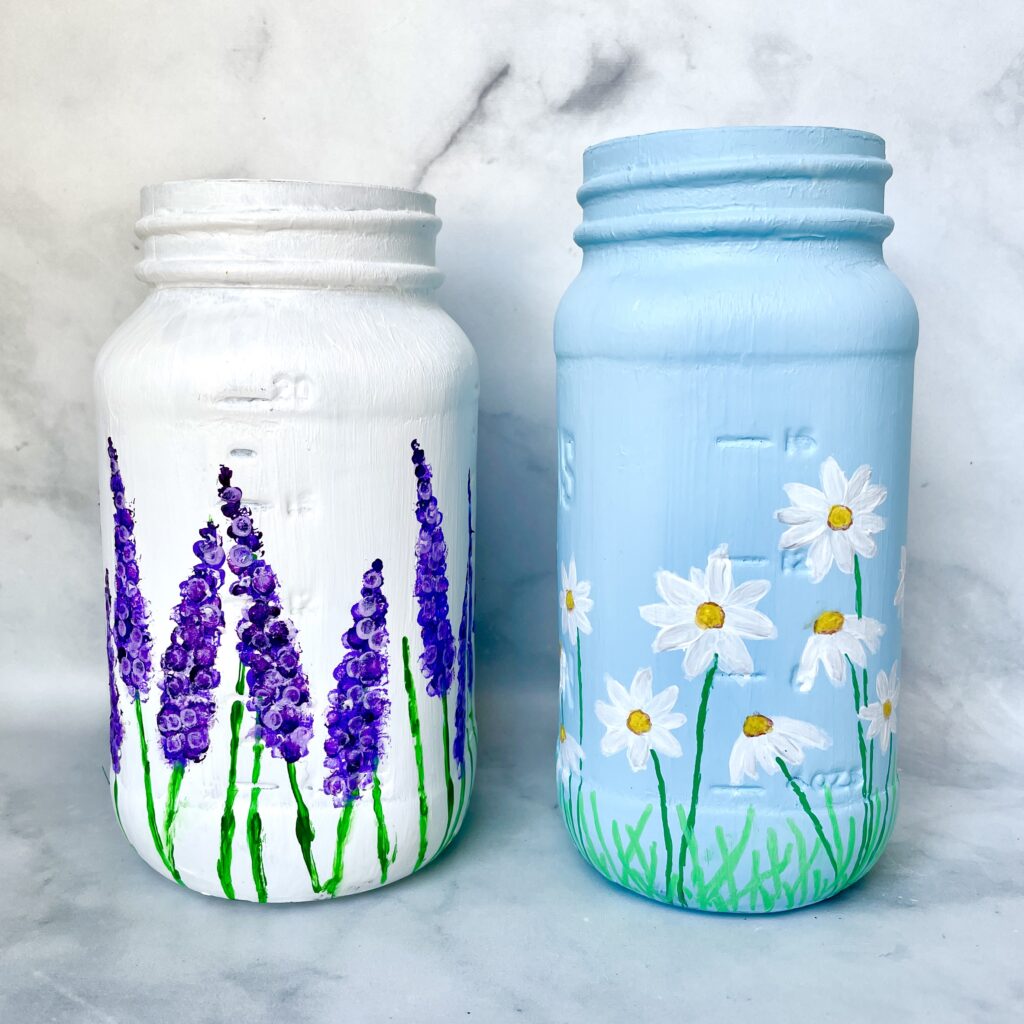
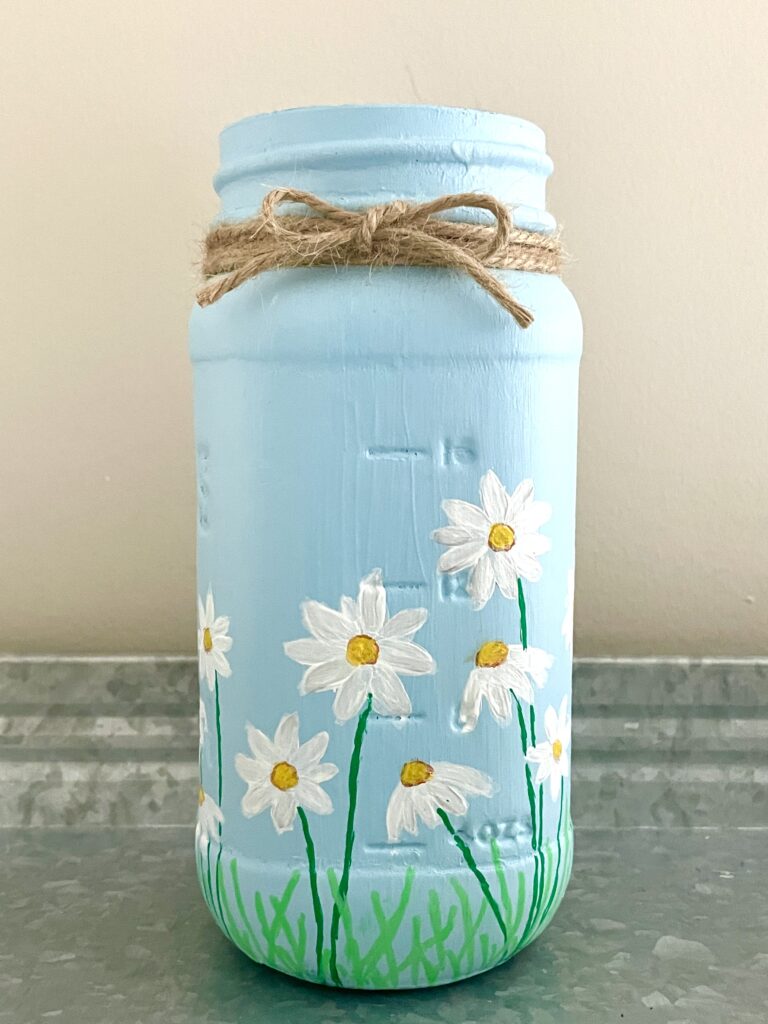
Tip # 3: Paint Flowers
Flowers are always an easy and beautiful design to paint. The easiest flowers to paint are the lavender flower (which you can paint with q-tips!) and daisy flowers. Both of which I painted in the jars below. You can also pick your favorite flower or paint a beautiful bloom in your yard. The possibilities with flowers are endless.

Tip 4: Pointillism Style with Easy Negative Space Hack
This super easy idea can work on a variety of surfaces like canvas, ceramic mugs and glass mason jars! This method is also easy enough for kids. Check out this Sharpie mug tutorial that used the pointillism method and a simple sticker to create the negative space.
Simply add a sticker of choice on a solid painted mason jar. Then using a oil based Sharpie or paint brush, create dots in different colors around the edges of the sticker. Remove the sticker when done and you won't believe your eyes with the awesomeness of this design!
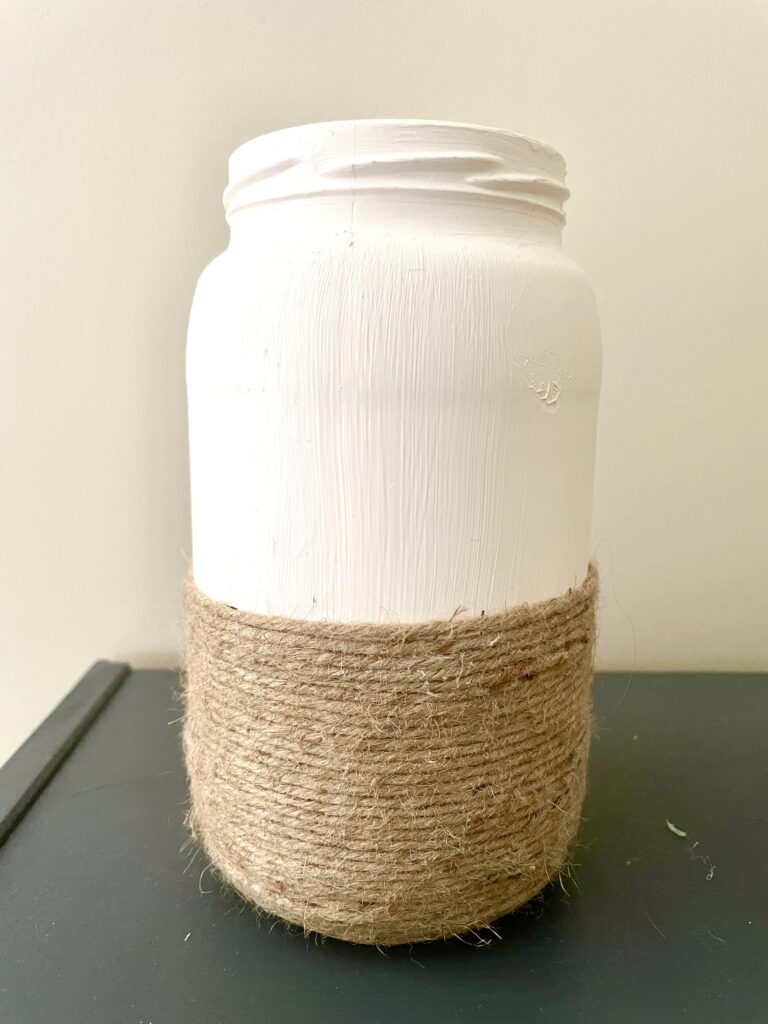
Tip 5: Wrap Twine String Around Base Of Jar
First paint your jar white or any solid color. Then take some twine and a glue gun and wrap the string around the bottom half of the mason jar. This will give an inexpensive and unique, country vibe to your jar, that's super easy to do to. Follow the painted glass jar tutorial here.
Techniques For Applying The Base Coat Evenly And Smoothly
Below are some tips for the most streak-free and smoothest paint application on your mason jars.
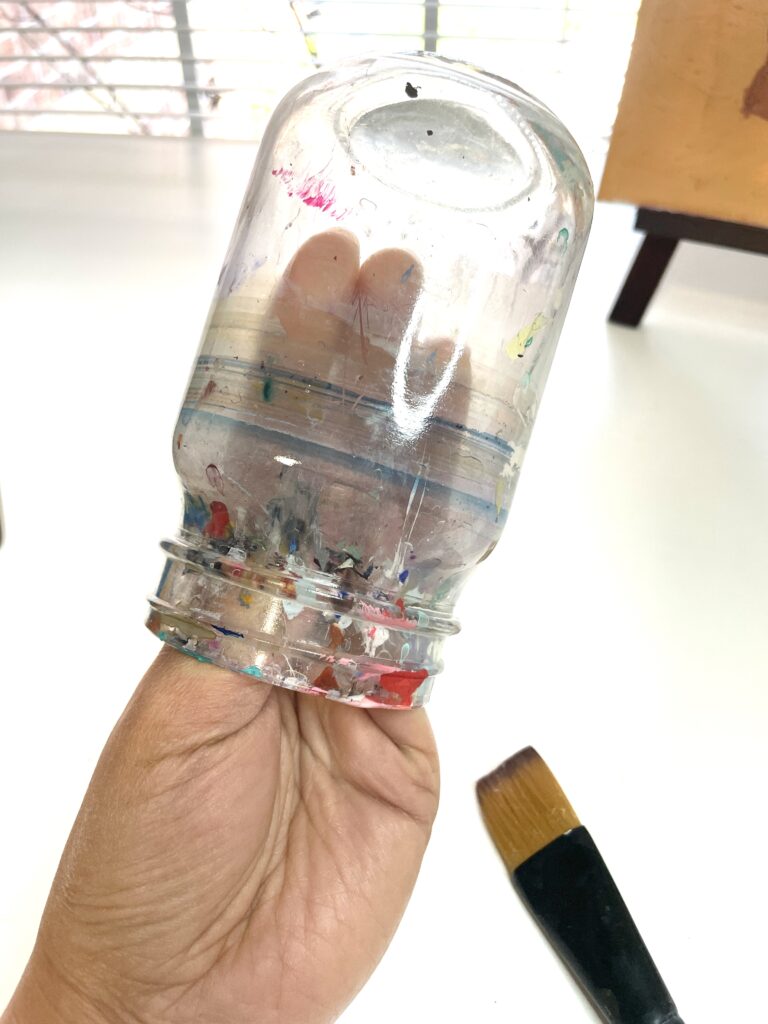
To prevent your fingerprints from mucking up a smooth paint application, hold your jar with your hand inside the mouth of the jar (jar will be upside down). Use your wrist to rotate the jar as you paint.
Use a foam brush for smoothest paint application. You can use a normal brush too just make sure the bristles and nice and soft and pliable. Use vertical, up and down, paint strokes to apply thin layers paint.
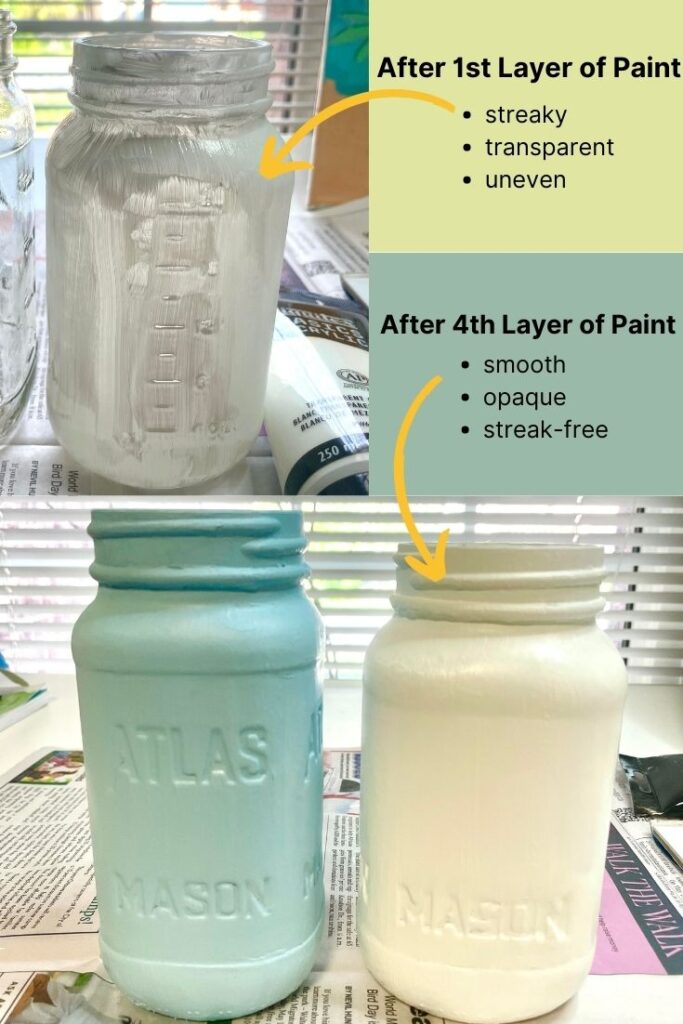
Another tip is to apply multiple thin coats of paint. Leave each layer to completely dry before the next and work up to an opaque, smooth finish. The initial 2-3 layers will appear streaky so don't fret! Just continue adding layers and that streaky look will transform into smooth even paint application.
To speed up drying time en between coats, use a hair dryer.
You can also use painters tape. Use it to add crisp lines and stripes as nifty design elements. Or add the tape to the inner lip of the jar so excess paint doesn't get on the inside.
Step-By-Step: How To Paint a Mason Jar

Learn how to paint a mason jar from start to finish with acrylic paints. Learn what materials/supplies and tips and techniques to get your mason jars looking A+ !
Materials
- Mason Jar
- Rubbing Alcohol and Cotton Balls (Optional)
- Acrylic craft paint (white, green and purple)
- Palette
- Q-Tips
- Small Brushes
- Sealer (Spray or Brush on)
Instructions
- Prepping the Surface: clean your mason jar with warm soapy water, then leave to dry completely. Alternatively you can clean surface of jar with a cotton ball dipped in rubbing alcohol Let dry completely before next step. Minimize handling the jar with hands after cleaning (natural oils from fingers can cause oily residue on jar and impede the paint from sticking properly).
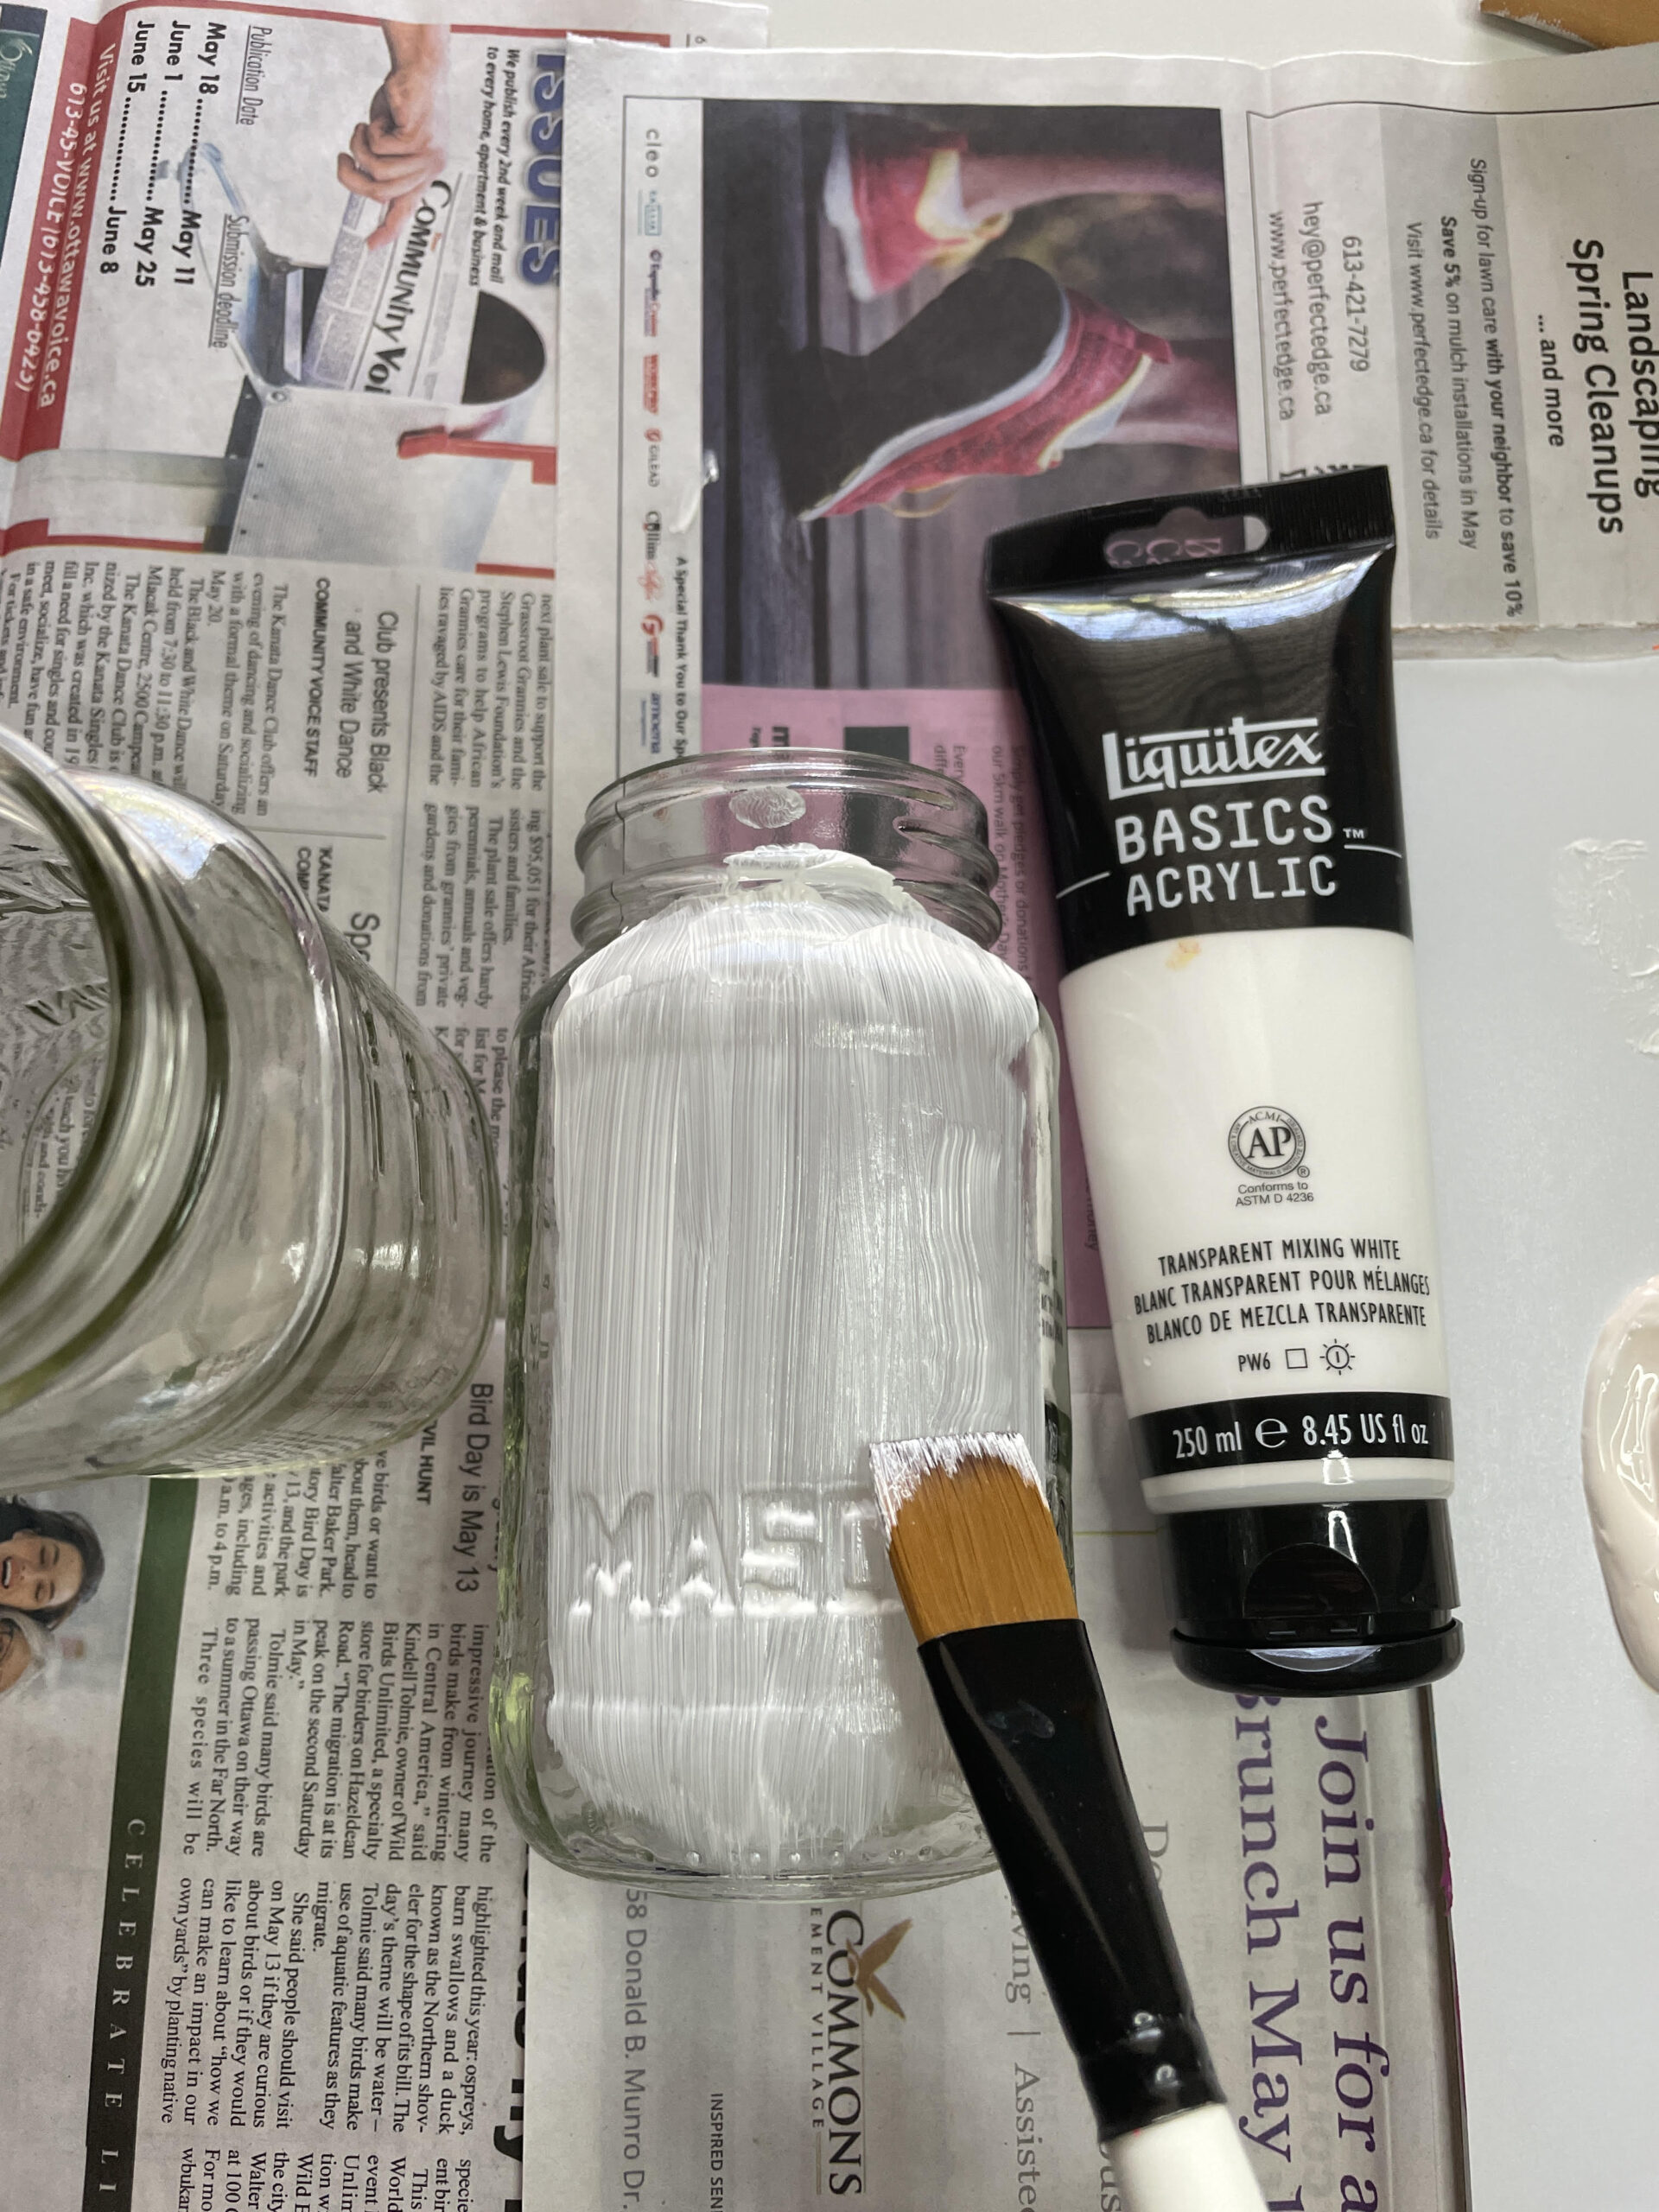
- Applying the Base Coat: take a foam brush or regular brush, dip it in your paint of choice and apply the first layer of acrylic paint to the outside of the jar. For smoother, less streaky application, use the thinnest layer of paint with vertical up and down strokes. Also leave to dry completely before starting the next layer. For faster drying time use a hair dryer.

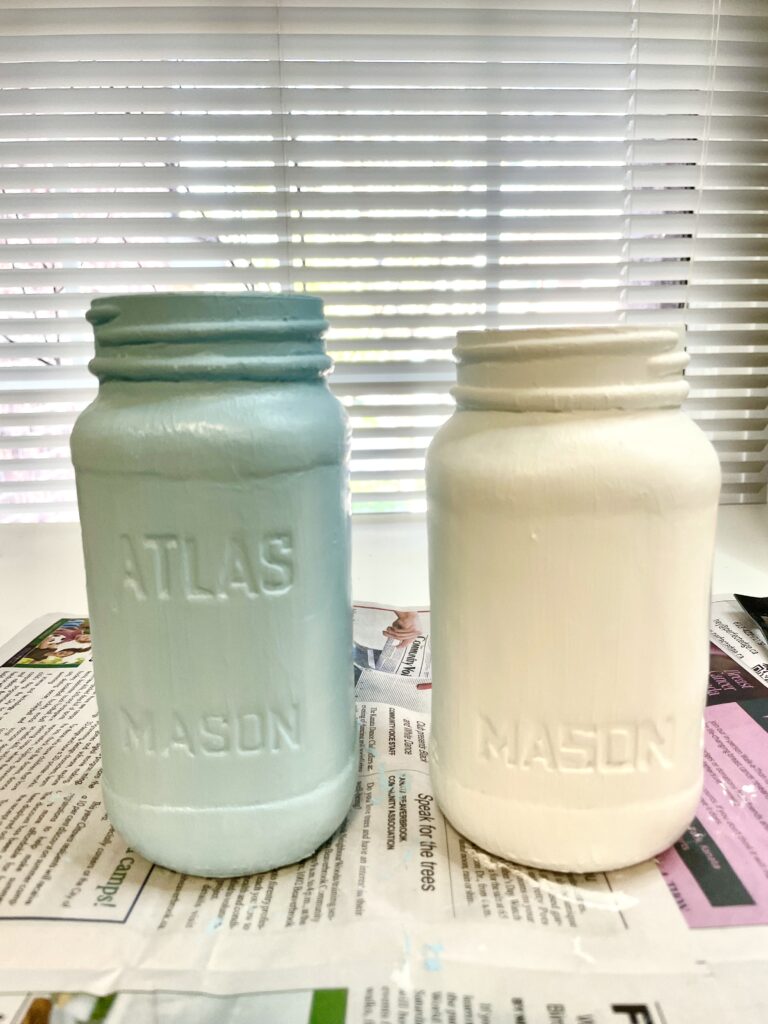
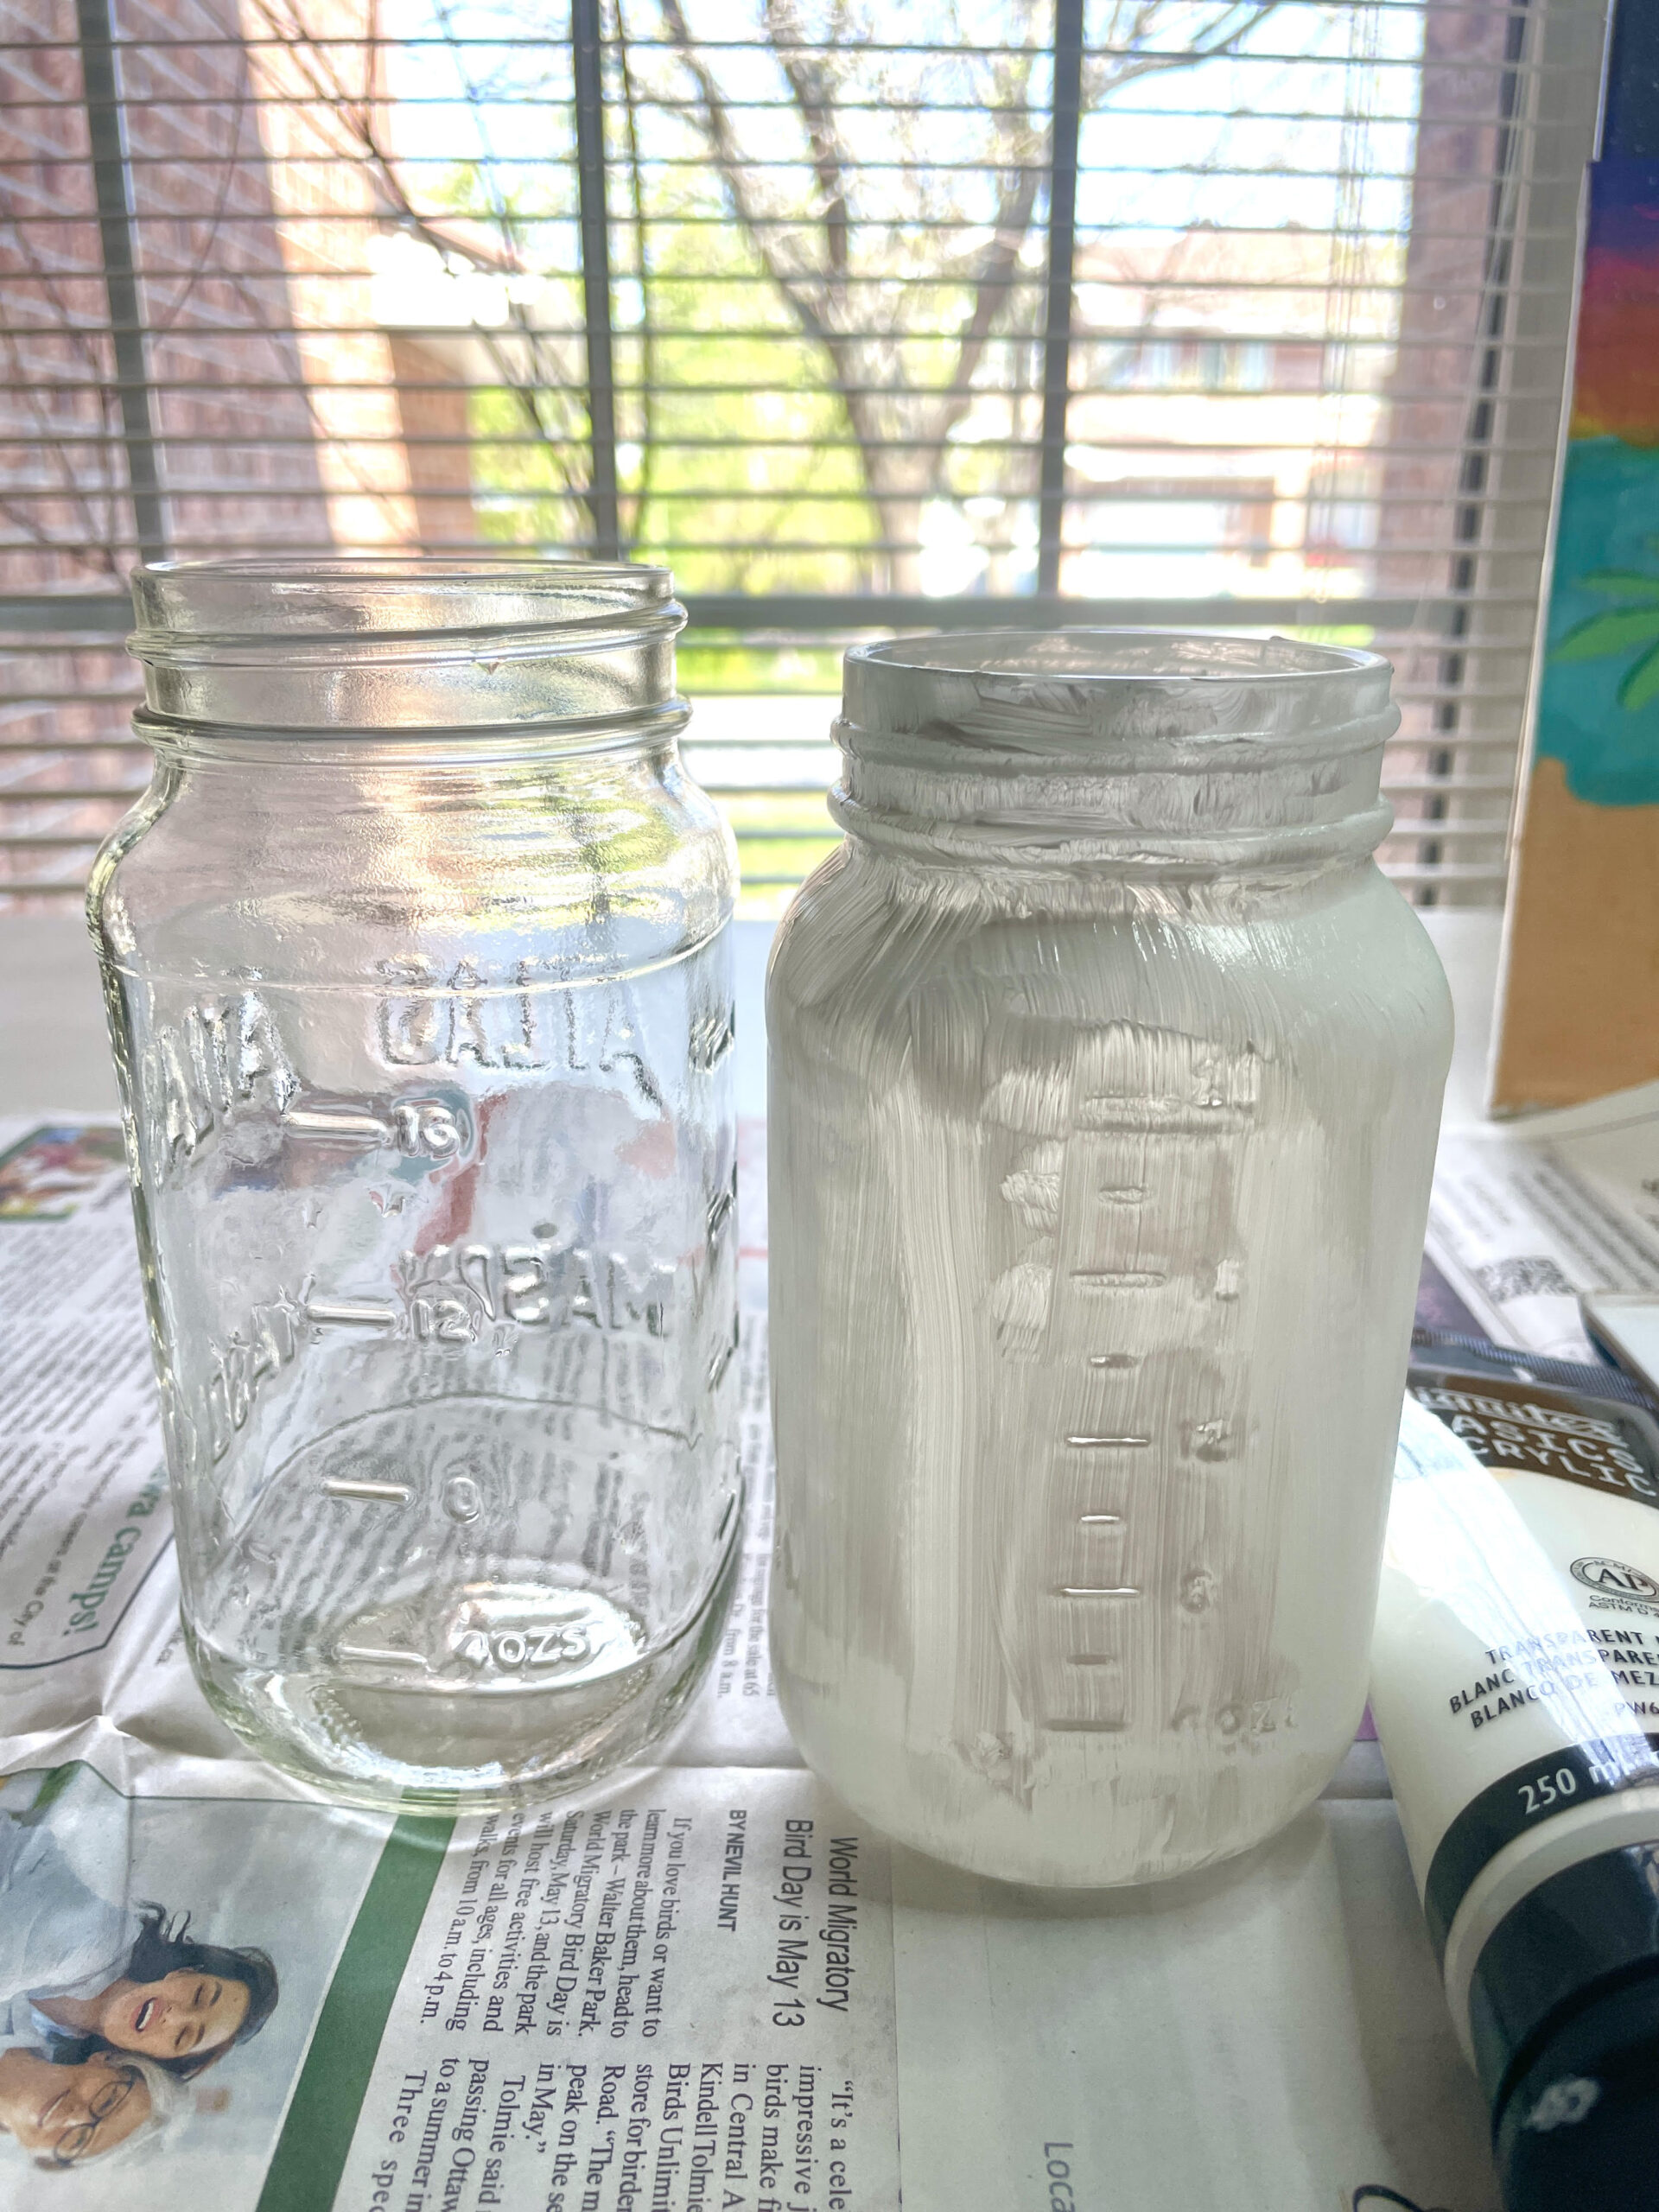
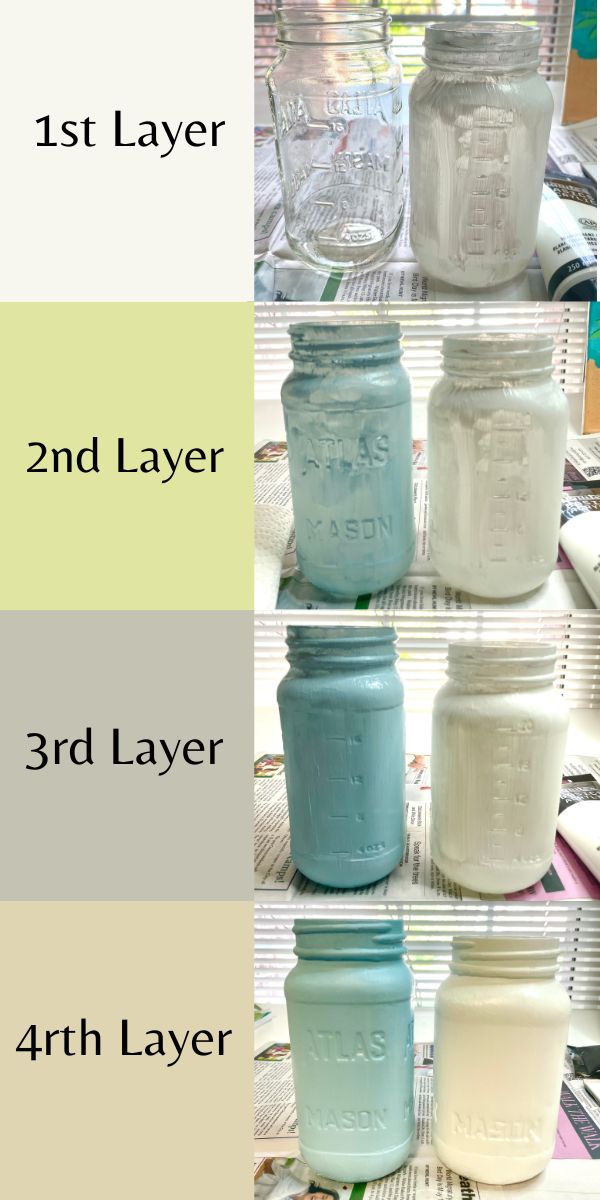
- Repeat adding 3-4 more layers of paint, letting each layer to completely dry before the next. The number of layers will depend on the thickness and opacity of the paint you're using. For the Liquitex Basics paints I needed 4-5 layers to achieve the finish I wanted. The paint color also effects the number of layers. I found the plain white paint took more layers to achieve the same look as the light blue paint. Don't be discouraged if your paint looks super streaky and uneven the first few layers, just keep layering up and it'll turn out!

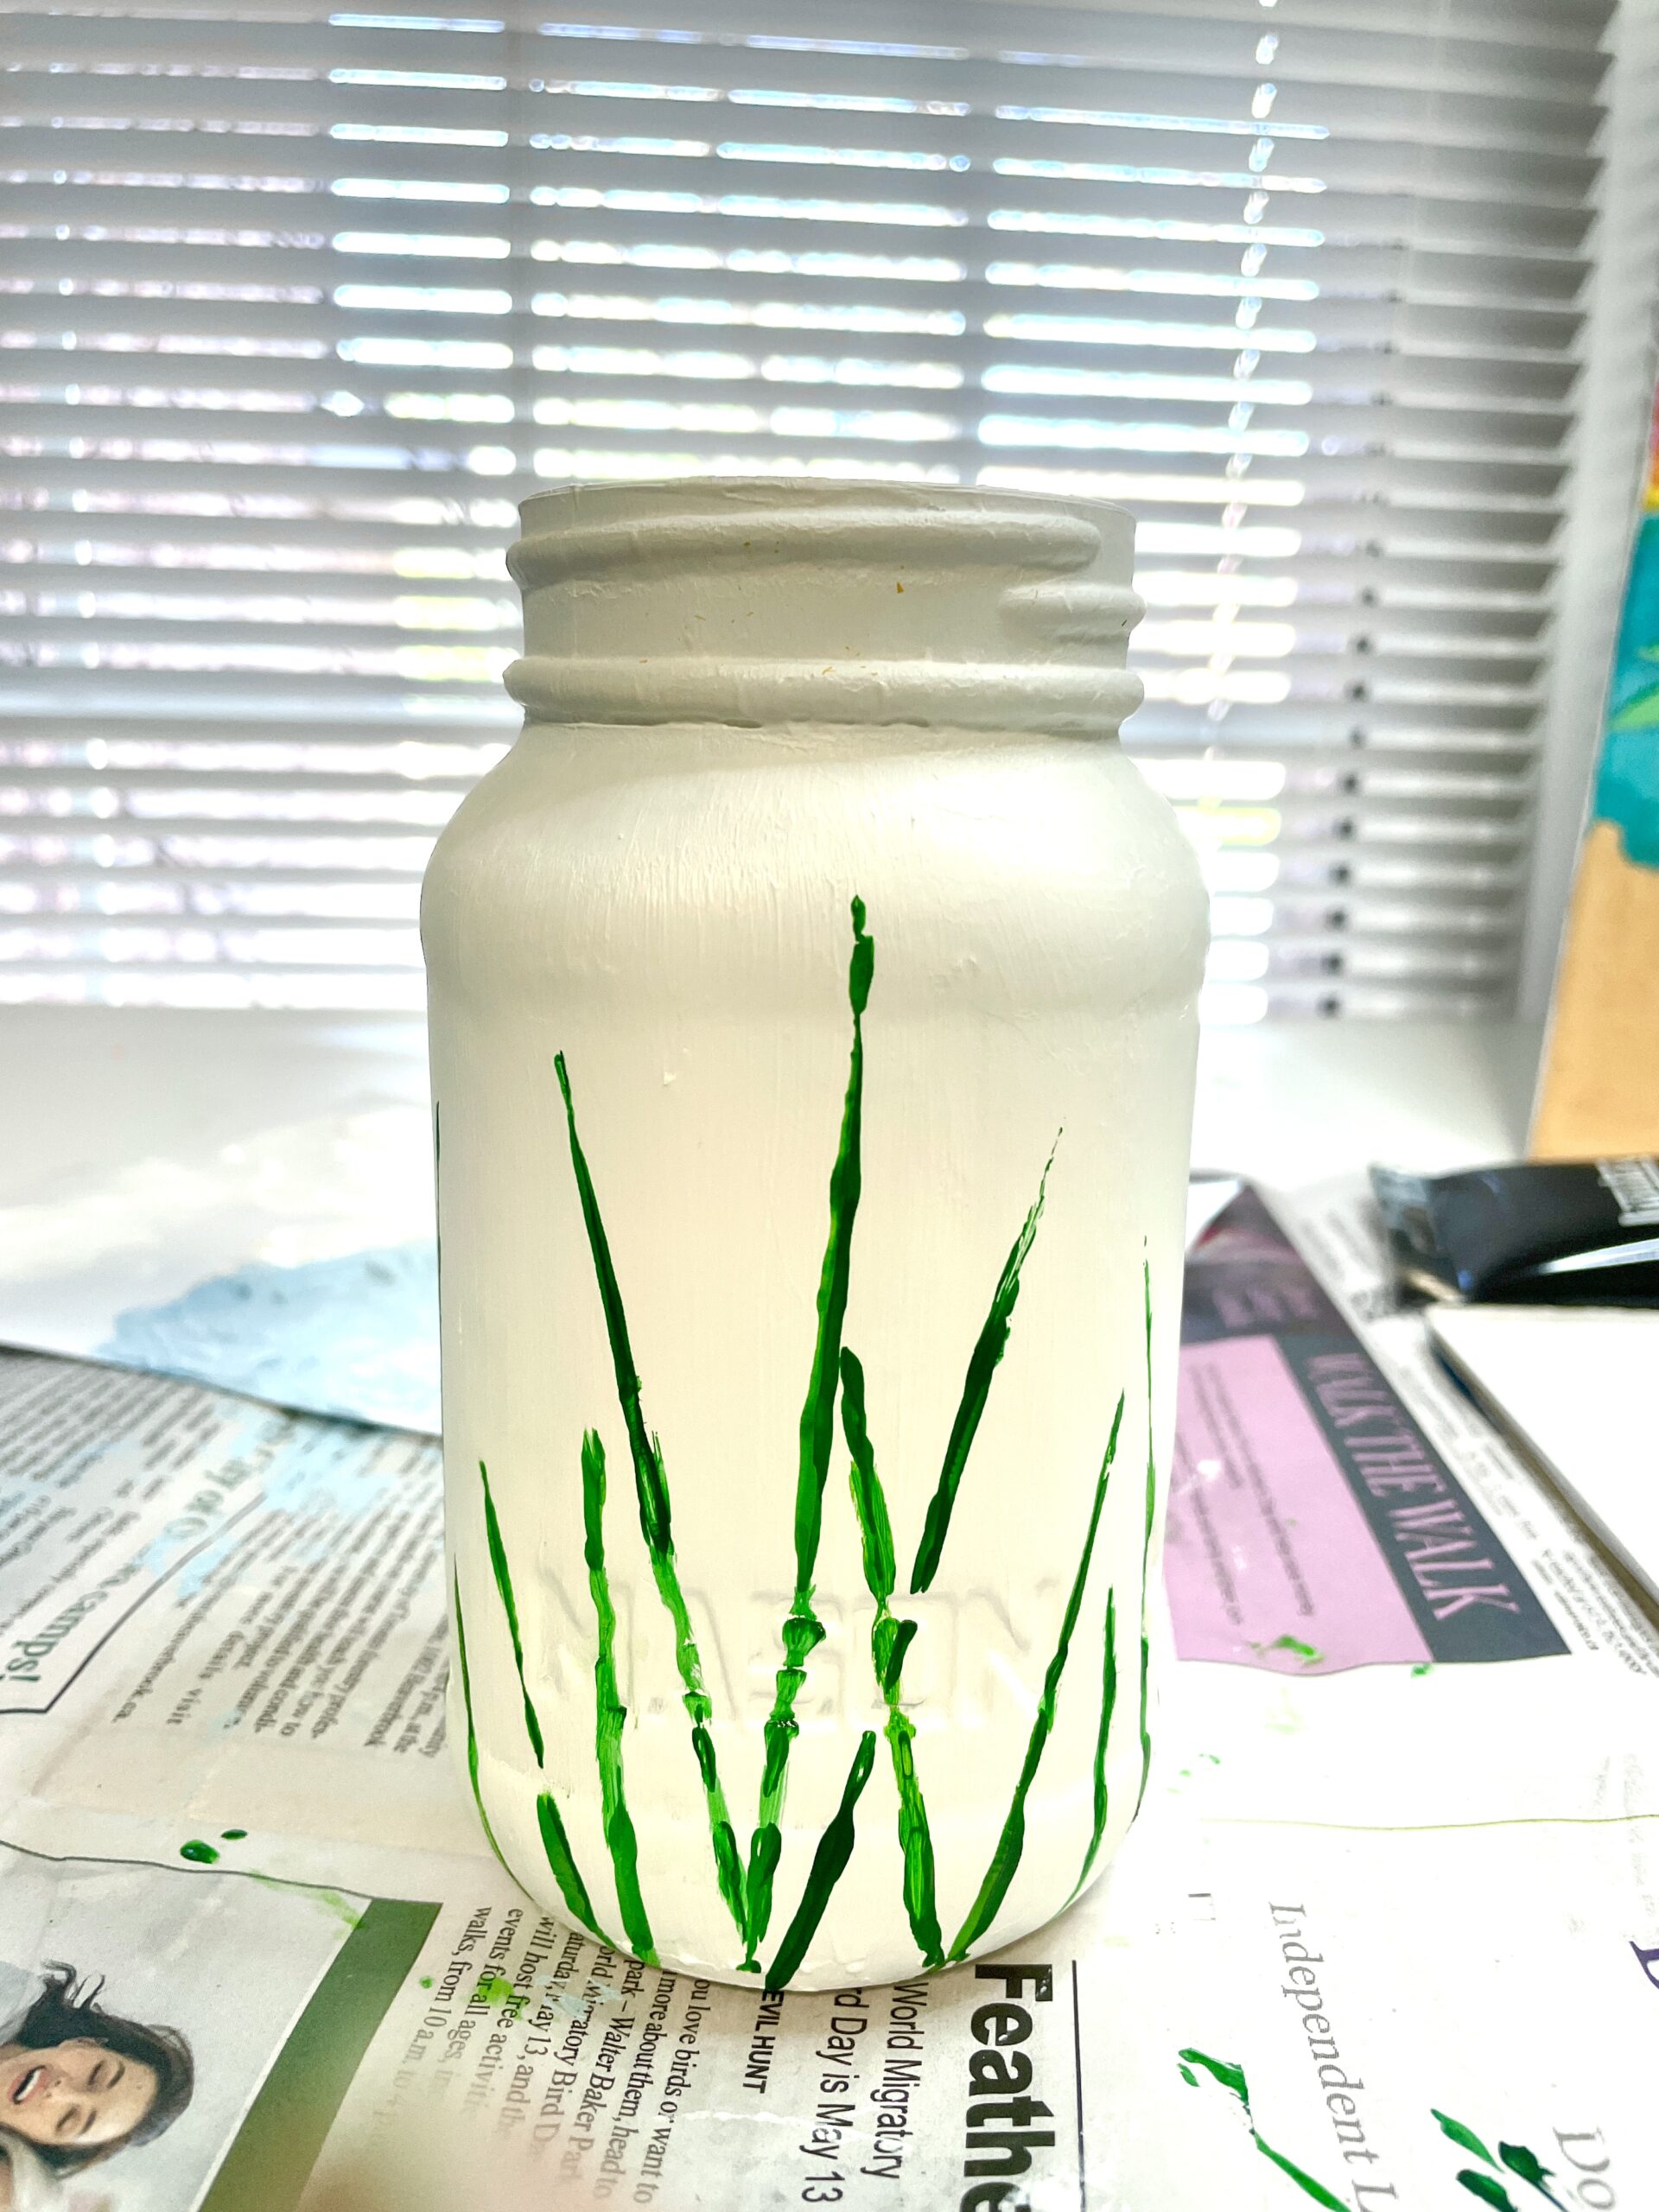
- Using a green paint marker or a small paint brush and green paint, make the lavender flower stems from bottom of jar upward. For more detailed steps on how to paint these lavender flowers check out the tutorial. Leave stems to dry completely.
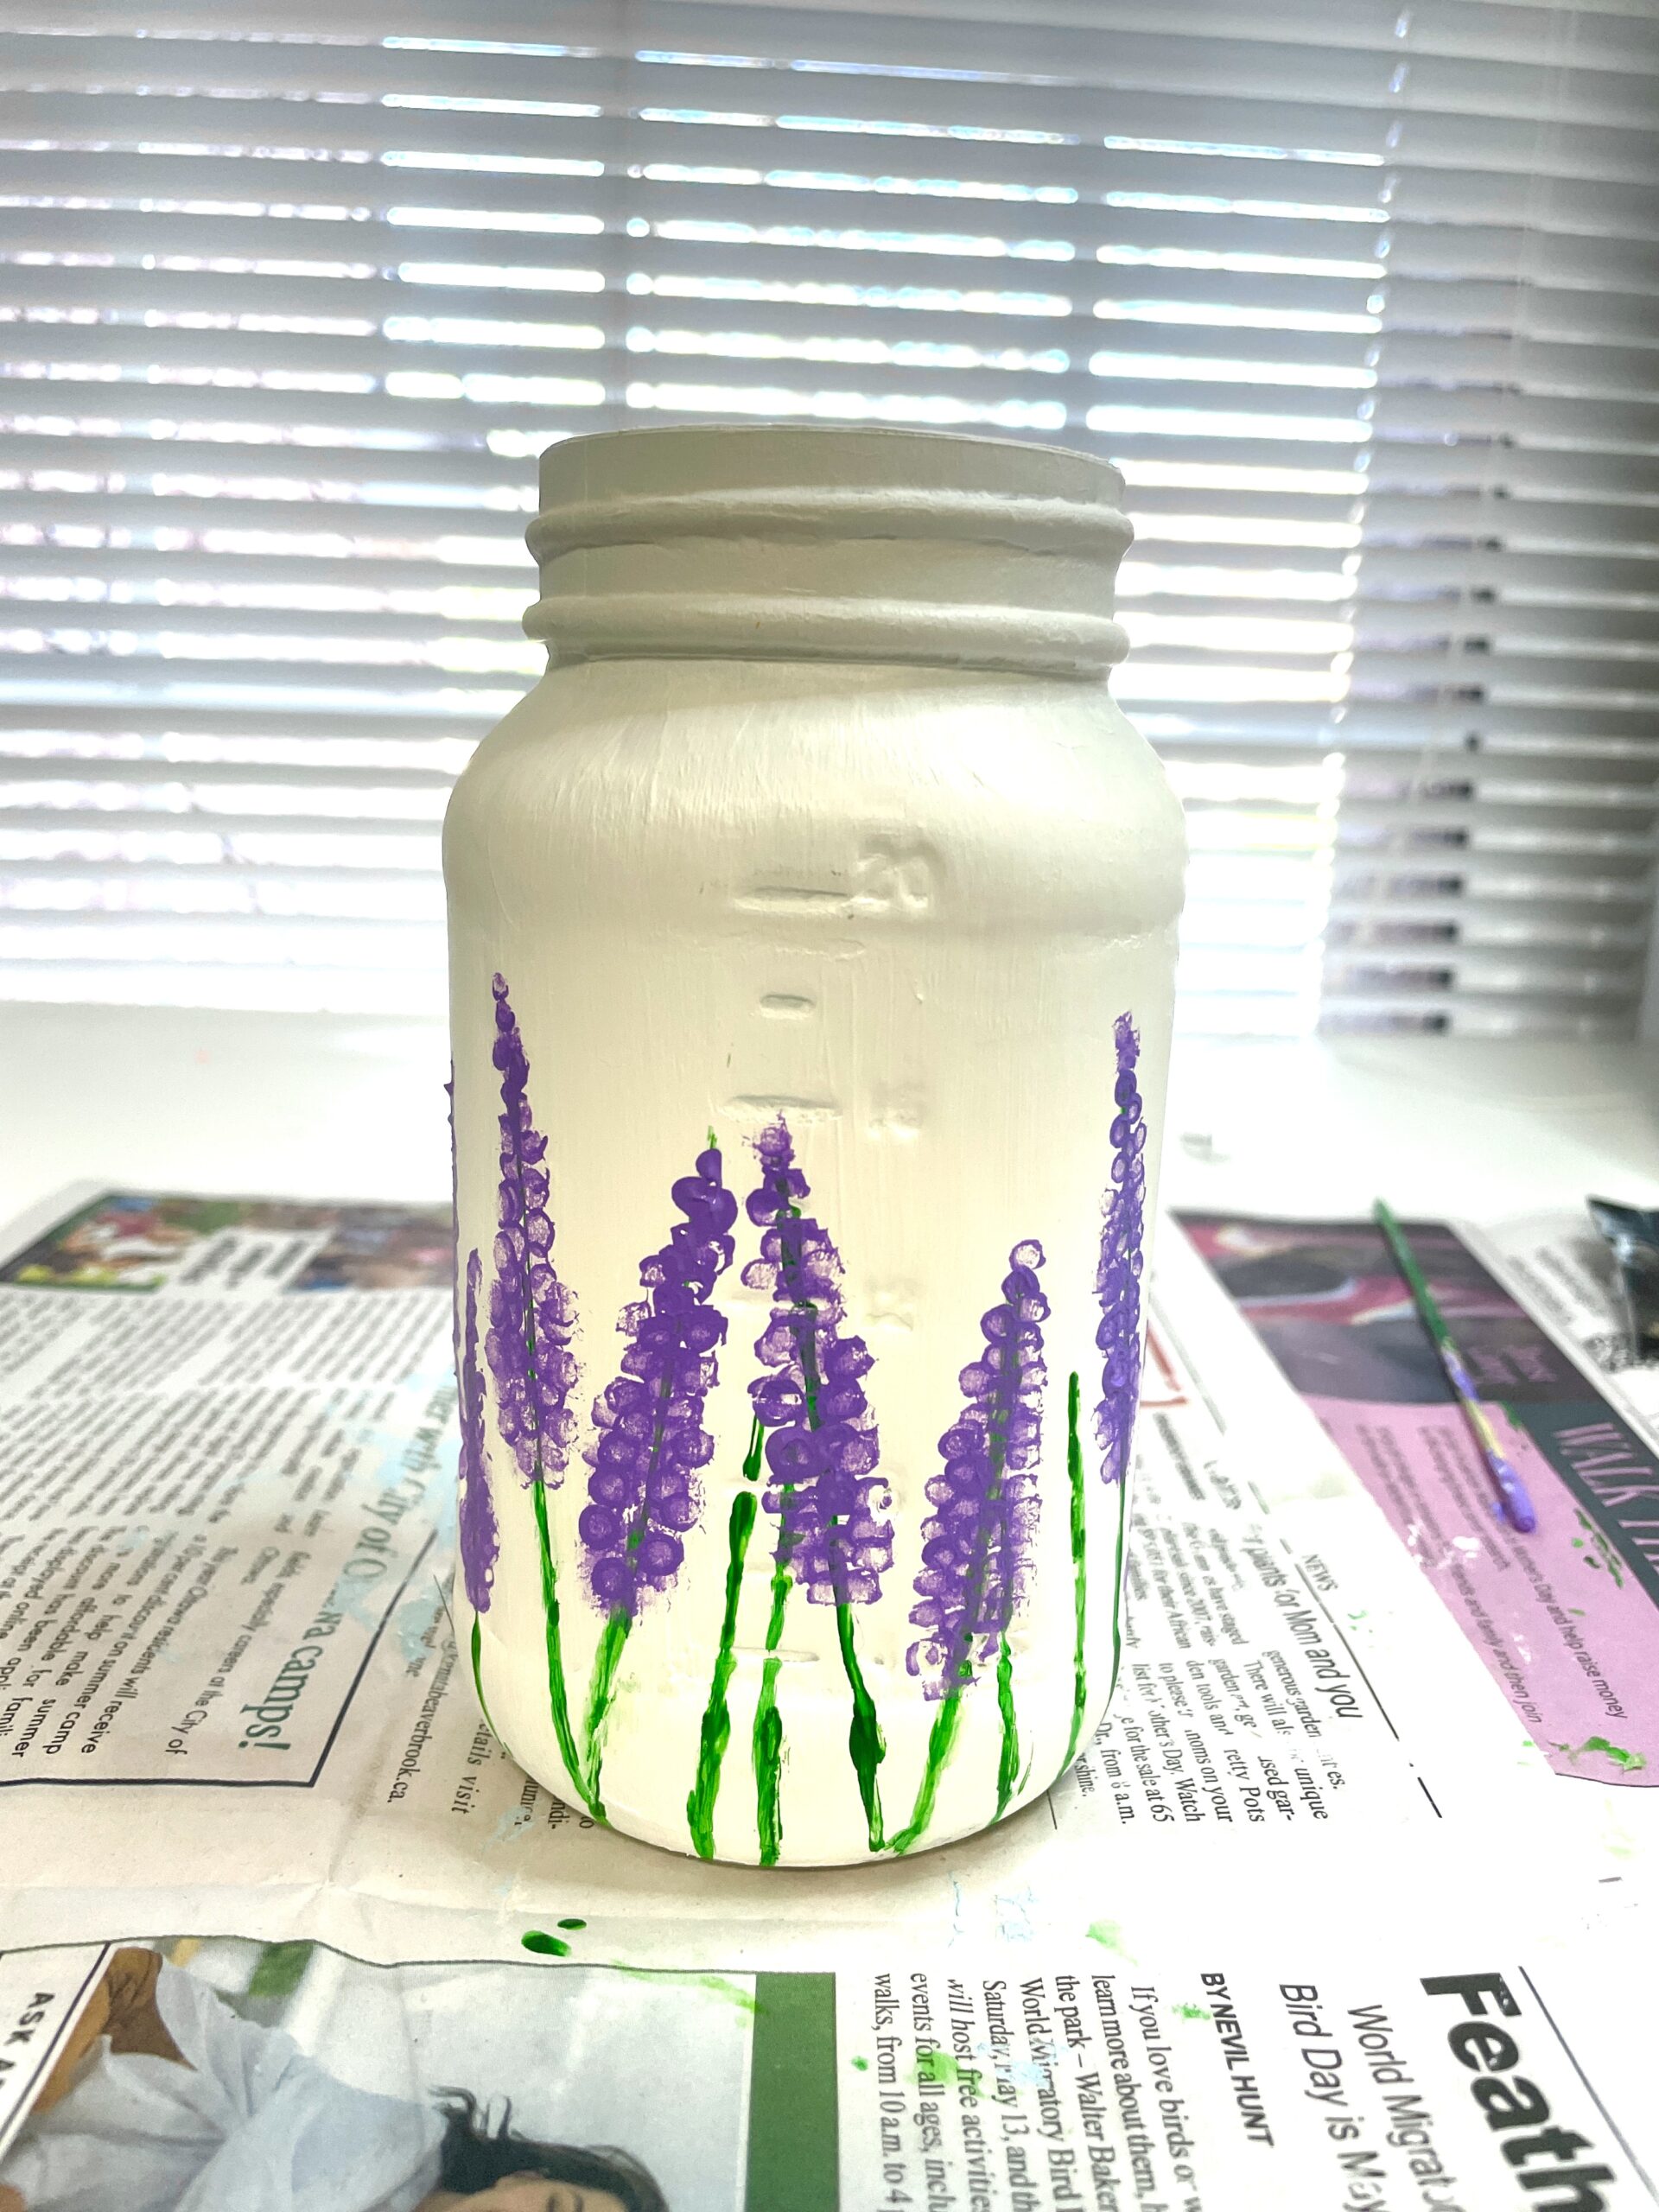
- Using q-tips and light purple paint create dot-like flower clusters in a lavender flower form around the tops of chosen flower stems. Leave to dry completely.
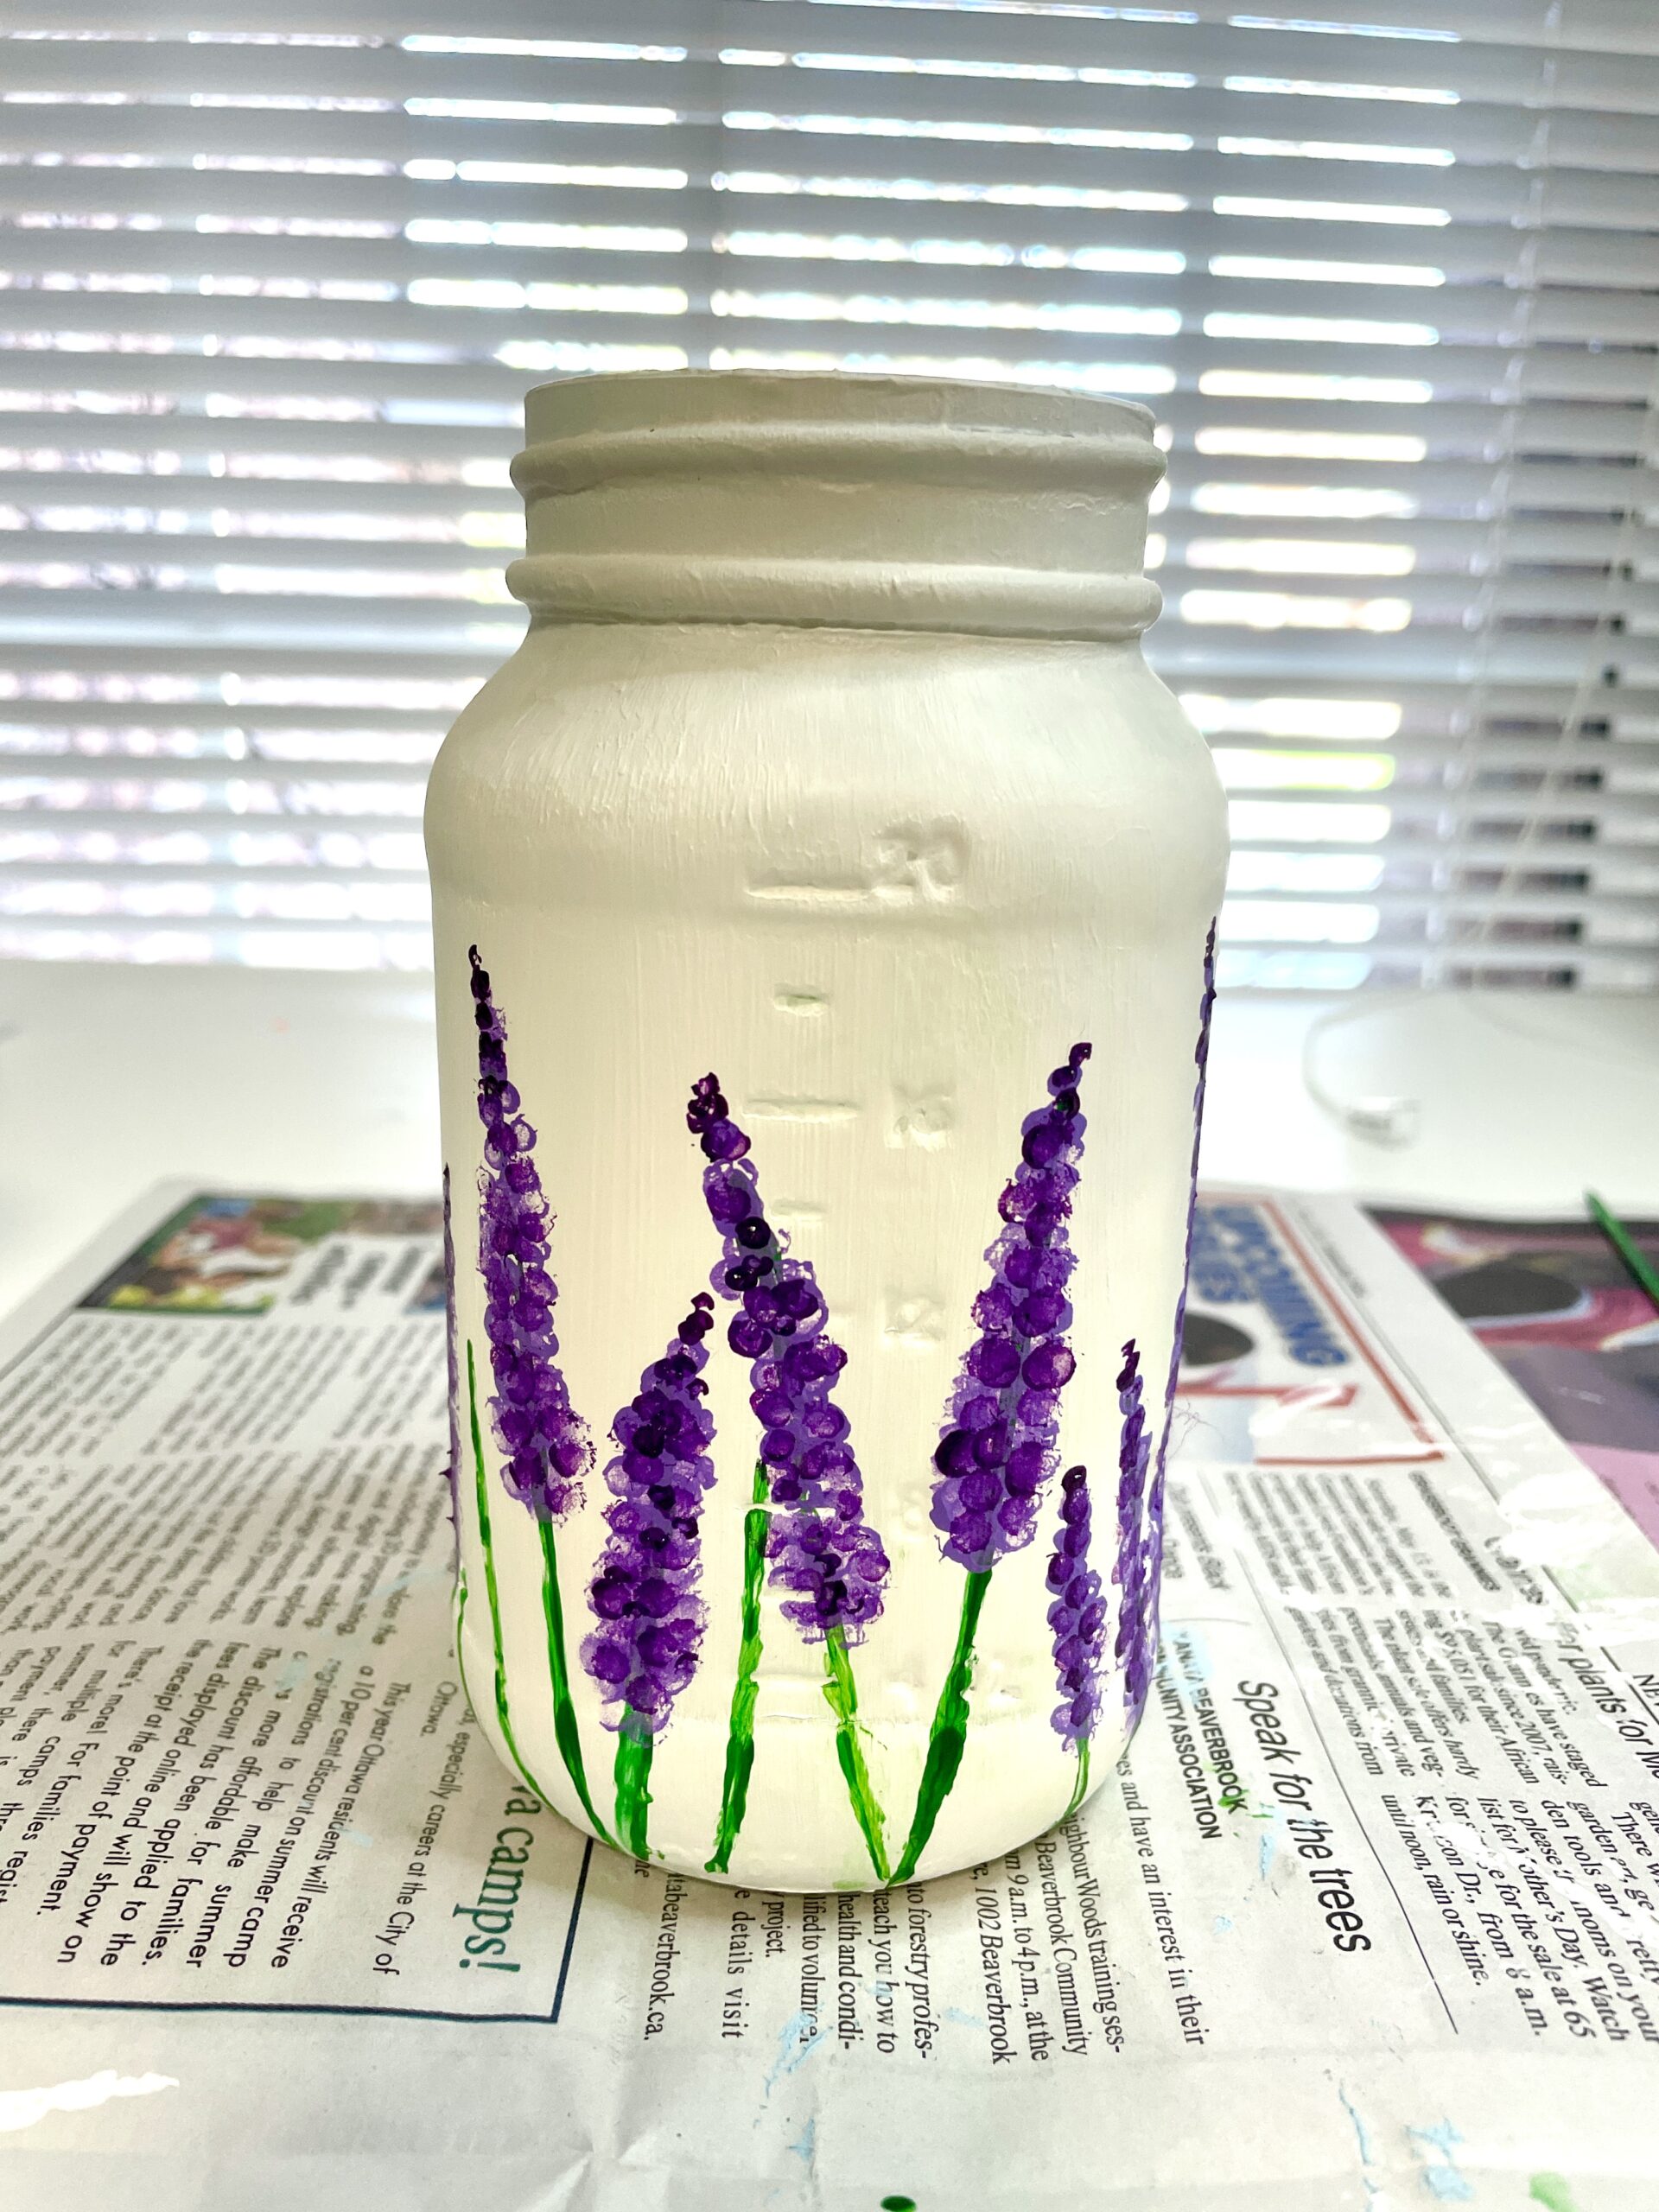
- Using a darker purple paint (mix 1 part original purple with a smidgen of black/brown) add some dabs over the light purple paint. Leave to dry completely.
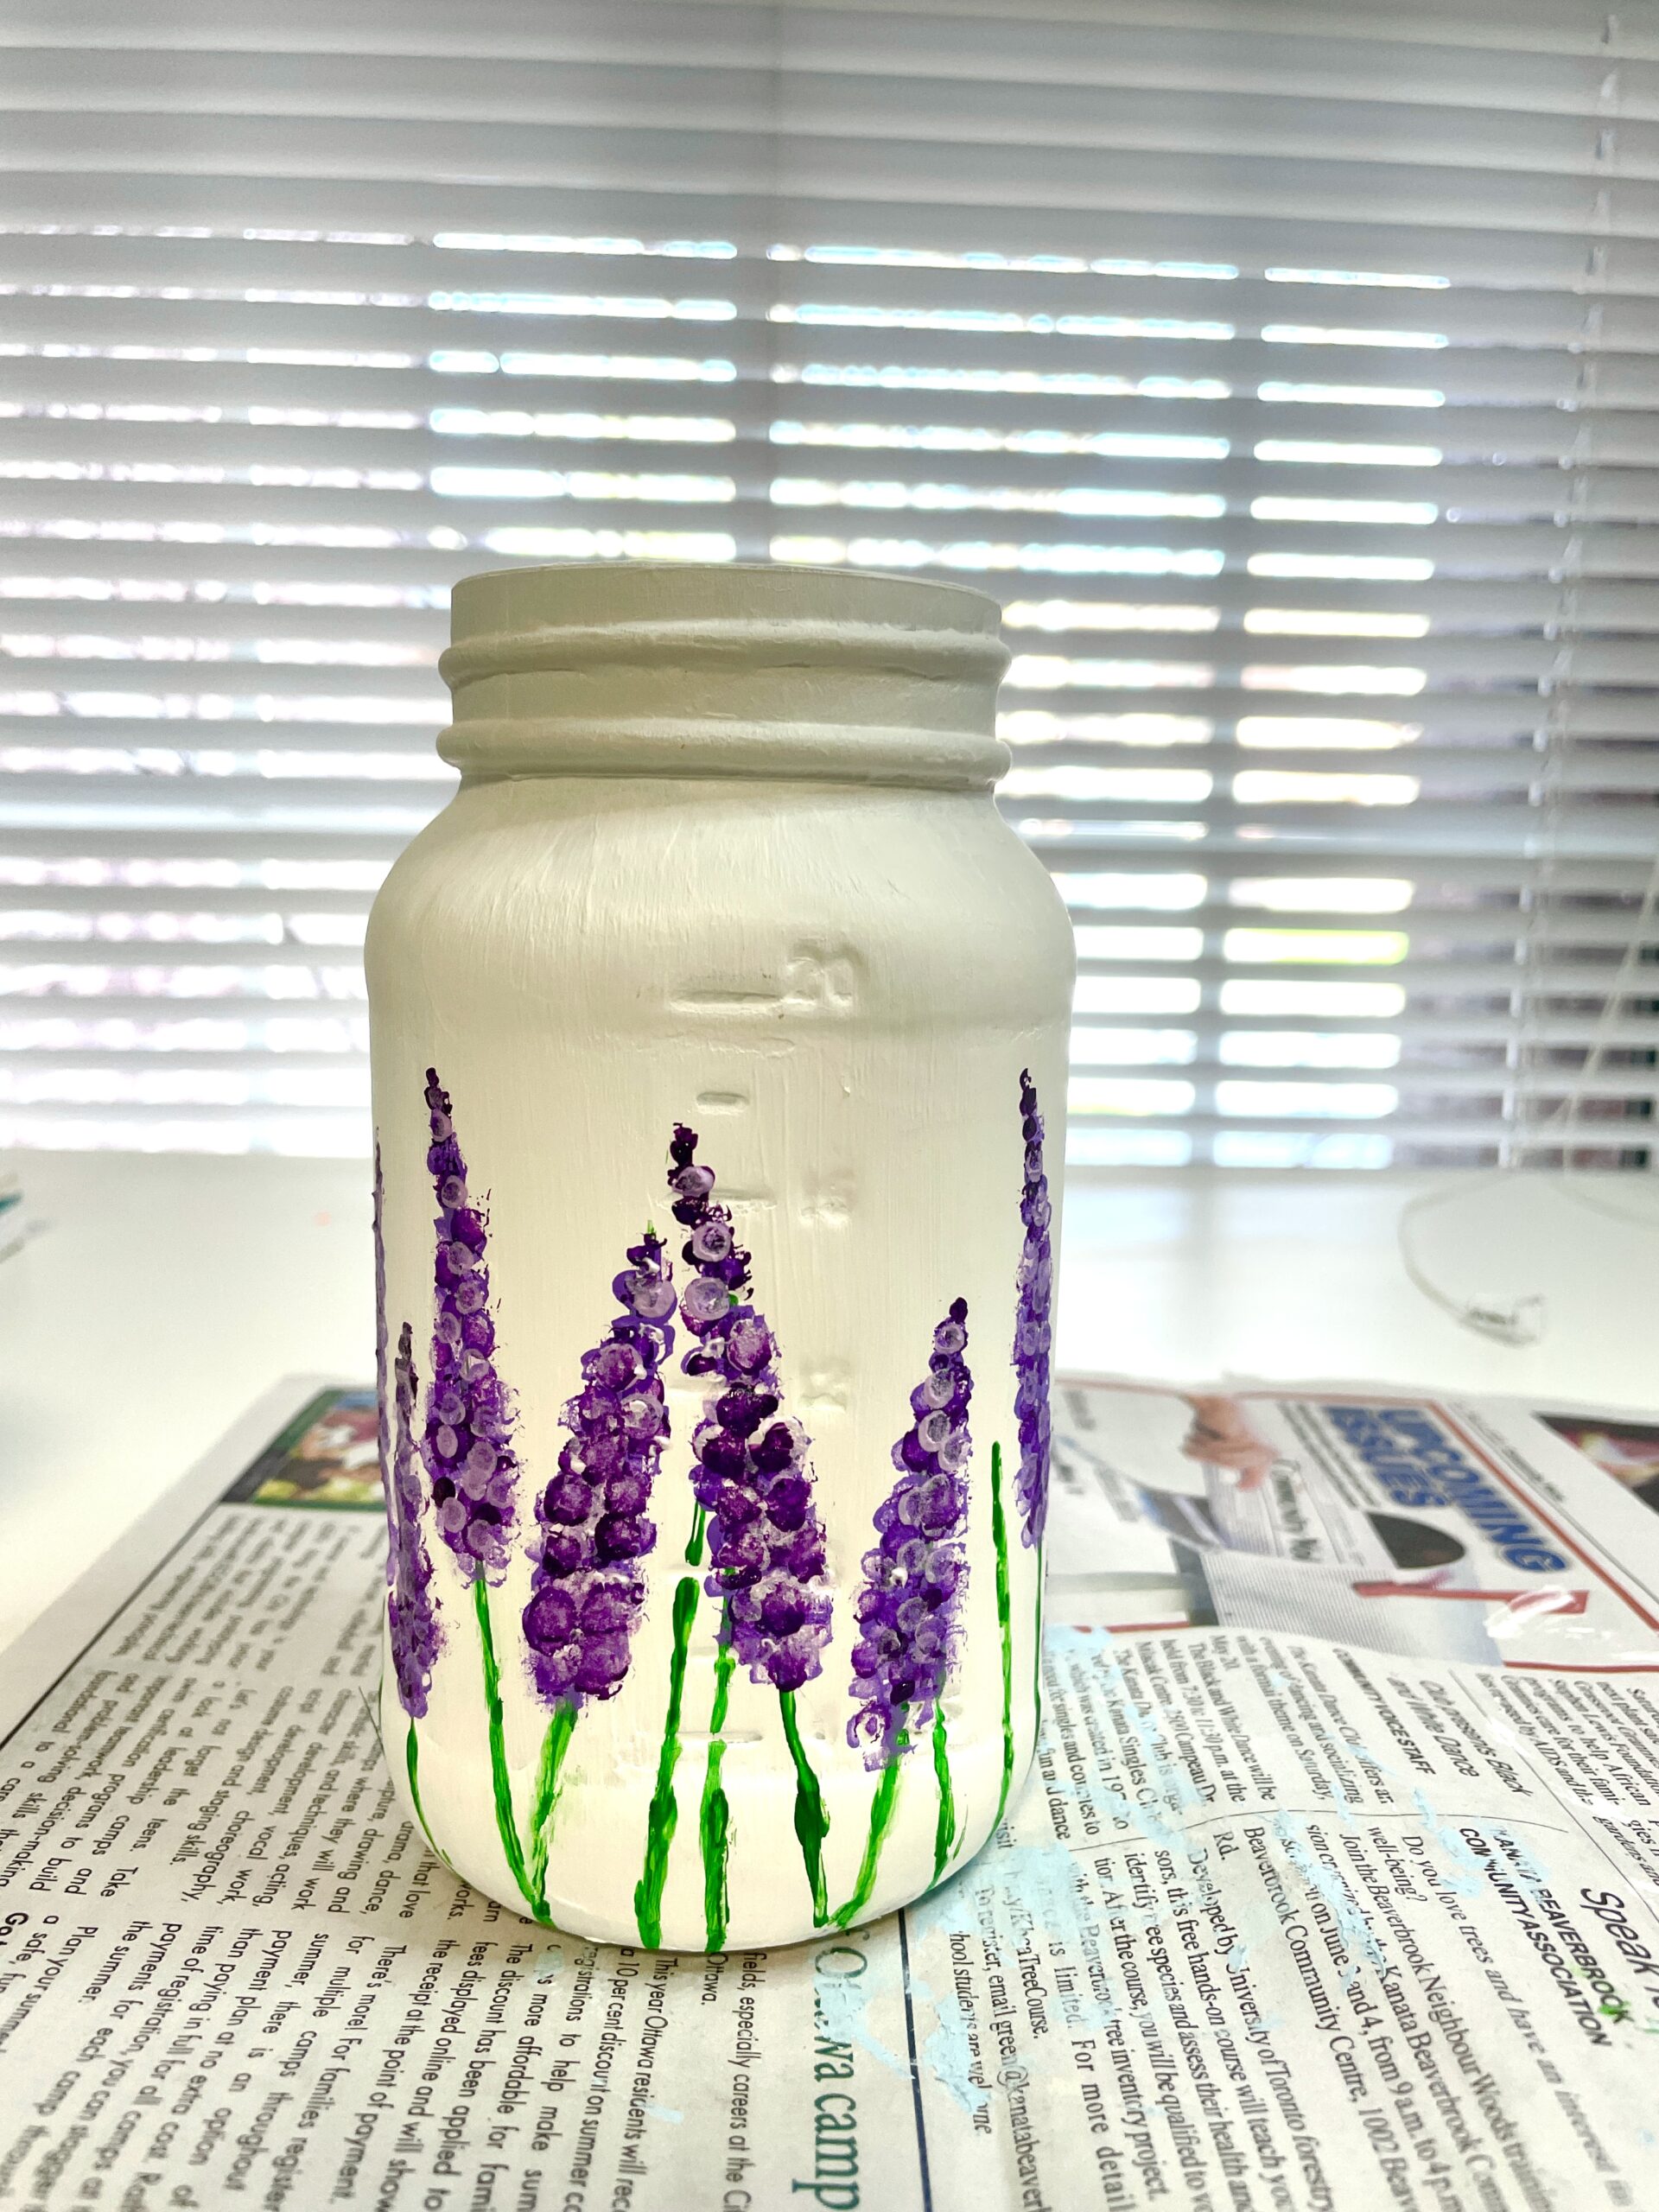
- Mix a pale purple color (mix 1 part original purple with 2 parts white) and add some dabs using q-tips, over the darker purple paint. Leave to dry completely.
- Wait for the paint to fully dry (1-2 hours, depending on thickness of paint).
- Seal your jar with a brush-on or spray-on acrylic paint sealer. If using the spray variety, it helps to lay the jar upside down so that the mouth of the jar is covered by the ground and spray paint won't drip inside the jar ( and cause longer drying time). Read the instructions on the label of your can for detailed and safety instructions. I painted mine outside in a ventilated space, and used 3 coats in total with 20 minute drying time in between coats. I also chose a matte finish to mimic the chalk paint look. There's different types of finished for sealers so make sure to read the label (gloss, semi-gloss, matte, etc.)


Creative Ideas for Using Painted Mason Jars
Painted mason jars can be displayed out your space or home in creative and decorative ways. Below are just some ideas of how you can incorporate your jar art into your decor.
- Flower vase that holds fresh or fake flowers
- Rustic centrepiece on your table (group together multiple heights and sizes of jars)
- Stationary holder on your desk
- DIY candle: pour in liquid wax and add a wick
- DIY Gifts: fill with goodies, succulents or small trinkets for a thoughtful handmade gift
- Makeup brush holder
- Utensil caddy: use 1 for all or have 3 each for forks, spoons and knives)
- Paintbrush holder
- Piggy bank: cut a slot in the metal mason jar lid)
- DIY tissue paper holder
- Wire hanging lanterns: leave a cutout of the glass surface unpainted for light to shine through)
- Solar lanterns for your garden
- As-is on a shelf or fireplace mantle
Tips for Maintenance and Care
This section will give you some important tips if you want to preserve the beautiful jar art. When cared for and cleaned properly your painted mason jars should last a very long time.
If you've painted your mason jar with enamel paint and it's properly cured then it's top rack dishwasher safe.
For mason jars painted with regular acrylic paint and sealed please read the label for cleaning instructions. Some sealers mention items can be hand washed and top rack dishwasher safe. Mine didn't mention any cleaning instructions so I'm going to be safe and use a damp cloth when cleaning it.
Sealing your painted jar makes it must easier to dust too thanks to it's smoother, less-porous surface.
If you painted it with regular paint and don't seal it, then use a damp cloth to wipe it down. Just be careful as acrylic paint on glass without sealer can easily chip and scratch off.
Conclusion
Congratulations! You've now unlocked the secrets to transforming ordinary mason jars into extraordinary works of art. Throughout this guide, we've explored the step-by-step process of painting mason jars, from selecting designs to adding those final finishing touches. We've discussed the importance of prepping the surface, choosing the right paint, and sealing your masterpiece for long-lasting beauty.
Remember, every brushstroke is an opportunity for self-expression and a chance to infuse your living space with warmth and charm. So, dive into the world of painted mason jars and let your creativity flourish.
Your journey awaits!
If you liked this post please pin it!


Can you tell me how to paint mason jar that looks like honey dripping down it and what color to use that looks like honey.
Going to use acrylic paint and follow your instructions but not sure if I need a pattern or just do free hand.
That's an awesome idea Martha! Was just googling some ideas and came across this blog post that shows step by step how she paints honey onto the jar. I thought it was super cool how she added hot glue to get more dimension and that "glossiness" of honey. Hope this helps: https://www.homewardfounddecor.com/2021/02/diy-decorative-honey-pot.html
Enjoy making your honey pot 🙂
Cheers,
Jasmine
Quick warning: sometimes acrylics and oils (you recommended an oil paint pen for designs) don’t mix! I tried using an acrylic sealer on a surface painted with acrylic paints but lettered with an oil paint pen. The acrylic sealer dissolved the oil paint and made it run. I had to redo the whole project with an acrylic paint pen for the lettering. Something to watch out for.
Hey Robin.
Thank you for pointing this you- you are right!! I didn't think of the situation of an oil medium sealed with an acrylic one!! I will update the post with your experience if you don't mind. That way others can avoid this situation. Thanks again an have a great evening!!
Cheers,
Jasmine