Seashell Art - Quick and Easy DIY for your Home
This DIY seashell art piece is a beautiful addition to any home beach decor. Use seashells collected from the beach or bought from the store and you'll be feeling beachy in no time!

Make this seashell art in under an hour with seashells you've collected from the beach or bought from the store. It's a cheap and creative way to add some beach inspired decor into your home.
Beach home decor is really popular these days -who wouldn't want to be surrounded by the relaxing and happy feeling of the beach all year long?
If you want to add beach inspired home decor to your home but I don't want to pay a fortune for them, then easy DIY projects are going to be your friend.
And this DIY seashell art is easy peasy.
For more easy beach inspired crafts, check these out: diy seaglass art here and diy seashell candles here. Or if you're looking for more easy-peasy crafts to keep you busy, check out this 71+ Craft for Adults post.
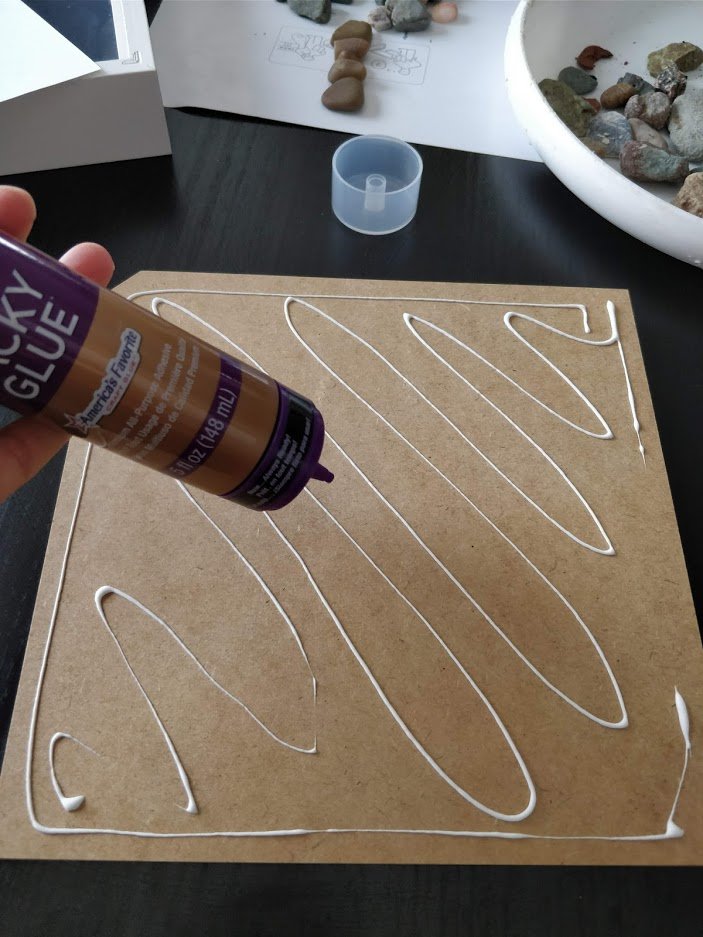
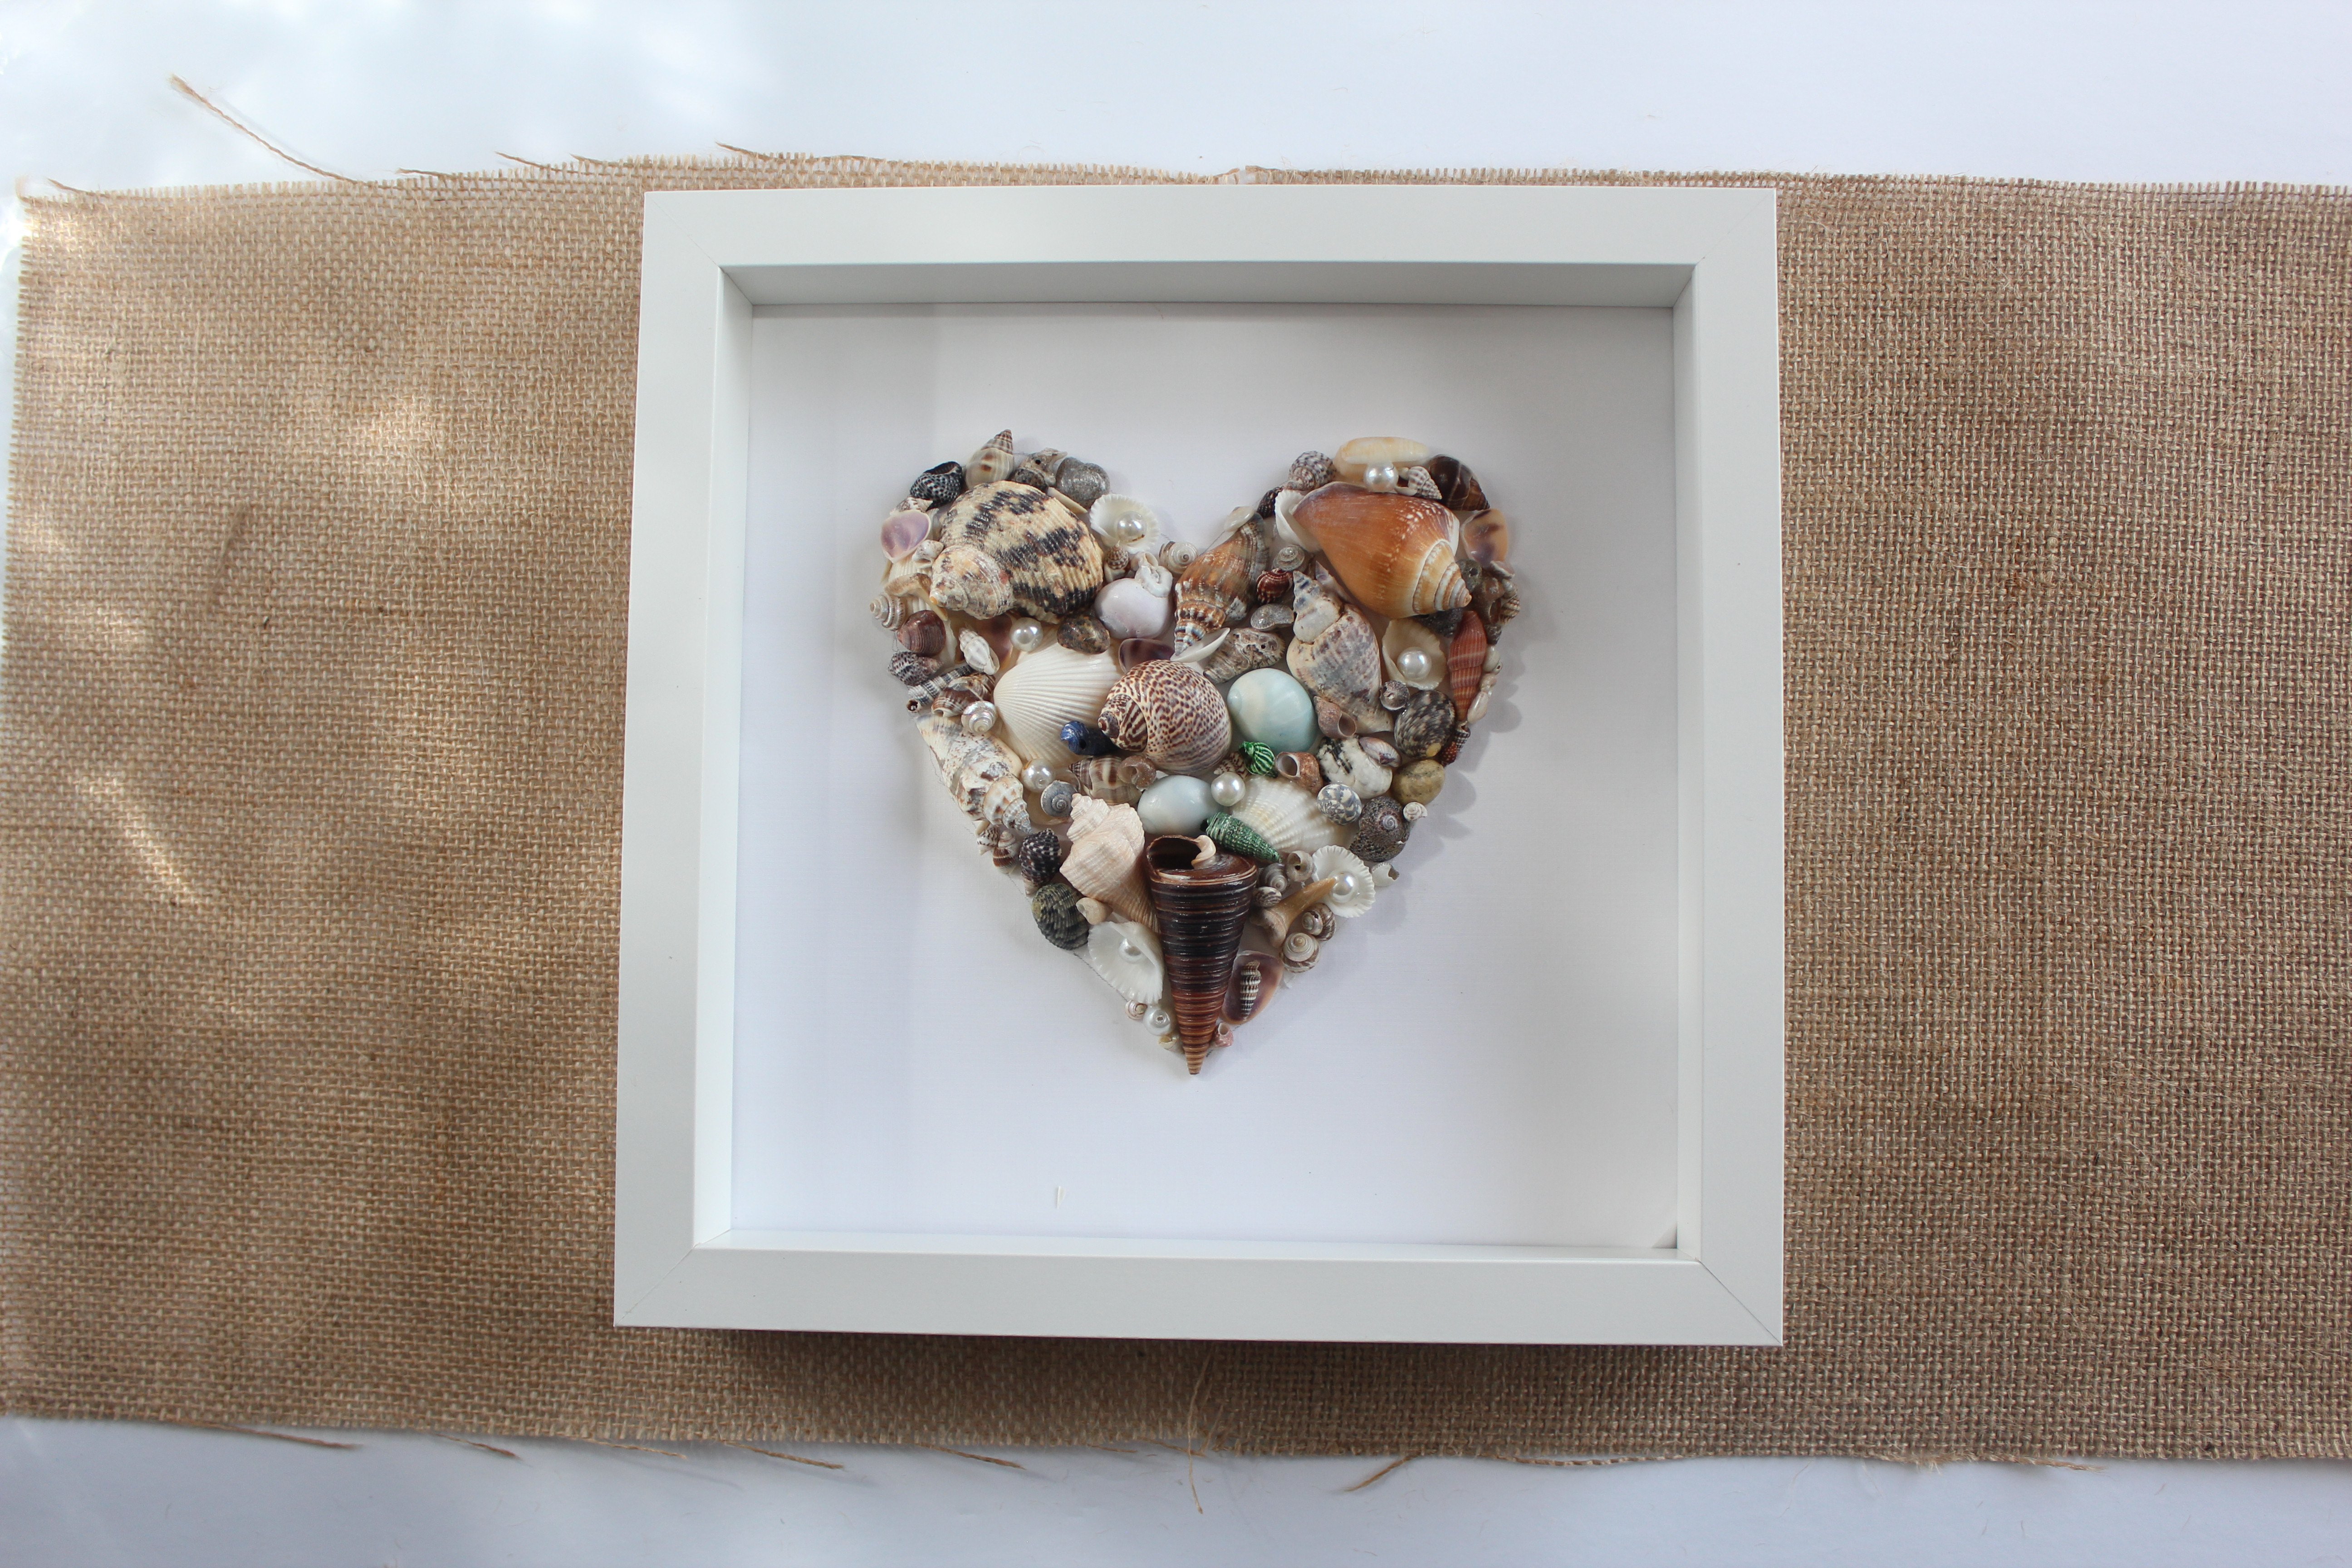
I created this seashell art with an inexpensive shadow box frame, some simple crafting glue and some seashells my family and I collected from the beach last summer.
This craft took less than an hour and was easy to make. It's like coloring in a shape with seashells!
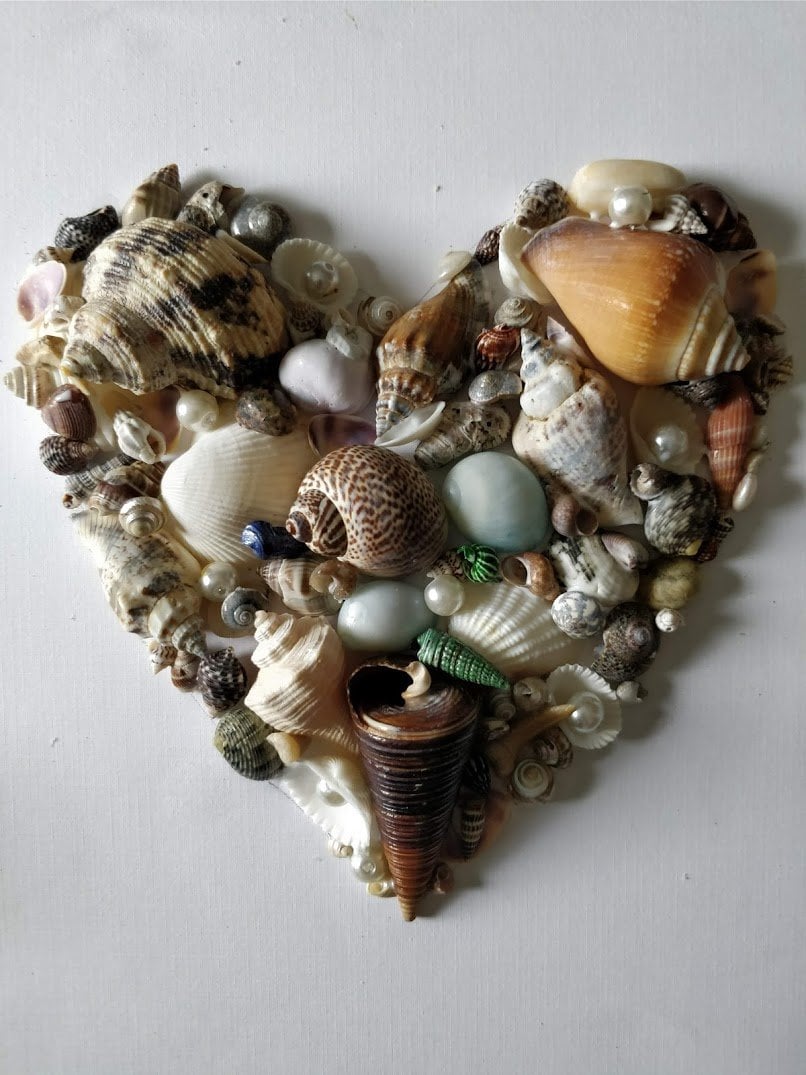
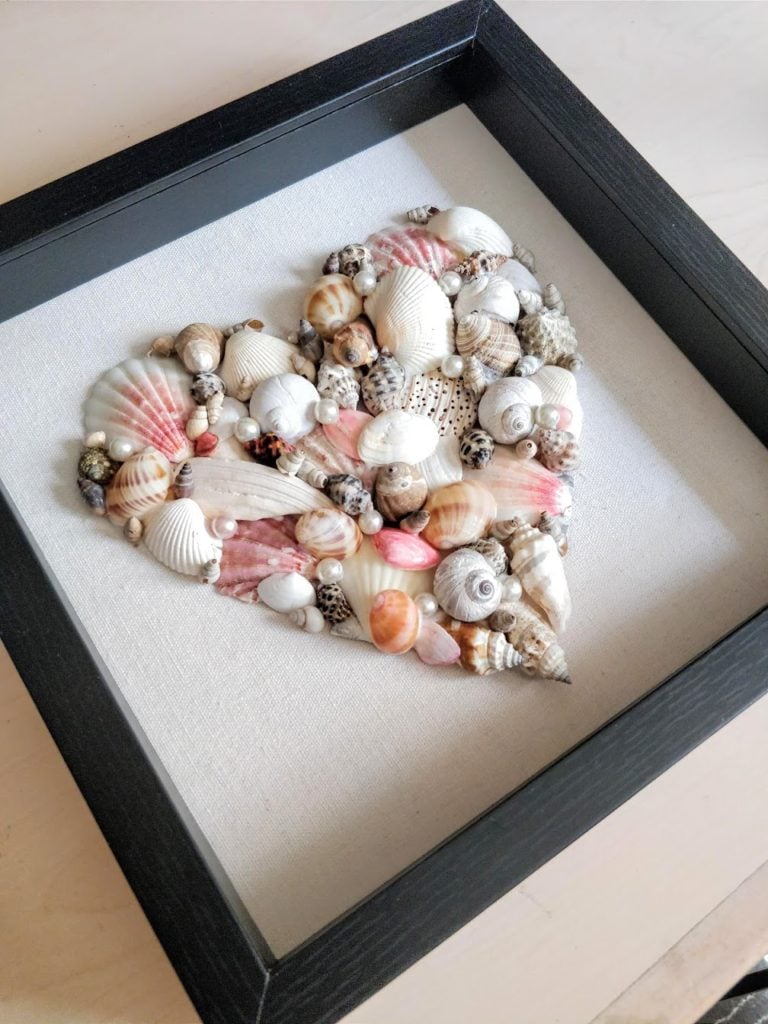
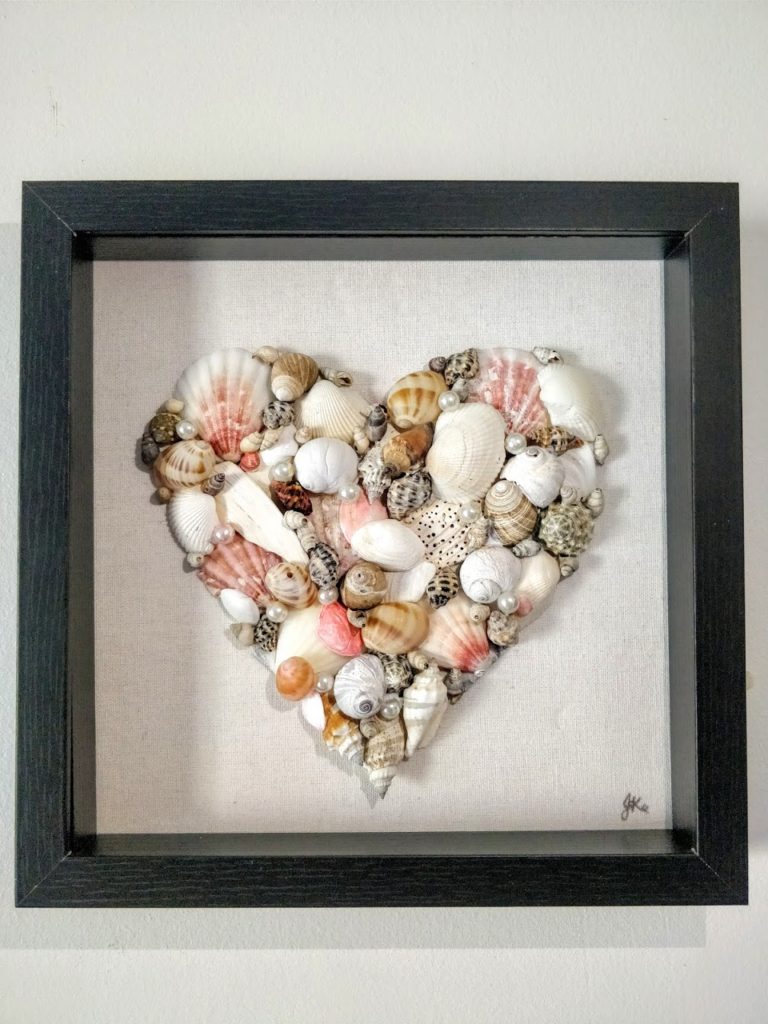
I made a heart shape with this piece, but the shape options are limitless.
I think it would look great with letter shapes too, like the initial letter or monogram for your family name, or even a number that holds special meaning.
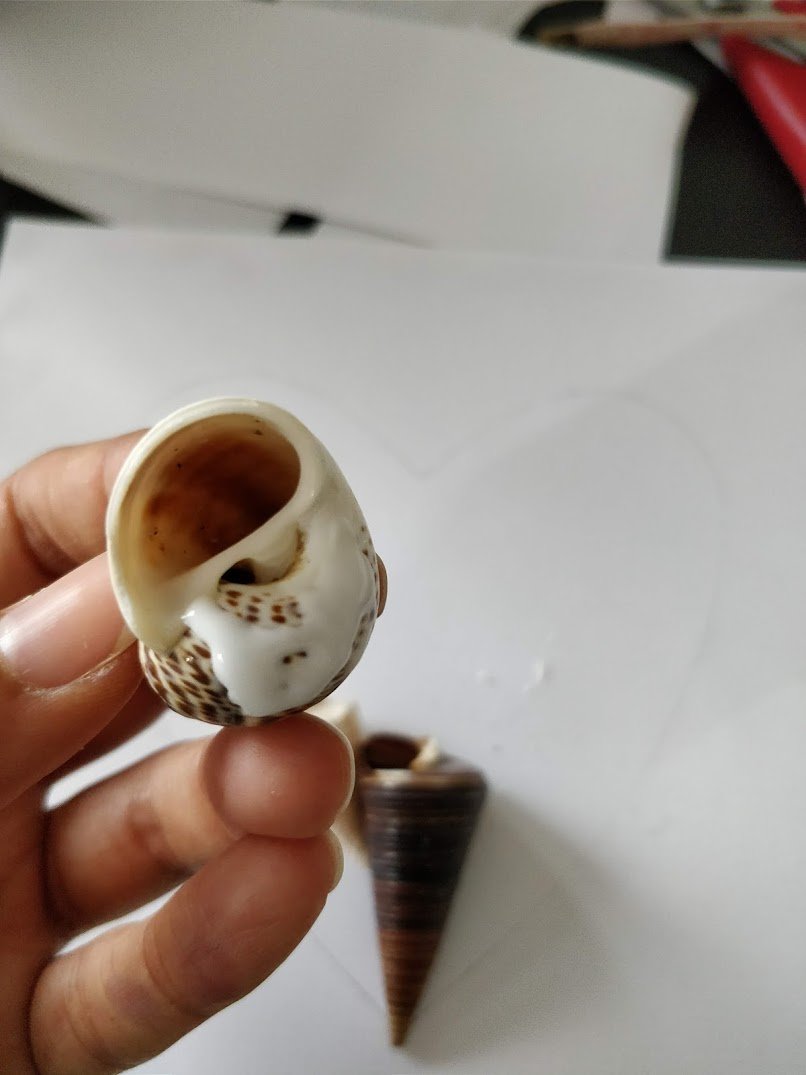
If you're using seashells collected from the beach, make sure you clean them for crafting.
Check out my blog post on how to clean seashells for a couple of easy methods. Cleaning them is important so you remove gunk and smells often left behind.
If you bought your seashells from the store or online, no need to clean them as they come pre-cleaned.
Once you have some squeaky clean shells, you are ready to get nifty! Here's the tutorial...
How to make Seashell Art -Heart shaped
This post contains affiliate links. For more information, see my disclaimer
Materials
- Seashells from the beach or buy online
- Shadow box frame
- crafting glue
- white cardstock paper (or plain white paper)
Instructions
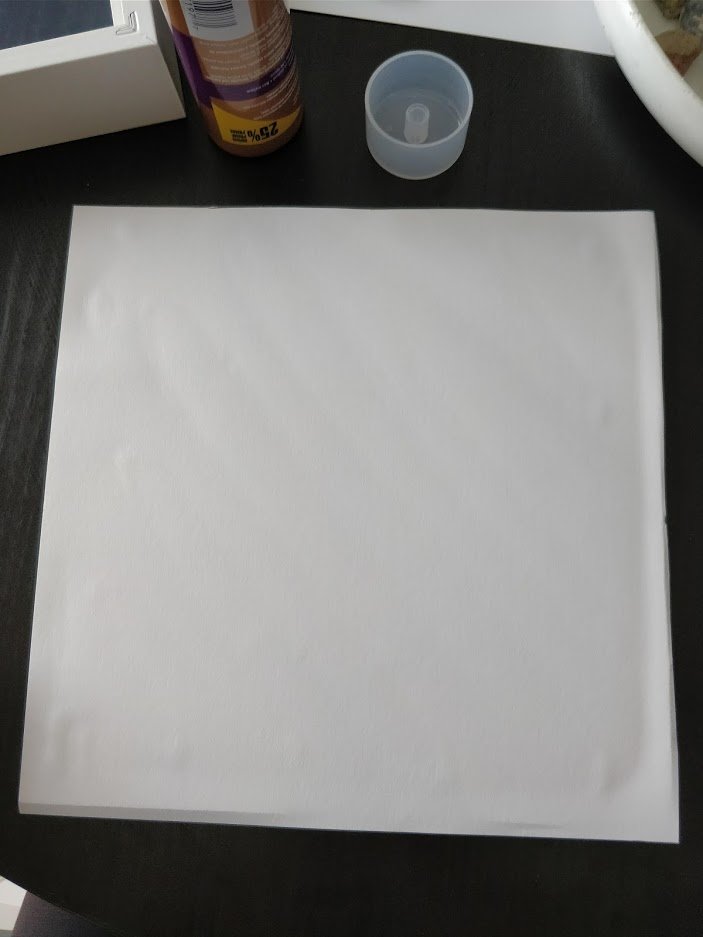
- Cut the cardstock or paper to the size of the backing of your frame and glue it to the backing.

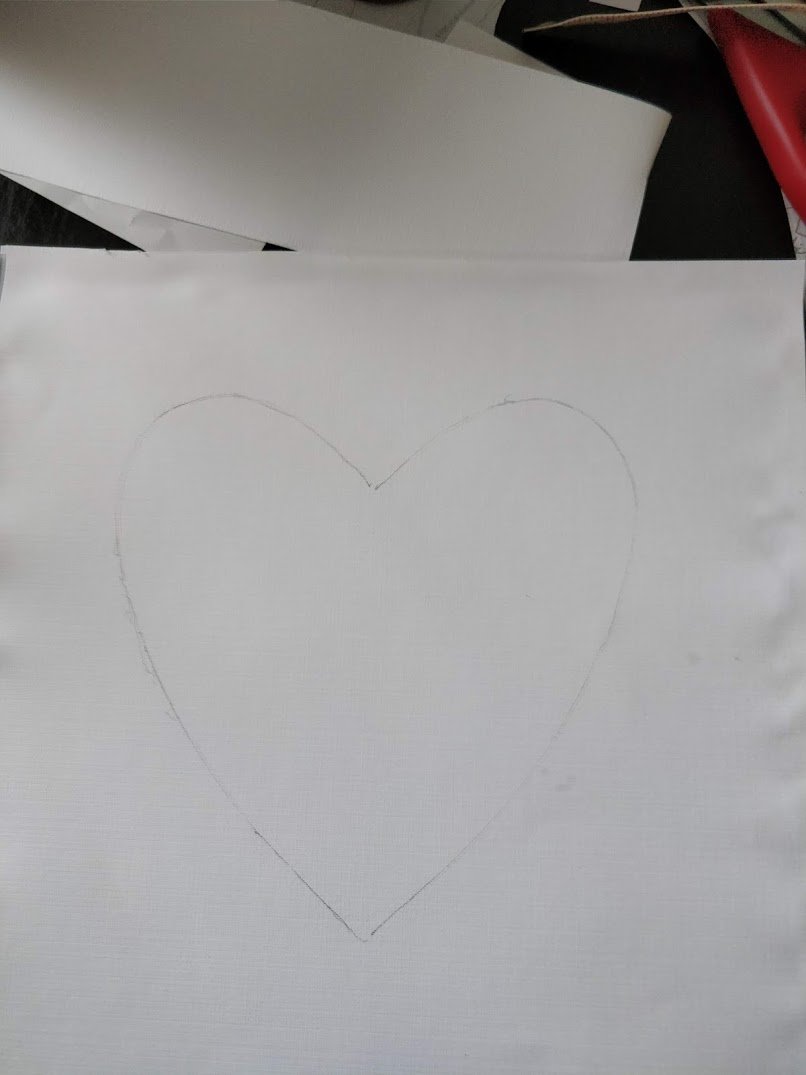
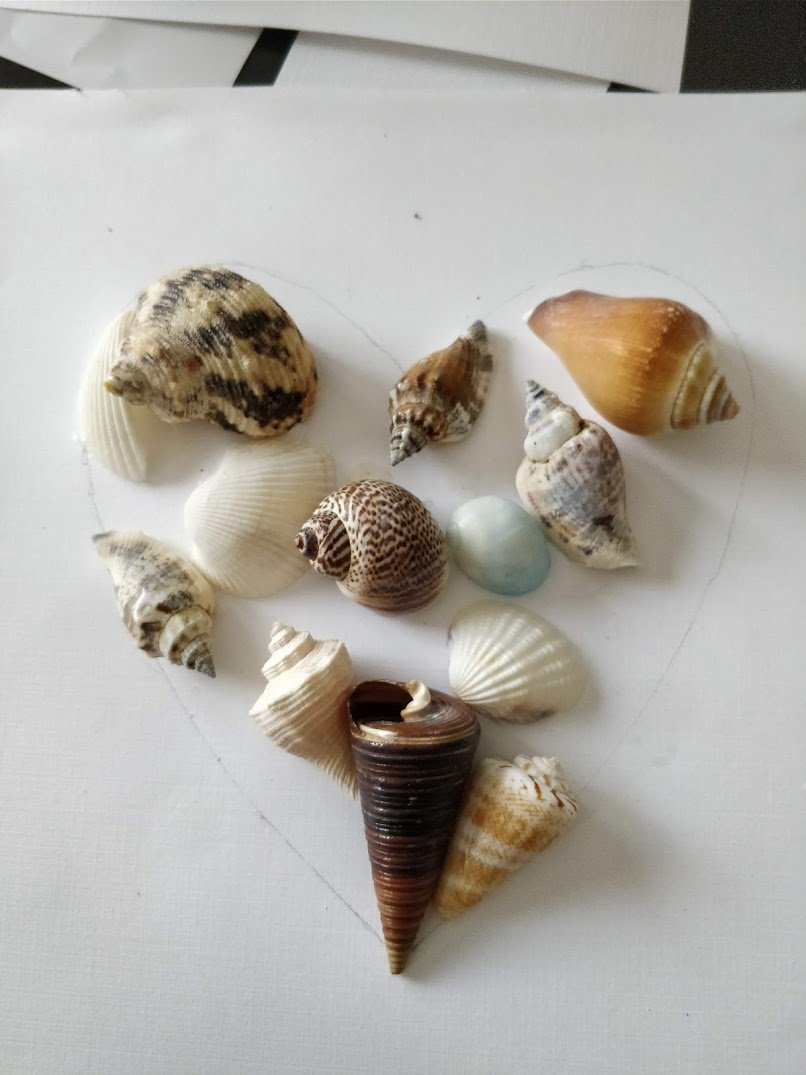
Glue the backing of the frame Place card stock on frame backing - Using a pencil, trace a heart shape (or any other shape) onto the cardstock/paper

- Using your larger seashells first, glue them in any place inside the heart shape. Make sure to even distribute the larger pieces within your shape
- Once the larger seashells are done, you can start gluing on the medium size ones. This ensures that the big and medium size seashells are evenly distributed within your shape, as they will be more eyecatching than the smaller ones. The smaller ones are for filling in the gaps and for creating clean edges along the border of the heart shape.
- Using the smallest shells, glue them to fill in the gaps between the rest of the shells and also the border of the shape.
- Optional: you can use decorative pearls to add some extra texture and shine to your artwork

And voila, your beautiful beach inspired seashell art is ready to be displayed! Enjoy and hope to SEA ya soon!
I ended up making 2 versions of this diy seashell art, here are some final pictures of both...

If you enjoyed this seashell art craft please pin on PINTEREST

Looks great Jasmine. Easy and pretty. My sister-in-law will probably be making these:)
Thanks Deneen! It's a fun craft, I hope your sister-in-law enjoys it!
What glue do you use on the shells to keep it stuck to the back?
Hi Mary,
I used Aleene’s tacky glue ( you can get it from any craft store).
Cheers,
Jasmine
Can Aleene's tacky glue be used on a wood surface and does it make a huge mess?
Hi Peggy,
Yes Aleene's can be used on woody surface too, and it shouldn't create a mess,as long as you don't use too much of the glue at one time. One thing to note is: it takes a few minutes for it to dry which is nice so you can rearrange its position (unlike hot glue or super glue).
Cheers,
Jasmine
How does the Alene’s Tacky glue hold up over time ? Have you had any of the shells fall off ? I want the project to last and thought of using hot glue. Any thoughts ?
Hi Laura,
That's a great question. The seashells have remained intact and in place for 5 years now. I have made 3 and they're all perfect. Hope that helps ease any concern.
Cheers,
Jasmine
Hi, can I ask what you’re glueing the shells onto if not the shadow box. I think I’m a little confused but looking to recreate
Hi Jackie,
Good question! I glued a thick piece of card stock right to the the shadowbox frame's back cover. Then once dried, I then glued the seashells to the card stock.Hope that helps and makes sense 🙂
Cheers,
Jasmine
@Jasmine Dhillon,
Why did you do this? Why not glue directly to frame backing?
Hey Kathryn,
I could have done that too, I just wanted the background to be white so I added cardstock. Hope that makes sense- but you can glue it directly to the frame too!
Cheers,
Jasmine
Hi,
Could Mod Podge be used to glue the shells down?
Hey Laci,
That's a great question. My bottle of Mod Podge says its a "glue, sealer and finish" so in theory it could work. But I would do a test on a spare seashell and glue it down on another paper to see if it sticks good first. Hope that helps!
Cheers,
Jasmine
I have been looking for days for a way to make a shadow box of shells s a birthday gift.
Your info is exactly what I needed. Thank you for posting and sharing. Very thoughtful of you!
I'm so glad to hear that Kathy!! It's a very fun project- enjoy making your fabulous (and thoughtful) birthday present 🎁
Cheers,
Jasmine