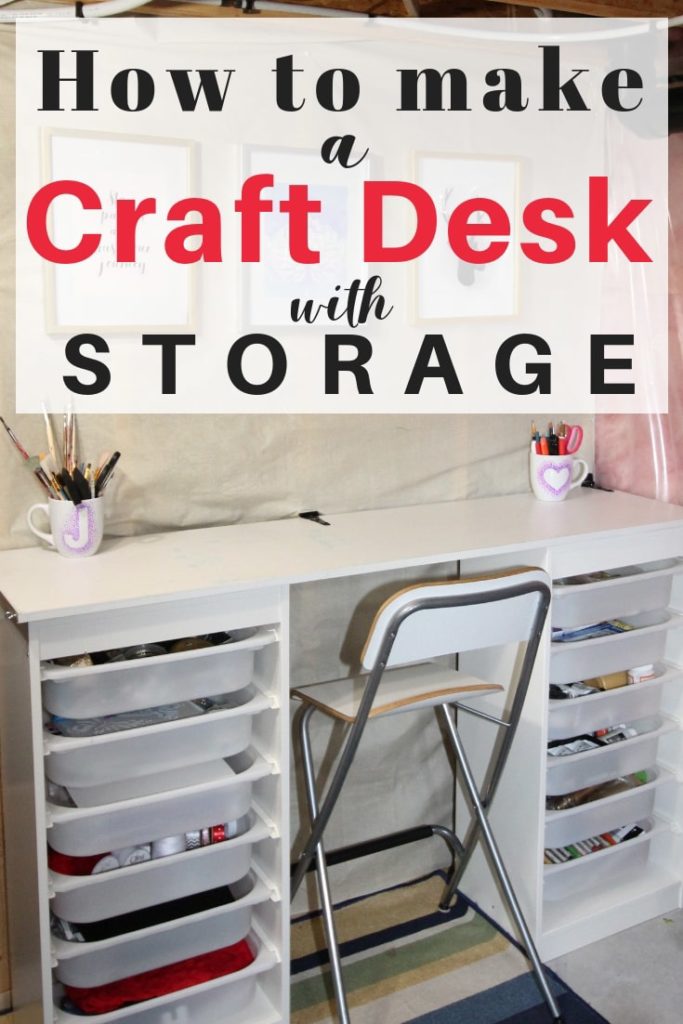
Ikea Craft Table For a Small Space
This Ikea craft table hack is an easy and budget friendly way to get your very own crafting space, at home! Tons of storage space to organize all your crafting supplies too!
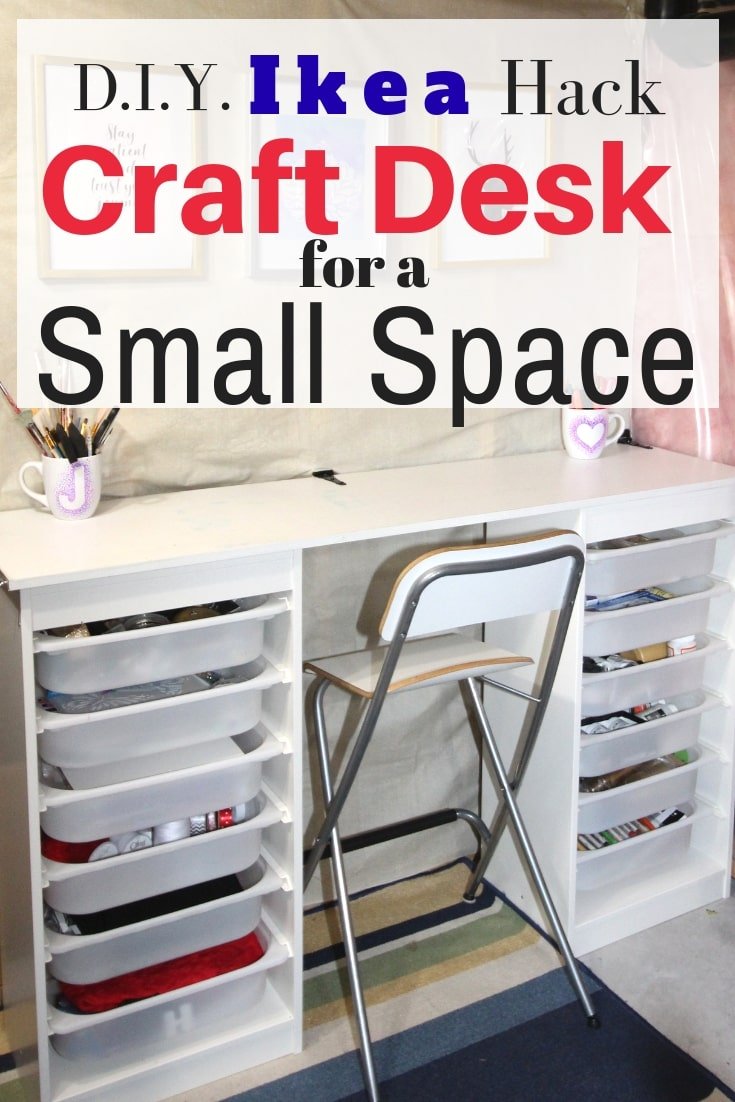
Are you a crafter that dreams of your own craft space, which is also beautifully organized with a ton of storage space? With this DIY Ikea Craft table, you get both!
I'll explain, step by step, how to create this easy, inexpensive and functional (not to mention stylish) craft table hack that you can call your own. Made from Ikea shelves.
And you'll love how tidy your craft supplies will be. When you can clearly see what supplies you have, it just opens up more creative possibilities...
Talking about organization, I added some pictures of some some craft organizing ideas for drawers of this craft desk. From paints, to ribbons, to sewing supplies- I was able to find a place for everything.
I ended up making a second craft table because I needed more desk space. You can check out that project here Ikea Craft Table hack (Counter-height)
Also, If you want to see 30+ craft room organization ideas, I compiled a list (with pictures) of some awesome idea's I found by some creatively talented bloggers. I got inspired by pegboards, so I ended up making an DIY Pegboard for craft rooms with Dollarstore accessories.
Choose the Best Crafting Space in your Home
This post contains affiliate links. For more information, see my disclaimer
It's important to plan which area in your home to put your craft desk. Here are some simple questions to ask you before you start, and you'll avoid hassle later on.
What types of crafts will you be doing, mainly? Will you will be dealing with lots of paints, glues, solvents or other odorous materials?
If so, then having your desk in a well ventilated area, is a must. Like near a window that can be opened, or a room with good ventilation.
Are you going to be doing some Cricut, sewing, or other crafts that require an electric device? Then you'll need to plan to have an electrical outlet nearby.
With most crafting projects you will need good lighting, so choose a well lit area. OR install some bright lighting.
I didn't have natural lighting in my space, so I solved it by adding a natural light lightbulb into a floor lamp near my desk. It really helps!
The Perfect Desk Size

The great part about this hack is that you can customize the length of the table top. The table top is made out of a sheet of shelving wood, so you can cut it to any length you want.
If you have a small space, you can make it as small as your space. If it's a long and narrow space, that will work too. I chose long and narrow for mine. If you want some inspiration for other desk options desk options, check out this list of over 20 Ikea Desk Hacks - it includes some awesome craft table hacks too!
In my home, since I had no extra room, I chose a small unused corner in our basement. Since it's in an unfinished part, I don't have to worry about getting too messy. I paint a lot so it CAN get messy!
When you've narrowed down where you want to put your craft table, then you'll need to measure the area and see how long a piece of shelving wood you need. Mine was 60 inches long.
For the width of the table top, you can choose how wide you want to make it. Mine measured 17 inches deep. But if that's not wide enough, you can make it bigger.
Another thing to mention, if you're going to be putting a sewing machine or a Cricut machine on your craft table then you need to make sure your table will be wide/deep enough for it.
Once you you've planned and measured, it's now time to build....
Ikea Craft Table : Step by step guide
Materials
- Sheet of white shelving wood (already coated with a white enamel) from Home Depot/Lowes. Mine measured 17" x 60".
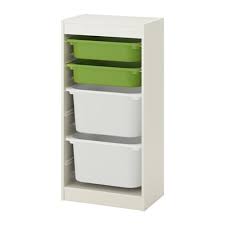
- 2 Ikea Trofast Storage Shelves
- Ikea Trofast bucket drawers
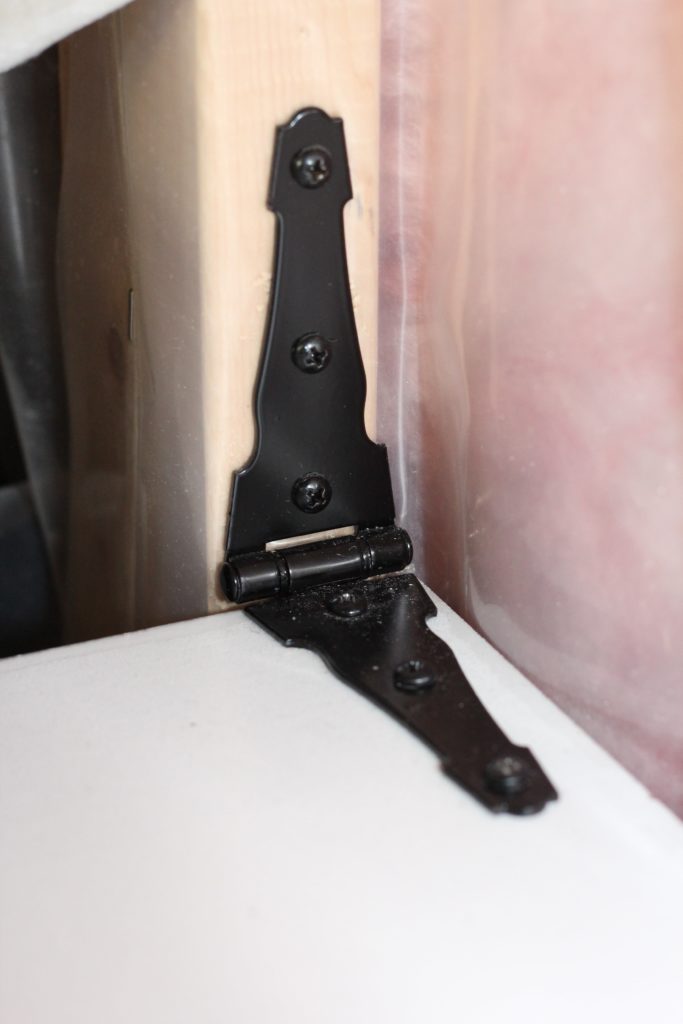
- (OPTIONAL) 2 or 3 wall hinges with screws
Steps by Step
-
Cut your shelving wood to the dimensions of your desired desktop. Lowes or Home Depot will cut it for free if you buy it from them.
-
Assemble your 2 Ikea Trofast's shelves as per Ikea instructions.

- Place your 2 Trofast shelves, and place them on either end of your pre-measured area. Make sure they are close to or even touching the wall behind it.
- Place your cut piece of desk top onto the Trofast units so that it sits centered, with the back edge touching along the wall.

- (OPTIONAL)Take your wall hinges and screw the top part of the hinges to the wall (preferably into the beams in the wall, if using it drywall then use wall anchors with screws). Screw the bottom part of the hinges to the table top.

- Insert all the trofast bins into their sliding slots.
- You're done you Ikea craft table! Optional: Look for a comfortable bar height stool or chair if you want to sit while crafting.
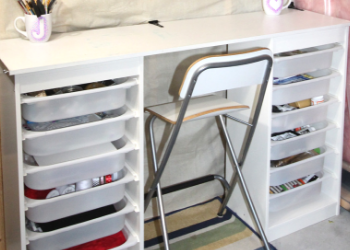
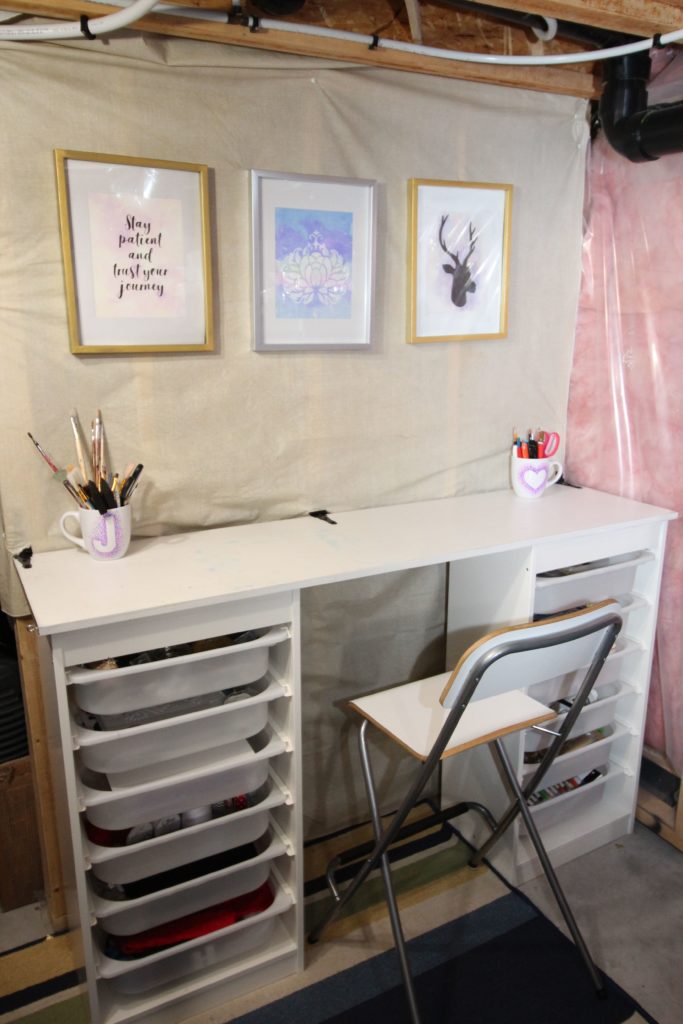
Here's the completed Ikea craft table (told you it was in the unfinished part of my basement, pipes and all!):
Ikea Craft Storage Ideas and Inspiration
As promised here are some pictures of how I organized my drawers to inspire some Ikea craft storage ideas!
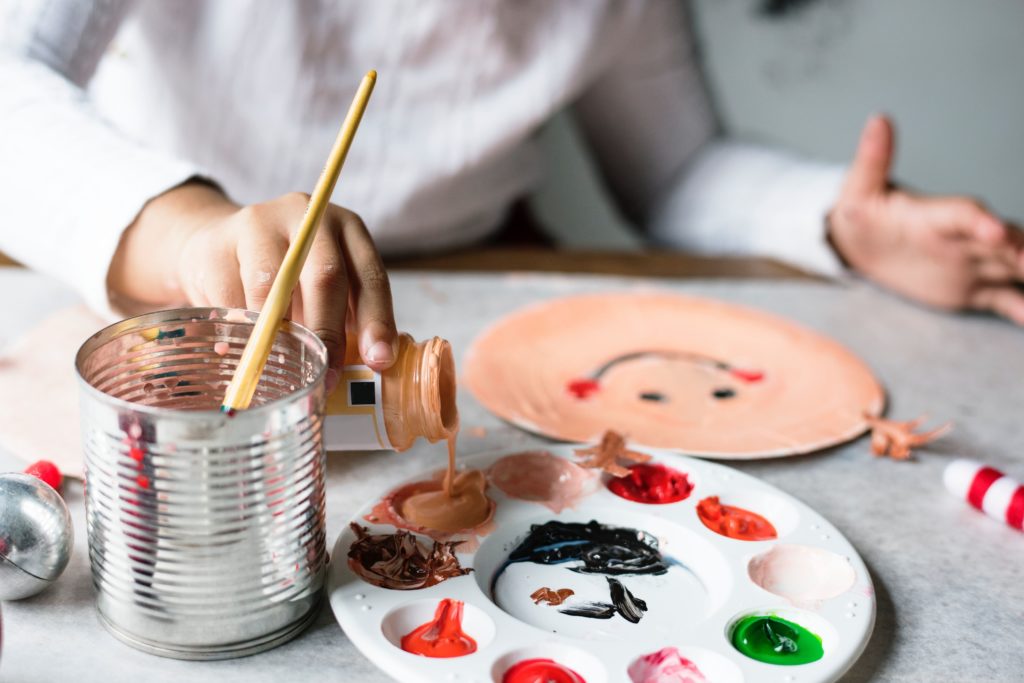
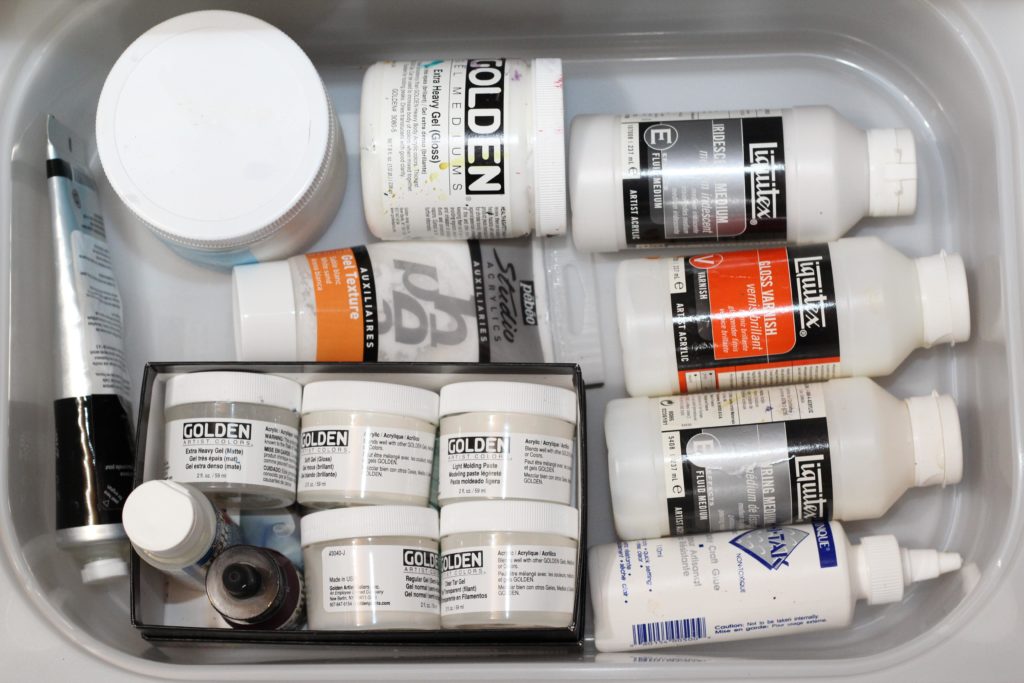
My paint drawer holds my assortment of bottled paints. They are finally easy to see and pick a colour when I start or in the middle of a project. I love it!
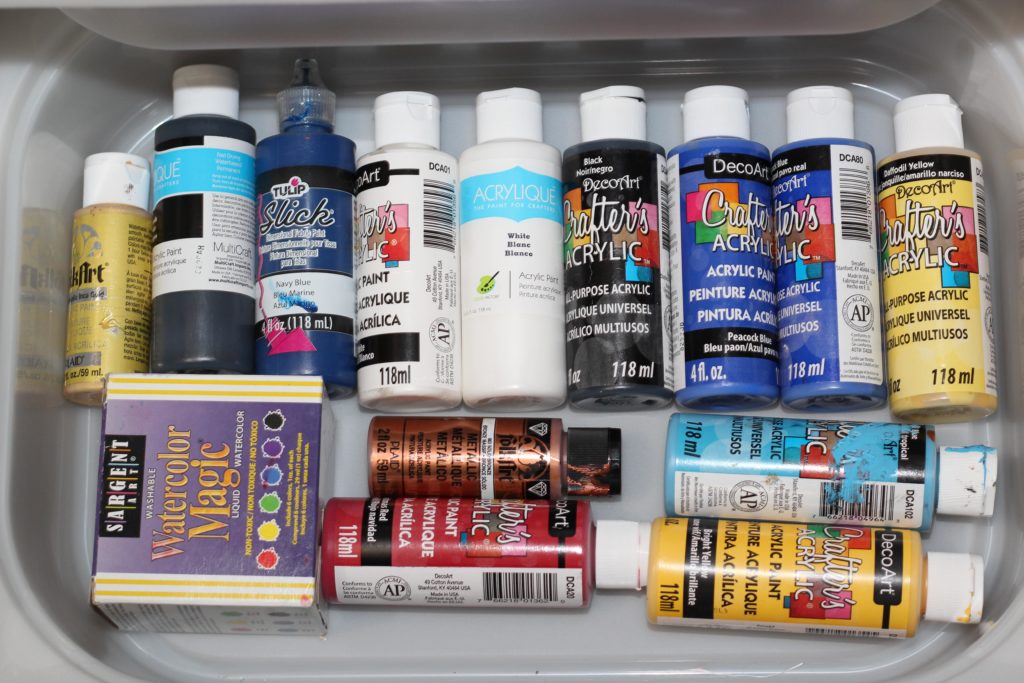
My next drawer holds all my paint mediums in one drawer. Again, its easy to pick out since the labels are all showing- face up.
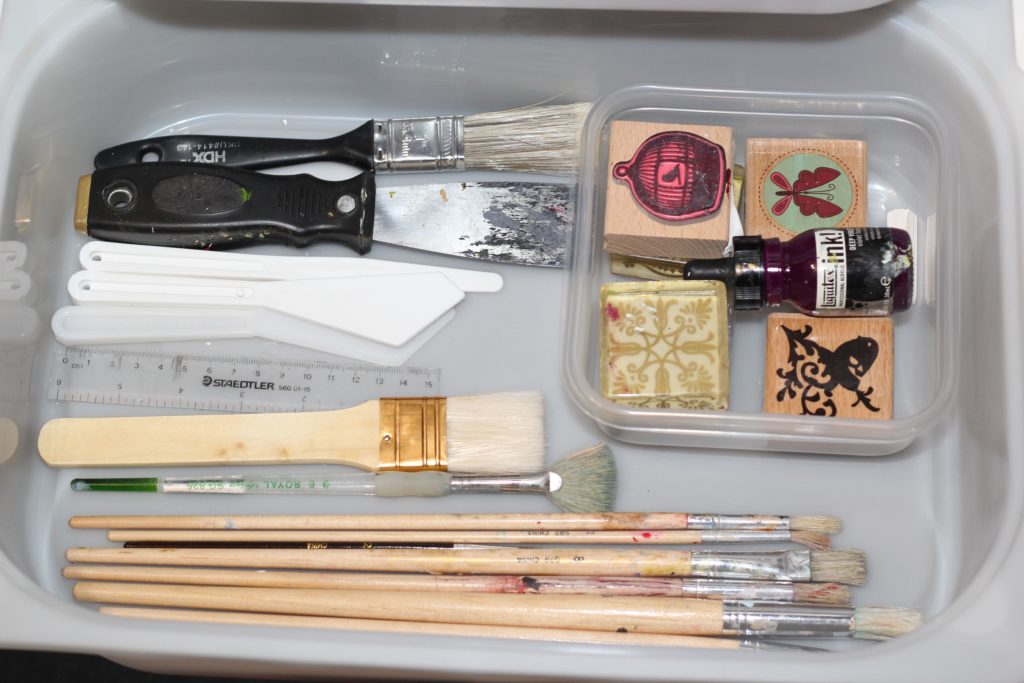
My Brush drawer is a dream! So easy to see all my brushes and other painting tools. It beats my old storage idea of just tossing it all into a huge Rubbermaid container
My sewing gear is nicely in order. I lined up my folded material in the drawers so that they can be seen and picked out- EASILY. I took a cheap Ziploc food container to organize my thread spools and miscellaneous sewing tools.

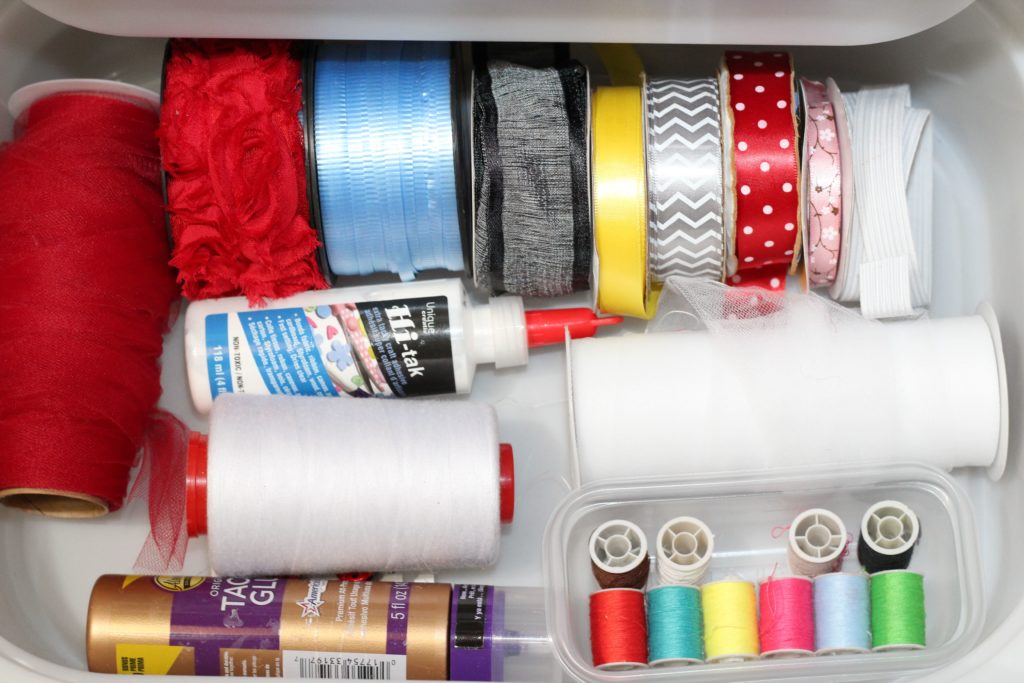
Organizing my rolls of ribbons have always been an issue for me. The Trofast bins are the perfect size to line the rolls of ribbon side by side. I also added in my rolls of tulle. Finally, no more tangled ribbons!
Check out some more craft supplies organization ideas (over 30 ideas with pictures). There is some serious creatively organized craft rooms out there, so inspiring!
Conclusion
And there you have it! An Ikea craft table that's perfect for any space and any budget! I hope you liked the tips on how to put one together, and also got some idea's on how to organize your craft supplies.
I'll leave you with a question: which of your craft supplies do you wish were more organized? Leave a comment below with your answer.
And until next time....stay nifty!
If you can't get enough Ikea hacks check out my other popular Ikea hacker posts:
- 20+ Ikea desk hacks
- Turn an Ikea Bookshelf into a seating & storage bench
- Storage bench for a small space {IKEA hack}
- Lego table hack
- Kitchen Pantry Ikea Hack with the Billy Bookcase