Easy DIY Macrame Wall Hanging in 15 Minutes
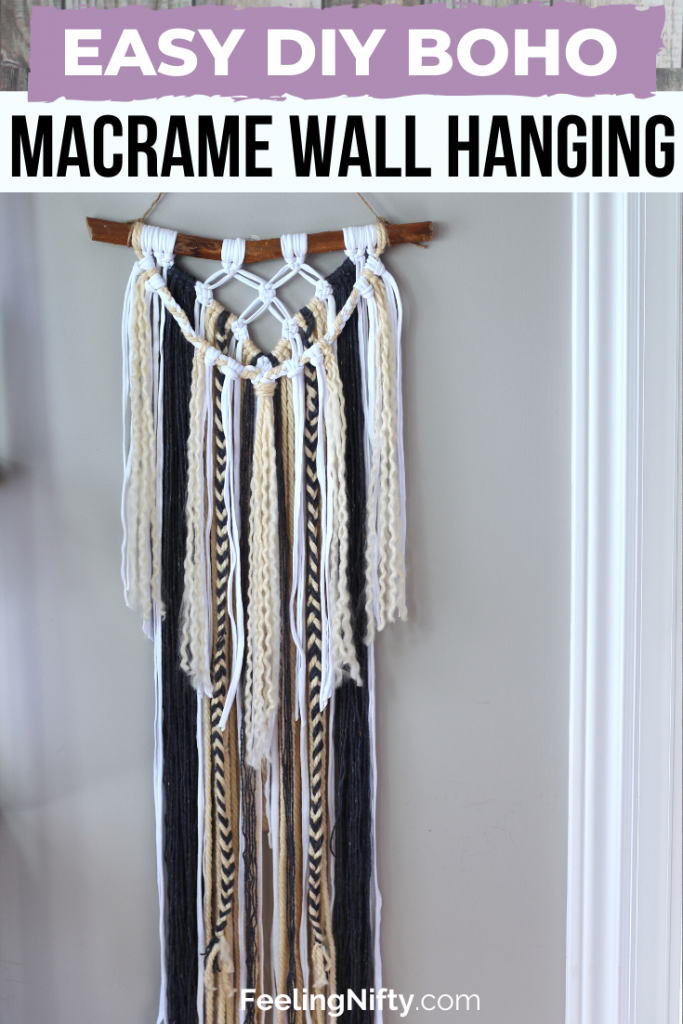
Learn how to make your very own, drool-worthy macrame wall hangings in this quick and easy 15-minute tutorial. You'll learn the basics of this boho-inspired macrame including the most popular (and easiest) macrame knot - the square knot.
I'm "knot" kidding when I say you'll be amazed at how simple and fun this project is!
Oh, and if you want more easy beginner macrame projects, check out my new DIY macrame plant hanger , that you can put together in 5 minutes!
What is Macrame?
Macrame is an ancient textile art that has regained popularity in recent years.
It's a craft that uses cord/yarn to create knots in different designs and patterns. In the new age macrame, crafters have innovatively used macrame knots to design wall hangings, plant-hangers, keychains, and charms to name a few.
How Do I Get Started with Macrame?
Macrame is a very low-cost and low maintenance craft. All you really need is the following:
- macrame cord (or simple yarn)
- dowel or tree branch (if creating a wall hanging)
- scissors
- measuring tape
Macrame Cord
Many macrame artists use a special yarn called Macrame Cord. Macrame cord is usually made out of cotton, twine, linen, hemp, jute, leather or yarn. The cord consists of equal length fibers that are twisted with each other to form a single strand
If you don't want to invest in macrame cord, you can use simple yarn (as I did below in the tutorial).
Another thing to keep in mind is cord/yarn thickness (usually indicated in an "mm" measurement on the packaging of yarn). The thicker the yarn/cord, the more "chunkier" your knots/design will be. The smaller thickness yarns will result in more intricate and detailed knots.
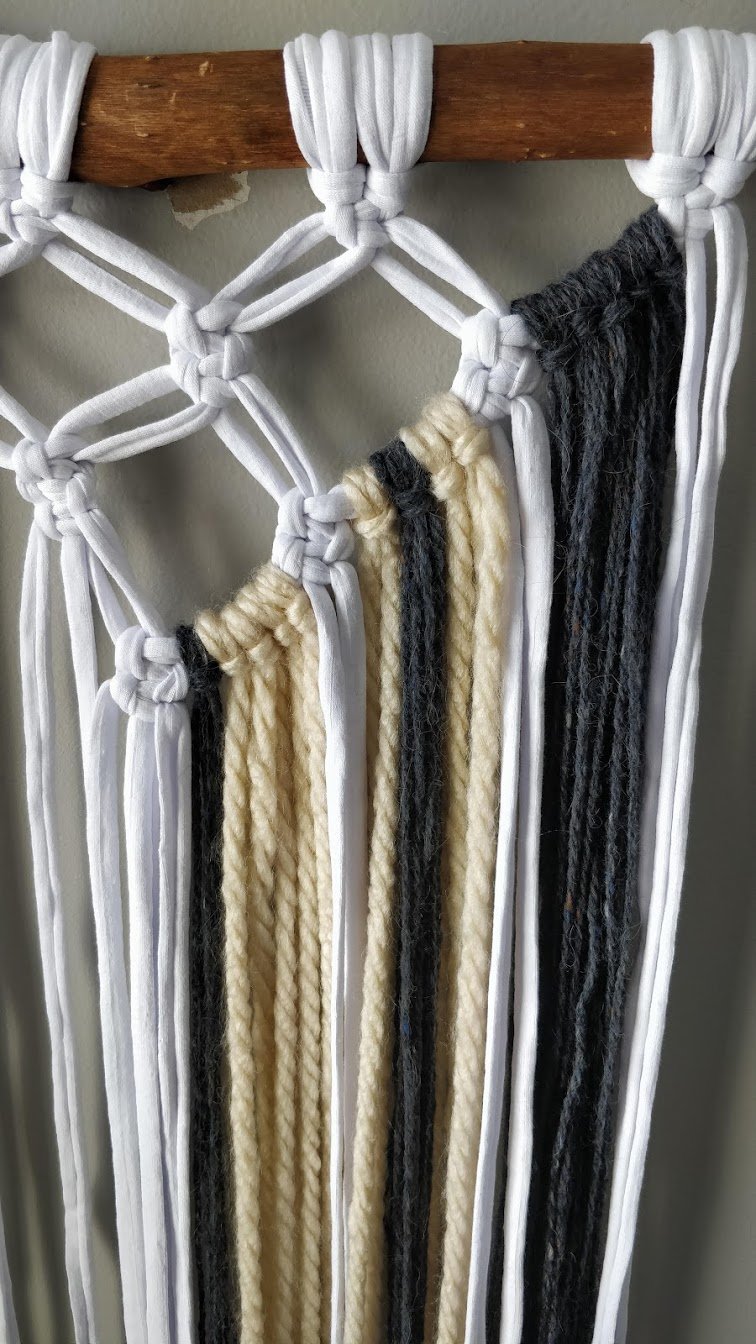
My Macrame Yarn Selection
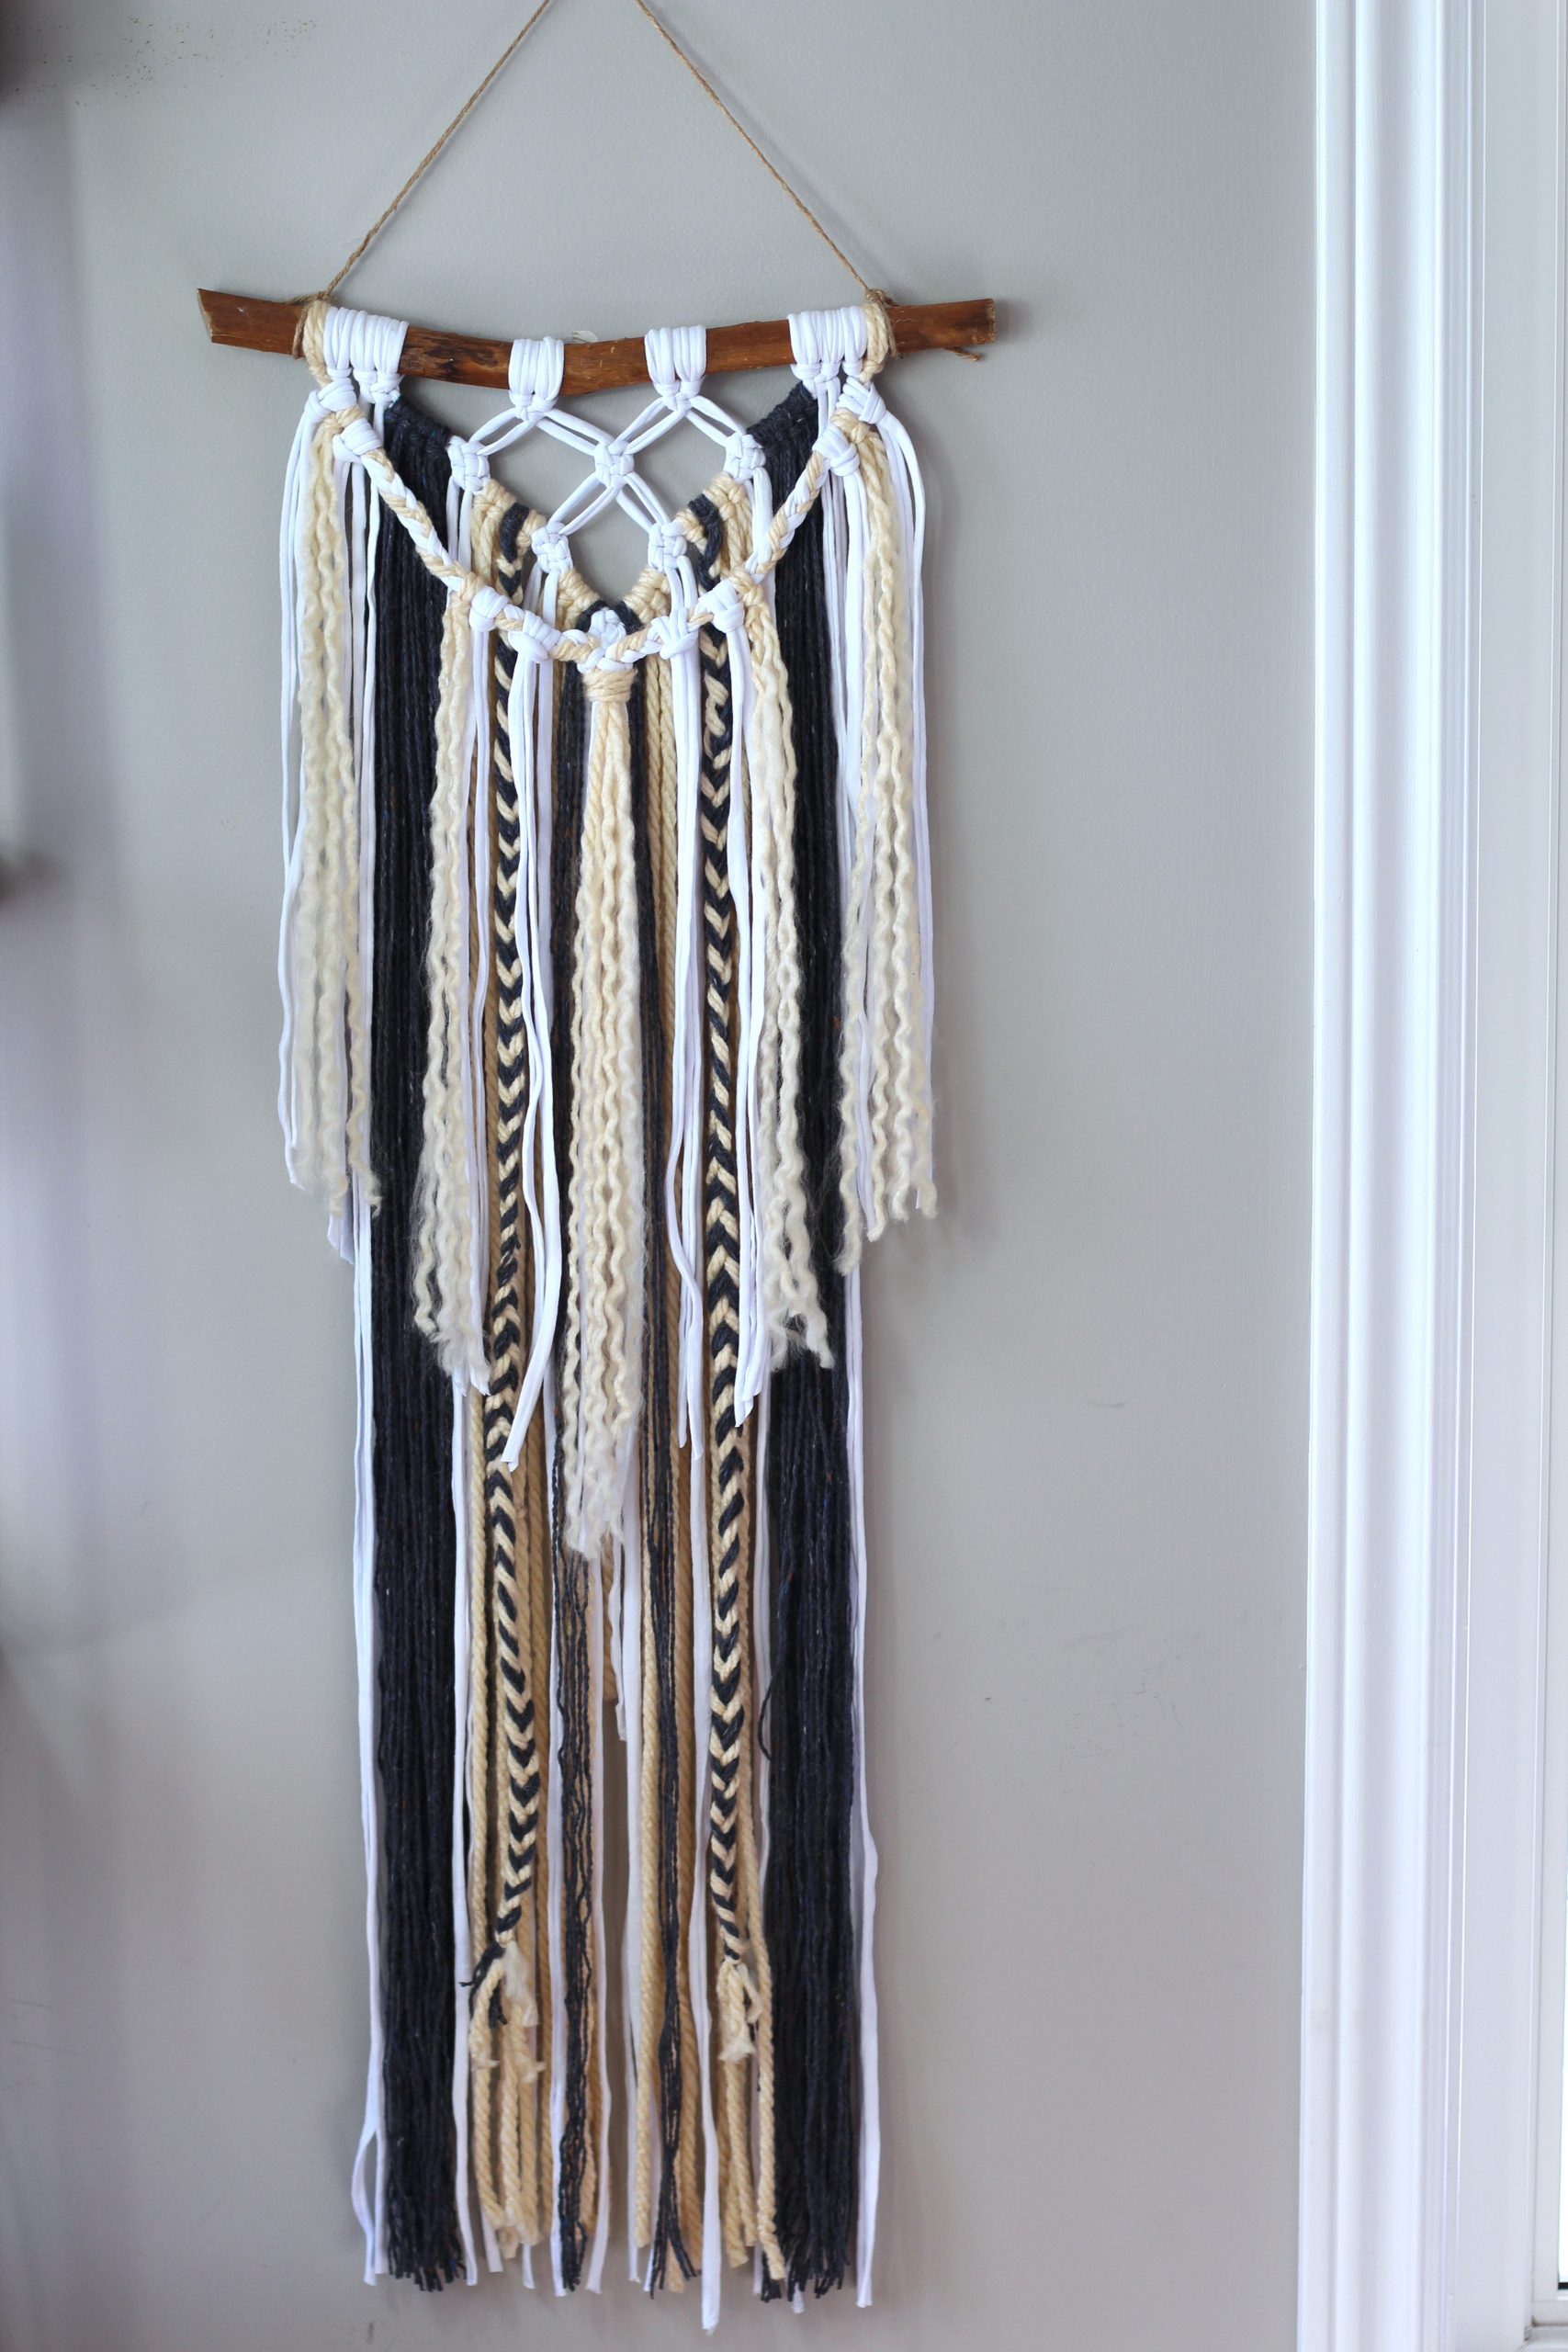
I chose to use regular yarn in the wall hanging in the tutorial below to prove you can macrame and create beautiful pieces with simple yarn (which you might already have laying around at home!)
The lovelies over at Love Crafts graciously sent be an assortment of gorgeous textured yarns, and I absolutely loved working with them!
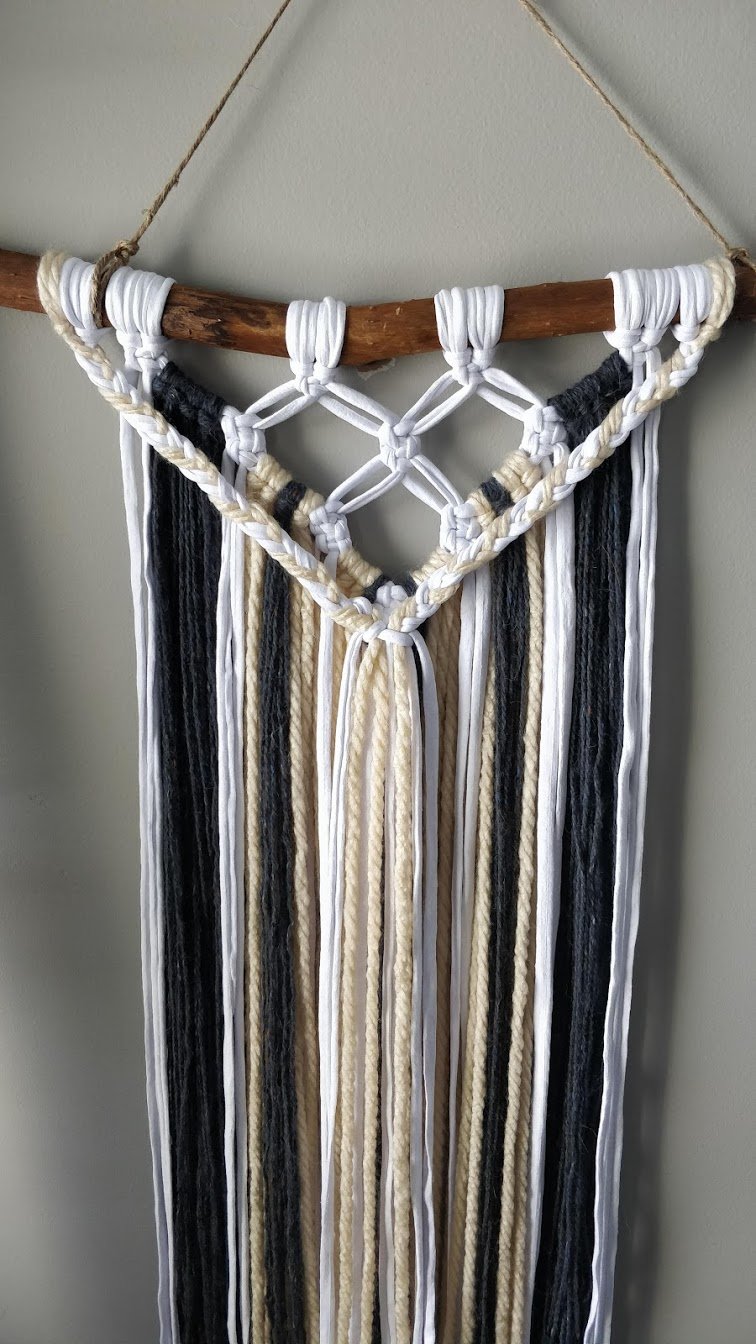
I chose different thicknesses and materials to give more visual impact and interest in the wall hanging.
The ones I used in this project are:
- Recycled t-shirt yarn in White
- Paintbox super chunky yarn in Vanilla Cream
- Felted tweed yarn in Carbon

My favorite yarn of them all was this environmentally-friendly yarn, made out of recycled t-shirts! Yup - you'll enjoy working with this smooth and sturdy cotton yarn and keep t-shirts out of the landfill to boot!
What's not to love!?
The Macrame Square Knot- Step-by-step
There are only a handful of knots to learn in the art of macrame, and the most popular and easiest of them all is the "square knot".
Let's go over how to make this knot with some step-by-step instructions and pictures.
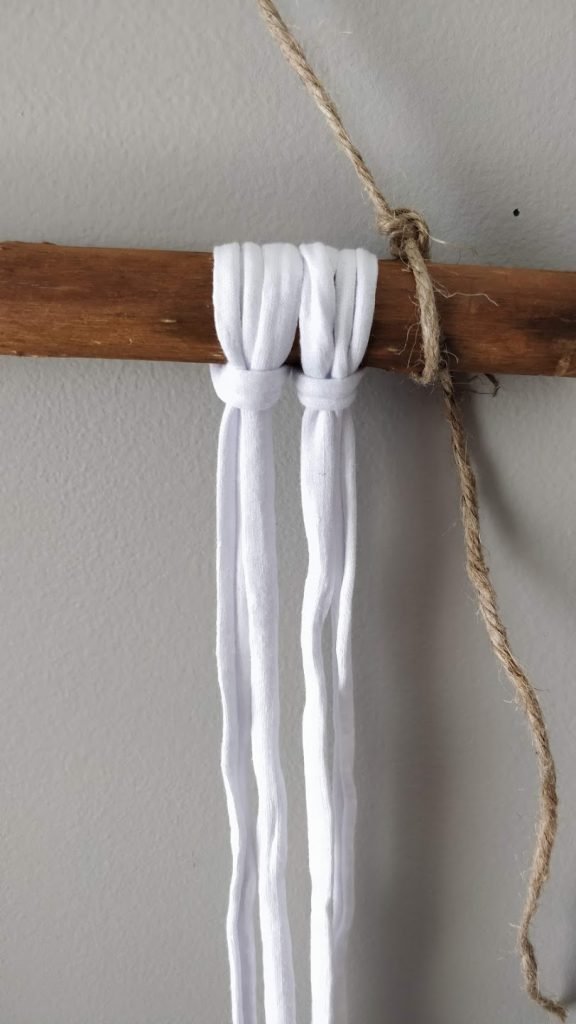
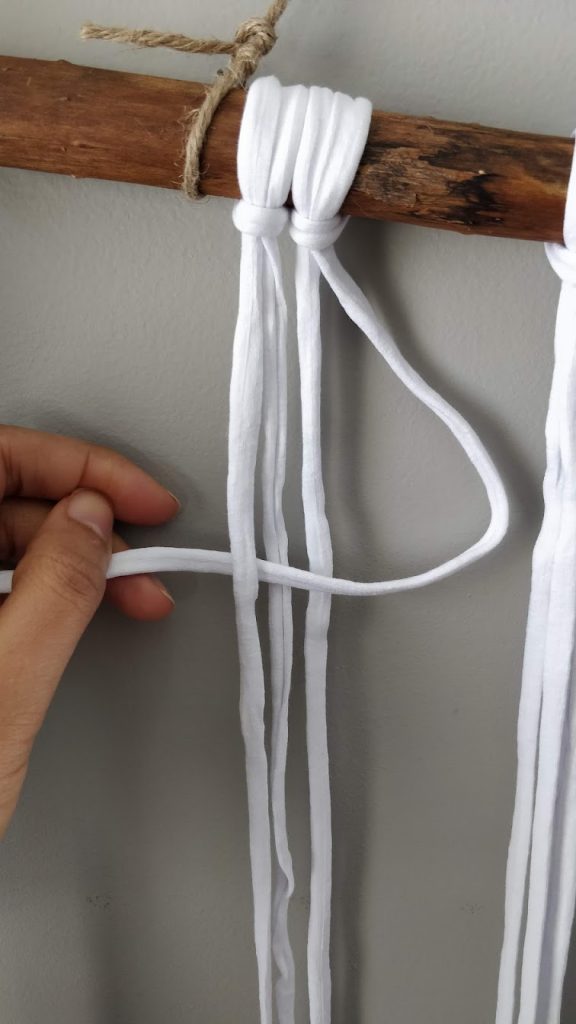
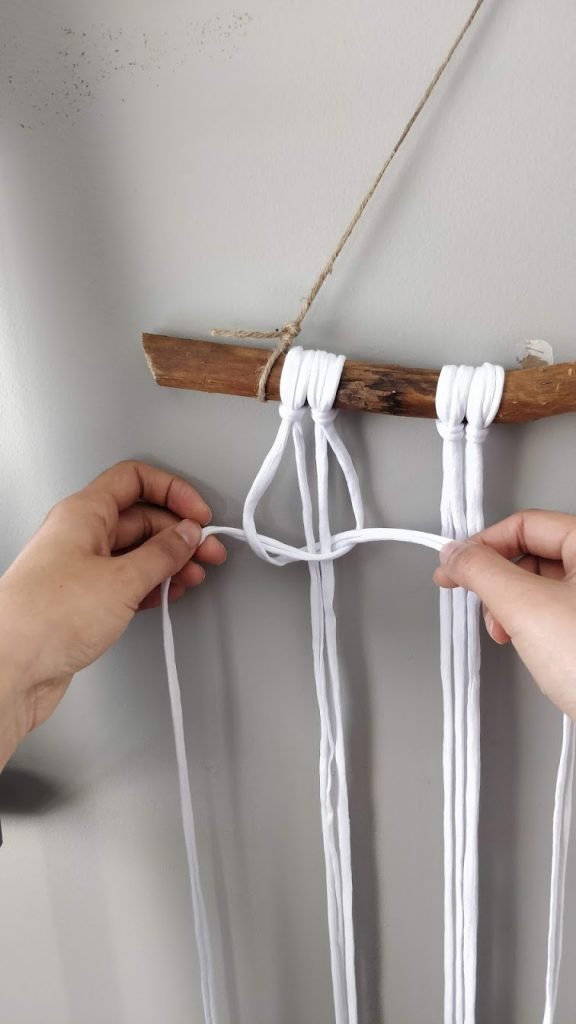
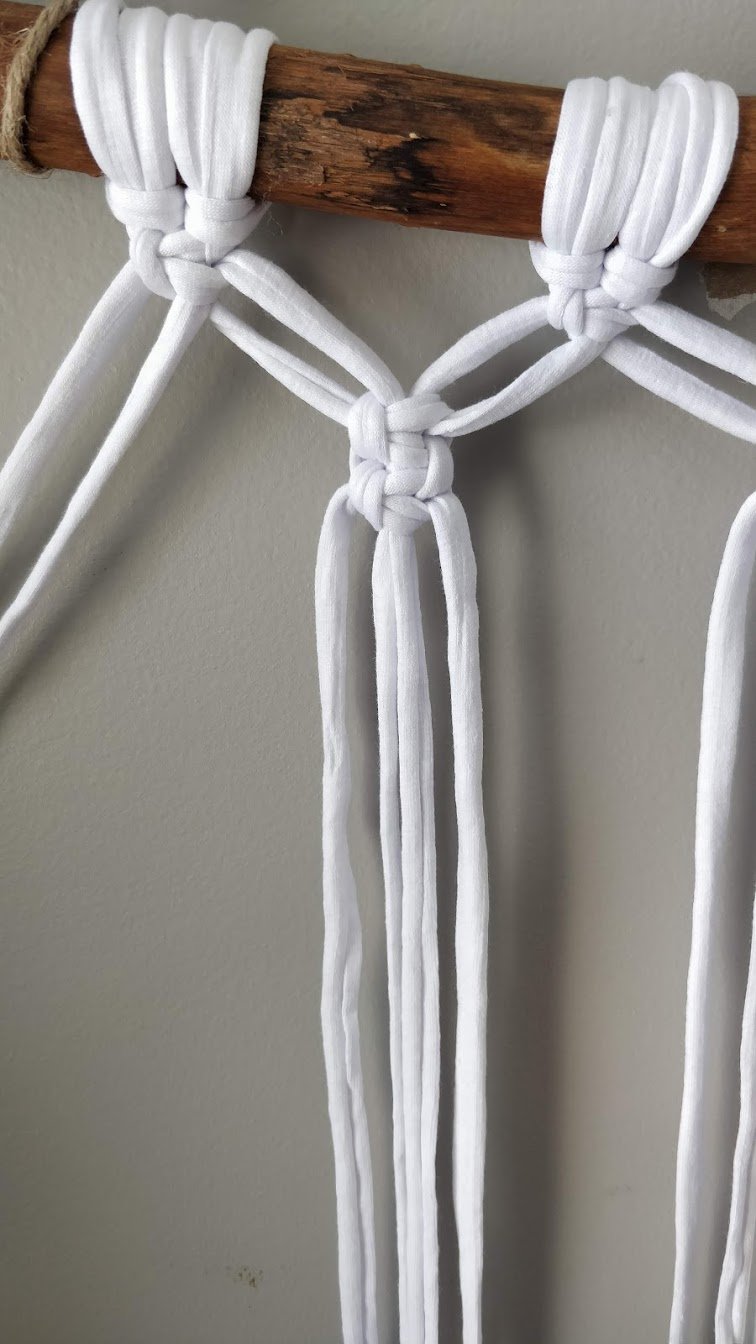
Step 1: The basic square knot is done by using 4 strings(attached to the branch using Lark's Head Knot). The outer strings will be the ones that you use while the middle (inner) 2 strings will remain stationary.
To make the first knot take the rightmost string and fold it OVER the 2 middle strings and UNDER the leftmost string. It will look like a "Sailboat" sail
Step 2: Take the leftmost string behind the two middle strings and up and through the "sail".
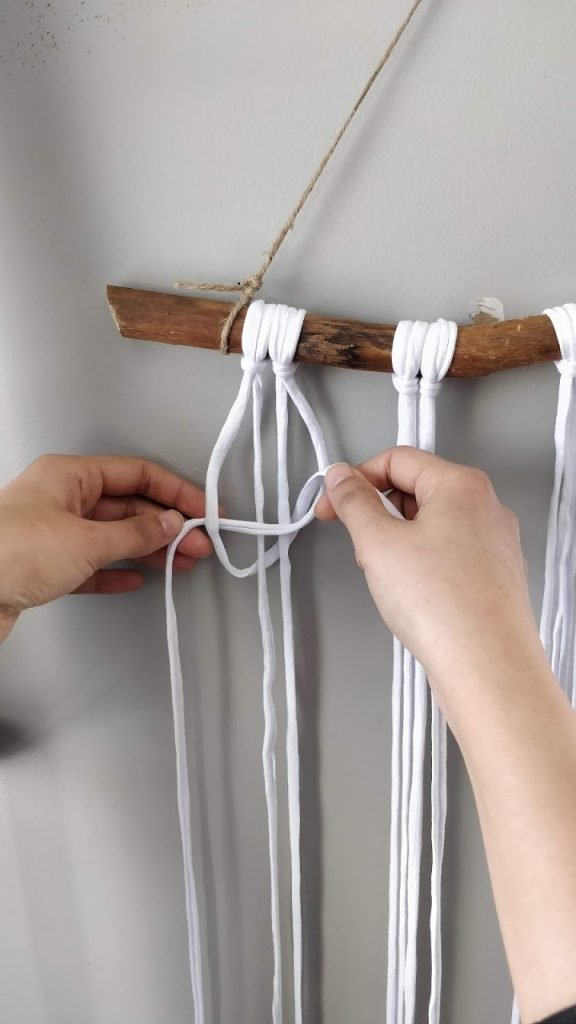
Step 3: Hold the tail of the left string and the right string in each hand and pull tight, until a knot is formed
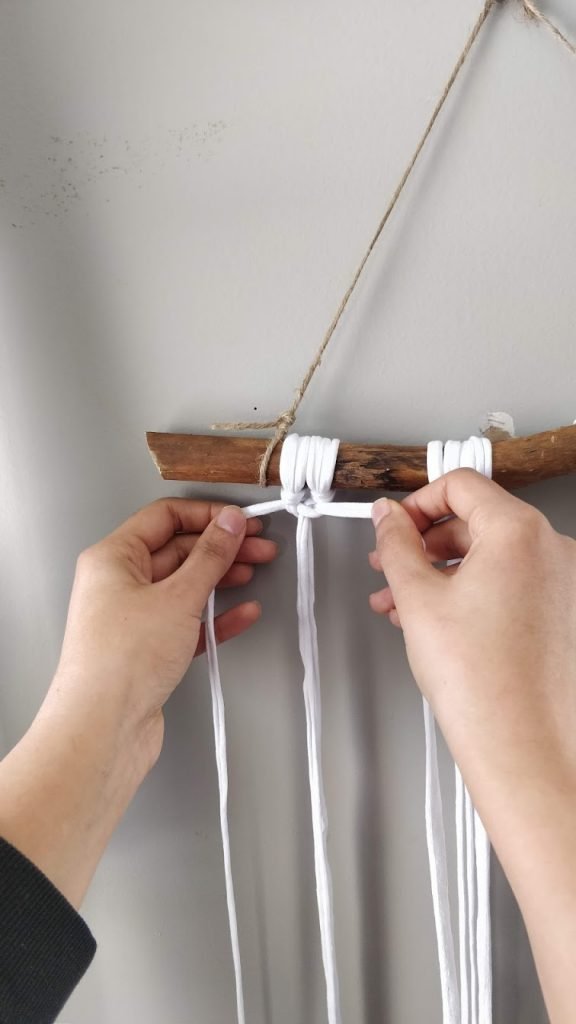
Step 4: To complete the square knot, repeat steps 1-3, but starting with the leftmost string this time. Fold the leftmost string OVER the 2 middle strings and UNDER the rightmost string. This will form the "sail"
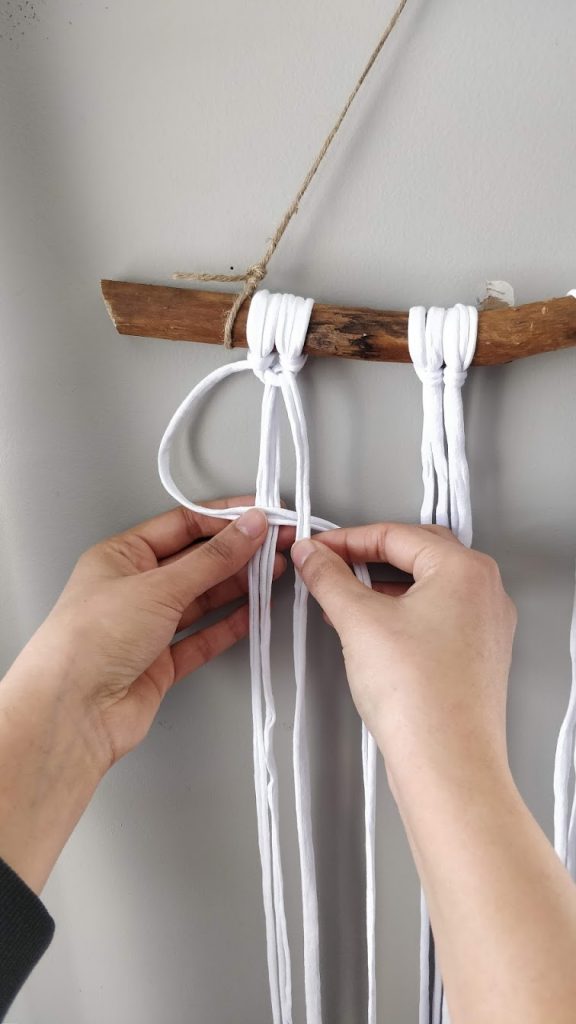
Step 5:Take the rightmost string behind and up and through the "sail". Holding the right and left strings in each hand pull tight until a knot is formed
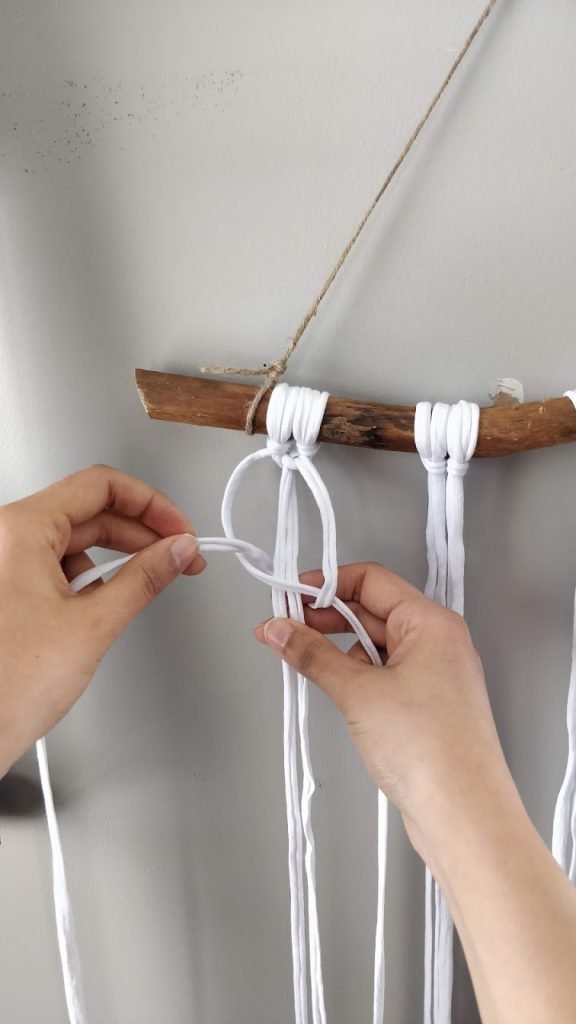
Step 6: You're done! Your square knot is complete! If you want most square knots just repeat steps 1-6 over again. This is a basic macrame design and knot you will see in many tutorials online.

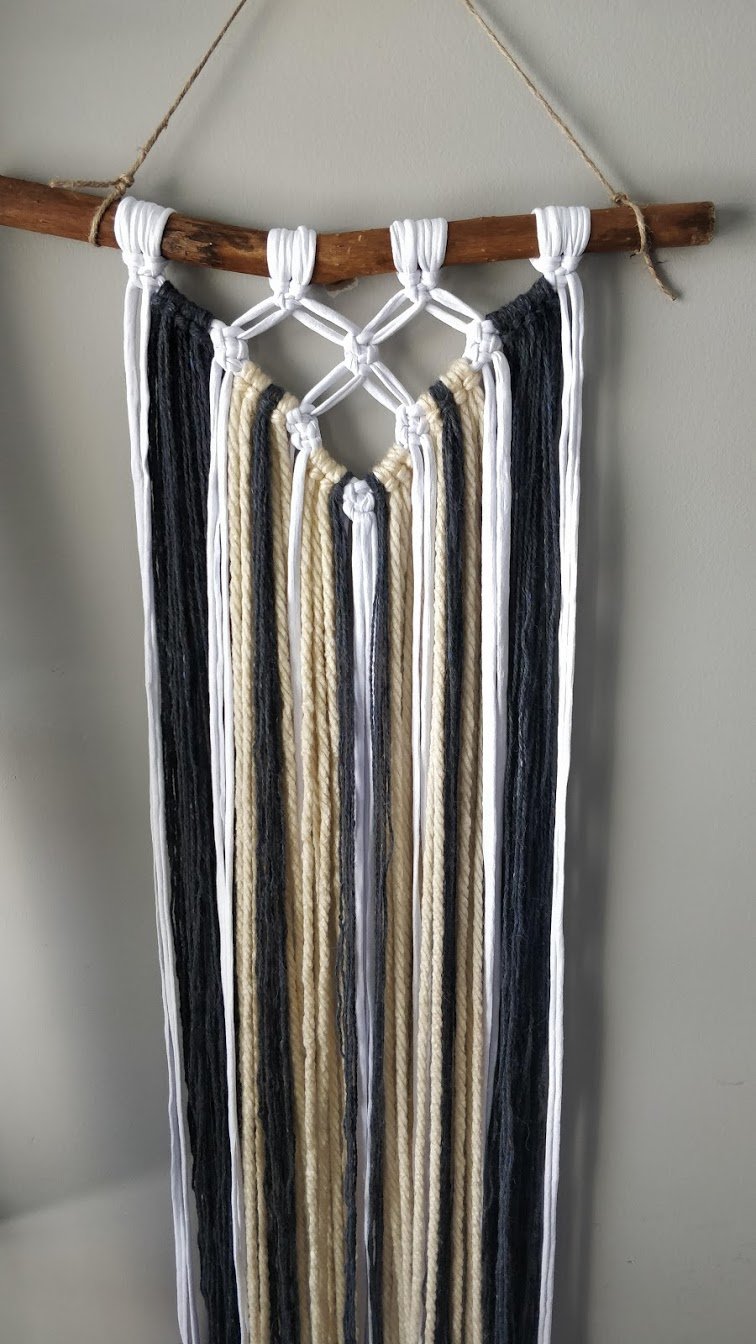
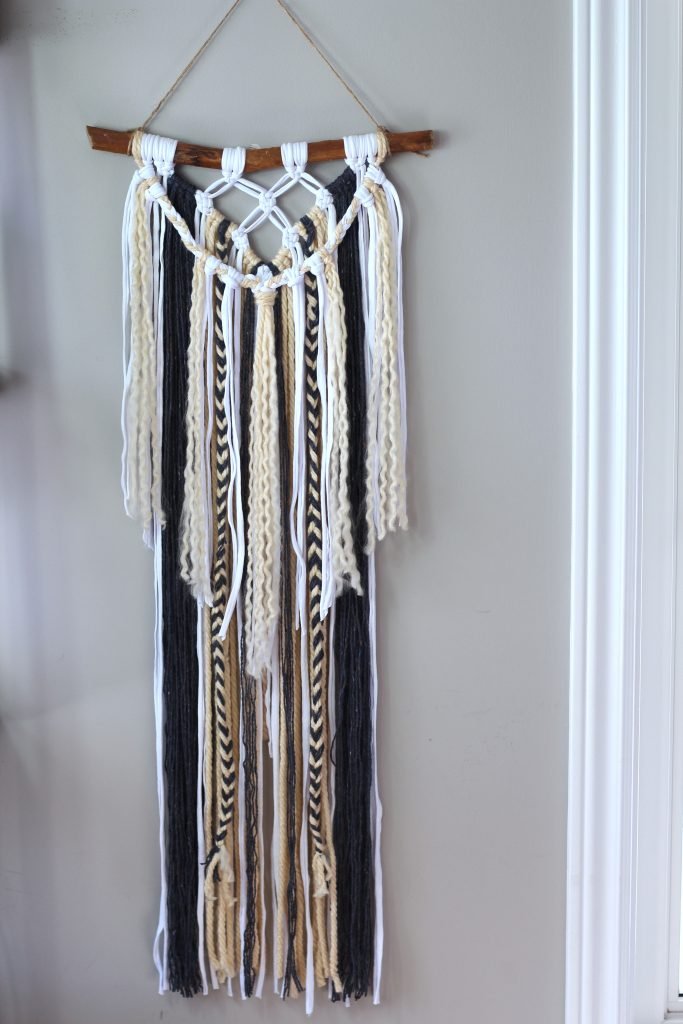
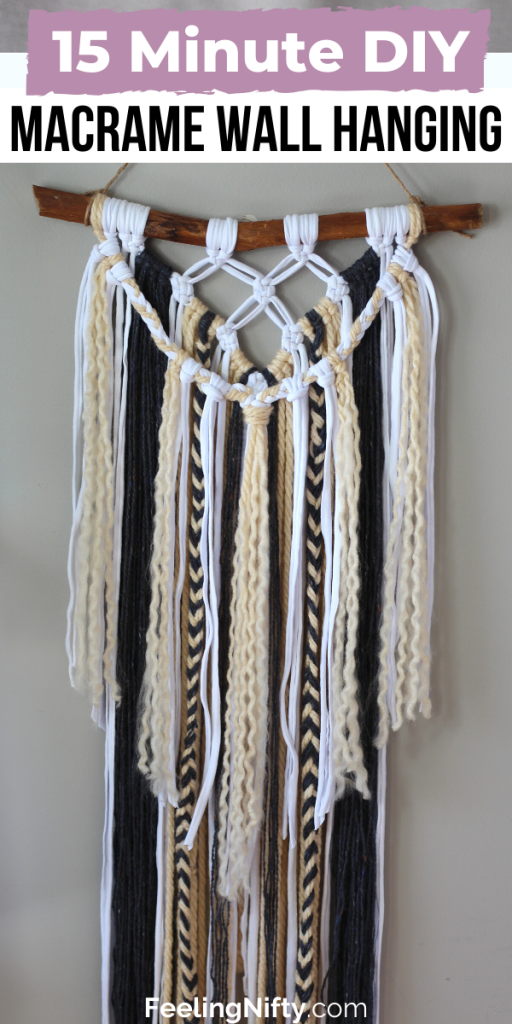
DIY 15 minute Macrame Wall Hanging

Materials
- -8 strands yarn, white (100 inches long each)
- -30 strands yarn, grey and beige (80 inches long each)
- -4 strands yarn, white and beige(70 inches long each)
- -12 strands yarn, white and beige (60 inches long each)
- -a tree branch, driftwood or a wooden dowel
- -scissors
- -measuring tape
Tools
Instructions
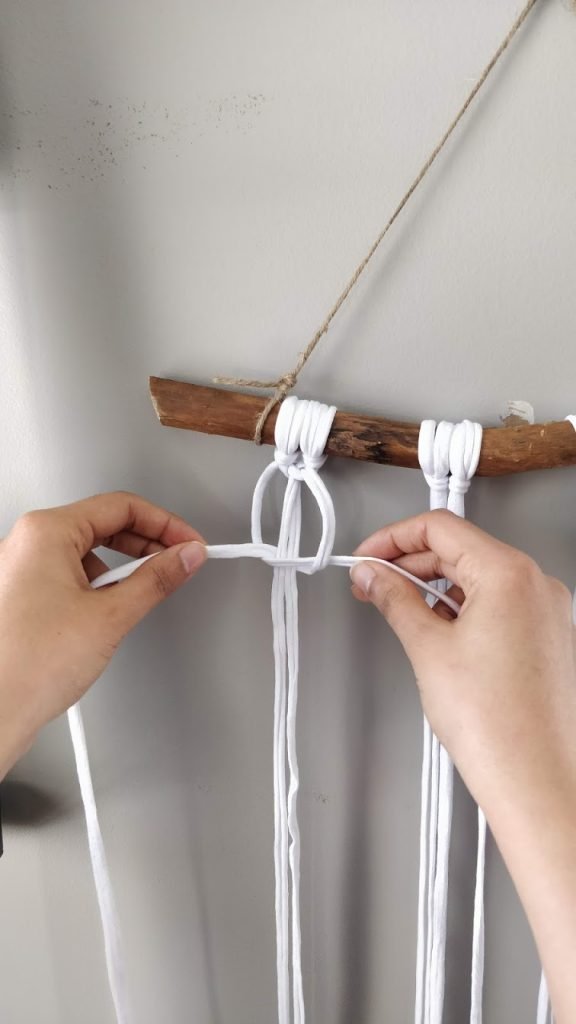
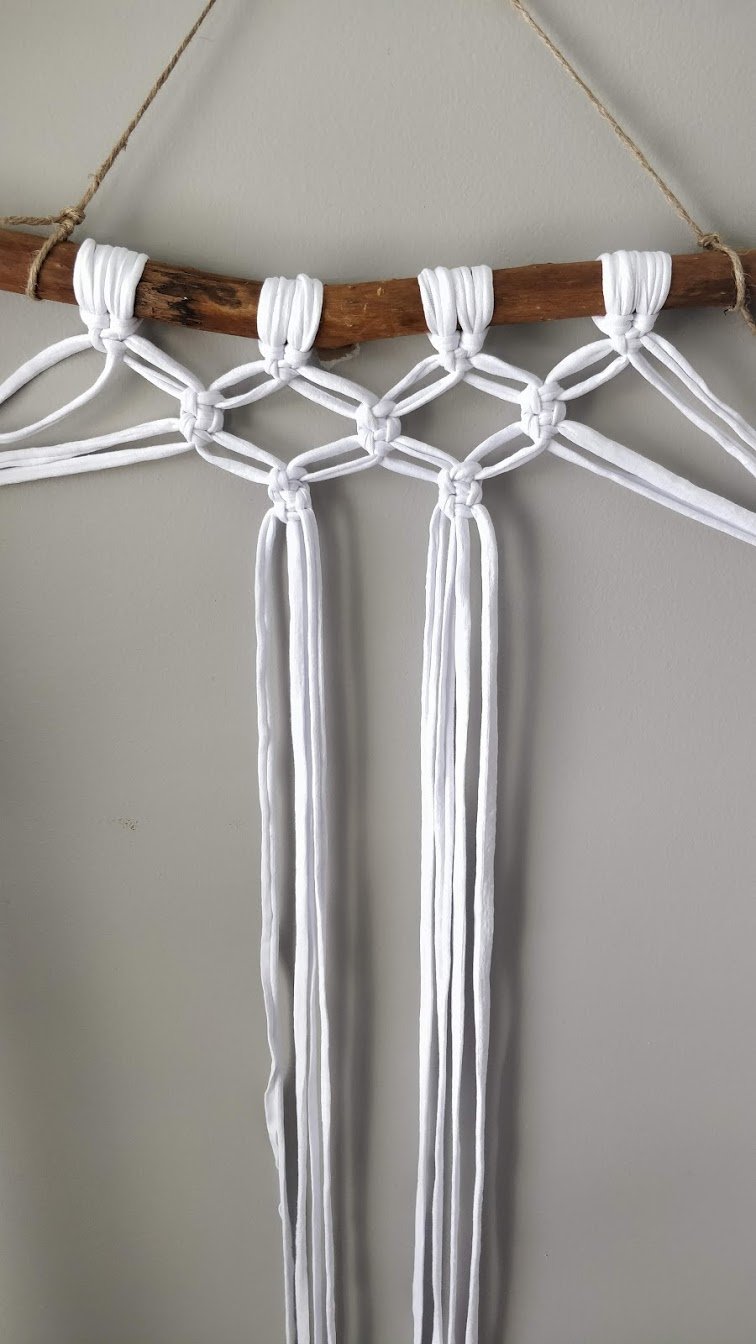
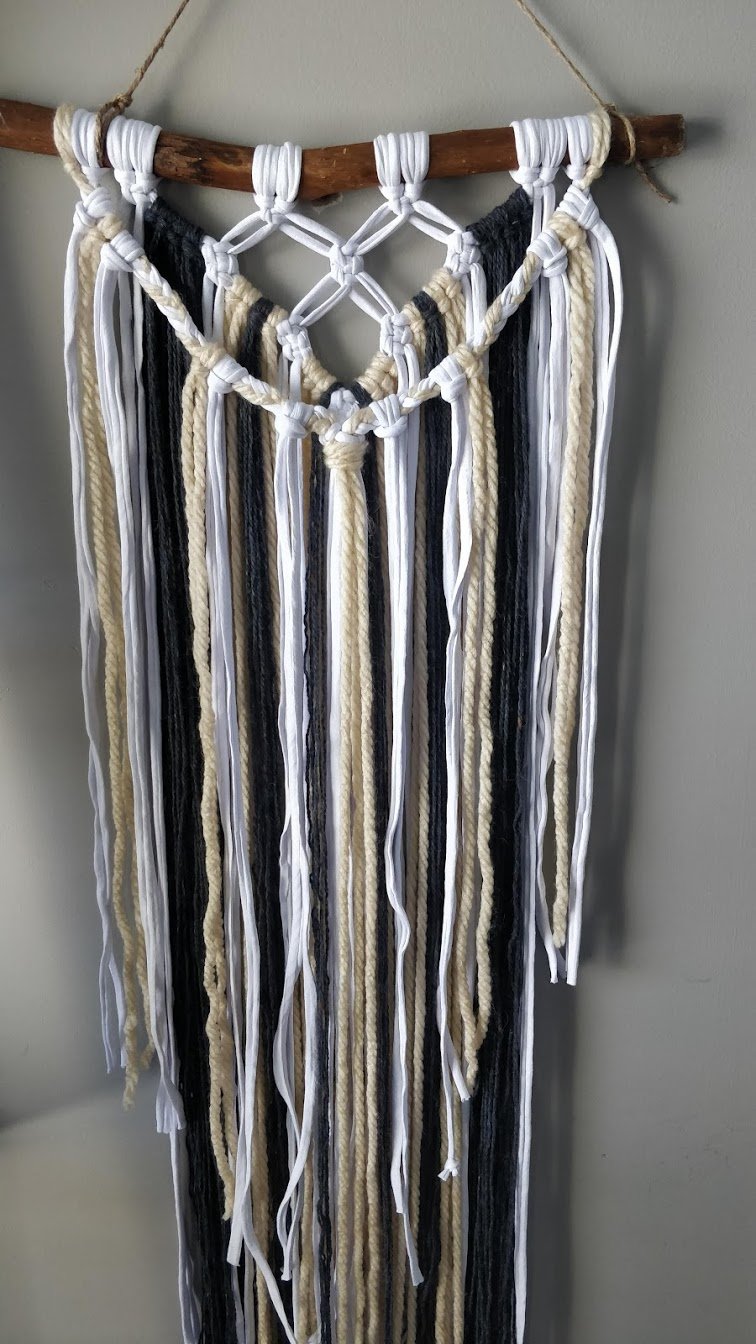
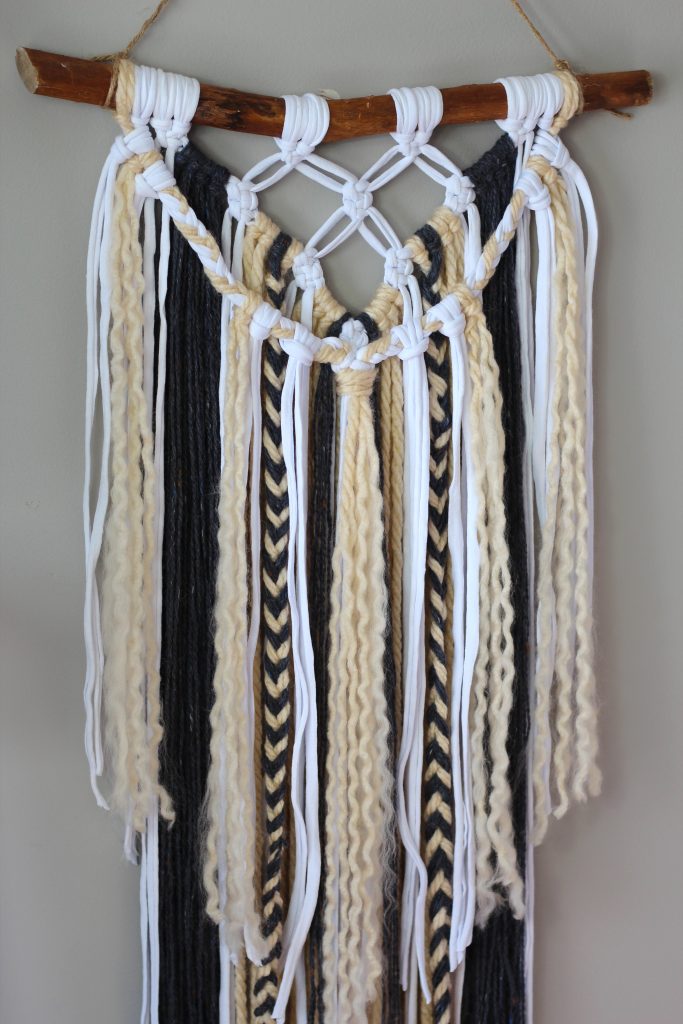
- Take your 8 (100 inch long) strands and attach them to the tree branch using Lark's head knots. To make a Lark's head knot, fold the string in half and take the middle of each strand (forming a loop) and put it behind the branch. Take the loose ends of the strand and put the through the loop. Pull the strings down and your lark's head knot is formed. do this for all 8 strands and group them in 2's to make 4 groups

- With each group of 4 strands, follow steps 1-6 above and tie a row of square knots.
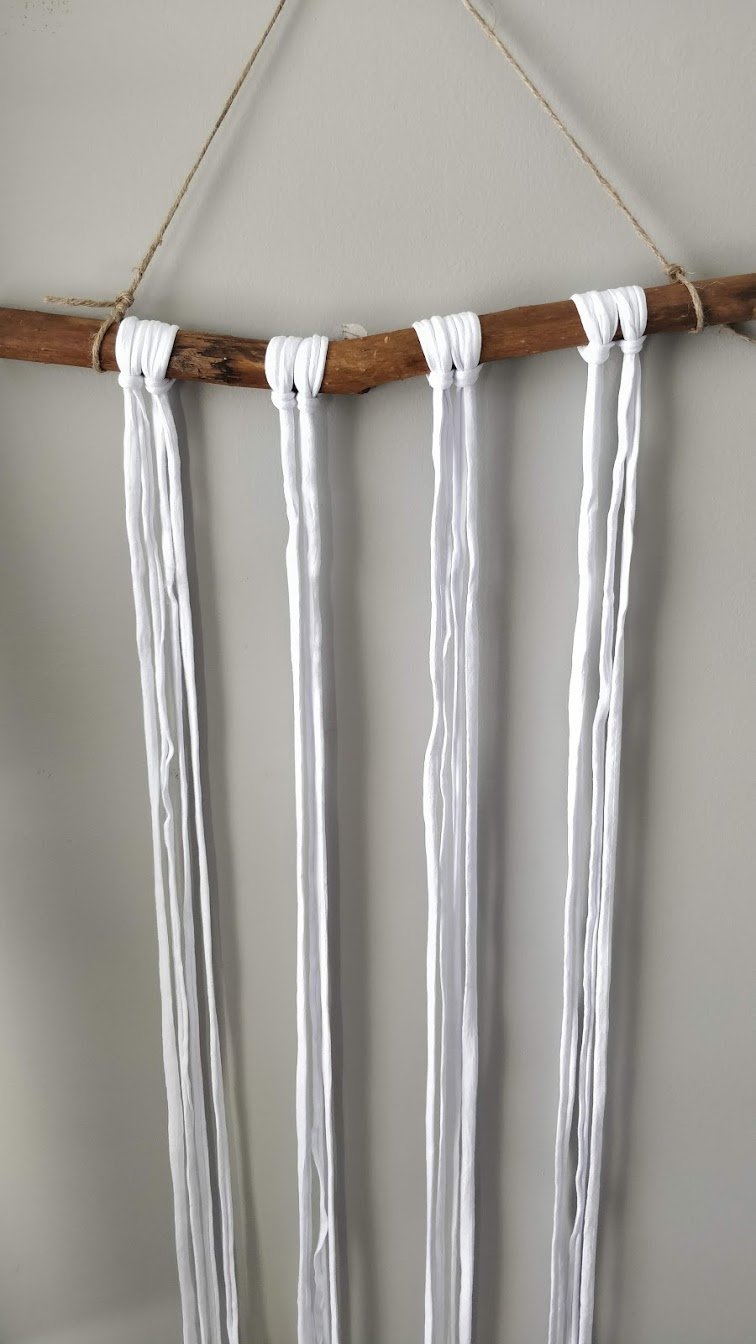
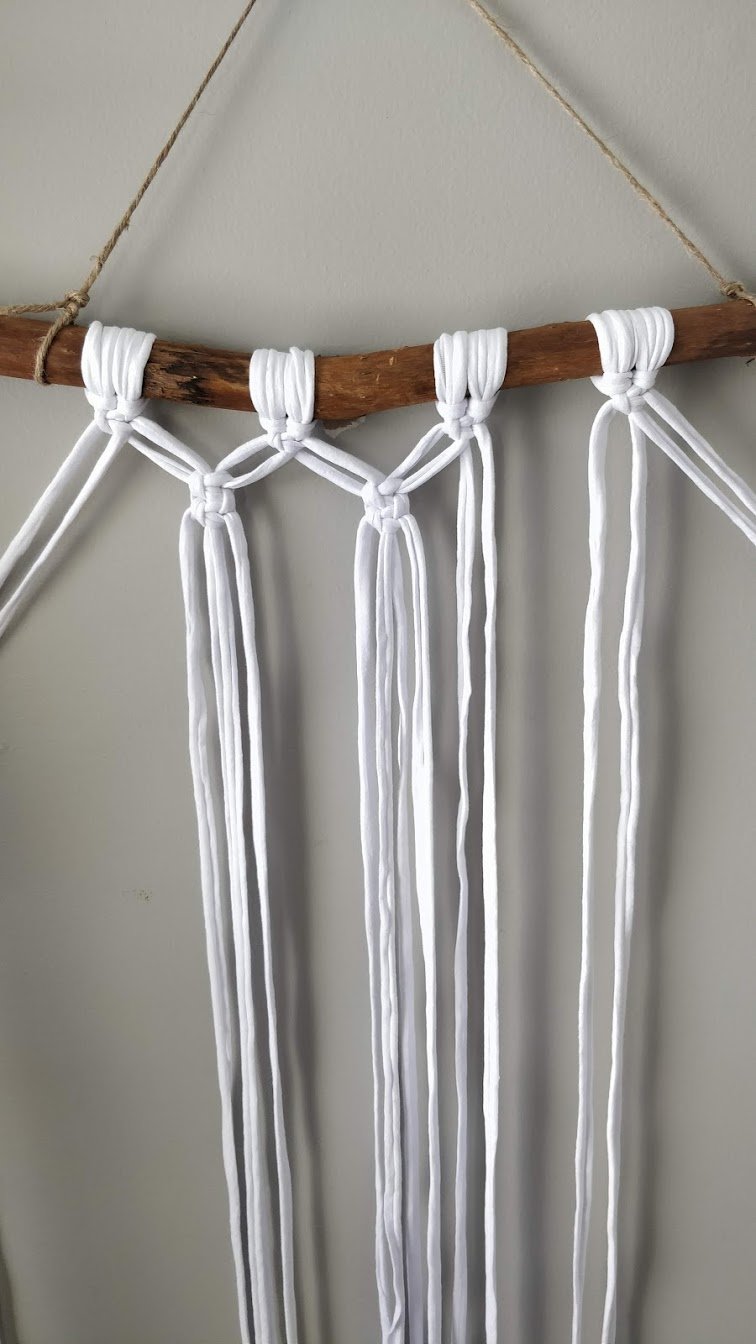
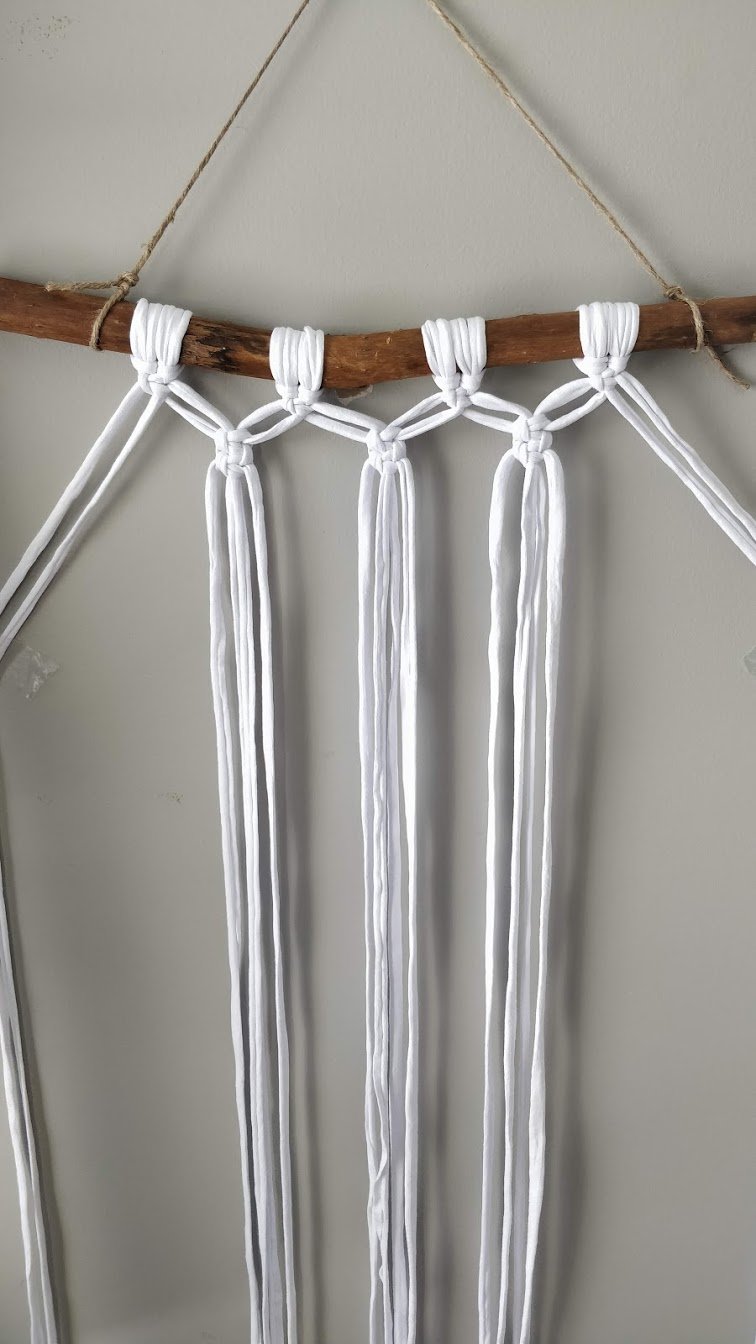
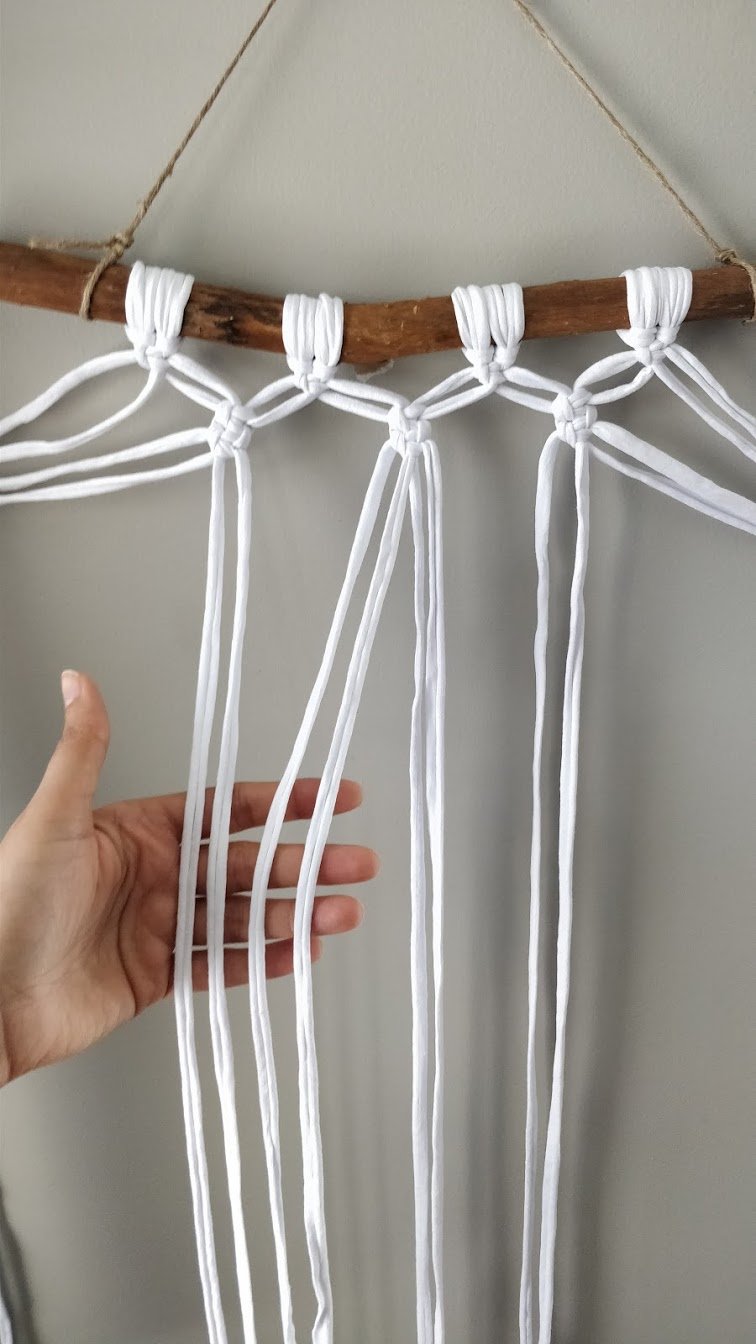
- Tape (or set aside) the 2 rightmost strands and 2 leftmost strands. You will not work with these. Take the first 4 strands on the left and tie a row of square knots.
- Take your next 4 strands and tie a row of square knots.
- Take your last 4 strands and tie a row of square knots.
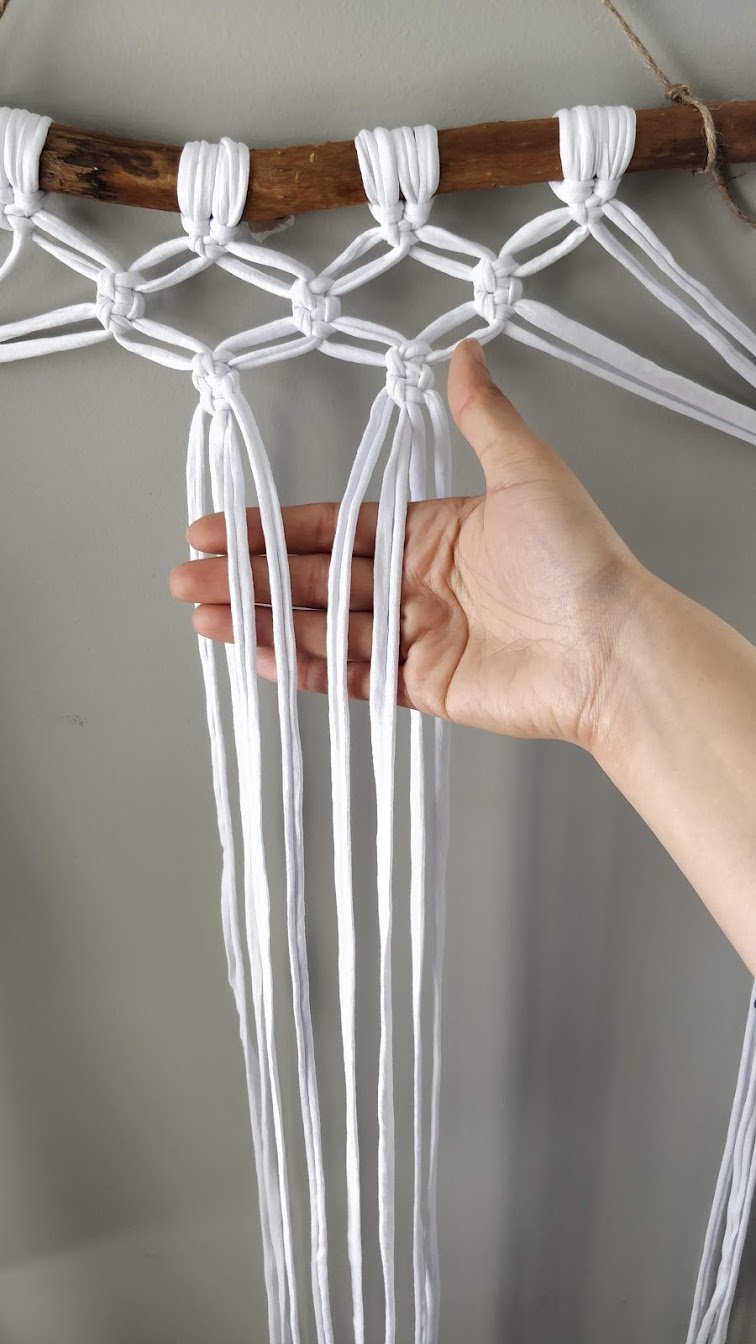
- Tape (or set aside) 4 rightmost and 4 leftmost strands. You will not work with these. Tie rows of square knots for the 2 groups of 4 strands.
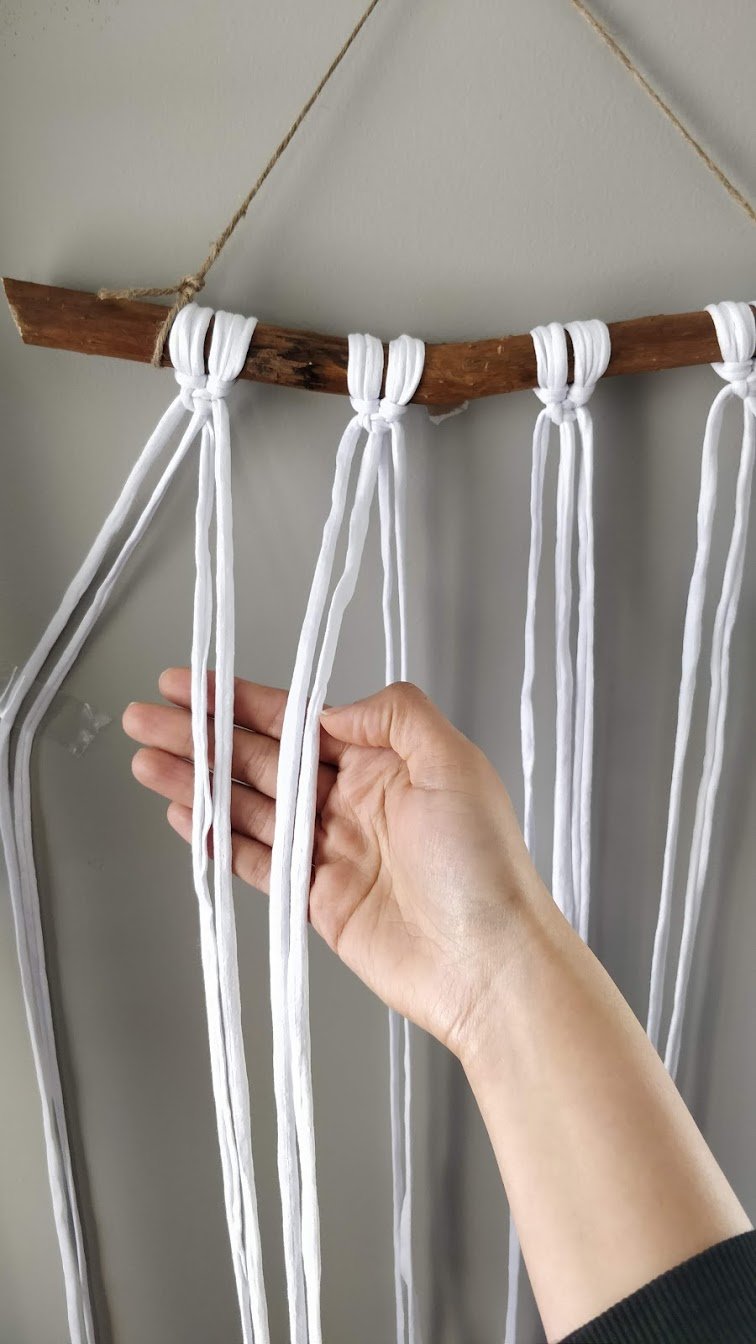
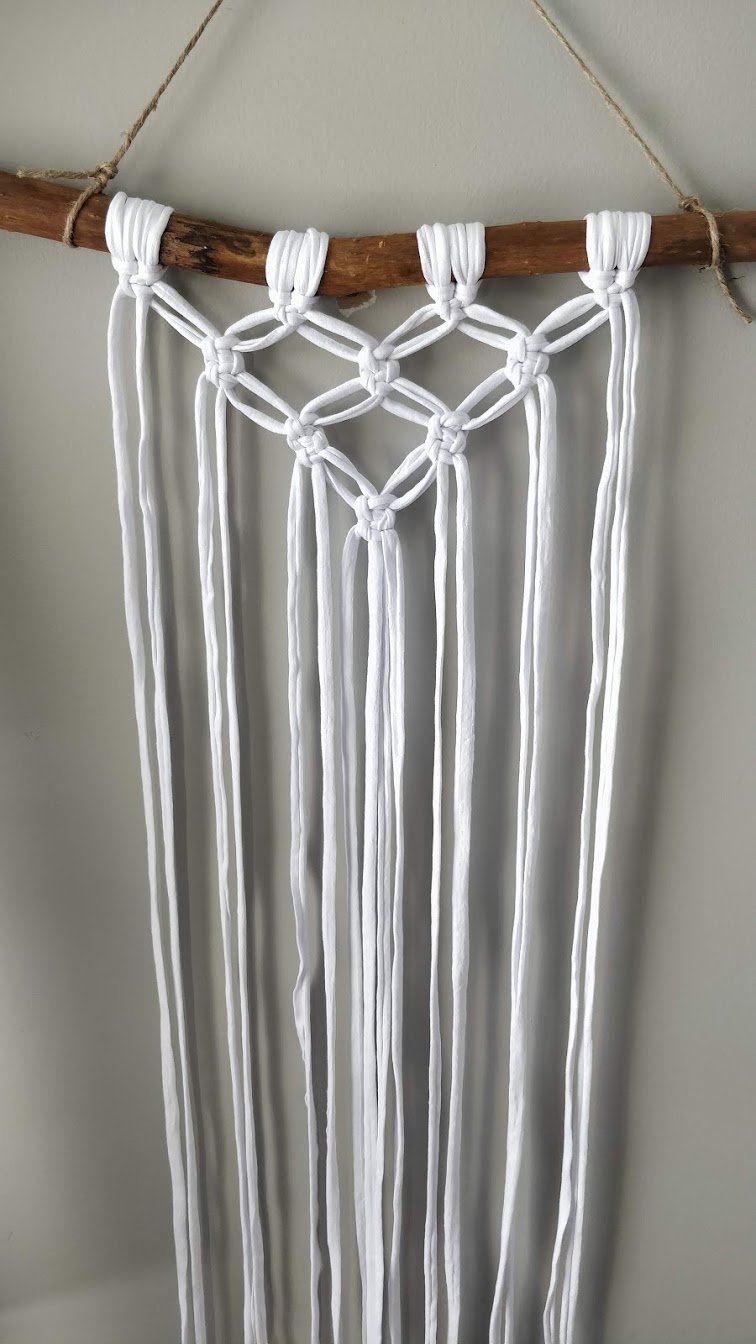
- Tape (or set aside) 6 rightmost and 6 leftmost strands. You will not work with these. Take your center 4 strands and tie a row of square knots. This completes the skeleton structure of the hanging
- Take your 30 strands (80 inches long each) and tie Lark's head knots along the bottom portion of the design. Use different colors, and texture yarns to create more interest.
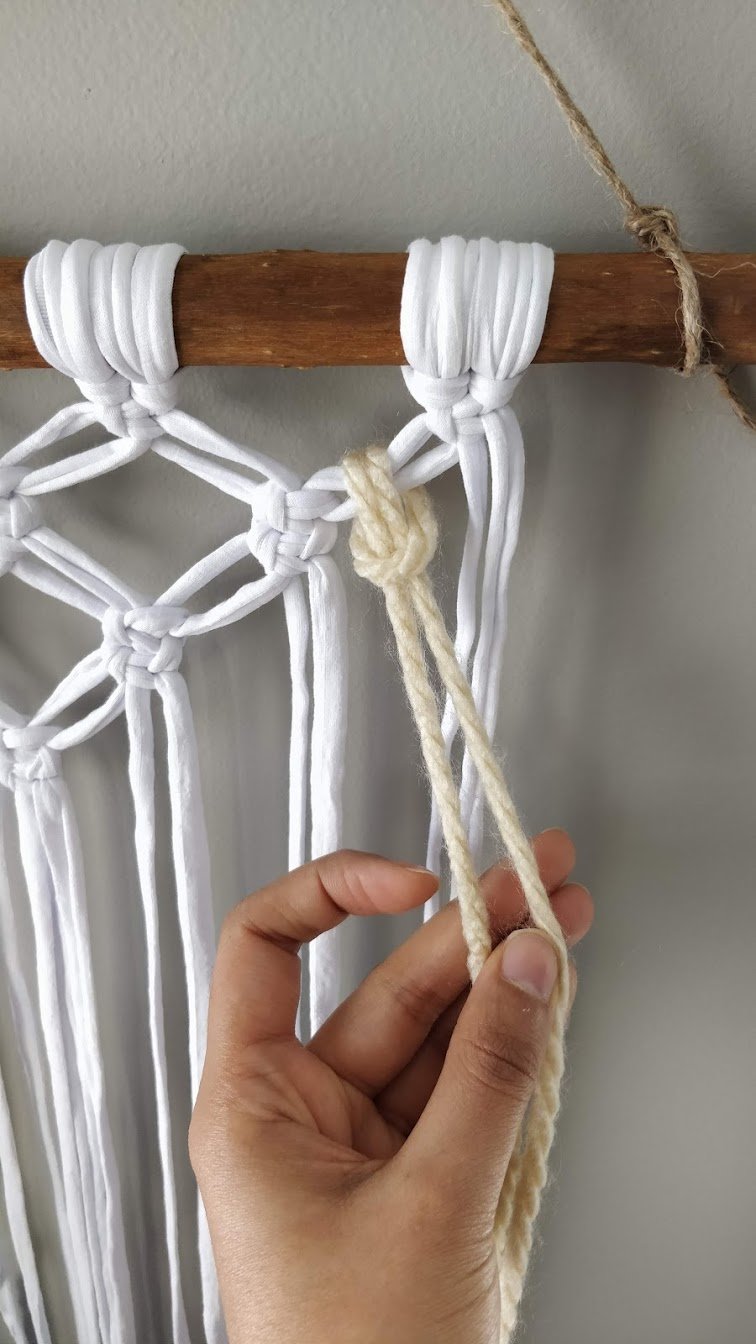
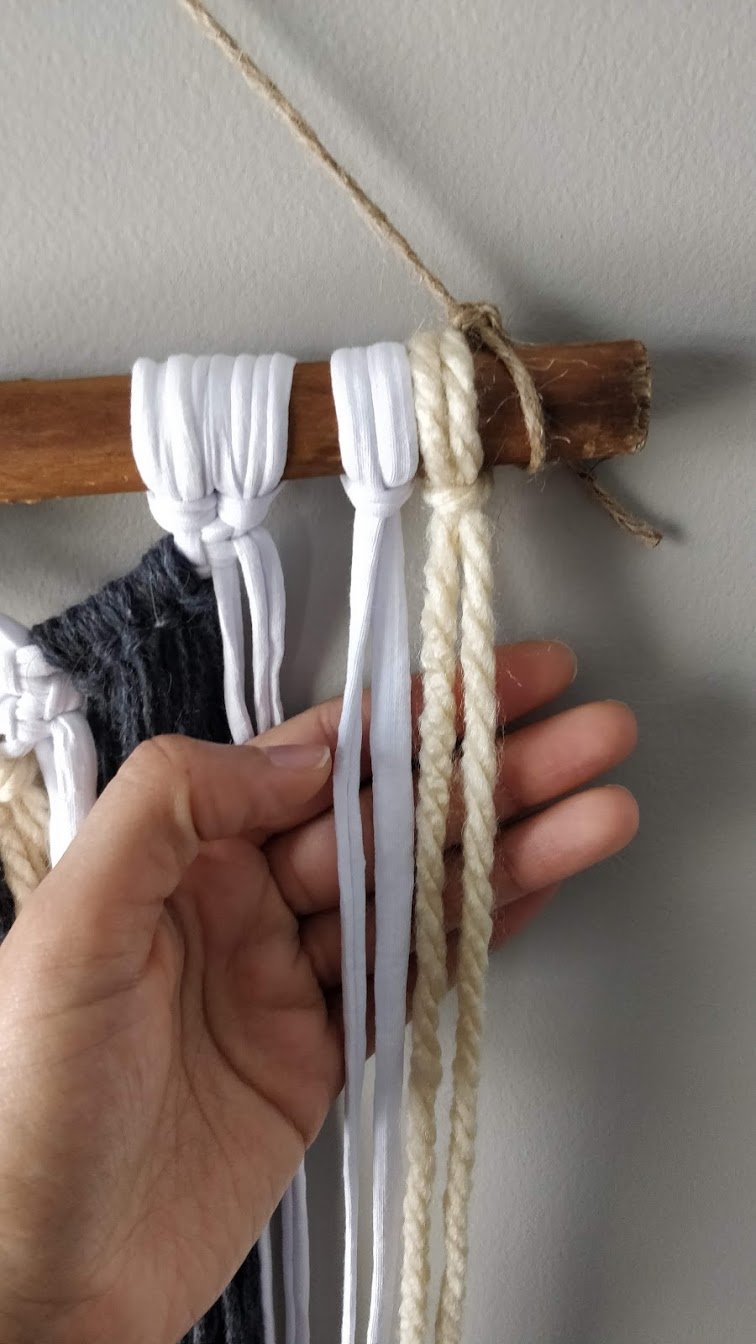
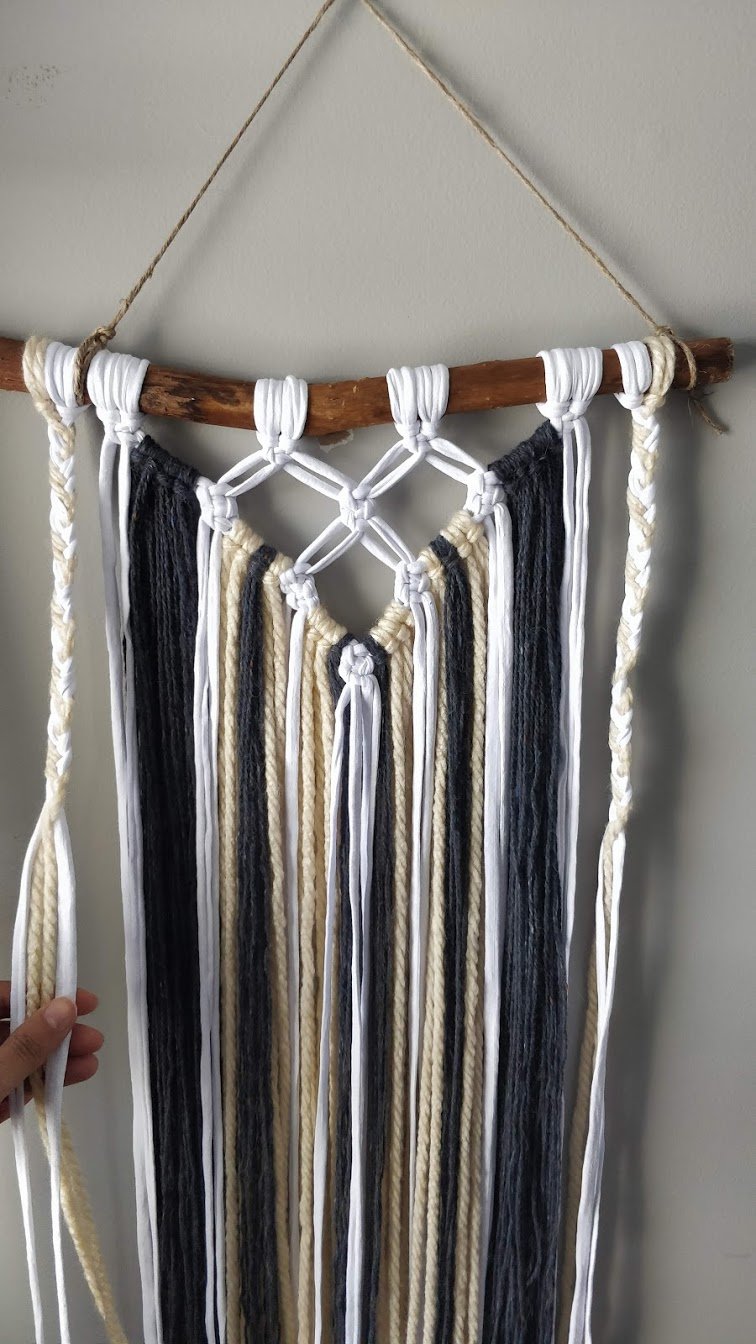
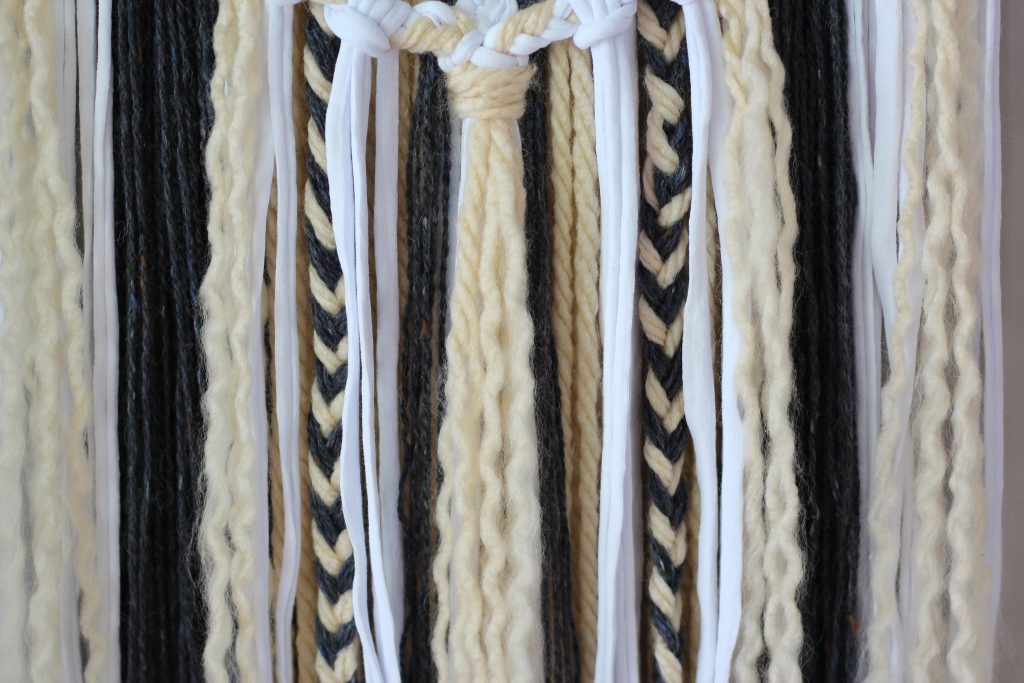
- Take your 4 strands (70 inches long) and tie 2 Lark's head knots on each end of the branch..
- With the strands from step 9, tie a braid on both ends of the branch (using 4 strands).
- Bring the braids to the center and tie them together using a small piece of string
- Take your final 12 strands (60 inches long) and tie them onto the braid portion using Lark's head knots. In this design I tied 3 strands at the top of the braid, 2 in the middle and 1 at the bottom-center (and repeated this on the other side).
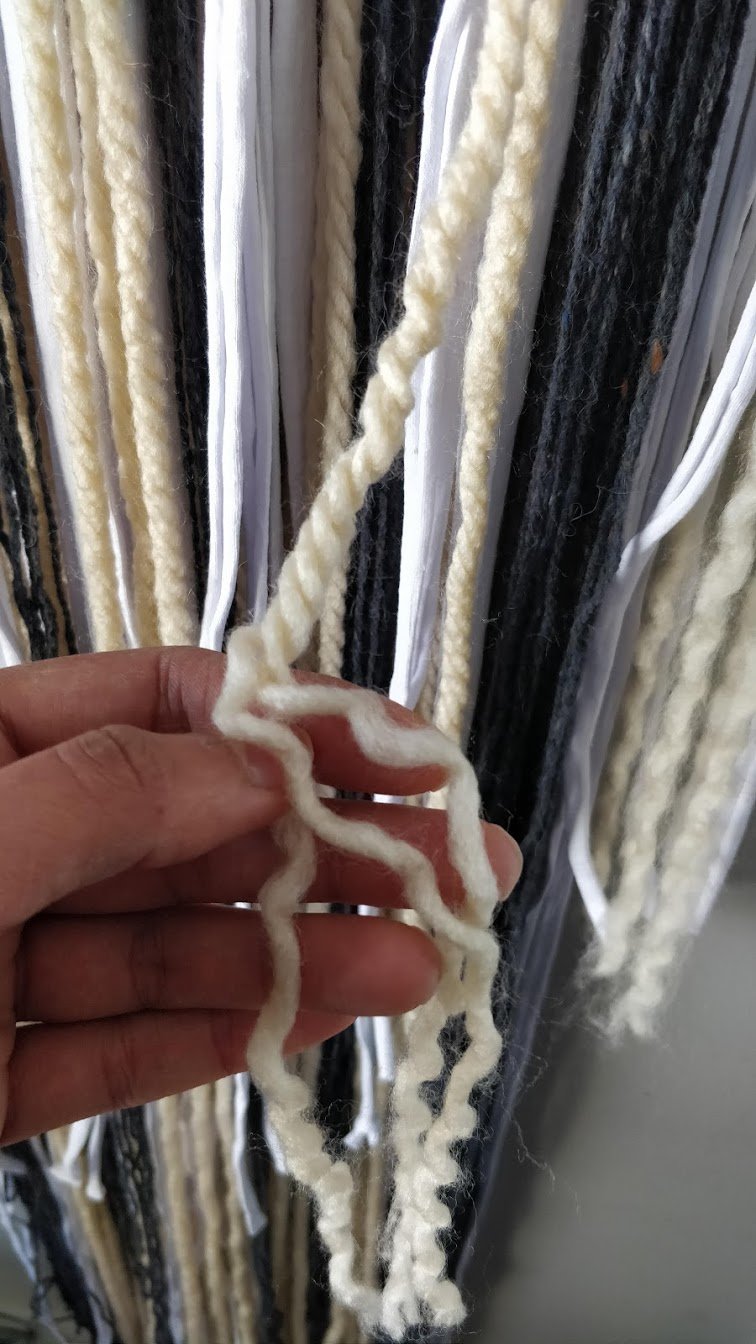
- I unraveled some of my chunky yarn, to give even more nifty texture variance. Just use your fingernails to unravel each strand of yarn.
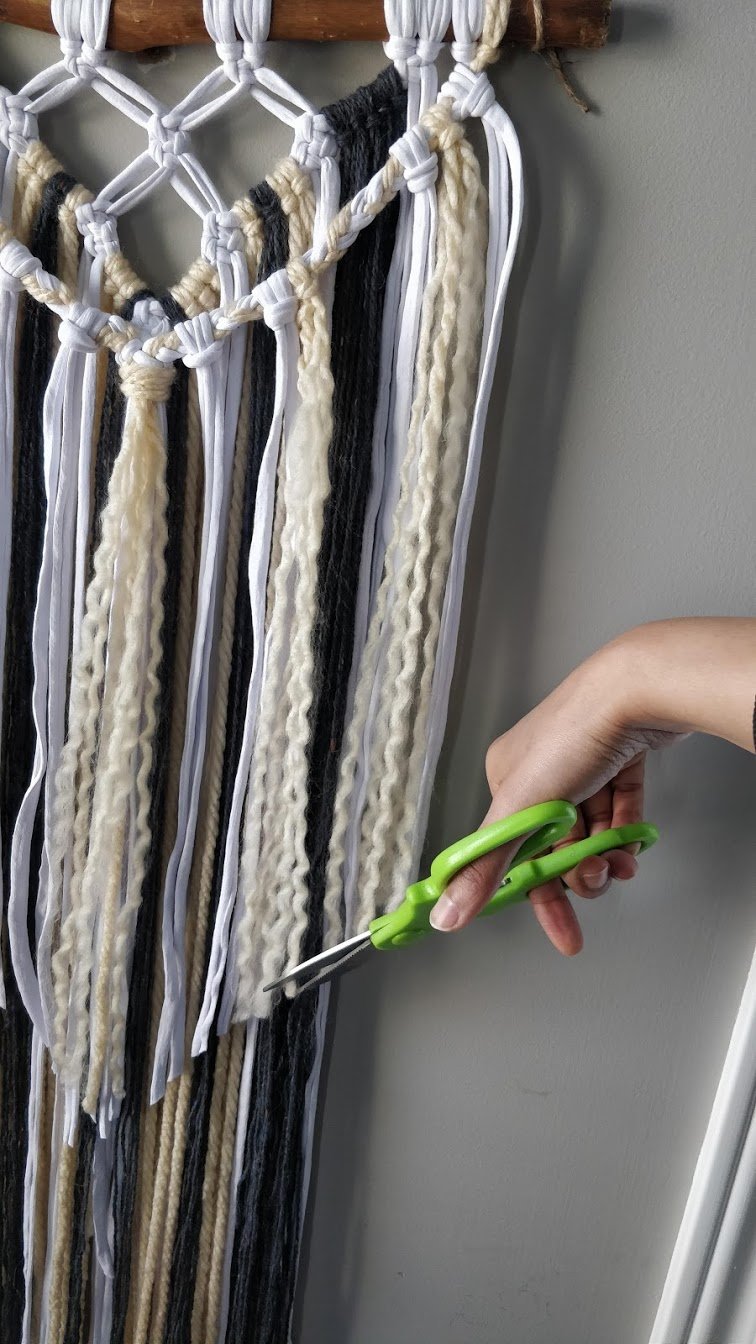
- Take a pair of sharp scissors and cut/shape the bottom of your wall hanging

 .
.
Recommended Products
As an Amazon Associate and member of other affiliate programs, I earn from qualifying purchases.
-
 SINGER 00557 4-½-Inch ProSeries Detail Scissors with Nano Tip, Teal
 -
Byher 15-Inch White Birch Logs for Decoration - Decorative Farmhouse Home Wall Hanging Decor (15 Inch)
-
MB Cordas Pure White Macrame Cord 3mm Single Twist Bleached Macrame String Soft Macrame Rope for Handmade Plant Hanger Wall Hanging Craft Making and DIY Projects (White)
-
(Linen Grey, 4mm x 100m(About 109 yd)) Handmade Decorations Natural Cotton Bohemia Macrame DIY Wall Hanging Plant Hanger Craft Making Knitting Cord Rope Linen Grey Color Macramé Cord
-
XKDOUS Macrame Cord 3mm x 220Yards, Natural Cotton Macrame Rope, 3 Strand Twisted Cotton Cord for Wall Hanging, Plant Hangers, Crafts, Knitting, Decorative Projects, Soft Undyed Cotton Rope


If you liked this project please PIN IT!


Where is the video for this project? Thanks!
Hi Patty,
I unfortunately don't have a video for this project.
Cheers,
Jasmine
Thank you for this tutorial. You made it so easy to understand, and I actually think I can accomplish this. So many tutorials are not as easy to follow! Thanks for taking the time to show how to do these knots!!!
You are very welcome Kathleen!! So glad to hear you found the tutorial easy to follow 🙂 I hope you enjoy making your macrame art 🙂
This is gorgeous! What are the finished dimensions? Thanks:)
Thank you Beth!! The finished dimensions are 1ft x 3 feet.
Very good instructions I think they will be easy to follow when I make my attempt
Thank you Osleene!!🙏 Enjoy making yours😊
Cheers,
Jasmine
Hello ! Are the 2-toned braided ones added at the end ? That is a gorgeous addition.
Thank you Dawn!🙏 Yep, it is a 2 tone braid on either end.
Cheers,
Jasmine
I was delighted to see your project and how easy it seems to be to make. I'm 65 and I have always wanted to learn how to macrame. I'm am going to try this. Thank you.
Thanks so much for your comment Connie! I hope you enjoy making it, it's a fun and easy project for any skill level.
Cheers,
Jasmine