DIY Lemonade Stand {with Free Printables}
This DIY lemonade stand is super easy to make and tons of fun for the kids to enjoy. Read below for the step-by-step guide
This was our second year participating in the I Take A Stand fundraiser for the Ottawa Regional Cancer Foundation. It's a fantastic event that inspires kids across the city to set up their own lemonade stands to help raise money for their local Cancer Foundation.
![]()
My kids are 7 and 4 and thought it would be a nice way to introduce them to fundraising for this great cause and learn some entrepreneurial skills while at it.
I didn't want to force the kiddos into this though. I really wanted it to be something they were excited about themselves, so I explained the event to them and watched for their reactions.
Their eyes lit up with excitement-it was an absolute YES! They were SO excited and couldn't wait.
Witnessing their excitement was incredibly infectious. So I decided to try and make them a funky DIY lemonade stand to add to their excitement.
I hopped on Pinterest and Google Images to get some ideas on how to make one easily and cheaply. Many creative people had re-purposed old wooden crates and turned them into really nice looking lemonade stands, so I decided to try that out!
And, if you live in Ottawa (Canada) and are reading this - I bought all the items from local Ottawa Stores (I provided links where I could) so you should be able buy the same items too!
Check out how to make this cheap and easy DIY Lemonade stand below...
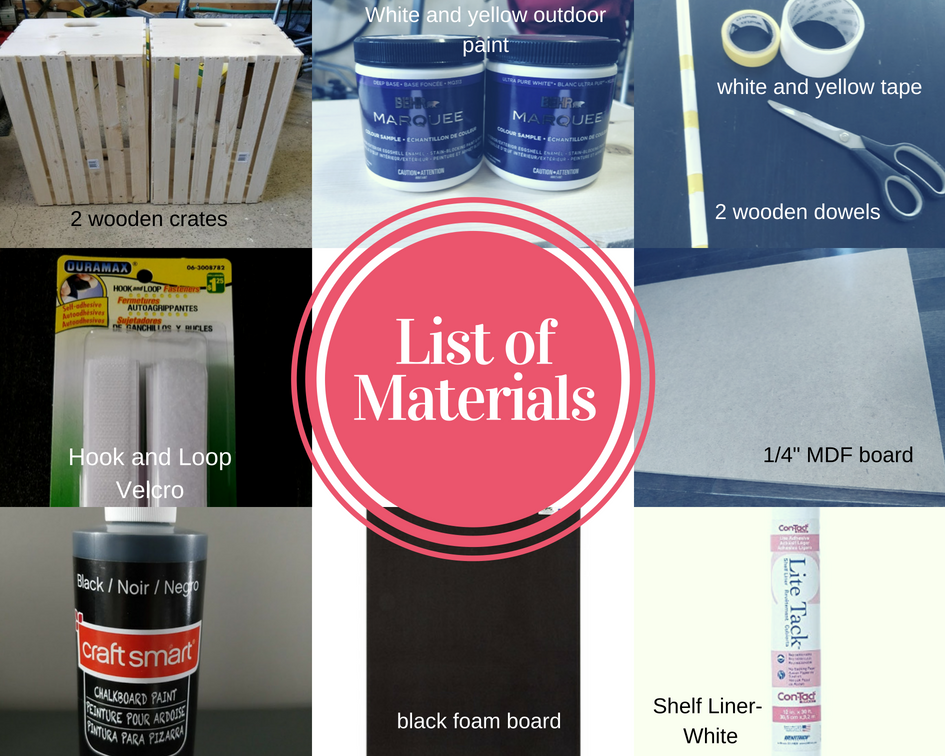
Materials needed
Disclaimer: I am not affiliated with Home Depot, Dollarama, Dollartree and Michaels. I voluntarily used their products for this project and am linking them for ease of searching
- 2 large wooden crates - Home Depot
- 2 Sample cans of outdoor paint BEHR Marquee brand -Home Depot (colors: Buzz-In P300-6 and Ultra Pure White both in eggshell finish)
- 2 wooden dowels (½" thick and 48" long) -Home Depot
- ¼" MDF board (Tip: Home Depot will cut it for you) - Home Depot
- Zip ties (from HomeDepot or Dollarama)
- Hook and Loop Velcro strips -Dollarama (check Hardware section)
- Black foam board (white works too) -Dollarama (check Stationary section)
- Self-adhesive shelf liner -Dollarama (check Kitchen section)
- Chalkboard paint -(Micheal's)
- Tools : Hot glue gun, scissors, chalk
- Optional: Decorations ( white and yellow electrical tape, jute twine string & pom poms from DollarTree)
Step-by-Step Guide
Step 1
I found a couple inexpensive crates ($10 each) at Home Depot, and grabbed some "sample" indoor/outdoor paint cans in yellow and white ($5 each).
The amount of paint in the sample cans was MORE than enough to paint the stand, you could probably do a couple more and still have some left.
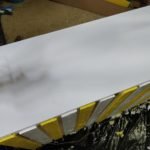
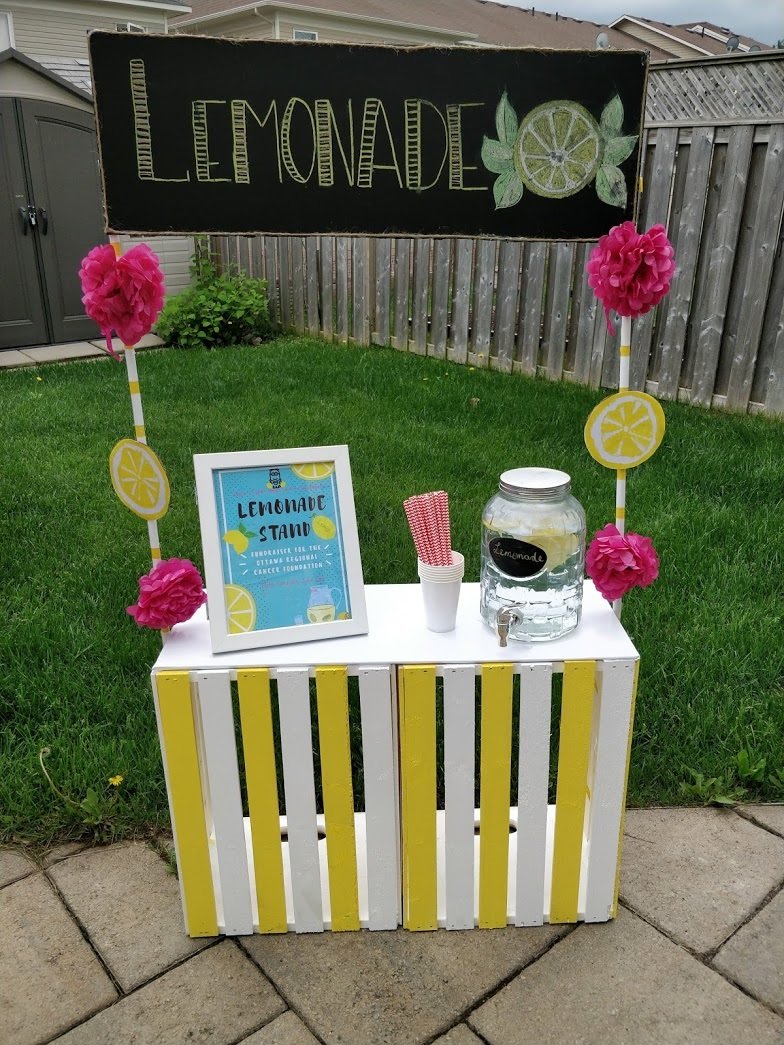
I turned the crates sideways and stuck them side by side, to take the stand form, and painted the wooden planks in alternating yellow and white stripes. It took 2 coats to get the colors to pop.

Step 2
For the counter portion of the stand, take your ¼" MDF board and cut it to the measurement of the top of your crates. Mine was roughly 29" x 11" (using the Home Depot creates linked above).
TIP 1: If you buy the MDF from Home Depot, just visit their cutting section and they'll cut it to your exact measurements (most of the time for free). Saves the hassle to rent /use your own saw.
After it was cut, instead of painting it white with the remaining sample paint(which you can do), I covered it with self-adhesive kitchen shelf liners. I have so much of this stuff from when we moved, and I'm determined to find a use for all of it!
The benefit of the liner is, it's water resistant and it can be easily wiped clean, especially since we're dealing with lemonade!
TIP 2: If you decide to paint the counter with the remaining paint, you might need to seal it with a top coat to make it water resistant.
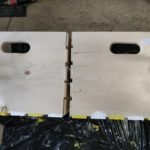
To stick the counter onto the crates, I used self adhesive Hook and Loop Velcro, That way you can easily disassemble the stand for storage while not in use.
Step 3
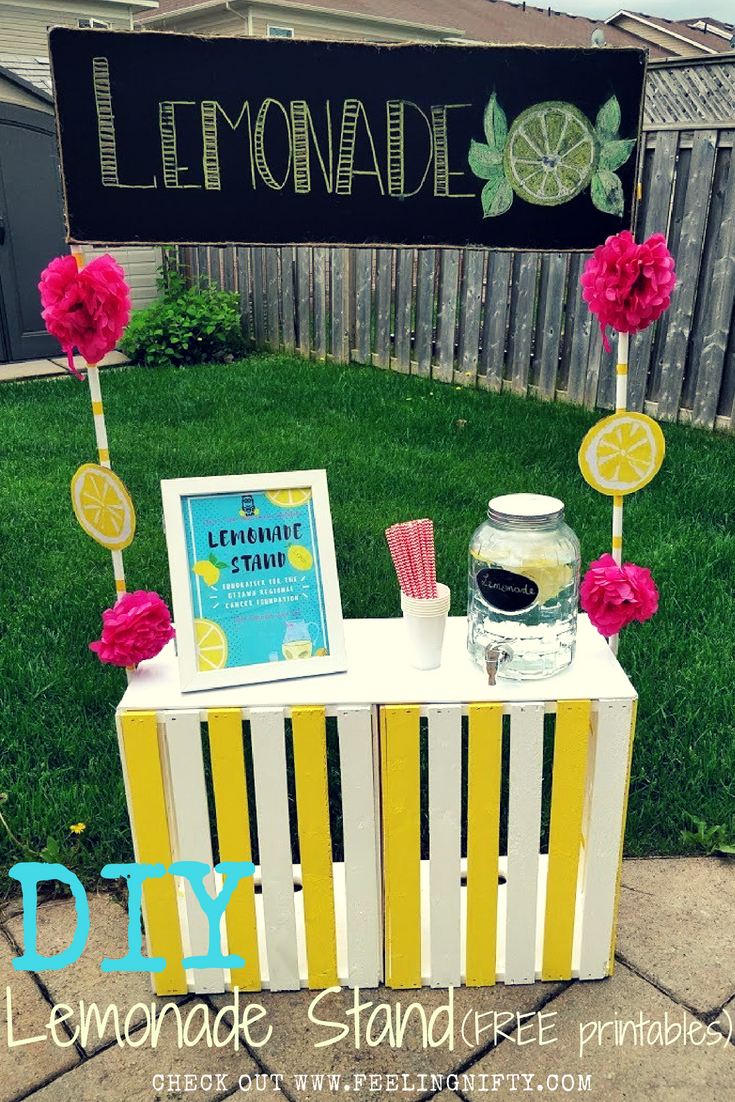
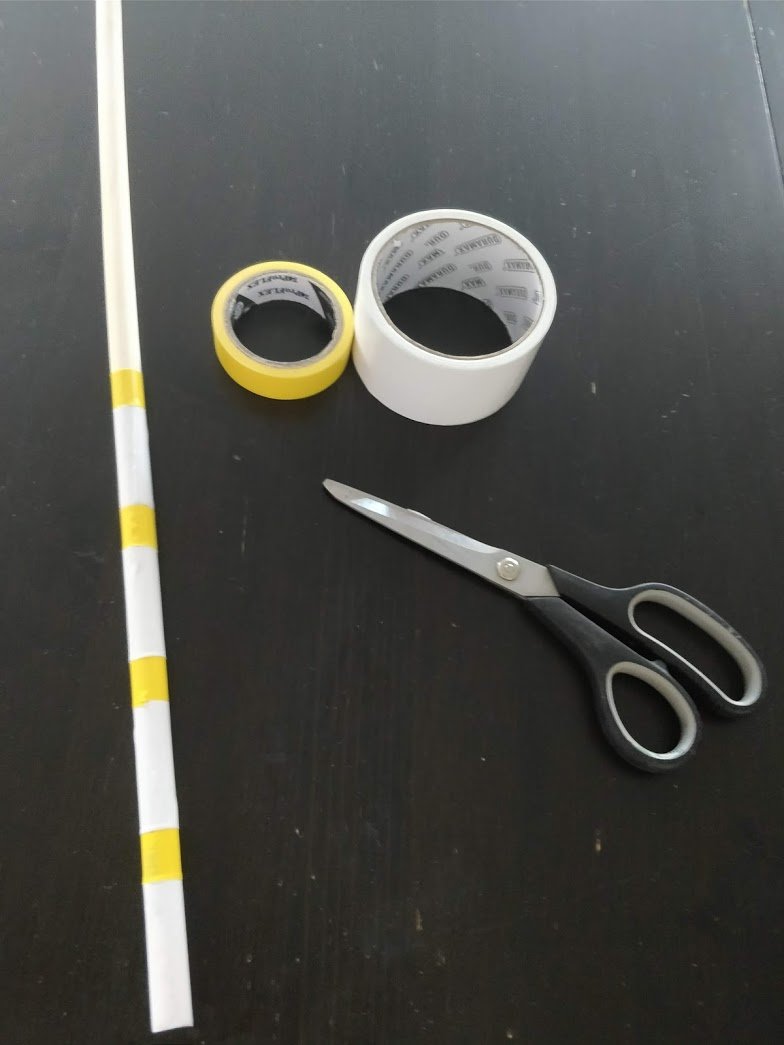
To prop up the sign I used ½ inch dowels and I got a bit fancy here. You could simply paint it with the leftover white/yellow paint, but I decided to put my own lemonade-y twist to it.
I had some white duct tape and yellow electrical tape at home and used them to create the yellow and white pattern- kind of looks like a straw!
Step 4
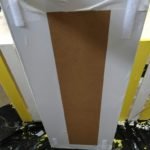
For the sign portion of the DIY Lemonade stand, I bought an inexpensive sheet of black foam board from the Dollarstore. The length was a perfect fit between the dowels , I just had to cut it width wise.
I then painted the surface with chalkboard paint (2 coats) and let it try overnight. If you can't find black foam board, white works too- you might just need an extra coat of paint to cover the white.
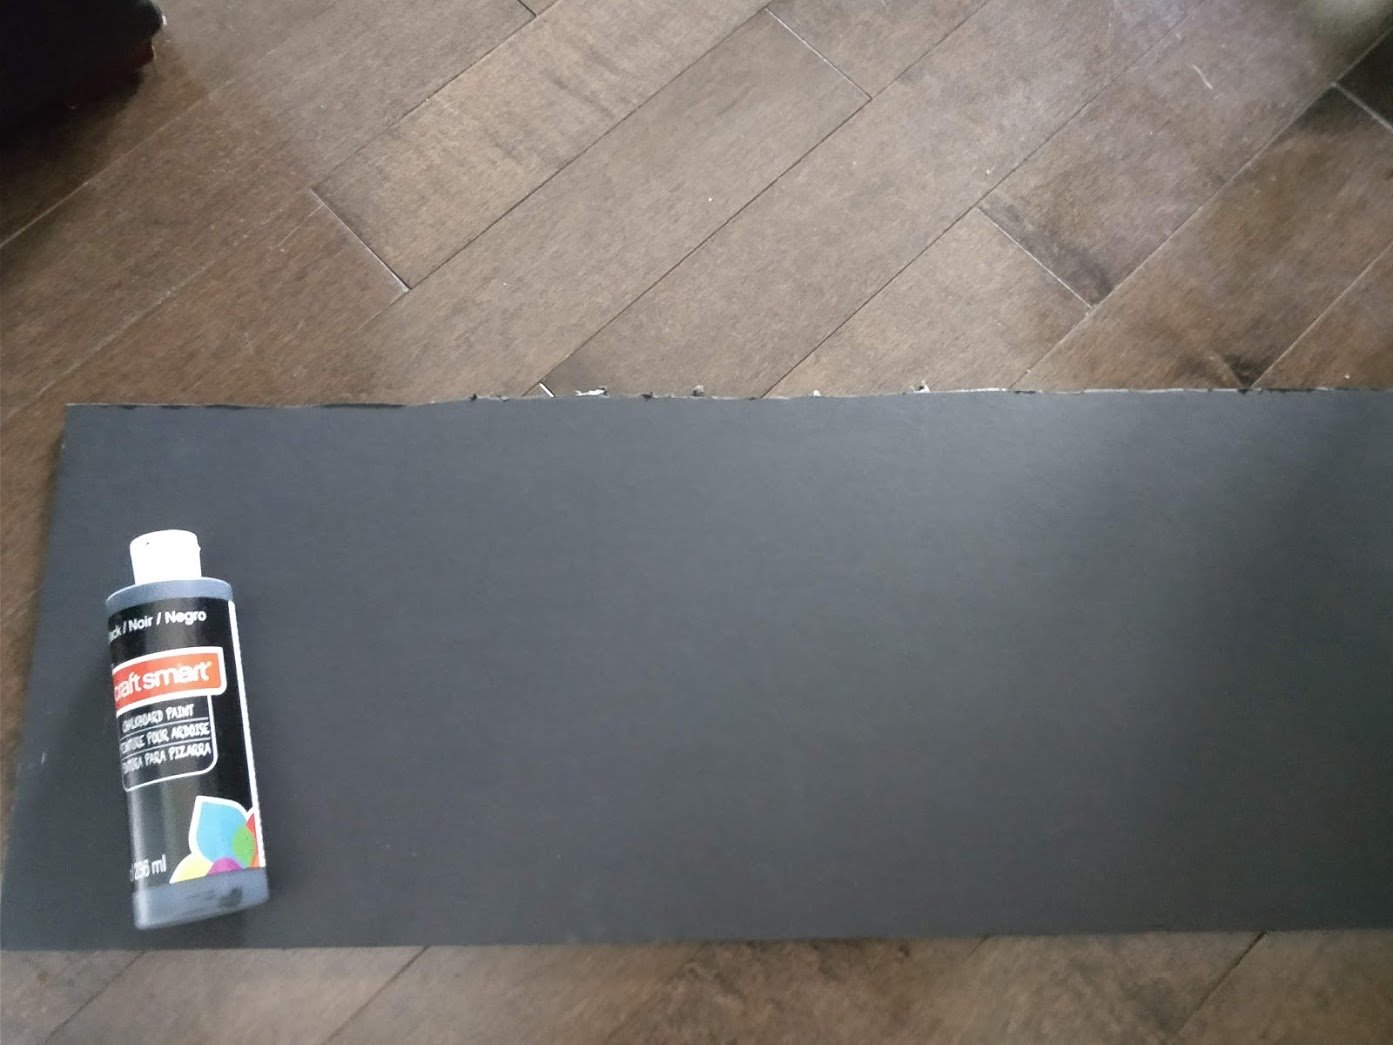
Once the paint was dried and cured I used chalk to draw on the chalkboard sign.
Also, since I cut the board on one side, it wasn't a clean edge, so I hot glued some twine rope as a border to hide the unevenness, and I think it gives it extra character!
Finally, I used a hot glue gun to stick the foam board sign to the top of the dowels. We finished it off with some great lemony decorations made by my daughter and some pom poms.
Step 5
To attach the bottom of the dowels to the crates, my handy husband suggested using some zip ties to attach them. It worked great! You could also try using string or twine for a swankier look.
All Done!
And voilà, a DIY Lemonade stand for roughly $40! The kids totally loved it and they ran that Lemonade stand like a couple of pros - and all for a great cause!
If you're looking for more ideas and inspiration, I really liked this bloggers curated list of DIY lemonade stand ideas. Enjoy, and happy making!
UPDATE for 2019: This year the kids beat their goal and raised $500 for the Ottawa Cancer foundation. A job well done kiddos!
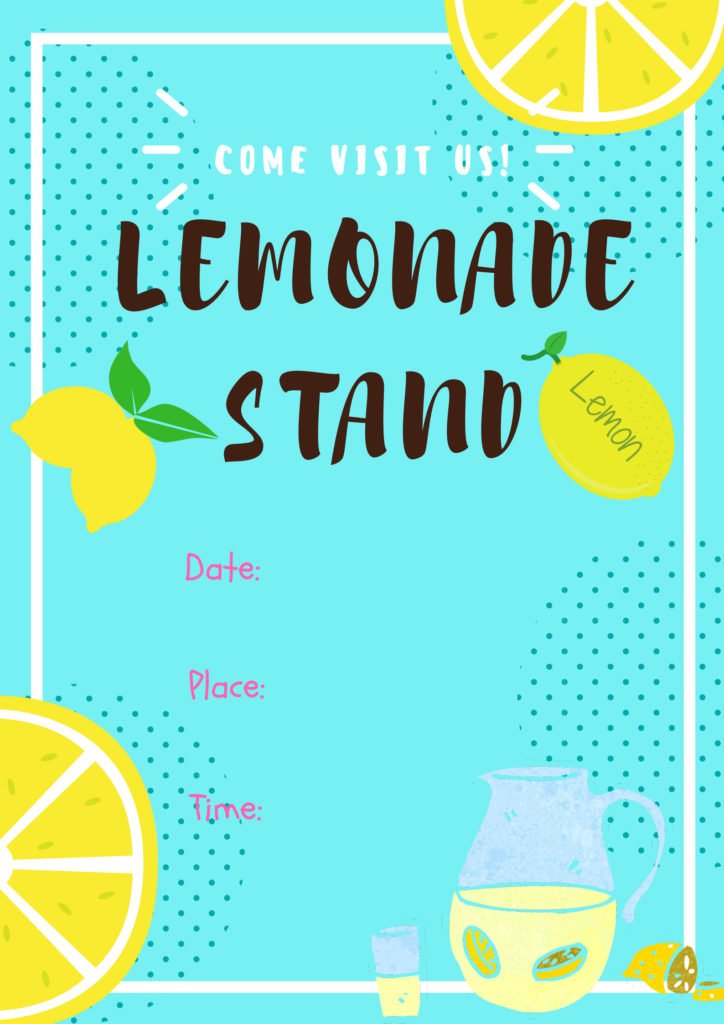
EXTRA: I'm including free DIY lemonade stand printable signs my daughter and I designed for the event. Feel free to use them (just click to open image, and then right click "save image as").

If you liked this project, pin it!