Easy Beach Painting with Acrylics for Beginners
Beach Painting: Easy Beginner Tutorial
Looking for an easy beach painting idea with acrylics?
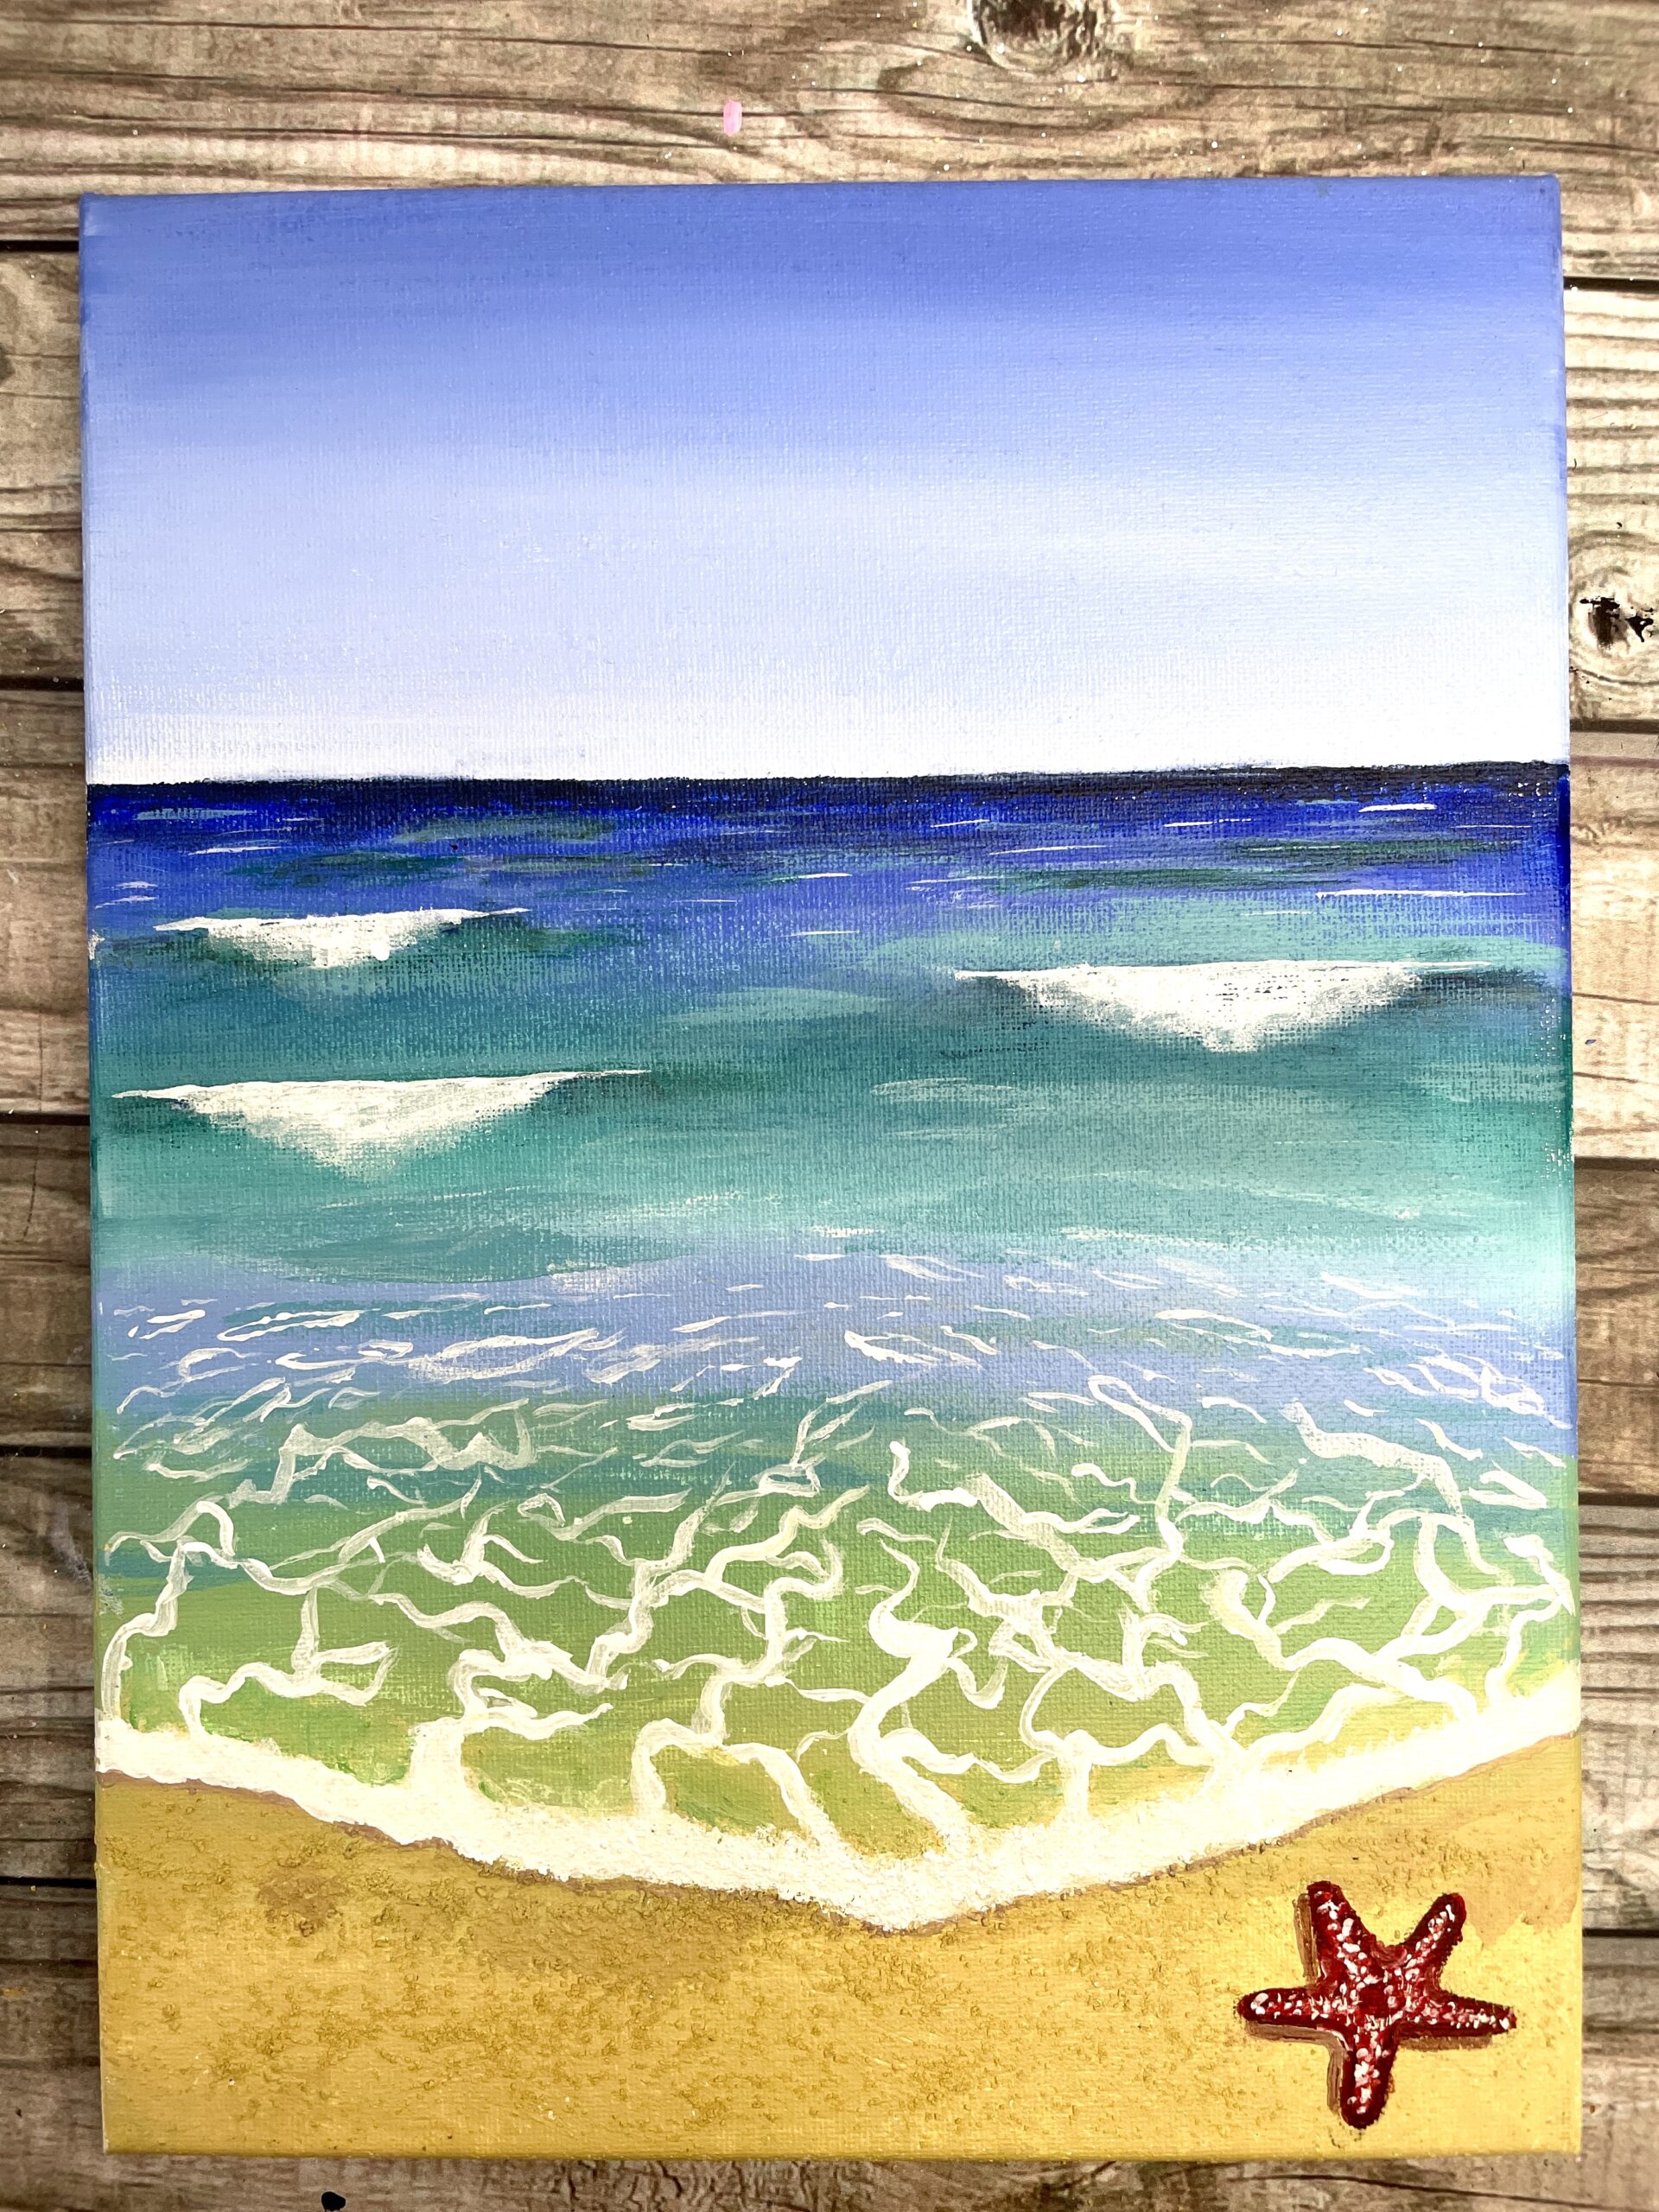
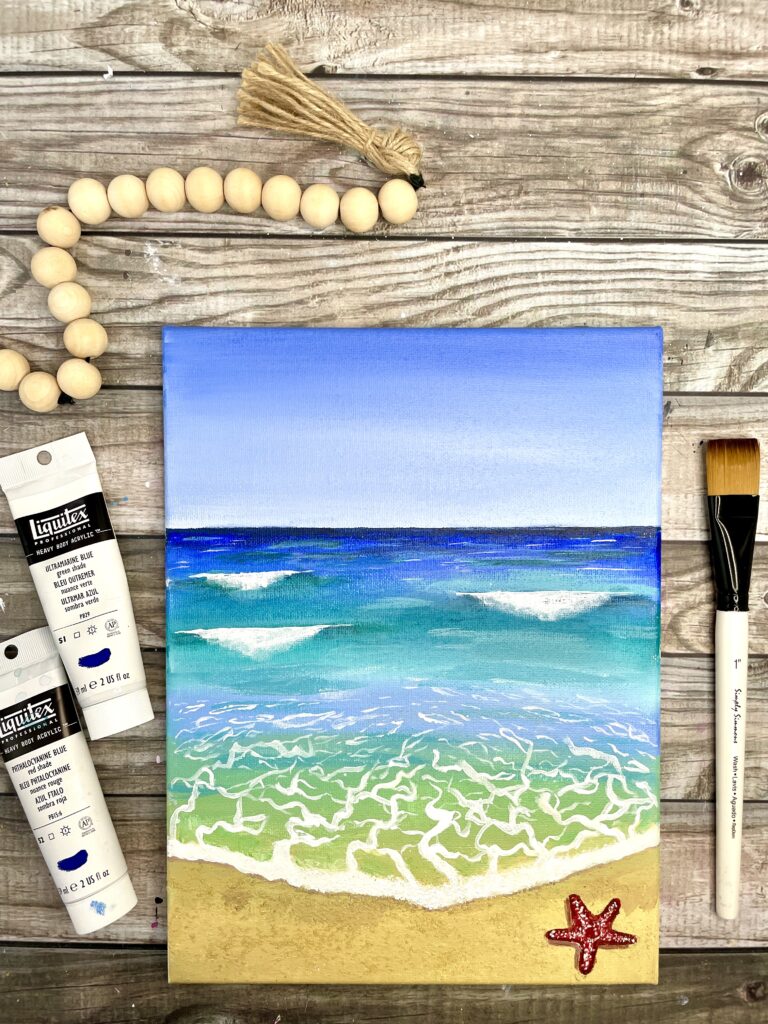
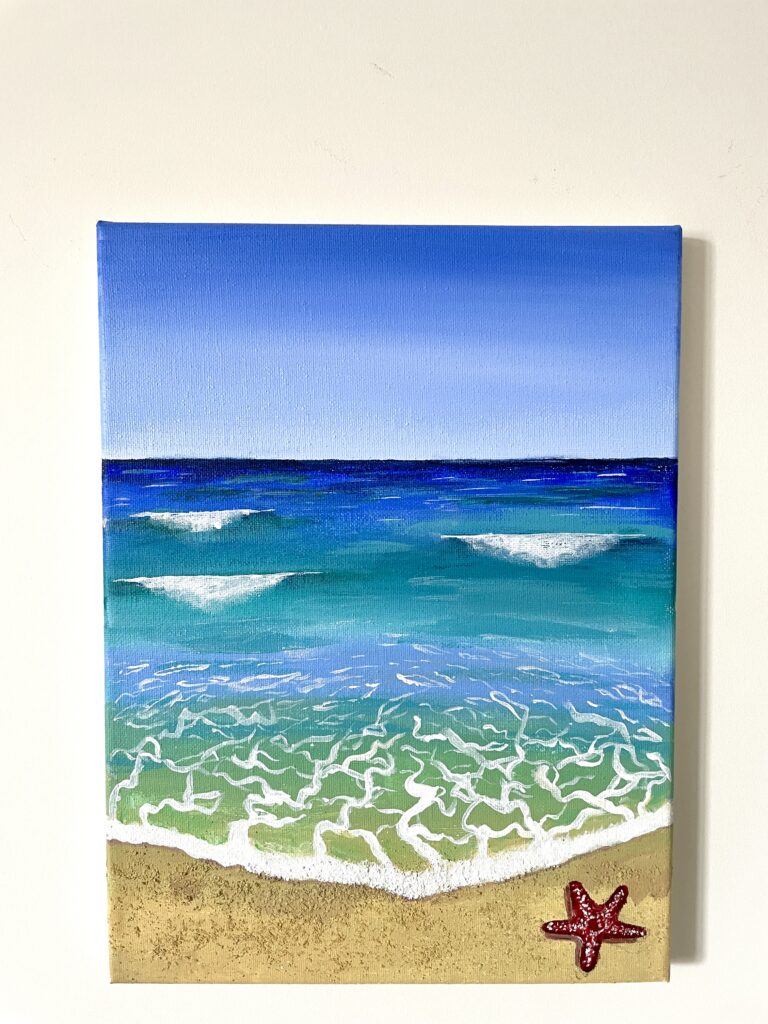
This easy beach painting for beginners will show you how to paint gorgeous tropical waters, a sun-kissed sandy beach (with real sand texture using something in your kitchen), easy ocean waves, a mesmerizing seafoam shoreline complete with a cute starfish on the shore. (YouTube video is coming soon!)
Before we begin, if you're new to acrylics be sure to check out the how to paint with acrylics for beginners: ultimate guide, and 65+ easy painting ideas for more painting inspiration.
And if you're in a summer painting mood, try making this serene and tropical beach sunset painting or this majestic "how to paint a sea turtle" underwater scene or these 45 Summer Painting Ideas.
Let's get to it!
How do you paint an easy beach?
Beach paintings are easy landscapes for beginners to paint. And the best part of beach paintings are you don't need many colors to paint it.
All you need is 5 basic colors.
For the sky and luscious turquoise ocean waters, you'll need:
And for the beautiful warm sand color, you'll need:
- cadmium yellow medium (or any yellow)
- burnt umber( any brown)
White will also help you paint in the seafoam on the beach and waves in the distance.
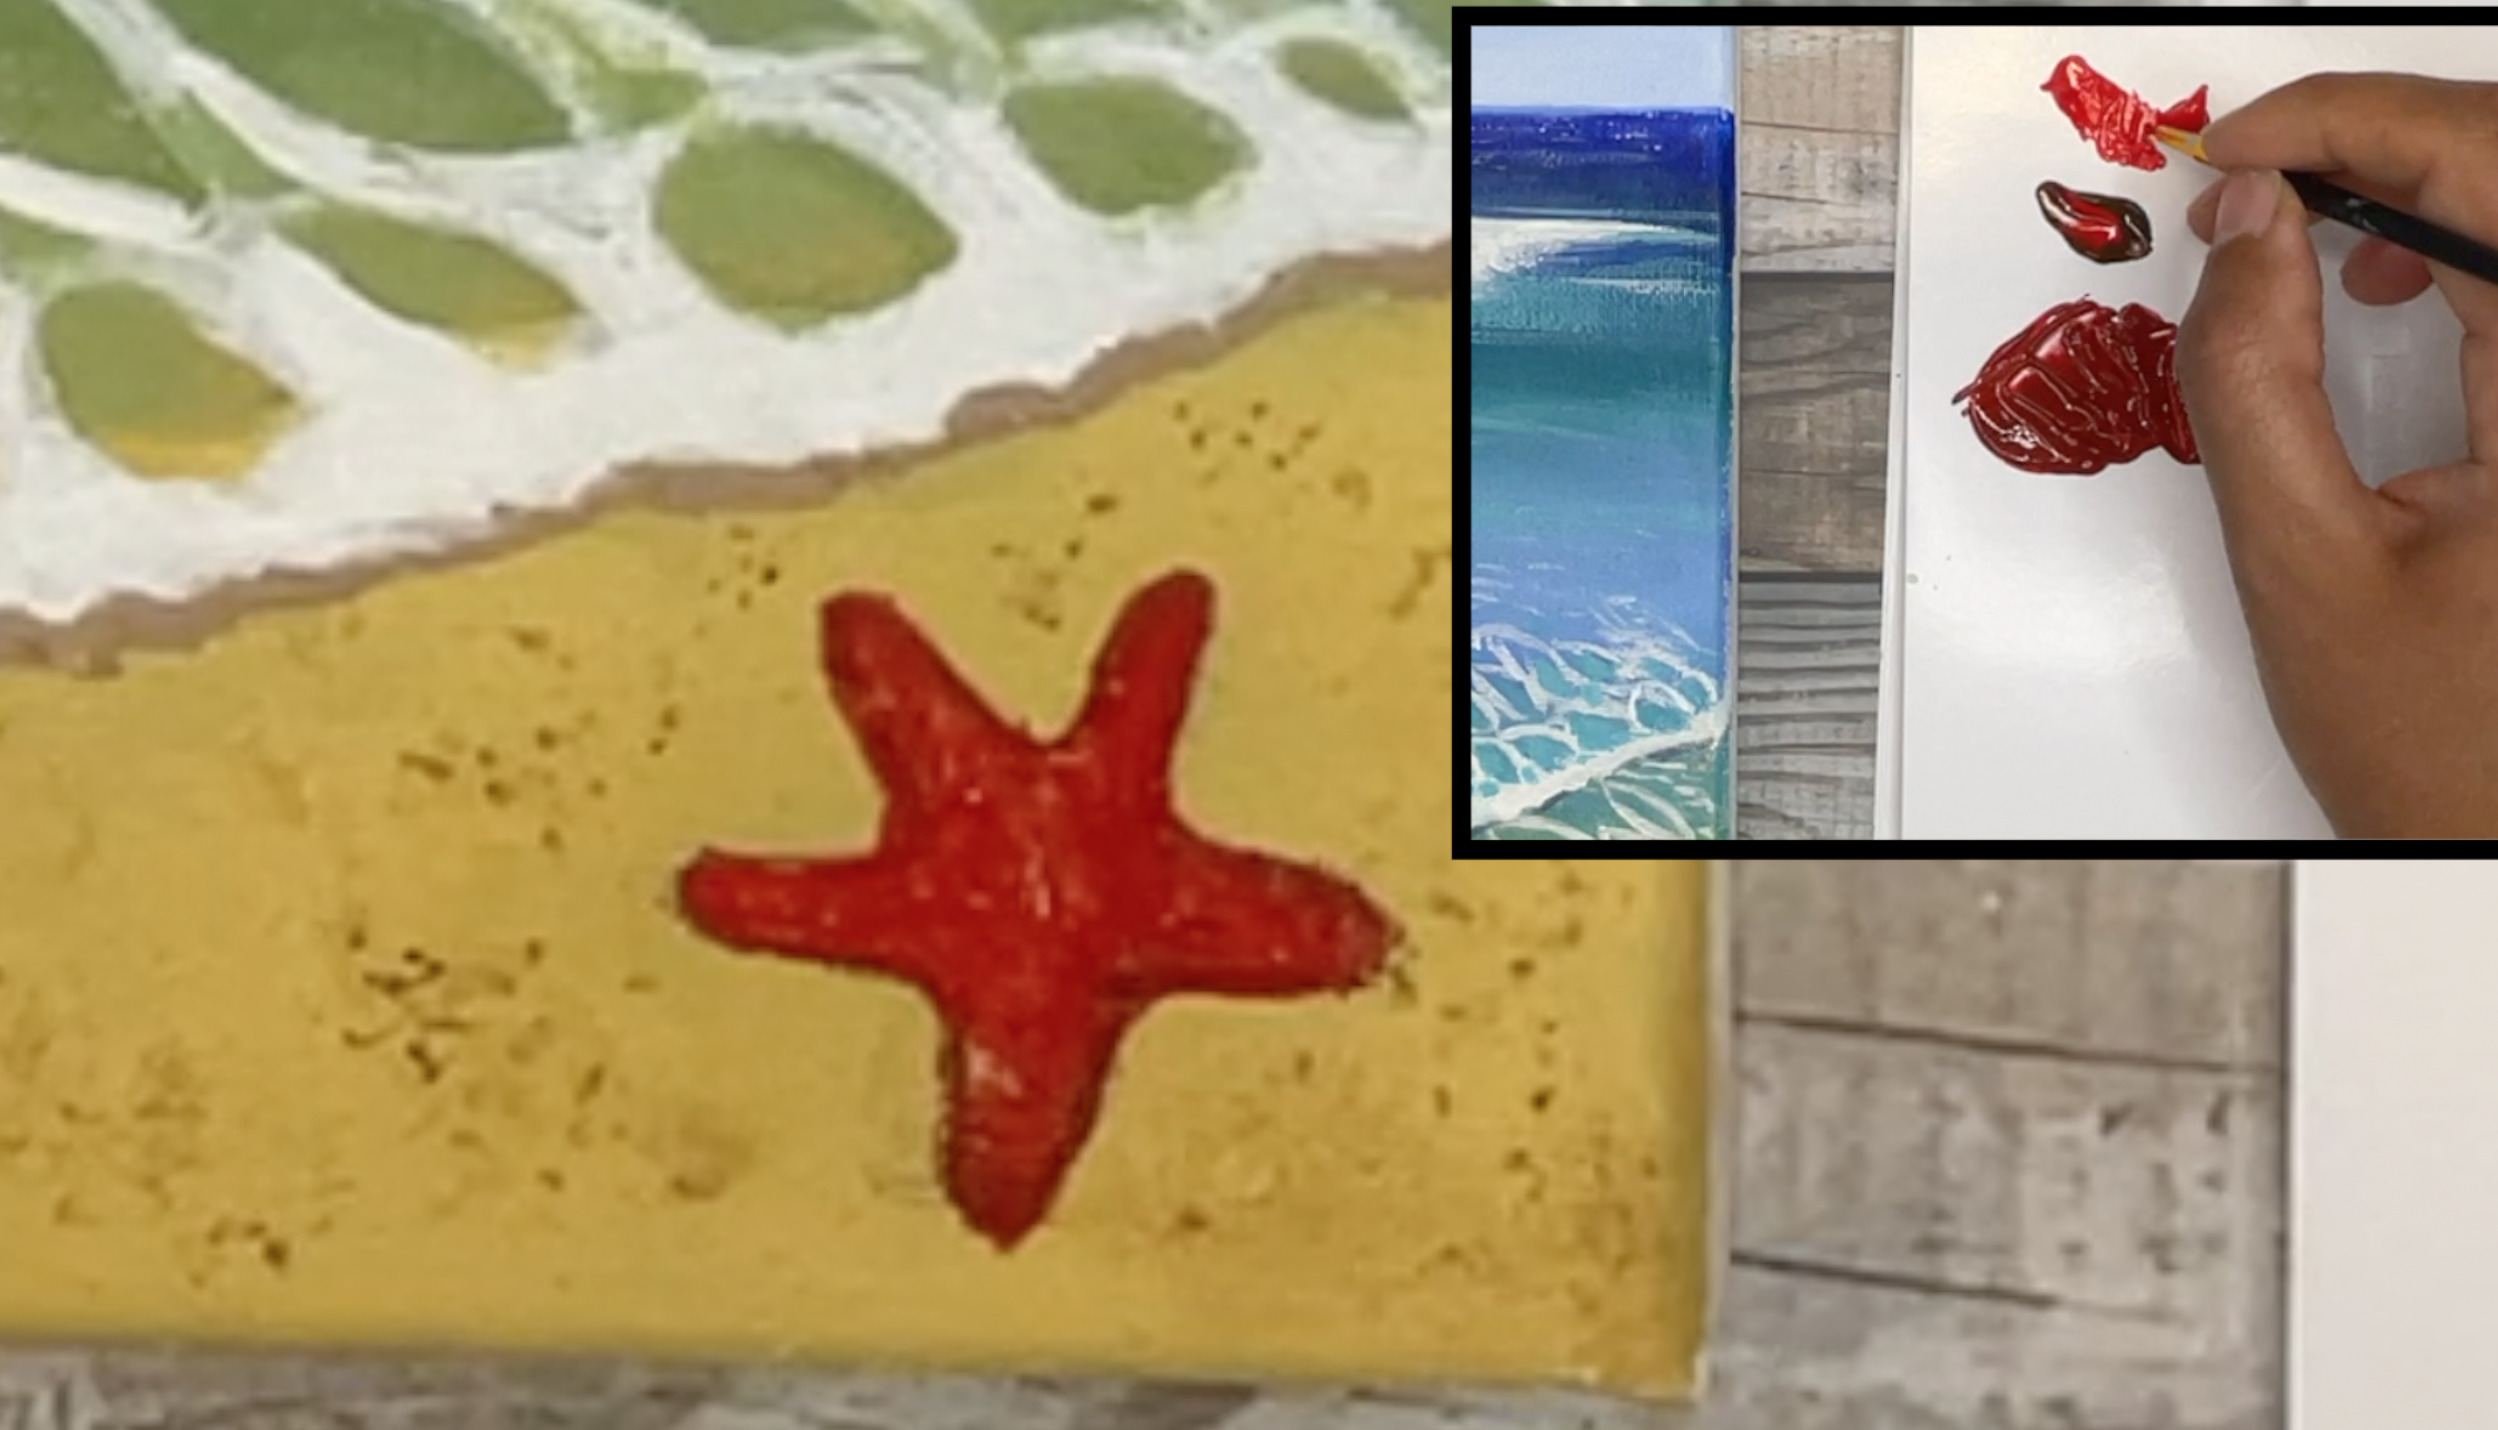
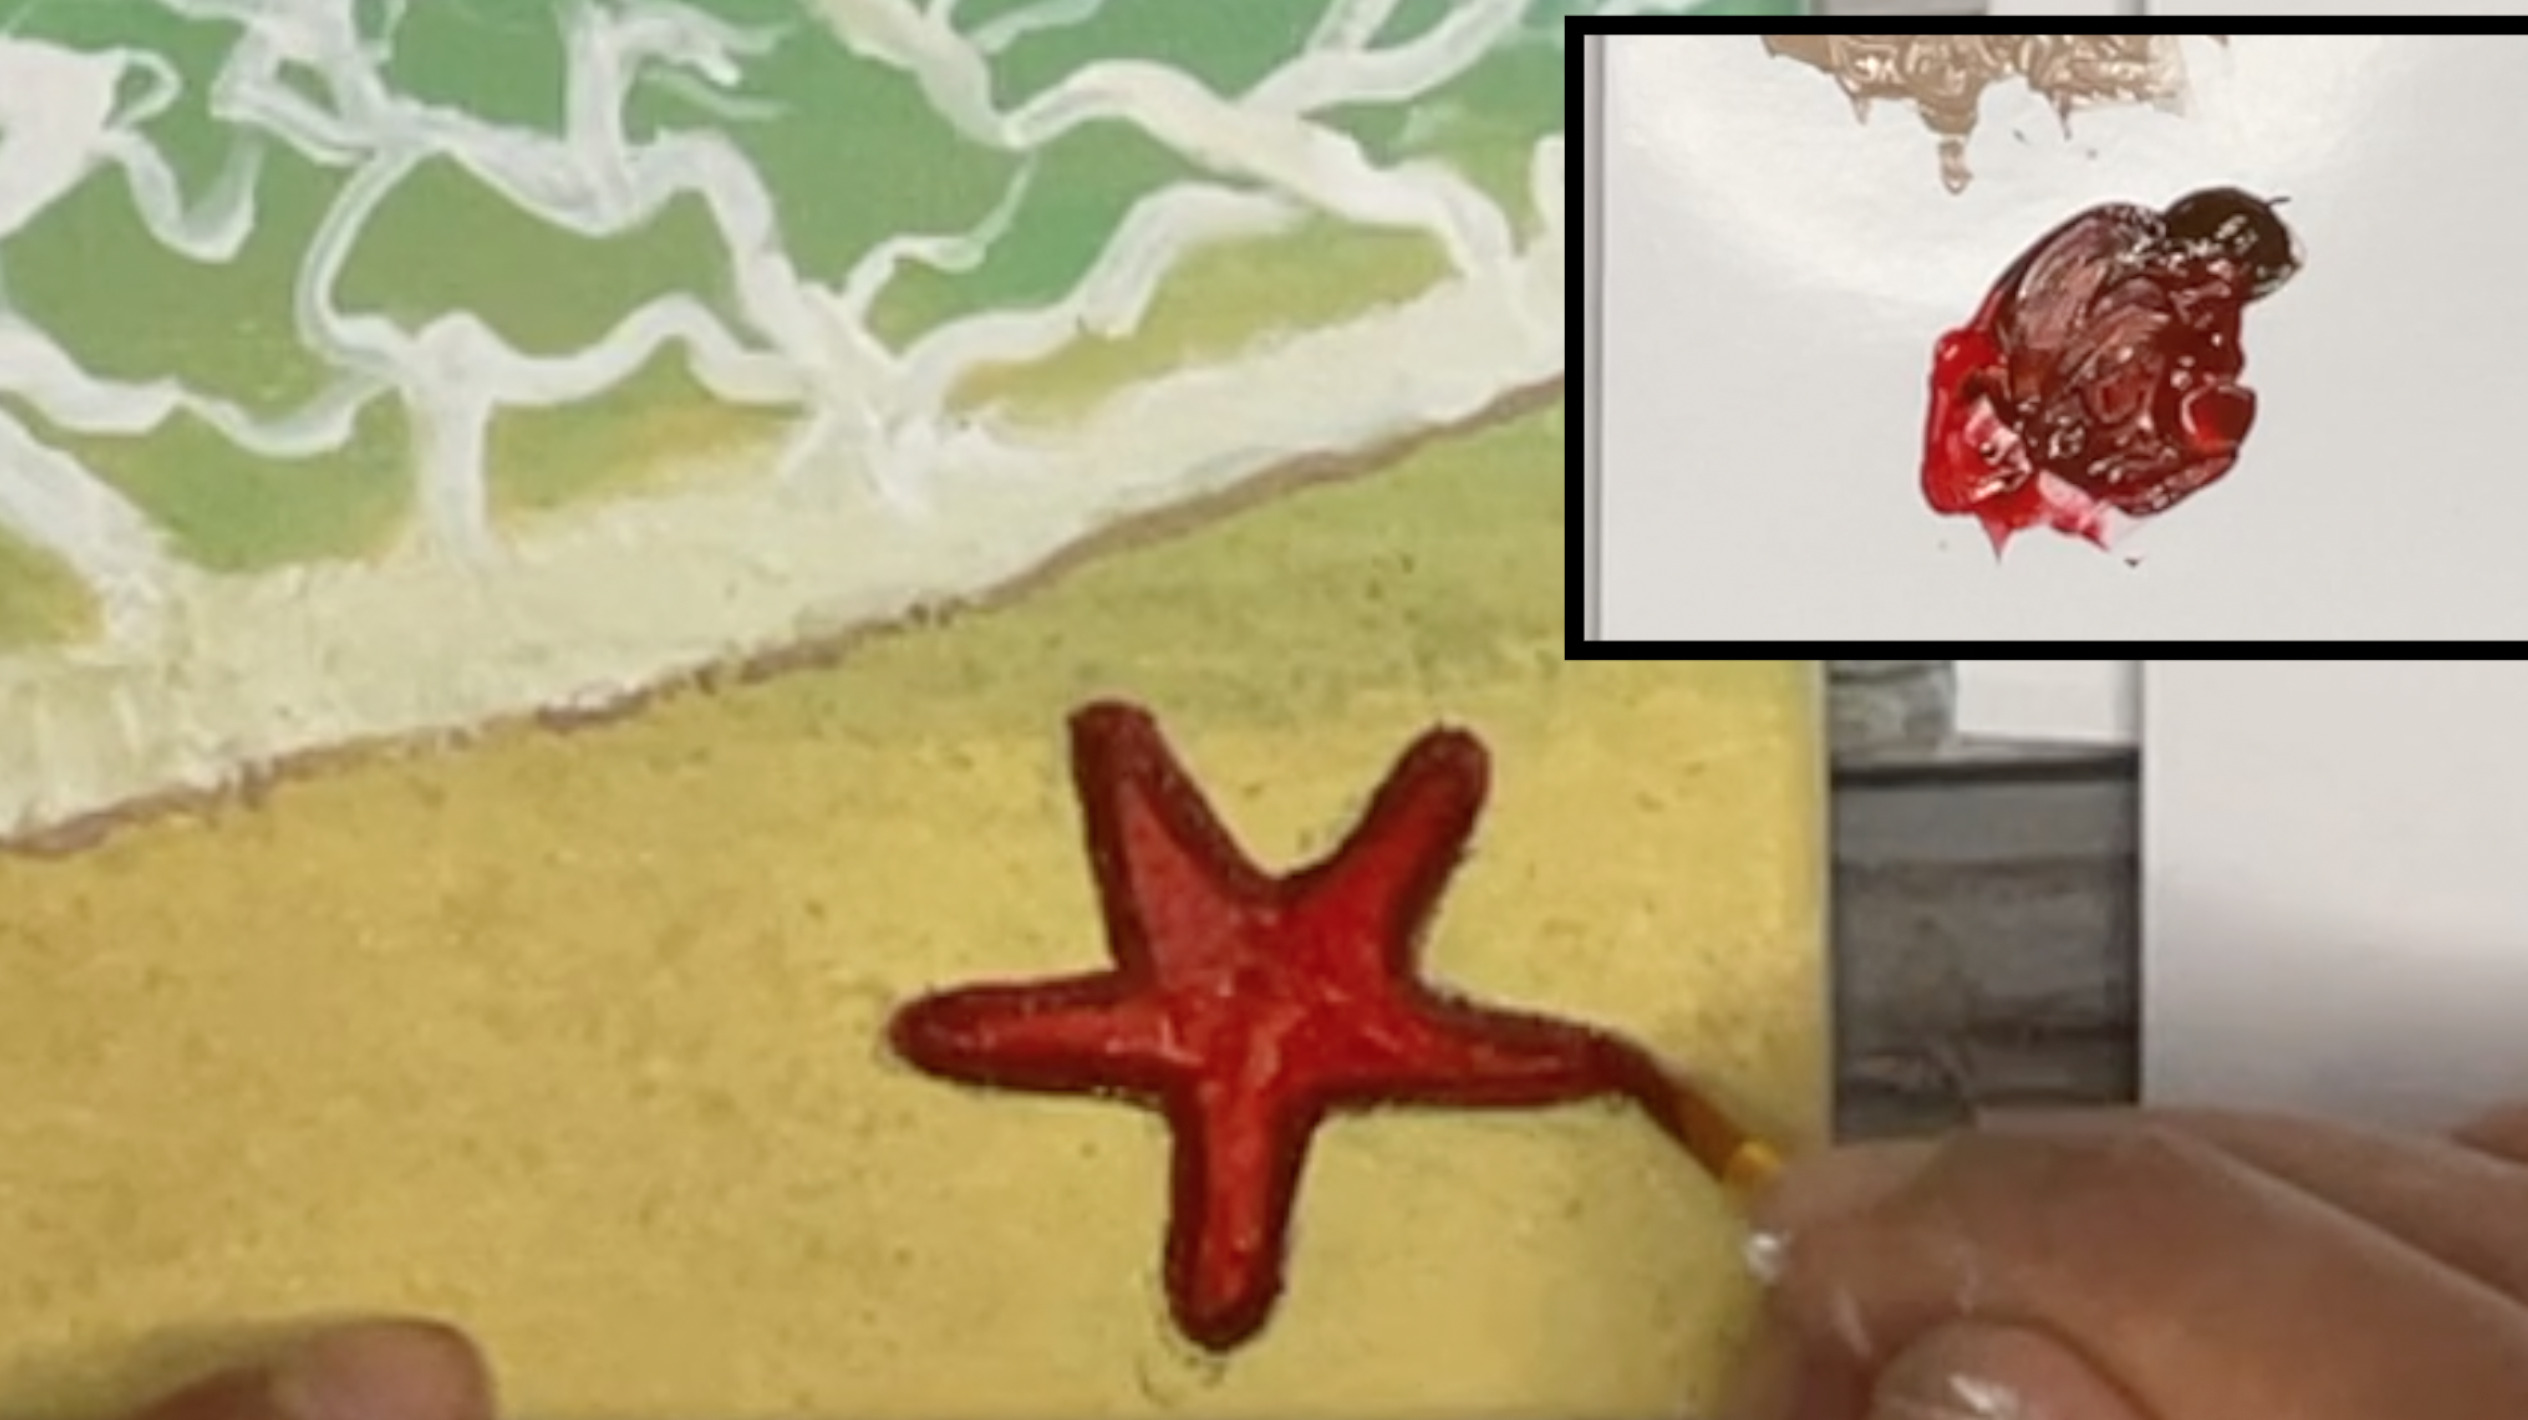
If you want to add a cute starfish all you need is a bit of cadmium red medium and you're set!

How do you paint ocean waves for beginners?
Waves might look intimidating to paint but when you break a waved down into simple shapes they're actually pretty simple.
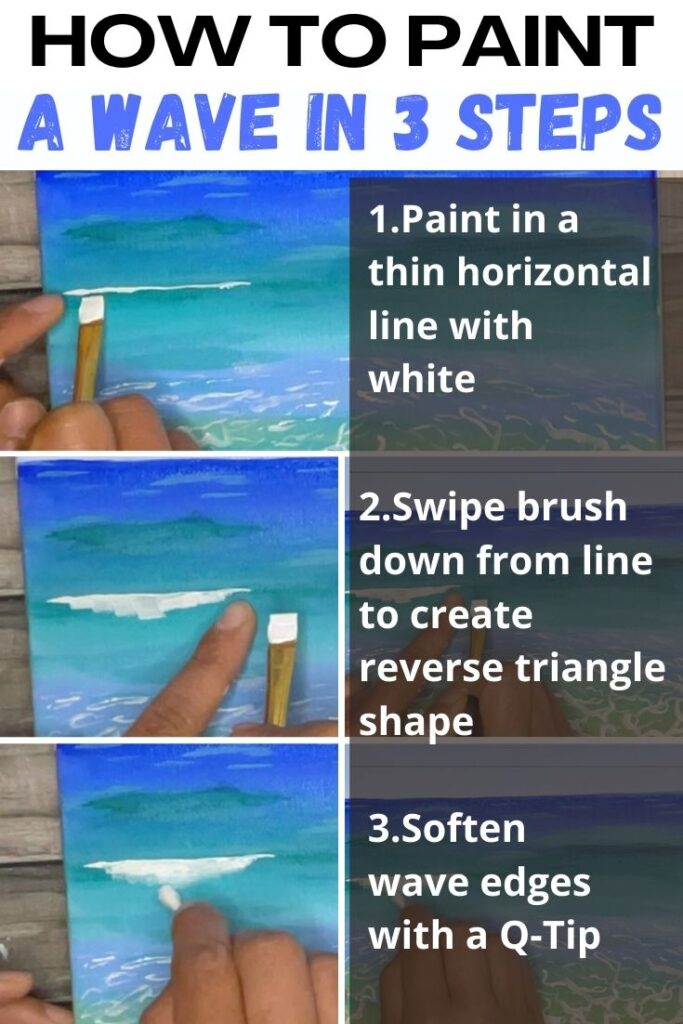
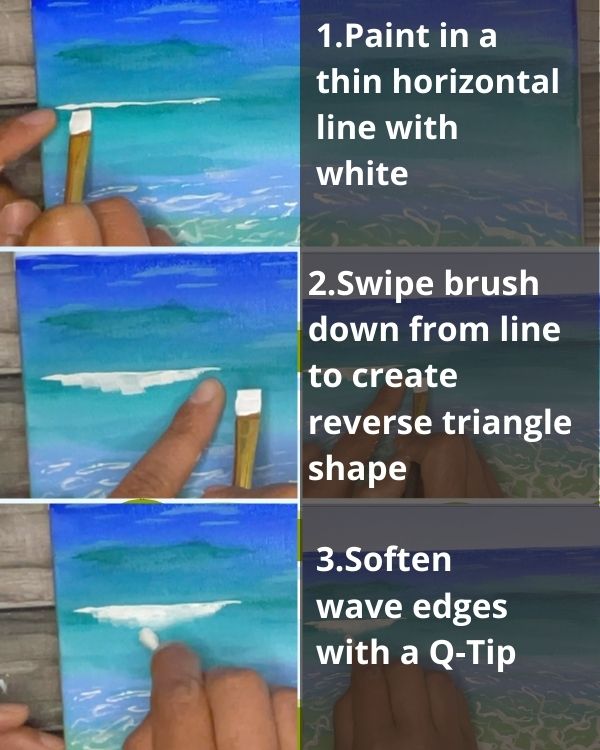
The start with, paint a thin horizontal line with titanium white, which will be the top of your wave.
Waves that are crashing down have a reverse triangle shape. Using a small flat brush and titanium white sweep down from the line and create an triangle shape. The middle of the wave will have the longest "sweep down".
To soften to edges of your wave use a simple Q-tip in a circular motion which will make the edges of your wave nice and soft.
Rinse and repeat wherever you want waves!
Easy Wave Painting Tip
Waves that are further away in the distance (or further from our eye) are smaller. Keep that in mind when painting your waves to create an illusion of depth.
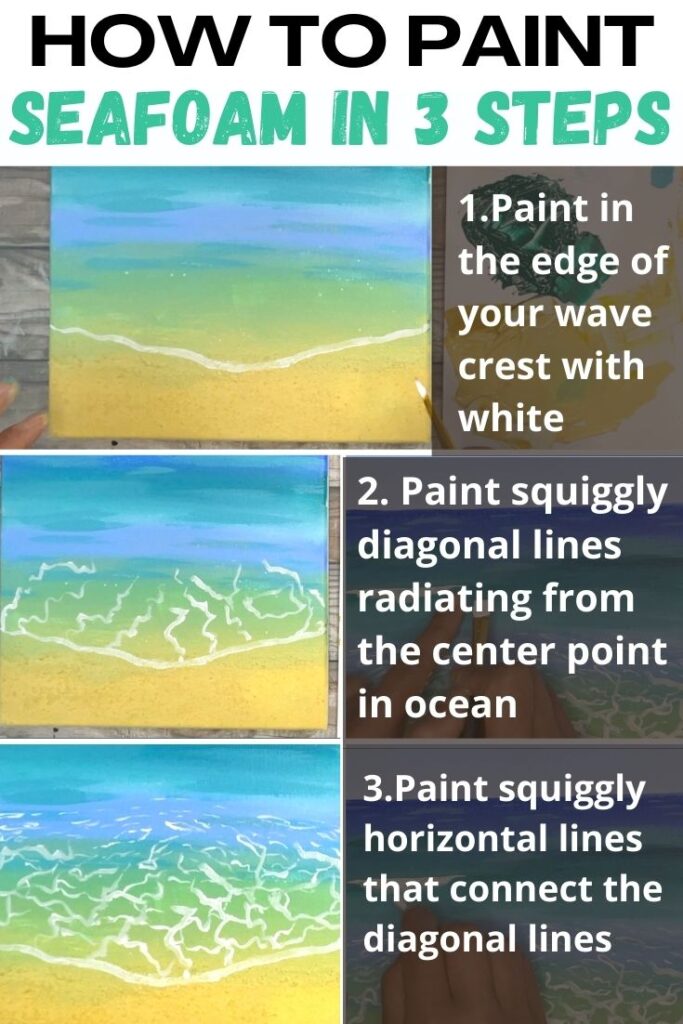
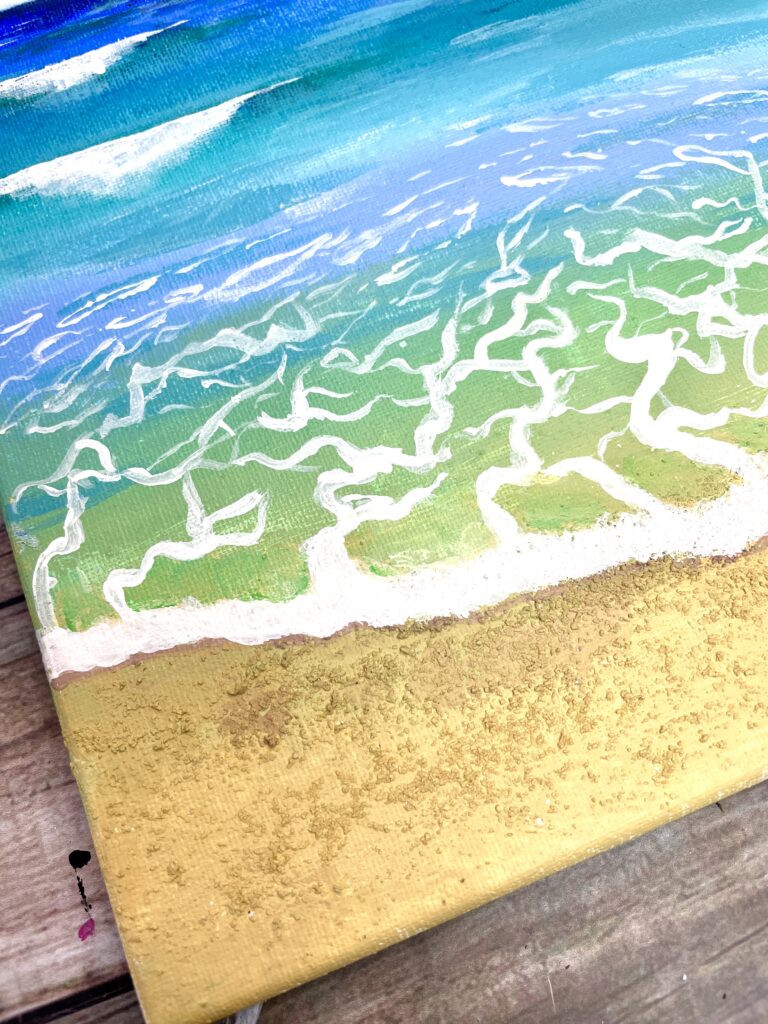
How do you paint seafoam on the beach?
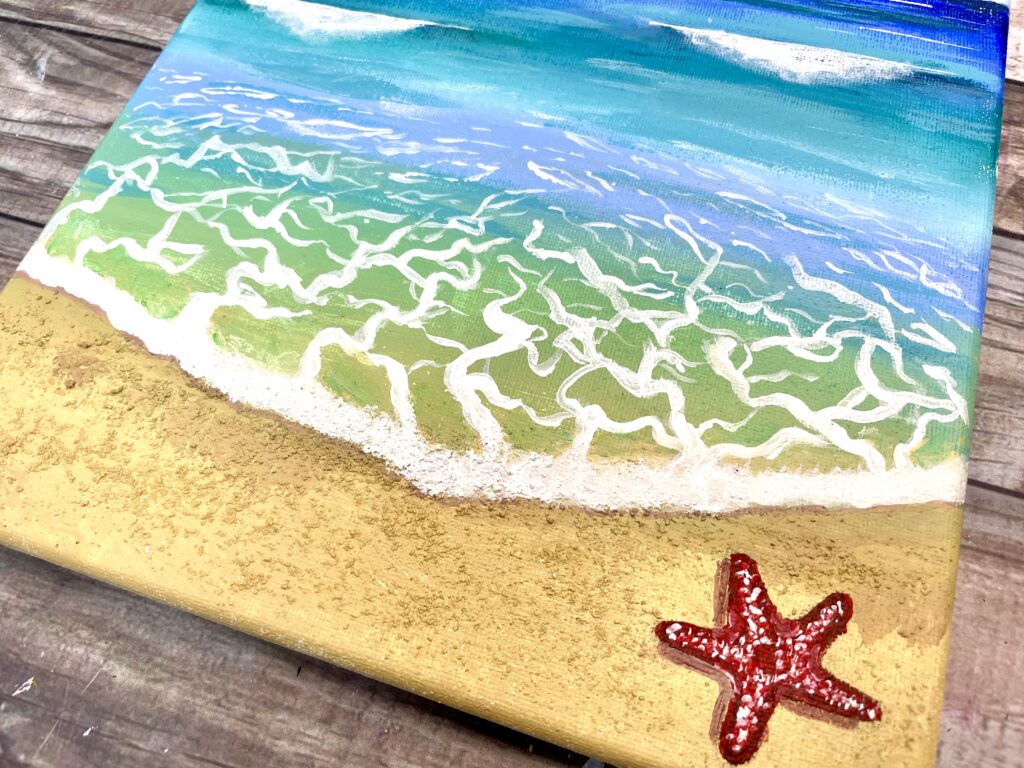
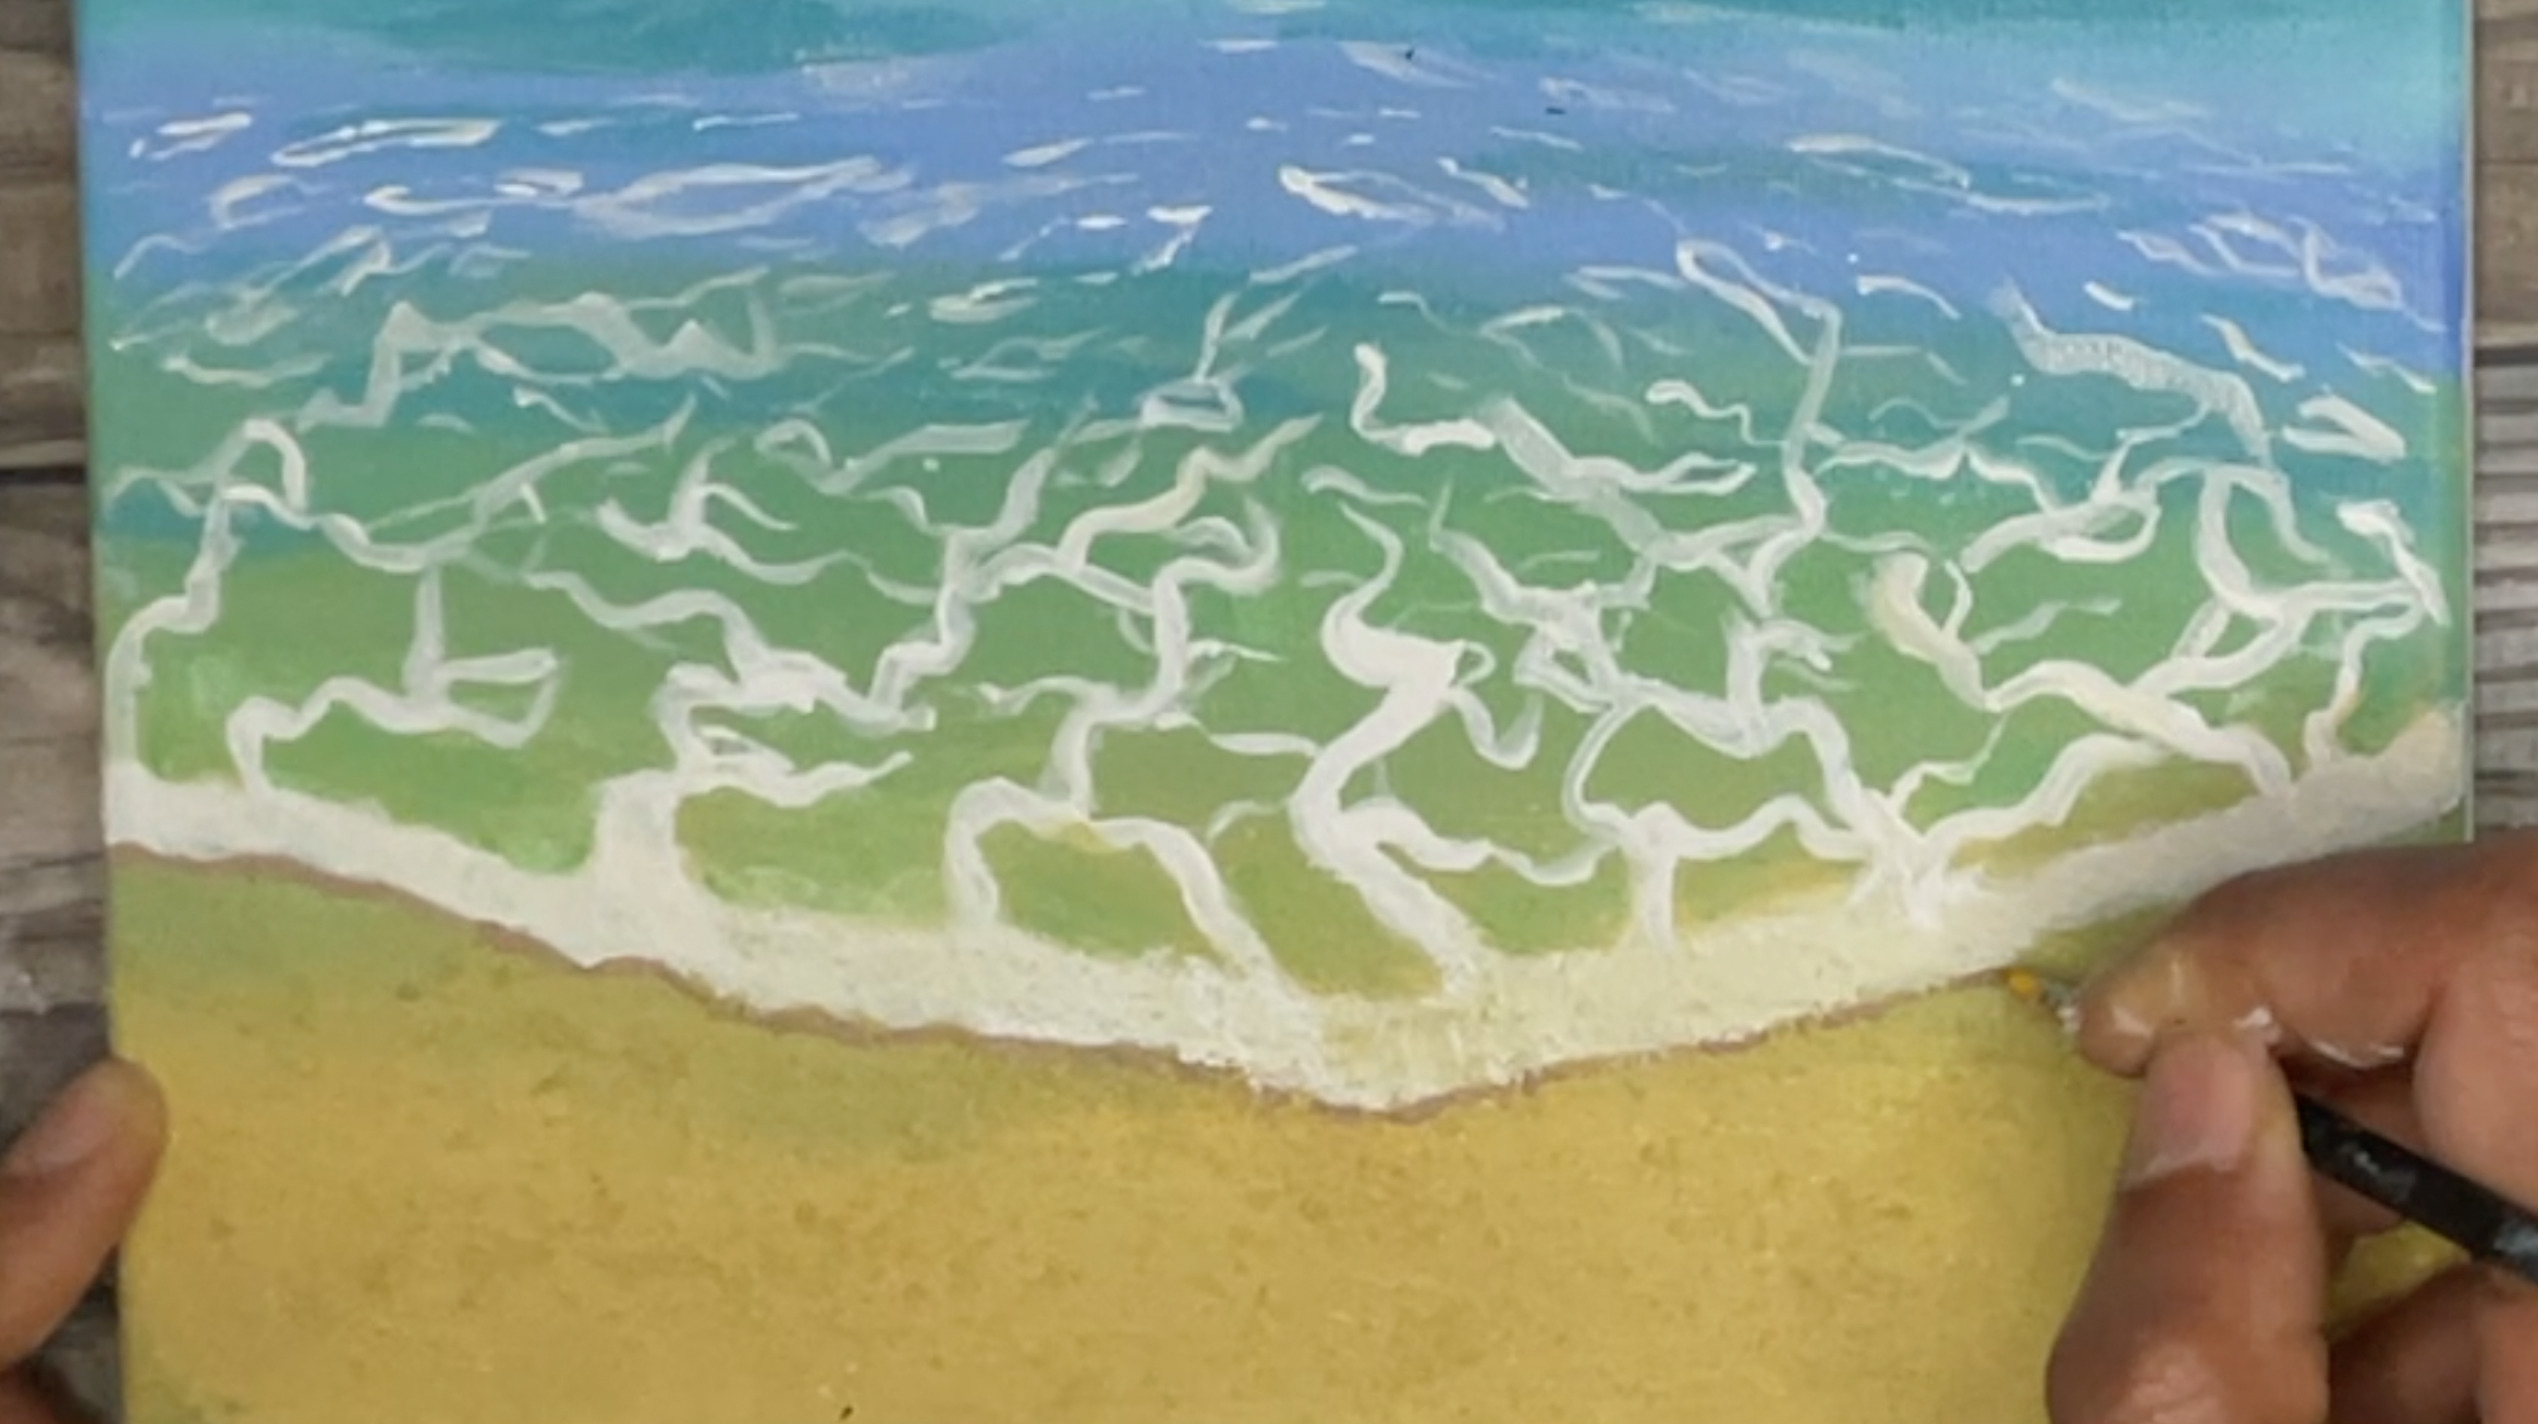
Seafom on the beach makes a beautiful lace/web like pattern. To replicate this pattern first draw the edge of your waved on the sand shore using titanium white.
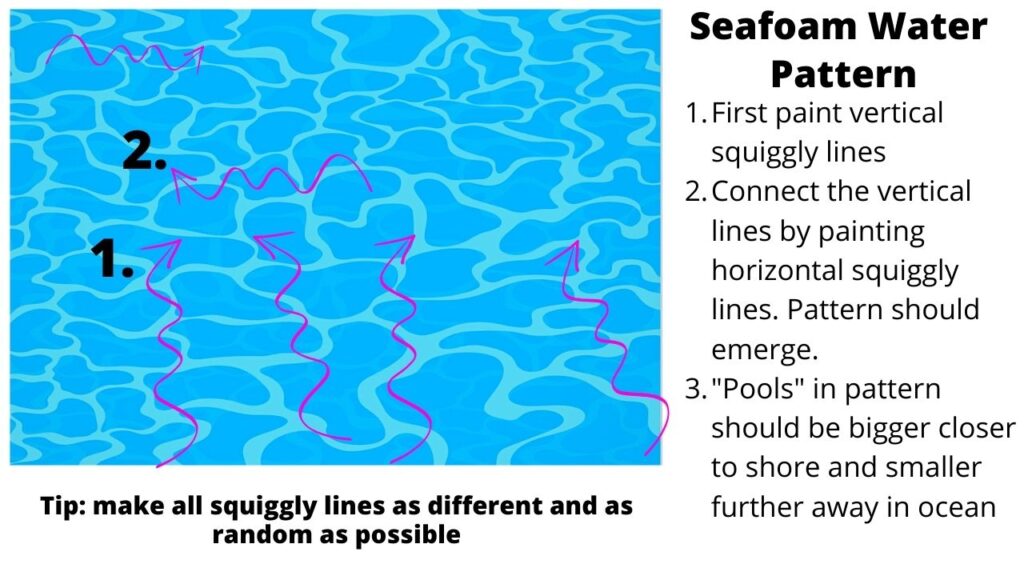
Next draw squiggly vertical/diagonal lines (random and different as possible) that are pointing to the middle of the ocean above. This will create an illusion of depth.
Next connect these diagonal lines by painting in more squiggly horizontal lines. This will create small wavy "pools" of water.
These pools of water will be bigger at the shore and smaller as you move out into the ocean. Keep that in mind when painting in your horizontal squiggly lines.
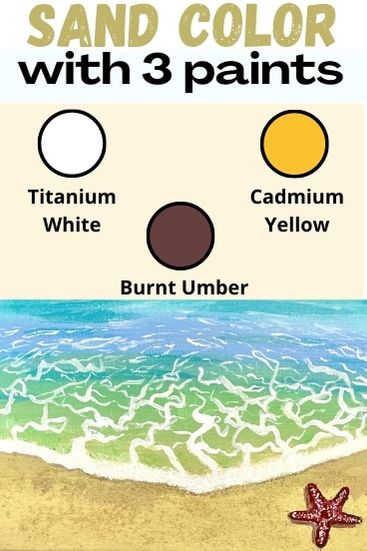
What colors make a sand color?
Save yourself some cash ($$) by mixing sand color yourself with colors your probably already own.
Sand color is one of the easiest colors to mix too!
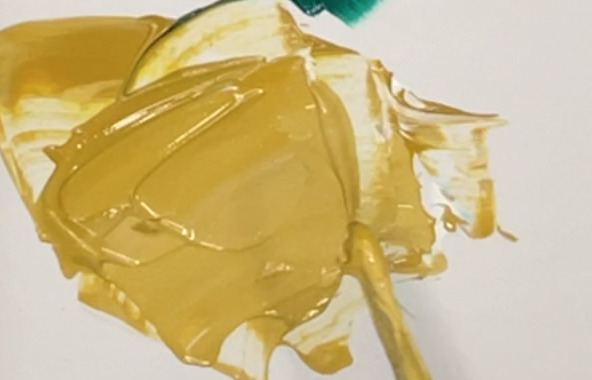
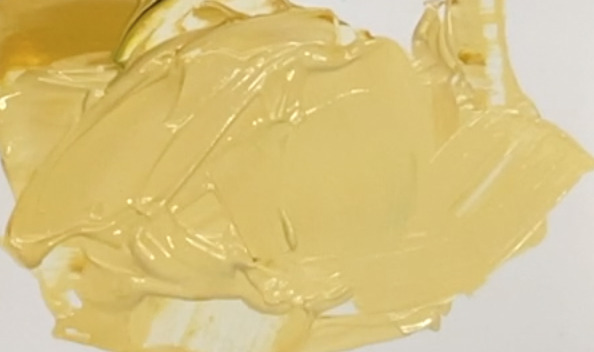
To mix sand color add equal amounts of cadmium yellow medium and burnt umber (or any yellow and brown you have). Then slowly add small amounts of titanium white to lighten the mix until you're happy with the color.
If you're looking for different sand, sky and ocean color paint recipes check out this tutorial that gives you many paint recipes that would be useful in this beach scenery painting.
Sand Color Mixing Tip
If you're working with student quality or level 1 acrylics, you'll want to mix the sand color 1 or 2 shades lighter. Cheaper paints usually dry a shade or 2 lighter compared to when they're wet.
Keep adding small amounts of titanium white to the mix until your sand is light enough.
Can you mix sand with acrylic paint?
Absolutely! mixing sand right into your acrylic paint is an easy and inexpensive way to add texture to your beach.
You can either mix the sand right in with your paint on your paint palette or sprinkle it over wet paint on your canvas.
If you're sprinkling the sand over wet paint, make sure to seal the sand onto your canvas with another layer of sand colored paint over top.
What to add to paint to give it texture?
There are a few different ways to add texture to your acrylic paint. The first way is to mix in a coarse pumice medium in with your paints. This will give a sandy, bumpy texture when dried.
If your'e looking to DIY it and save yourself some money you can mix in the following inexpensive items in with your paint to give it a nifty texture when dried
- Sand
- Salt (coarse or fine)
- Rice
- Crushed egg shells (clean and dried)
- Tiny pebbles (gravel)
Beach Painting YouTube Video Tutorial
Easy Beach Painting Step By Step Tutorial
Easy Beach Painting with Acrylics for Beginners
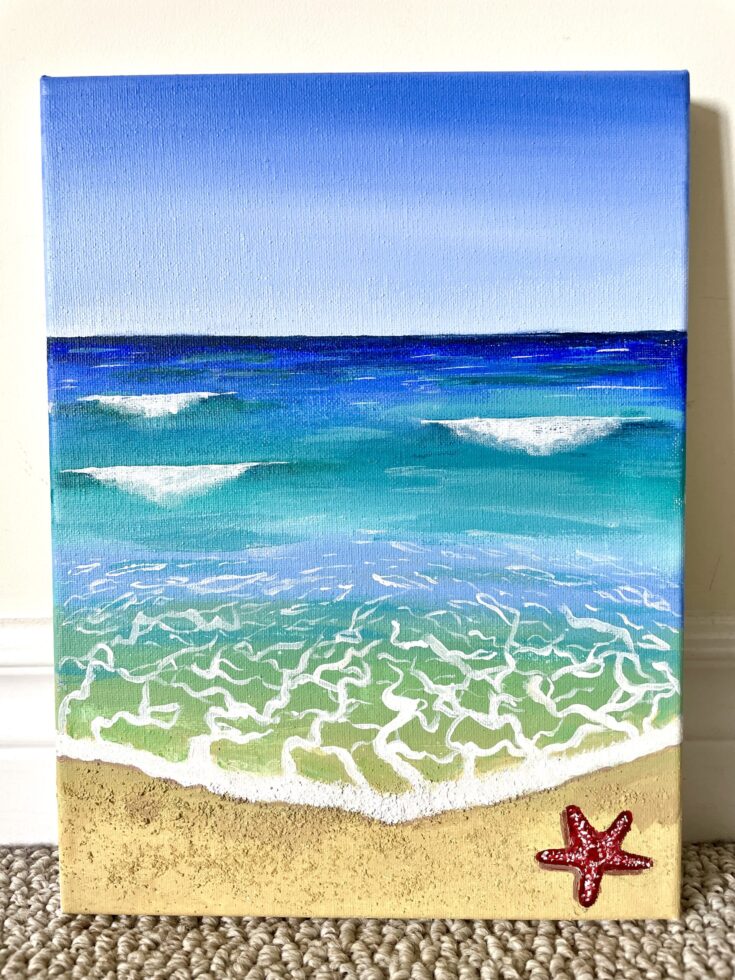
Learn how to paint an easy beach painting with acrylics. This beginner step by step painting tutorial is simple to follow and fun!
Materials
- 9x12" stretched canvas
- Ultramarine Blue (or any blue)
- Phthalo Blue (or any blue/green)
- Titanium White (or any white)
- Cadmium Yellow Medium (or any yellow)
- Burnt Umber (or any brown)
- Cadmium Red Medium (or any red)
- ¾" flat brush
- Size 8 flat brush
- Size 5 round brush
- Size 2/0 detailing round brush
- 1 Q-Tip
- Other tools: water jar, paint palette, masking tape
- Optional tools: palette knife, spray bottle with water
Instructions
- Check out the beach painting YouTube video tutorial here
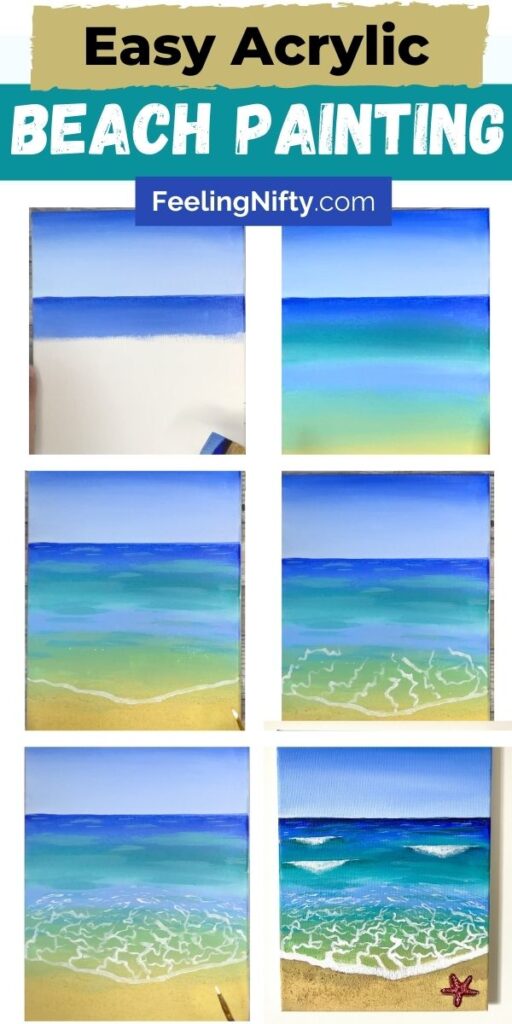
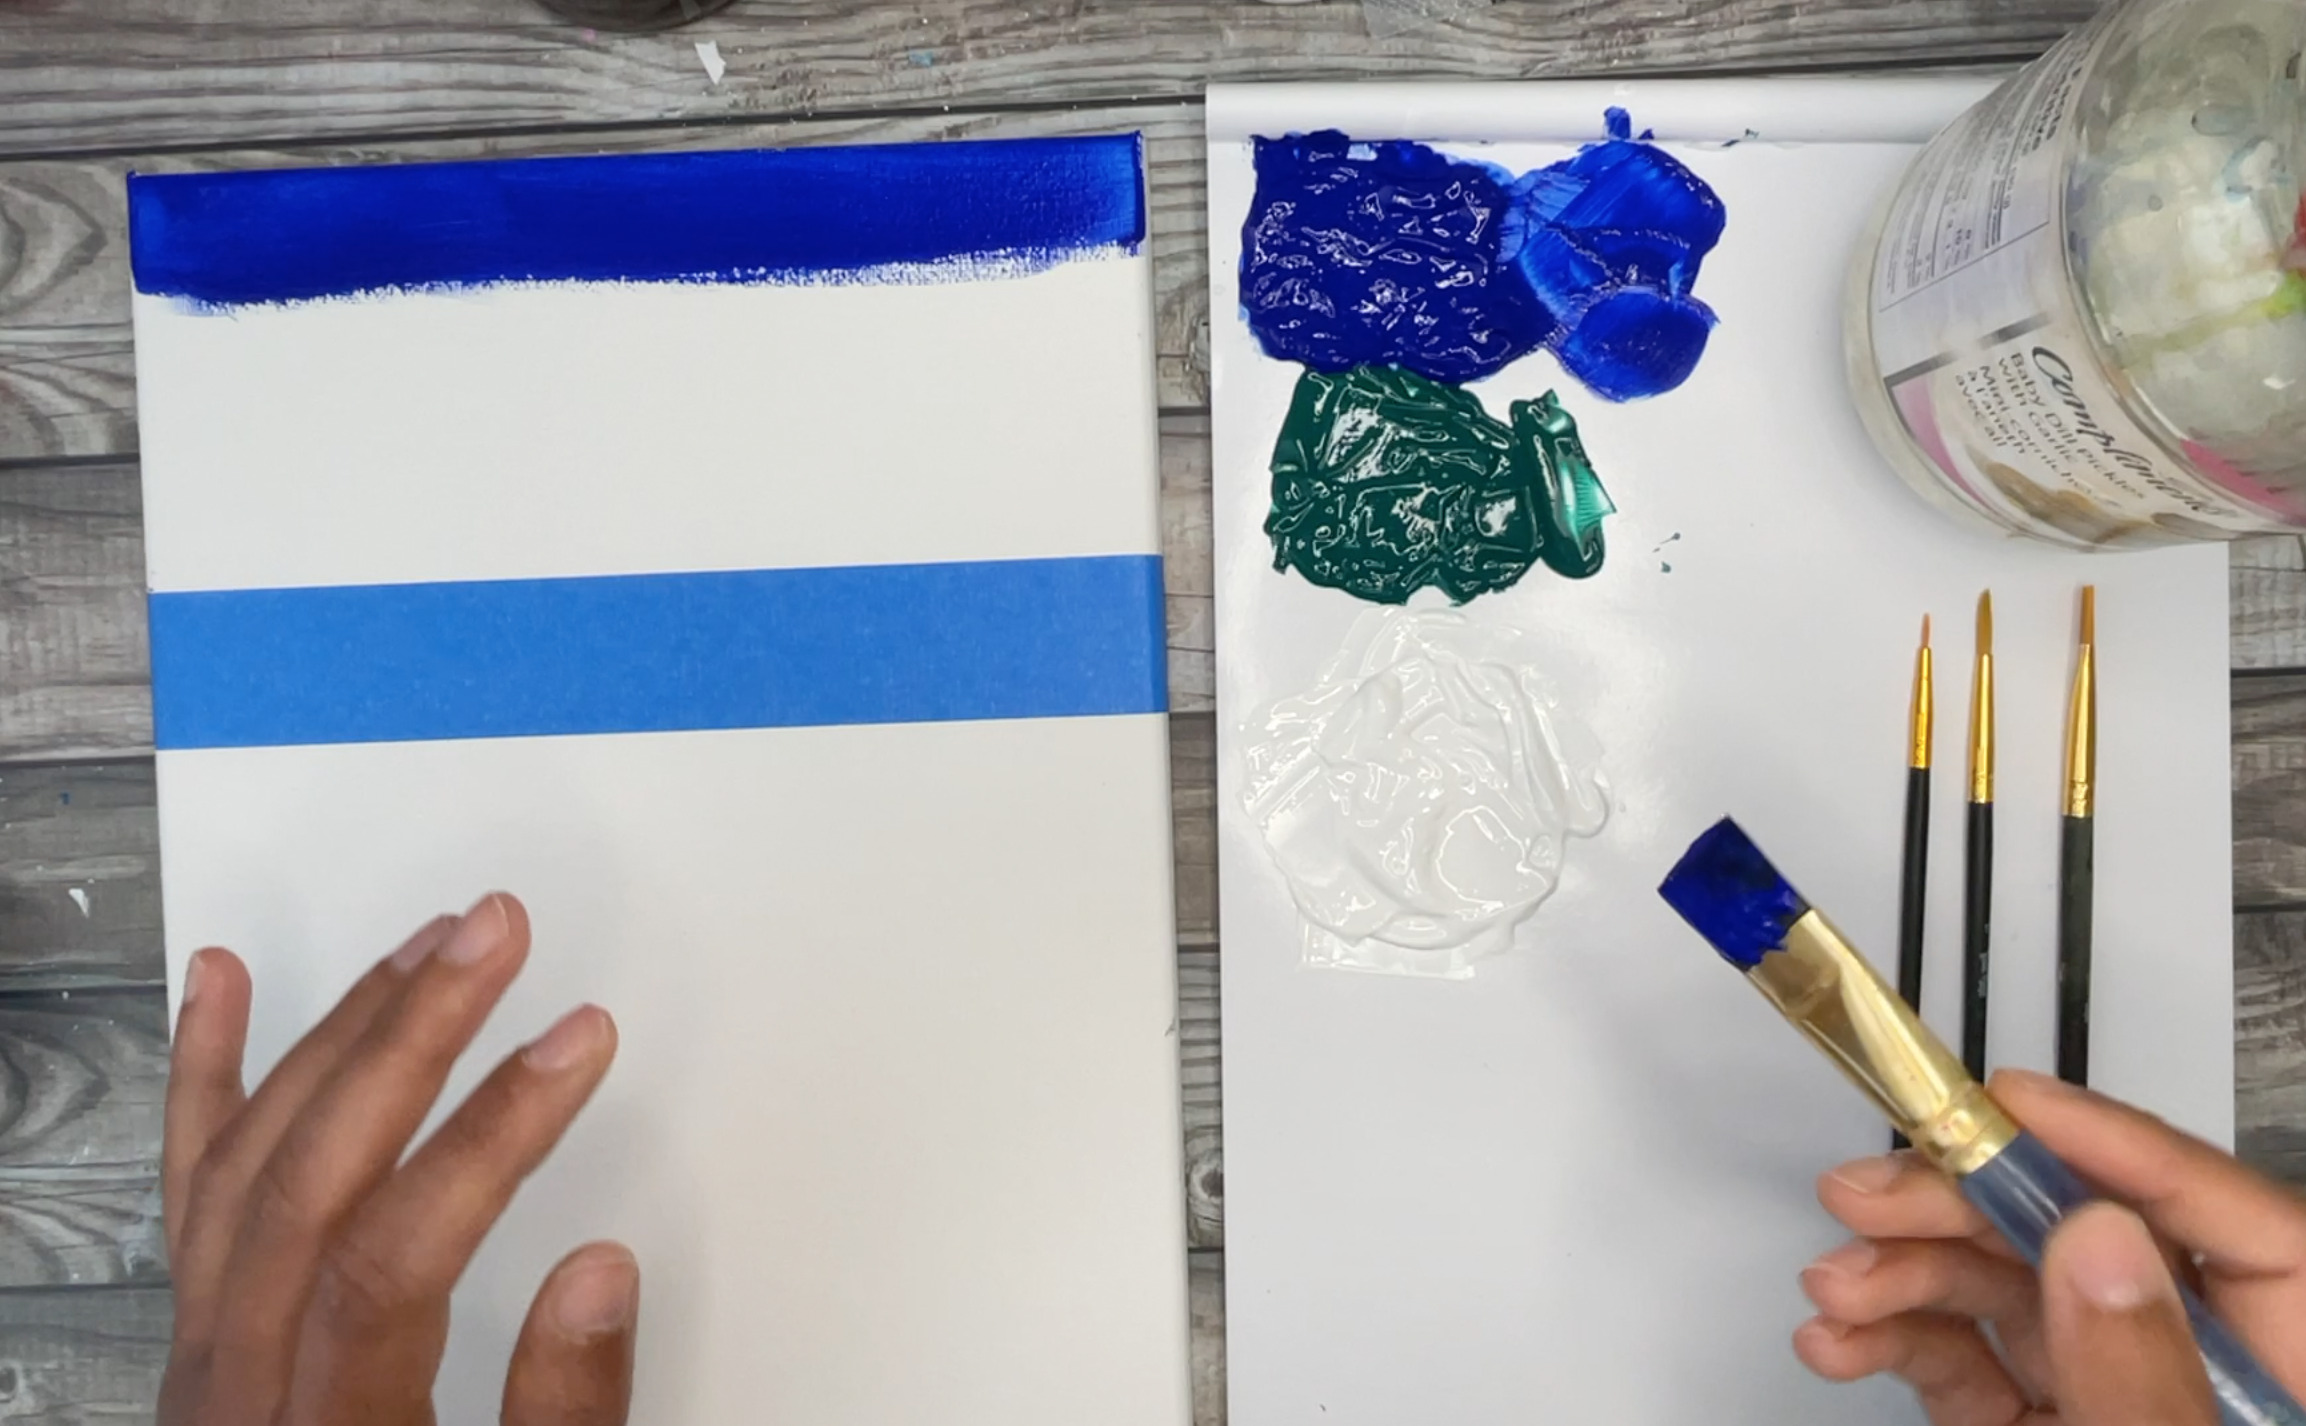
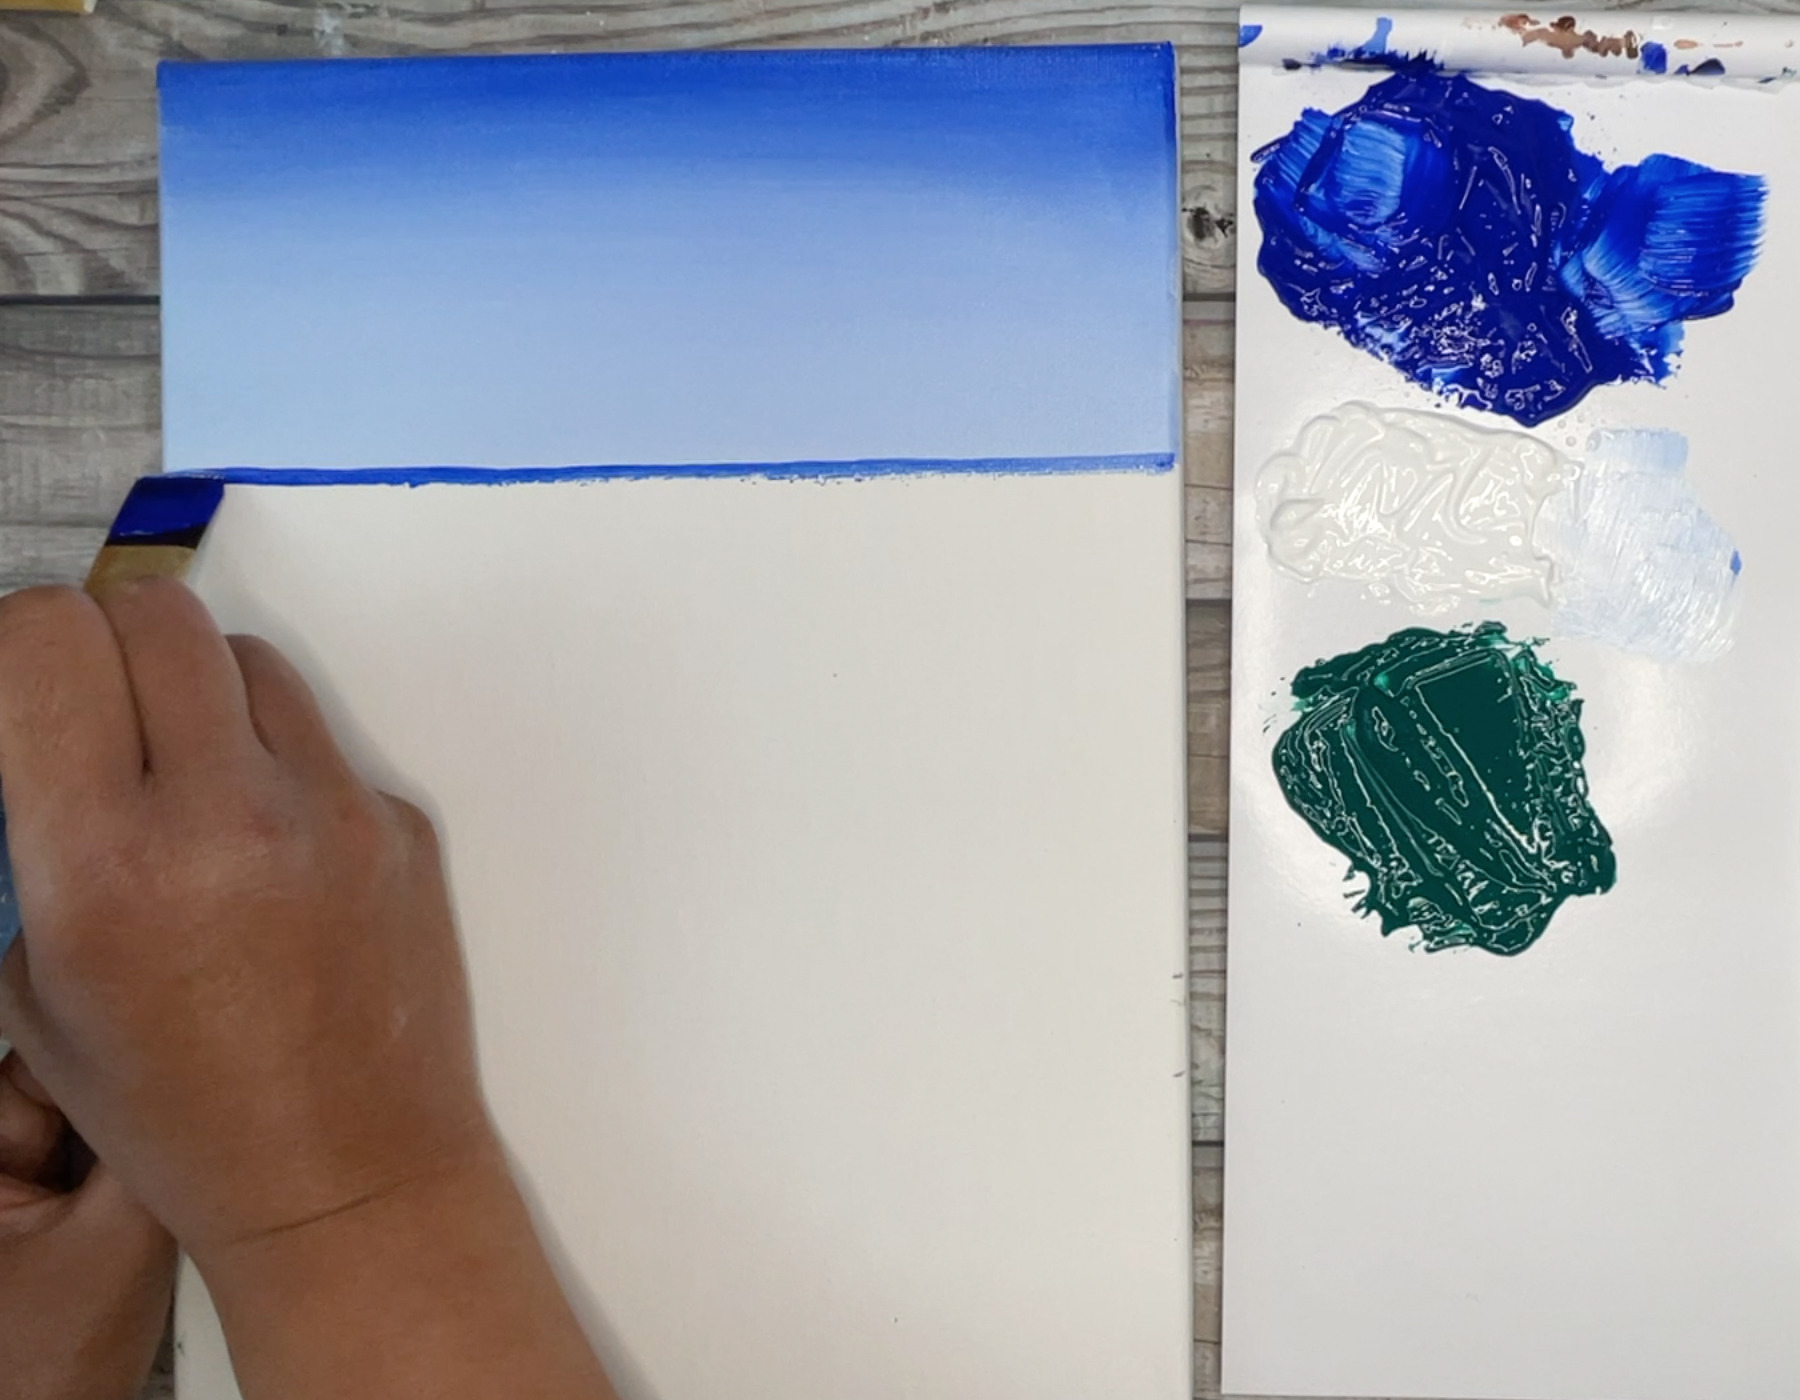
- Stick masking tape to the top ⅓ of your canvas. This will help create the horizon line
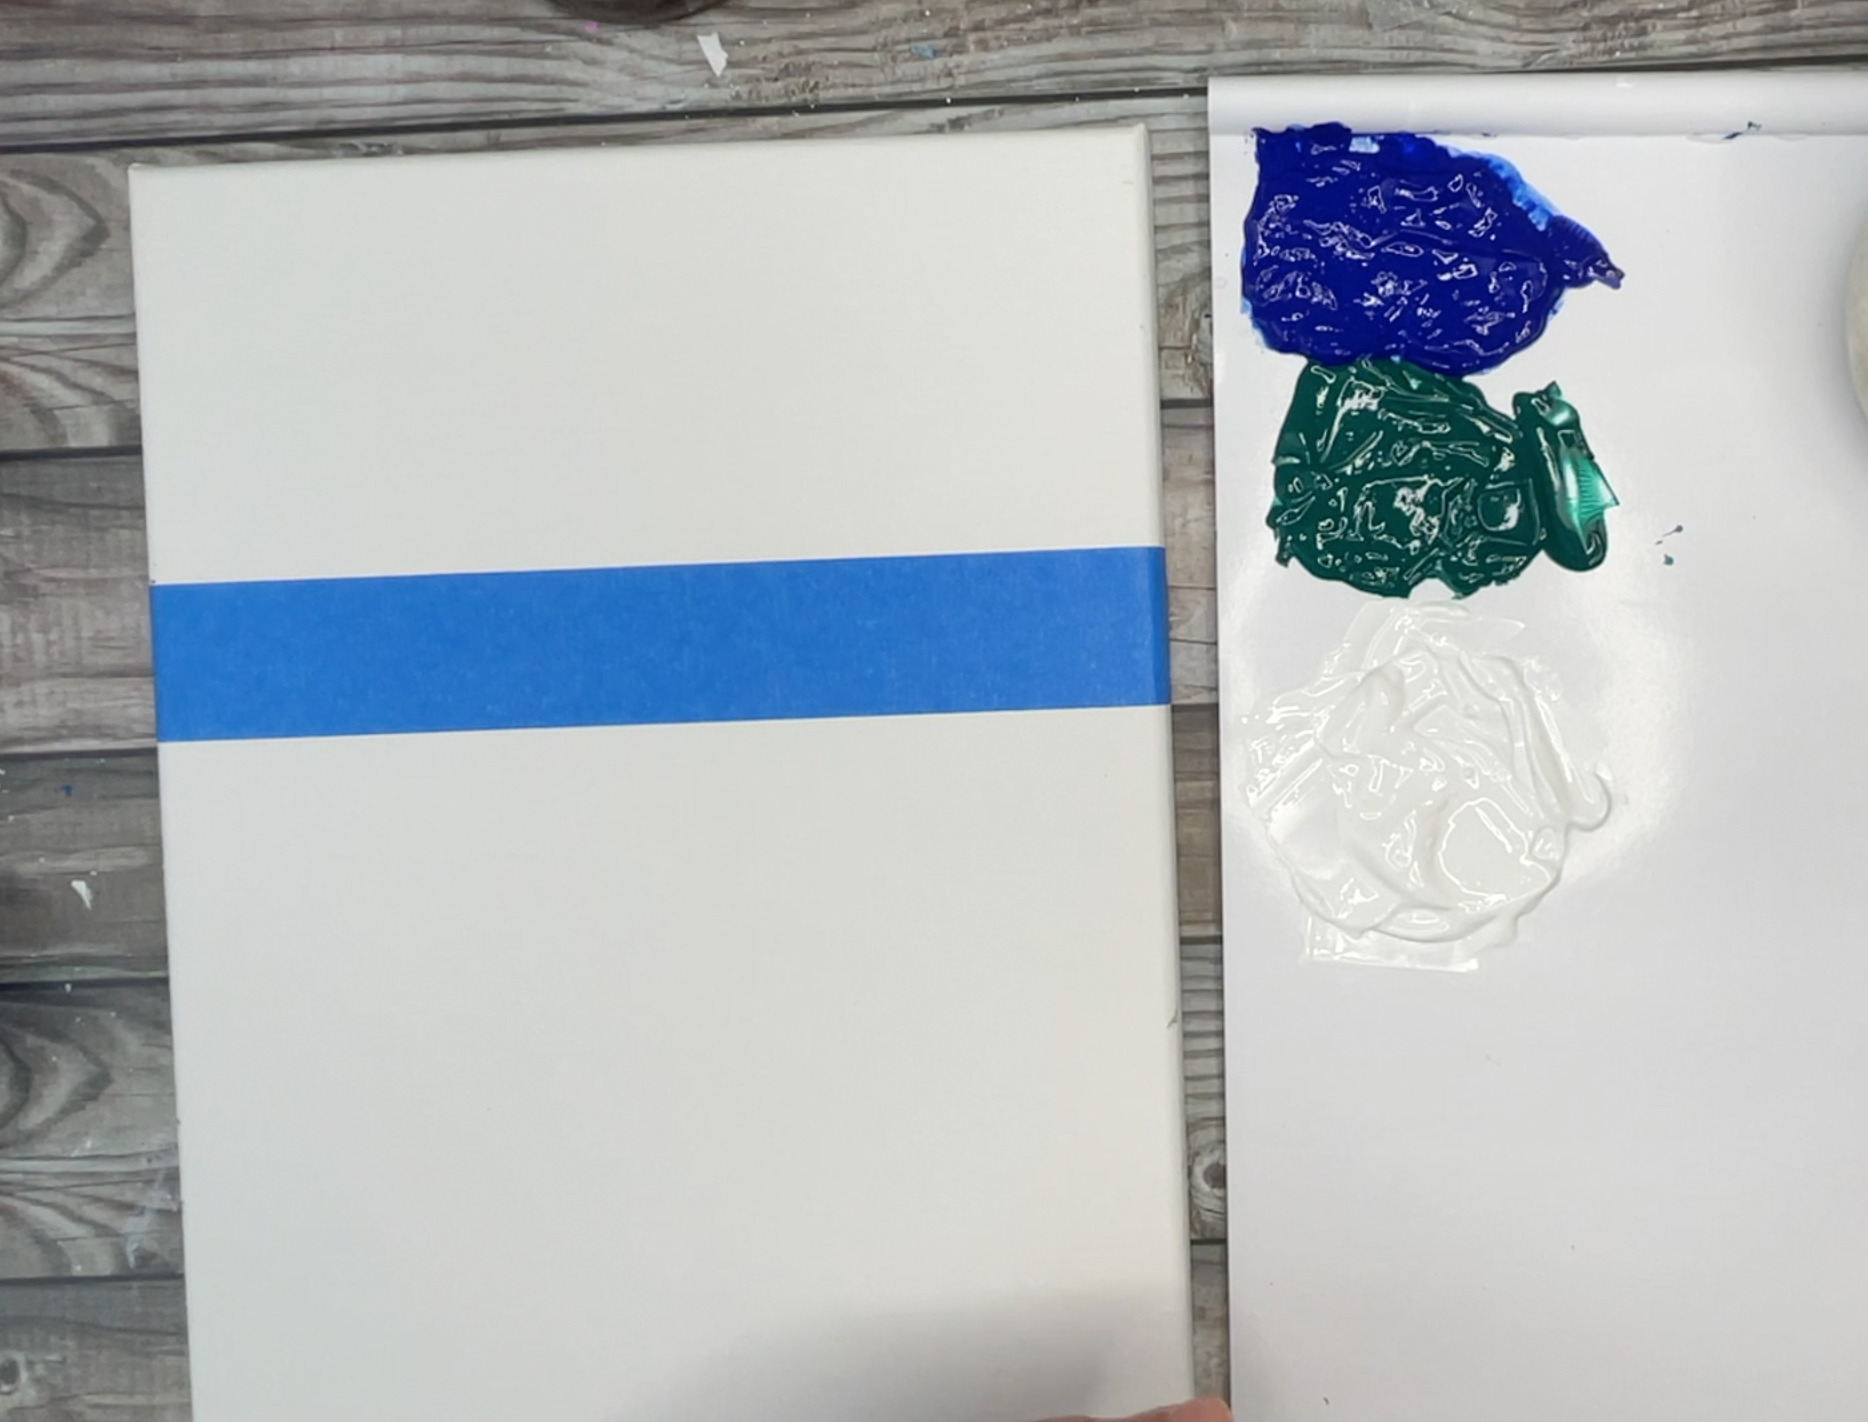
- Pick up ultramarine blue on your ¾" flat brush and paint the top part of the sky using horizontal back and forth strokes
- Without cleaning off your brush, pick up some titanium white on your brush and add the white to your sky below the blue. Use back and forth horizontal strokes to blend the blue and white.
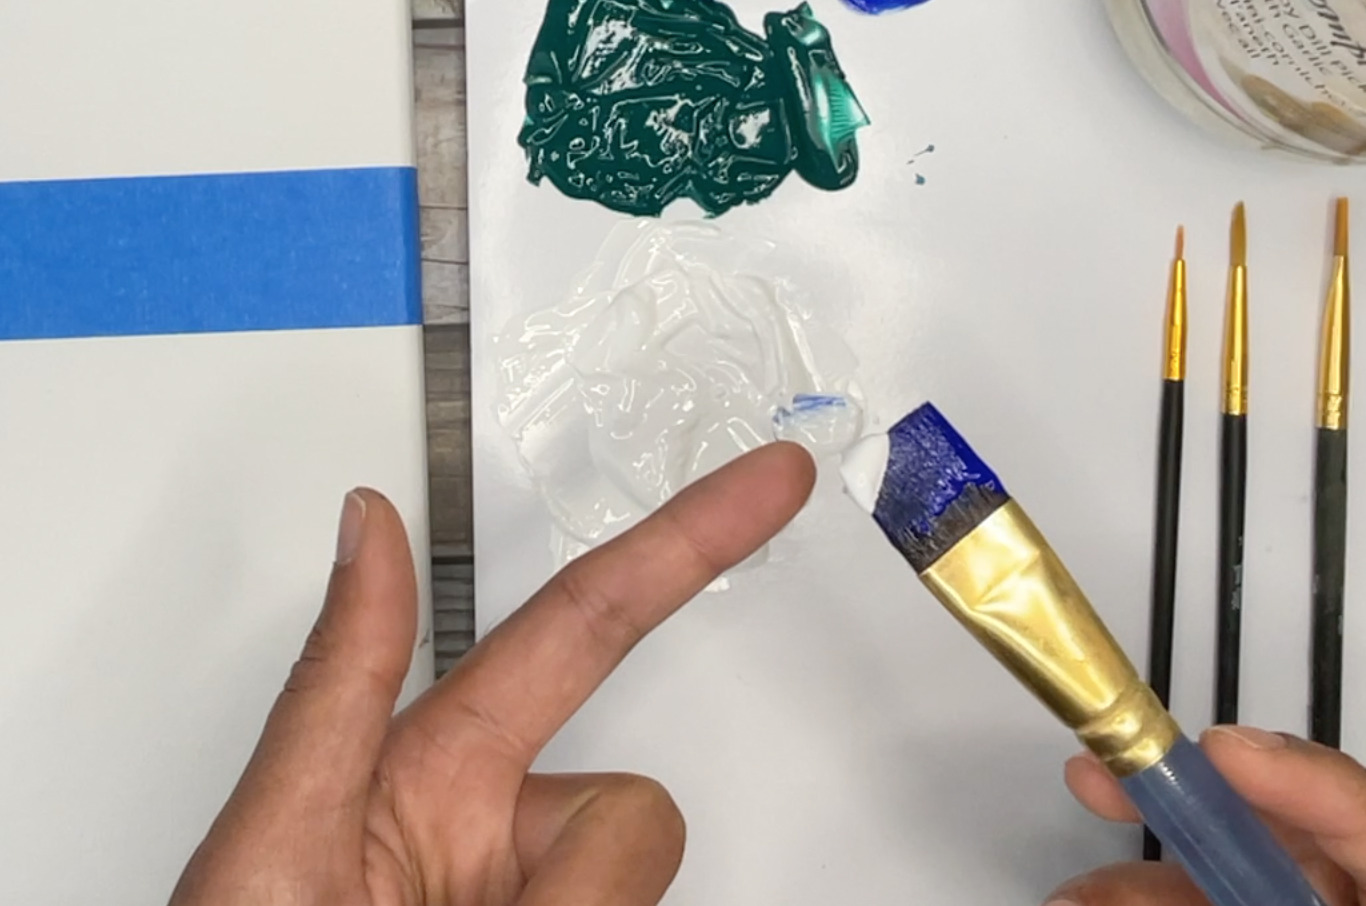
- Keep picking up white on your brush and blending in your sky with back and forth strokes until you get to the masking tape (horizon). The color at the horizon should be a very pale blue (almost white)
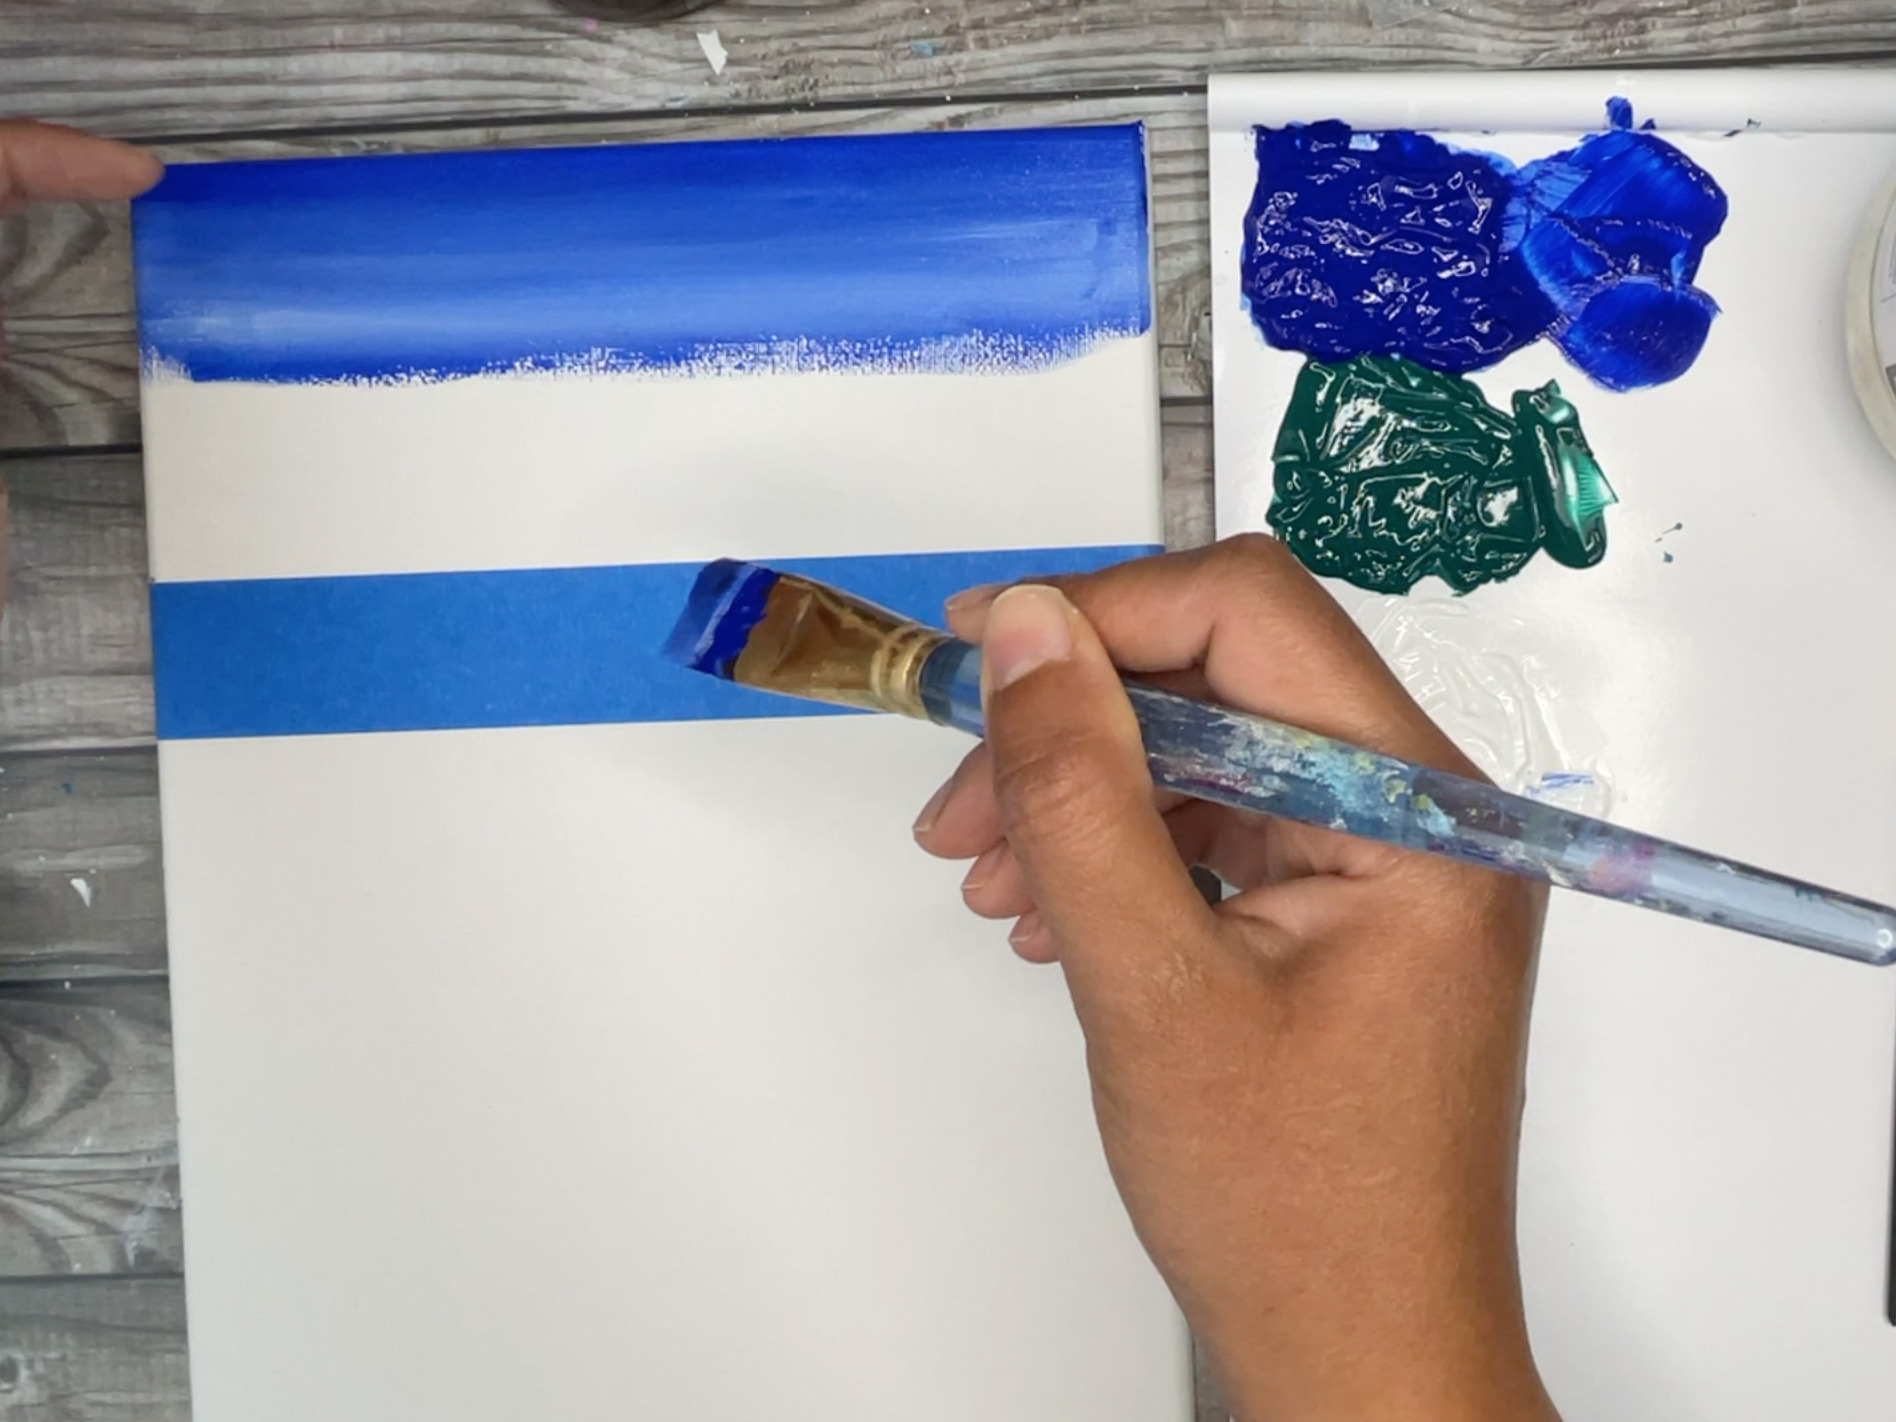
- Take off masking tape. Clean off your brush in water then pick up some pure ultramarine blue. Using the chiseled edge of brush create a straight line at the horizon. Don't worry if it's uneven at this point. I'll show you a trick at the end of this tutorial on how to make a clean straight line at the end.
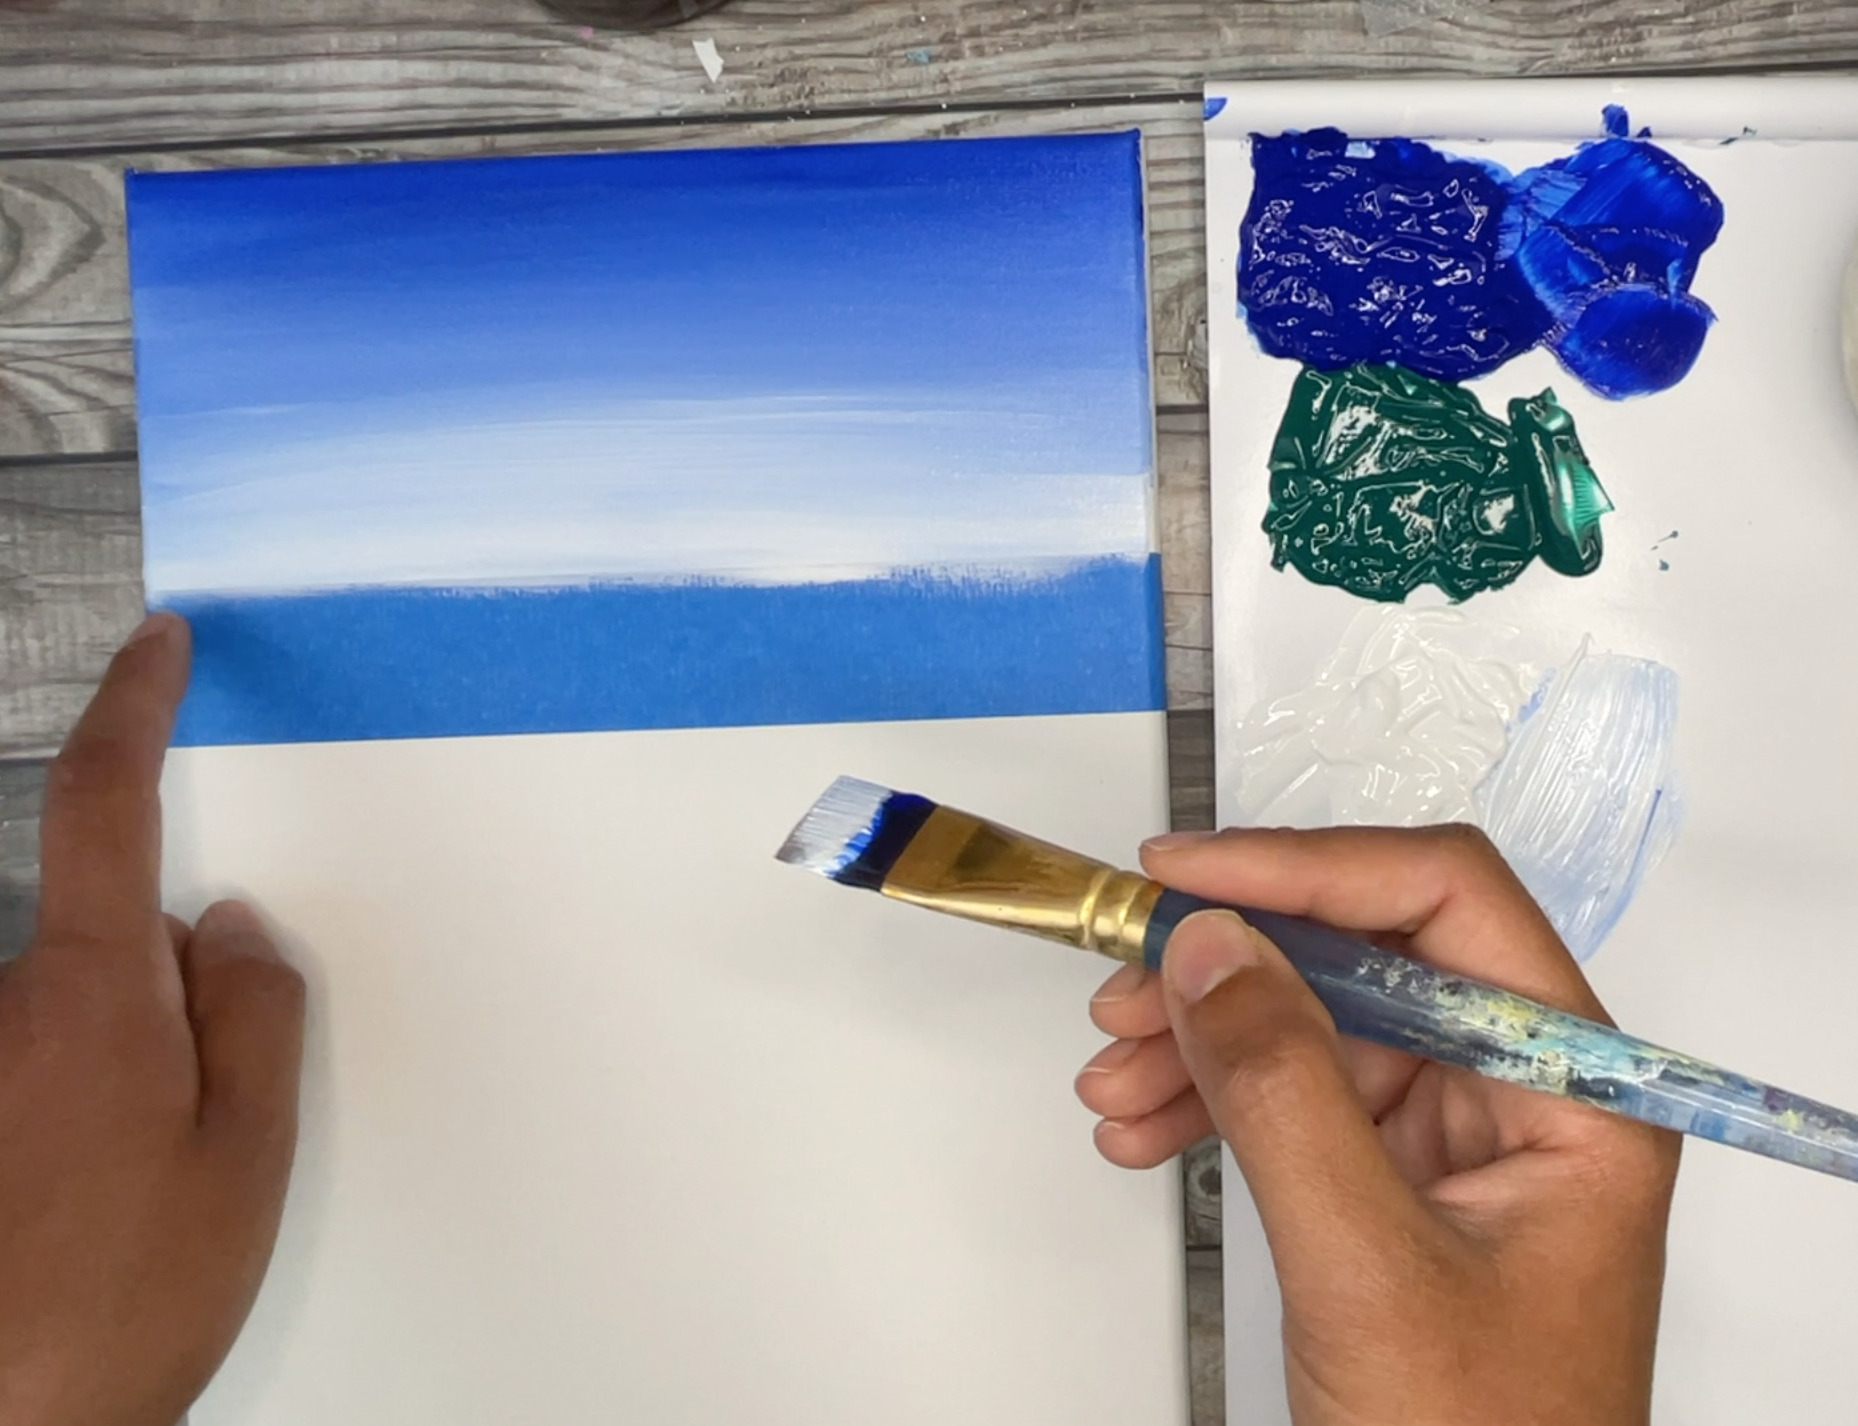
- Pick up more ultramarine blue and paint in the top portion of the ocean using the same back and forth strokes.
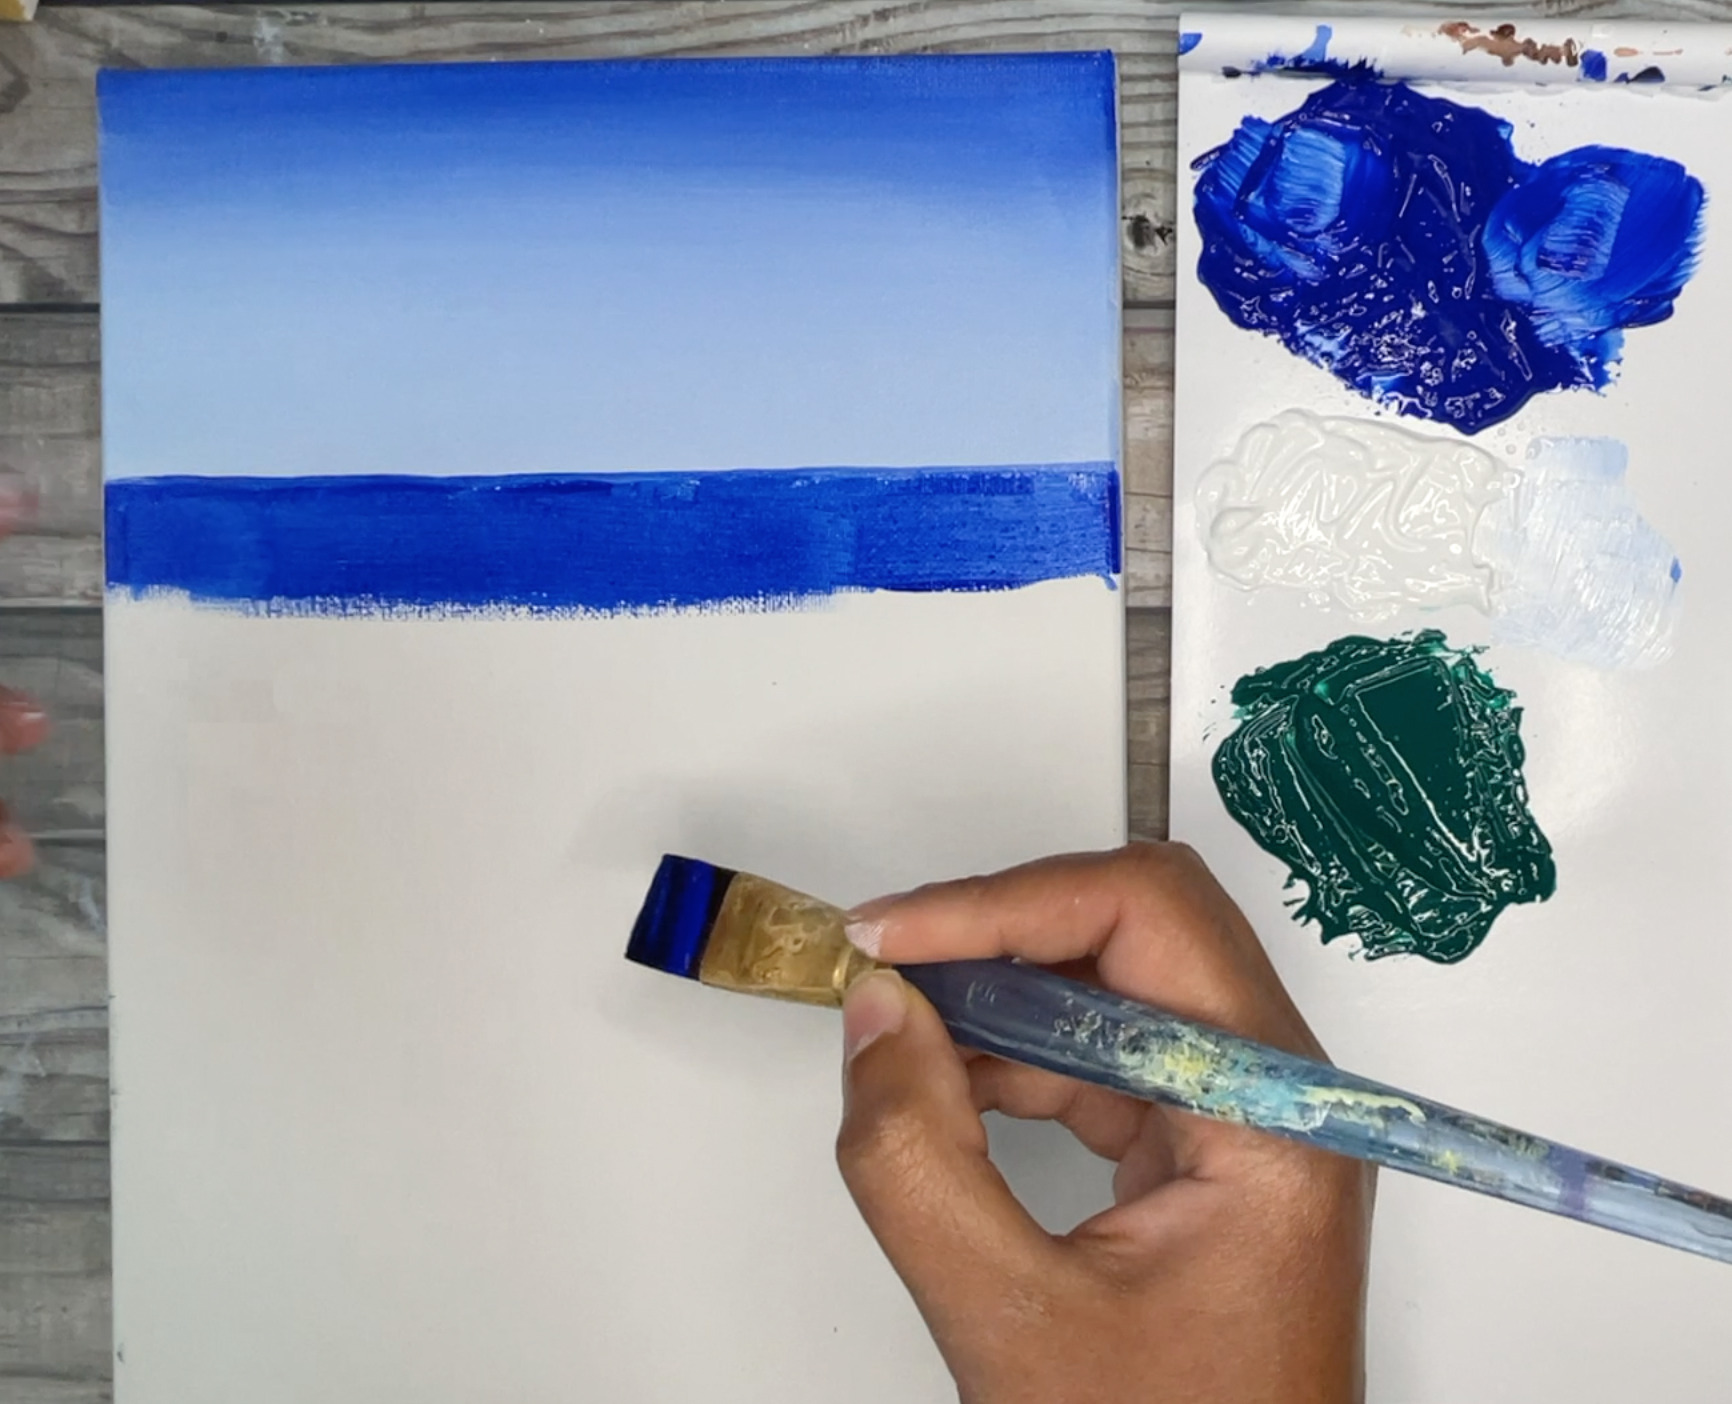
- Without cleaning off your brush pick up some white on your brush and blend the blue with some white. Make sure to leave some dark ultramarine blue close to the horizon. Things are darker the further in the distance they are, so we want to make sure the ocean at the horizon is still nice and dark. Also we want to make sure the ocean is darker than the sky- this will give a beautiful contrast effect at the horizon
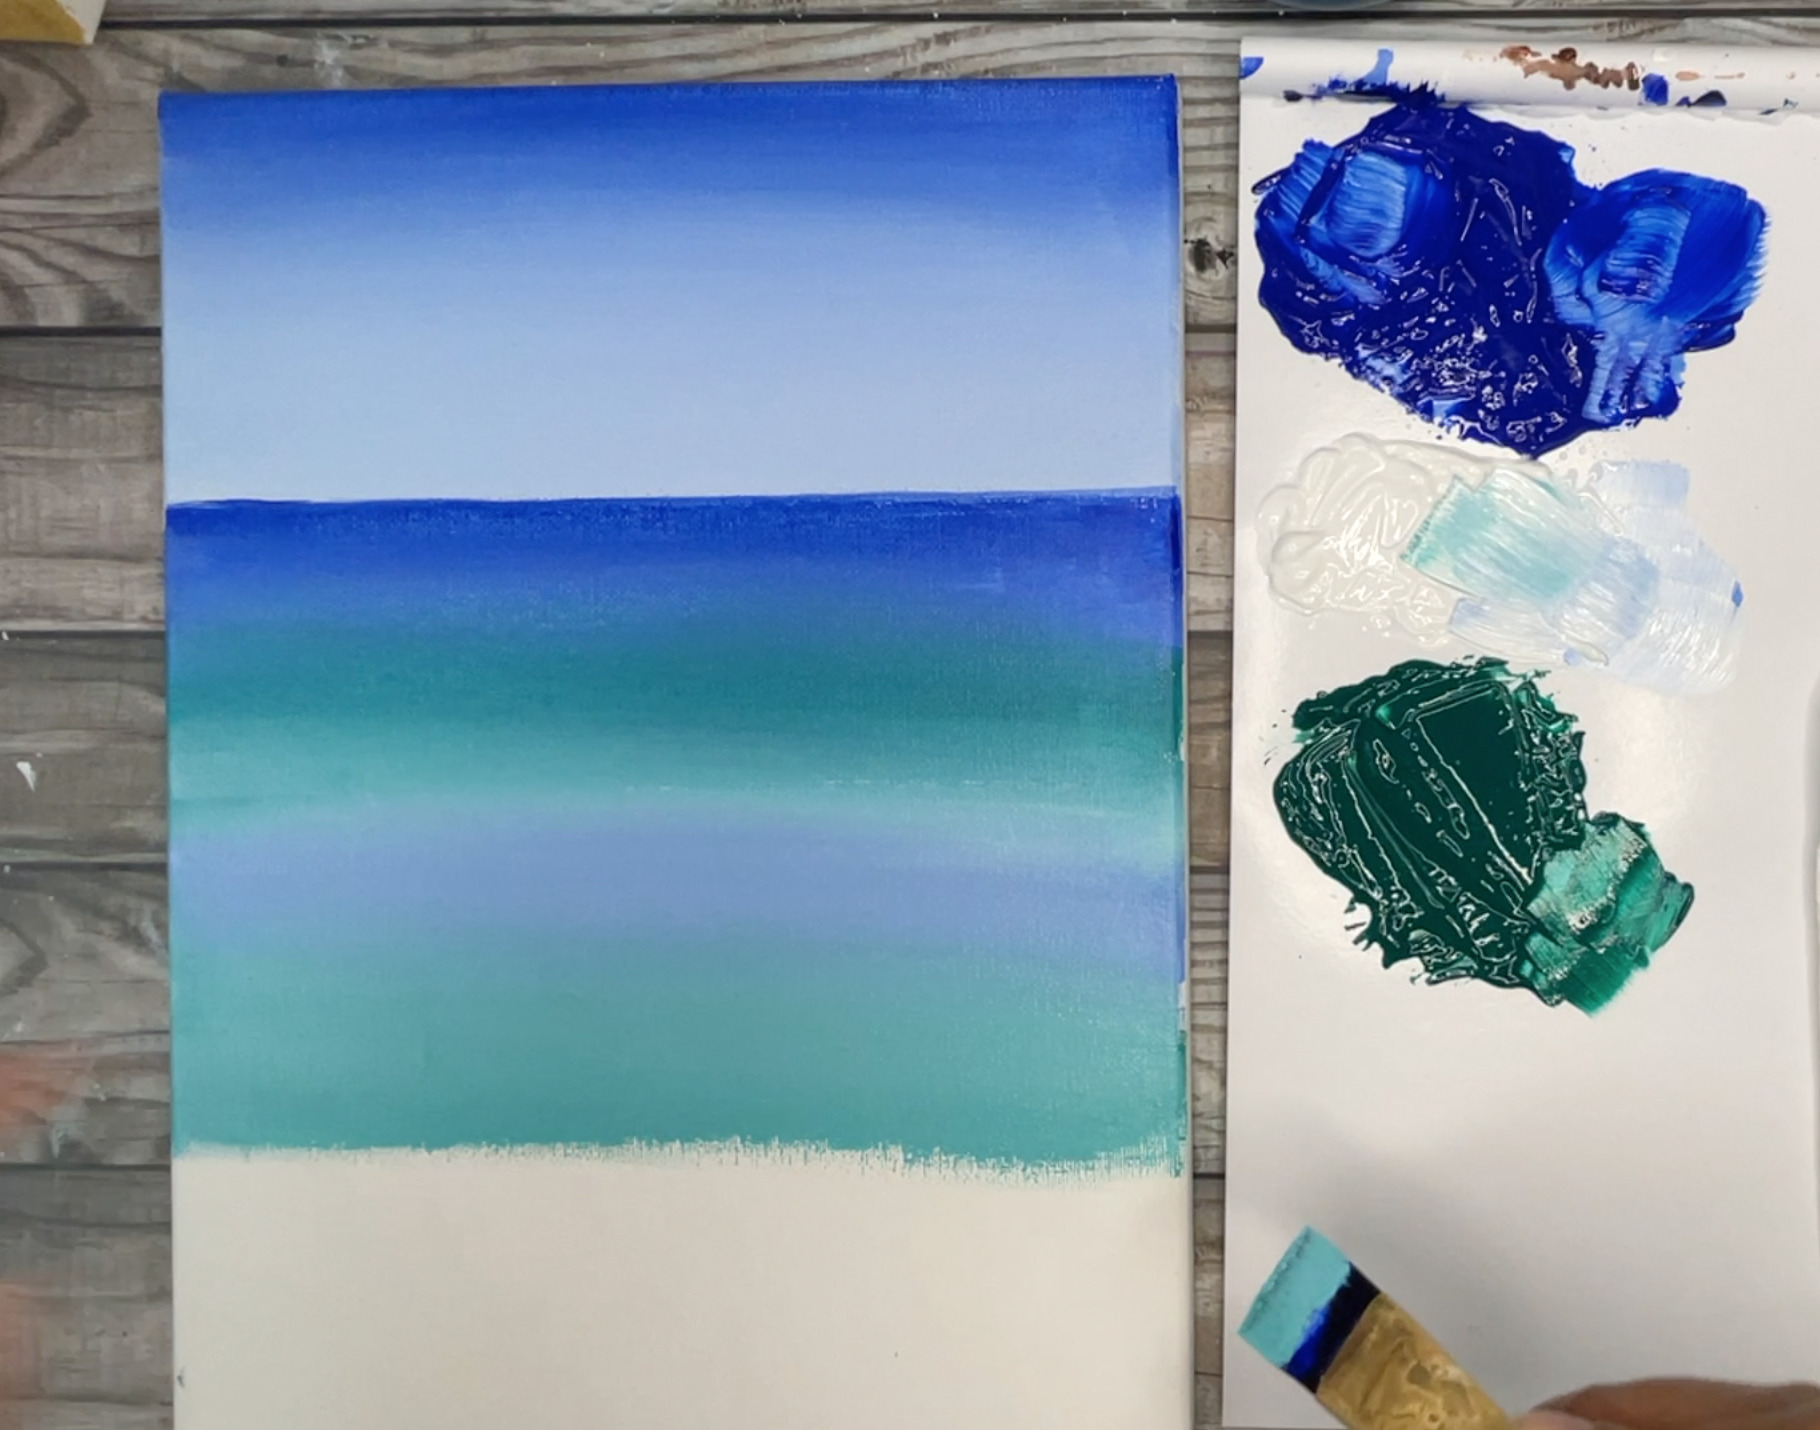
- Without cleaning off your brush, pick up some phthalo green on your brush. Using back and froth strokes add the green below the blue. It will be pretty dark in this step. The next step we will lighten the color by adding some white over top it.
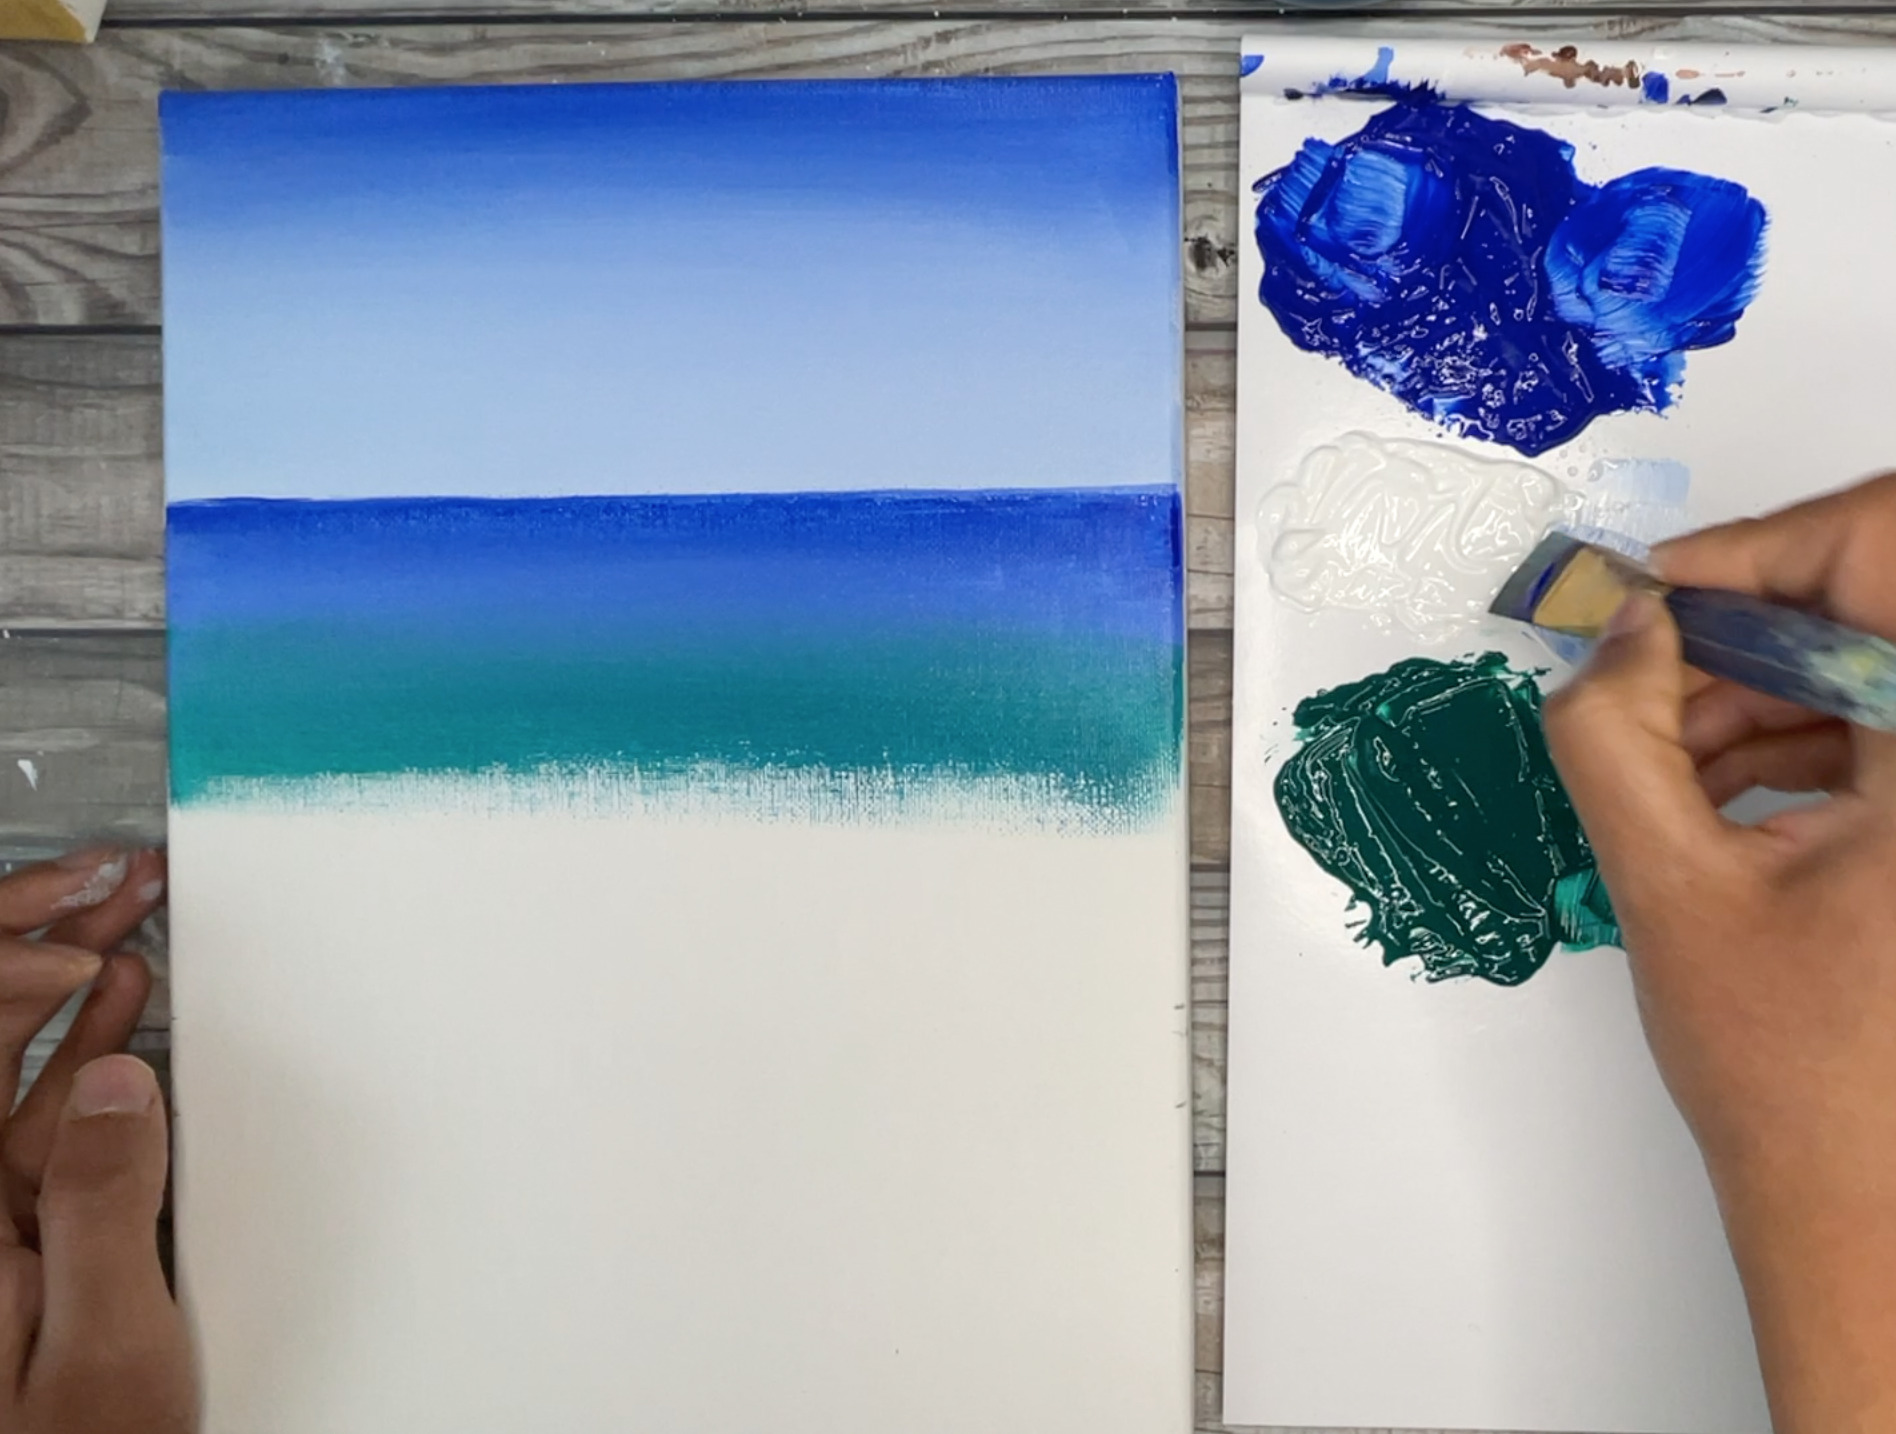
- Without cleaning off your brush, pick up some white on your brush. Paint right over top the phthalo green to make a lighter seam-foam green color. Don't lighten it too much because we want to save a lighter version of this color for further down.
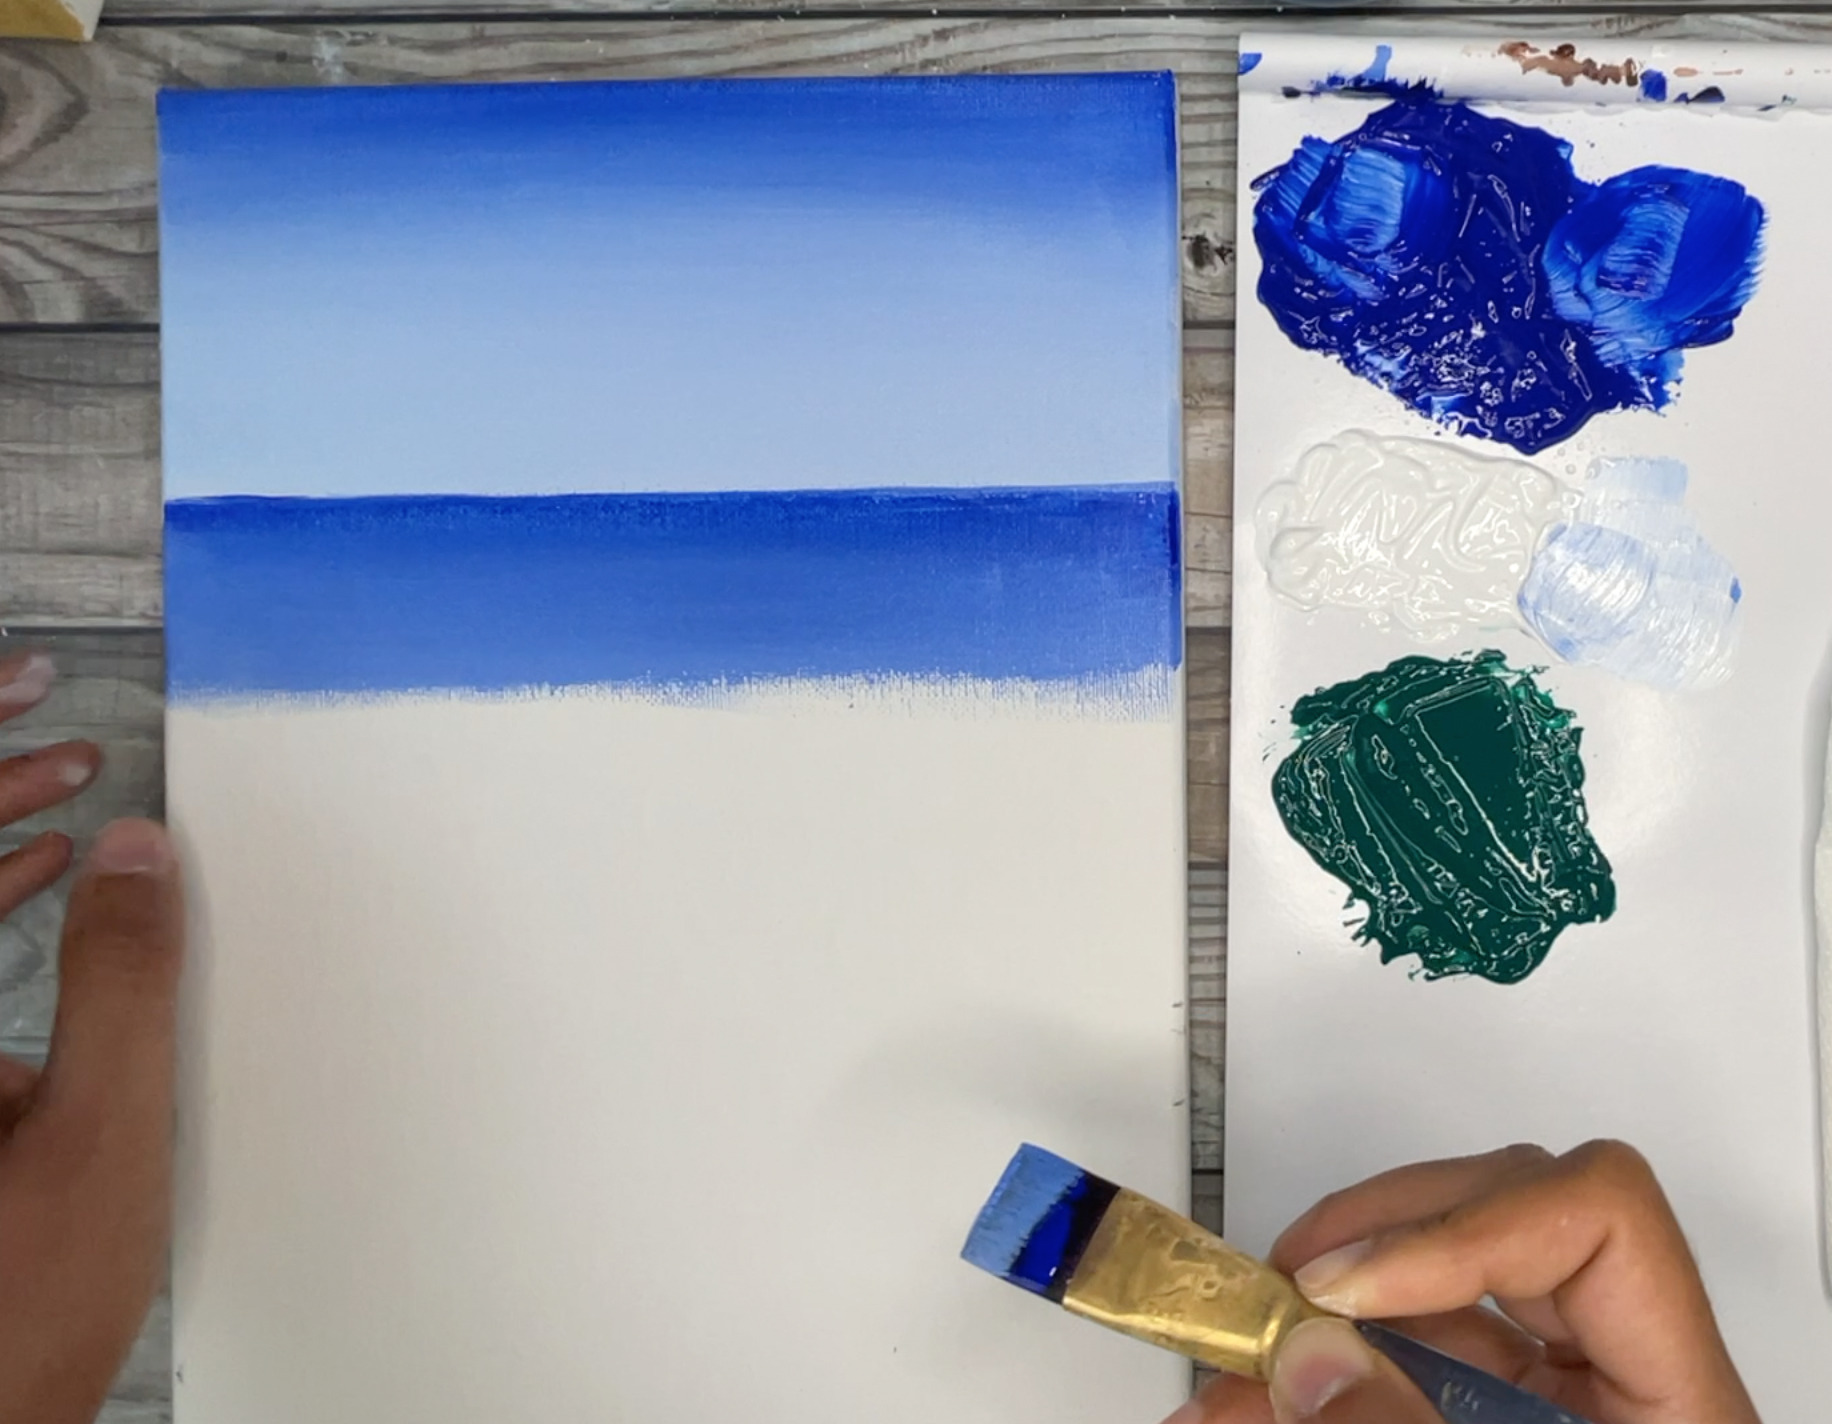
- Without cleaning off brush pick up some ultramarine blue and add a small section of blue below the green. Then pick up some white and lighten it. The goal here is to create a slightly lighter ultramarine blue compared to the blue at the horizon.
- Without cleaning of your brush paint another section of phthalo green below the blue. Lighten it right on canvas with some white. The goal here is to green a slightly lighter version of green compared to the section above. MAke sure to leave aa little less than ⅓ of canvas below it blank.
- If you have a spray bottle with water, mist the green paint you just painted in the last step with a couple sprays of water to keep it from drying out.
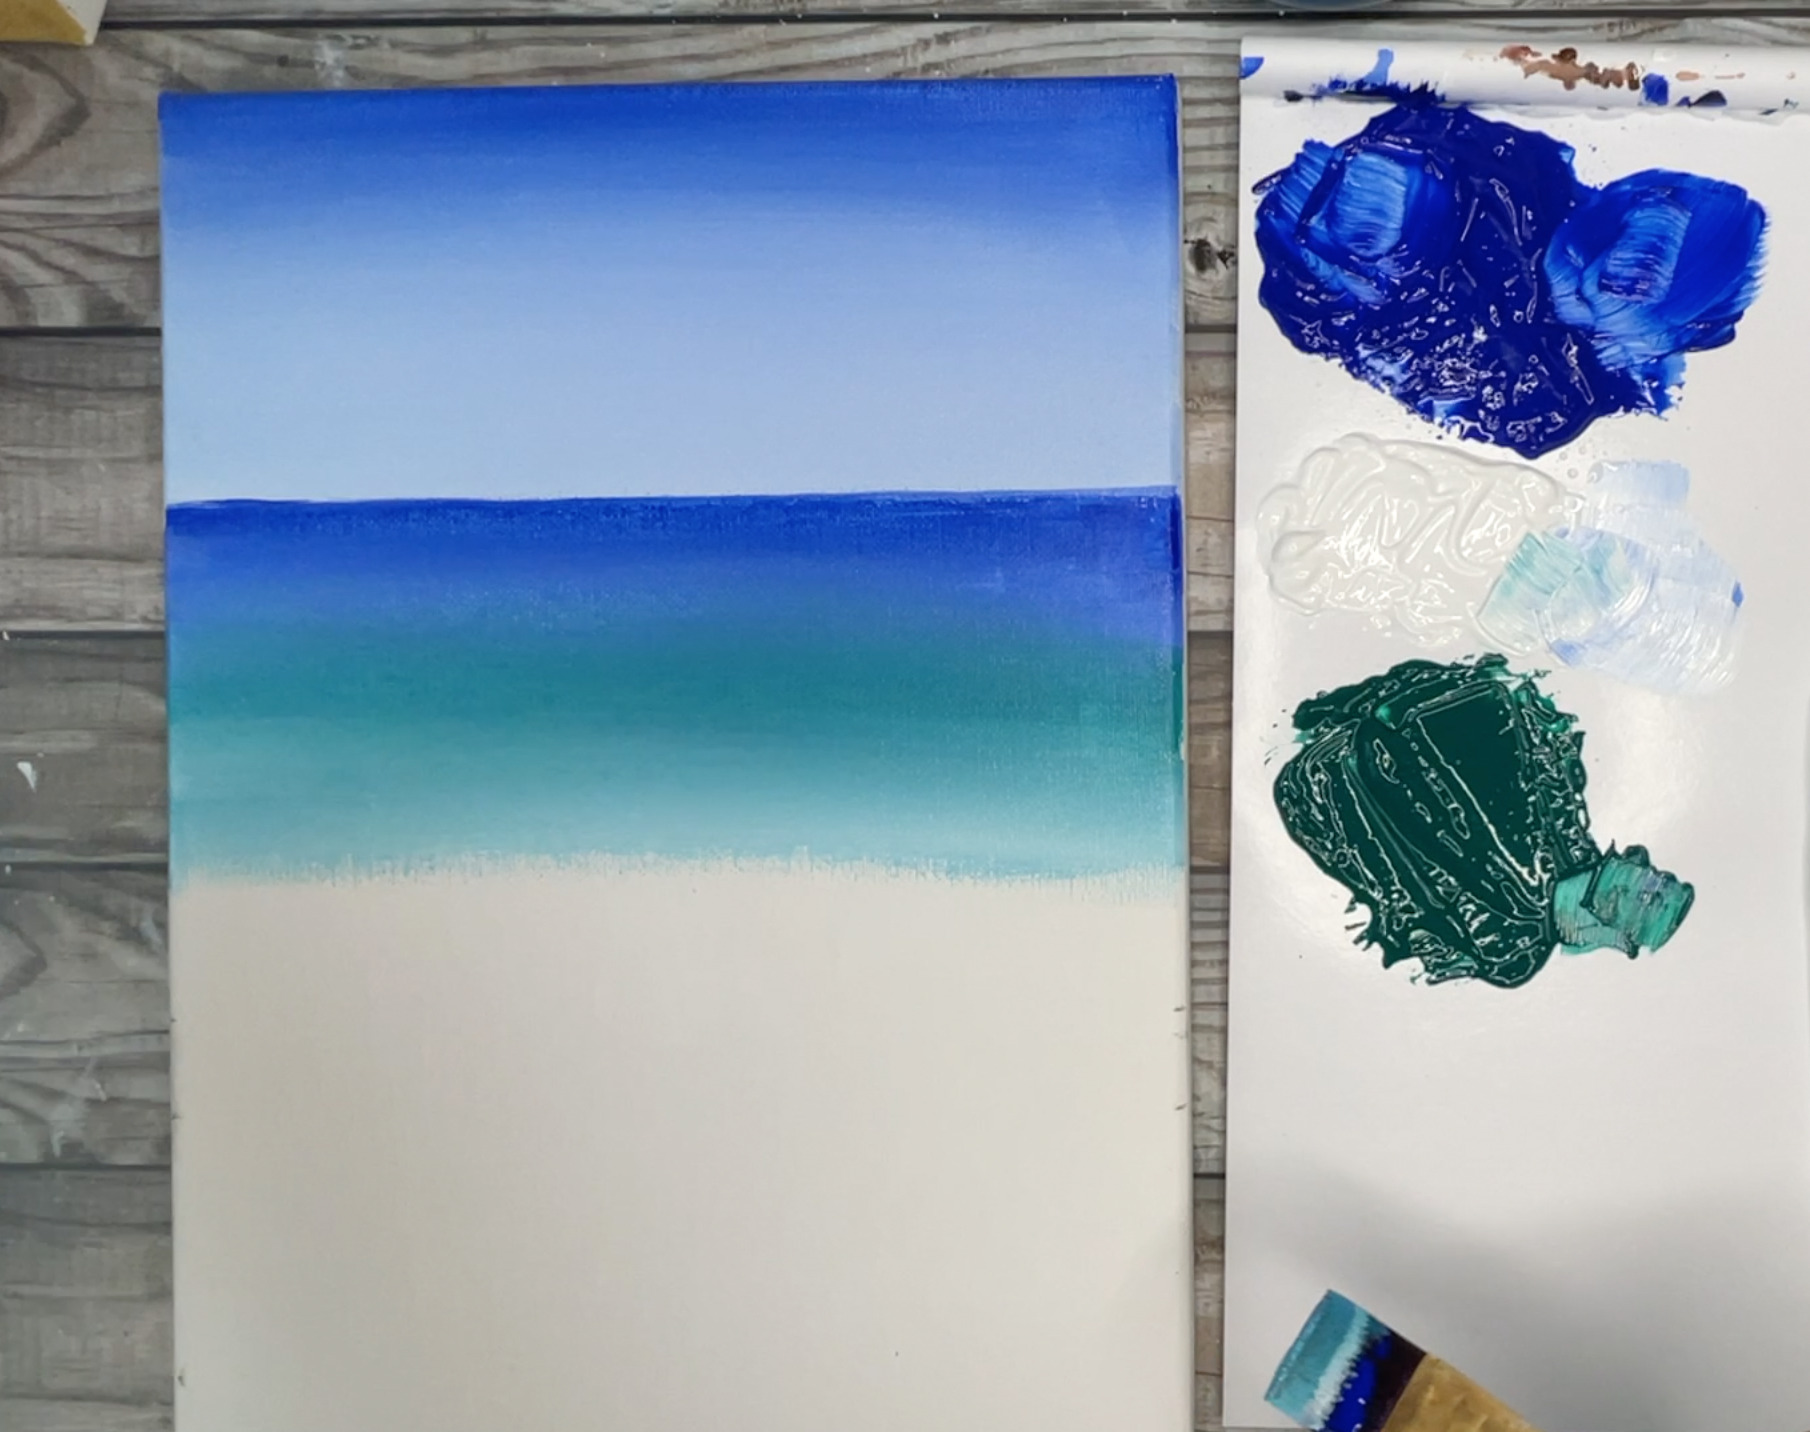
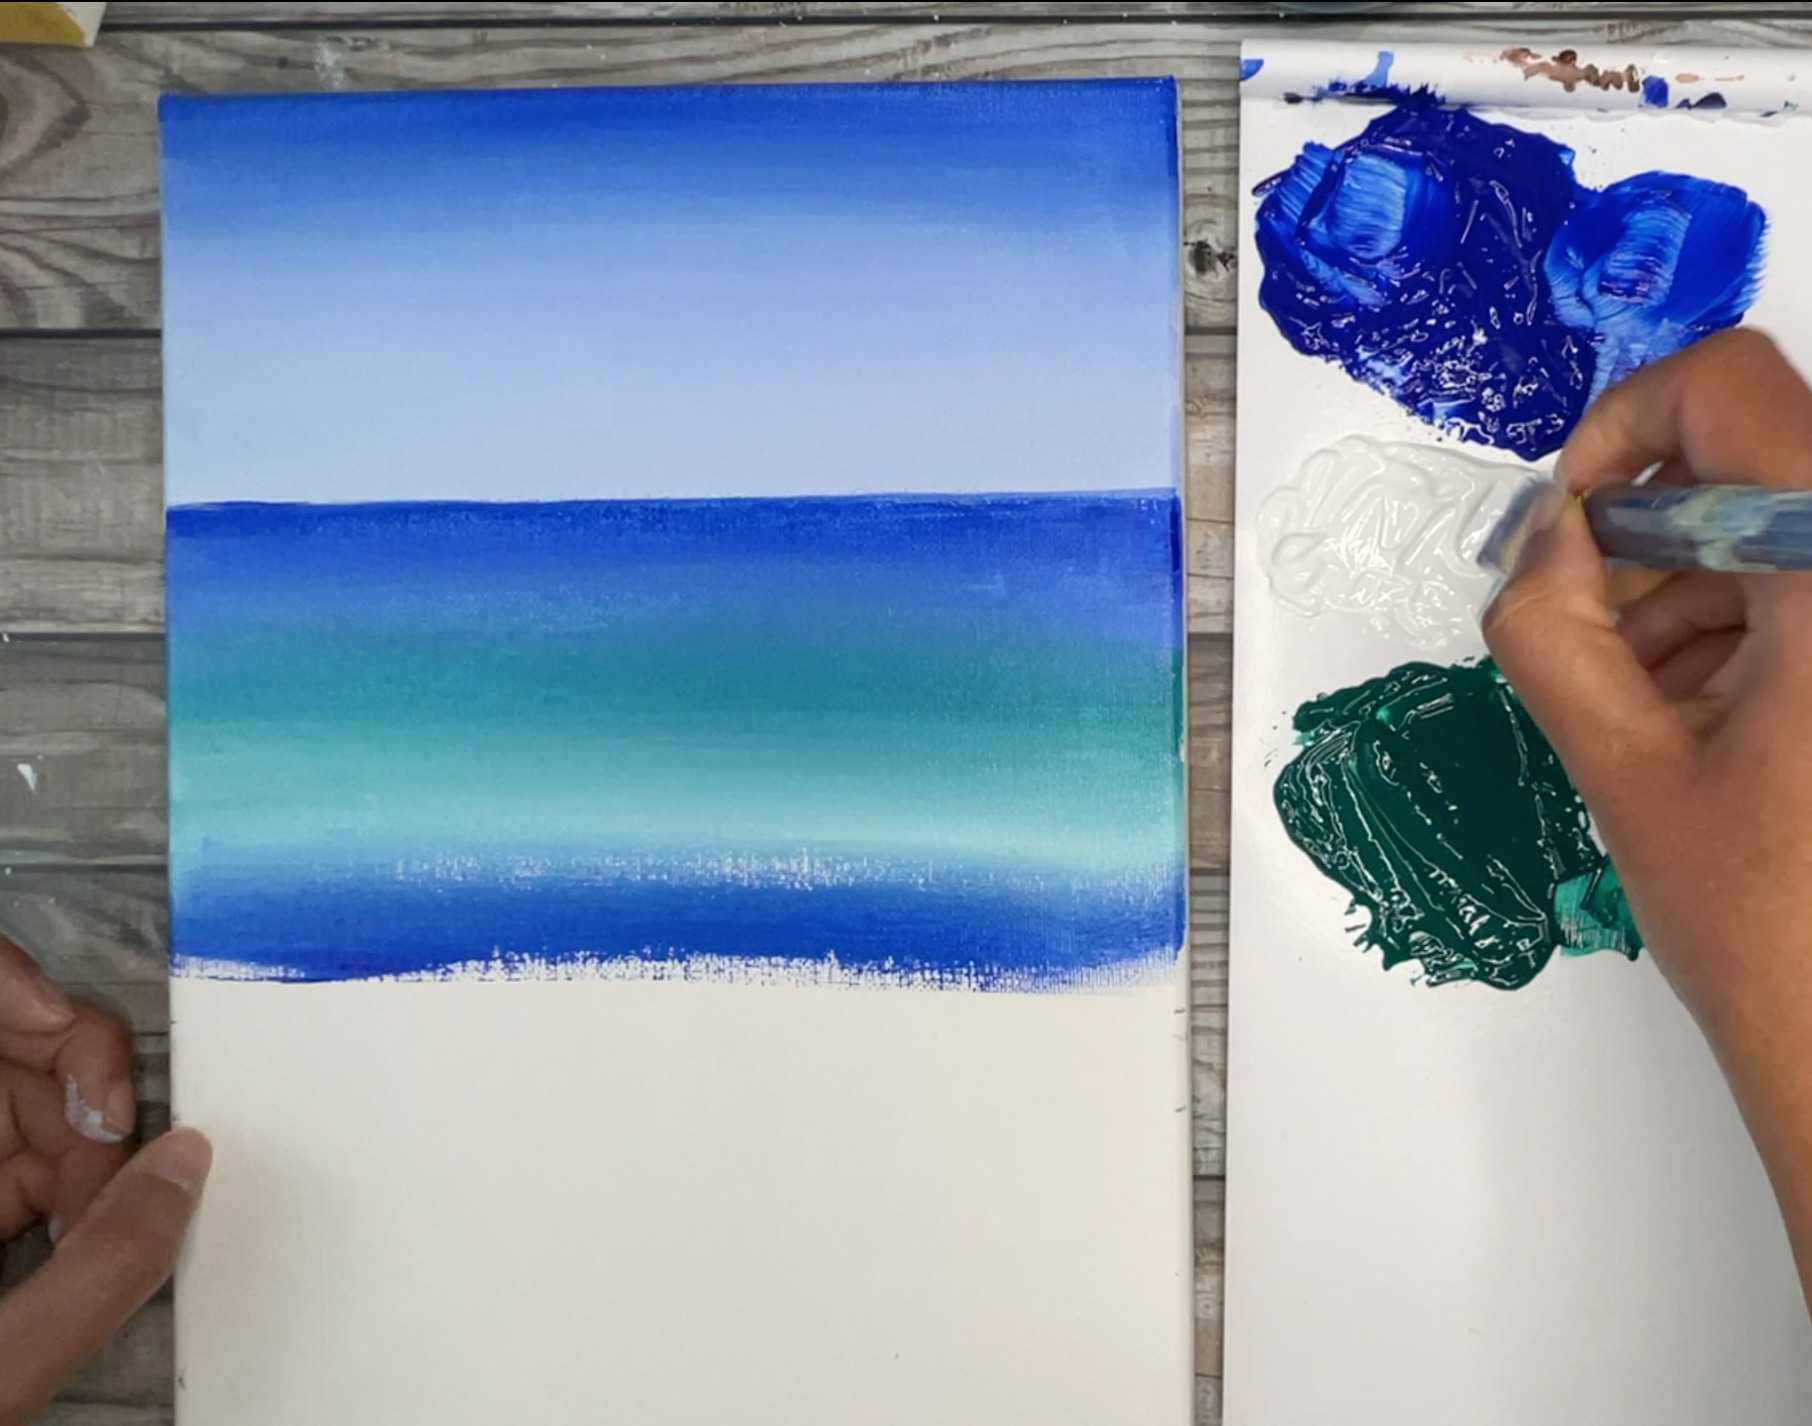
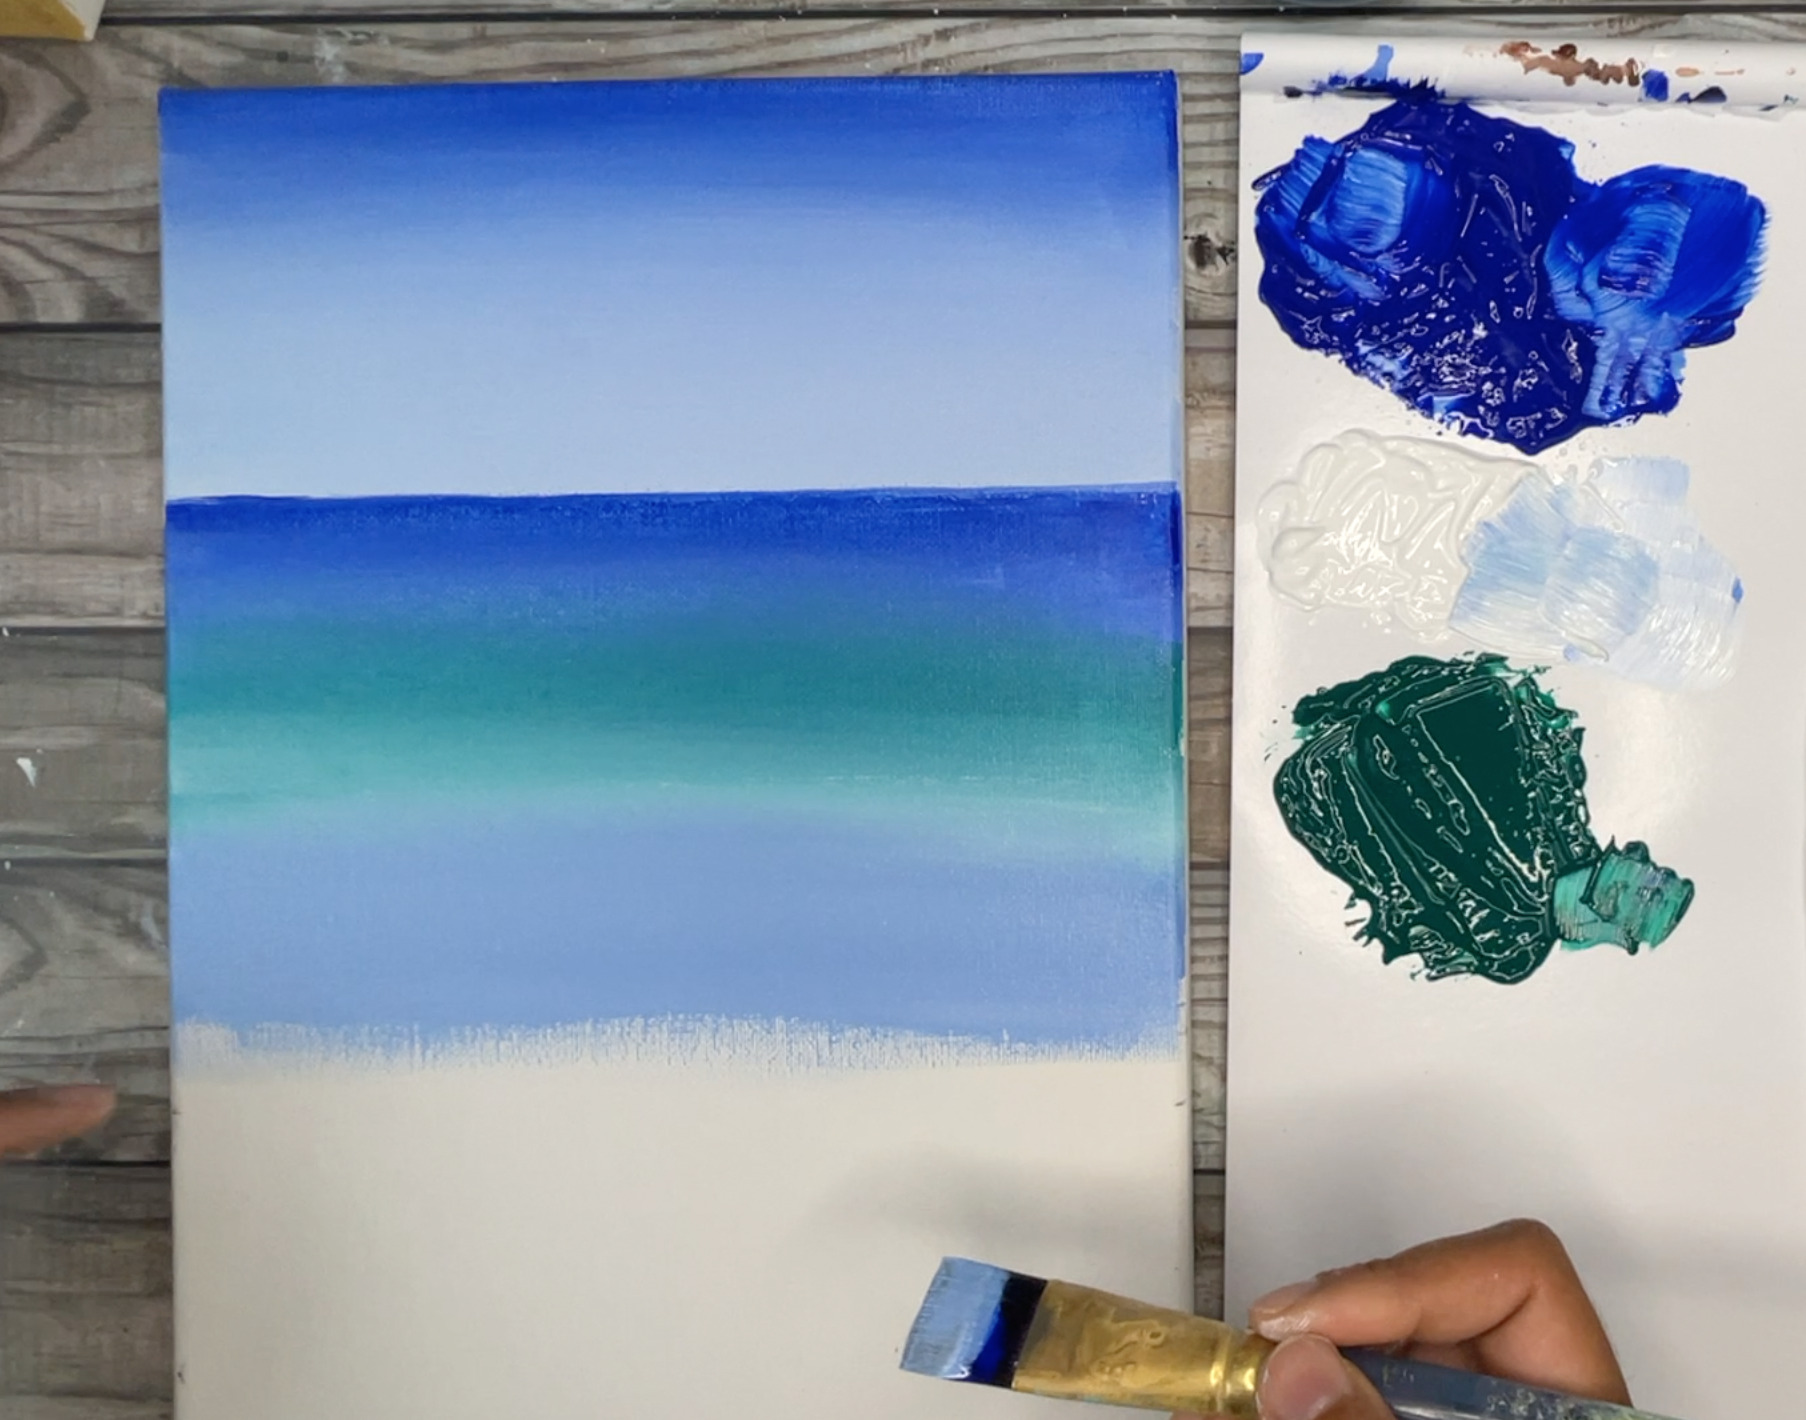
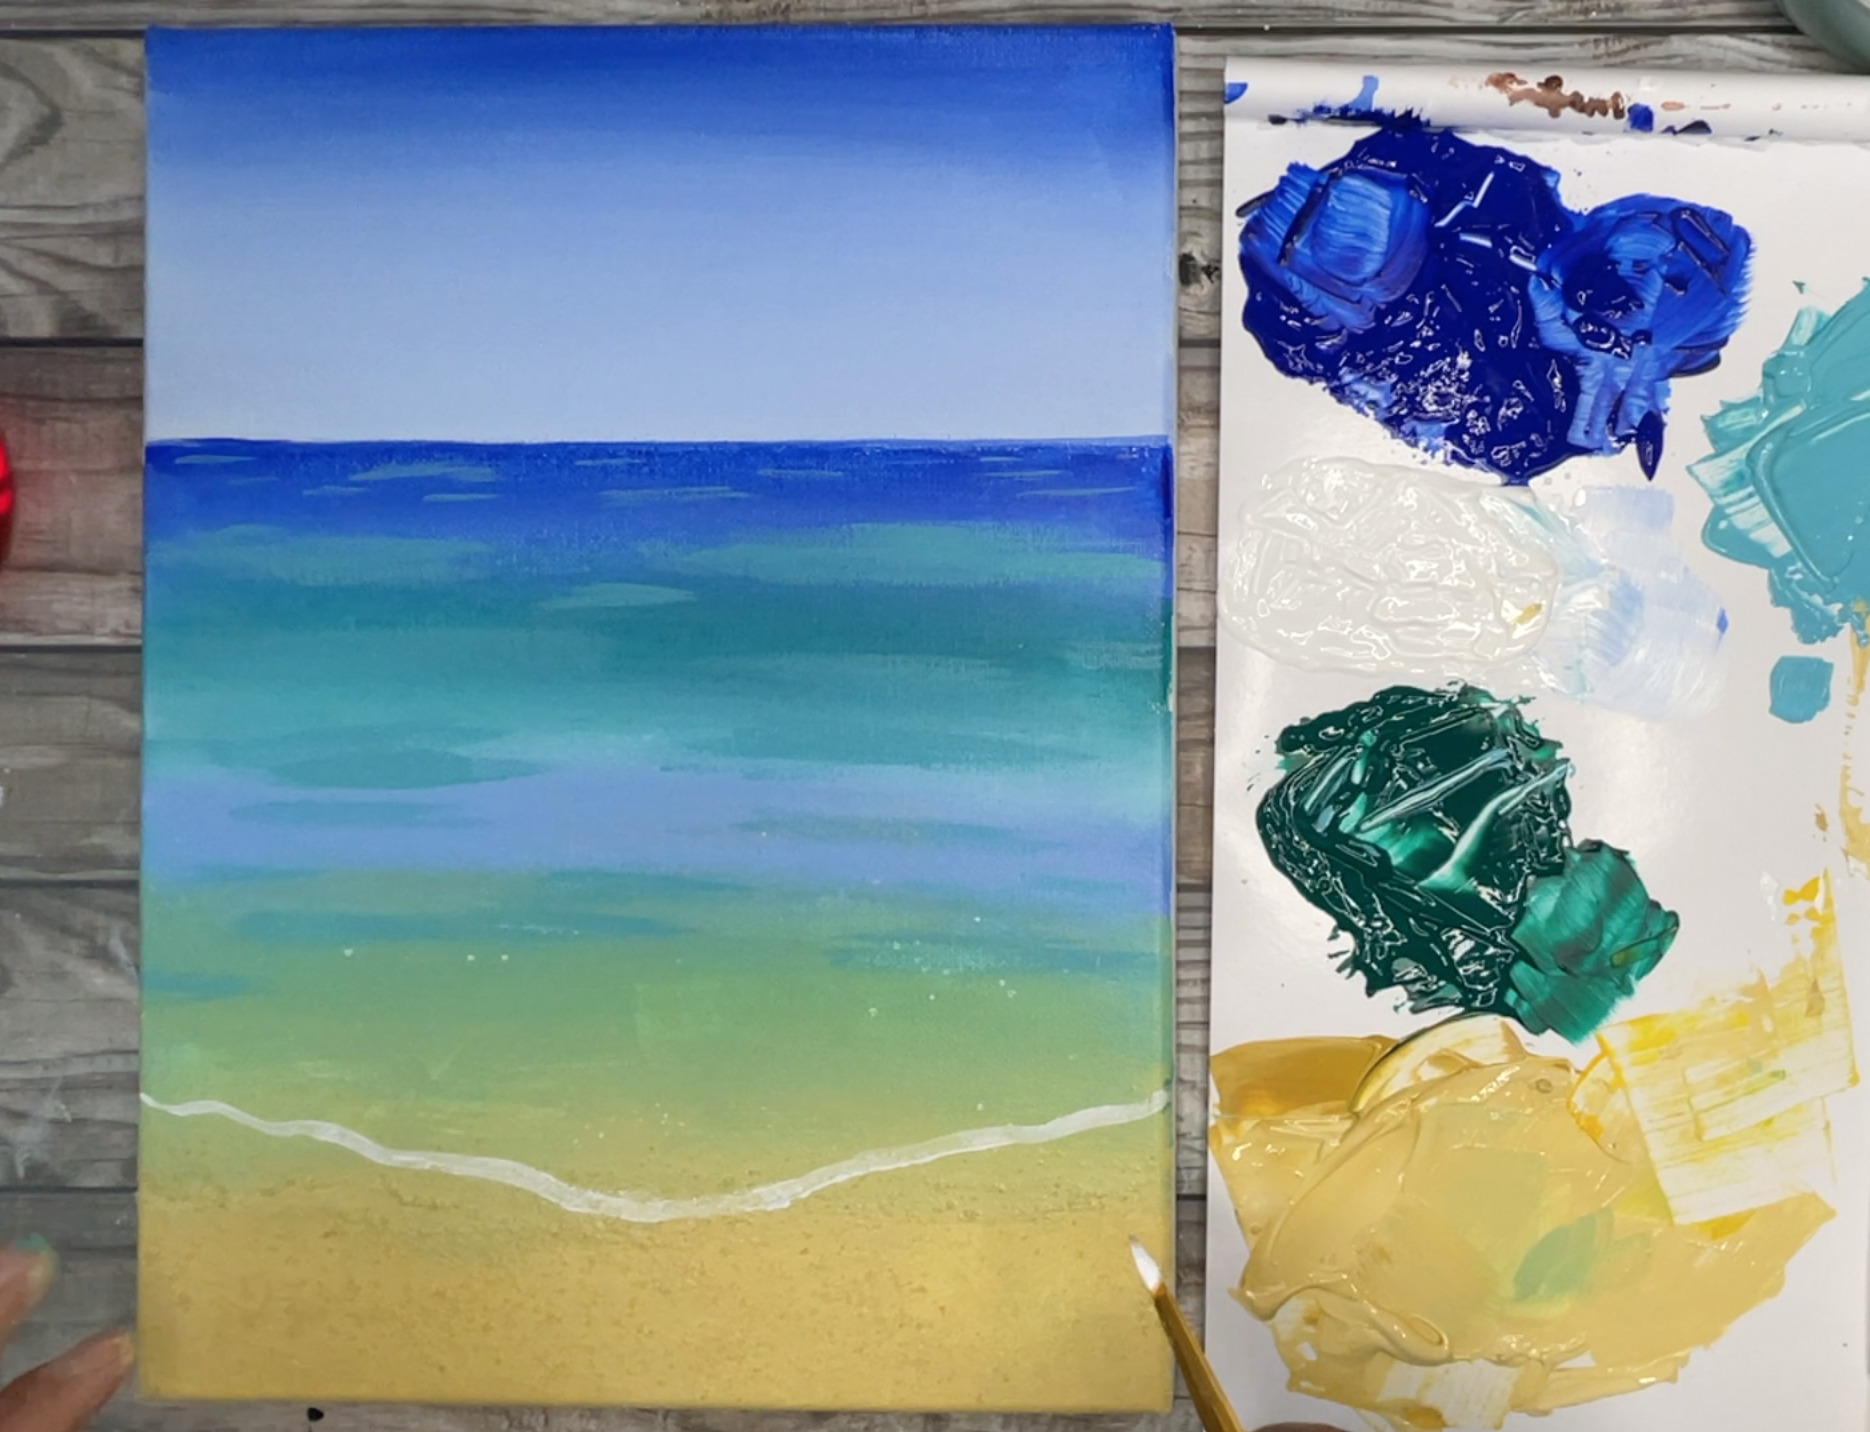
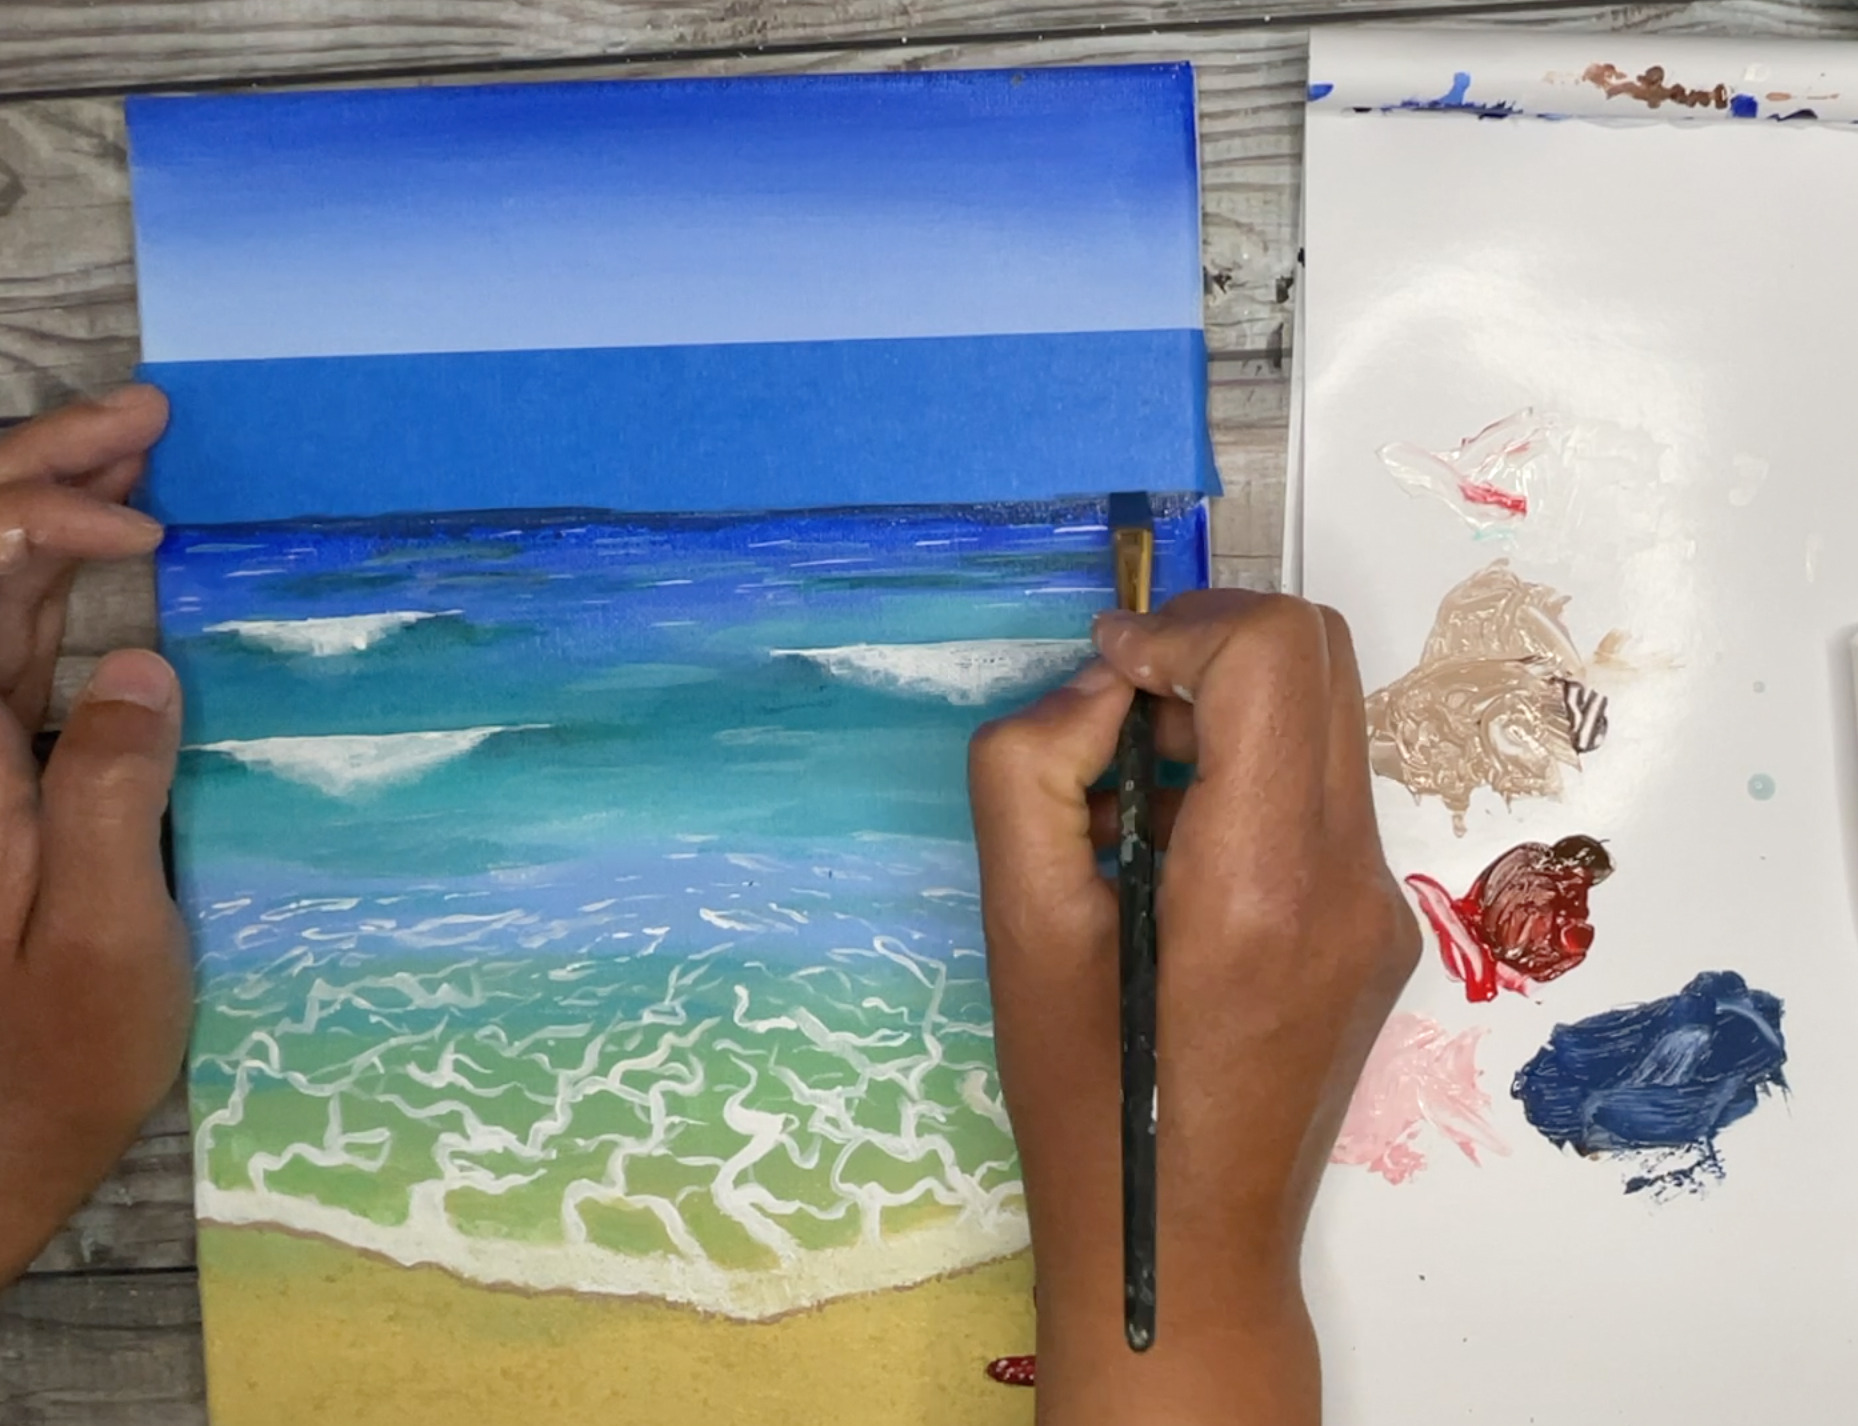
- Mix sand color on your palette by mixing equal parts cadmium yellow, burnt umber and white. Add more white to your mix until you are happy with the sand color. Without cleaning off your brush, pick up some of this sand color and apply it below the green ocean. Blend the sand color up into the green portion of the ocean (using back and forth strokes). This will create a gorgeous warm green color (which will come below the waves in later steps).
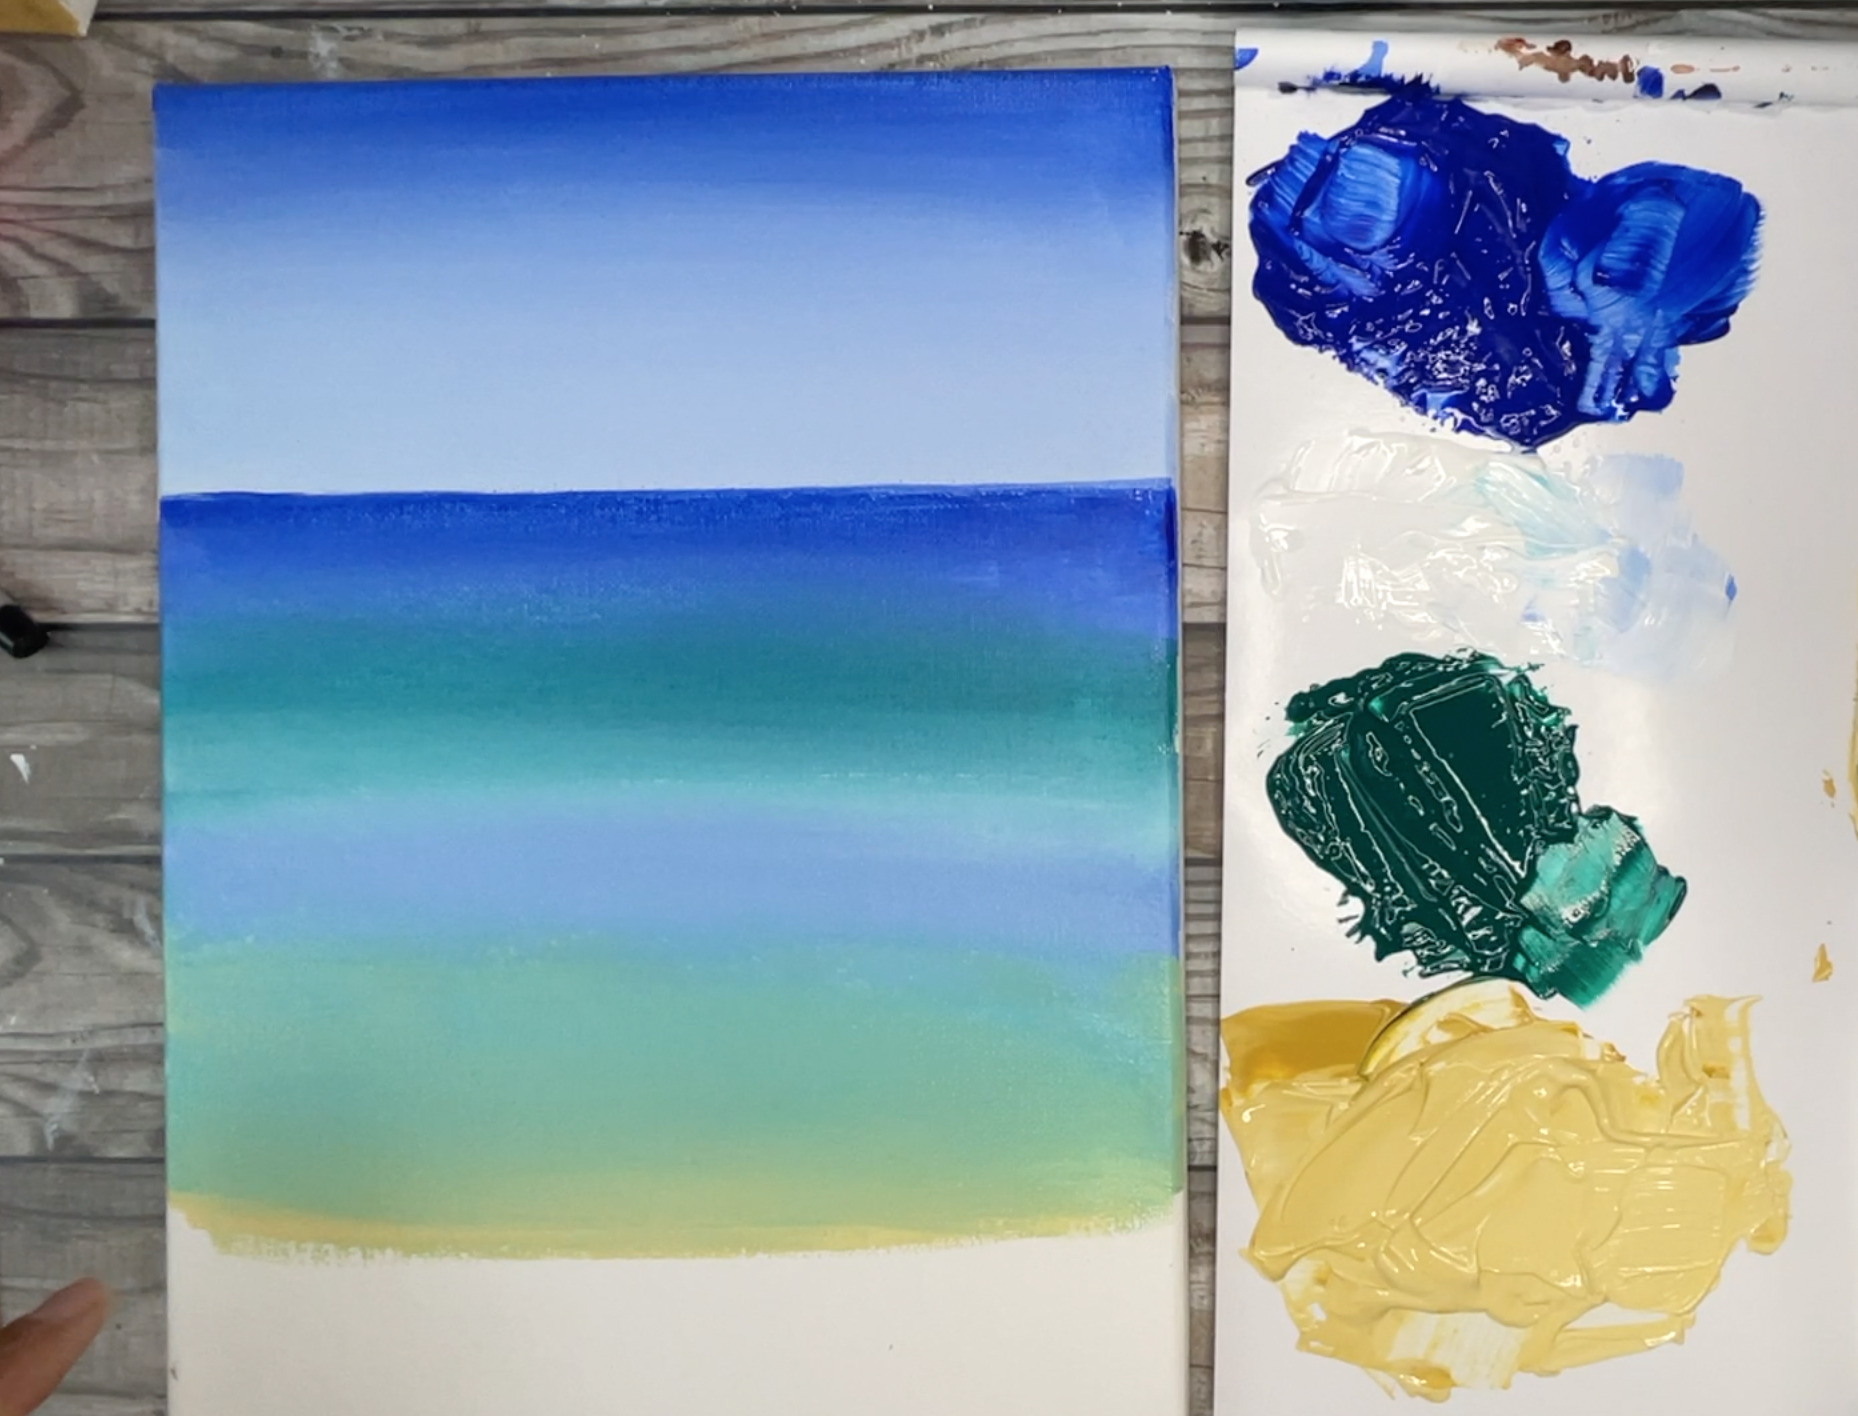
- Clean off your brush with water to make sure its clean. Pick up some pure sand color on your brush and apply it to the bottom part of the canvas (all the way to the bottom) using back and forth strokes.
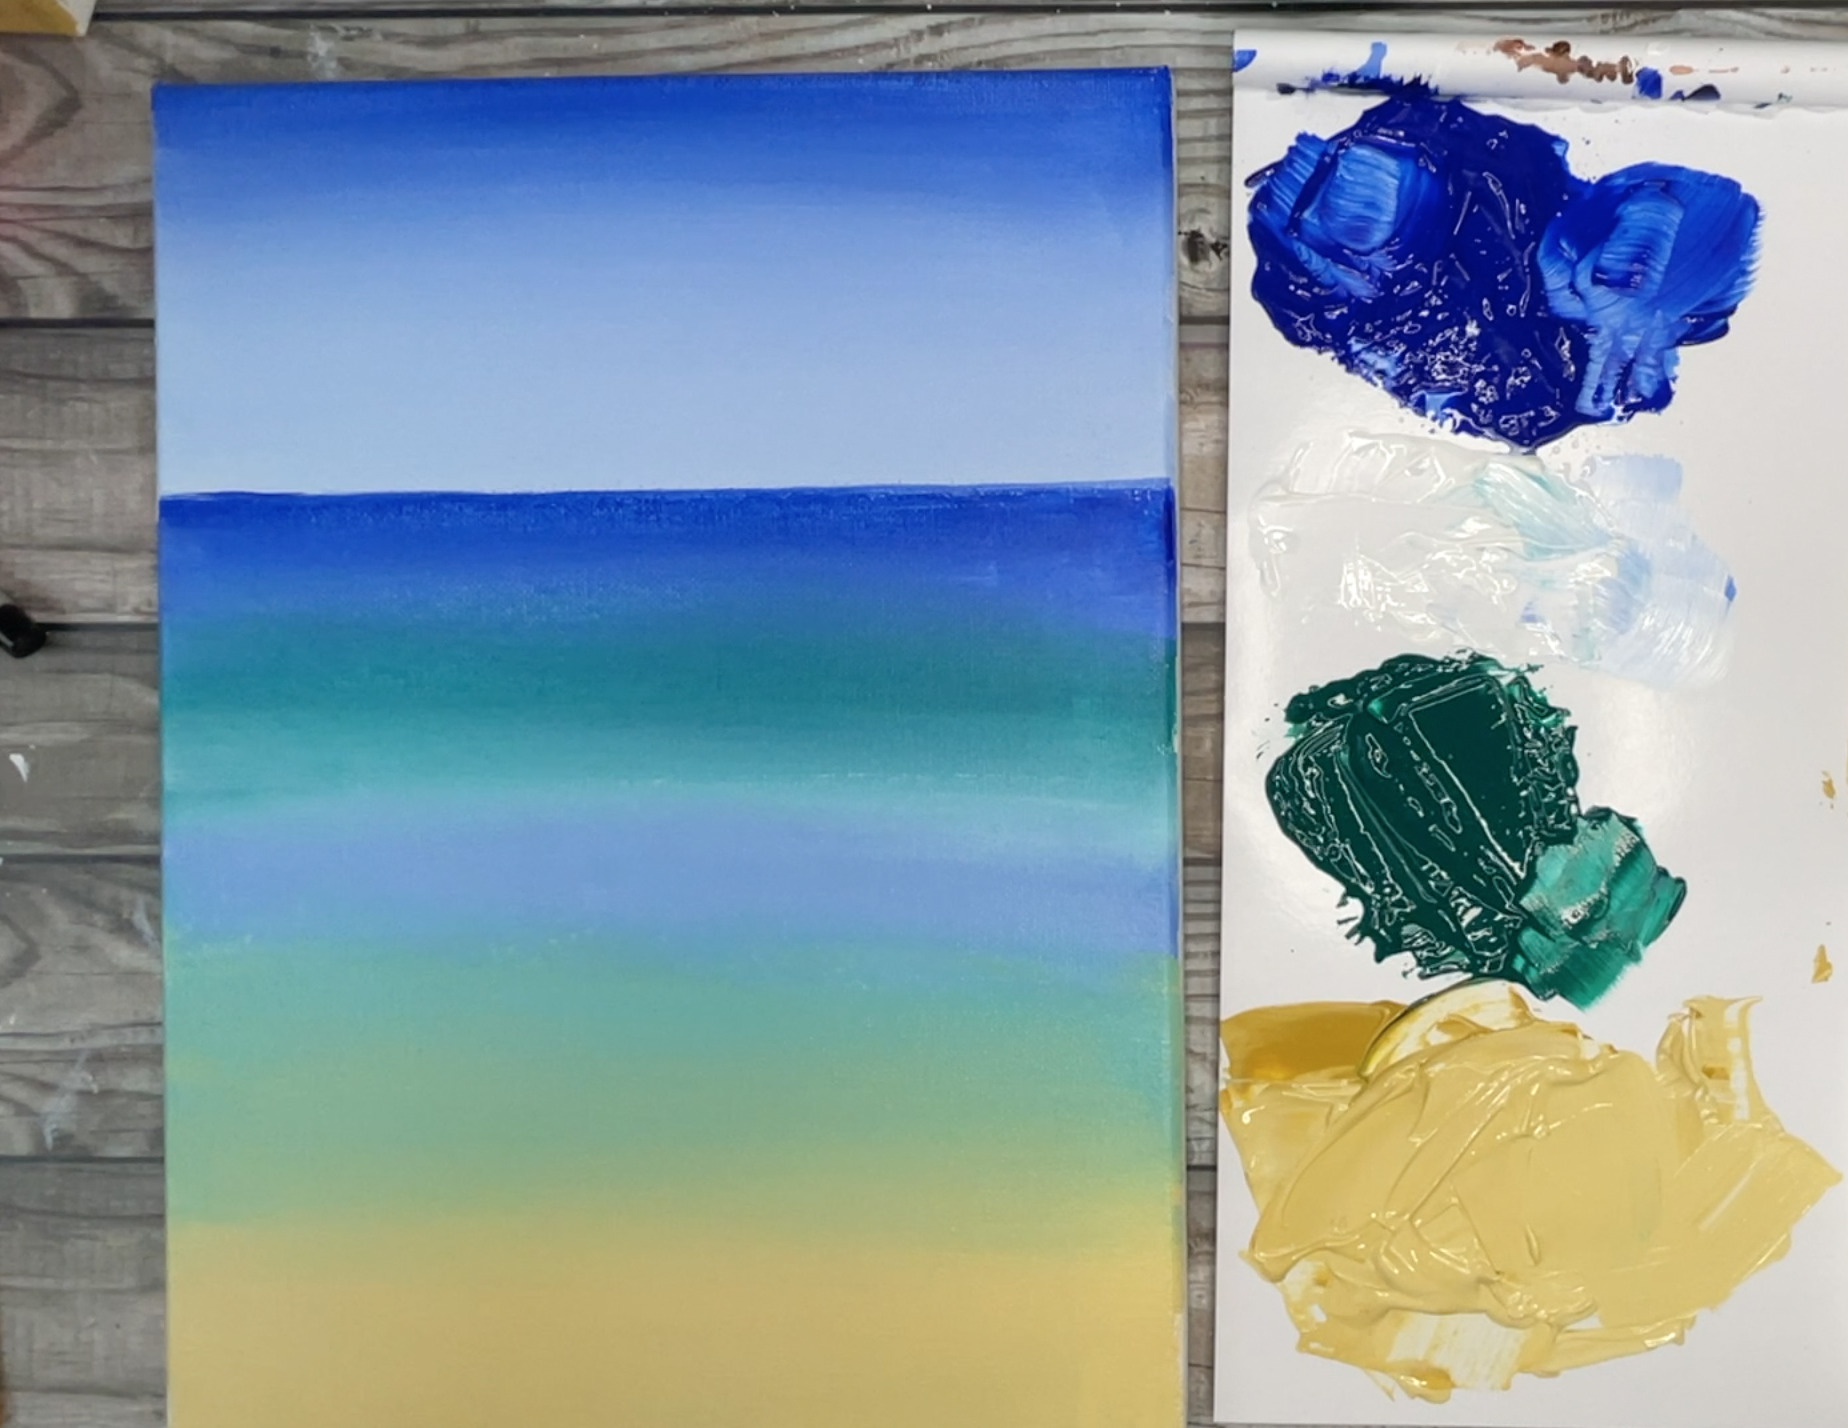
- Optional texture step: While sand paint is still wet, sprinkle some salt or sand onto the sand part. Seal the salt onto canvas with another layer of sand paint.

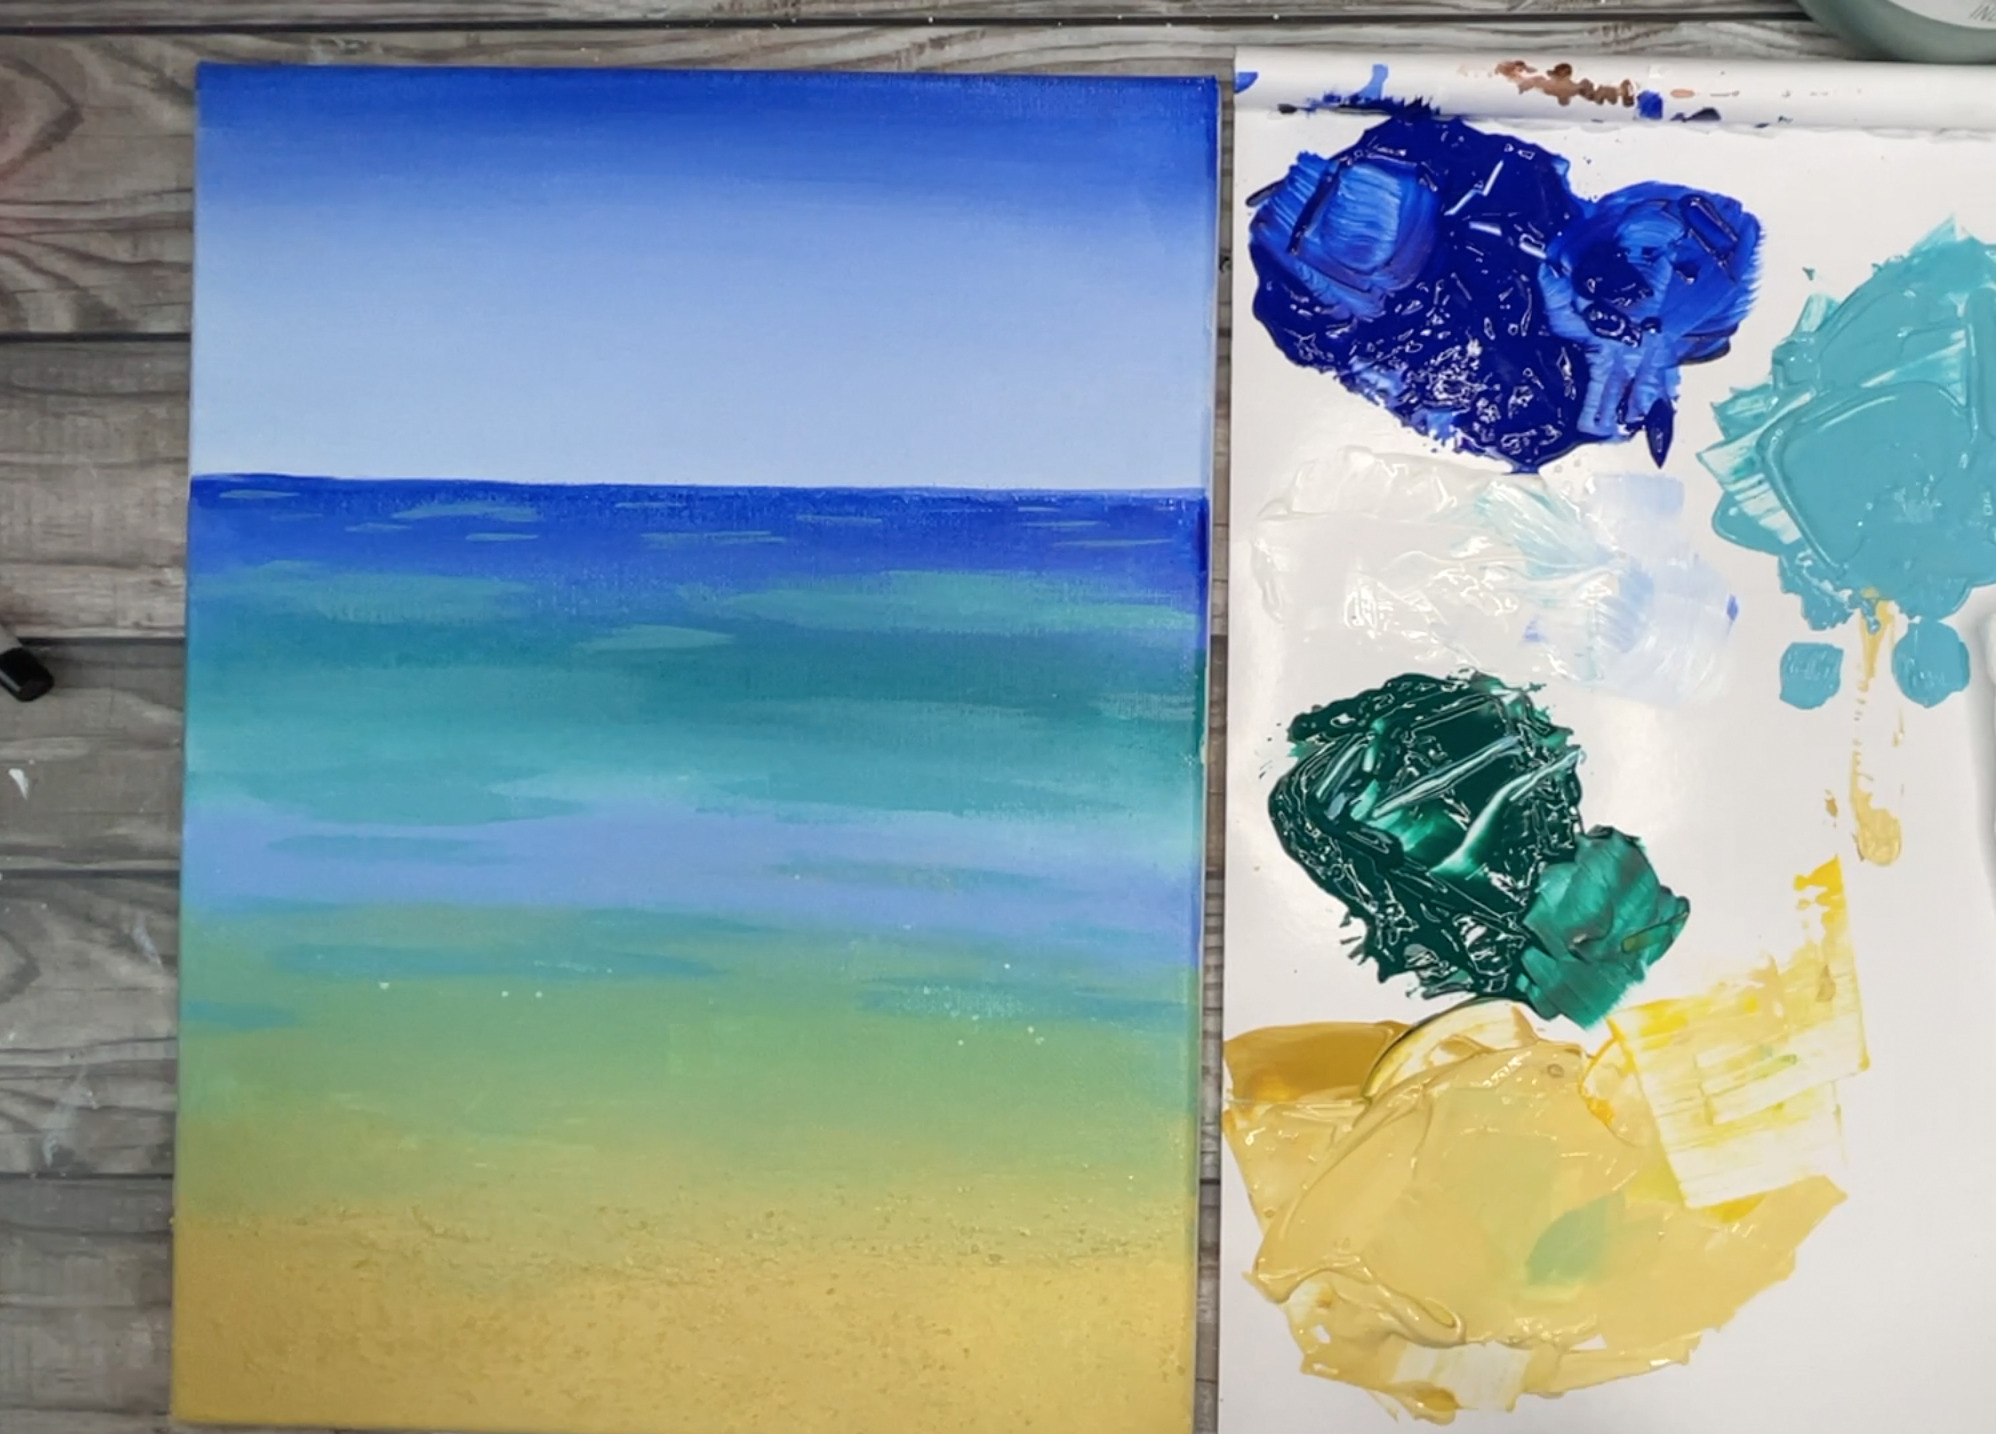
- Leave the sand portion to dry. We can now move onto the second ocean layer. Mix a teal color by mixing equal parts ultramarine blue and phthalo green and double the white.If your blue is too "grey" add in a tad more of the phthalo blue. You want this teal blue to be lighter than the ocean colors. Using your smaller flat brush (make sure brush is dry and not wet), pick up some of your teal color and add small pools of it throughout your ocean.
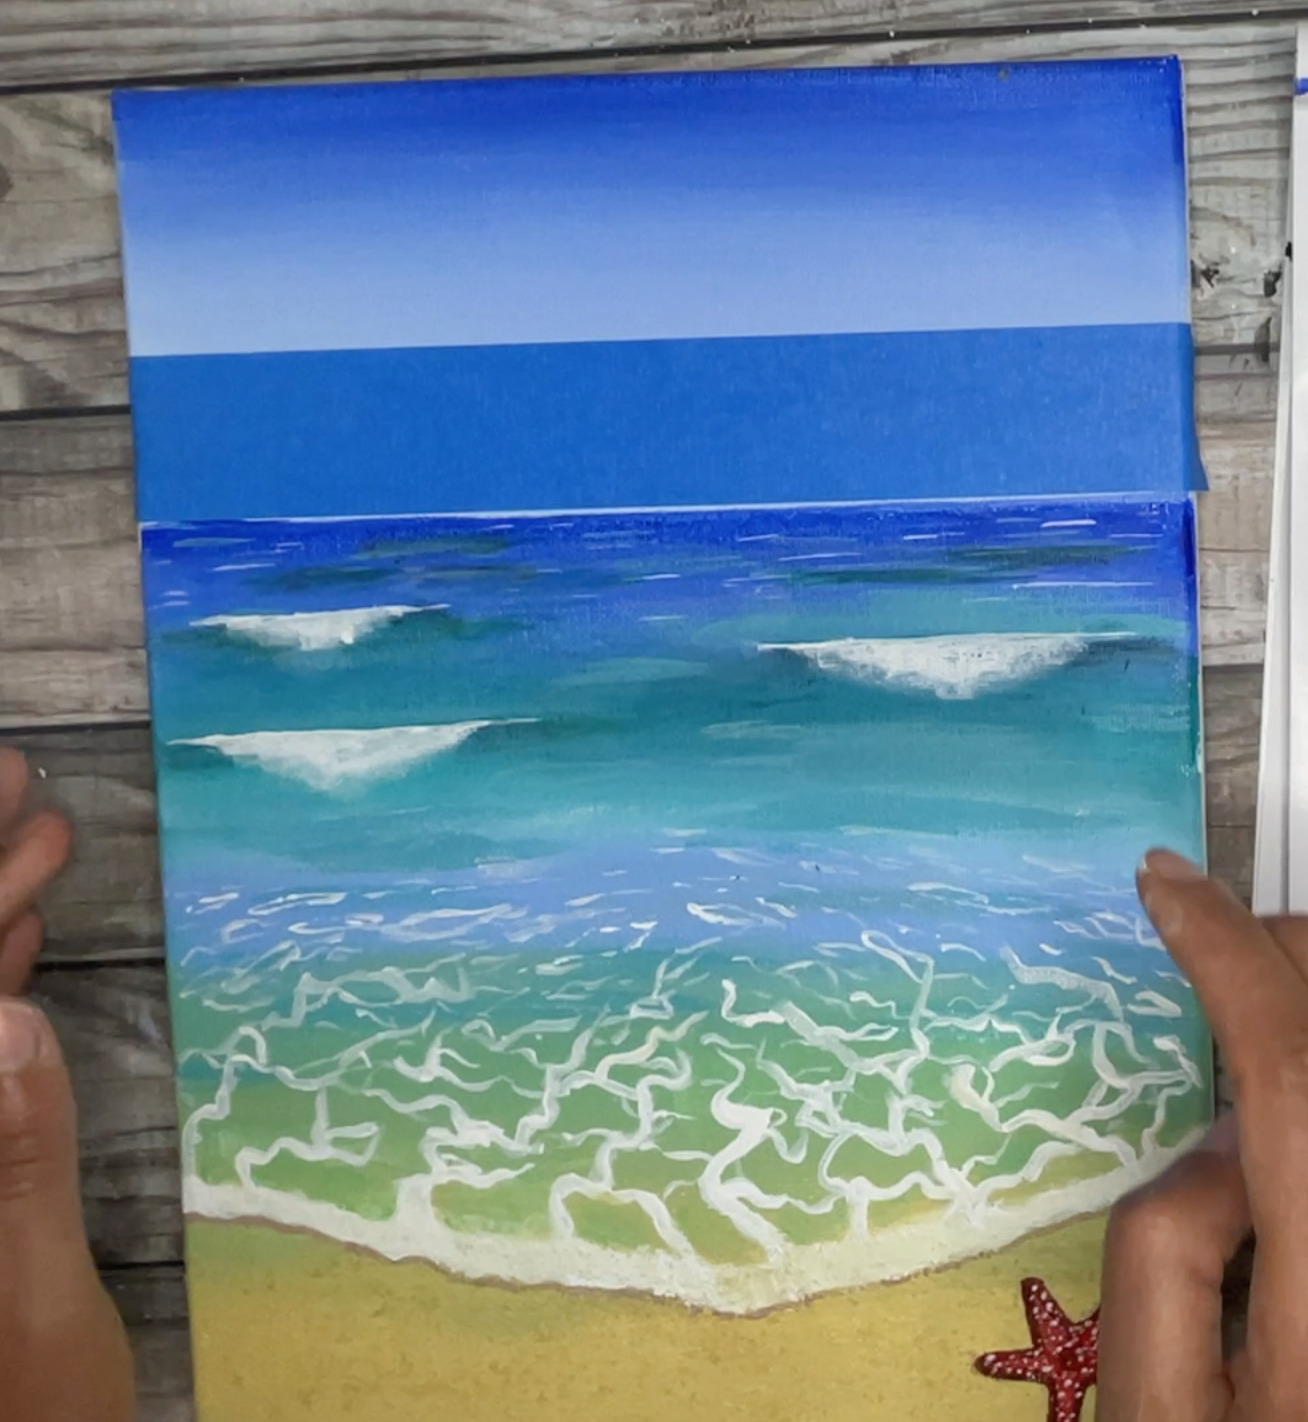
- Make sure sand portion is dry to touch before moving on to this step. Pick up some titanium white paint with your larger round brush and paint in the shore wave shape.
- For the seafoam shapes, add in diagonal squiggly lines radiating from the center of the ocean above (using larger round brush). then connect these diagonal lines by painting in horizontal squiggly lines. This will create small seamfoam "pools" pattern. Take note: the pools closer to the shore will be bigger and further apart and the ones further in the ocean will be smaller and closer together.
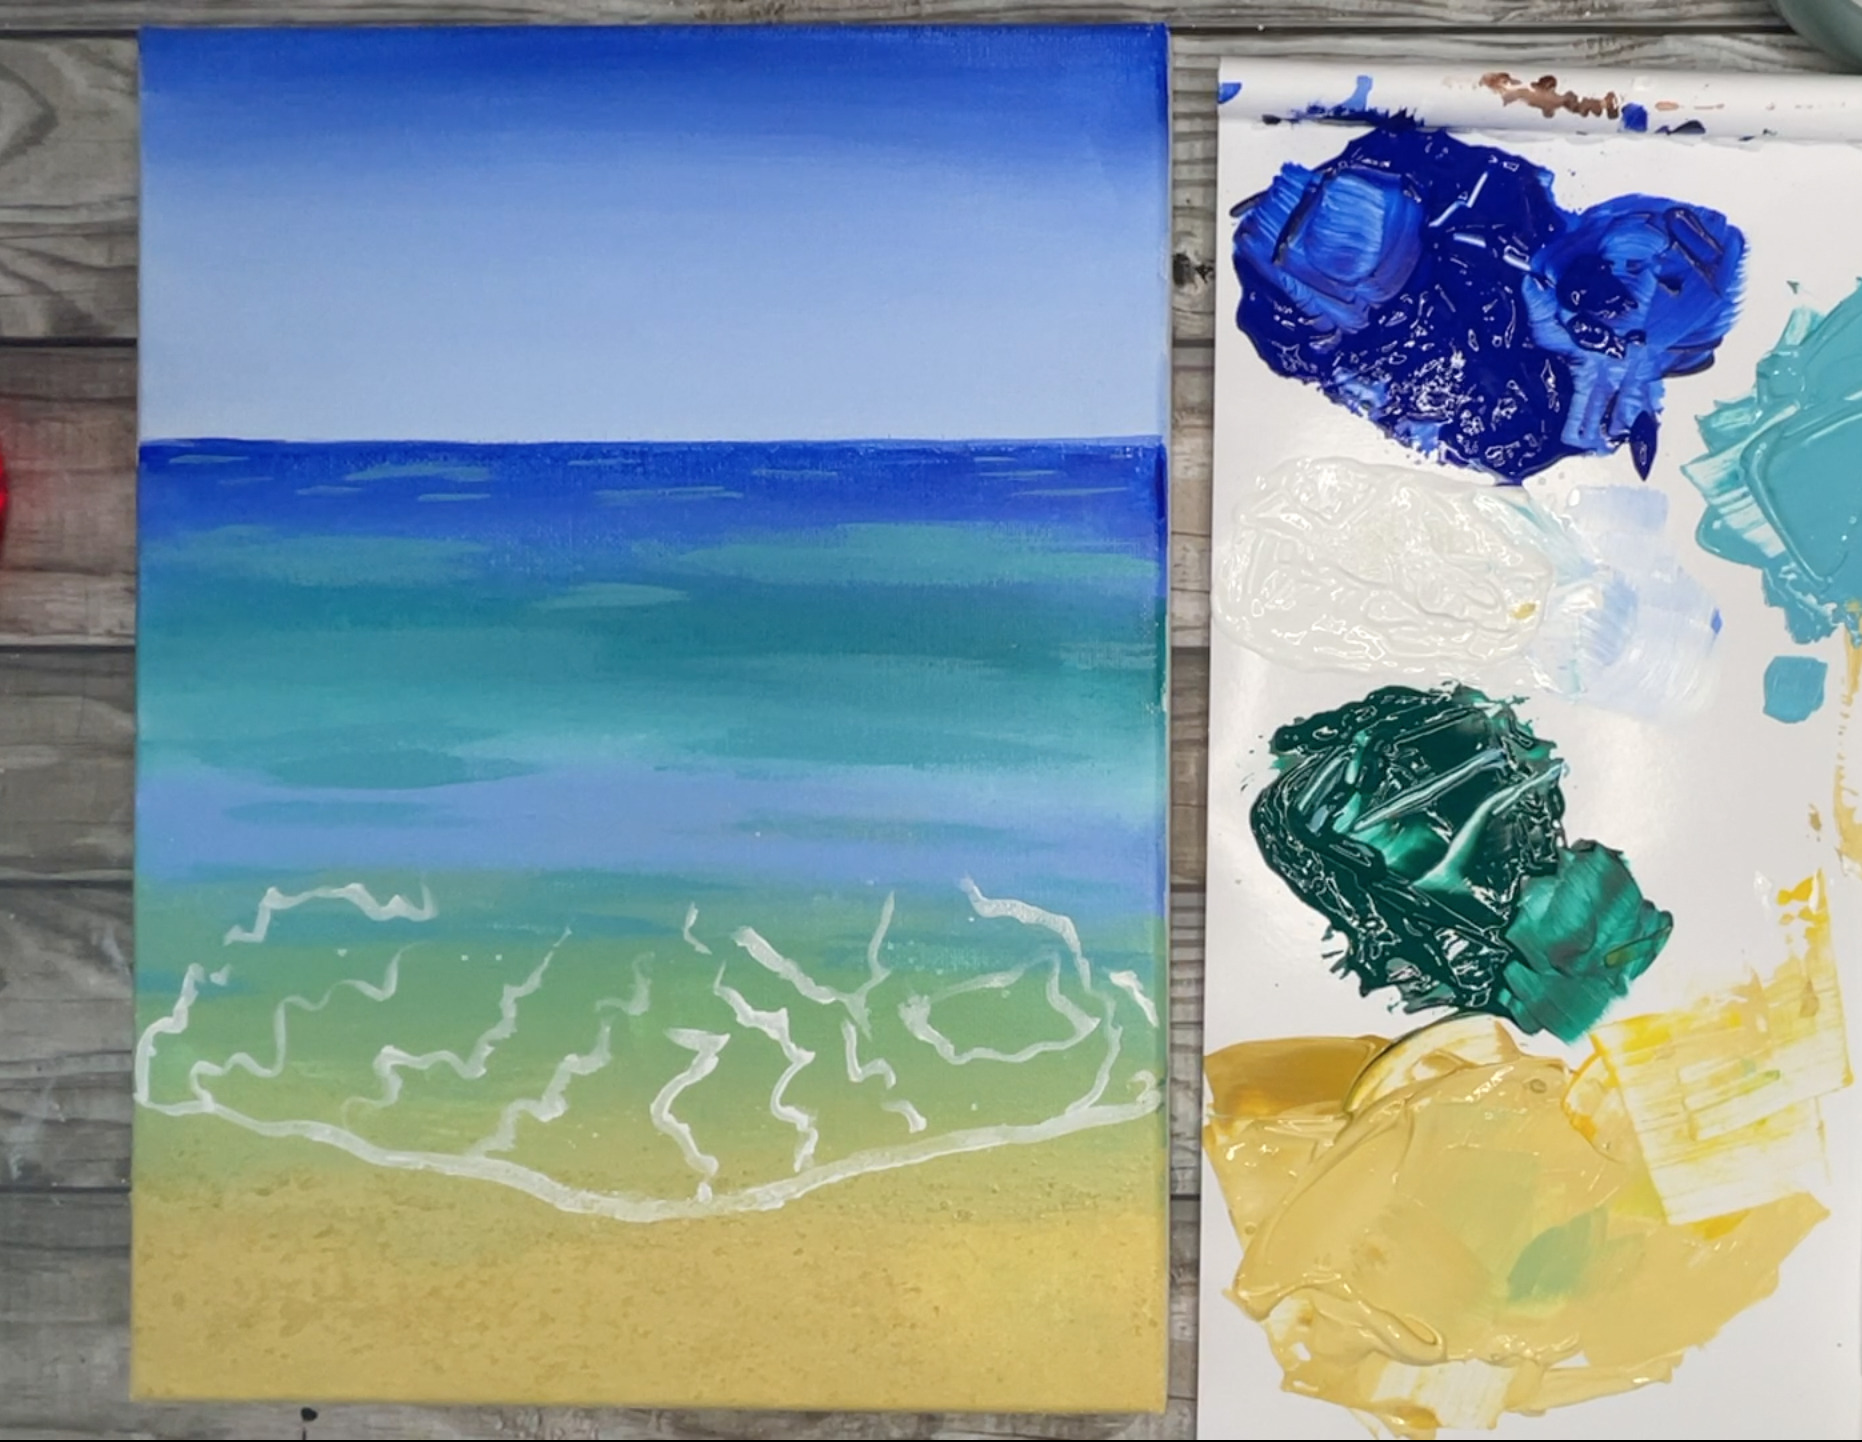
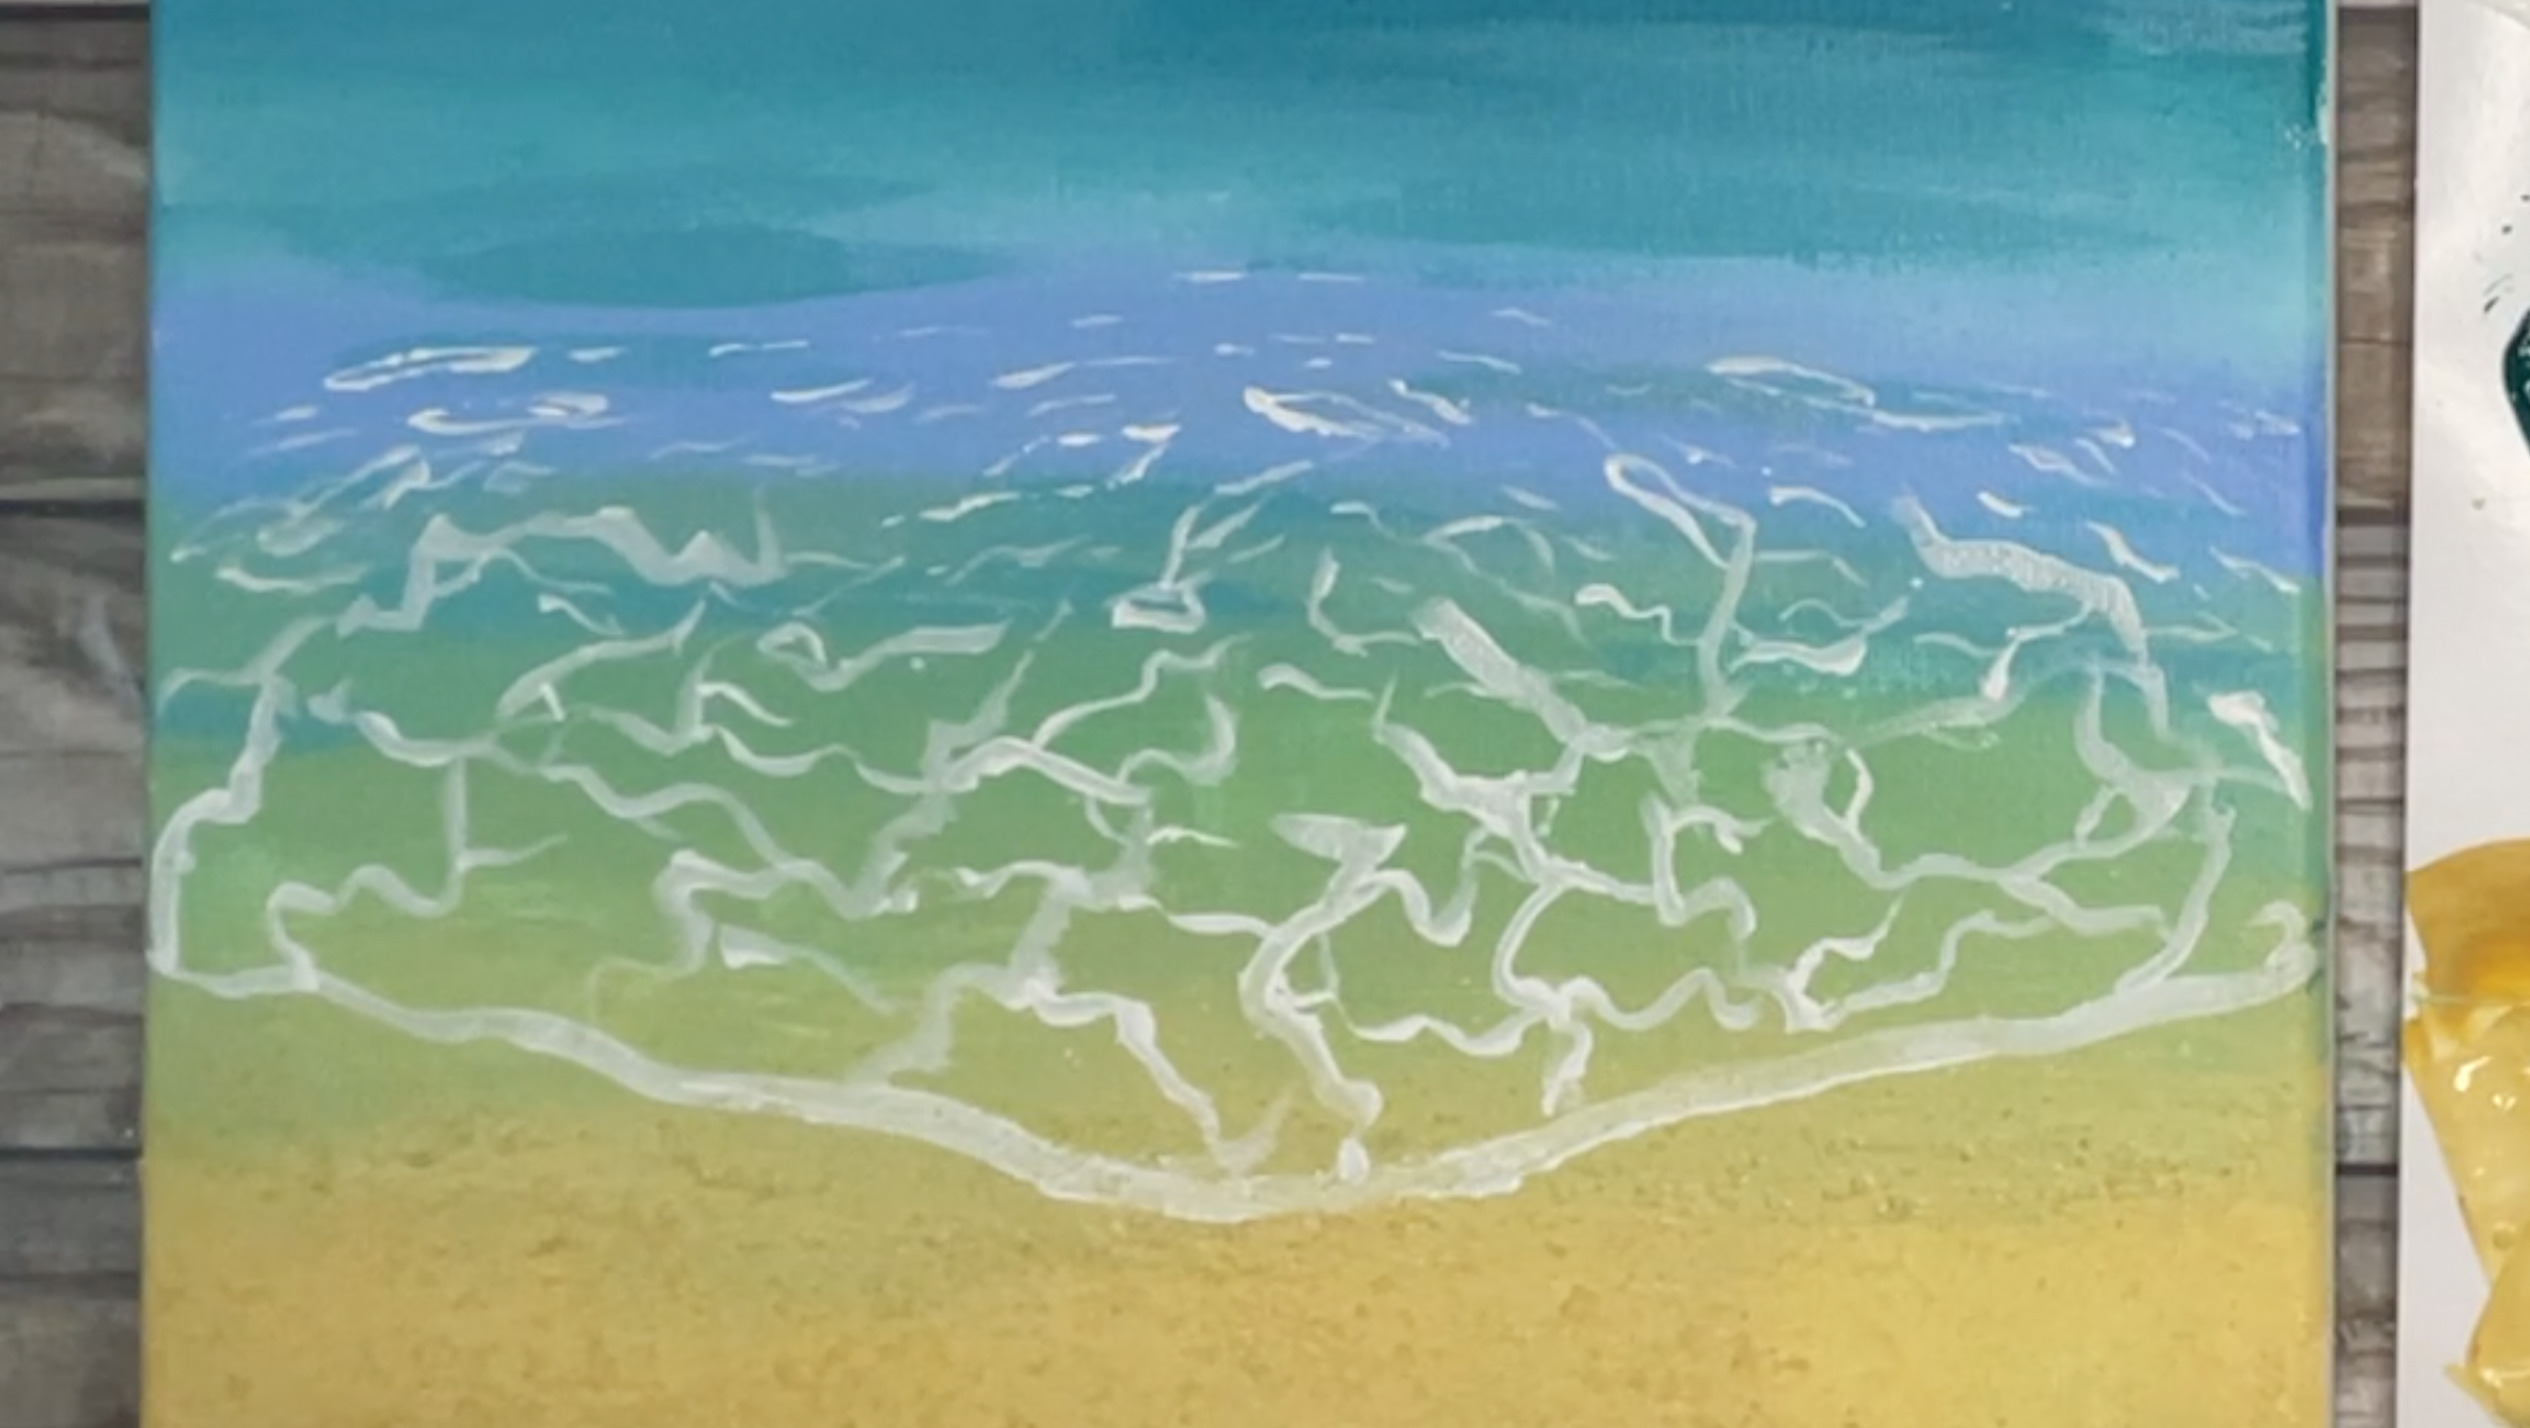
- Using the same round brush and white paint, thicken the end of the wave using a circular motion.
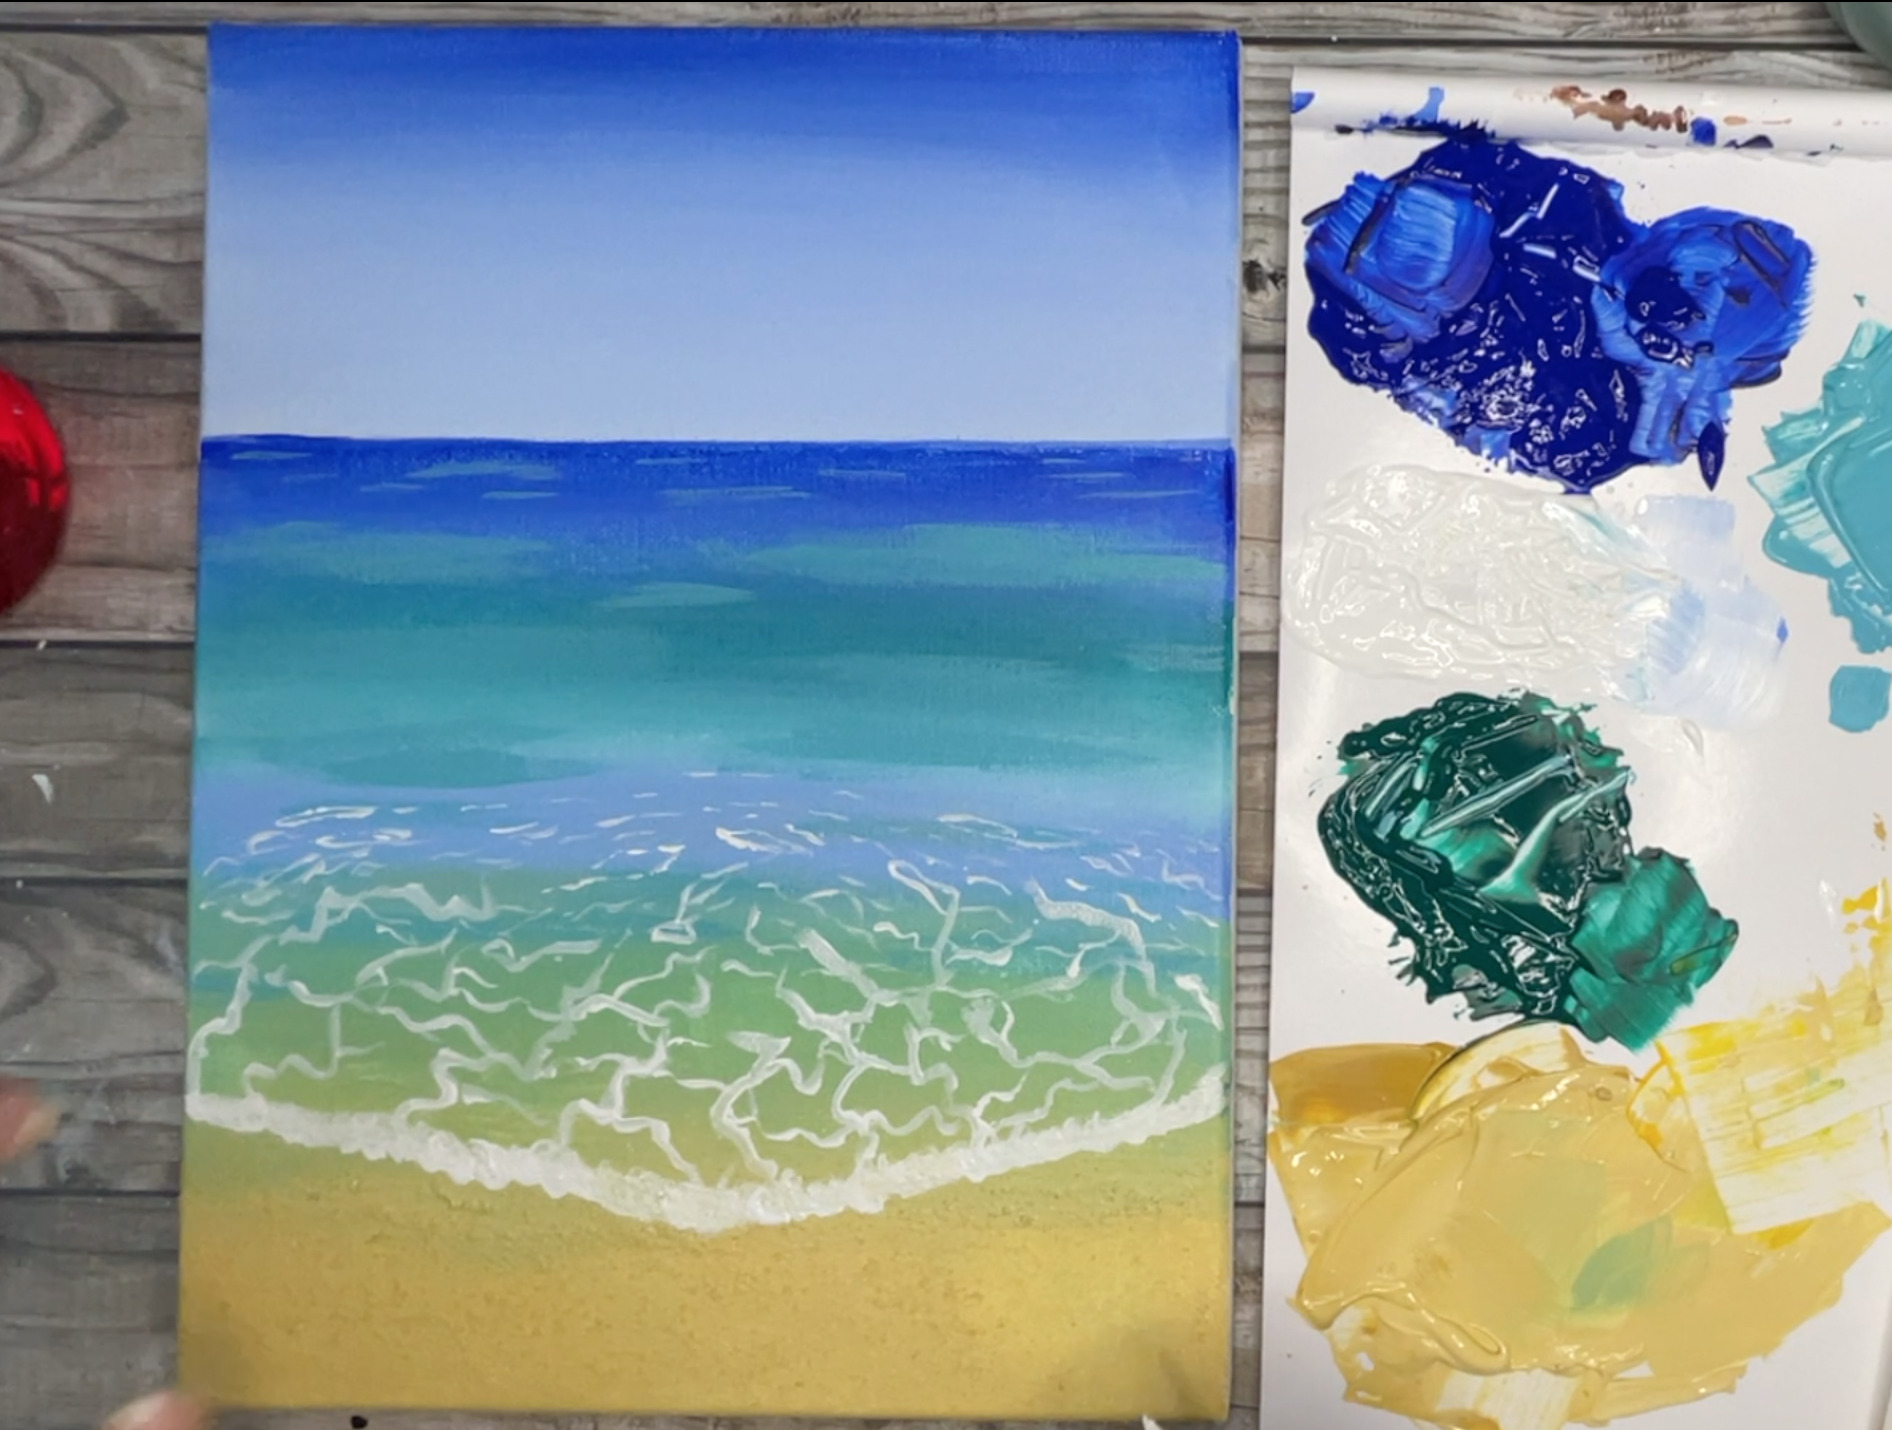
- Create some waves in ocean distance using the following steps. Use your small flat brush and titanium white paint. Add as many or as few as your'd like. Remember, waves further out in the ocean will be smaller than the ones closer to shore.
- Once the wave on shore is dried, add a shadow below the wave on shore. Make a light brown color by mixing burnt umber with white. Use your smallest round brush to make a thin brown line on the bottom of the wave.
 .
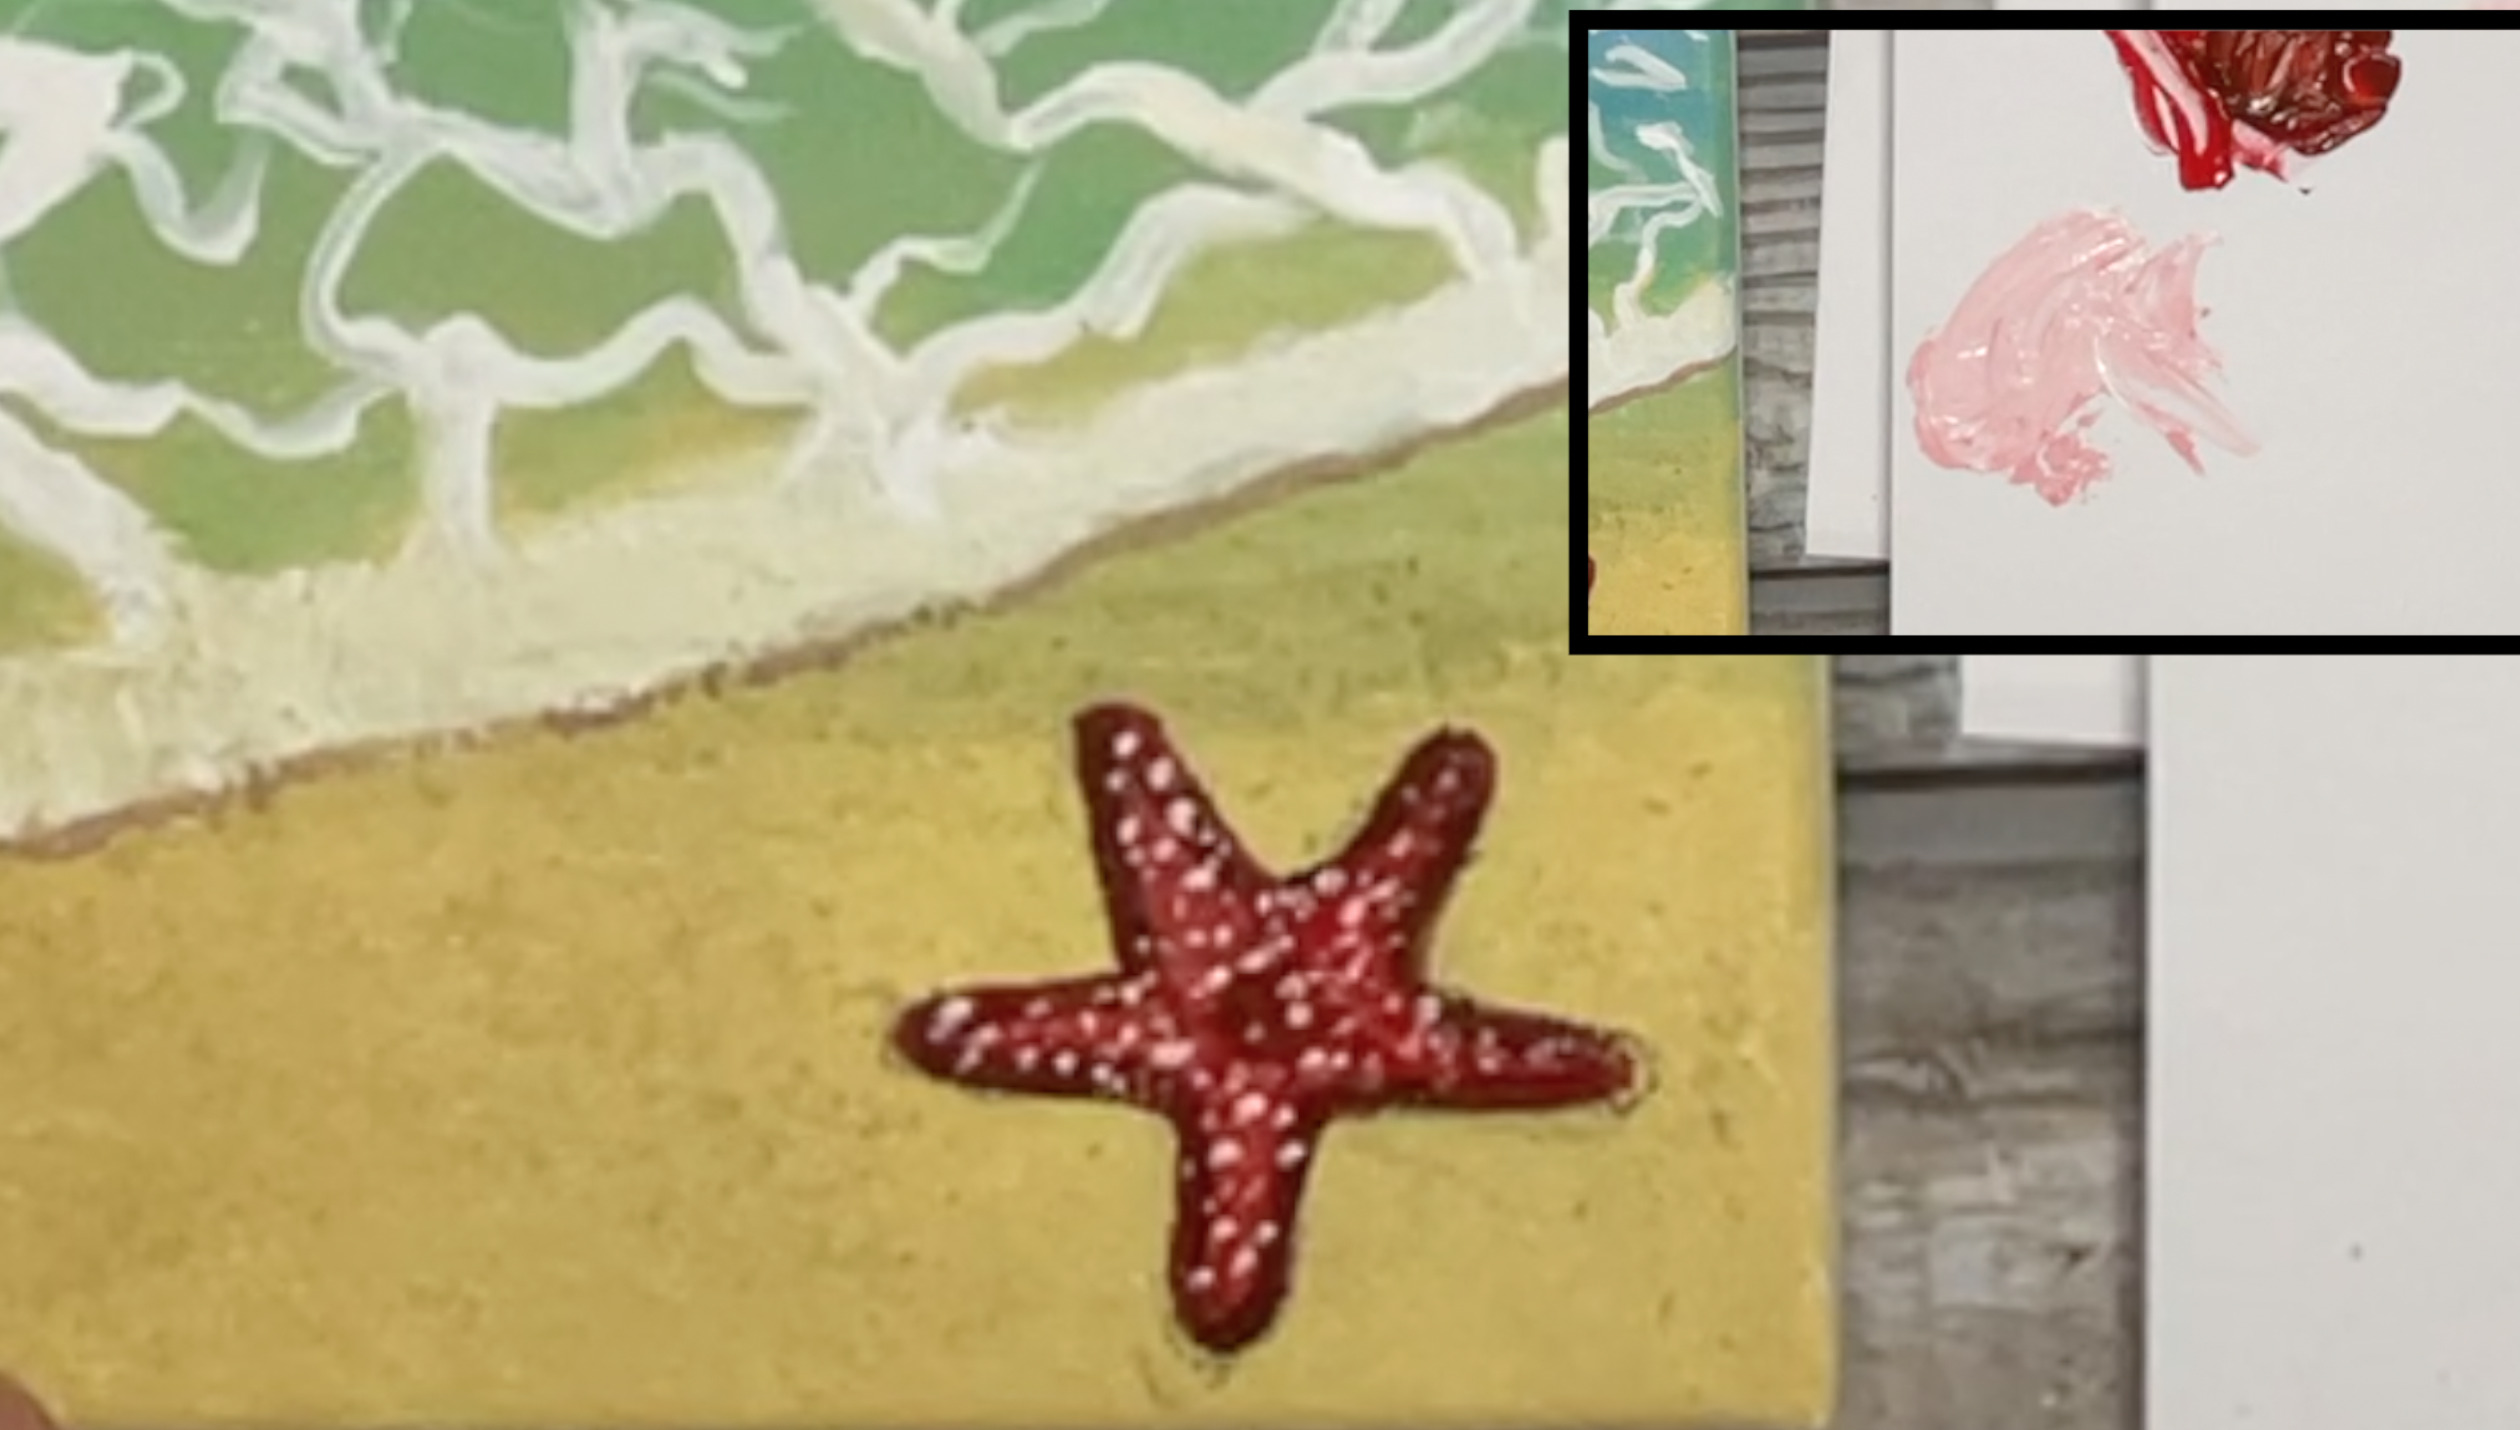
. - Star fish steps:Pick up some cadmium red paint on your smallest round brush and paint in your starfish on the sand shore. Once the red is dry, make a darker red by mixing in red + small amount of burnt umber. Use this dark red and paint the outline of the starfish (this will give it dimension). Once the dark red is dry mix a light pink color by mixing in white with a tiny amount of red. Create dots with this pink paint all over the starfish.
- Pro tip for straight horizon and adding extra illusion of depth at horizon: add masking tape on sky portion and as close to the horizon as you can. Make a darker blue color by mixing a small dab of ultramarine blue with an even smaller dab of burnt umber. Using your smaller flat brush paint in this dark blue color at the horizon.This will darken and de-saturate the blue at the horizon (aka make less vibrant) which will trick the eye to making the horizon look further away in the distance.
 .
. - Done:
Recommended Products
As an Amazon Associate and member of other affiliate programs, I earn from qualifying purchases.
-
 Ranger MIS22701 Inkssentials Mini Misters, 3-Pack
 -
 Amazon Basics Masking Tape - 0.7 Inch x 180 Feet - 3 Rolls
 -
 Q-tips Safety Swabs, Family Size, 625 ct (Pack of 2)
 -
 ARTIFY 12 PCS Watercolor Paint Brushes Premium Nylon Hair for Oil Painting Acrylic Painting for Kids and Adults, Beginner and Artist, Figger Round Flat Cat's Tongue Shape
 -
 Liquitex BASICS Acrylic Paint, 4-oz tube, Cadmium Yellow Medium Hue
 -
 Liquitex BASICS Acrylic Paint, 4-oz tube, Burnt Umber
 -
 Liquitex BASICS Acrylic Paint, 8.45-Oz Tube, Titanium White
 -
 Liquitex 4385380 BASICS Acrylic Paint, 8.45-oz tube, Ultramarine Blue
 -
 Liquitex 1046317 BASICS Acrylic Paint, 4-oz tube, Phthalocyanine Green
 -
 PHOENIX White Blank Cotton Stretched Canvas Artist Painting - 9x12 Inch / 8 Pack - ⅝ Inch Profile Triple Primed for Oil & Acrylic Paints
Finished Beach Painting Pictures
If you liked this easy beach painting tutorial, please pin it on Pinterest