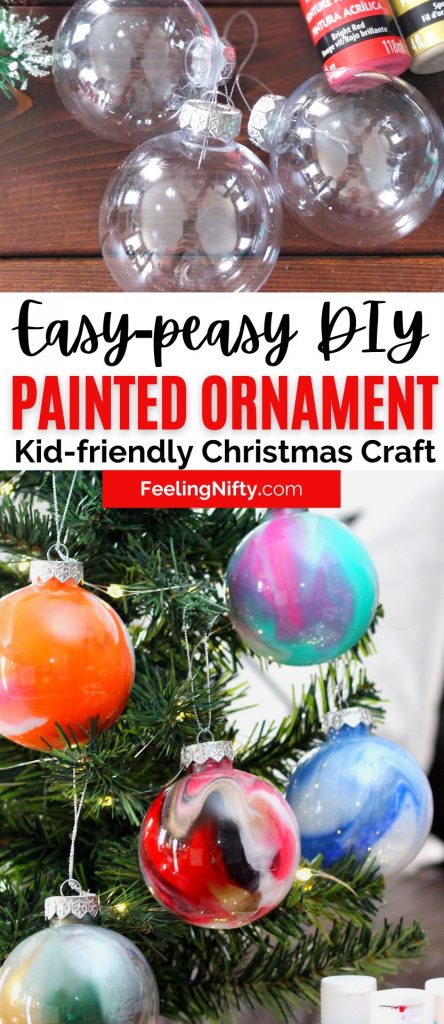
DIY Ornament Balls - Paint Swirl 2 Ways {Dollar Tree Craft}
Learn how to make these cute DIY ornament balls in this step by step tutorial
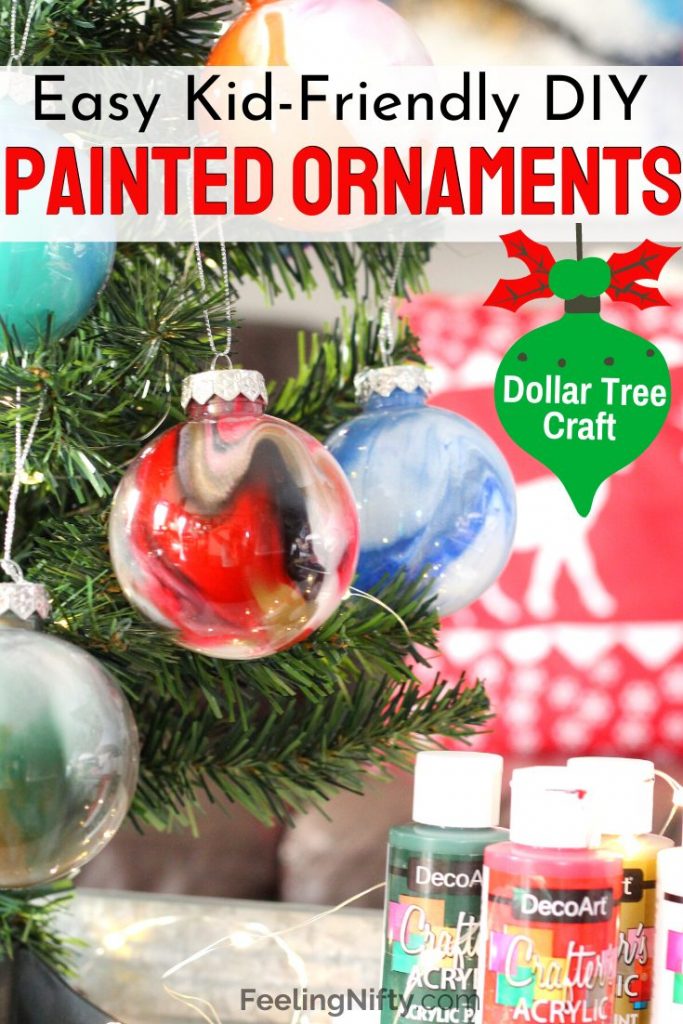
I am so excited to show you these DIY ornament balls with 2 different paint swirl method I discovered last week. Its a fun and cheap Christmas craft using supplies from Dollar Tree or your local Dollar store. The tutorial includes a detailed step-by-step guide below and a full length YouTube video too (being released this evening).
Oh yes, and just incase you're wondering how much painting skill you'll need to make these DIY Christmas ornaments? The answer is zilch. They are e-a-s-y to make and would actually make a perfect Christmas craft to make with kids too.
If you're looking for more fun Christmas Crafts / Painting projects check out the 4 below:
- How To Paint a Snowman {Paint and Sip}
- How To Paint Stunning Wood Slice Ornaments
- $8 Christmas DIY Wreath (Dollar Tree Items)
- How to Paint a Snowy Cardinal on a Branch
- How to Paint a Christmas Tree Tutorial
And if you've caught the Christmas arts/crafts bug and want more project you can tackle, check out this list of 65+ Christmas painting ideas. Also, these 65 easy winter painting ideas will give you a healthy dose of vitamin A(RT) this cold season.
Clear Ornament Balls- Time to Spruce Things Up.
Have you ever passed by those clear plastic ornament balls and thought to yourself, "What can I make with clear Christmas balls?"
I know I have.
Although I've always been intrigued by them, I was kinda apprehensive to buy them because I had no clue what to do with them.
That all changed this holiday season when I bravely put a couple in my cart and promised myself that I would try and have fun creating something out of them.
And, oh my goodness, I am sooo happy I did!
And I learned a heck of a lot. Let's just say there were a few fun failures (or as Bob Ross would say "Happy Accidents" ) along the way...
Below I will share with you the Coles note version of what I learned making these beauties. Like what paint works best, the best color combinations to avoid mud, how to dry them properly and fun extra ways you customize and decorate them.
And of course the full step by step tutorial as always!
Let's get started...
DIY Ornament Balls -A Cheap Christmas Craft
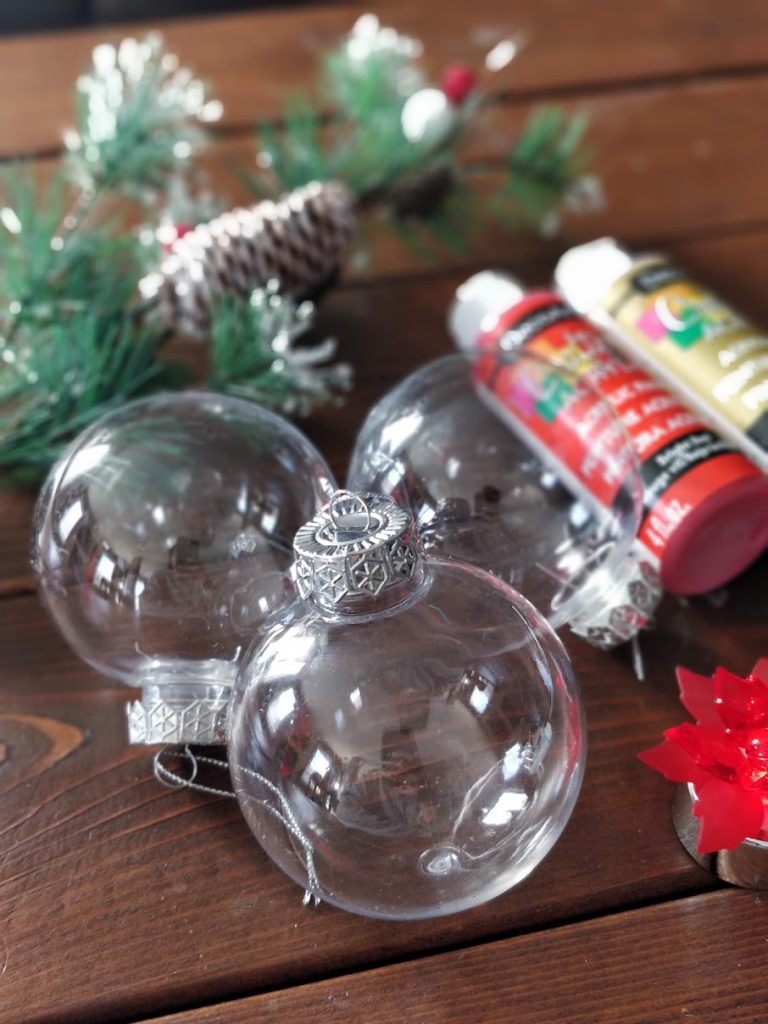
Everything you need to make these DIY ornament balls, you can get from the Dollar Tree or any Dollar store (Dollarama if in Canada). Which makes this craft not only fun and amazing but cheap to boot.
I bought the clear plastic ornaments from Dollar Tree for $1.25 (for those in Canada, Dollarama also sells them them in a 2-pac for $2). If you don't have access to a Dollar Store near you check out Micheals or Amazon has some here.
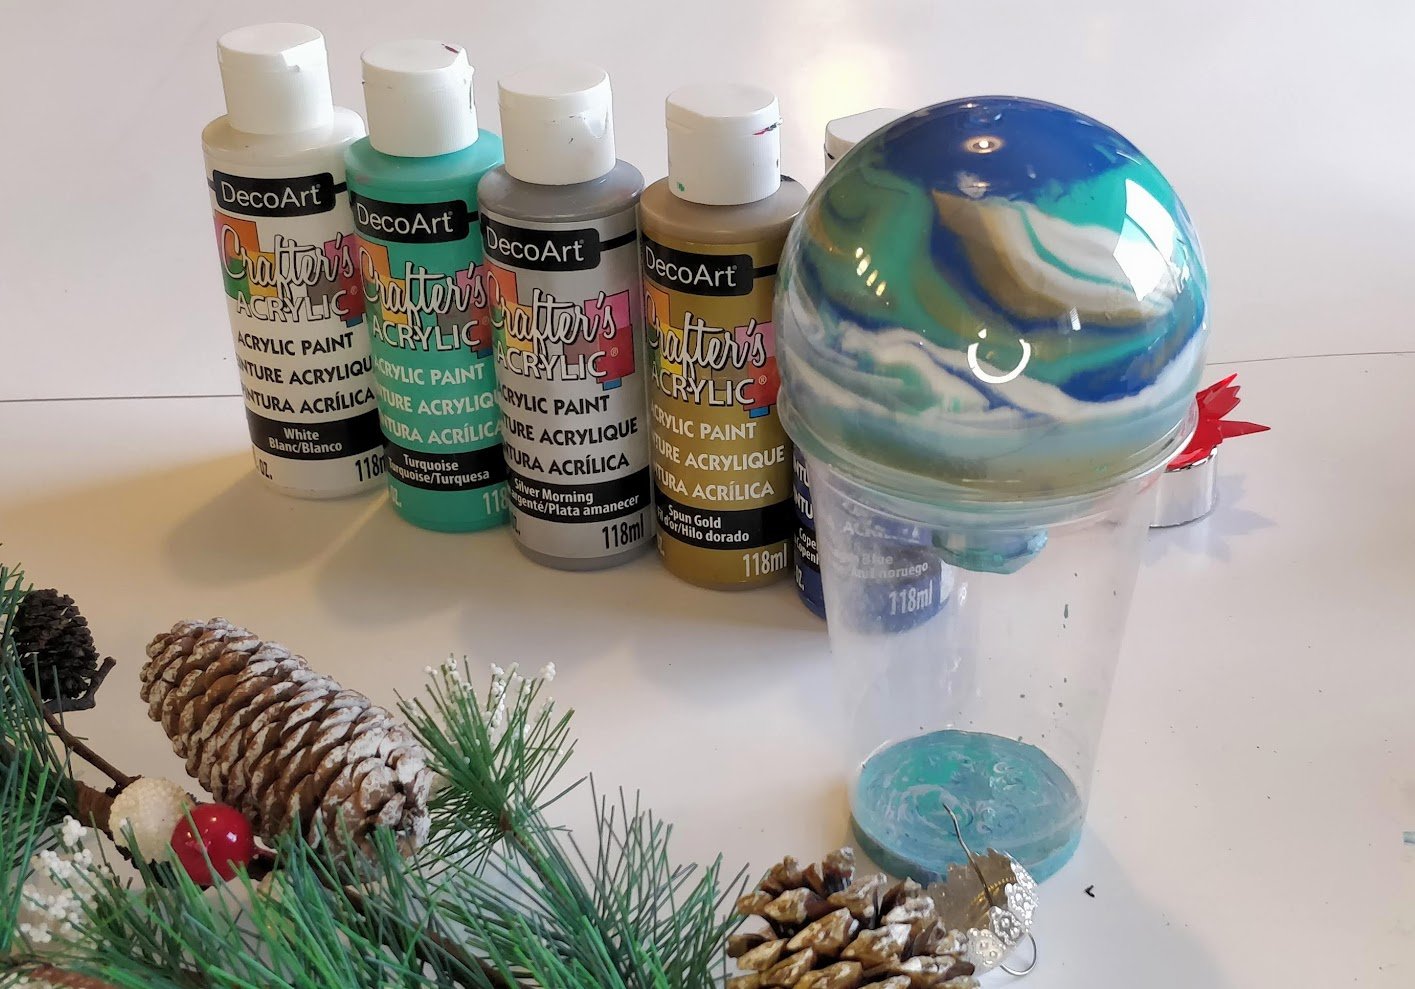
I already had some craft paint at home, but if you don't then the ones in bottles from Dollar Tree and Dollarama (in Canada) work well.
What Kind of Paint Do You Use For Plastic/Glass Ornaments?
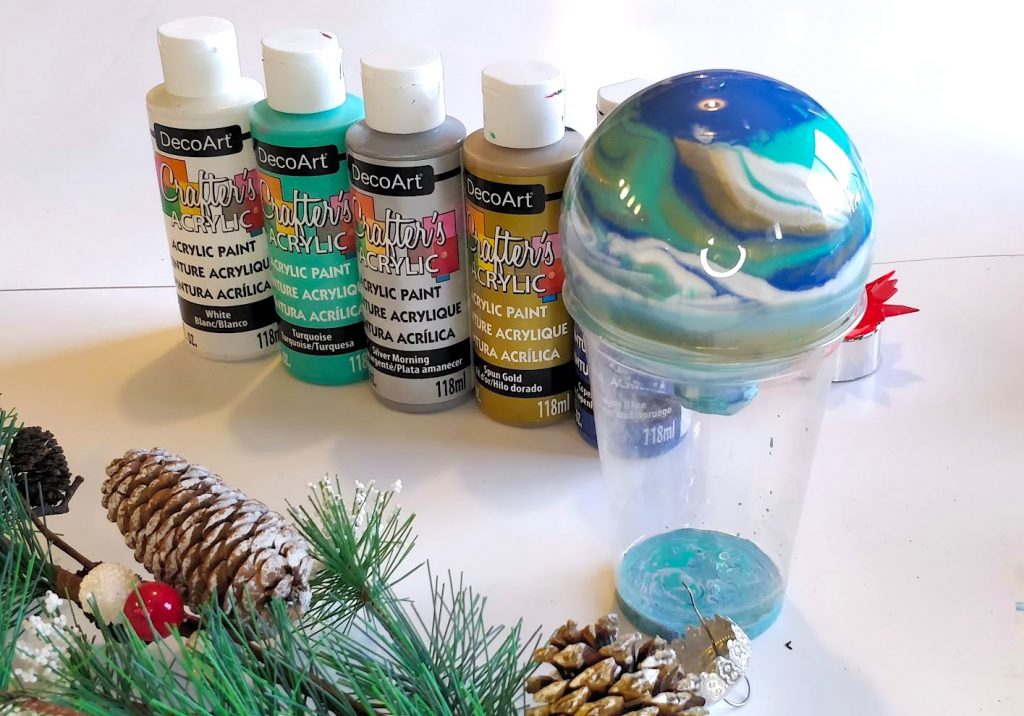
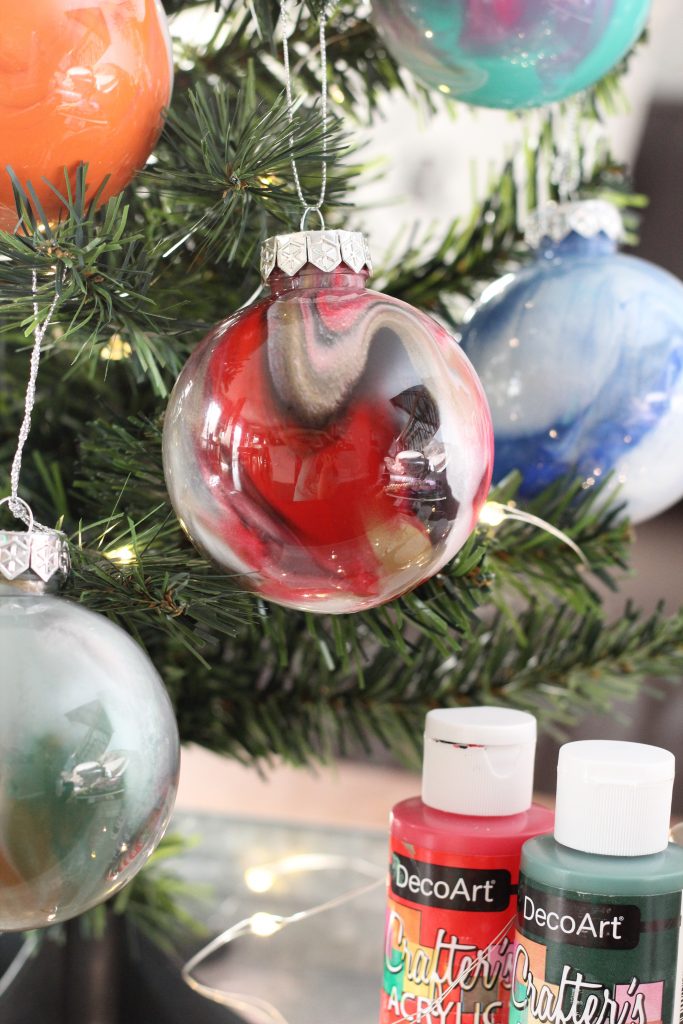
As mentioned above, I used both the acrylic craft paint brands sold at Dollar Tree (Acrylique bottles) and Dollorama (Deco Art bottles) and they both worked.
If you use of have other brands of craft paint I can't guarantee 100% they'll work since I haven't tested them out, but in theory they should. The reason I say that is because I initially used a pre-made acrylic pouring paint from Micheals, and it didn't work for me. Most of the paint drained out and it made the colors streaky and transparent. I'll share with you my experience with that below.
As a precaution I wouldn't use pouring paint or add anything to your craft paint that would thin it down because it might not work.
How Do You Paint Inside Glass Ornaments?
To paint the inside of a clear plastic or glass ornament you will need to slowly pour your craft paint through the nozzle . Then you will either slowly turn it or shake it to coat the inside of the ornament, depending which method you use below. (see below for step by step instructions)
You'll probably need to add in more paint and repeat this step until the desired amount of the ornament is covered.
The benefit of painting your ornament on the inside is that you won't need to seal it afterwards and it'll look super glossy and shiny since the outer clear plastic/glass isn't covered.
So if you're wondering how do you make colored ornaments, then you'll love the tutorial below.
Drying Time
You'll want to make sure your paint is fully dry and cured before putting the cap back on. You can use a q-tip or one of your fingers inside the ornament to test if it's dry.
The first step is to leave your ornament upside down for the extra paint to drain out overnight. Then flip it right side up to dry the rest of the way. It usually takes anywhere from 24-48 hours depending on the humidity in your area.
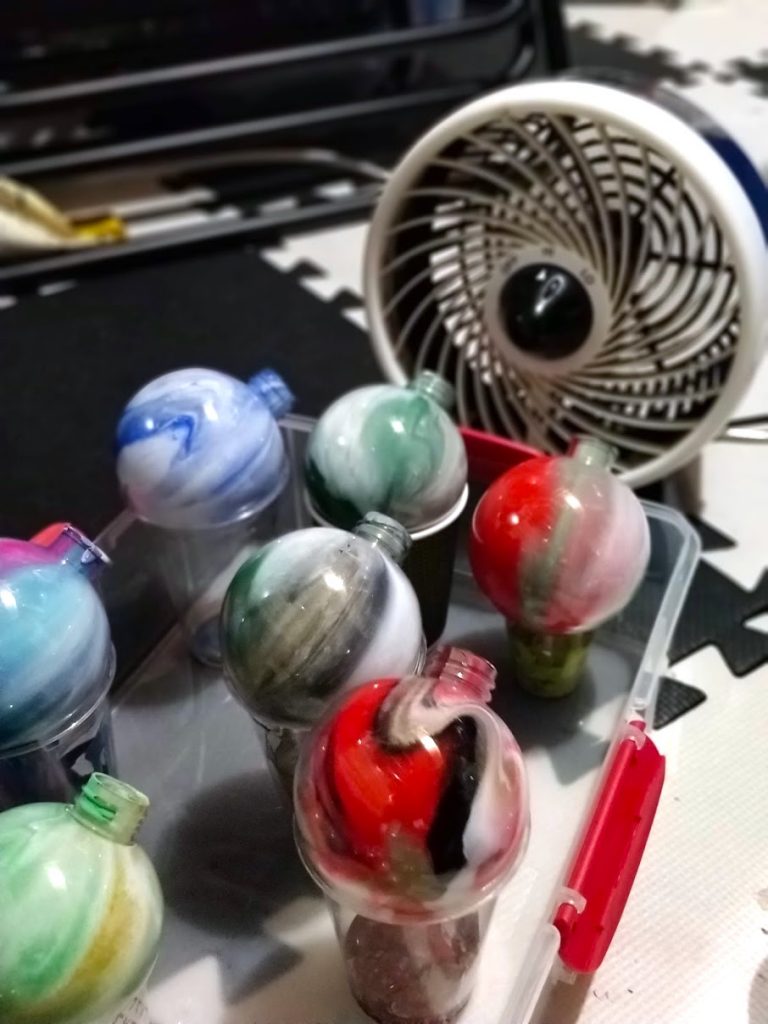
I live in a cold-humid area so it was taking my ornaments longer to dry.
To speed things up I decided to put my ornaments in front of a small desk fan we have. It took a couple hours and it completely dried them out! You can use this fan trick if you're pressed for time or they're taking extra long to dry too.
DIY Ornament Balls Designs Ideas
One of the design options when making these painted ornament is to leave some clear parts of the ornament show through in the end piece. You could leave it as is, or you can fill your ornament as another fun idea. Here are some ideas on what to put inside an ornament :
- fake snow
- tinsel
- glitter
- cotton balls
- strips of gift wrap tissue
- sand
- mini pom poms
- confetti
- stars made of book pages
How Do You Customize Christmas Ornament Balls?
Although the finish painted ornament are gorgeous as is, the hamster wheel in my brain can't stop but think of other ways you can further customize them. Check out the ideas below for inspiration.
Btw, I am totally going to try the temporary tattoo idea on one of my painted ornaments.
Plastic ball ornament decorating ideas:
- Stick on a cute temporary tattoo/stickers on the outside of ornament
- Use paint pen to handwrite name or initials
- Glue on sparkly rhinestones
- Use cutting machine to print out a festive words or name stickers
- Glue on a big bow made out of ribbon to top of ornament
- Mix some glitter into your paint for sparkly colors
- Paint the bottom half and fill the rest with fake snow, pom pom's or confetti
- wrap twine or yarn over the nozzle or ornament cap
- wrap twine/yarn over top half of ornament and paint bottom half
My Experience with Acrylic Pouring Paint
As I mentioned earlier, I initially used a pre-made acrylic pouring paint to make my ornaments because I thought it would work better since its designed to be used to flow better.
But [I think] the fact pouring paint is very thin and very flowy caused the paint to drain out and not stick to the sides of the ornament. In the end, my dried ornament looked a bit transparent, streaky, and not opaquely covered with paint.
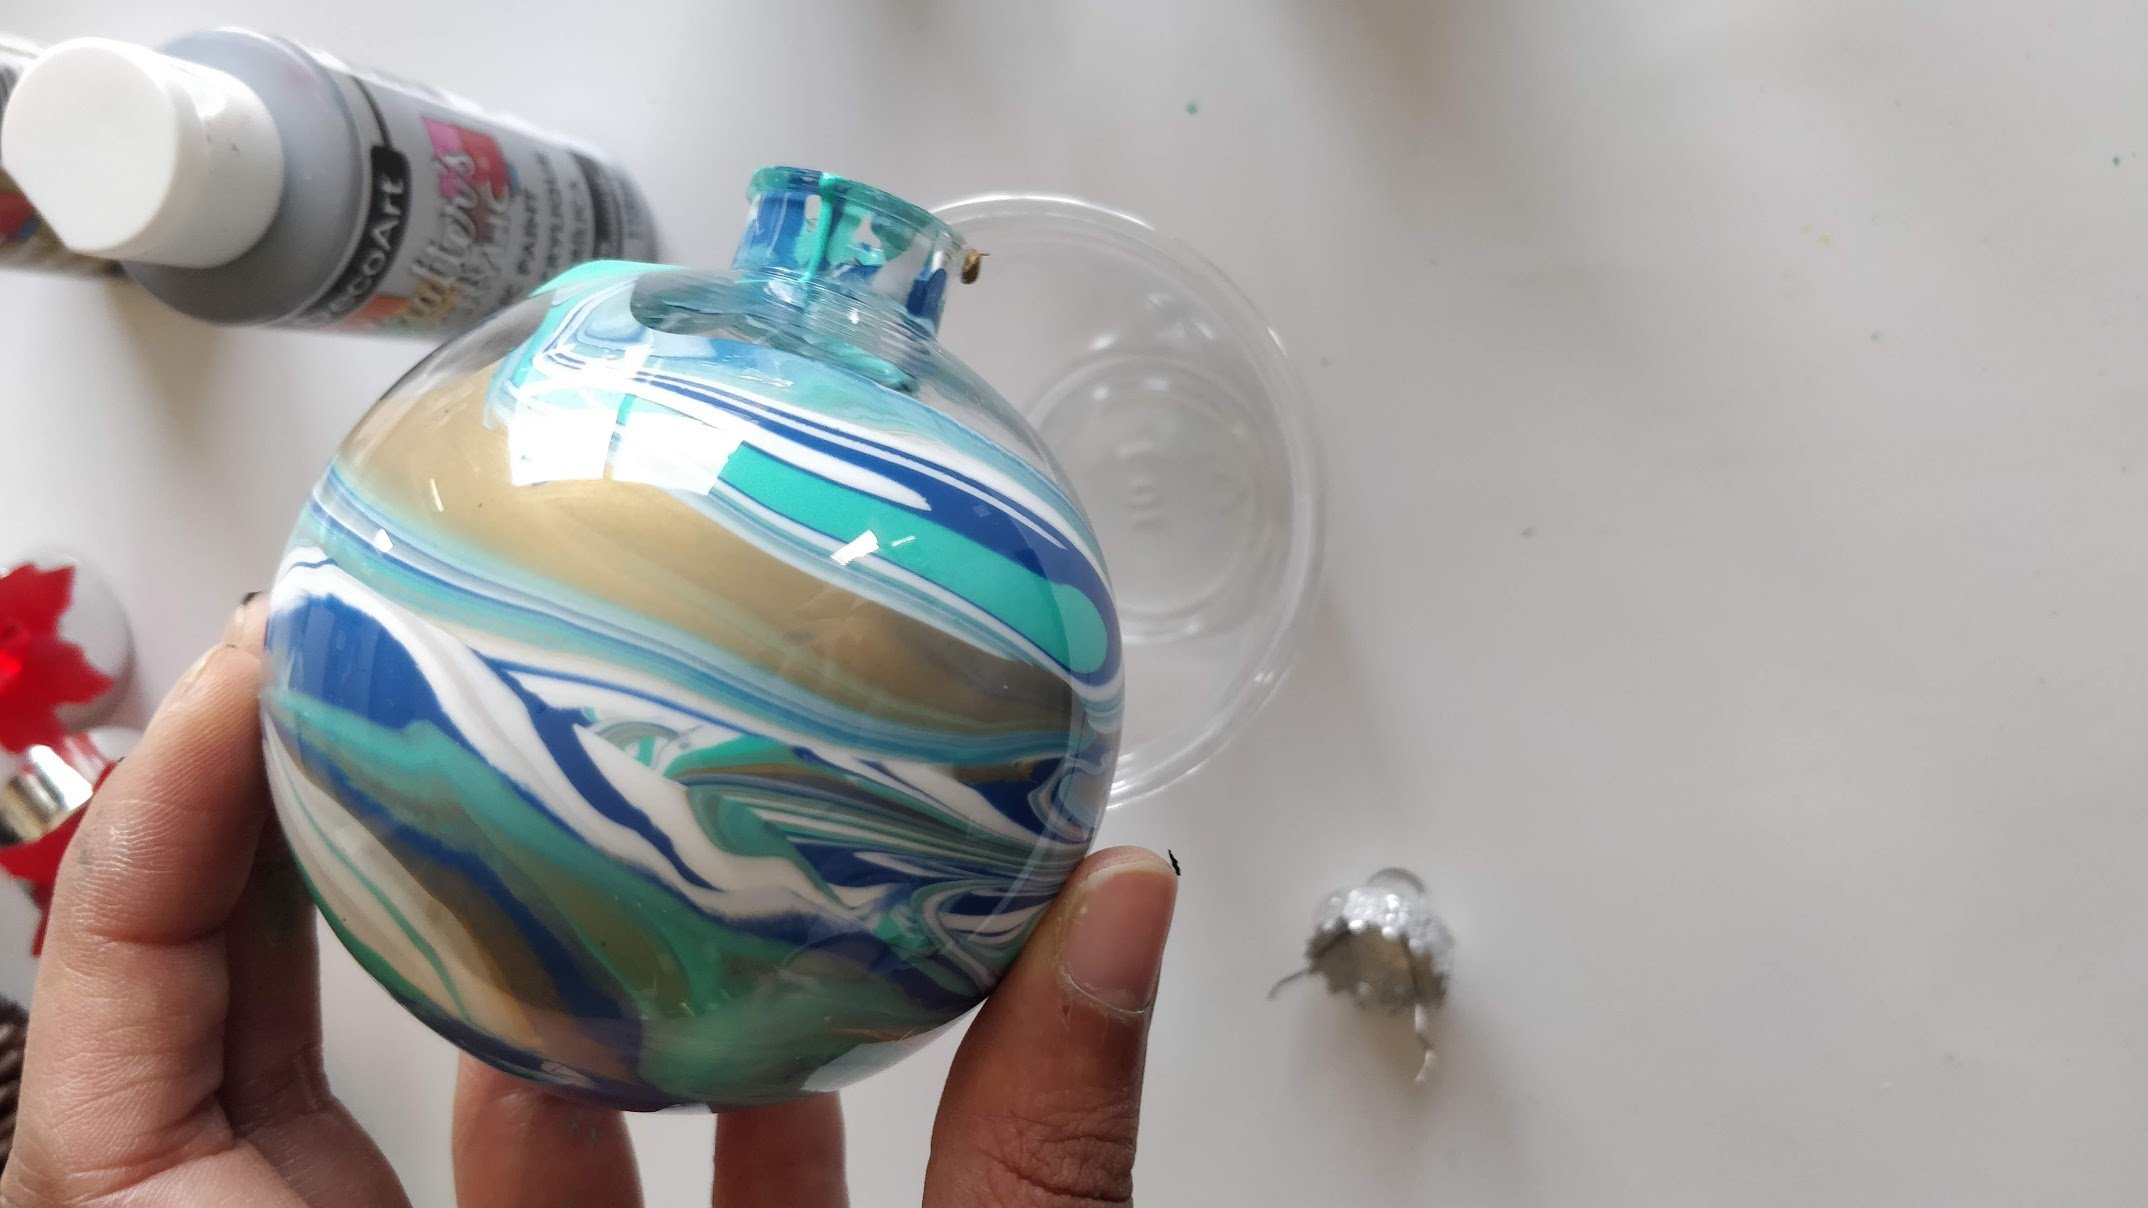
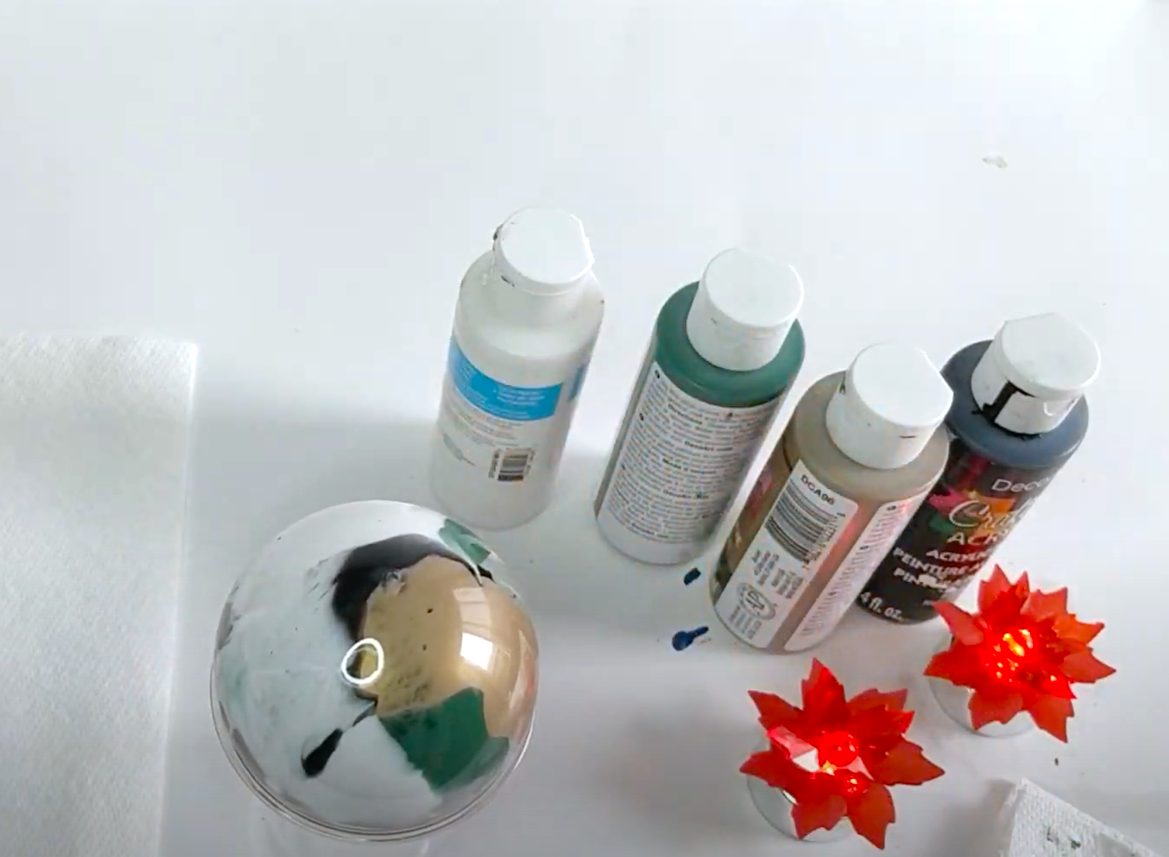
In the picture below the ornament with the pouring paint is on the left and the regular acrylic craft paint is on the right. Notice the streakiness and color opaqueness of the white parts.
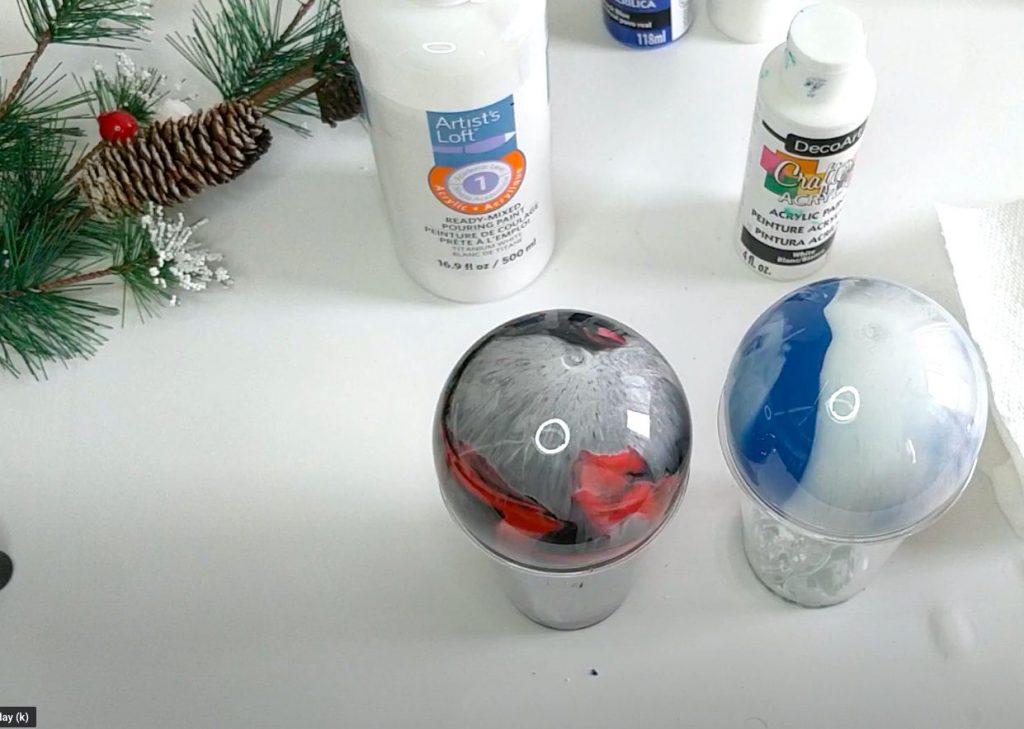
This might not be necessarily a bad thing if you like your ornaments looking a bit more on the transparent side, but for me I was looking to get solid opaque coverage.
The paint that worked beautifully, even when dried, was simple acrylic craft paint from the Dollarstore , which ended up costing way less to boot. Phewf!
On that note, I would avoid thinning down your craft paint with water or any medium because it could cause similar issues when making these DIY ornament balls.
Let's Talk Color
In terms of # of colors, feel free to use as many colors as you'd like. I've used 5 or 6 colors for some ornaments white others I used just 2. The beauty with this craft is that the sky is the limit with the combinations.
Here are some ideas to get you going...
Tip: I tested using black paint and learned using too much can overpower the other colors once dried. I found that using a couple of drops of black here are there worked better than adding a big dollops of it.
- Red, green, gold and white
- Blue and white
- red and white
- red, white and gold
- green, white and gold
- green, gold, white and black
- pink, gold, white and black
- florescent colors
- turquoise, white, gold, and dark blue
- red, white, gold and black
- orange, hot pink, white and gold
- purple, blue, green and silver
- pastel colors
- black and white
- black, white and red
One little caveat. In method #2 below, the paint colors might mix together which can create brown or muddy colors. If you don't want this to happen. try using similar colors together. Here are some examples of colors when mixed together won't create mud:
- blue, purple, green, silver
- orange, pink, red, yellow, gold
You can use black or white with any of the above combinations. It will bring out some lighter and darker tones in your colors without creating mud.
That's a wrap...
I hope you enjoyed this post on how to paint DIY ornament balls using Dollar Tree supplies. Make sure to check out the step by step tutorial below. We went over what kind of paint to use for homemade ornaments, extra tips on ways to fill clear Christmas ornaments and how to how to decorate them even more.
Making these DIY ornaments was super fun and easy - even for kids. Hope you take a chance on them and drop a couple in your cart next time you pass by them!
DIY Ornament Balls - Swirl Paint Method
Make these easy, kid-friendly DIY ornament balls with the 2 paint swirls methods below. Pick one or make both. Either ways this easy Christmas craft is tons of fun and creates gorgeous custom ornaments.
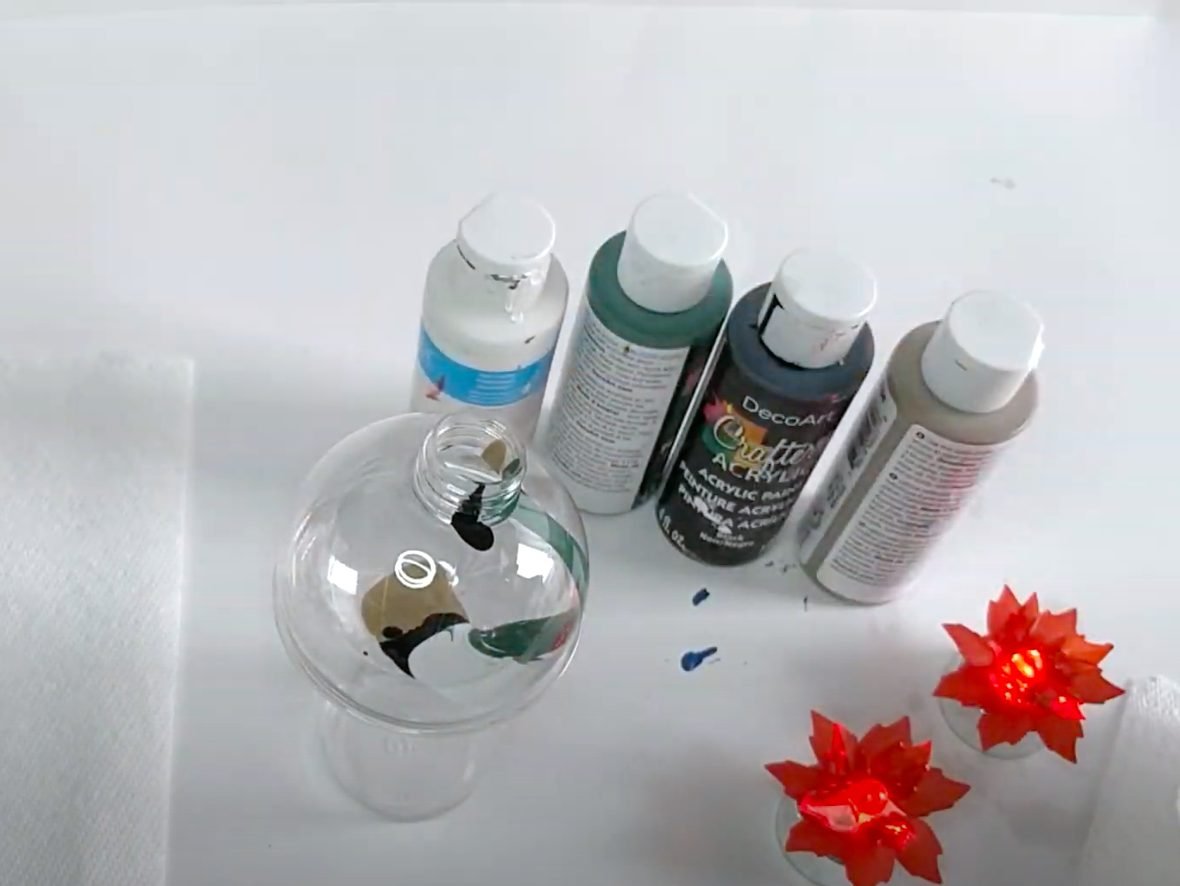
Materials
- Acrylic Craft Paints (see above)
- Clear plastic or glass ornaments
- Plastic cup or jar
- Piece of paper towel (method 2)
- skewer or long paintbrush (method 1)
Instructions
Method 1 : Subtle Marbling
Note: Click here to watch the full length tutorial on YouTube
- Shake your paint bottles to make sure paint is well mixed
- Take the cap off your ornament
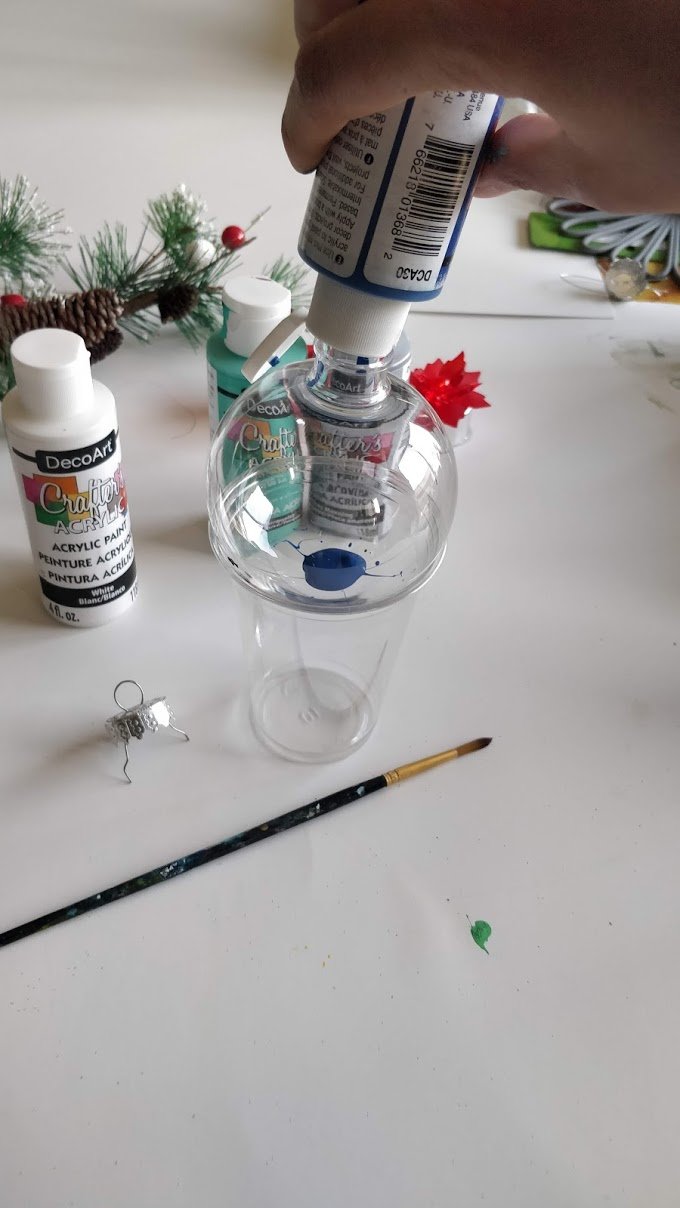
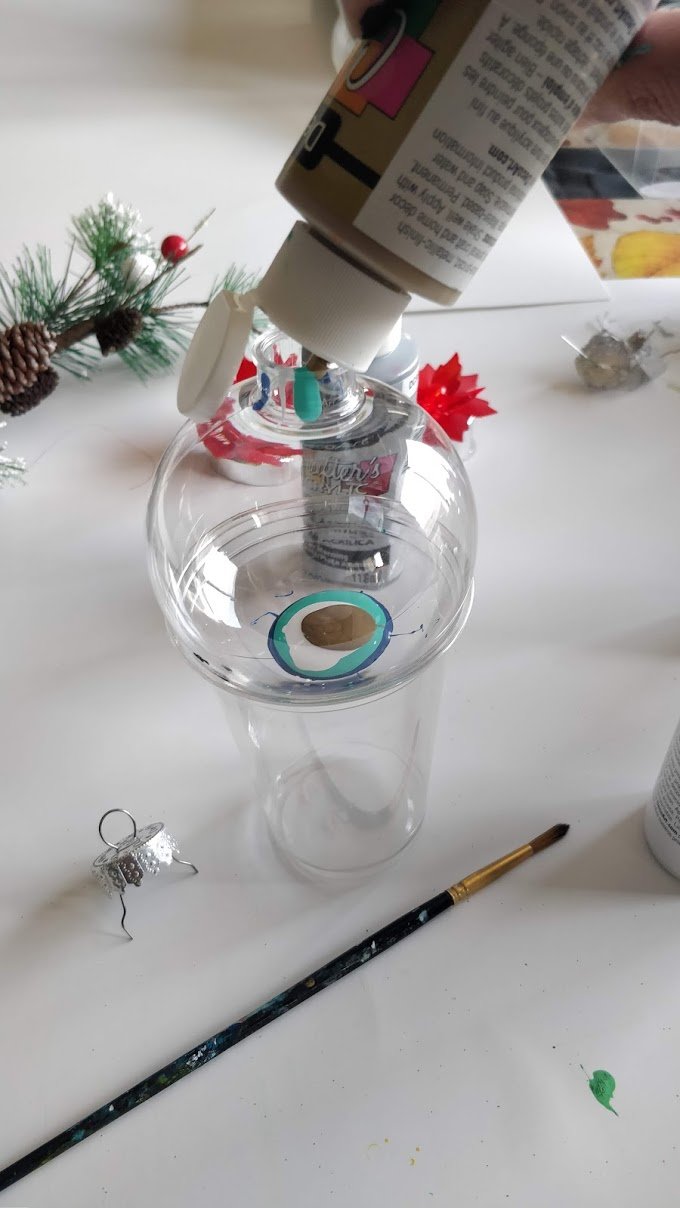
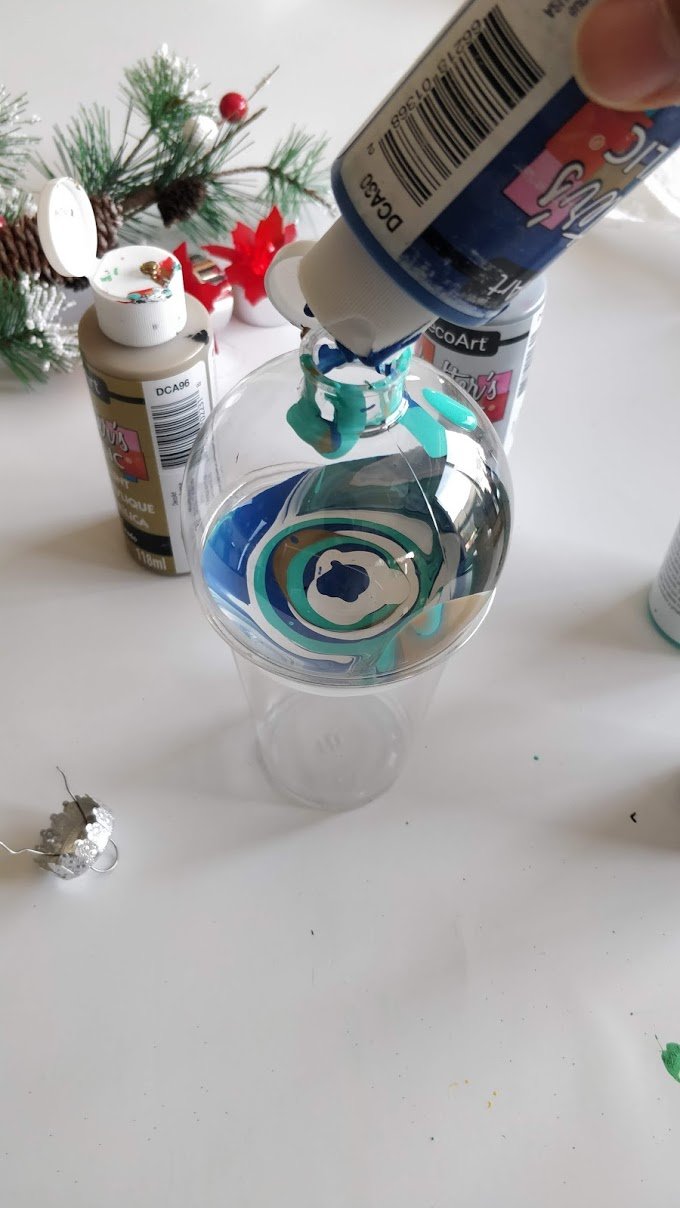
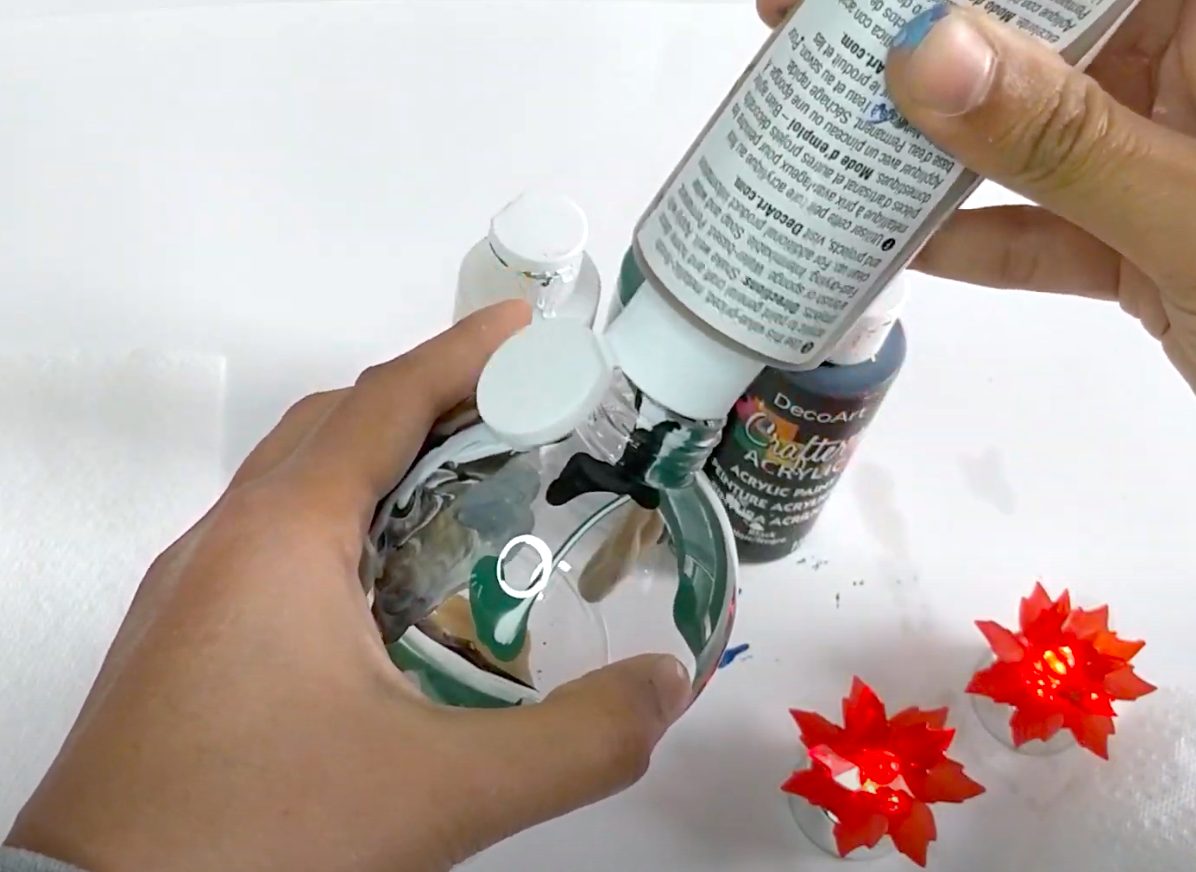
- Pour your colors into the ornament one by one, directly in the center of ornament.

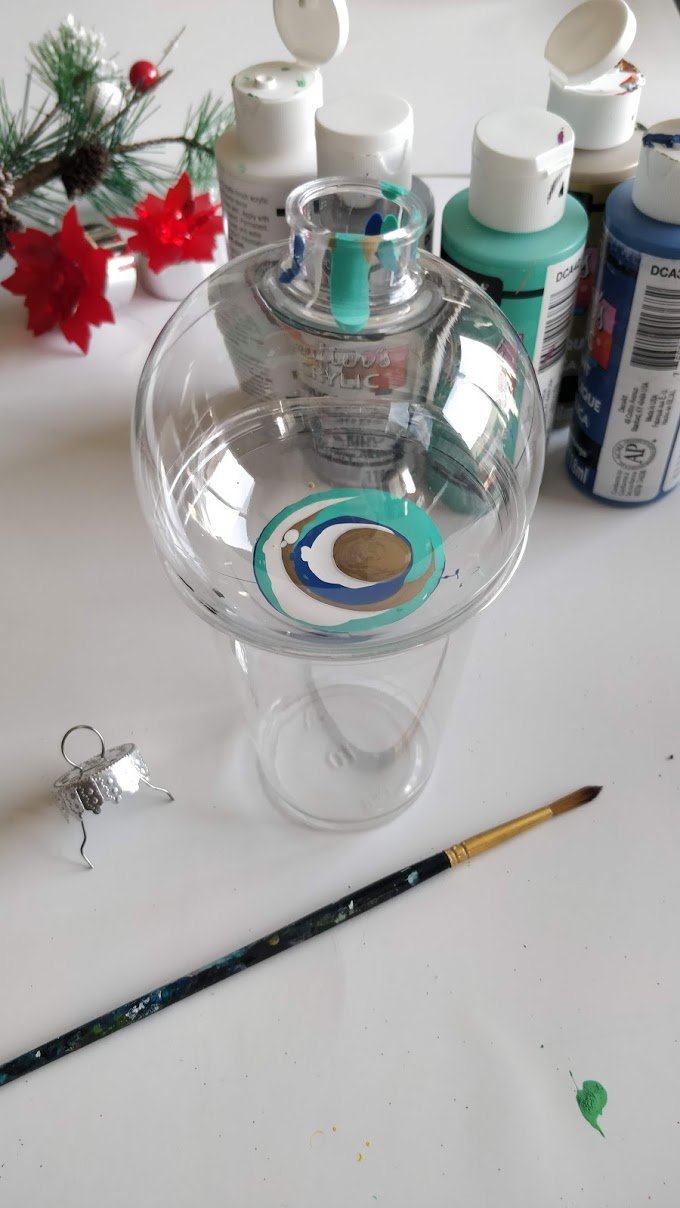
- Repeat step 3 to create another layer of paint in the same order. Essentially we want each paint color to have 2 layers before we start marbling.
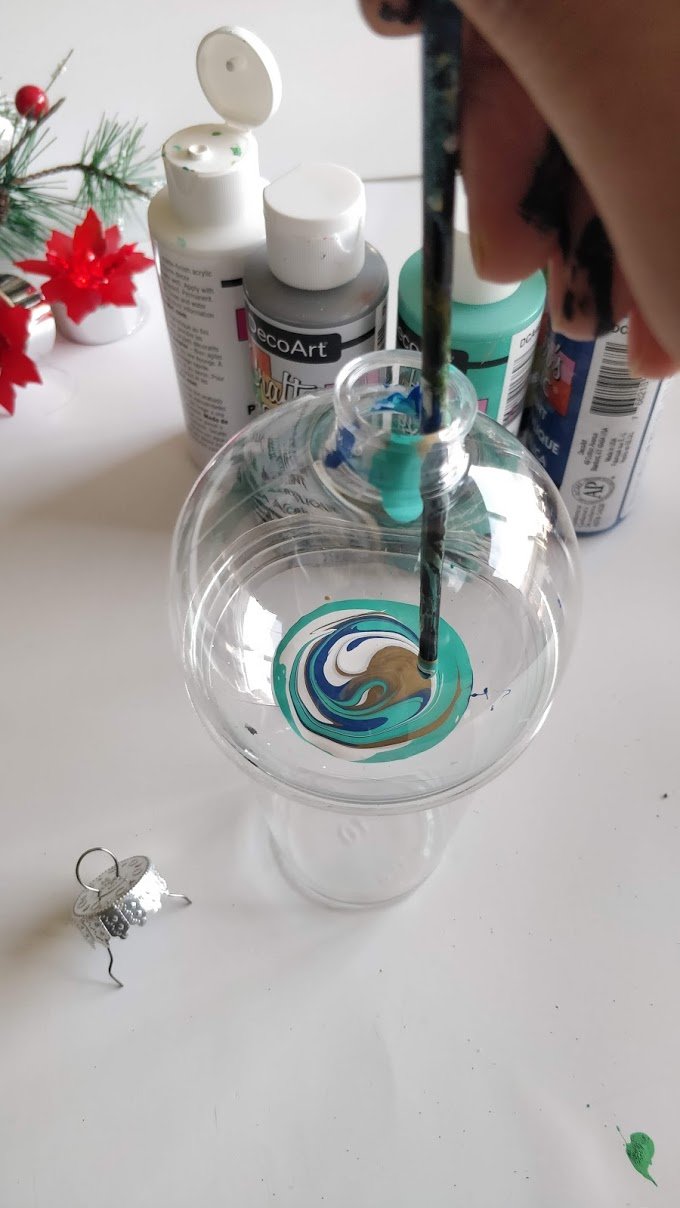
- Take your skewer or brush handle and gently swirl the paints being careful not to overmix. We don't want the paint to mix colors, just swirl together for a marbled look.
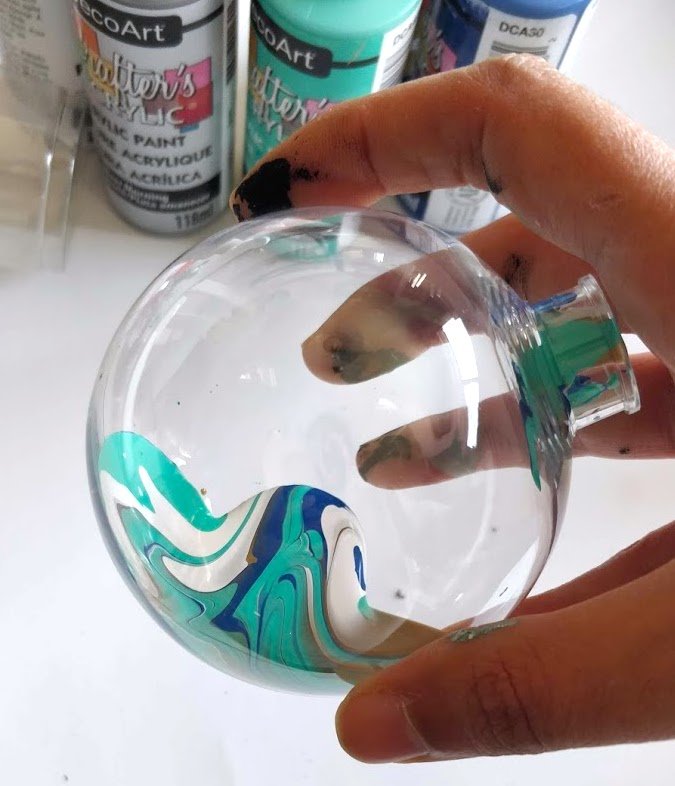
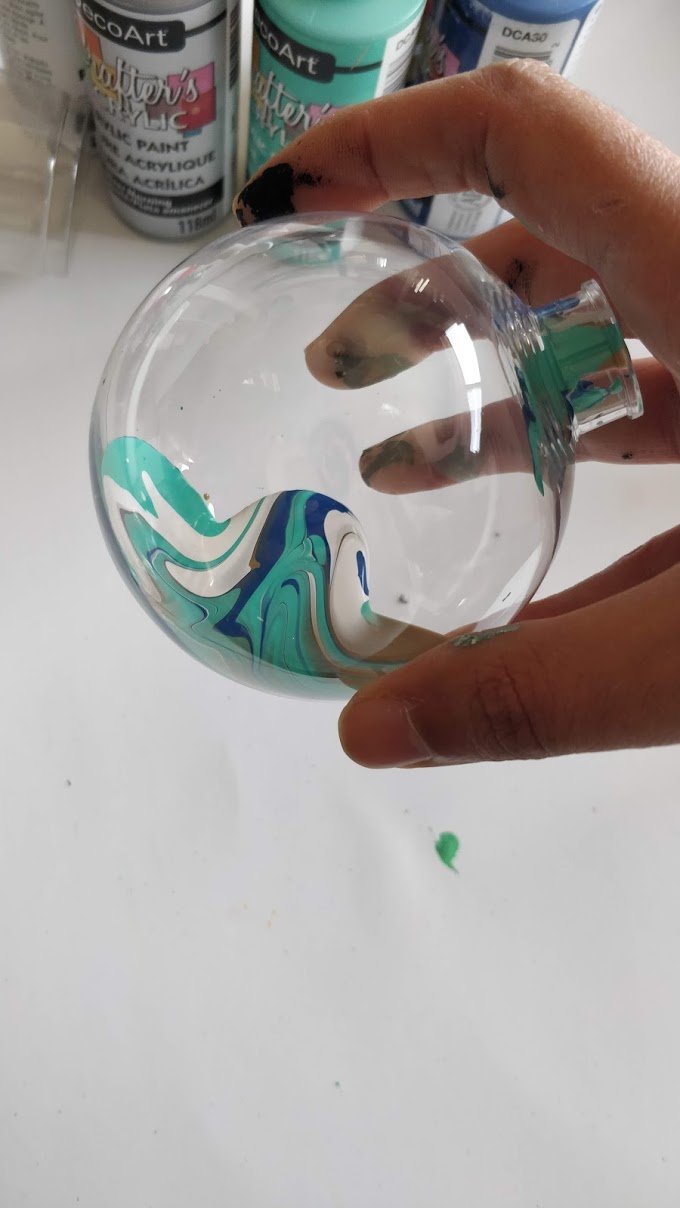
- Pick up your ornament and hold it on a 45 degree angle and start slowly turning and rotating it. You'll notice the paint starts flowing and coating the inside of the ornament. Continue until paint no longer flows.
- When paint no longer flows, repeat steps 3-6 to coat the remaining clear parts of the ornament.

- When all the clear part is fully coated, turn it upside down and let the extra paint drain out. Leave overnight, then turn it right side up to leave to dry the rest of the way (see above for tips)

- When it is dry to touch carefully put the cap back on
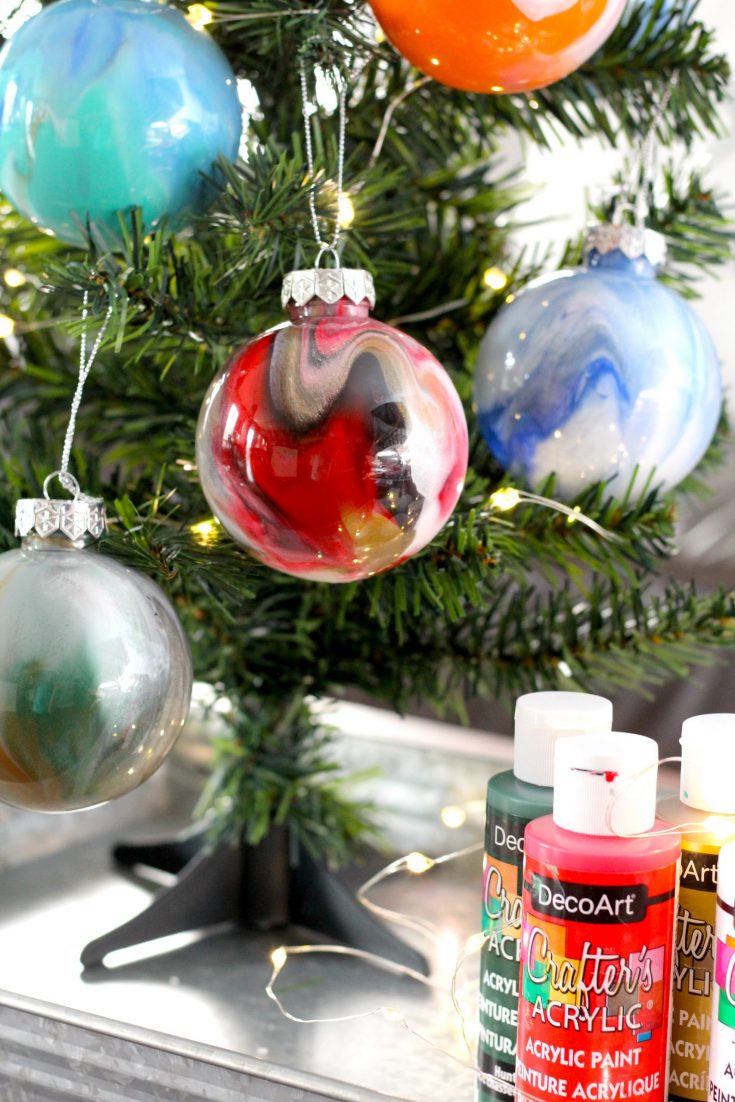
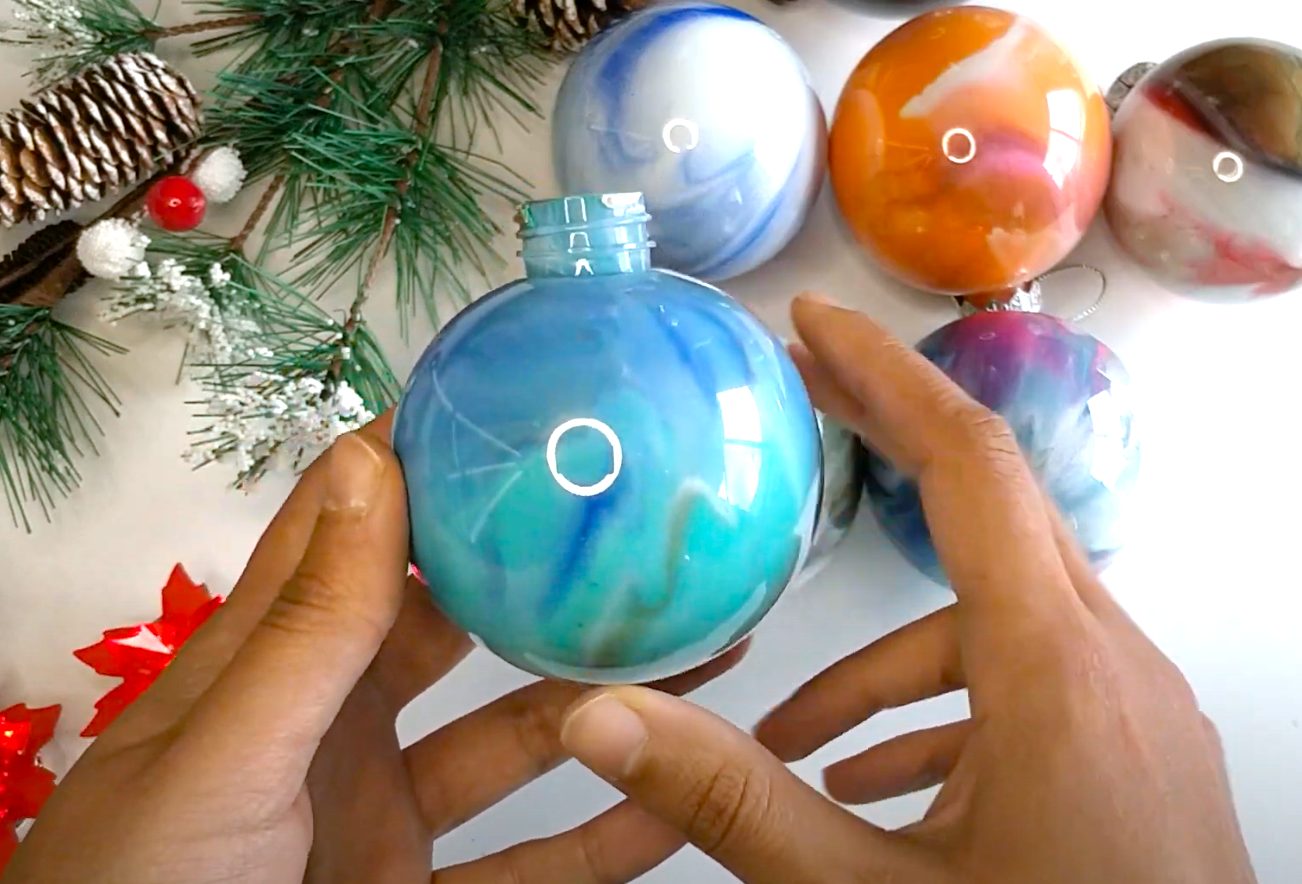
- Here's the coloration and design when the ornament is dried. The pattern is more sublte marbling and coloration is more even and not as streaky as method #2 below

Method 2 : Bold Colored Streaks
Note: Click here to watch the full length tutorial on YouTube
- Shake your paint bottles to make sure paint is well mixed
- Take the cap off your ornament
- Pour your colors into the ornament one by one. Some colors make sure to pour down the sides, while others down the middle, etc. Tip: the colors that are poured down the sides will leave bolder streaks once dried

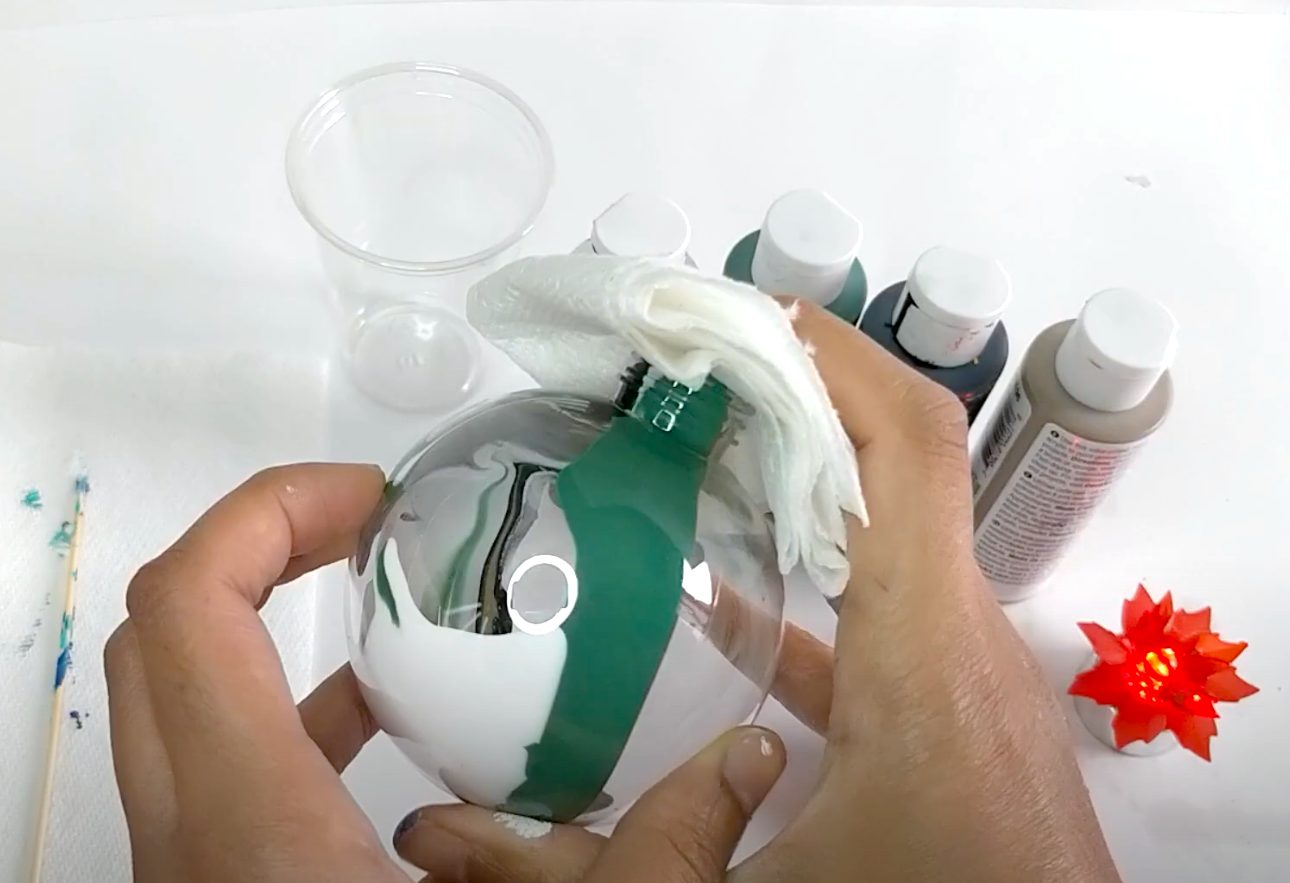
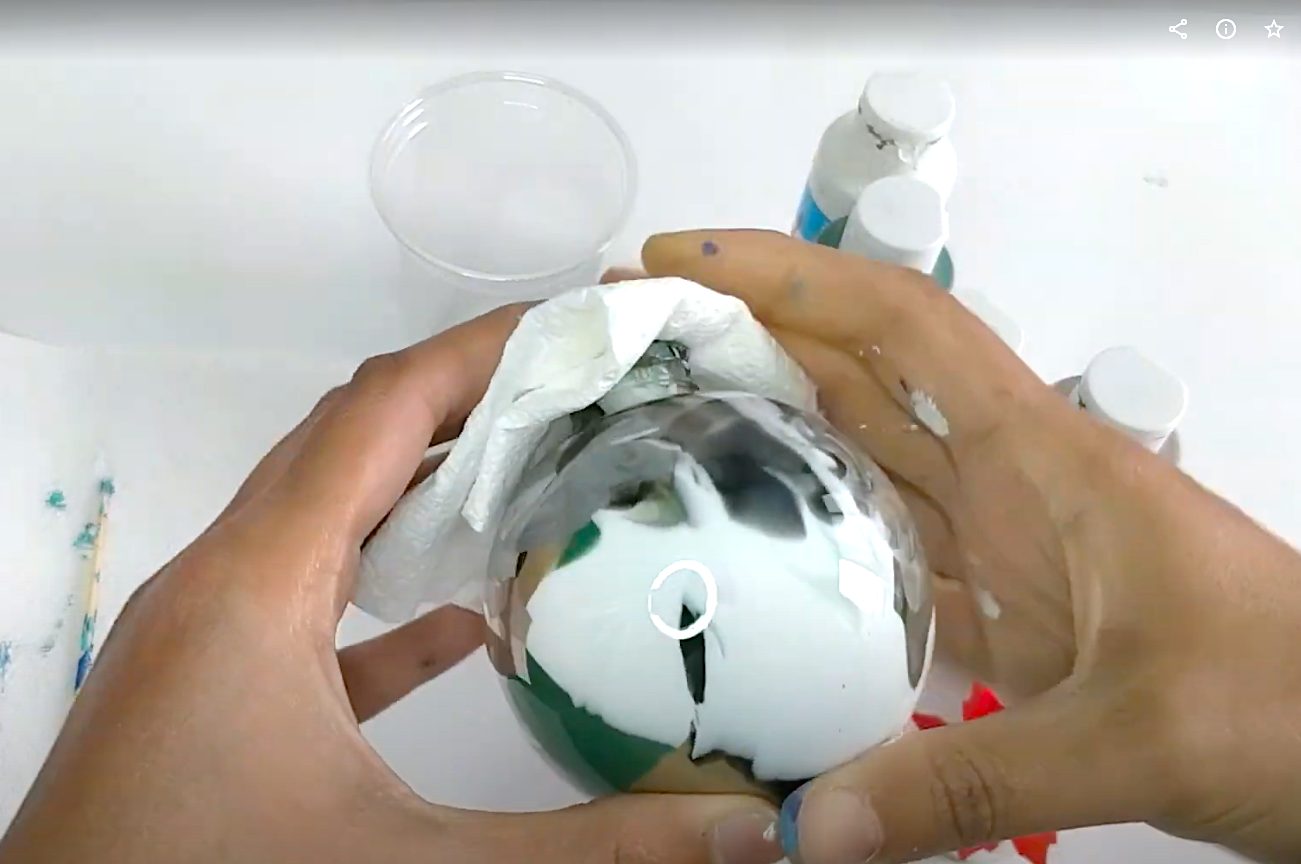
- Fold a piece of paper towel so that it covers the mouth of the ornament. Pick up your ornament and shake it vigorously. You'll notice the paint creating really cool bold patterns. Continue shaking until the paint no longer flows.

- Repeat step 3 making sure to pour some colors down the sides and some in the middle.

- With your paper towel covering the mouth, shake again to coat the remaining clear spaces. Stop a few times and take note of how its turning out. You might want to keep some clear spaces in your ornament and not fully coat it. Stop when you like what it looks like.


- When you are happy with it, turn it upside down and let the extra paint drain out. Leave overnight, then turn it right side up to leave to dry the rest of the way (see above for tips)

- When it is dry to touch carefully put the cap back on
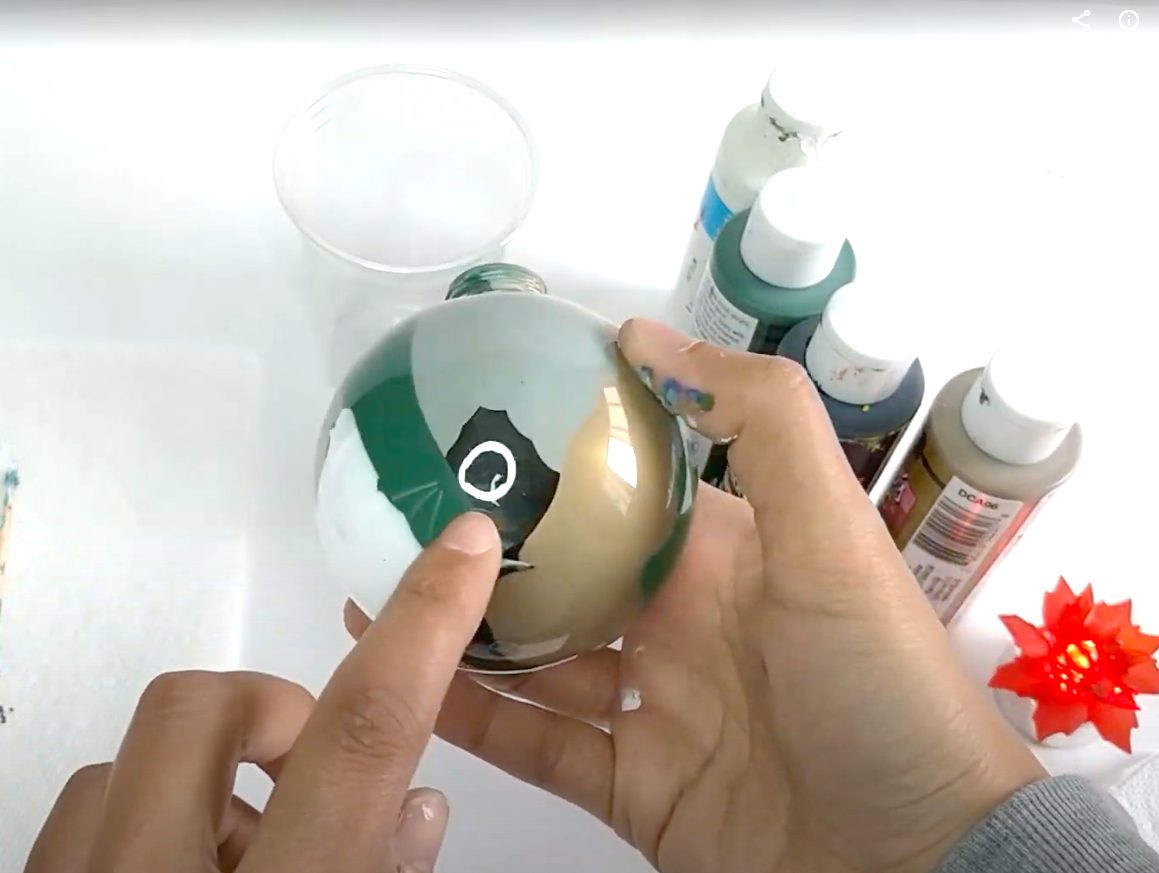
- Here's the coloration and design when the ornament is dried. The pattern is more distinct with bolder streaks of color compared to the method above.

Recommended Products
As an Amazon Associate and member of other affiliate programs, I earn from qualifying purchases.
-
 HOPELF 6" Natural Bamboo Skewers for BBQ,Appetiser,Fruit,Cocktail,Kabob,Chocolate Fountain,Grilling,Barbecue,Kitchen,Crafting and Party. Φ=4mm, More Size Choices 8"/10"/12"/14"/16"/30"(100 PCS)
 -
DecoArt Crafter's Value Pack Acrylic 12pc
-
Yeelan Clear Plastic Acrylic Fillable Ball Ornament Set (60mm,12pcs,Complete Ball)

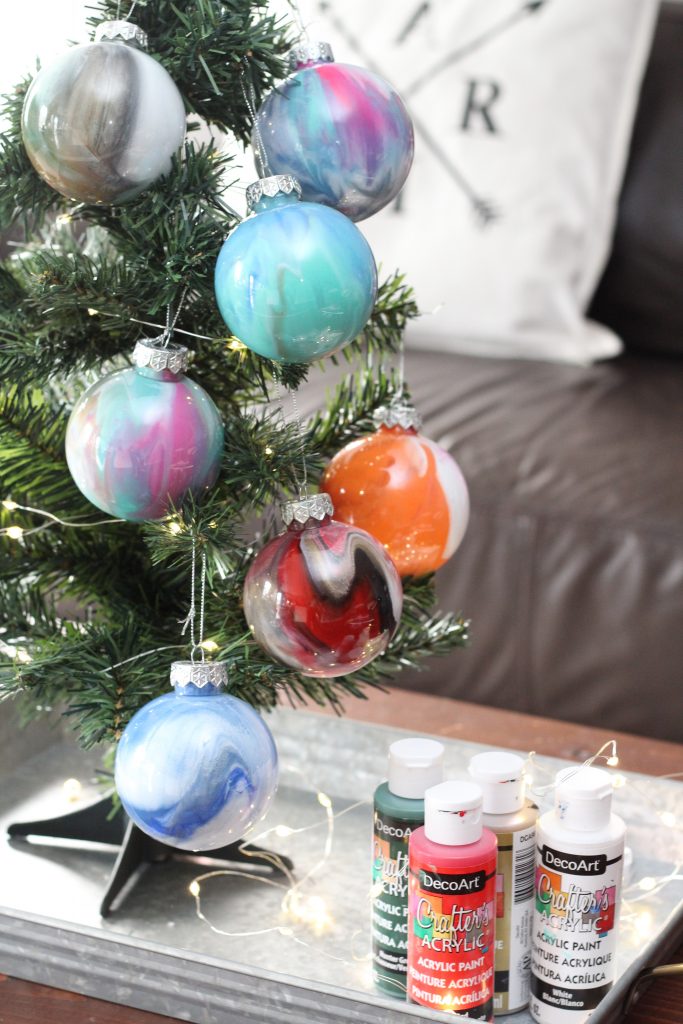
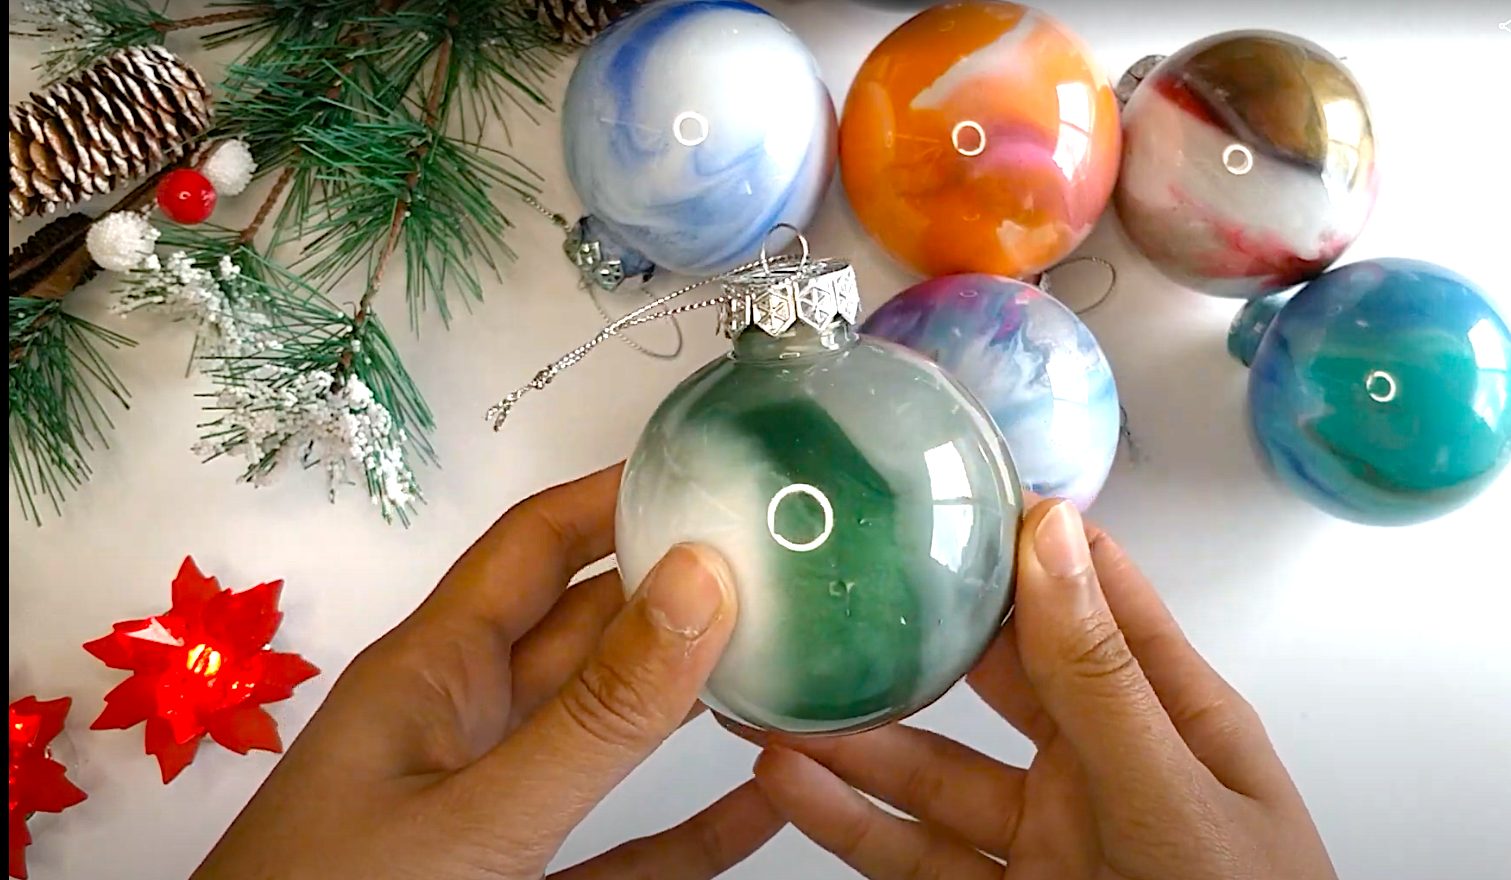
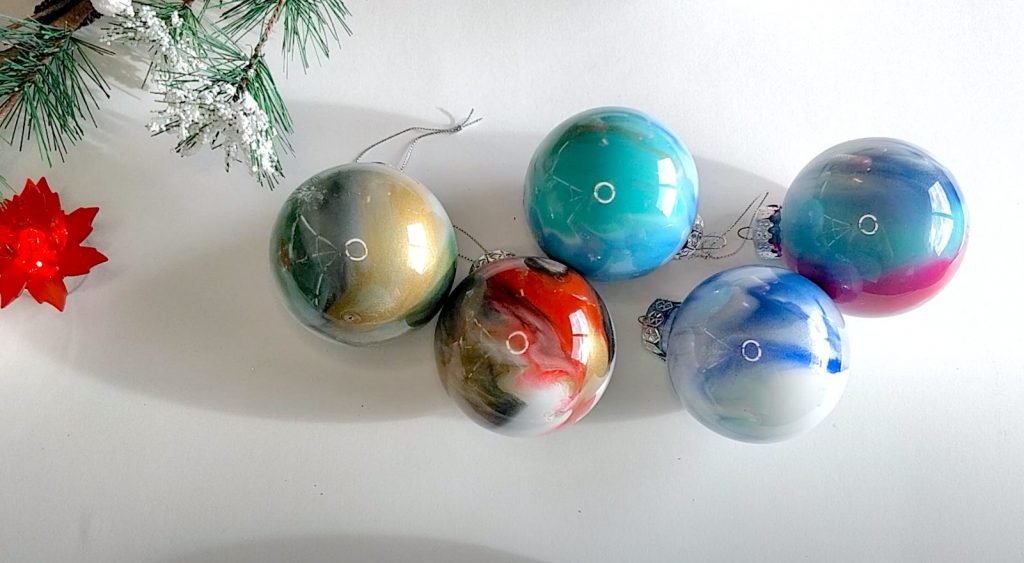
Here are some more pictures of the dried and finished ornaments

If you liked this post, please pin it!


So pretty! I love the paint swirls and that the mess is all on the inside of the glass ornament. Very clever DIY ornament idea!
Thanks Scarlet! I love the no mess part of these painted ornaments too 🙂
Cheers,
Jasmine
I loved them they were so cute when they finished
So glad to hear you enjoyed them Rilie, thanks for sharing that!
😊
Cheers,
Jasmine
Hi,
I just have question not sure if you'll know why or not. But we made these paint ornaments thus year and last christmas as well. They all turned out beautifully (we used acrylic paint) thus year after taking them off the tree i noticed that all of the ornaments we painted melted... and there was a pool of paint in the bottom. (Even from the ones we did last year) now they look translucent with muddy paint in the bottom.... we left them upside down to dry after making them and the ones we did last year were fine but this year they did the same thing as our new balls we painted. Any thoughts about what we might be doing wrong? Hope this makes sense.
Hi Jen,
Sorry to hear that. When I was experimenting with really thin paint, I found it ended up pooling at the bottom and made my ornaments translucent. It could be the paint is too thin. What kind of paint did you use?
Cheers,
Jasmine
@Jen, After they are dry try coating them inside with a Clear Coat that should set the paint.
Everyone talks about how great it is to paint the inside of clear plastic or glass baubles….BUT warning…. 9 times out of 10 it doesn’t work. The paint slides off the inside of the bauble while you’re waiting the 2 weeks it takes to dry. They look pretty at first but it will be next Christmas before they dry and then all the paint will have run down the sides and pooled at the the bottom even after you had them upside down for days. I found this to be the case for both plastic and glass. Very rarely does one turn out nice and beautiful like you see people posting. It’s very frustrating to keep seeing these posts on how to do theses ornaments but NOONE mentioning what the total out come is nor how long the dry time takes. It’s not.a project that gets done in a day or even two.
I’ve been trying this with regular acrylic paint like the deco art brand and similar. I get a nice cover over the whole ball and put it upside down for several days. On each one I’ve done some of the paint has chipped away (almost like someone scratched it off with their fingers) and I don’t know what I’m doing wrong. I’m currently using glass ornaments but I think I’ve read you can use both plastic and glass. Any ideas?! Thank you
I second the pouring paint. I ended up going with a thicker paint and the colors stayed beautifully. I made these as Christmas gifts for my students
So glad to hear this ornament painting project went well. And what lovely gifts to give your students - bravo!
Cheers,
Jasmine