How to Paint Lavender Flowers in Acrylics (Simple & Easy)
Learn how to paint lavender in acrylics using basic acrylic paints and cotton swabs!

Want to learn how to paint lavender in the easiest flower painting tutorial? Then this step by step tutorial (with YouTube video ) will be your pal!
Lavender is one of the easiest flowers to paint which makes it a perfect acrylic painting for beginners in painting.
In this step by step tutorial, you'll learn how to paint lavender flowers with some simple tools like Q-tips. I'll also go over some easy acrylic techniques to add some texture into your painting (using items you probably have in your kitchen!).
Oh, and if you're just starting out with acrylics , you'll definitely want to go through this Ultimate Beginners Guide: How to Paint with Acrylics. It goes through most things you'll need to know when starting out.
More Easy Flower Painting Ideas
Looking for more [ beginner level ] easy flower painting ideas? Here are some fun flower paintings to try: daisies, roses, hydrangeas, sunflower, 6 easy flower painting techniques, and butterfly on a sunflower.
And if you're looking for more spring blooms to paint check out this 60+ spring painting ideas.
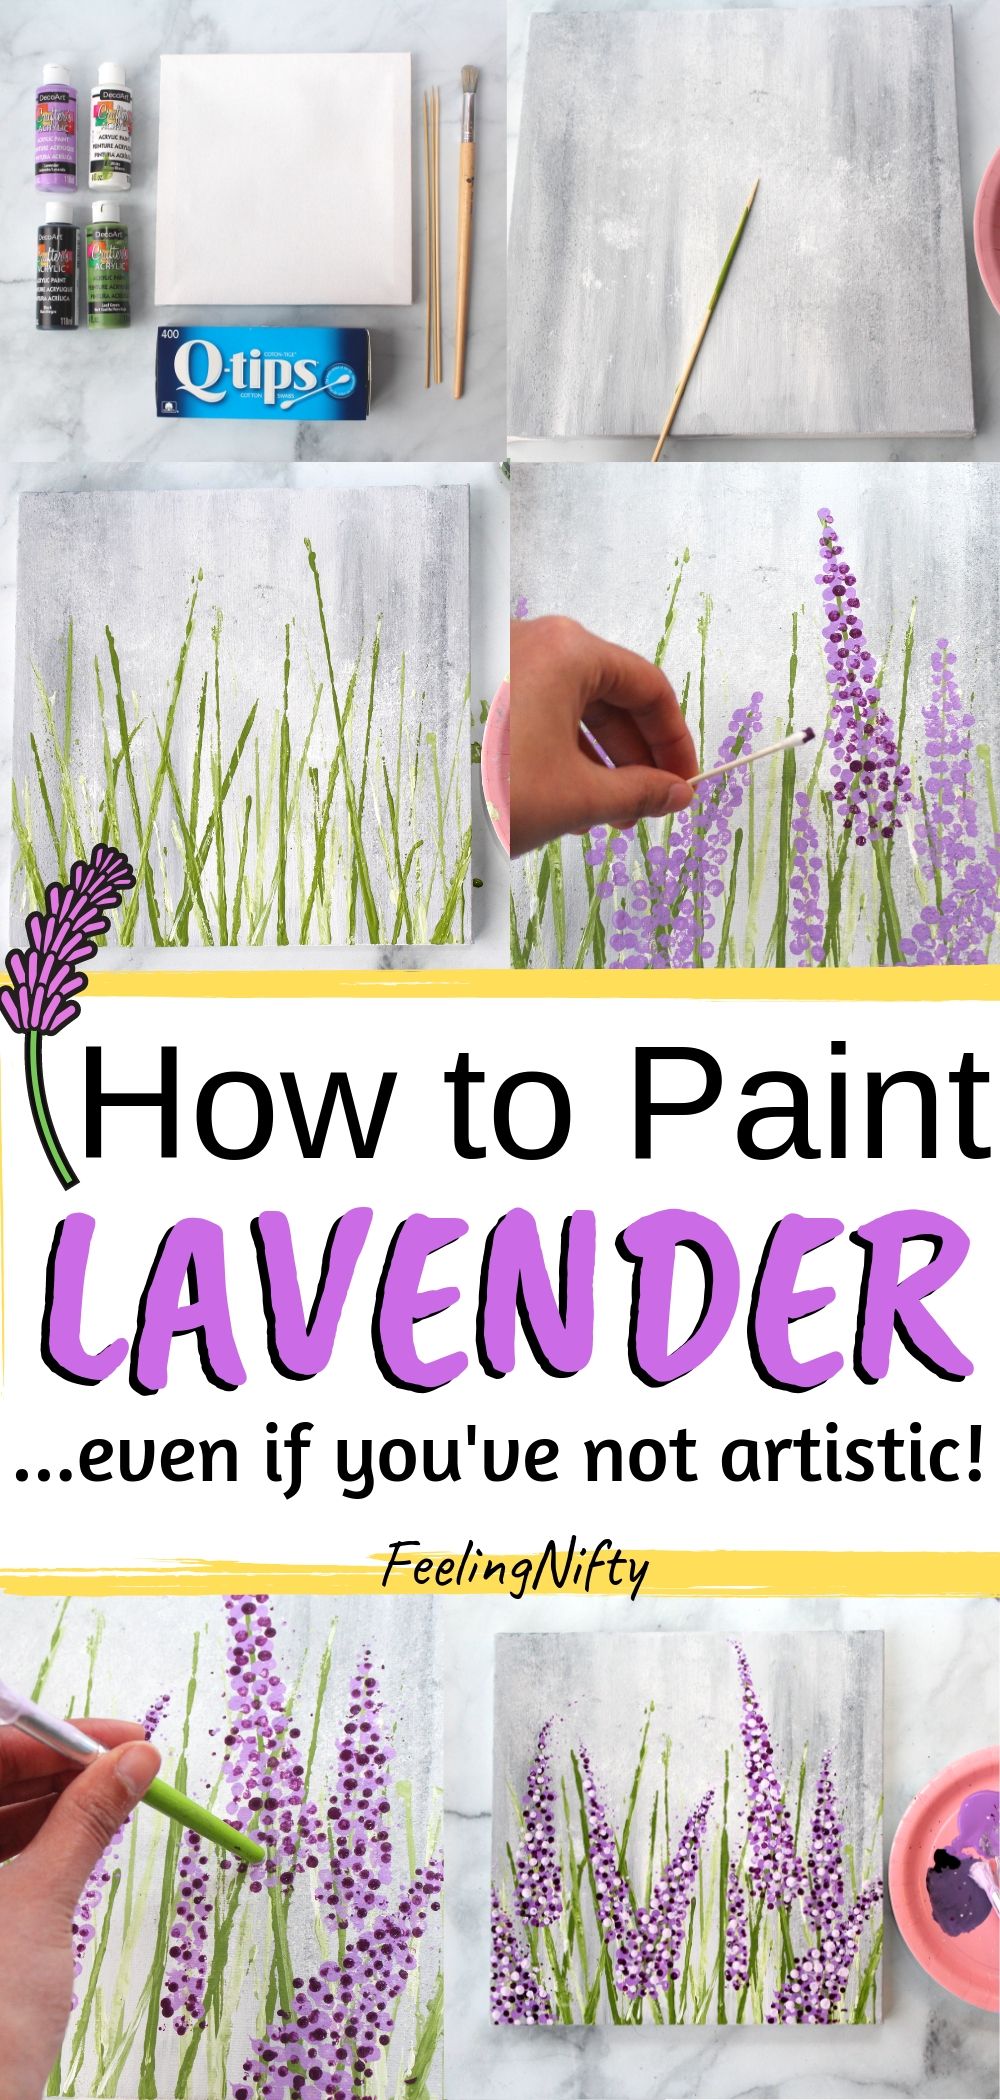
Now, let's get started and learn how to paint some simple and gorgeous lavender flowers with Q-tips!
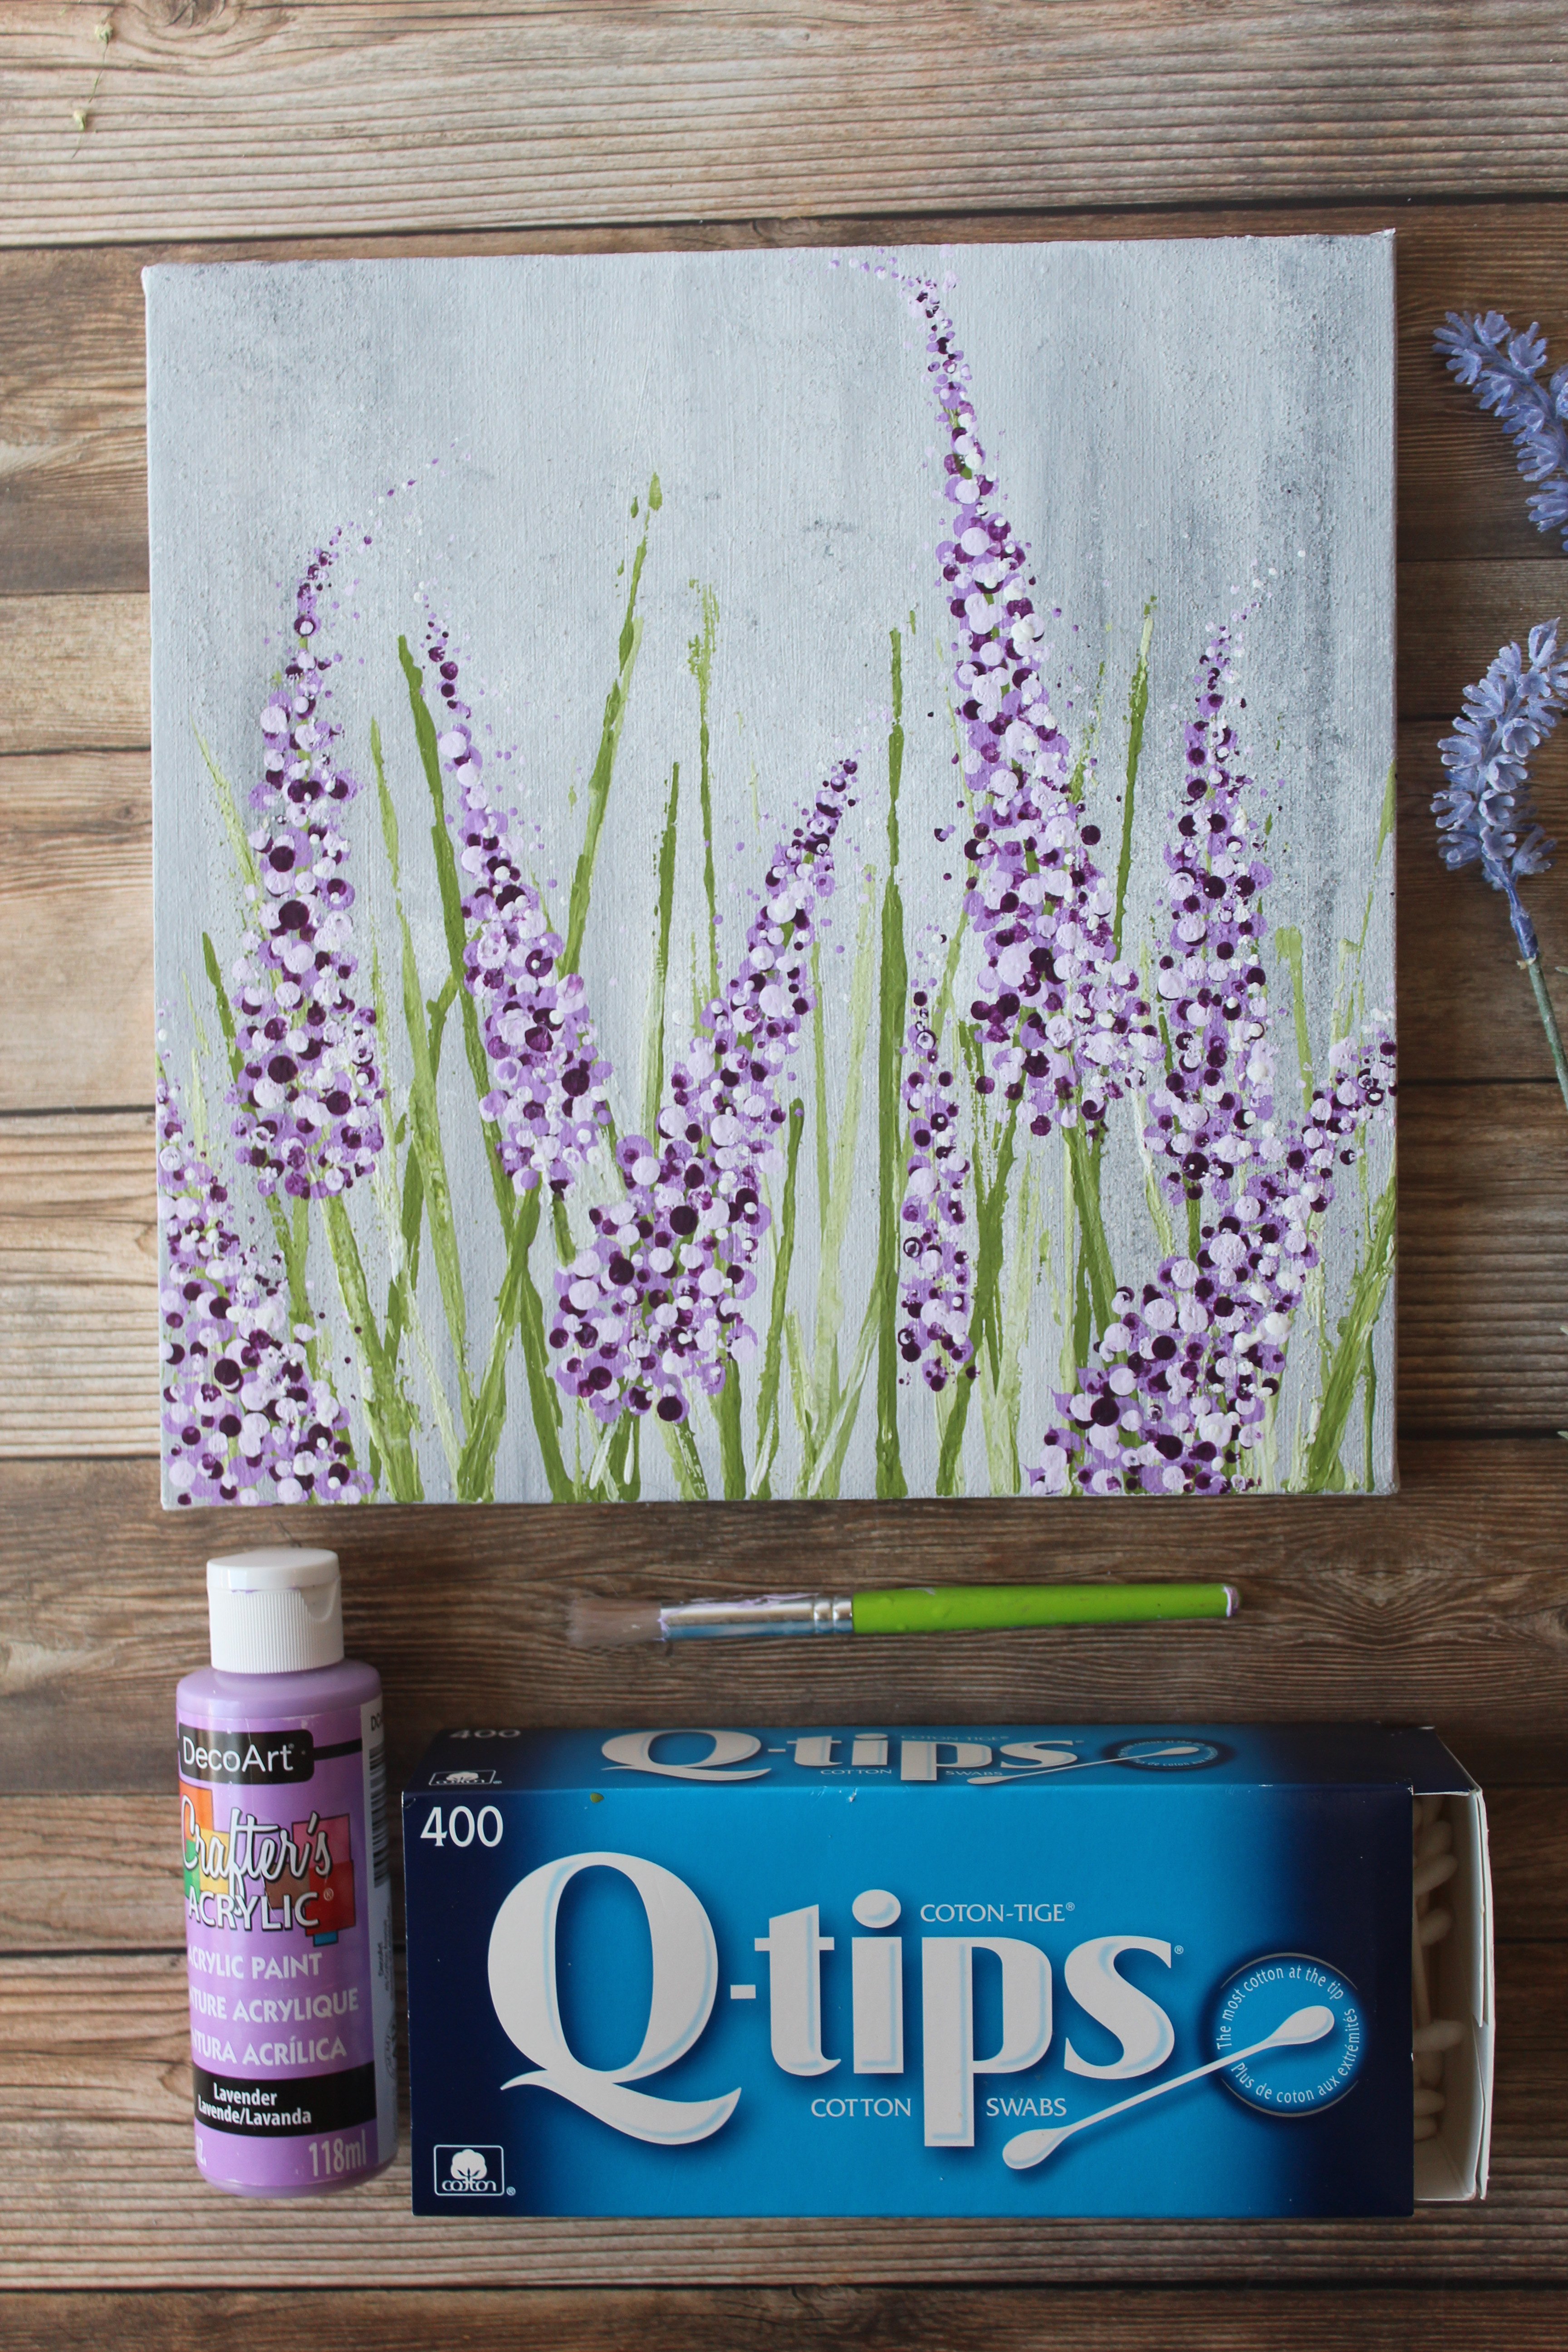
Lavender Flower Painting: Materials and Supplies
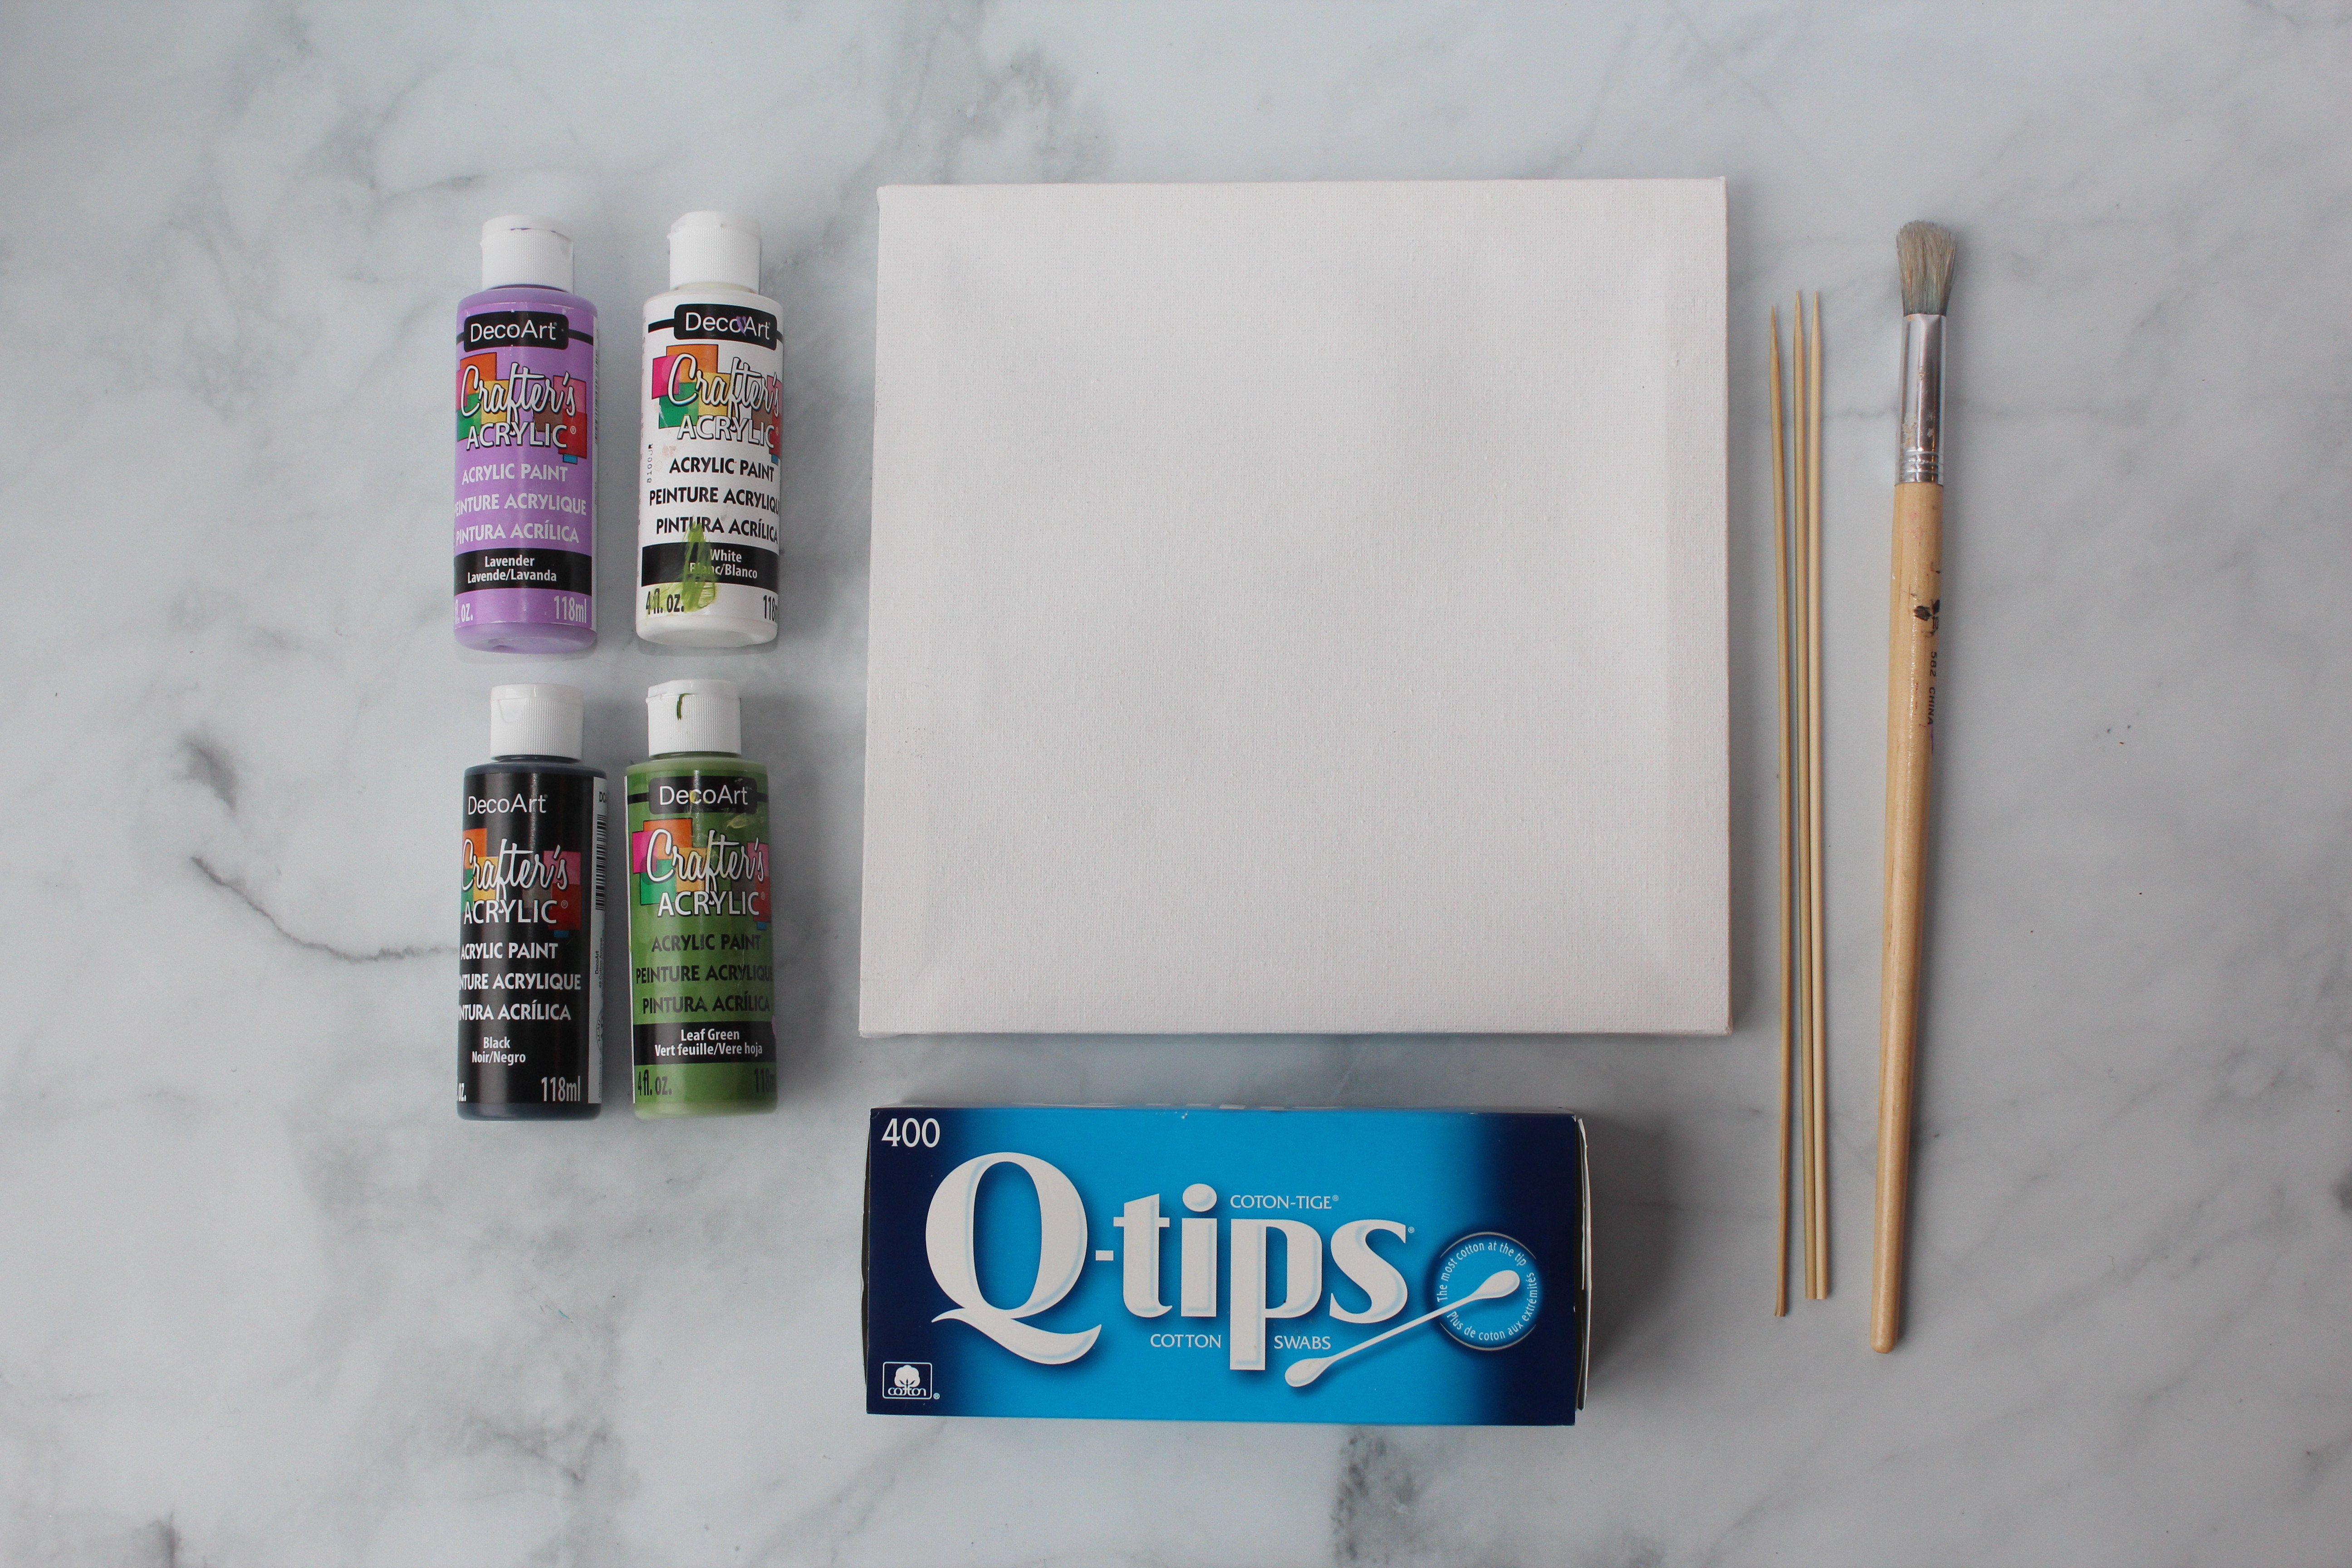
1. DecoArt Acrylic Paints in African Violet, Lavender, Leaf Green, White, and Black
5.Cup of Water
6. Paper towel and salt (for texture)
7. Qtips (cotton swabs)
8. Paper Plate or pallet to mix paint
9.Spray bottle filled with water
How to Paint Lavender Flowers - Step-by-Step Tutorial
Step 1
Follow along with the full-length YouTube tutorial here if you prefer video instruction (plus I'll share a few extra tips along the way).
Step 2
Lightly spray your canvas with some water. Not too much water, you don't want it to be pooling or rolling down your canvas. You just want to moisten the canvas so the paint glides across smoother in the next step. (Optional)
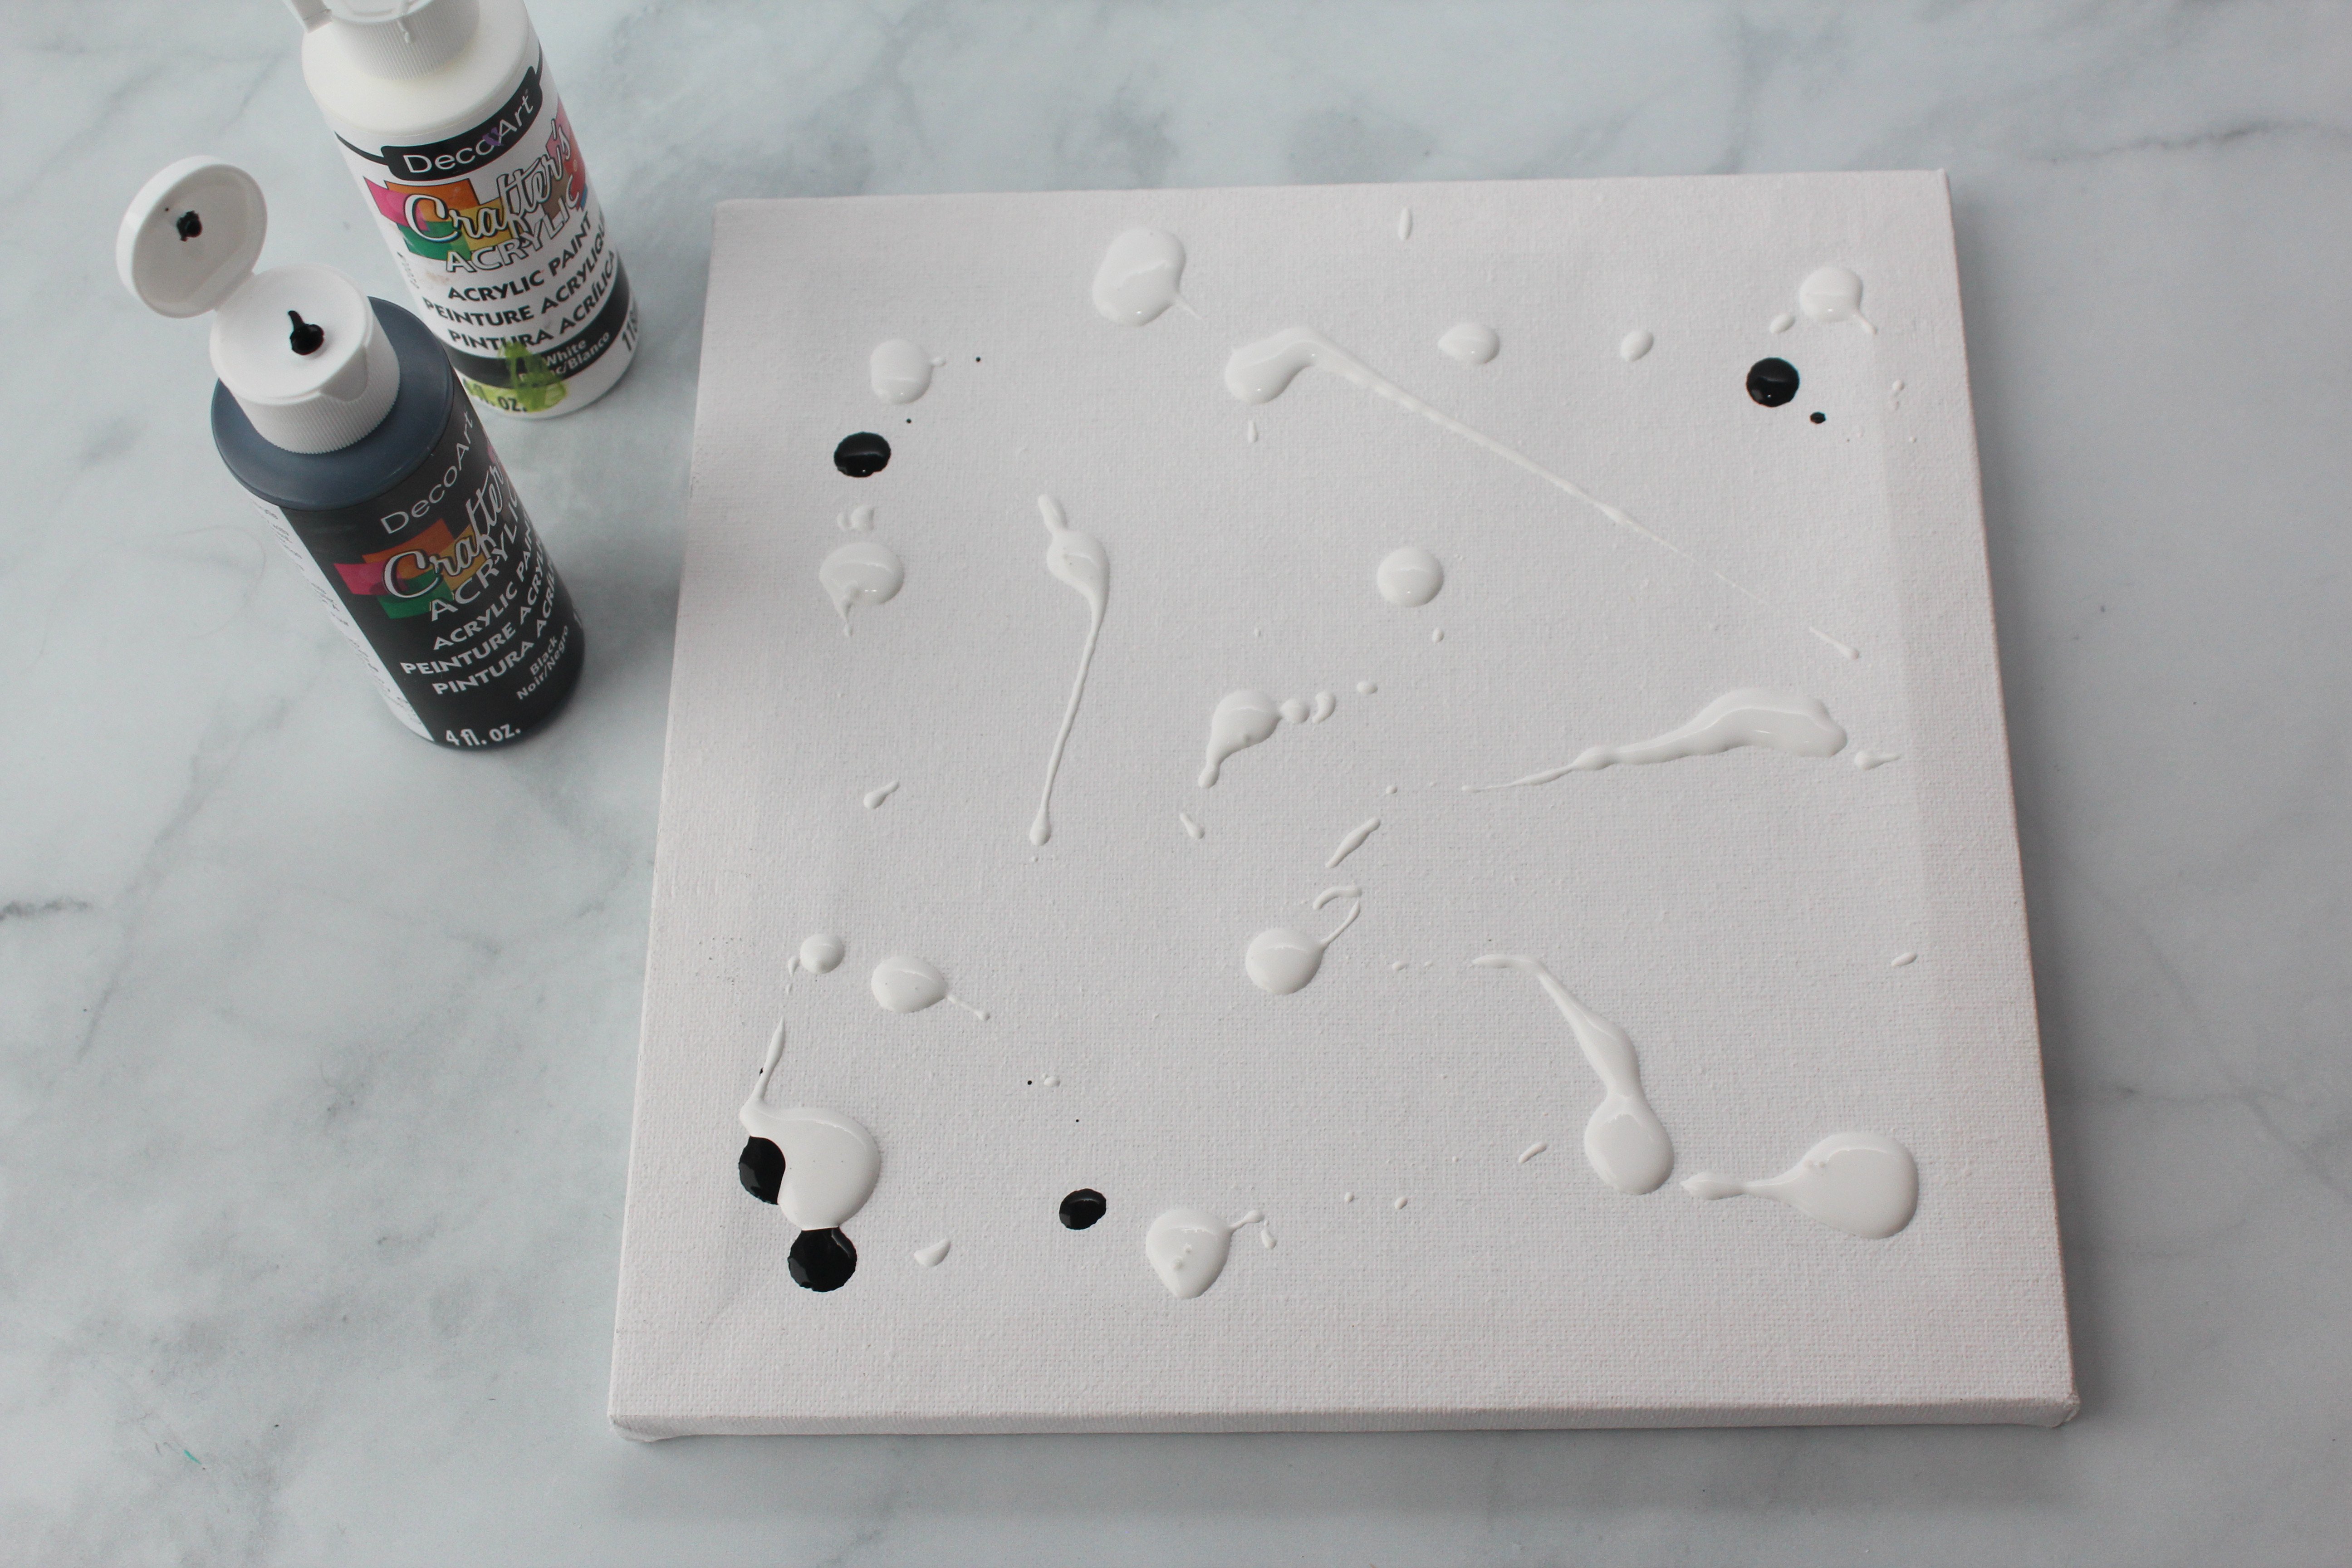
Step 3
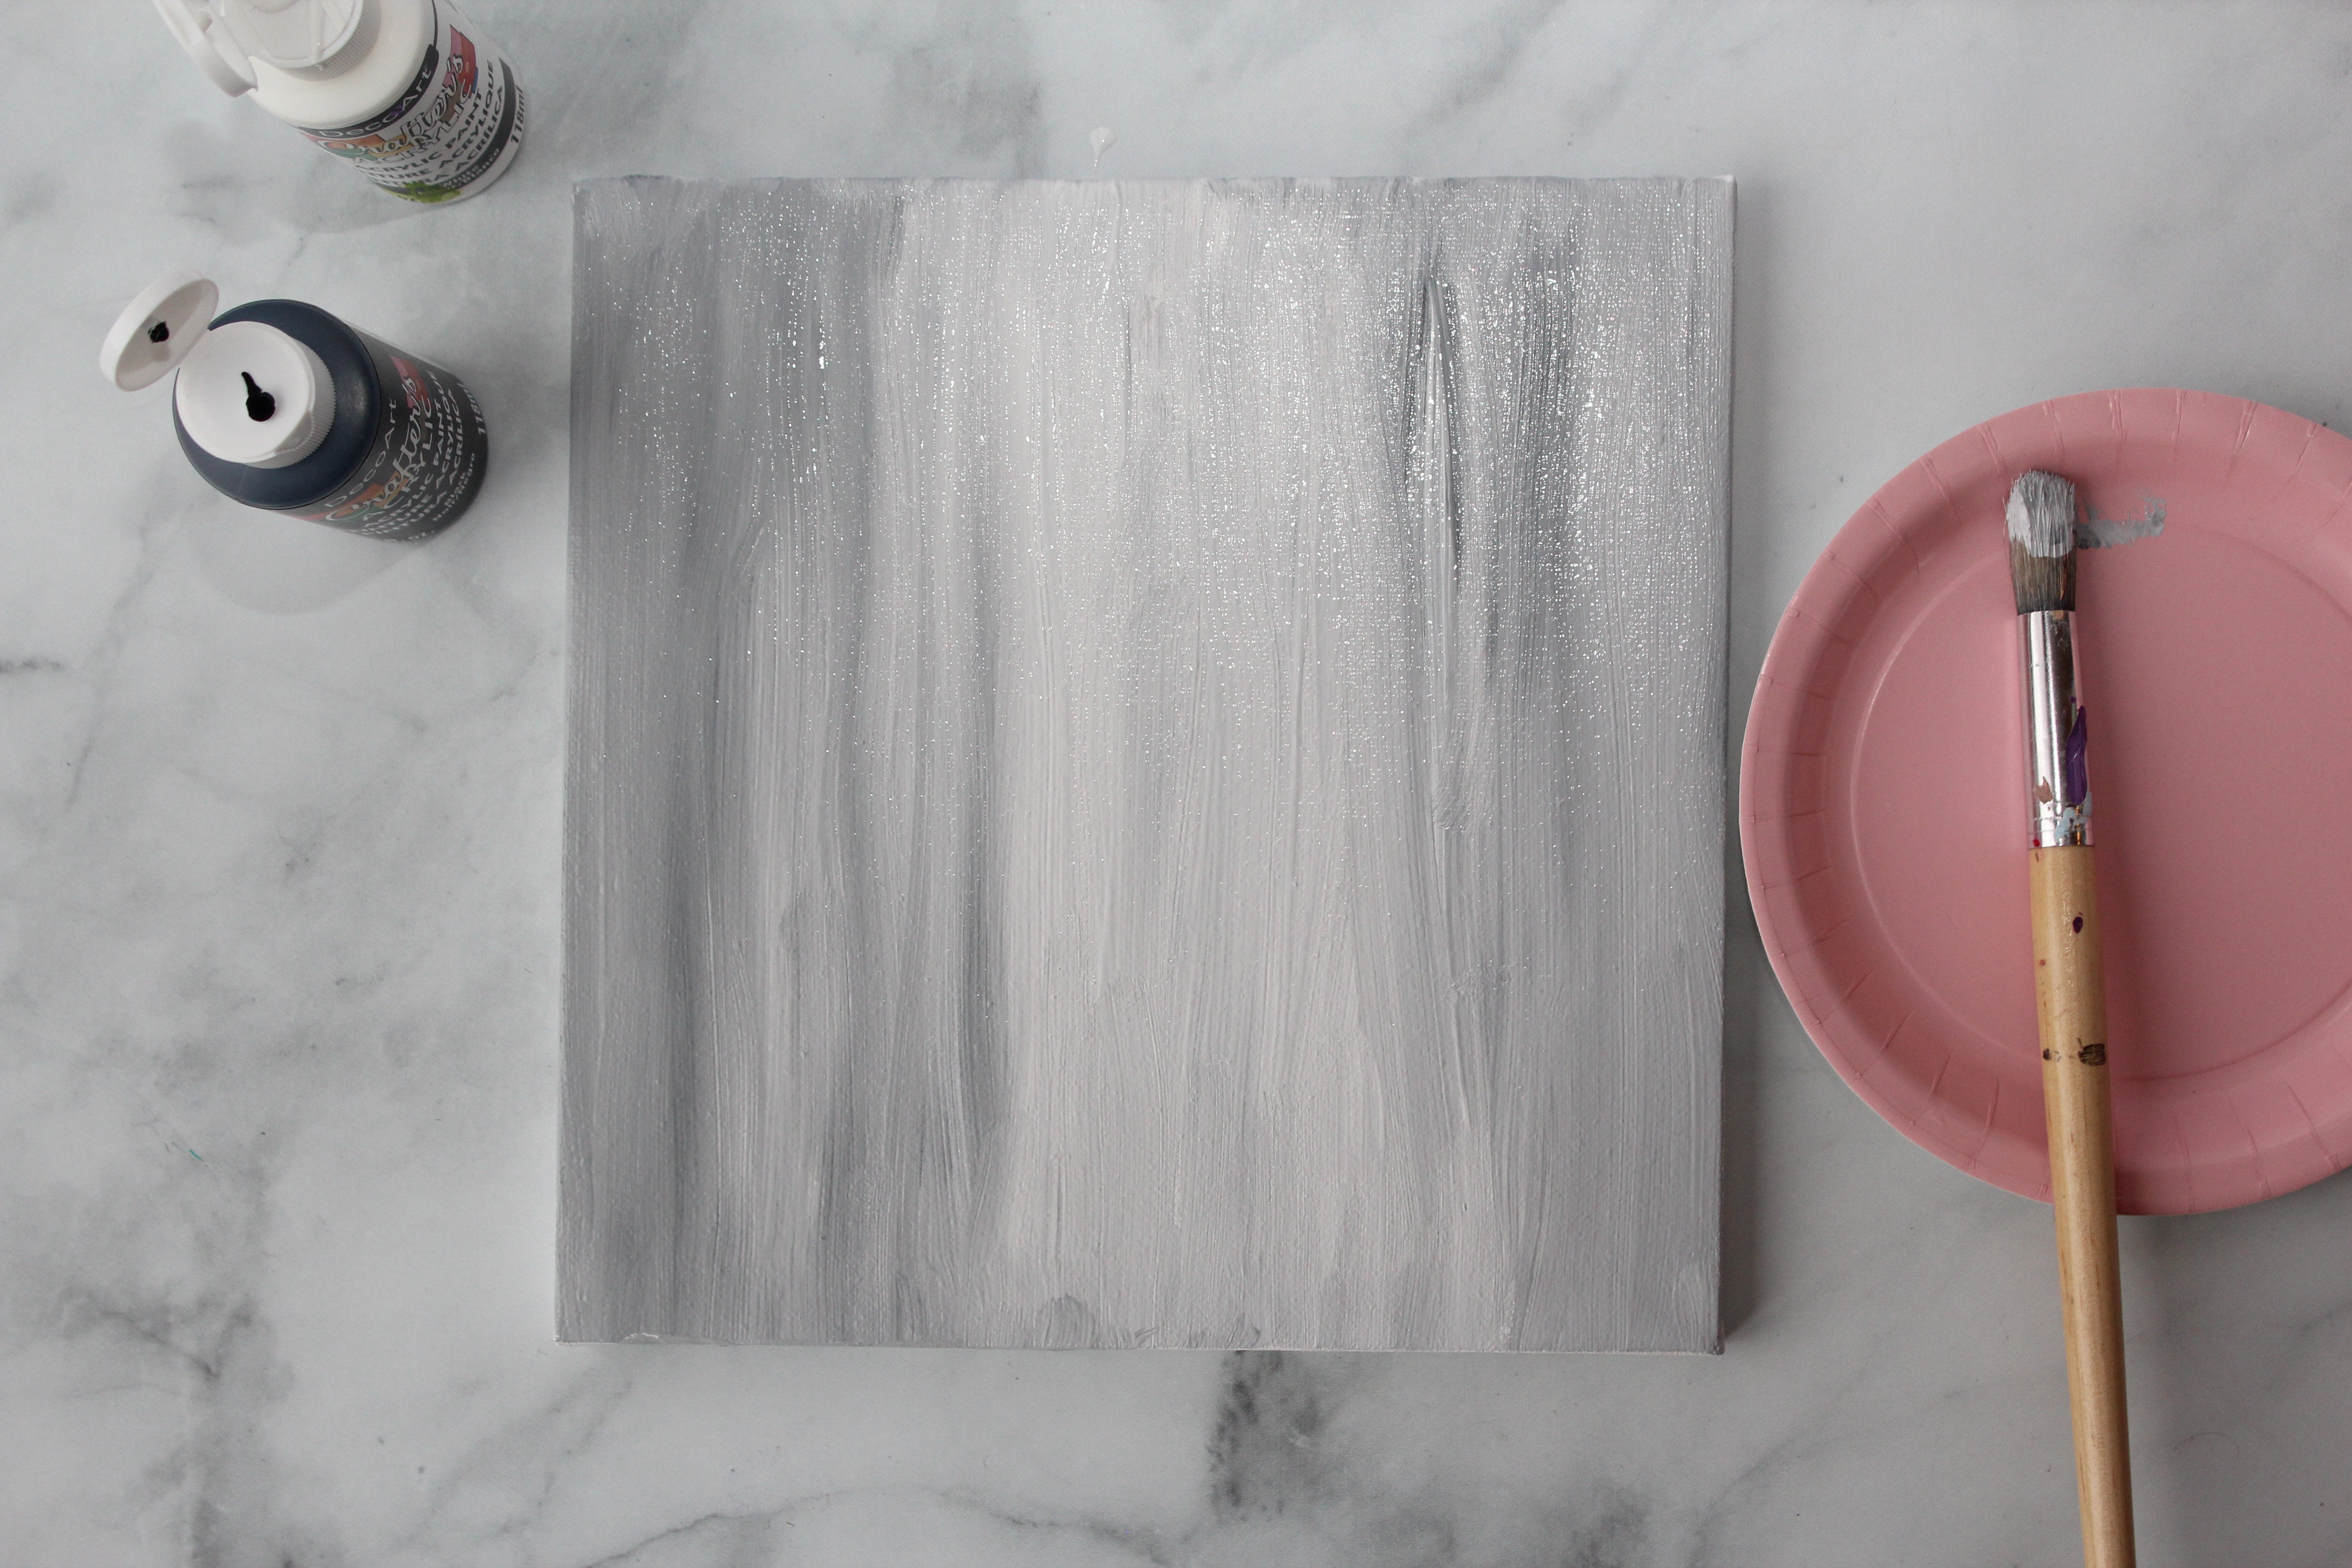
Add a few drops of white acrylic paints straight onto your canvas, along with 3-4 drops of black paint (focusing on the outer edges). Black is a very strong pigment, so a tiny bit goes a long way.
Step 4
Using a medium size paintbrush, use long vertical strokes to blend your white and black paint.
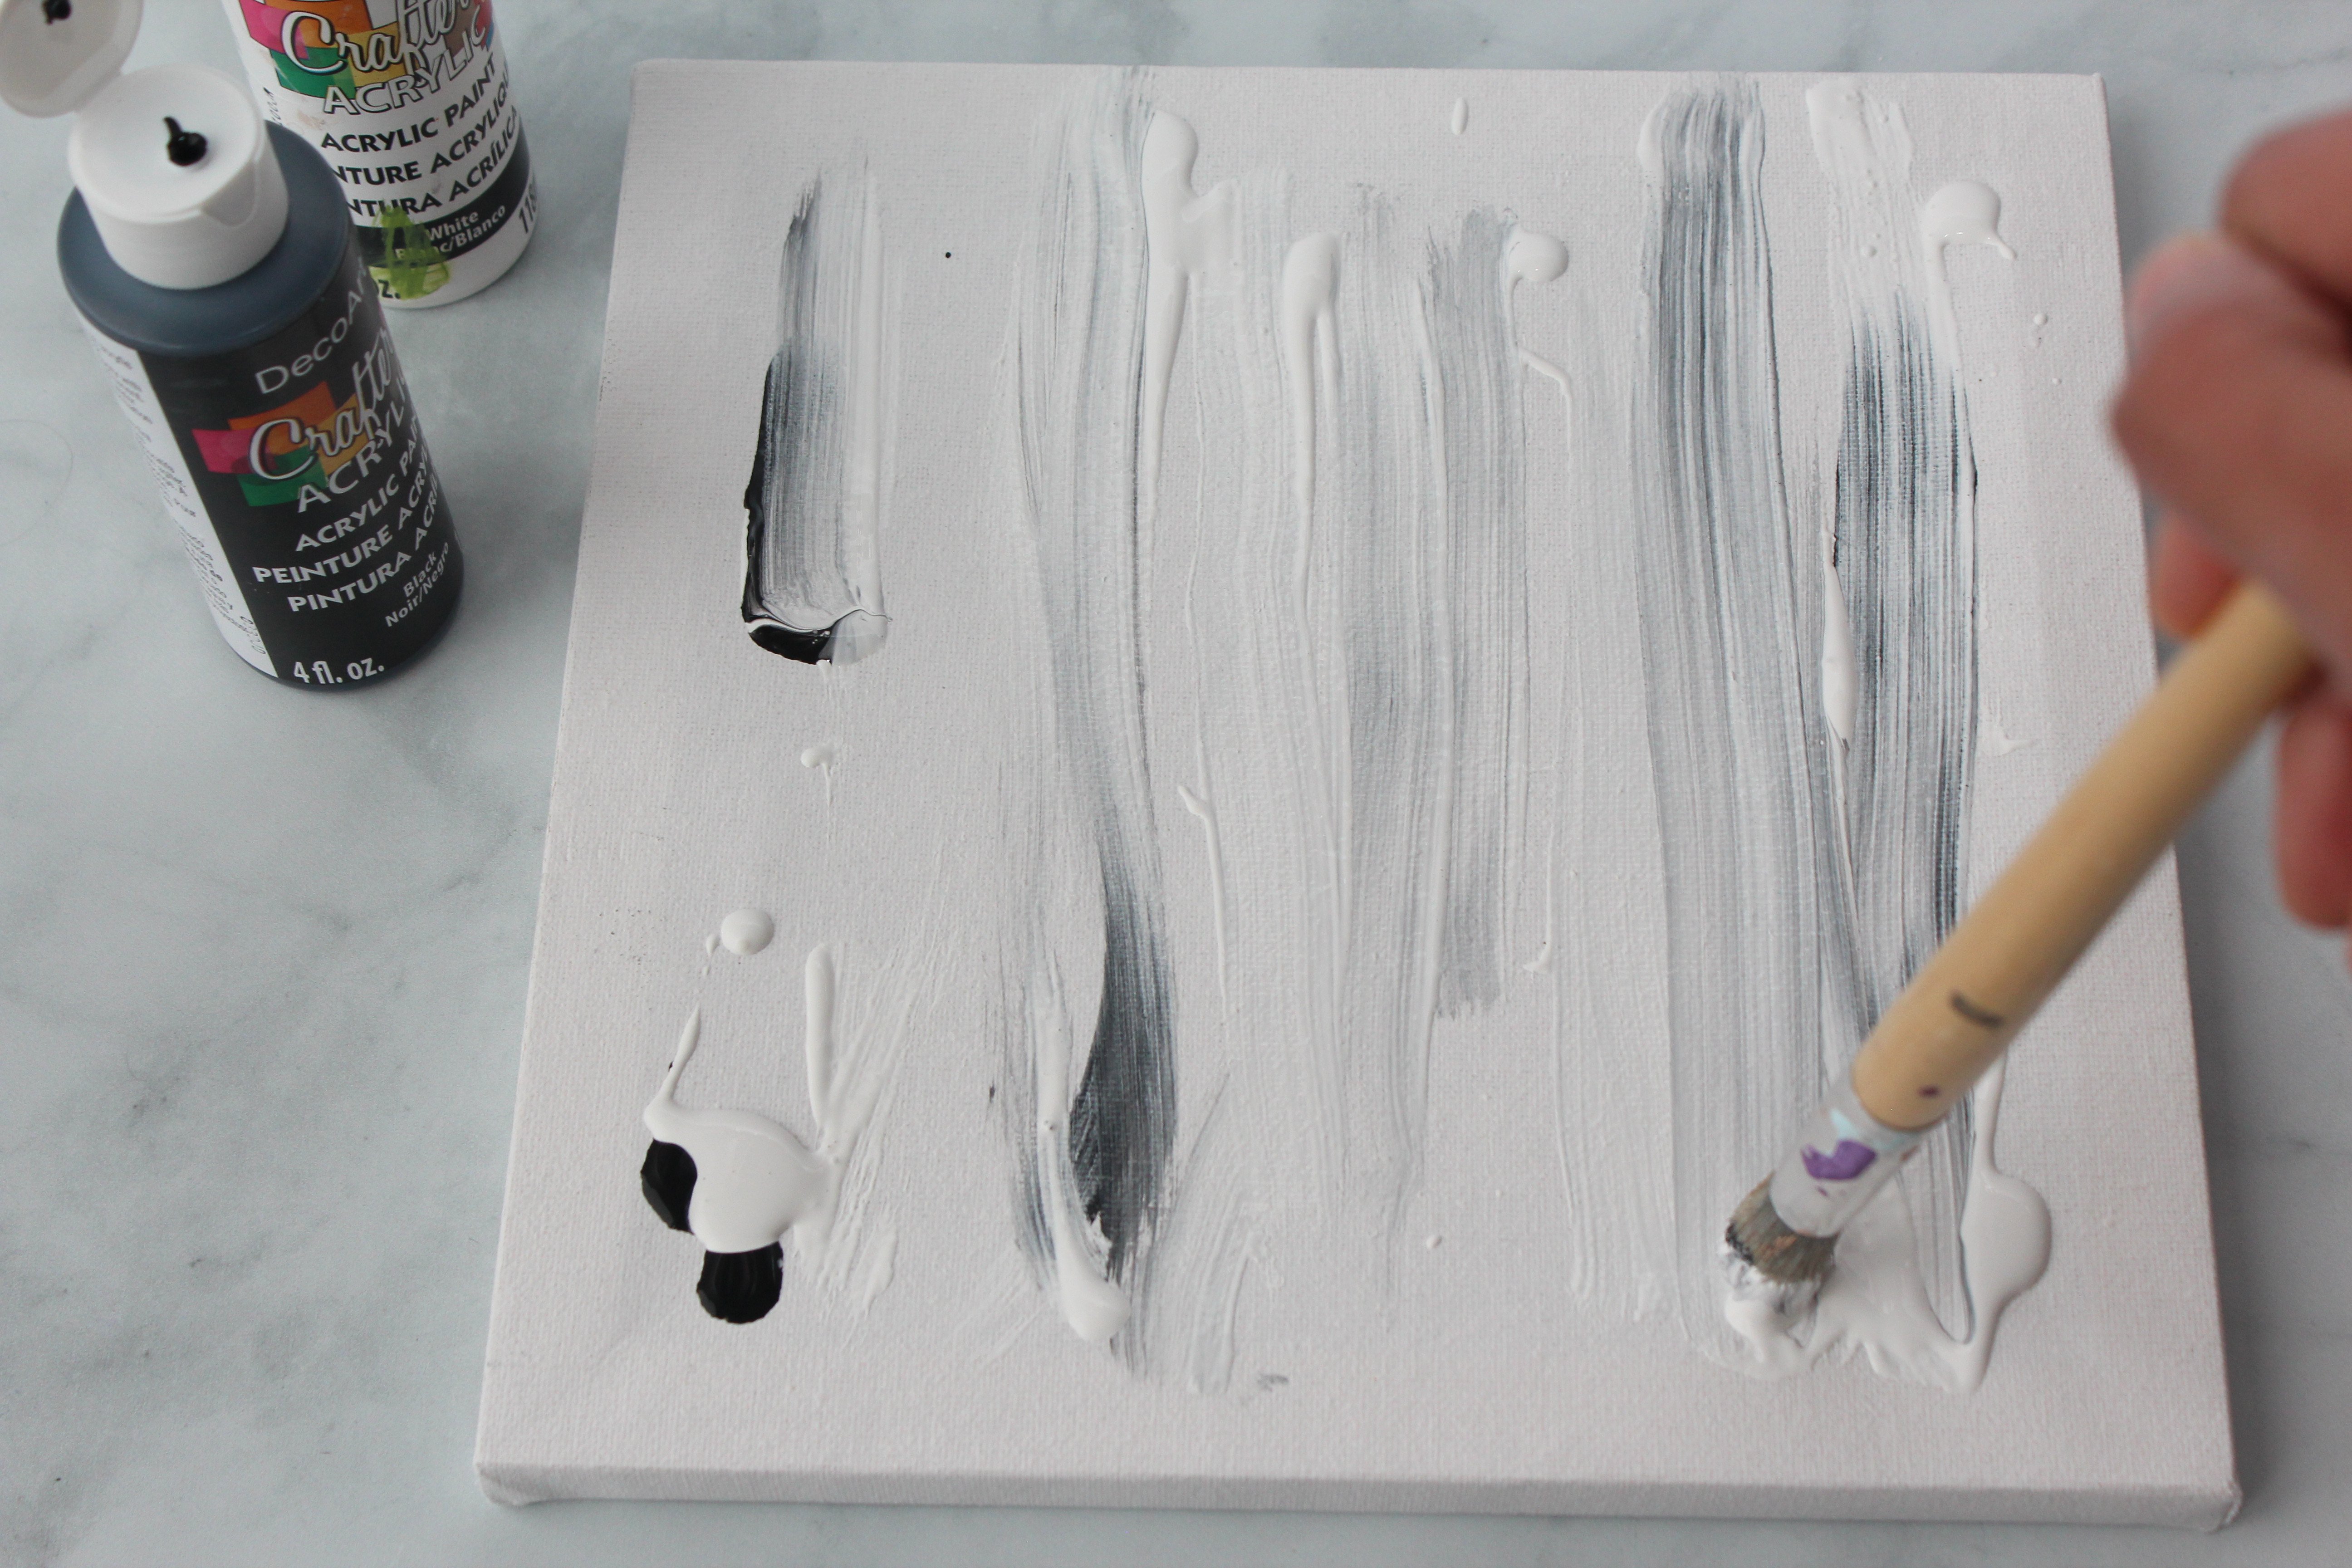
Step 5
If your grey background is too light after this step you can add in more black and re-blend. Its easier to make make your background darker, but harder to lighten it up after its too dark. So its best to add a drop or 2 of black at a time and gauge your results.
Step 6
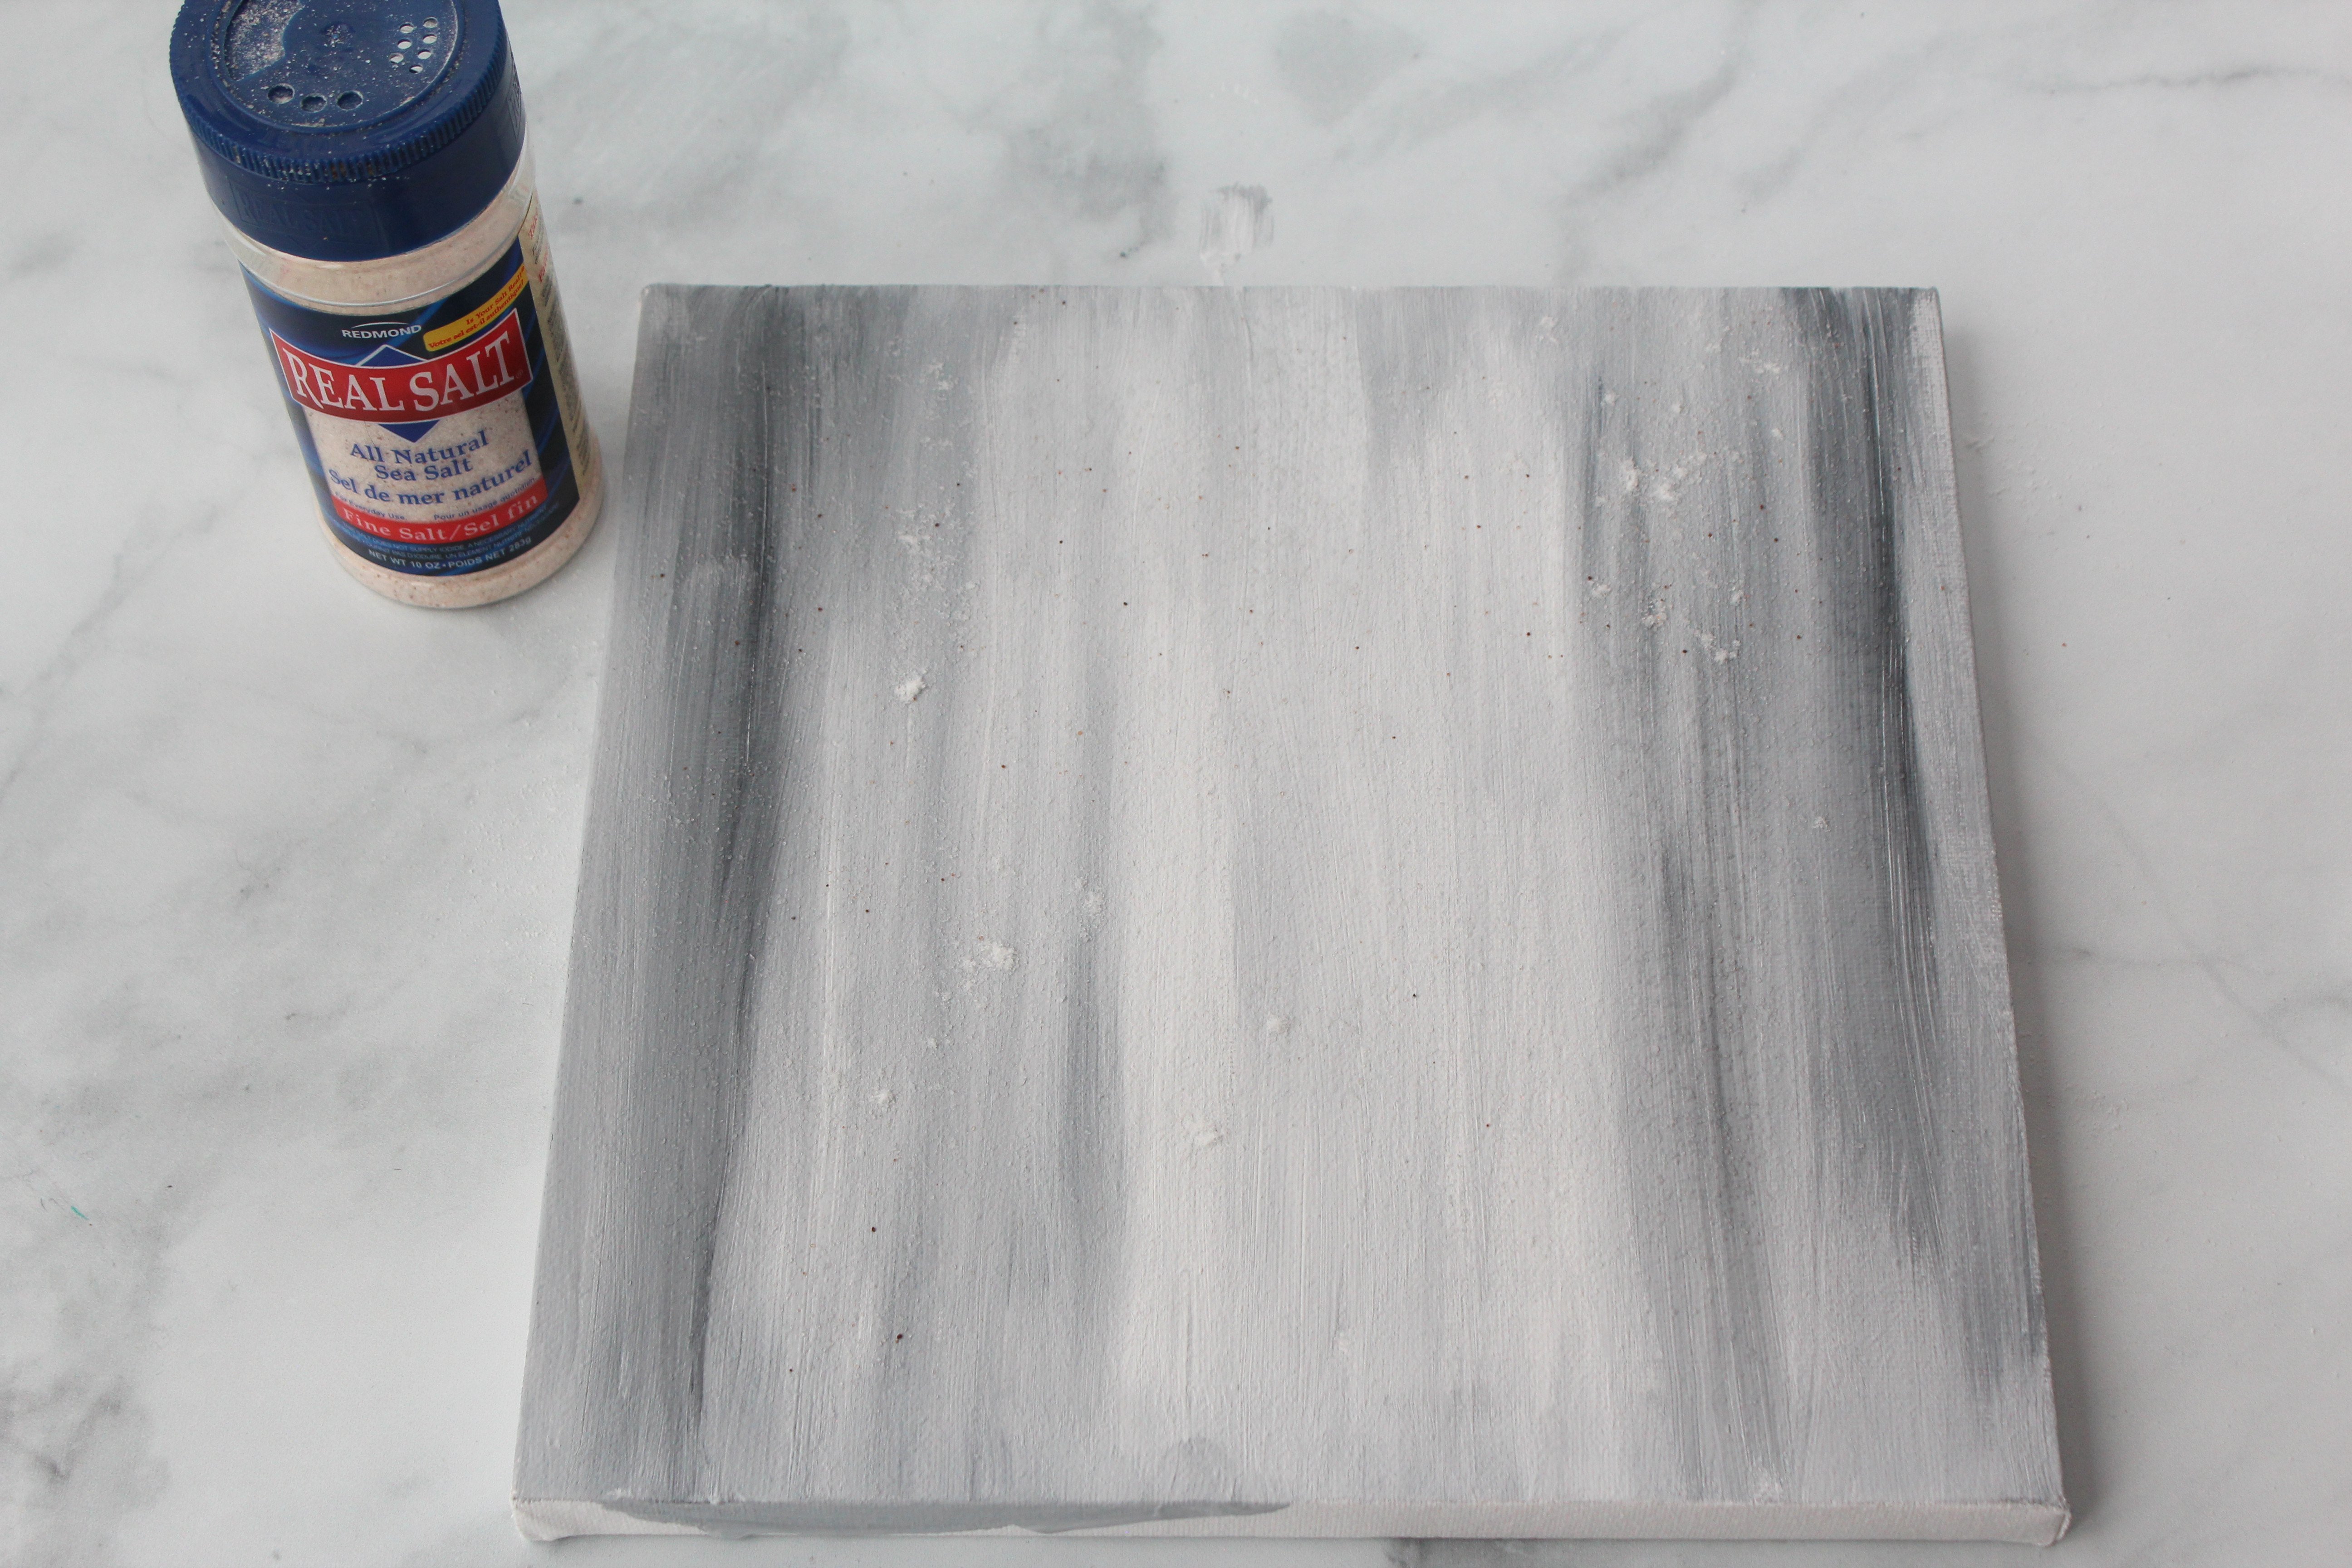
To add a bit of texture to the top portion of the painting (the bottom portion will be covered with flowers), sprinkle some salt (the chunkier the grains of salt the better) into the wet paint. Once the paint dries the salt will add a nifty "bumpy" texture look to it.
Step 7
(Optional) Taking a paper towel (preferably one with a pattern design on it), dab on a couple drops of white pain to create some extra texture in some areas. The background will look more interesting with a mixture of textures and paint strokes.
Step 8
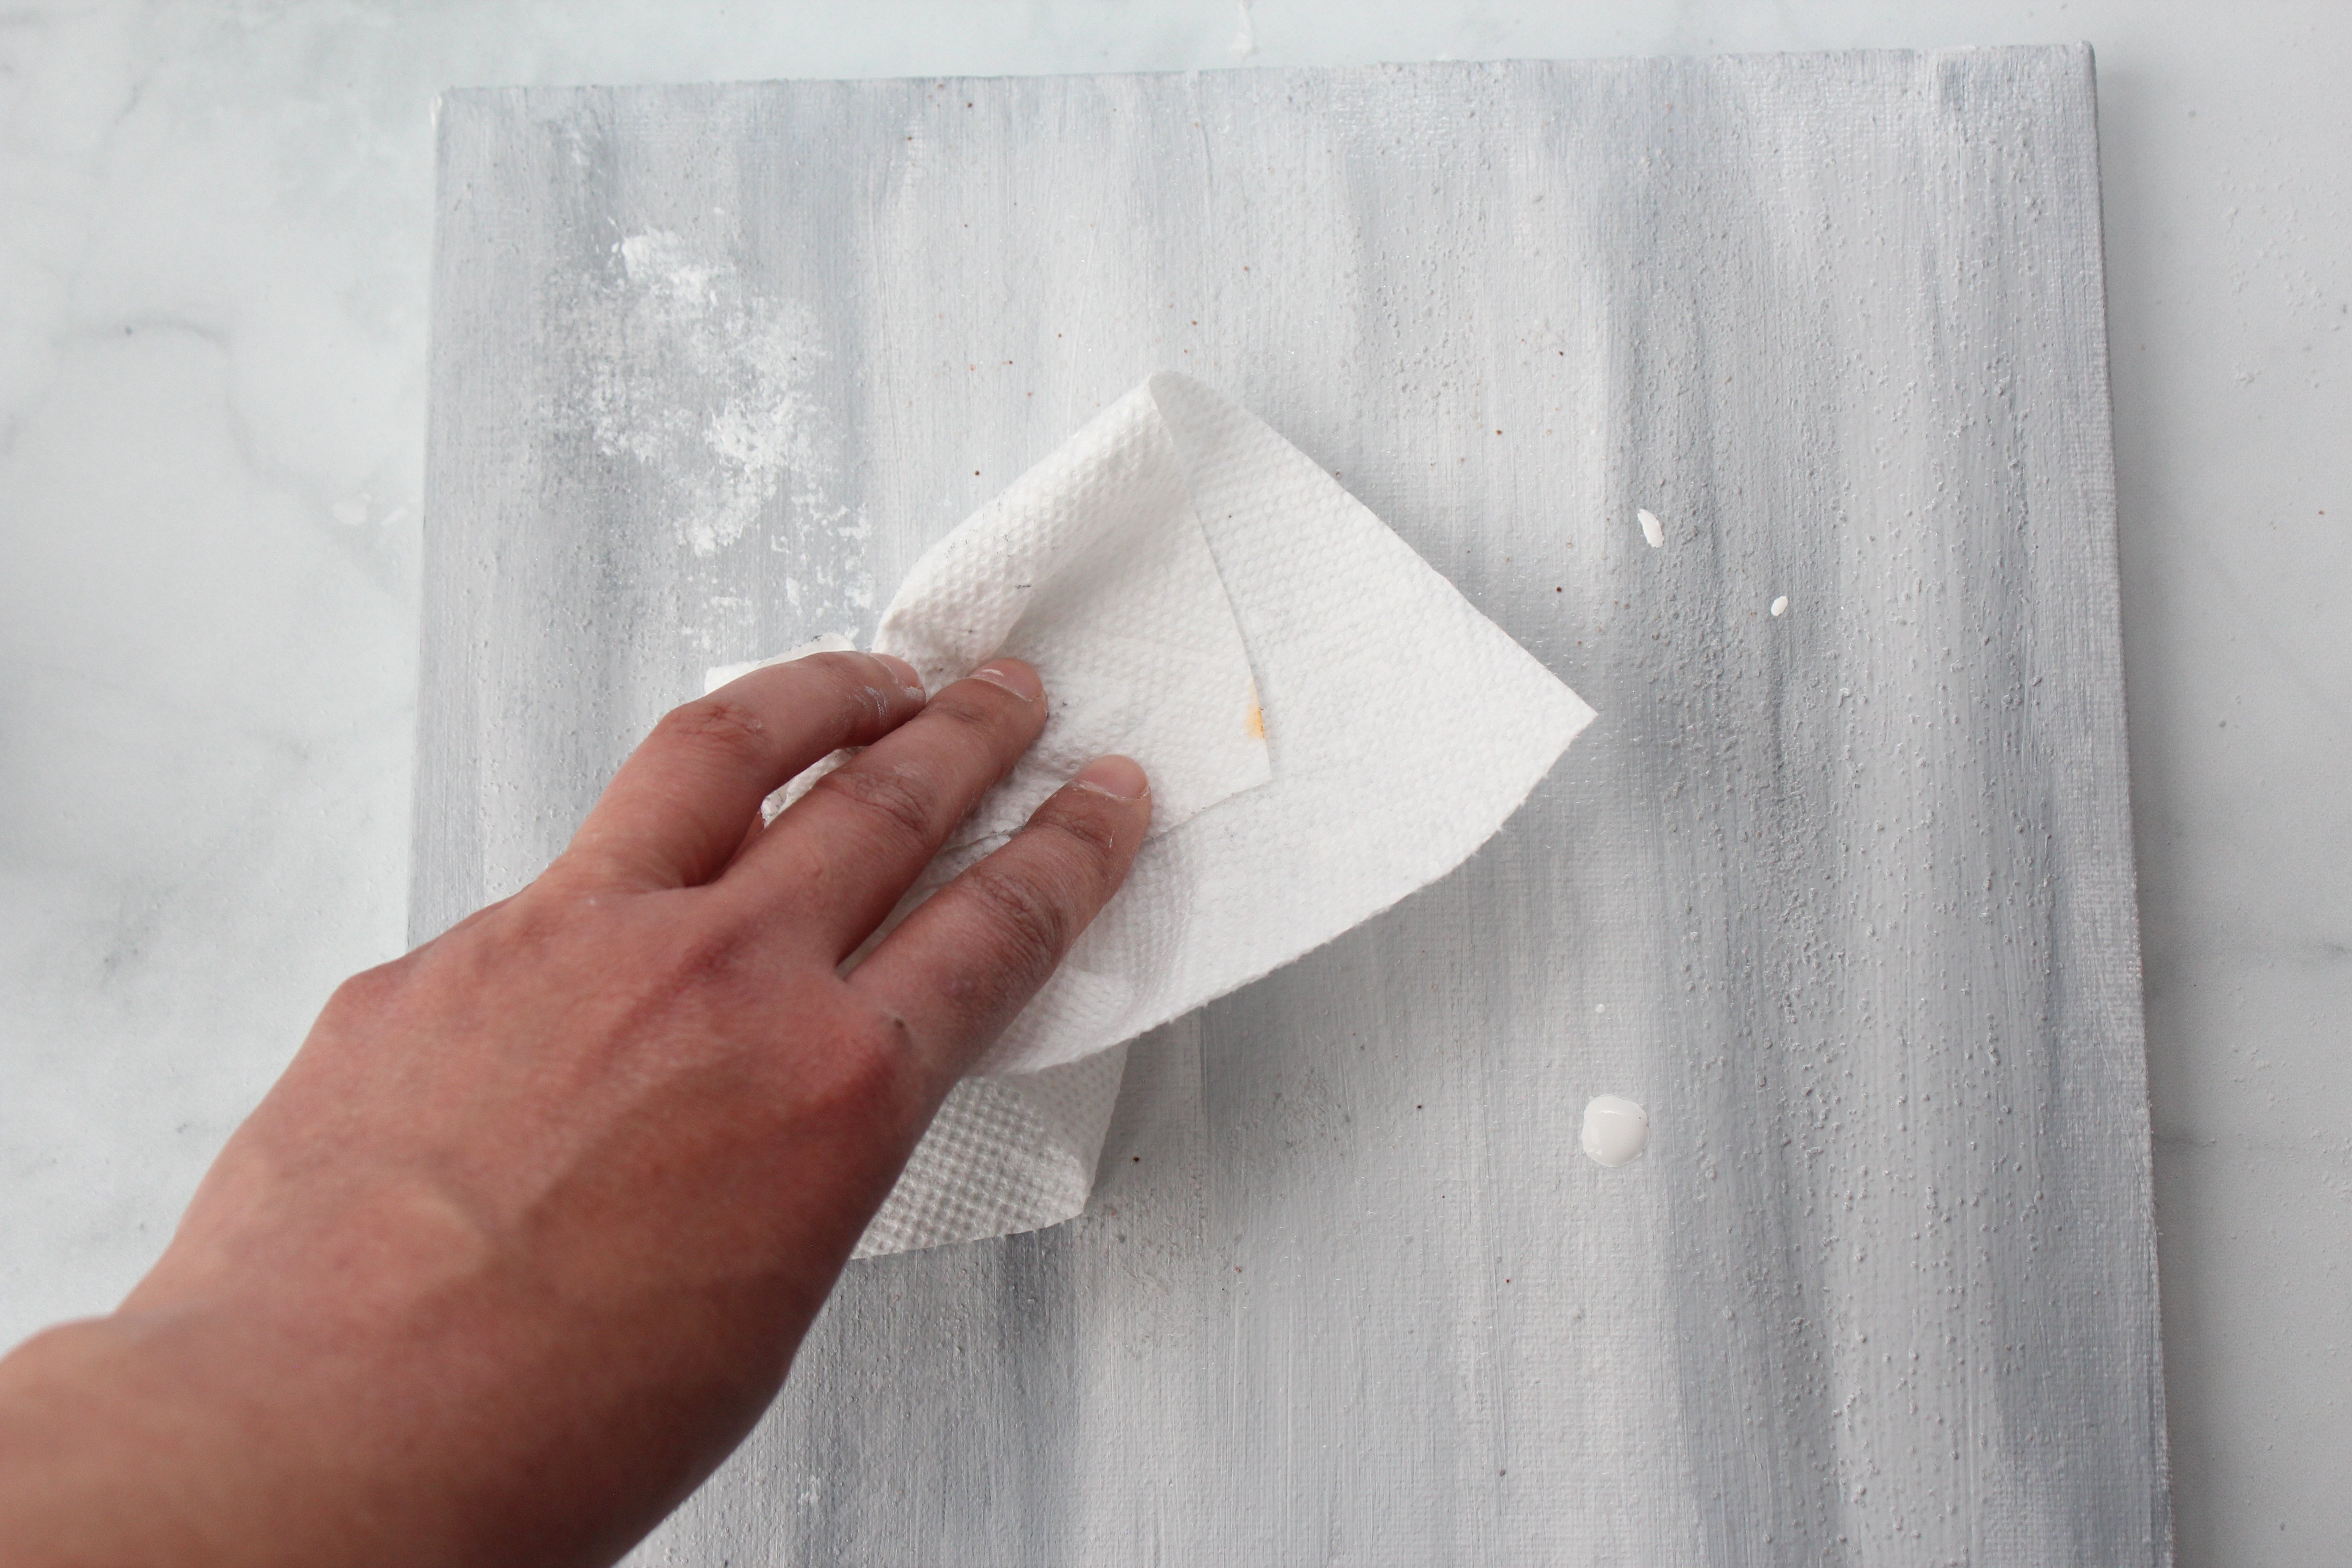
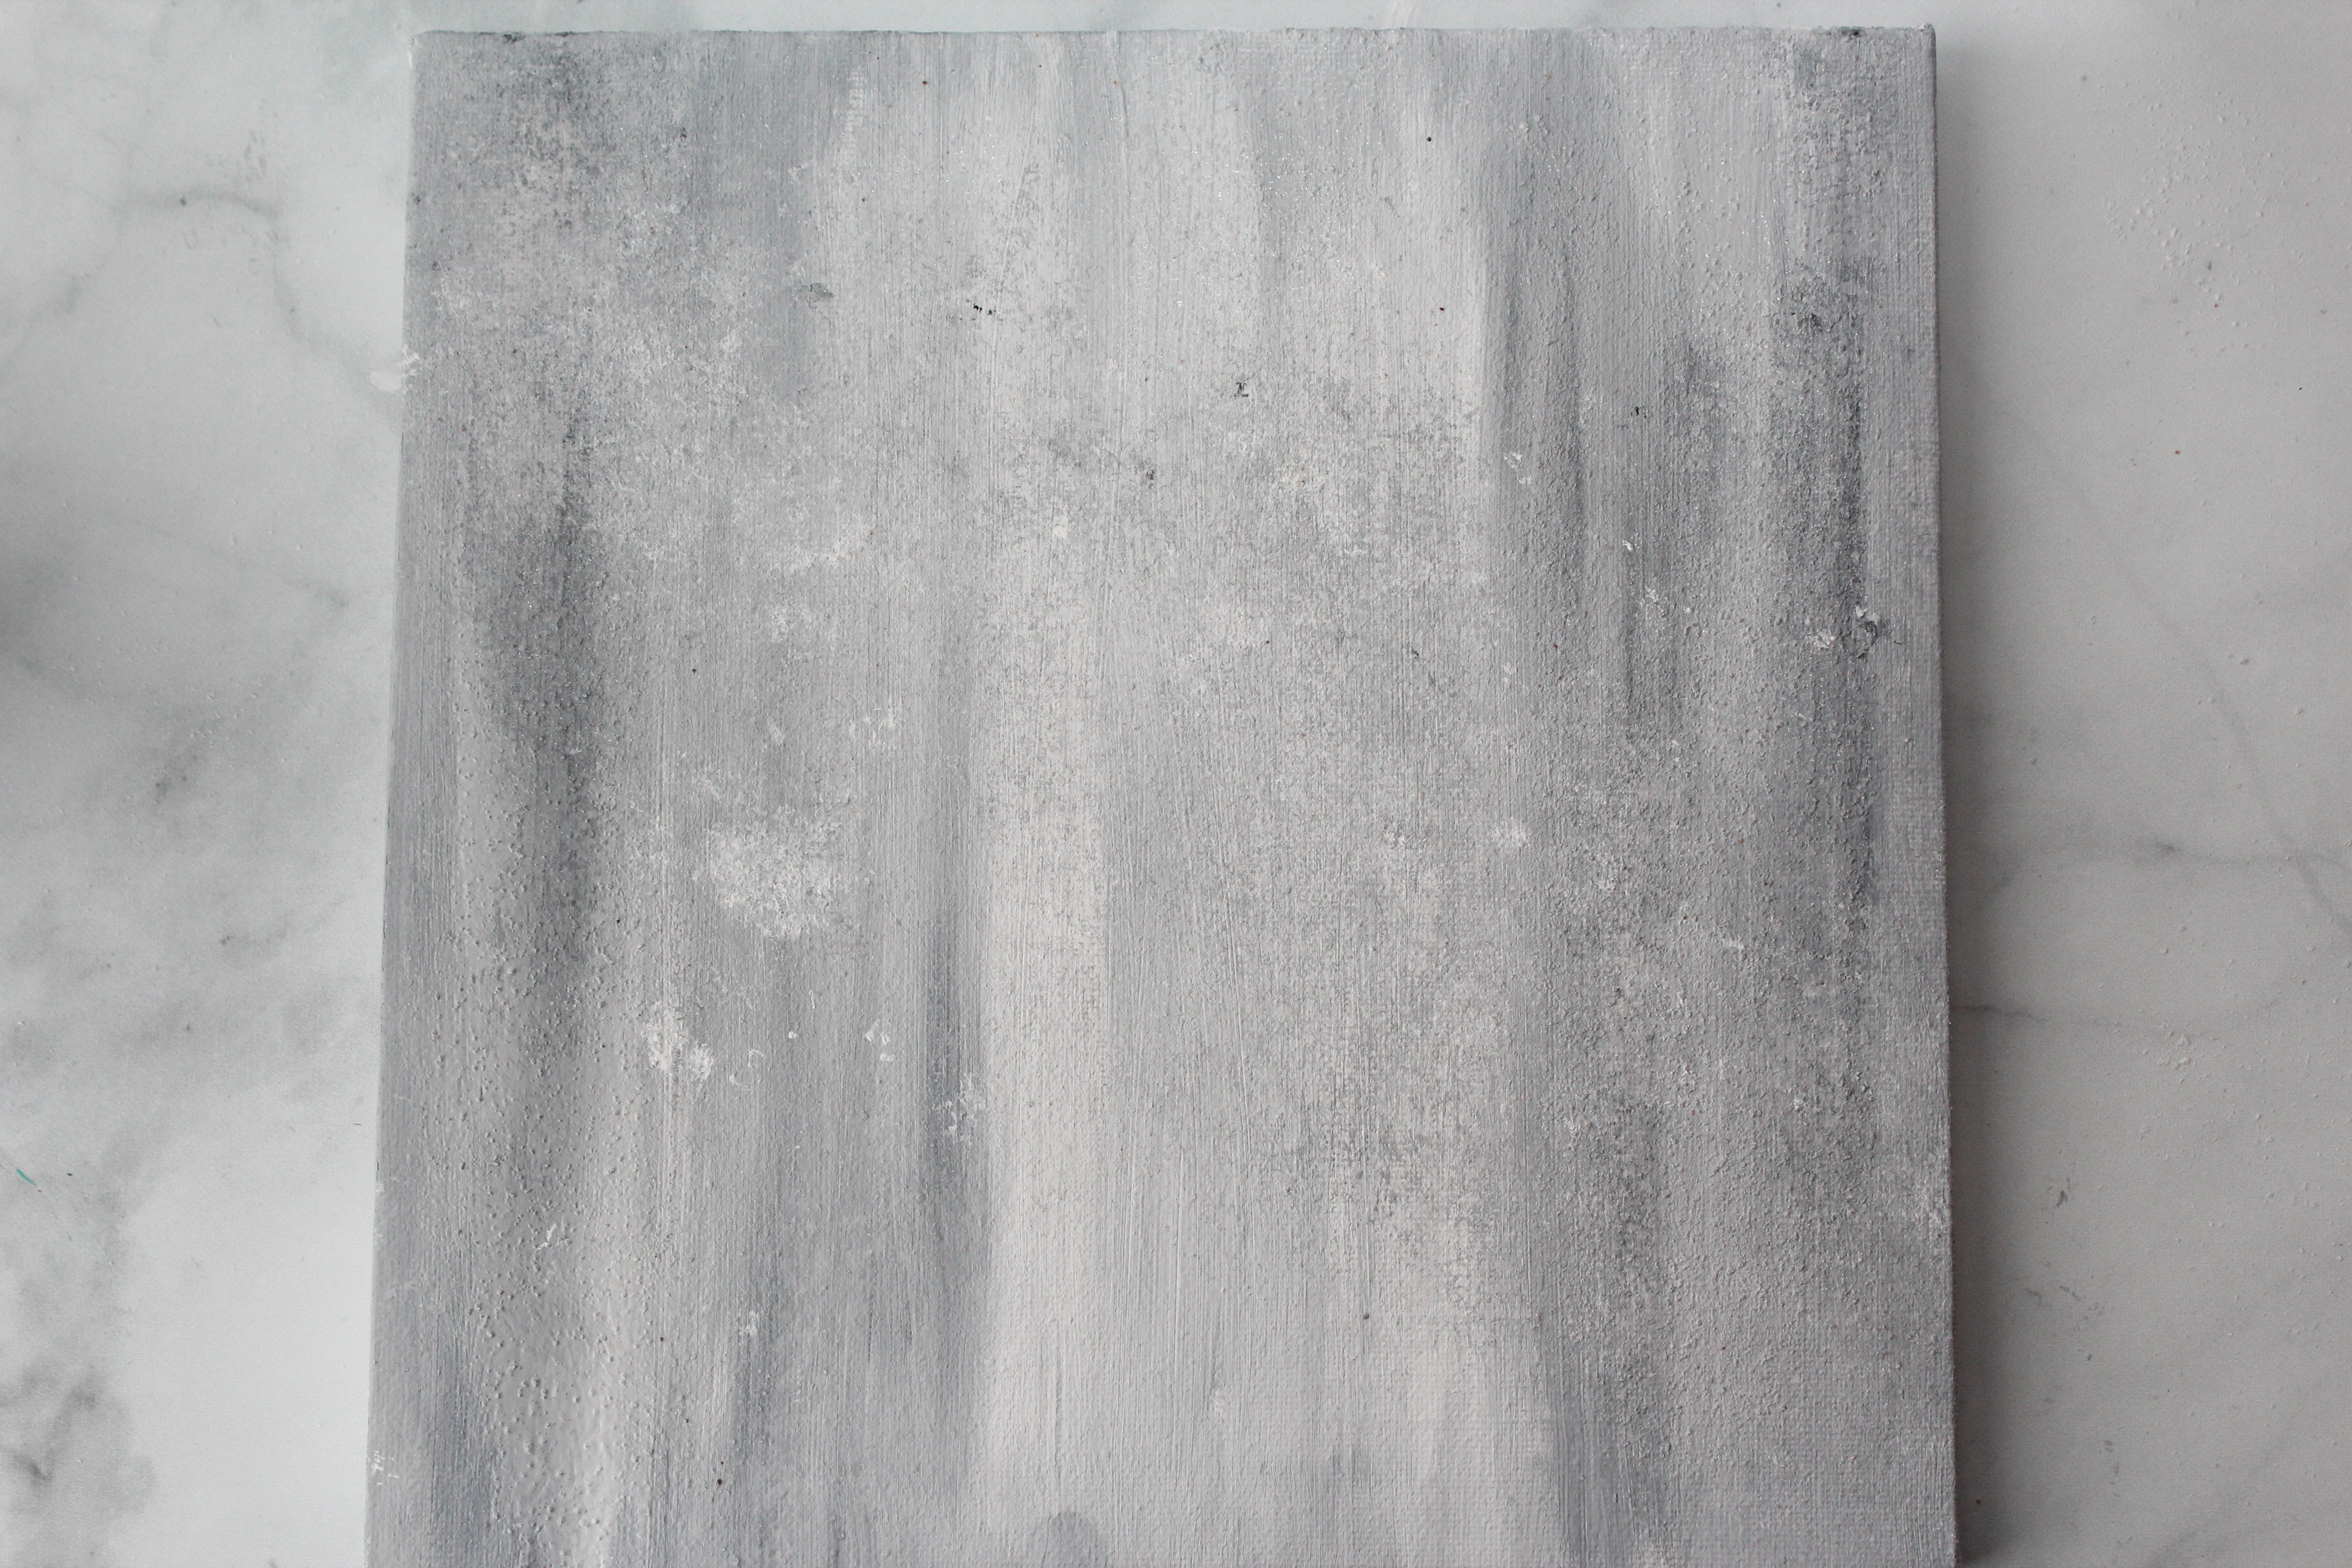
Let the background dry completely (should only take a few minutes). To speed up drying, use a hair dryer on medium heat.
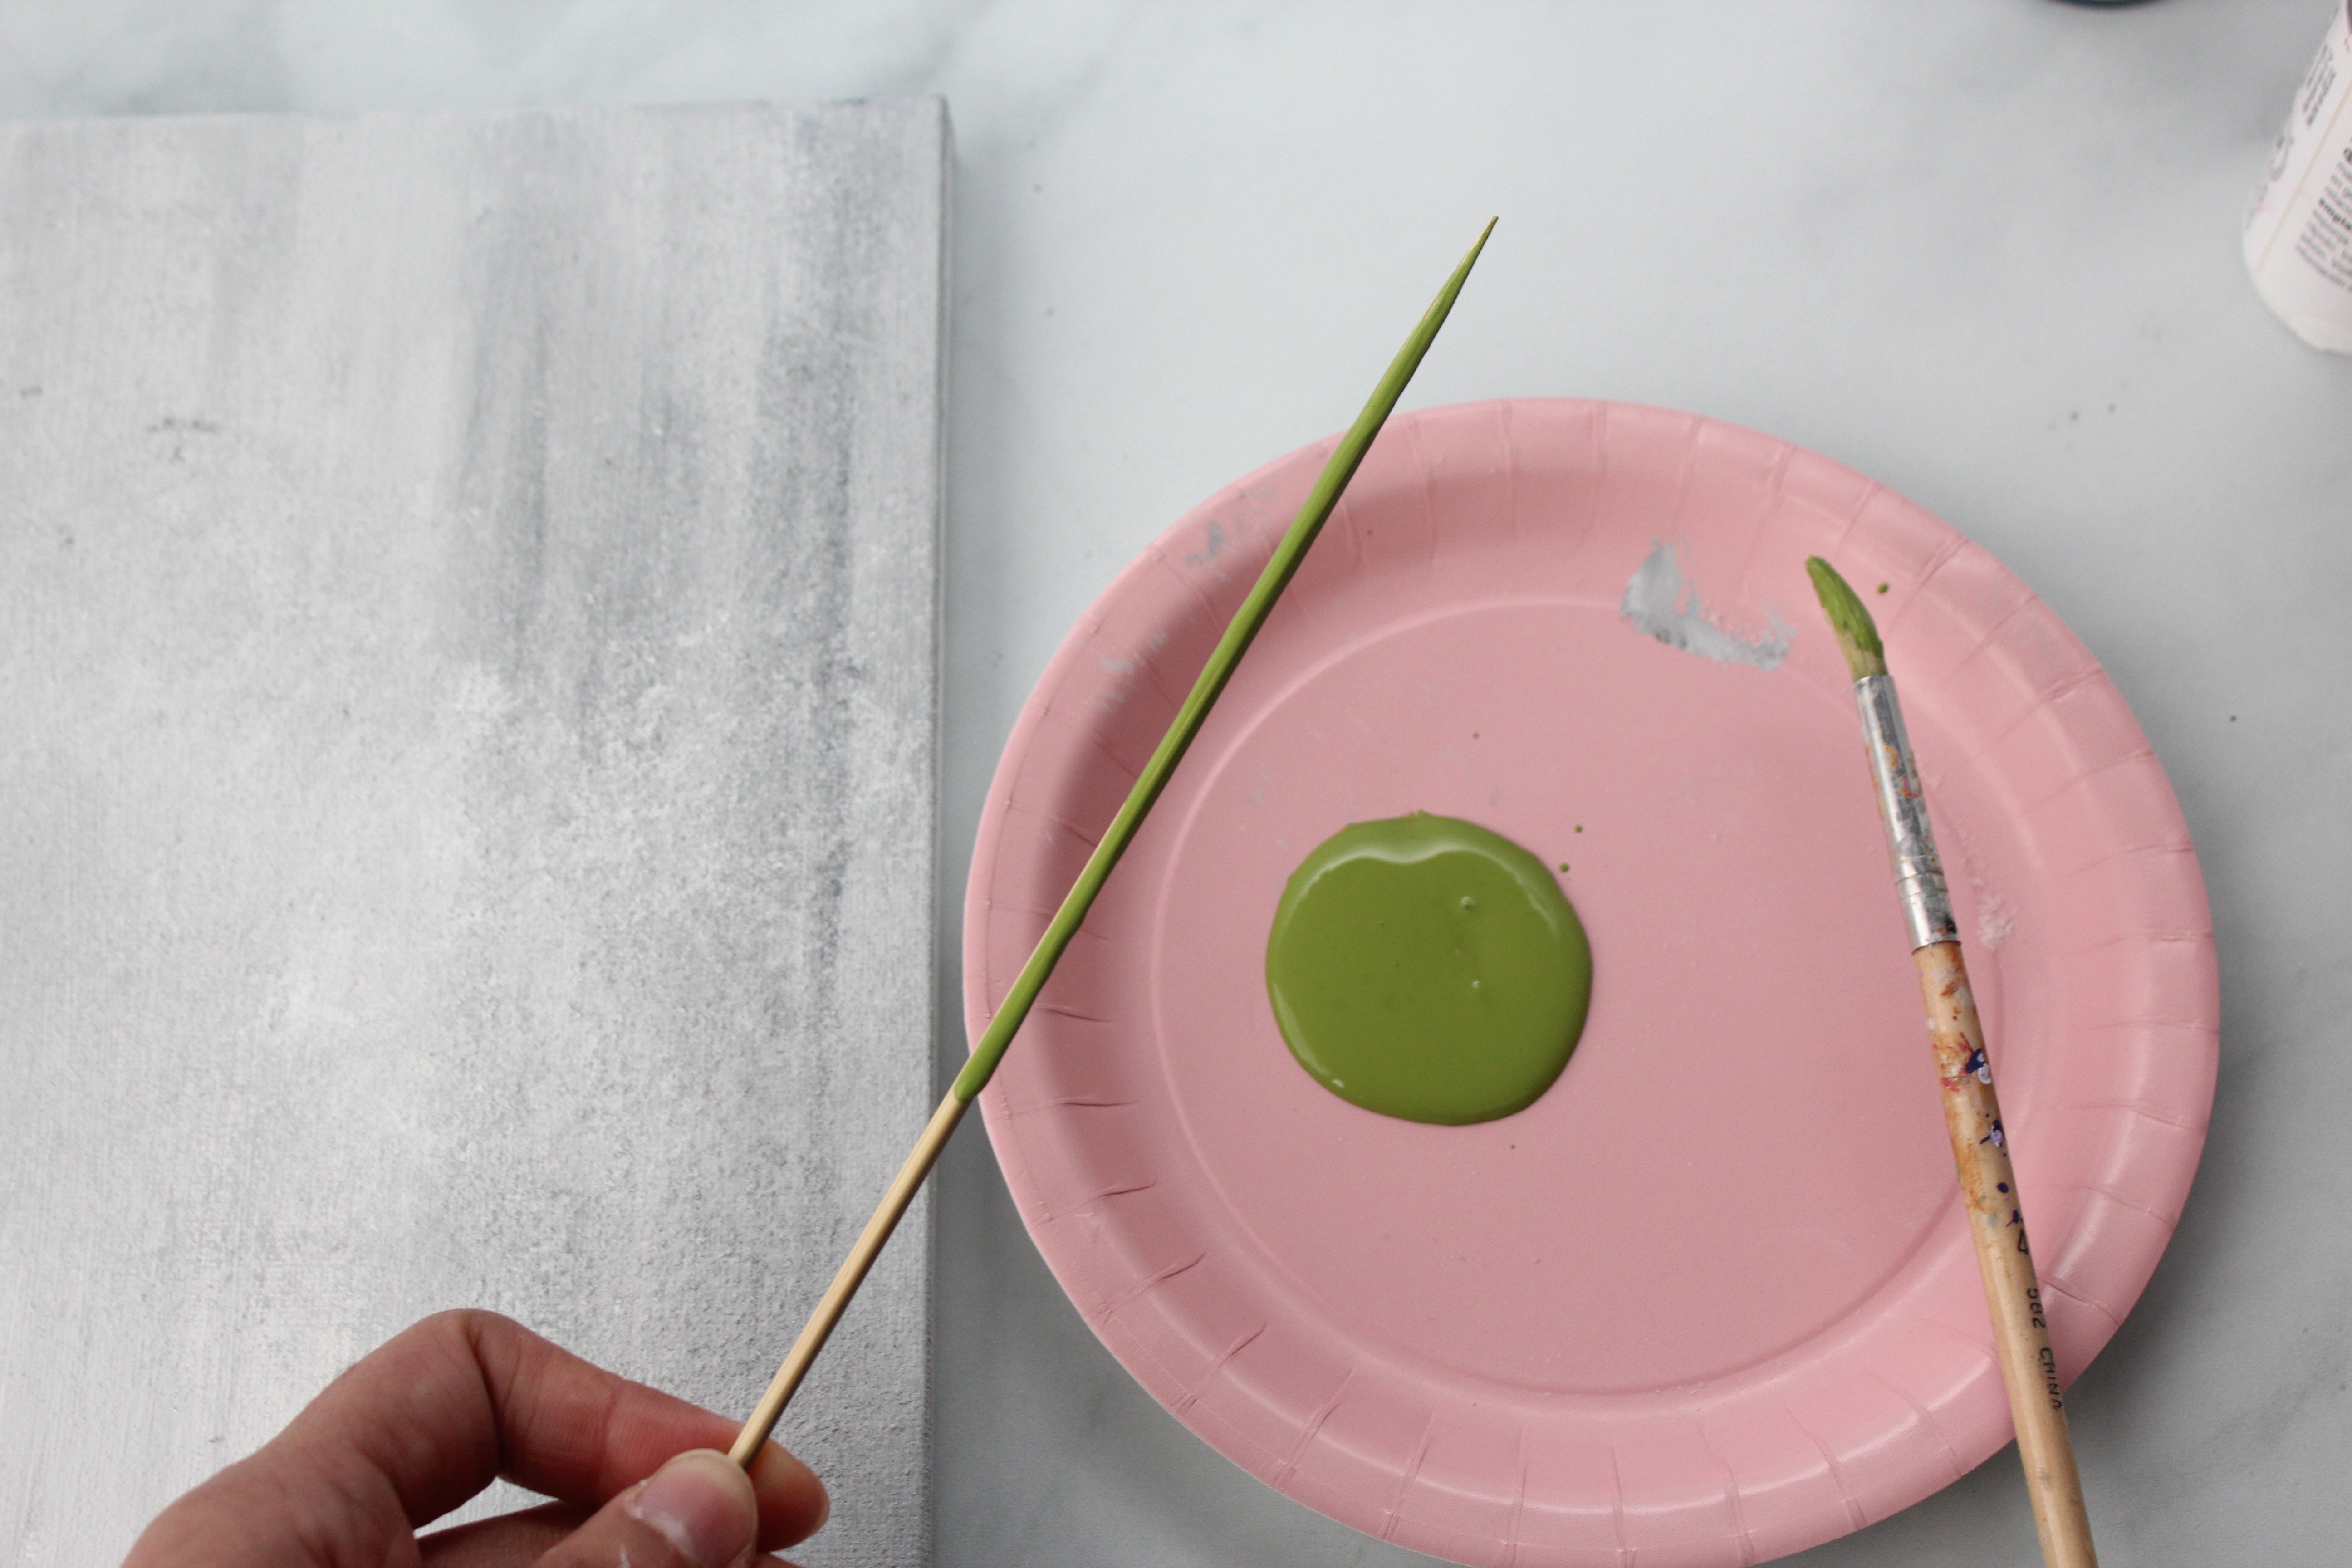
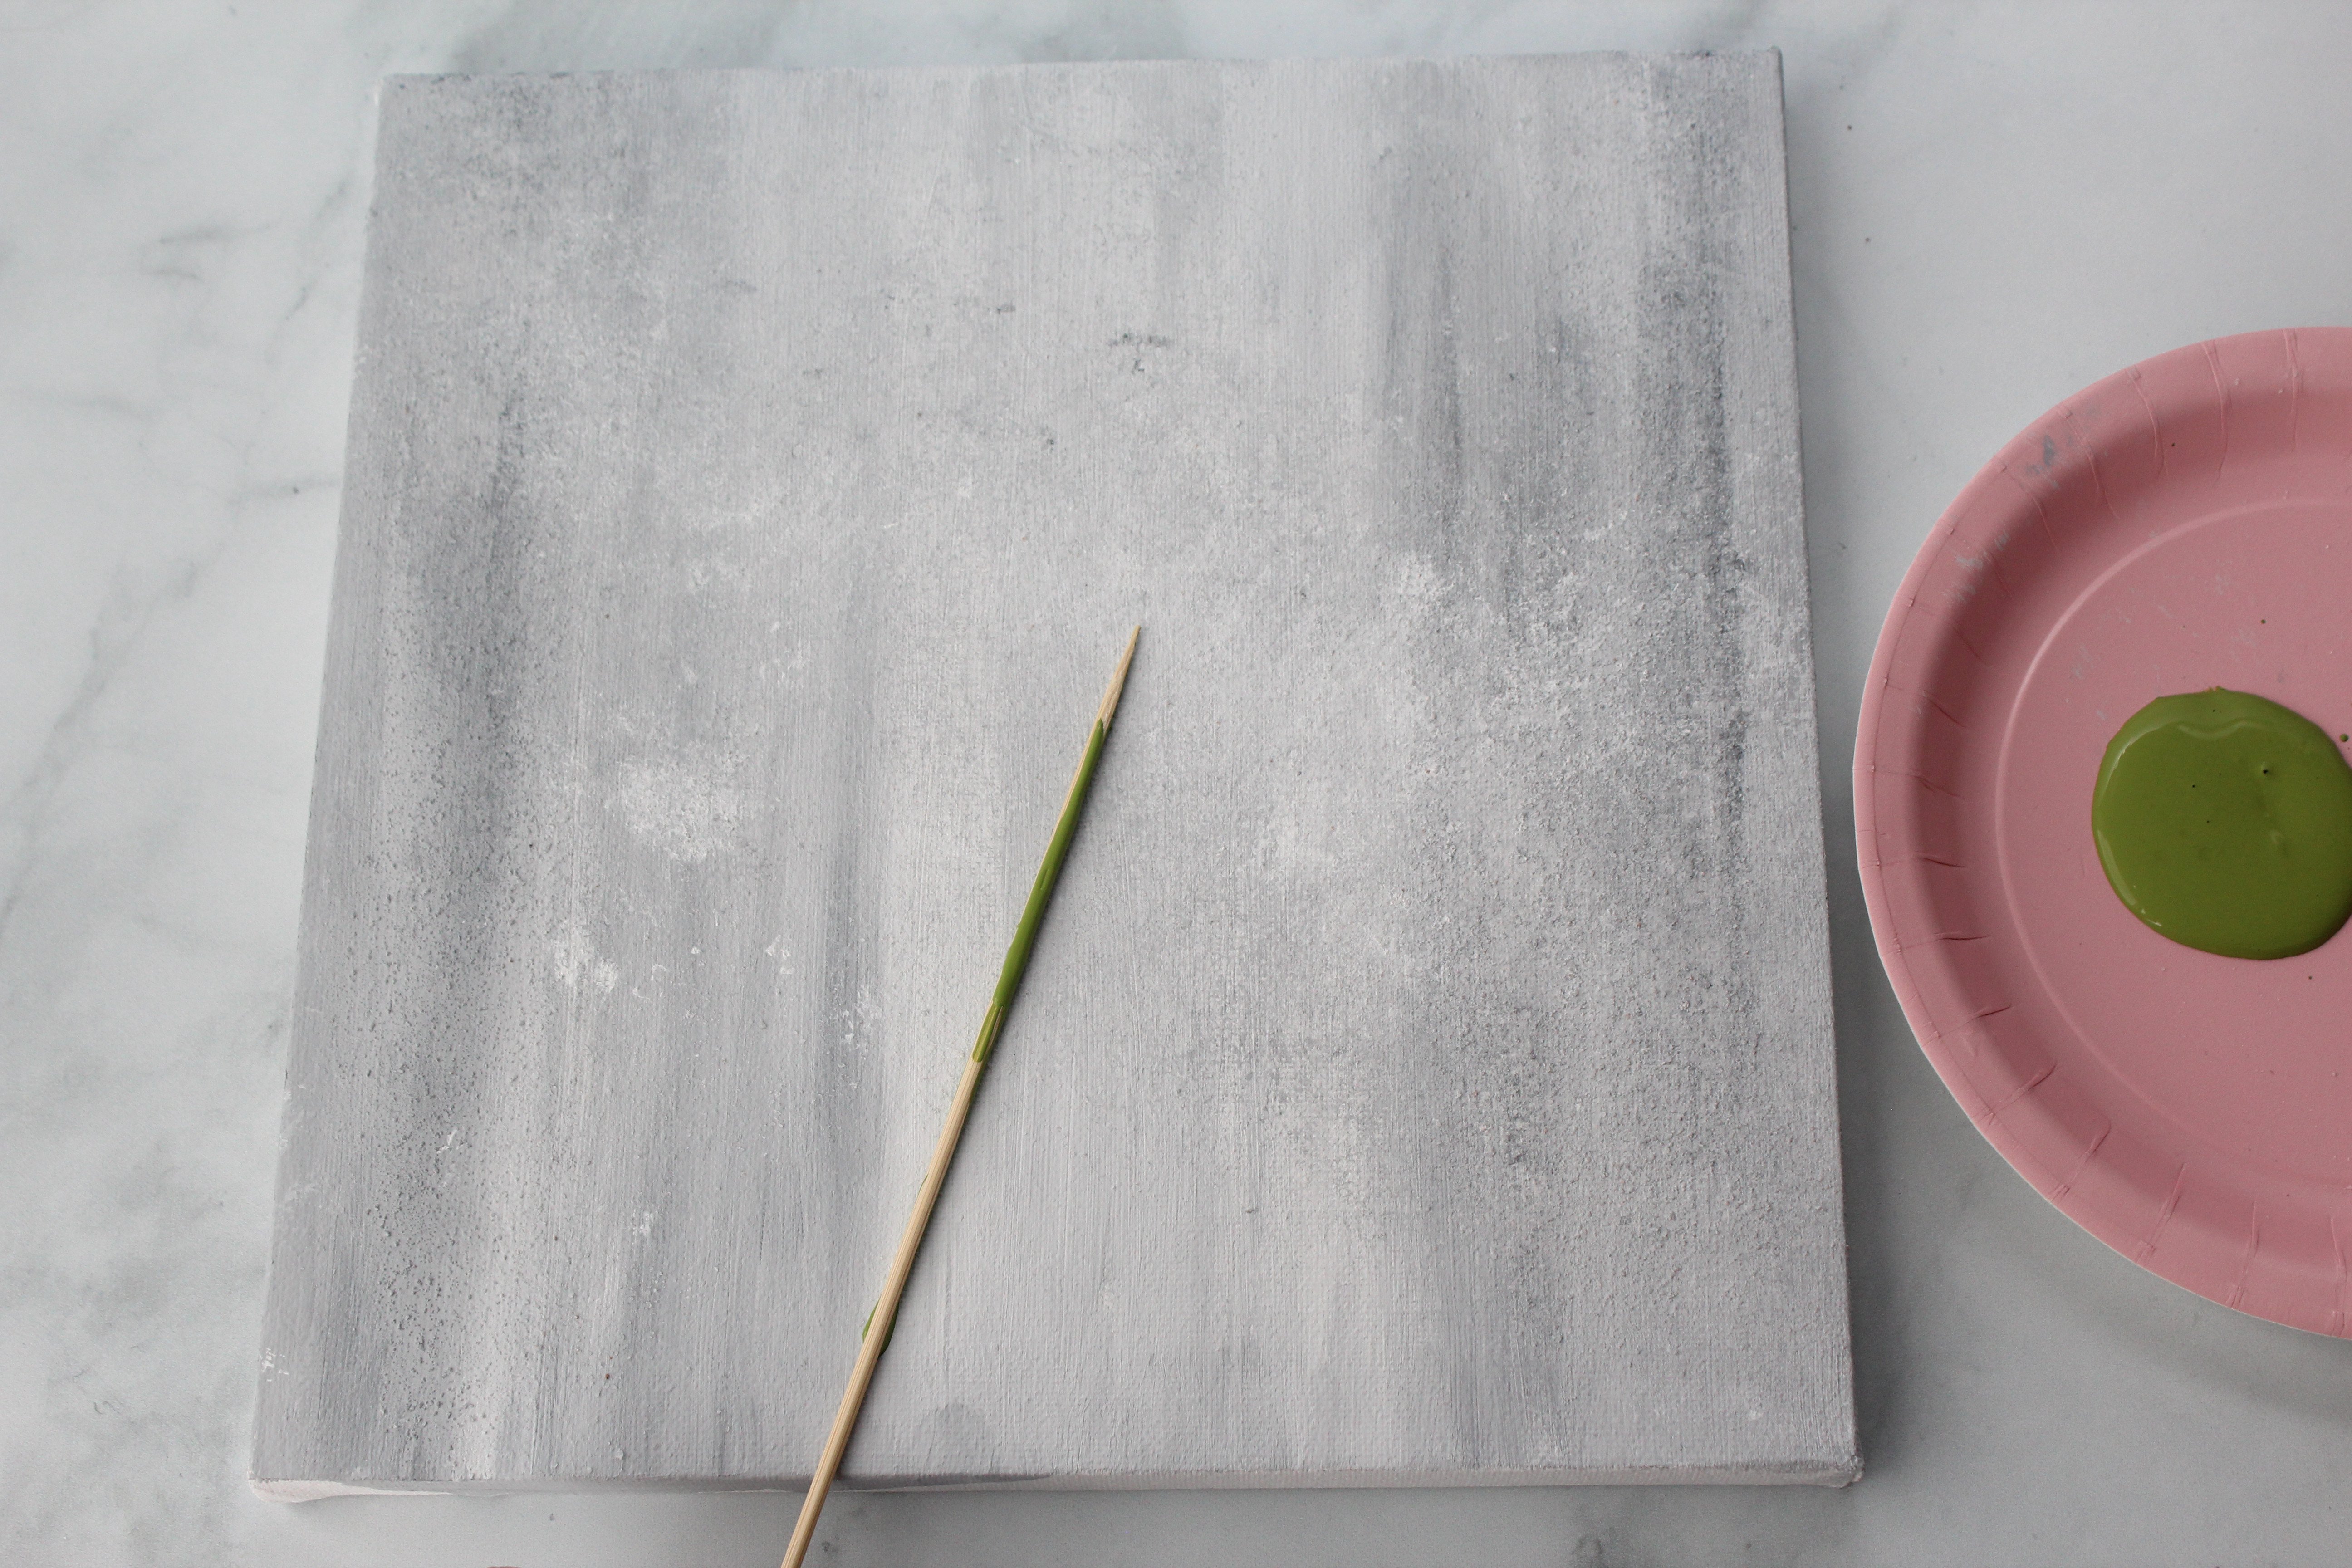
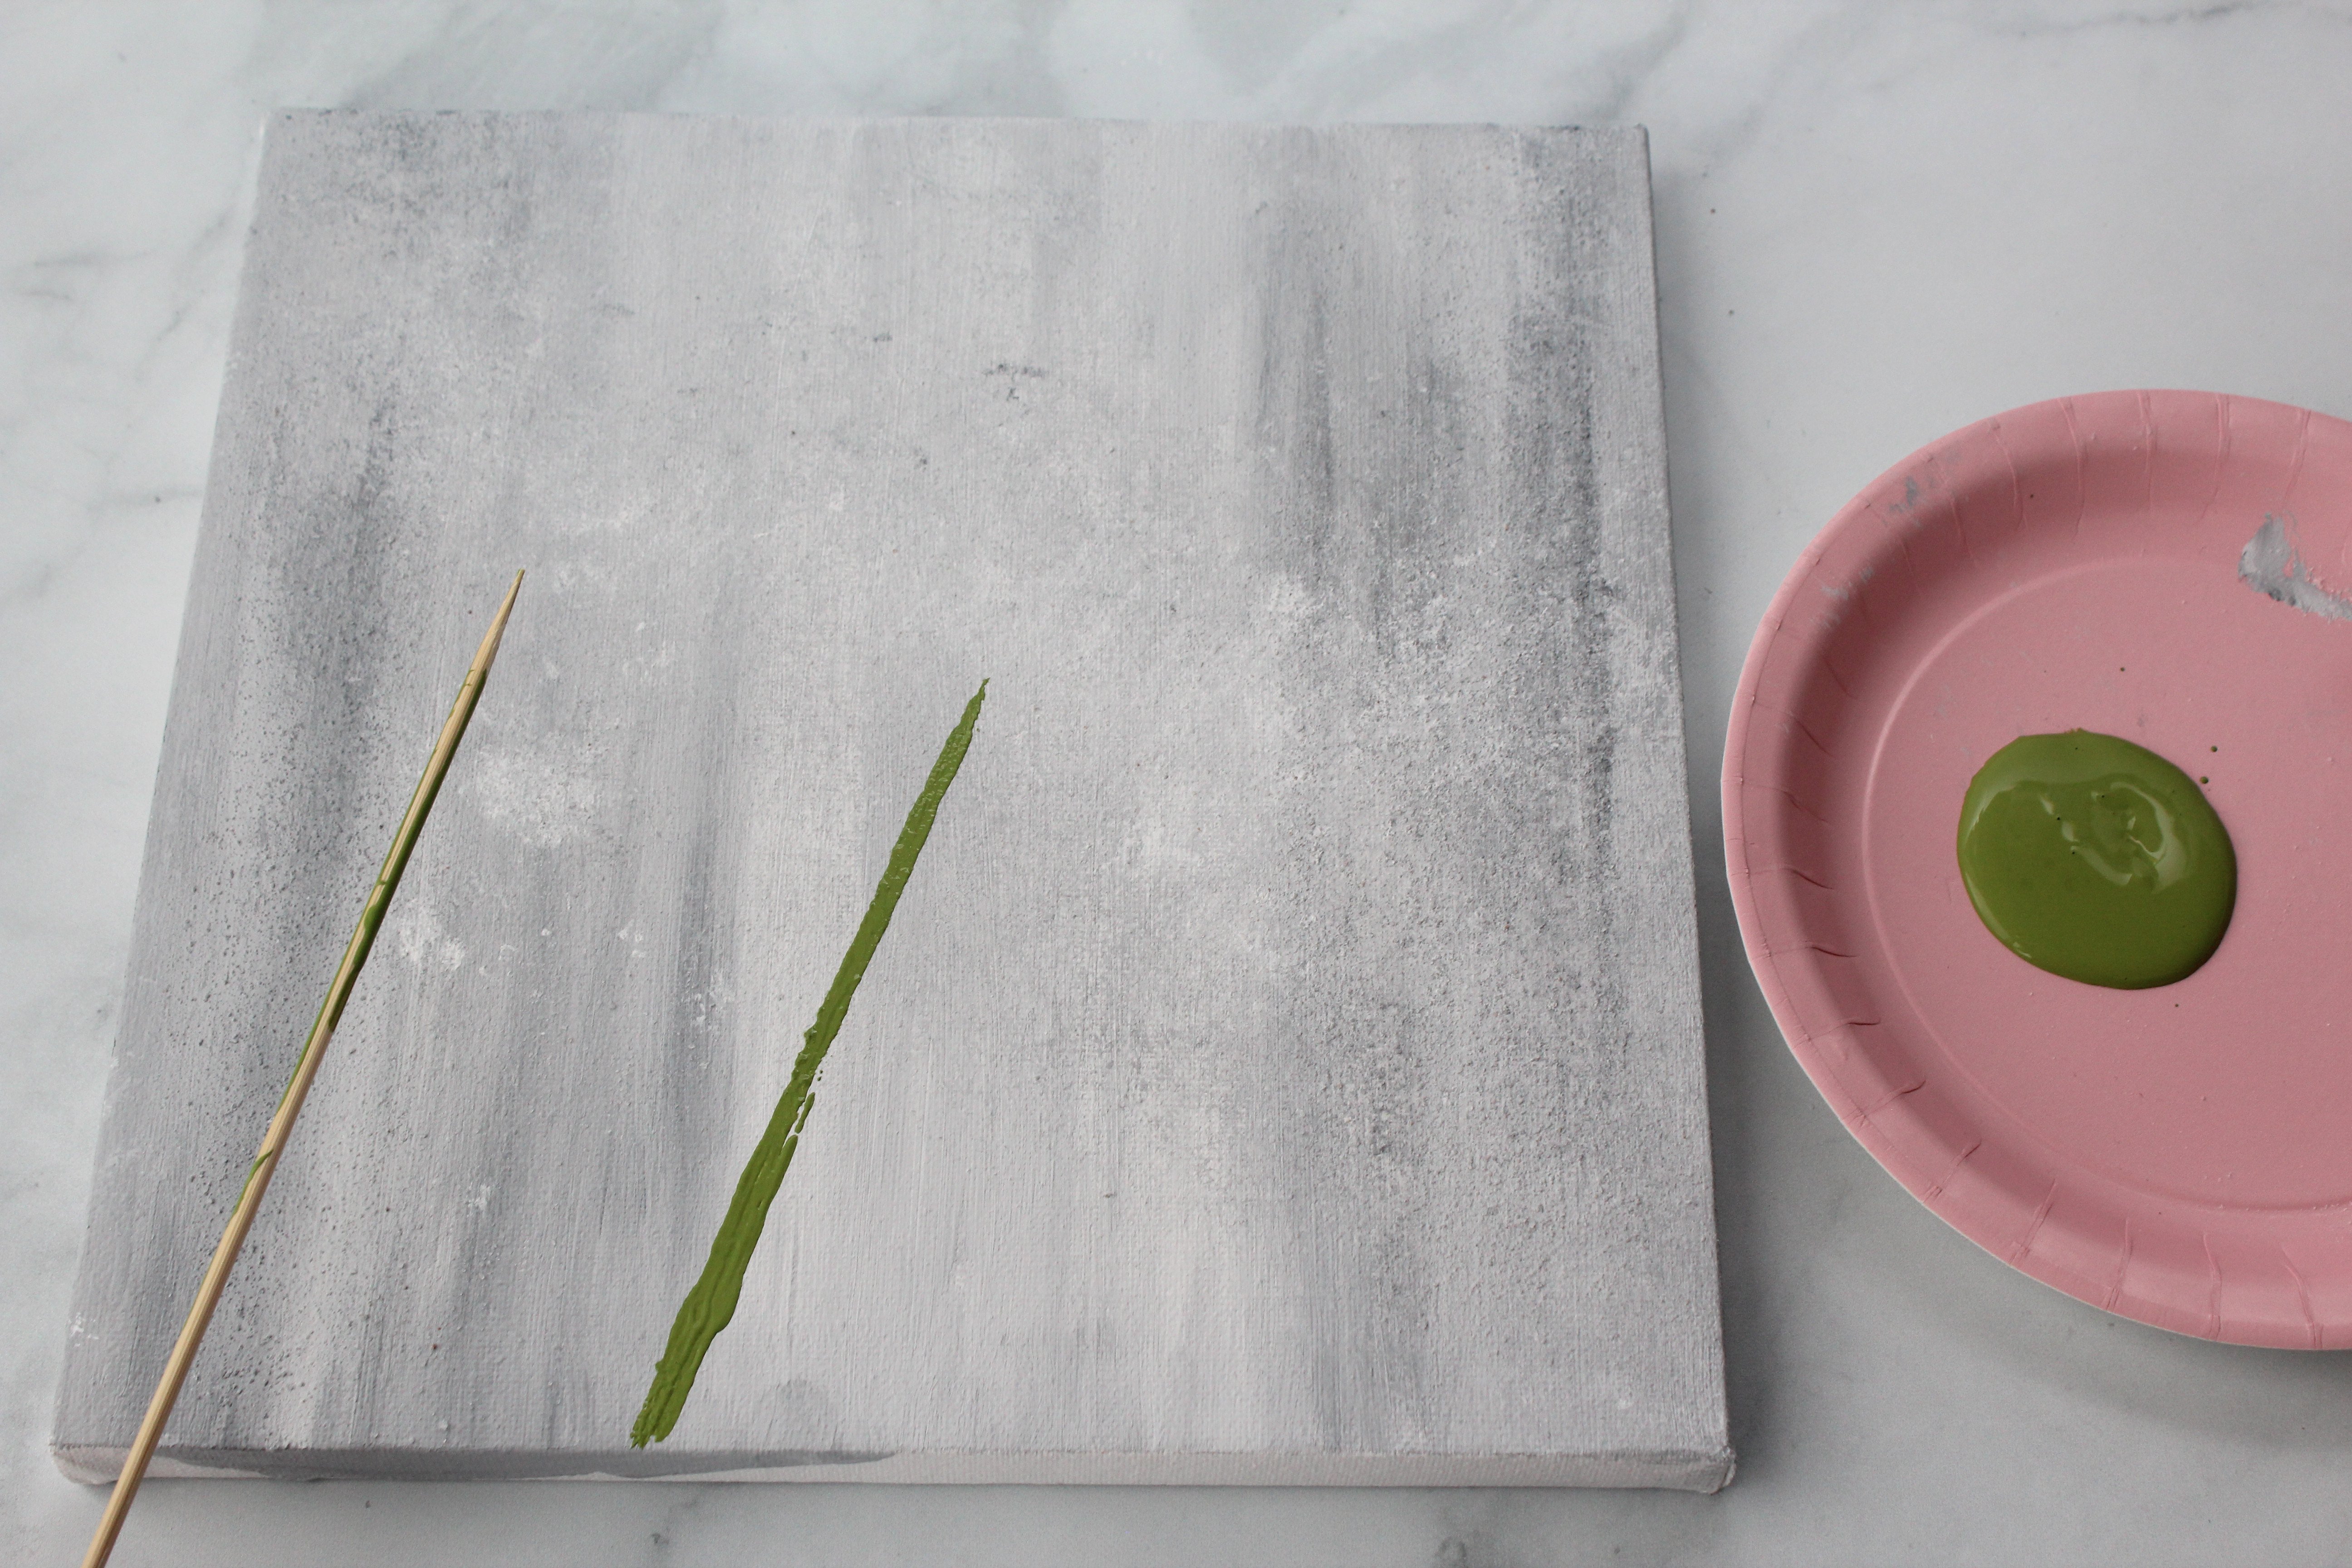
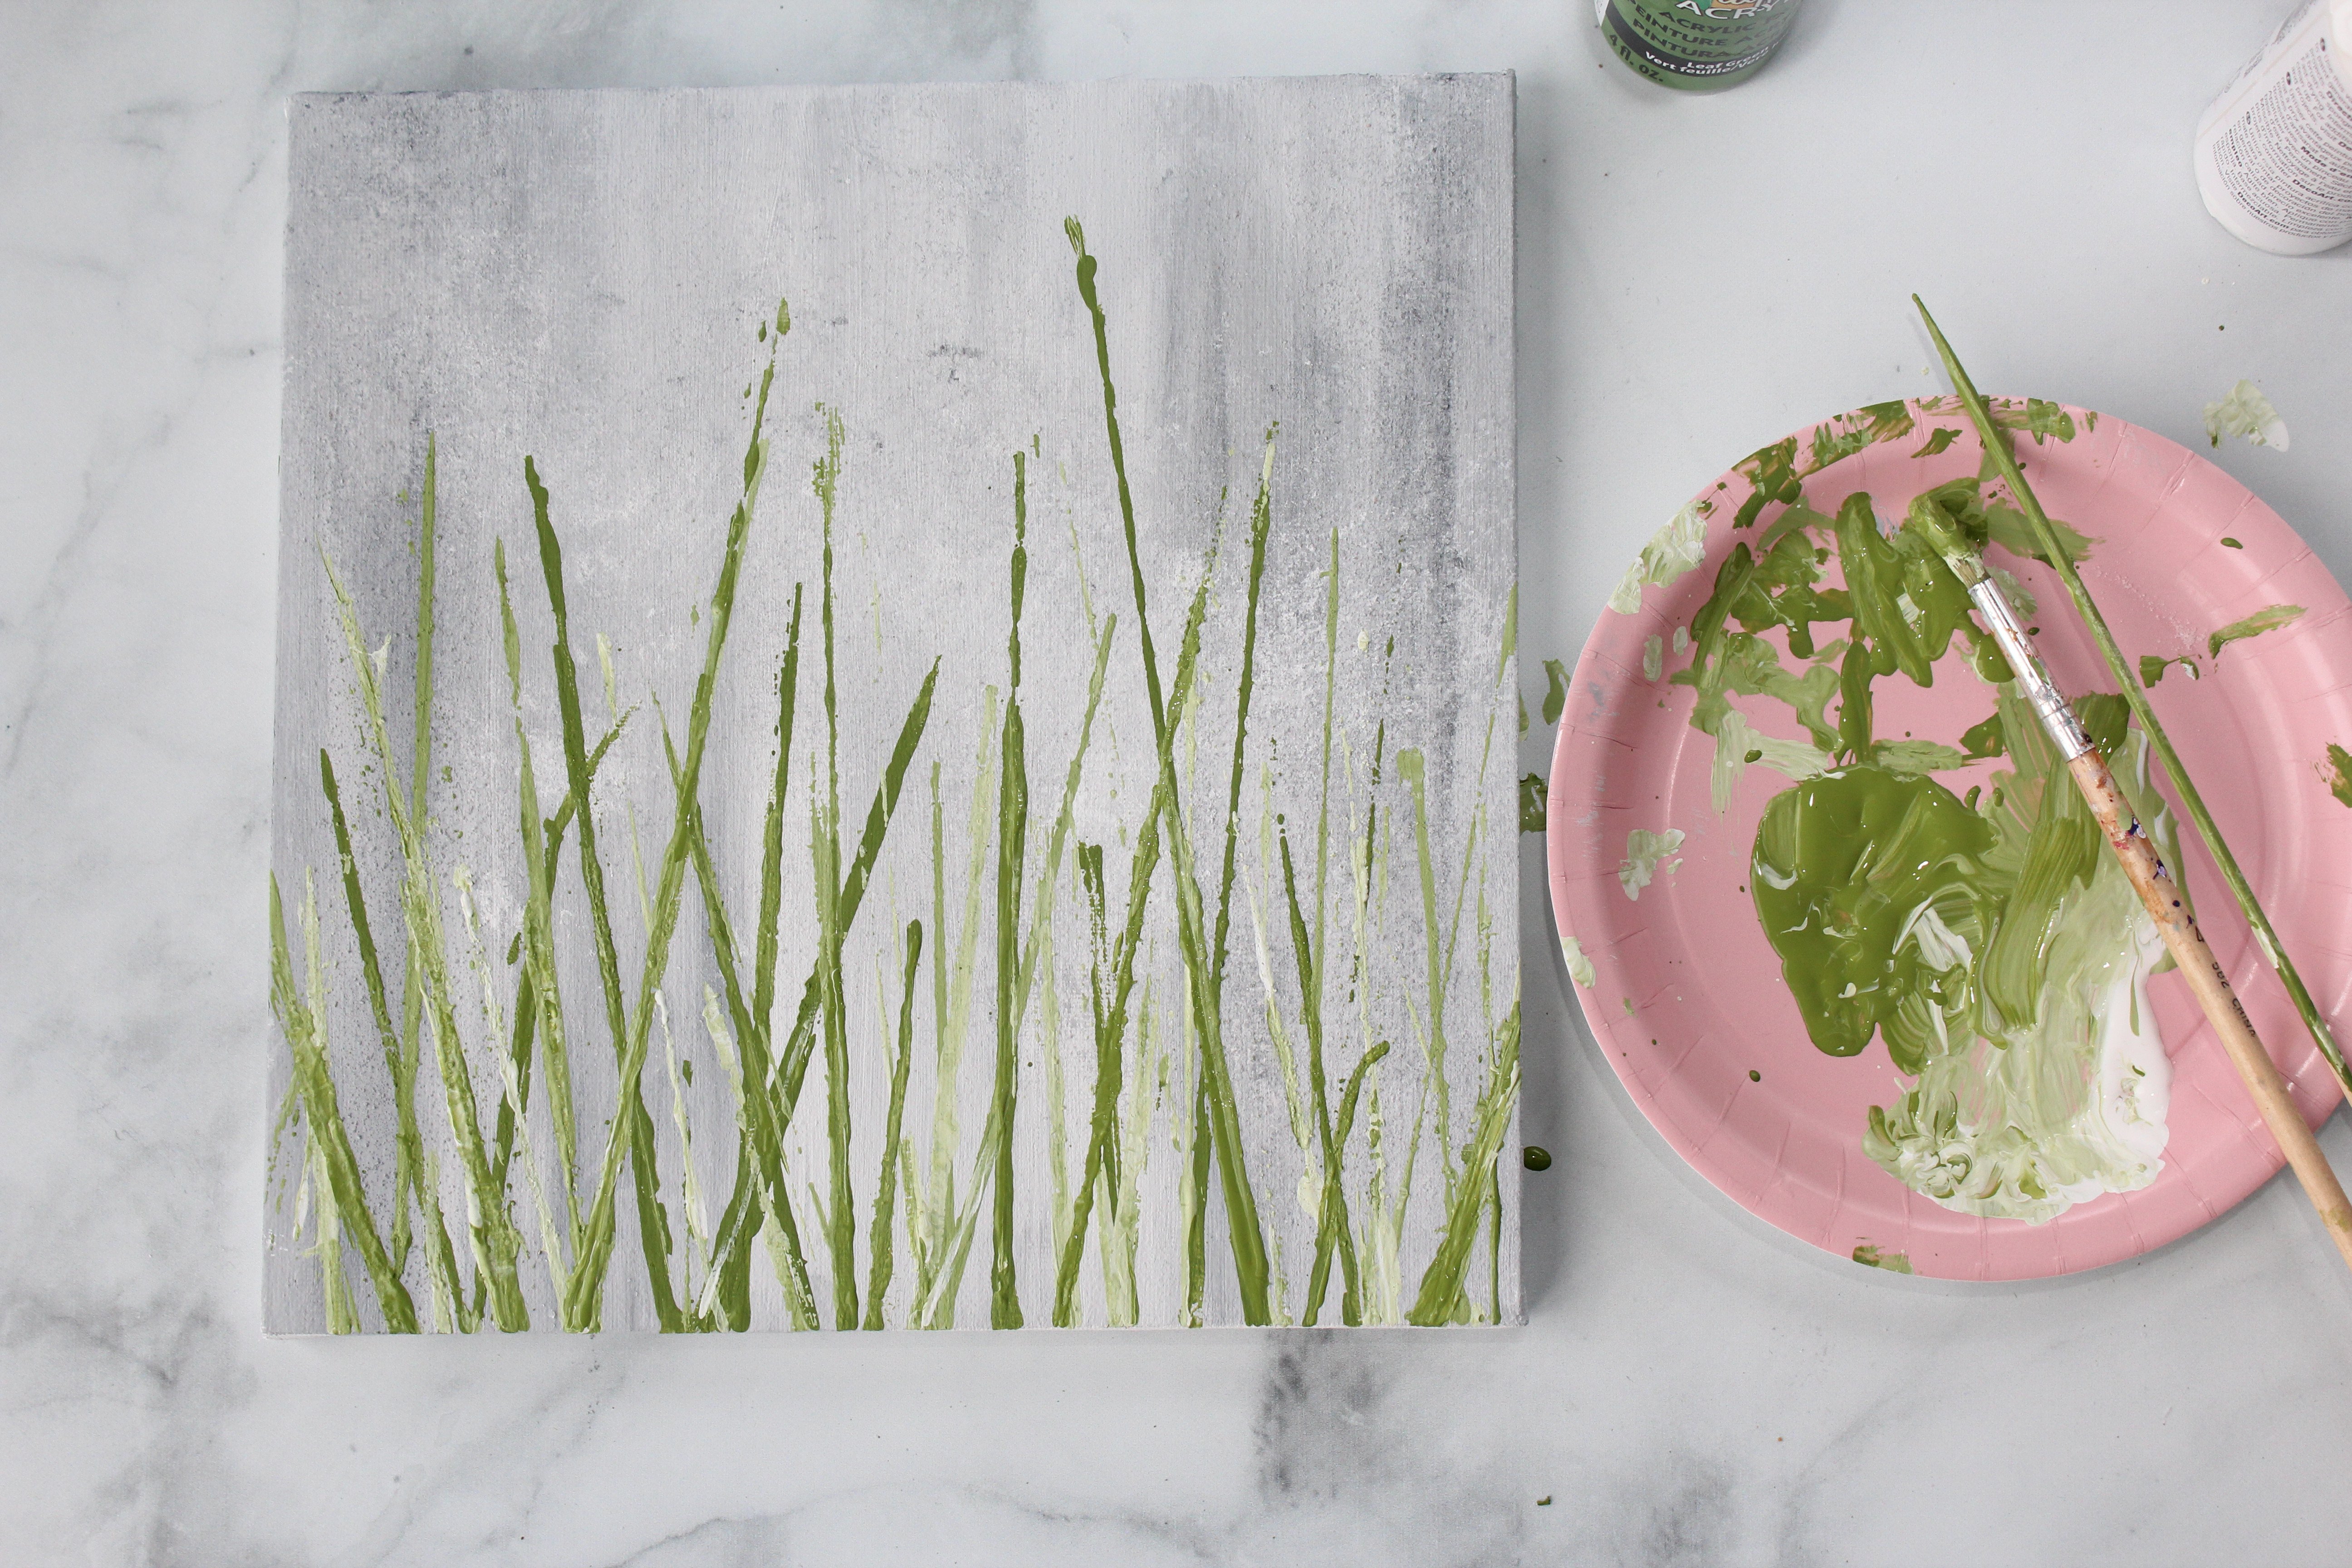
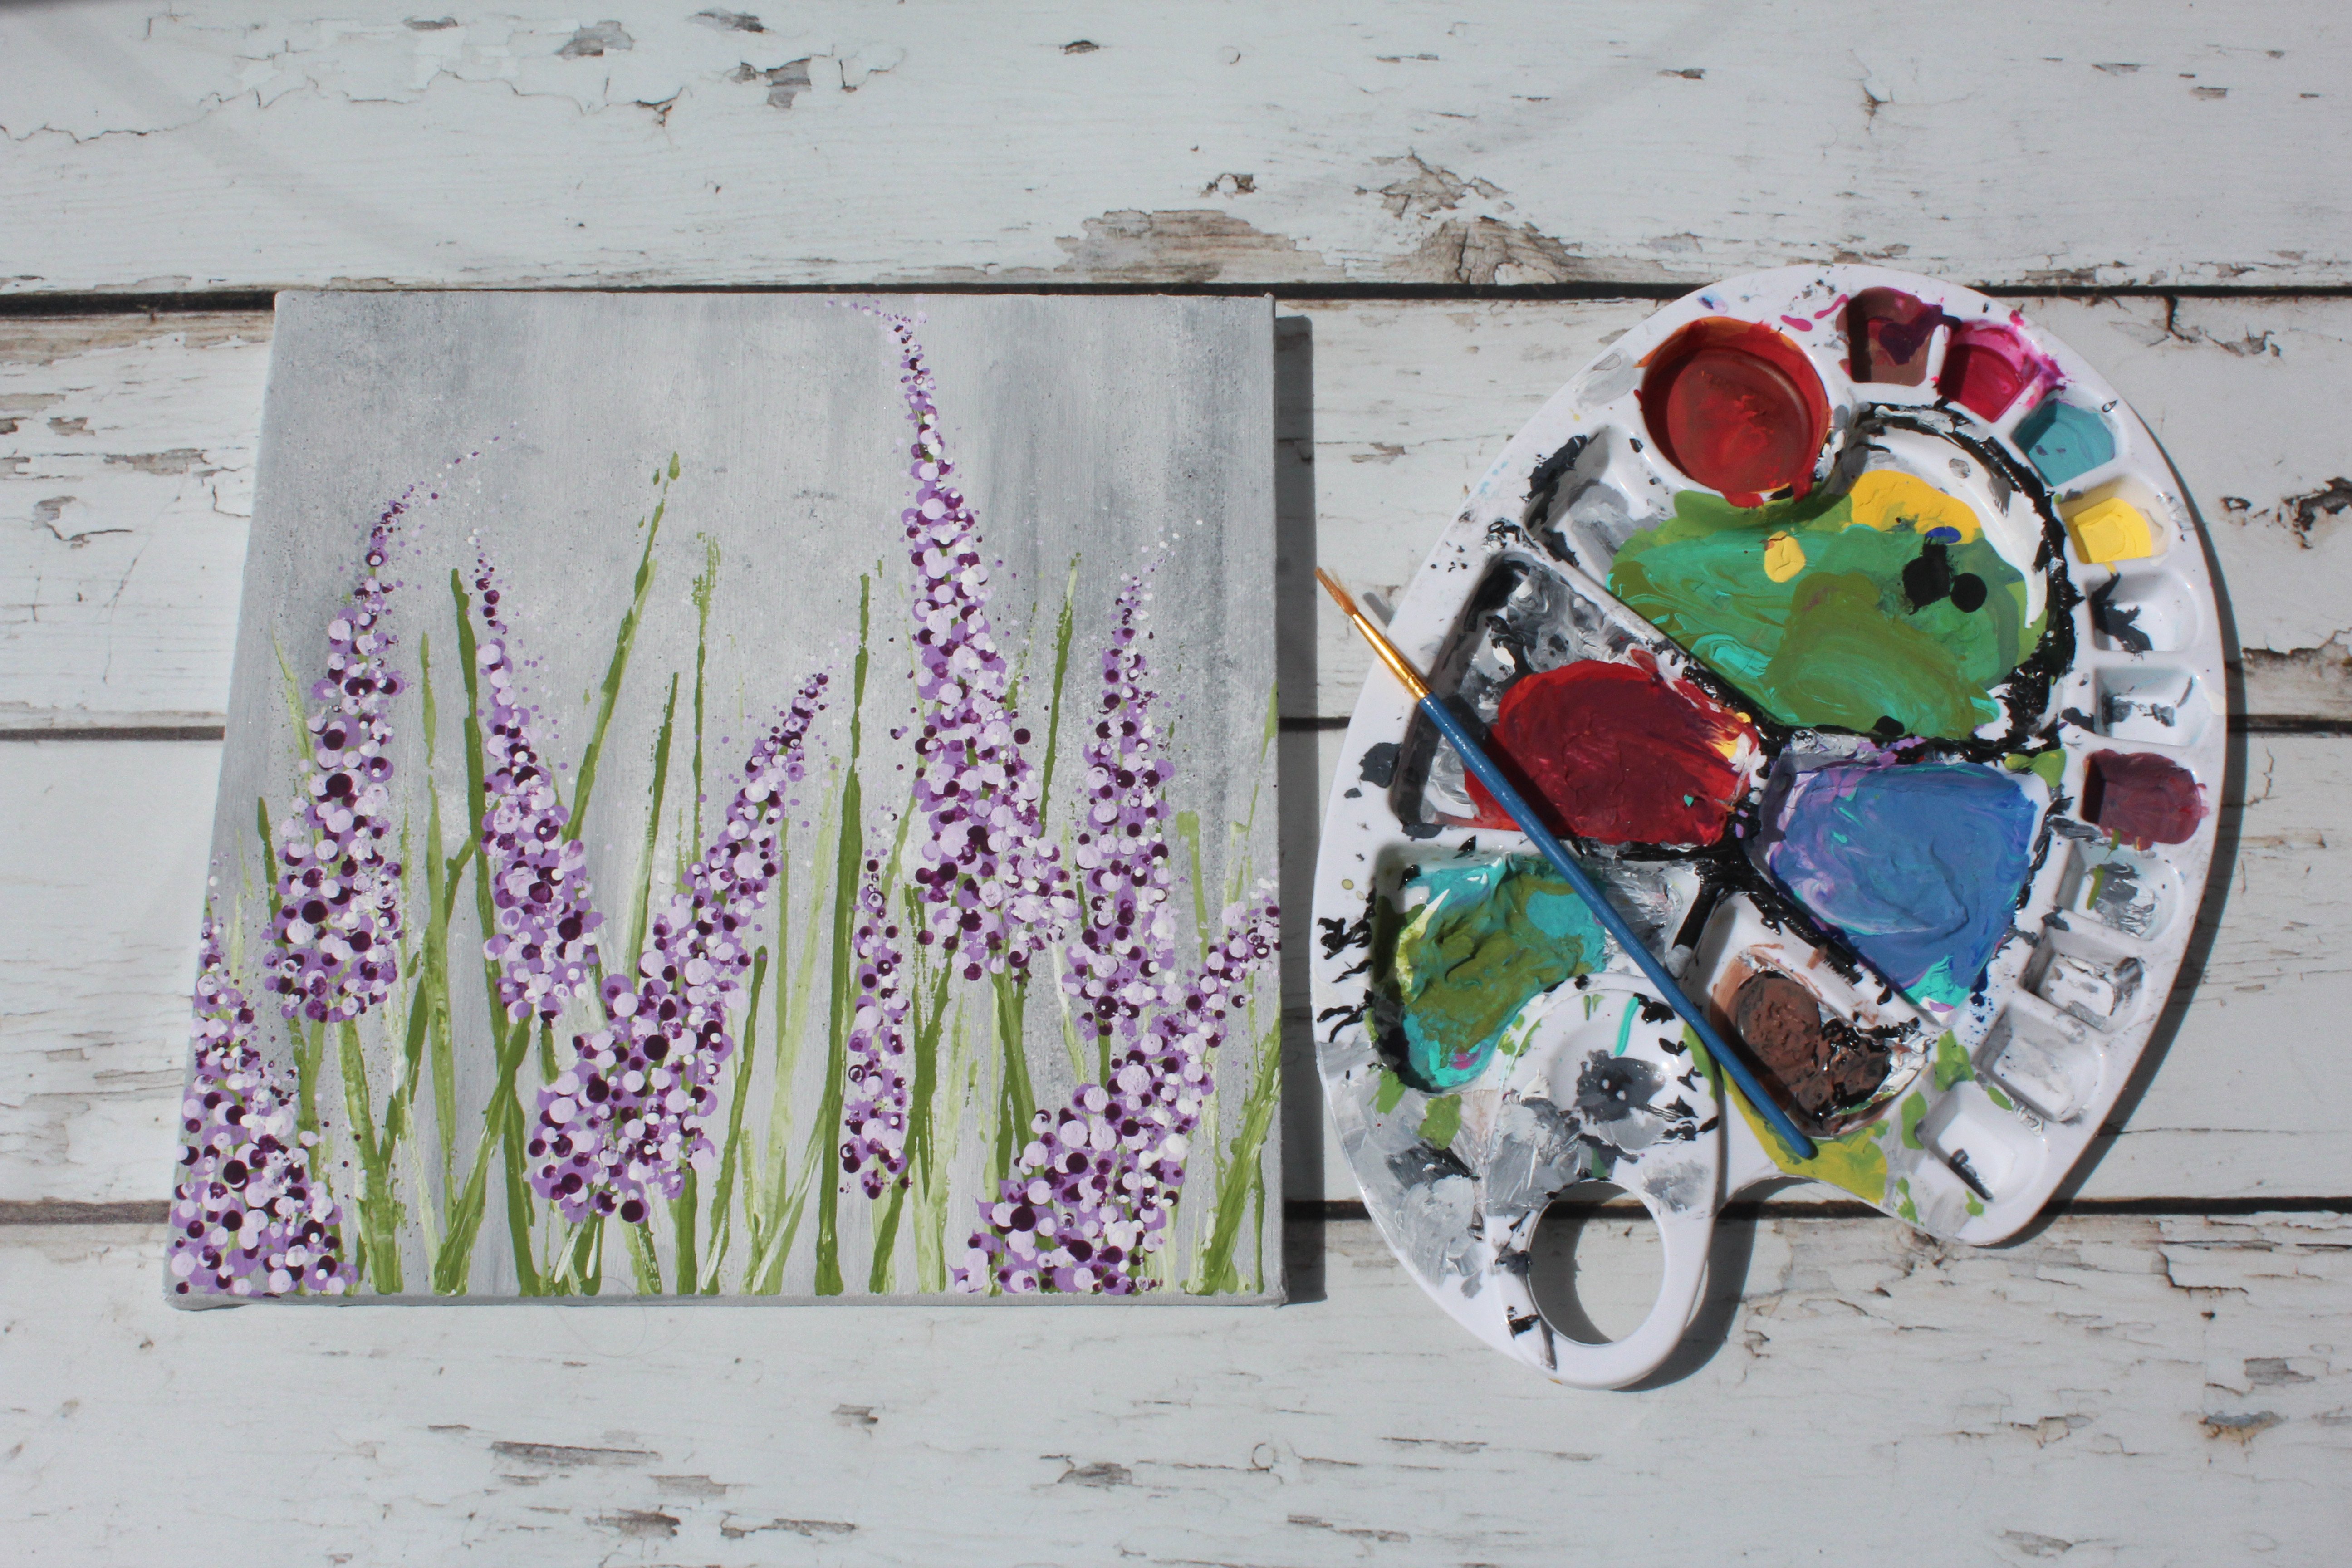
Once the background is dry its time for some flowers! First off we'll do the stems. Add some green paint into your pallet or a paper plate.
Using a clean brush, paint some green onto your wooden skewers. (Alternatively you could use the handle of a long paintbrush, instead of the skewer). Press the skewer (paint side down) onto the canvas. Life up the skewer to see your green stem. Nifty!
Also don't worry if the stems don't look perfect, actually it's better they don't! The beauty with abstract paintings( like this one )is that we can leave the stress of perfection behind. Don't worry if your stem are irregular or not perfectly straight, just go with it and focus on the enjoyment of making them!
Step 9
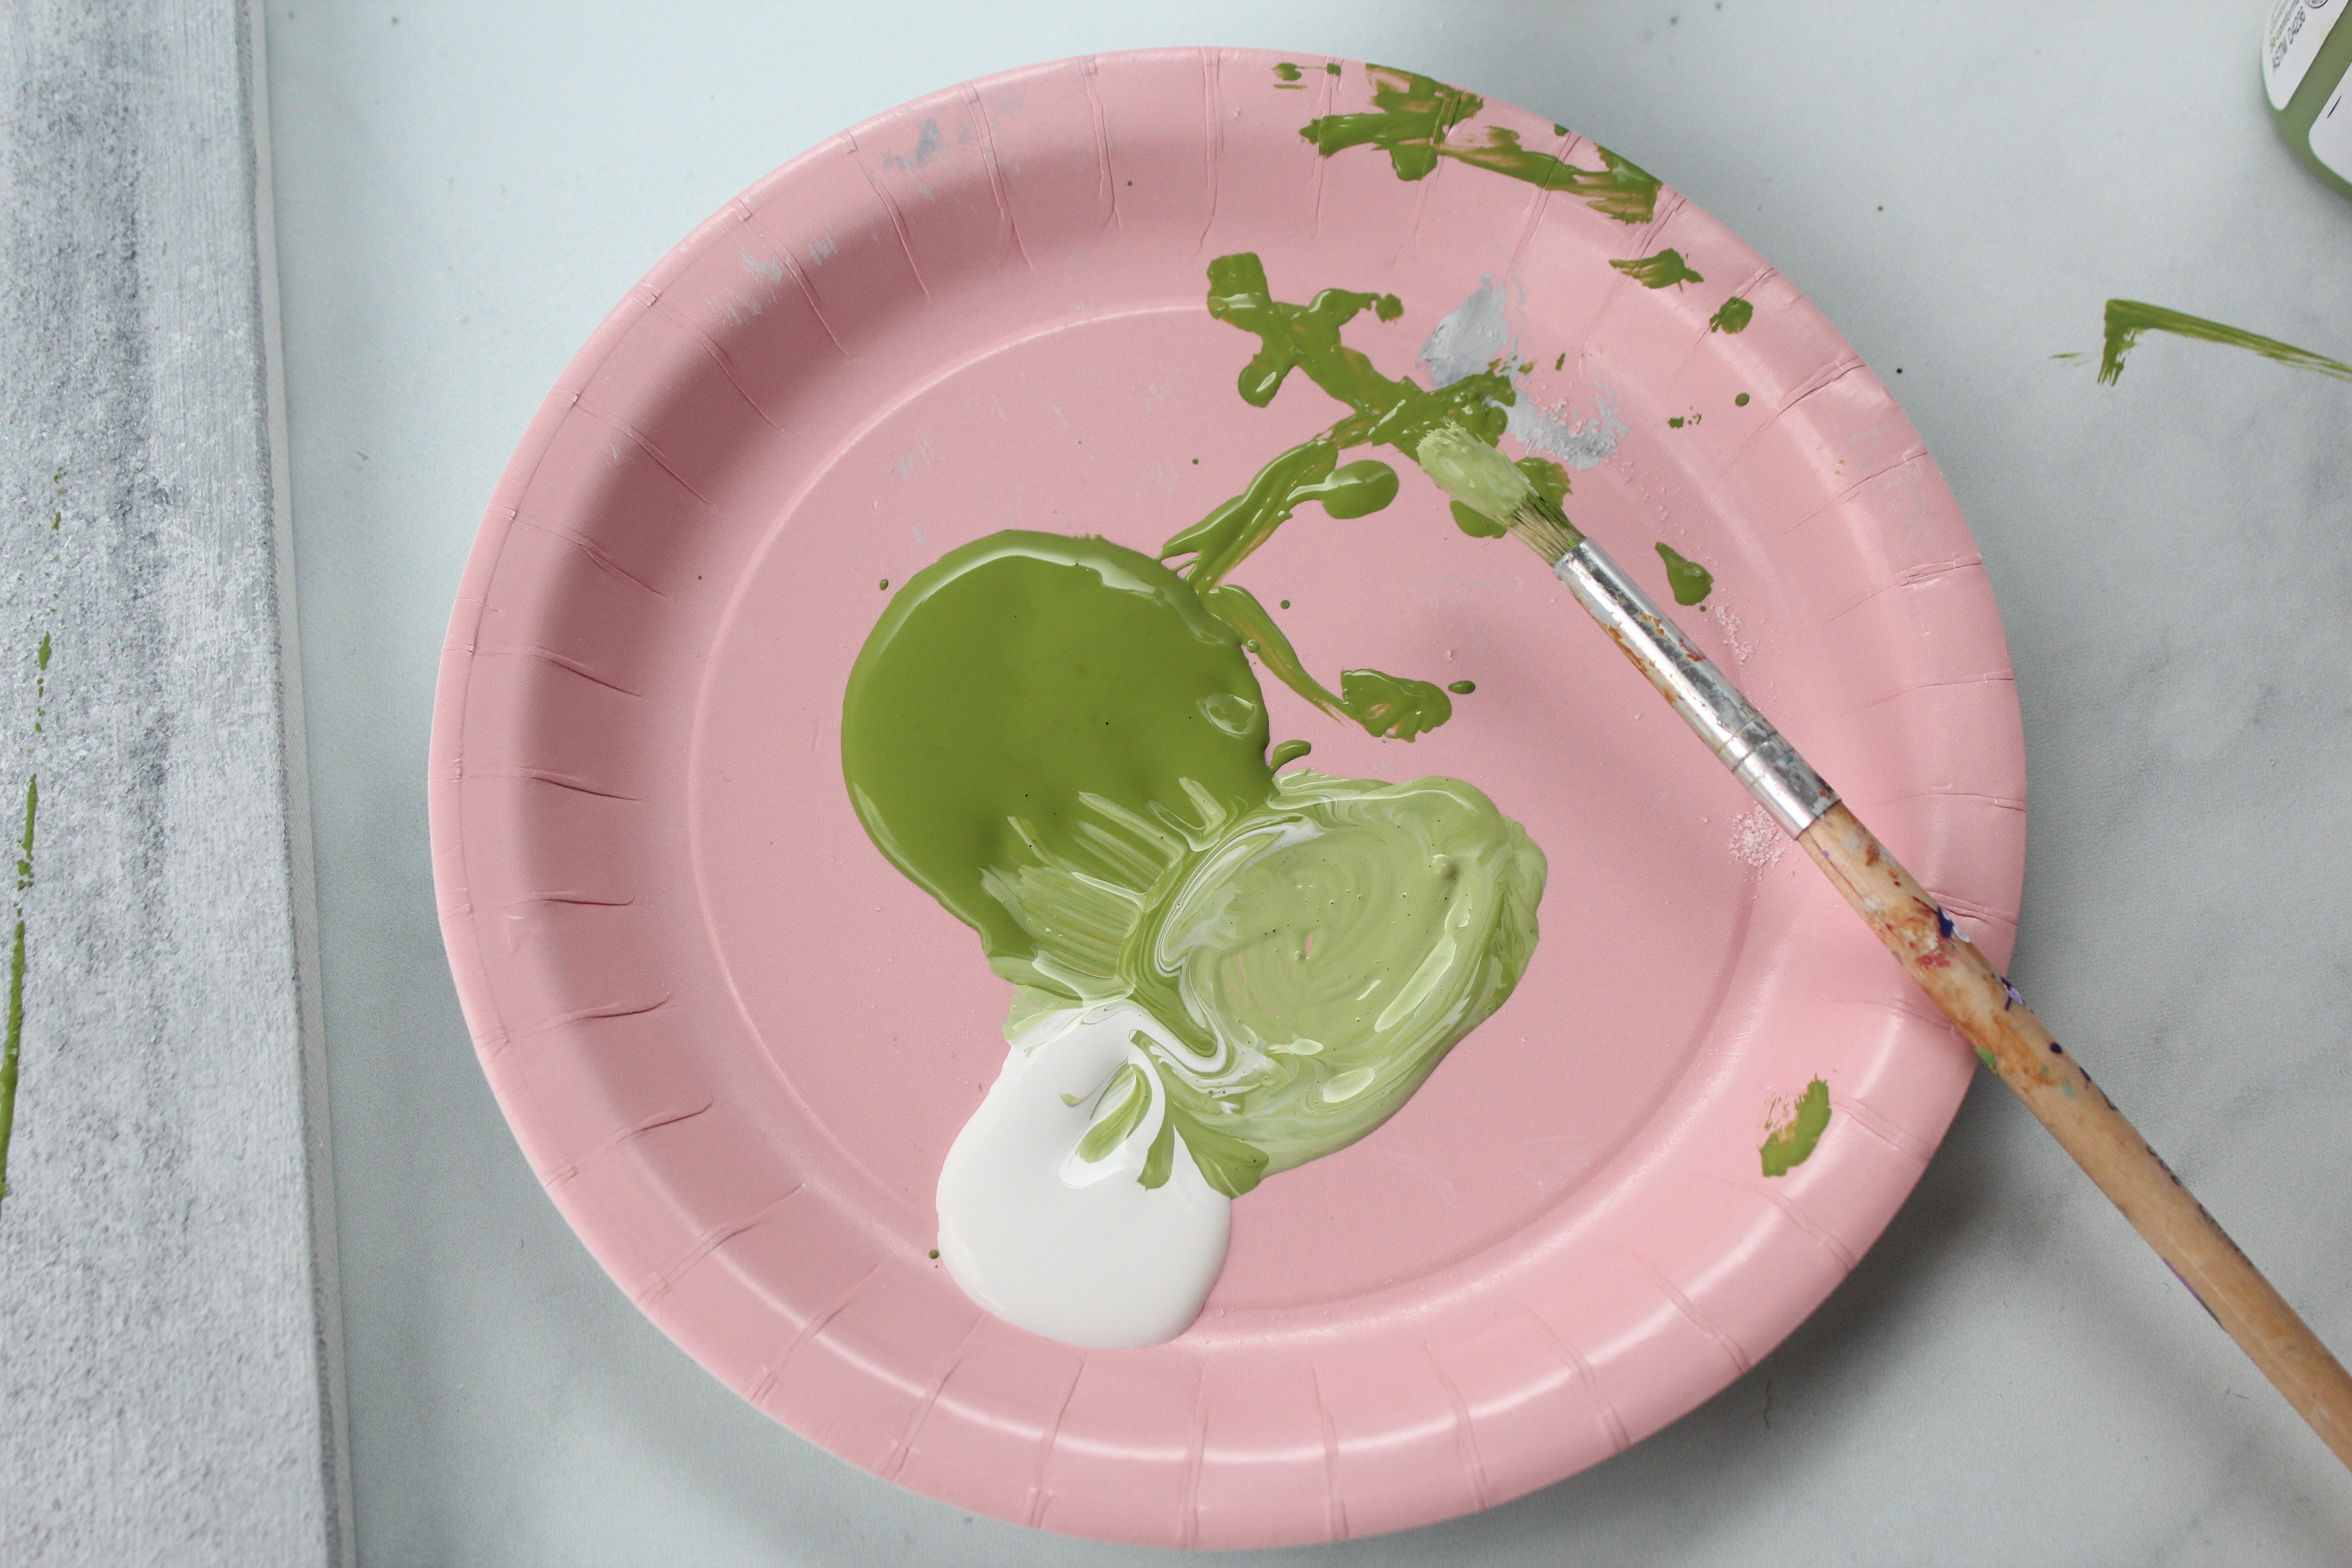
Repeat this step with different tints of green (mix in tiny bits of white into green to get different tints). Have different tints of green for your stems will give more dimension. Once your happy with the amount of stems, let the paint dry
Step 10
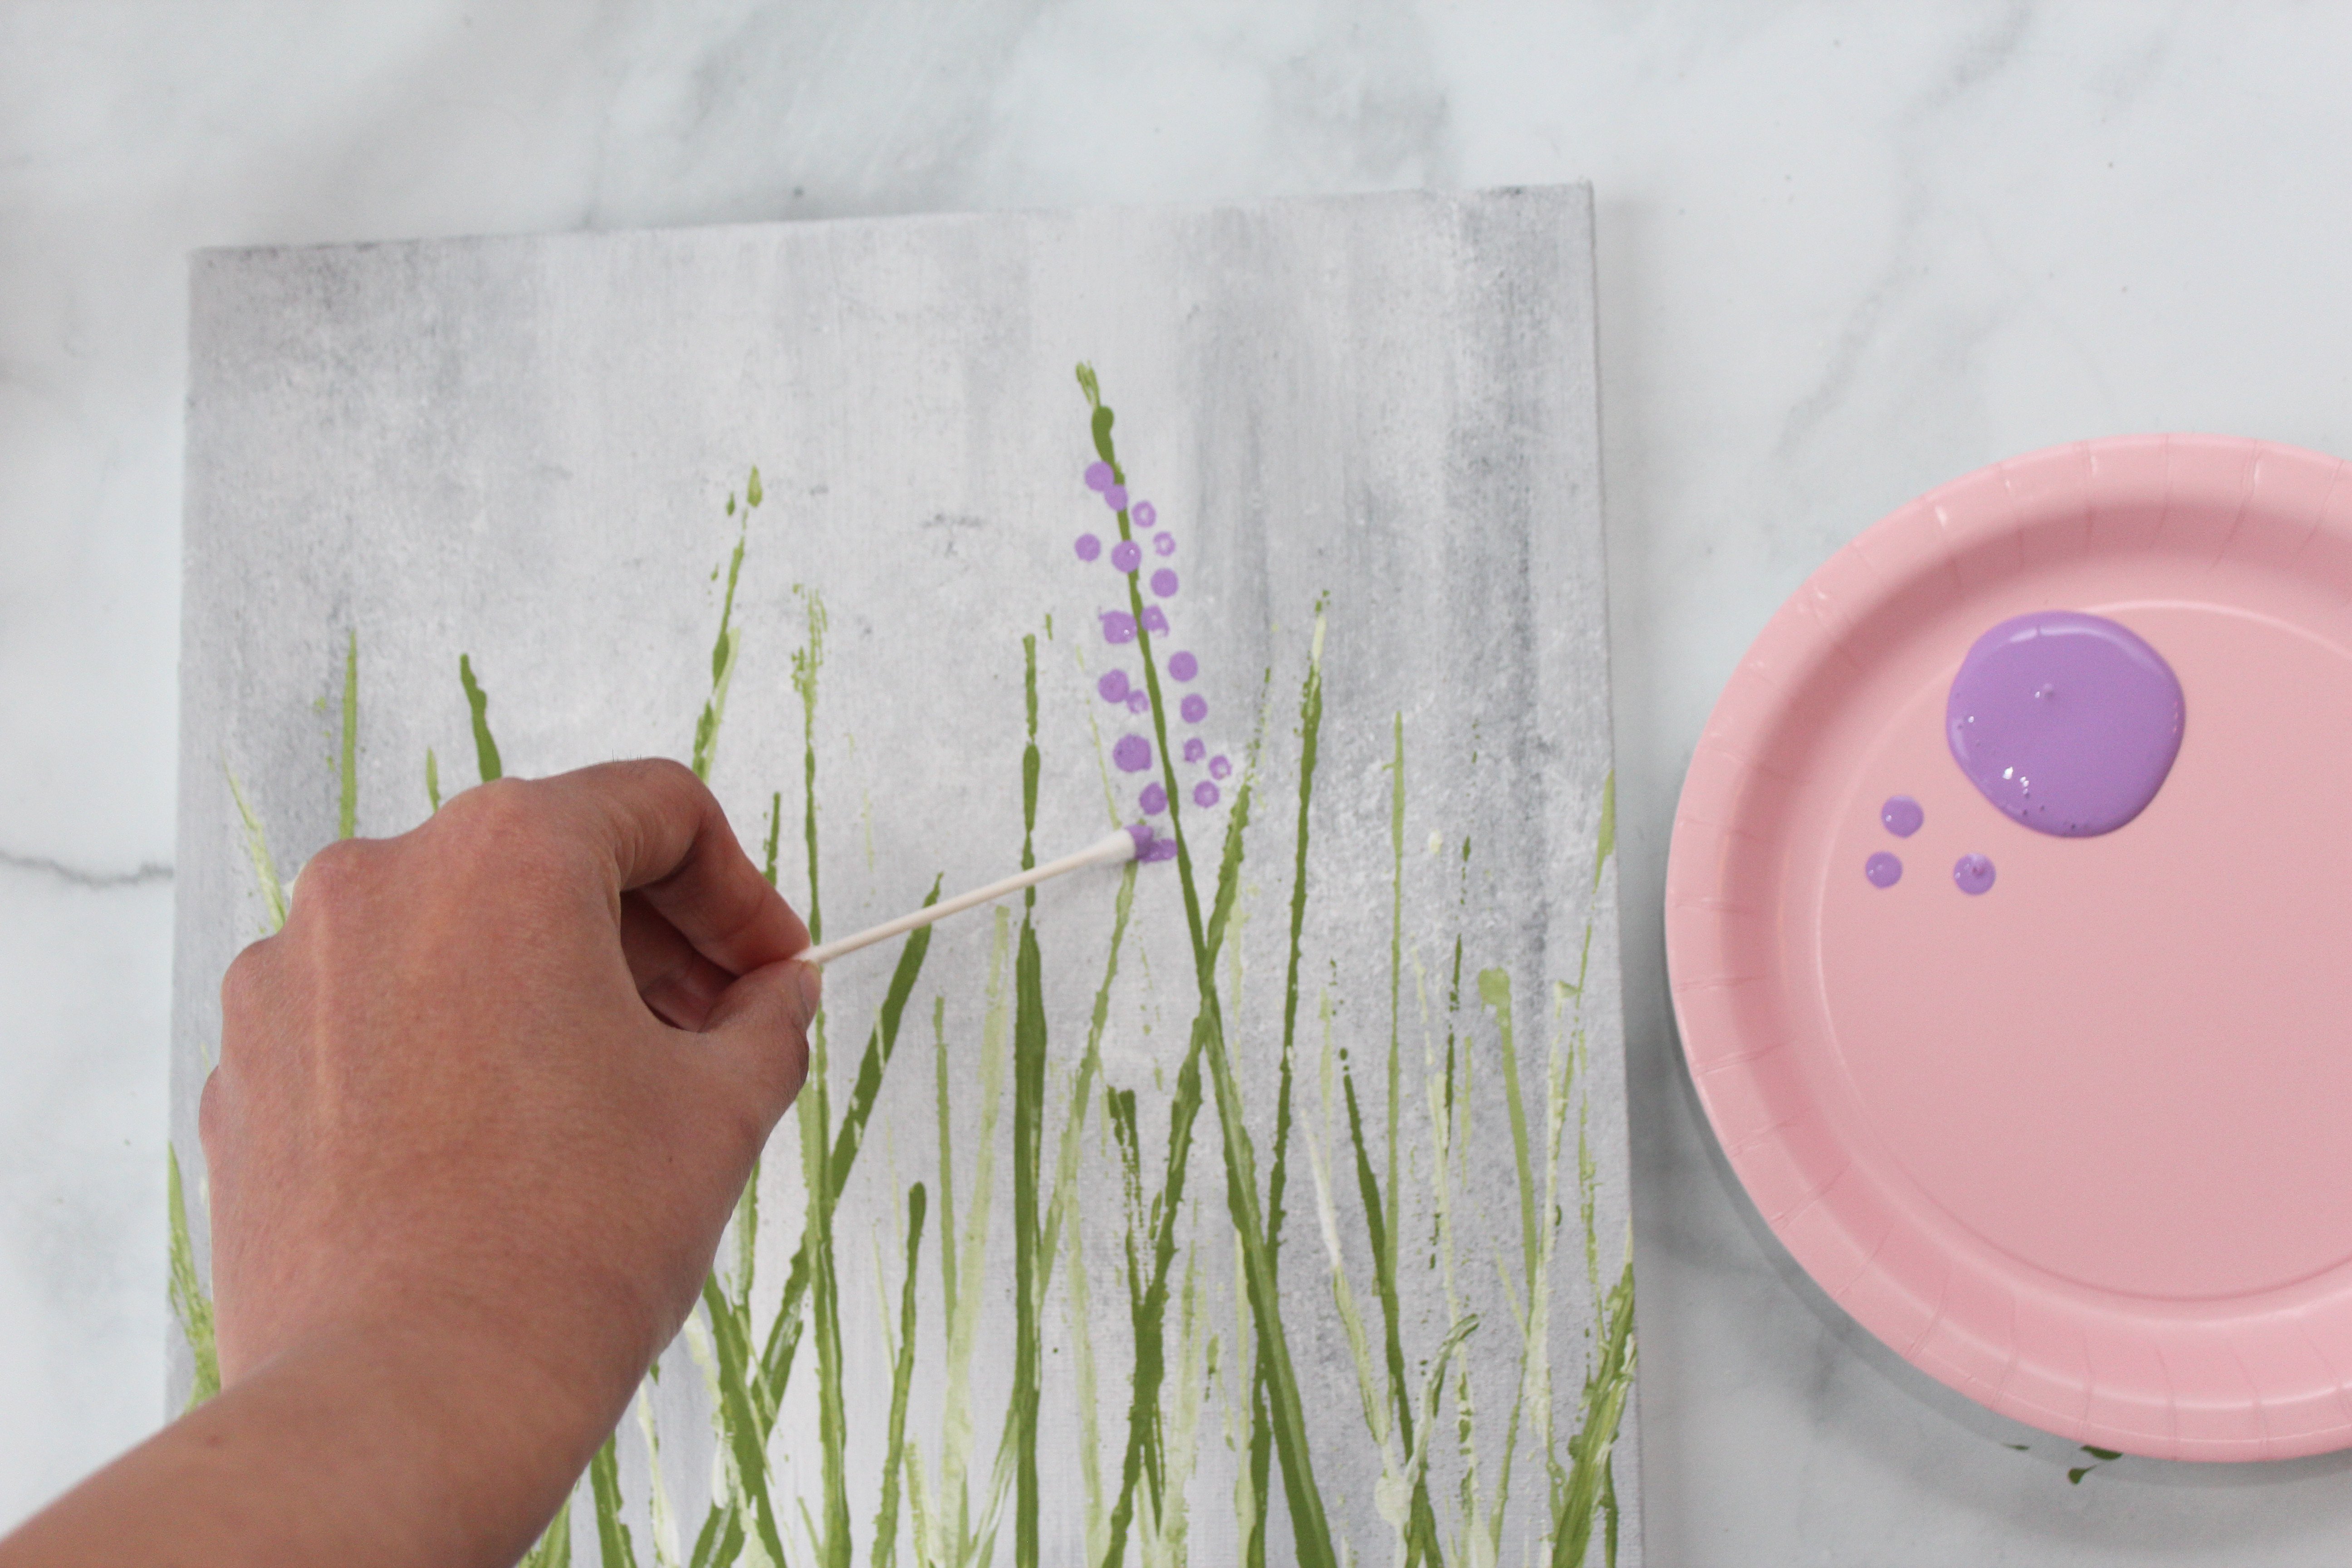
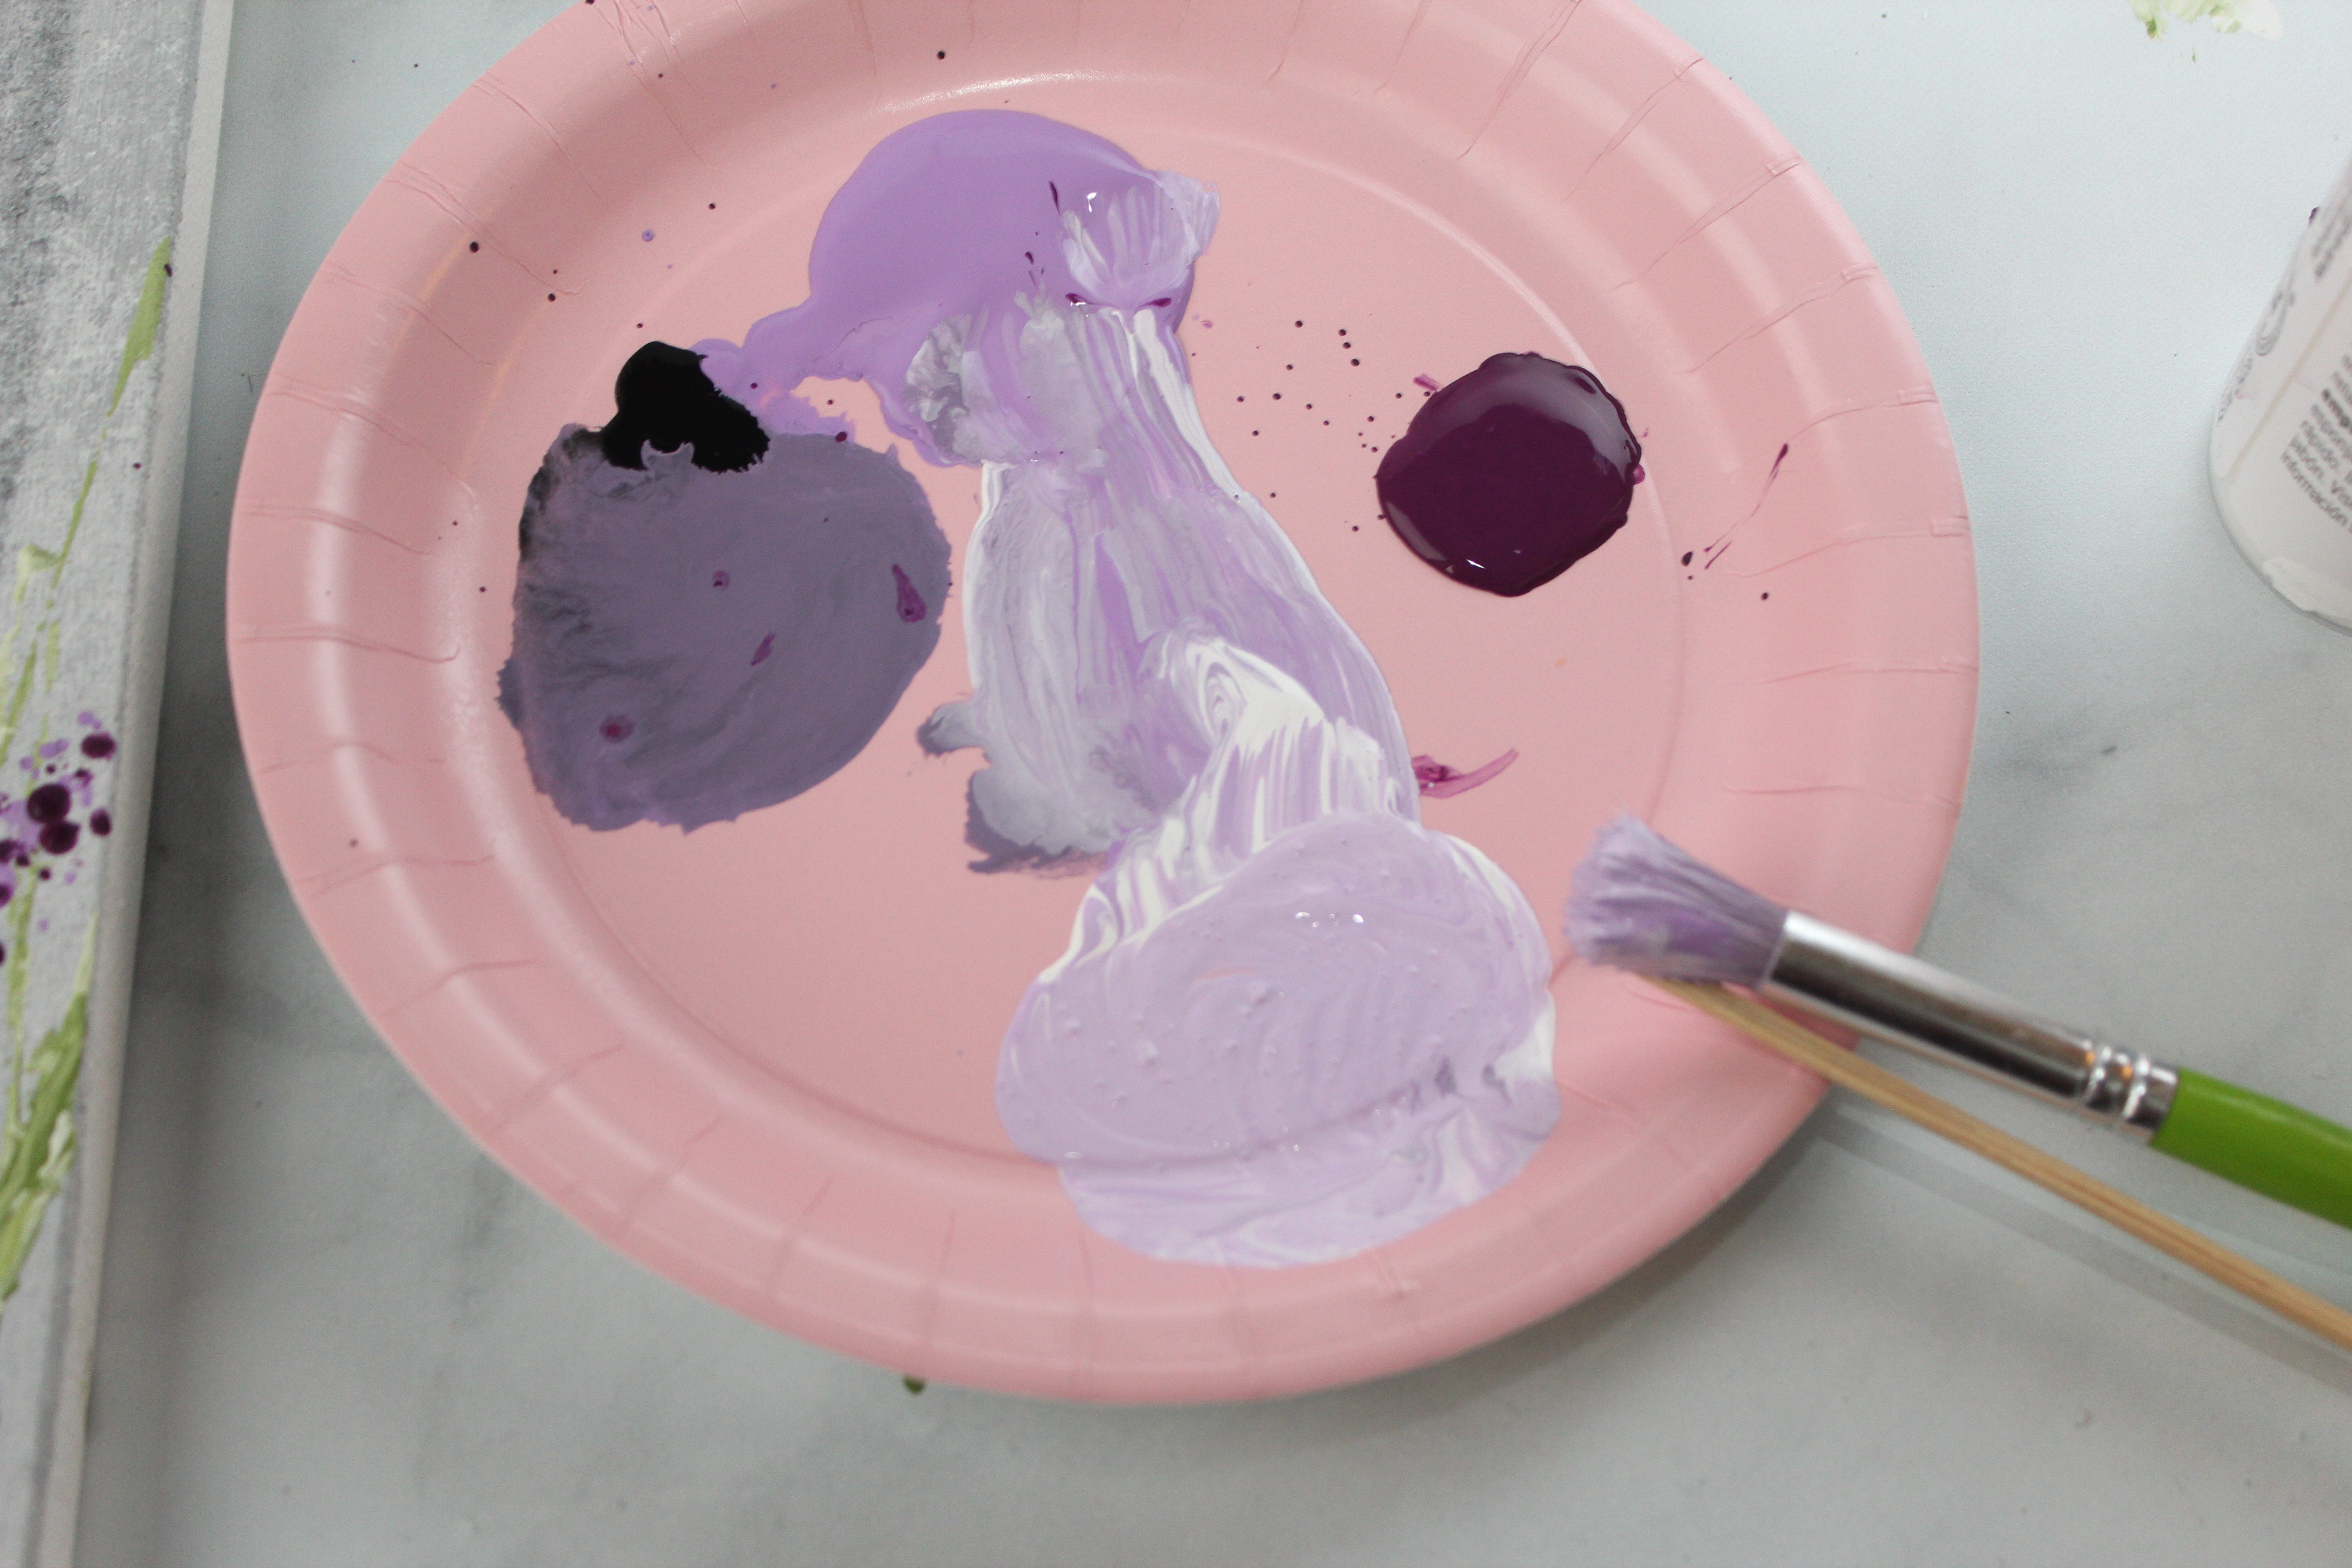
Now its time to make our lavender painting with cotton buds or cotton swabs (QTips)! Using your lighter color purple, dab your cotton swab in the paint and start dotting them around some stems to form the petals of the lavender flower.
Repeat this step to form all your lavender flowers, and let dry.
Step 11
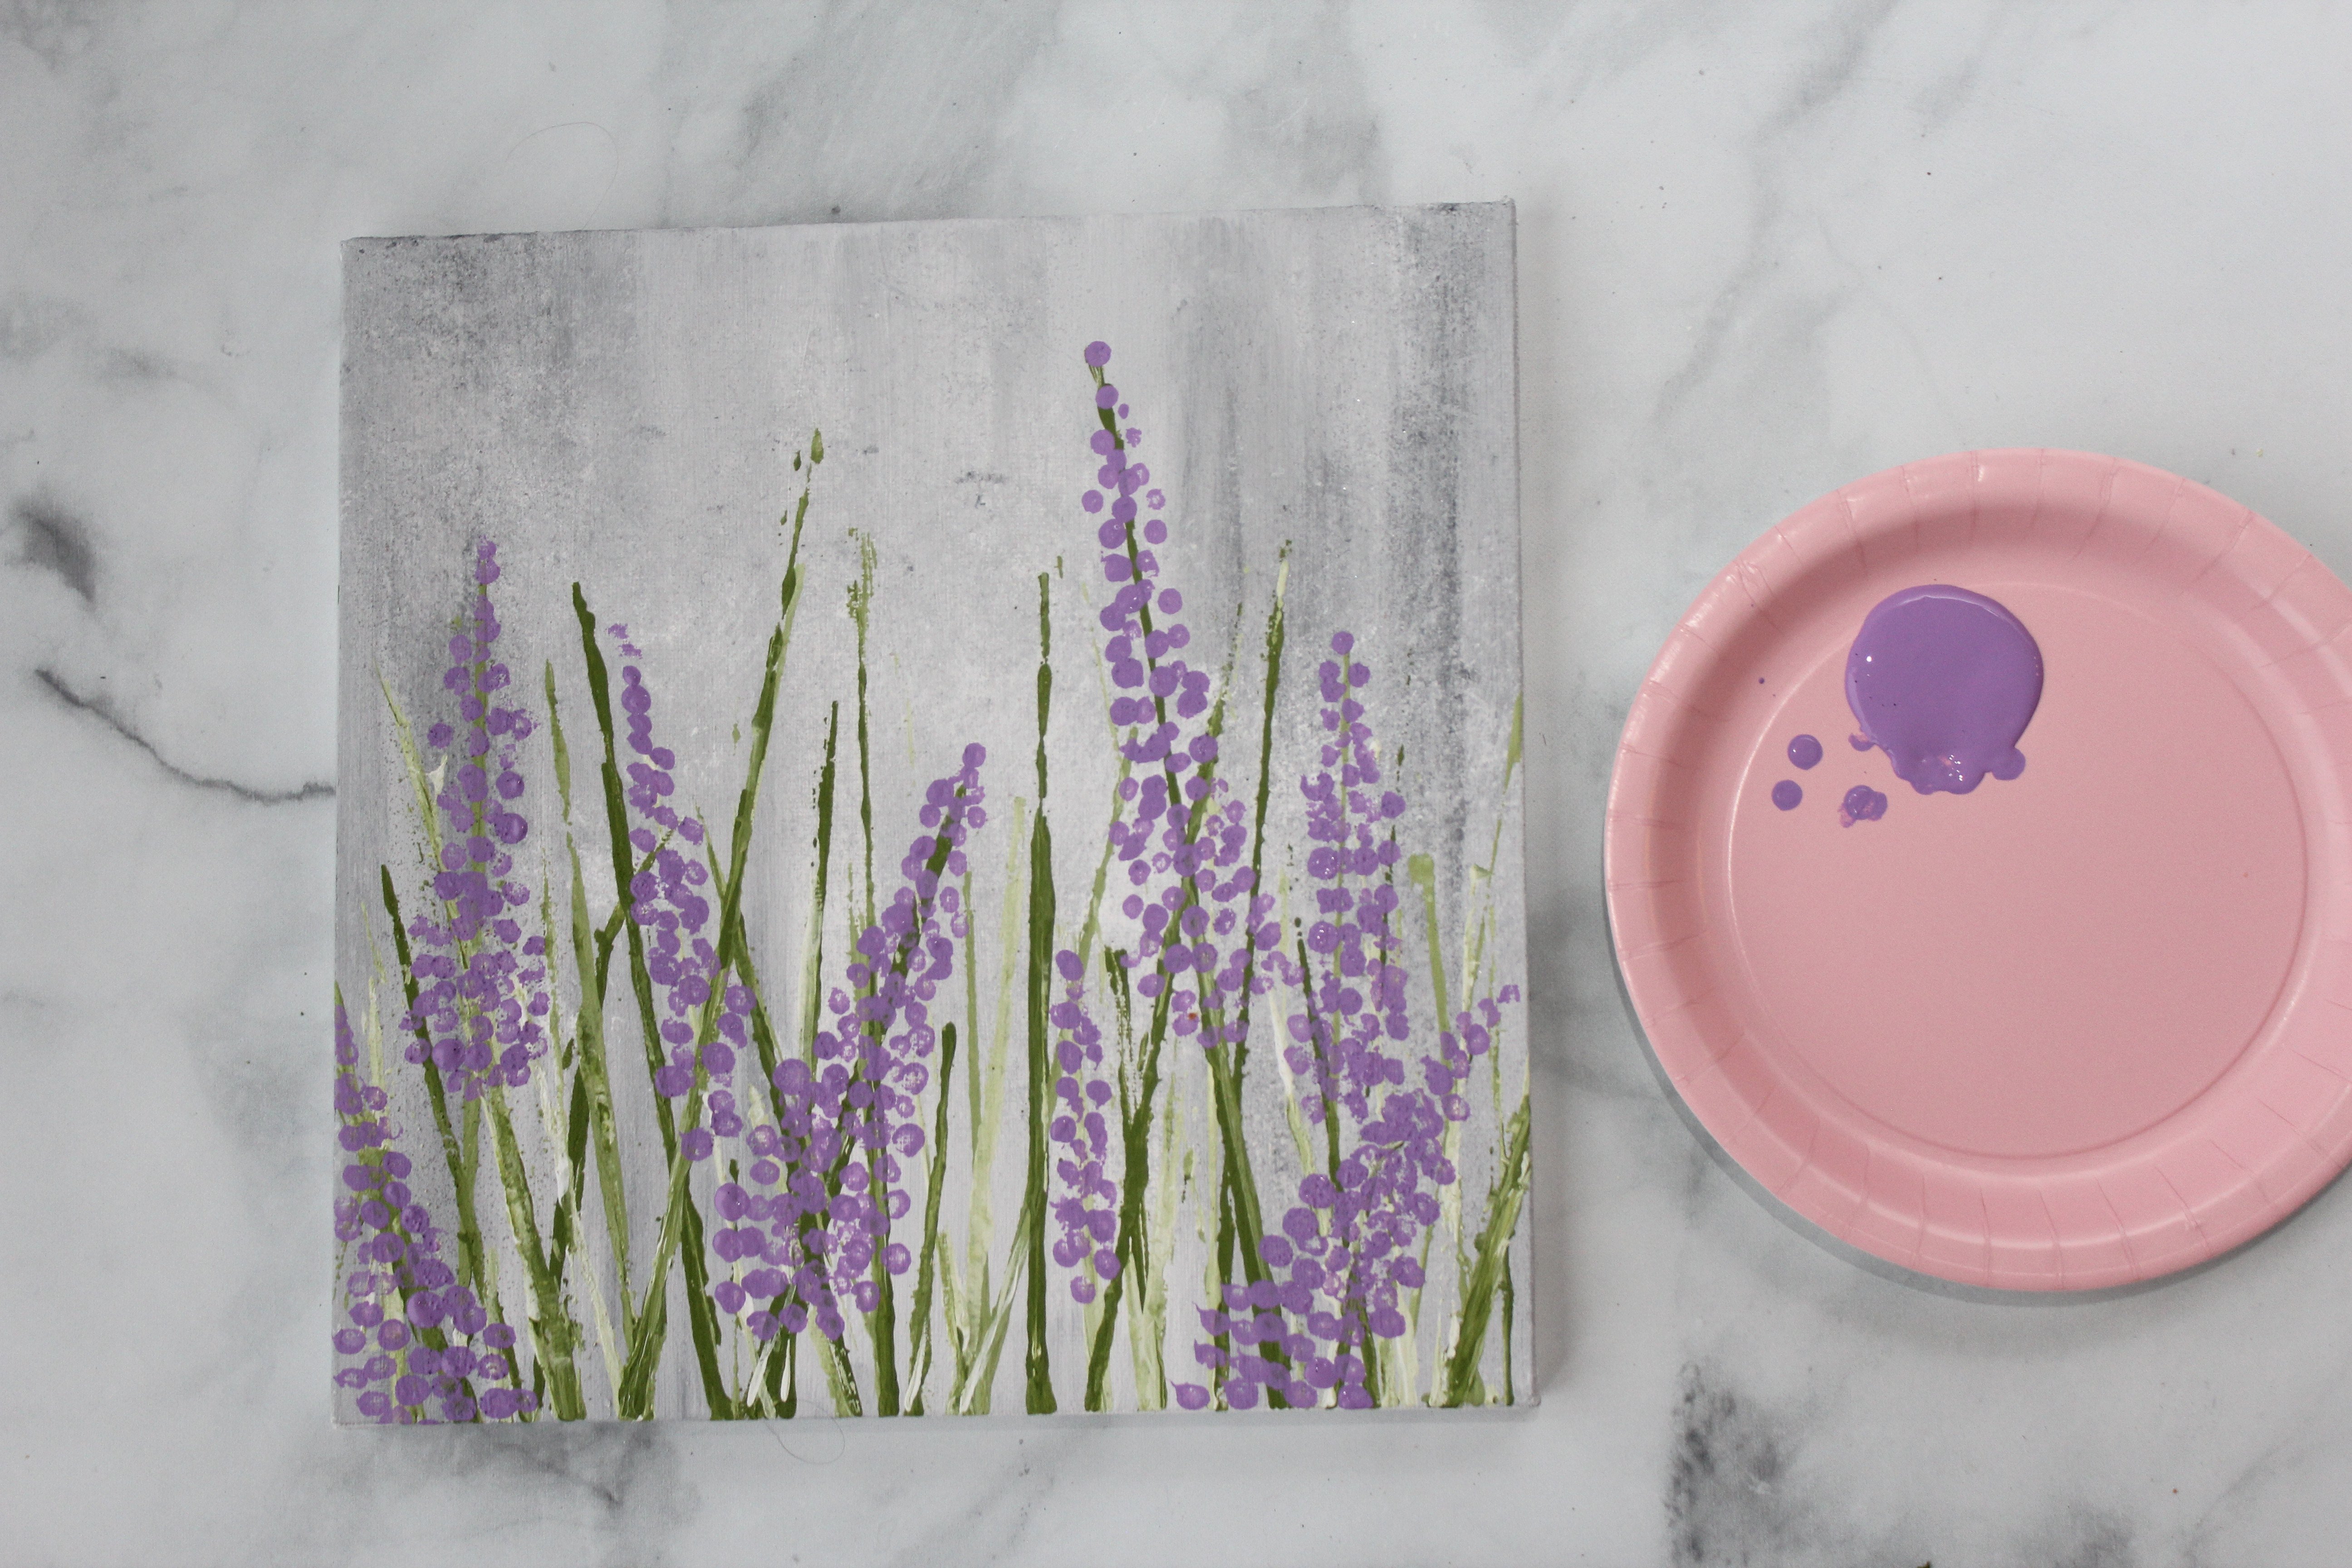
Once dry, you are going to take your darker purple color and using a clean cotton swab create some dots over top the lighter petals on the lavender flowers. Let dry

Step 12
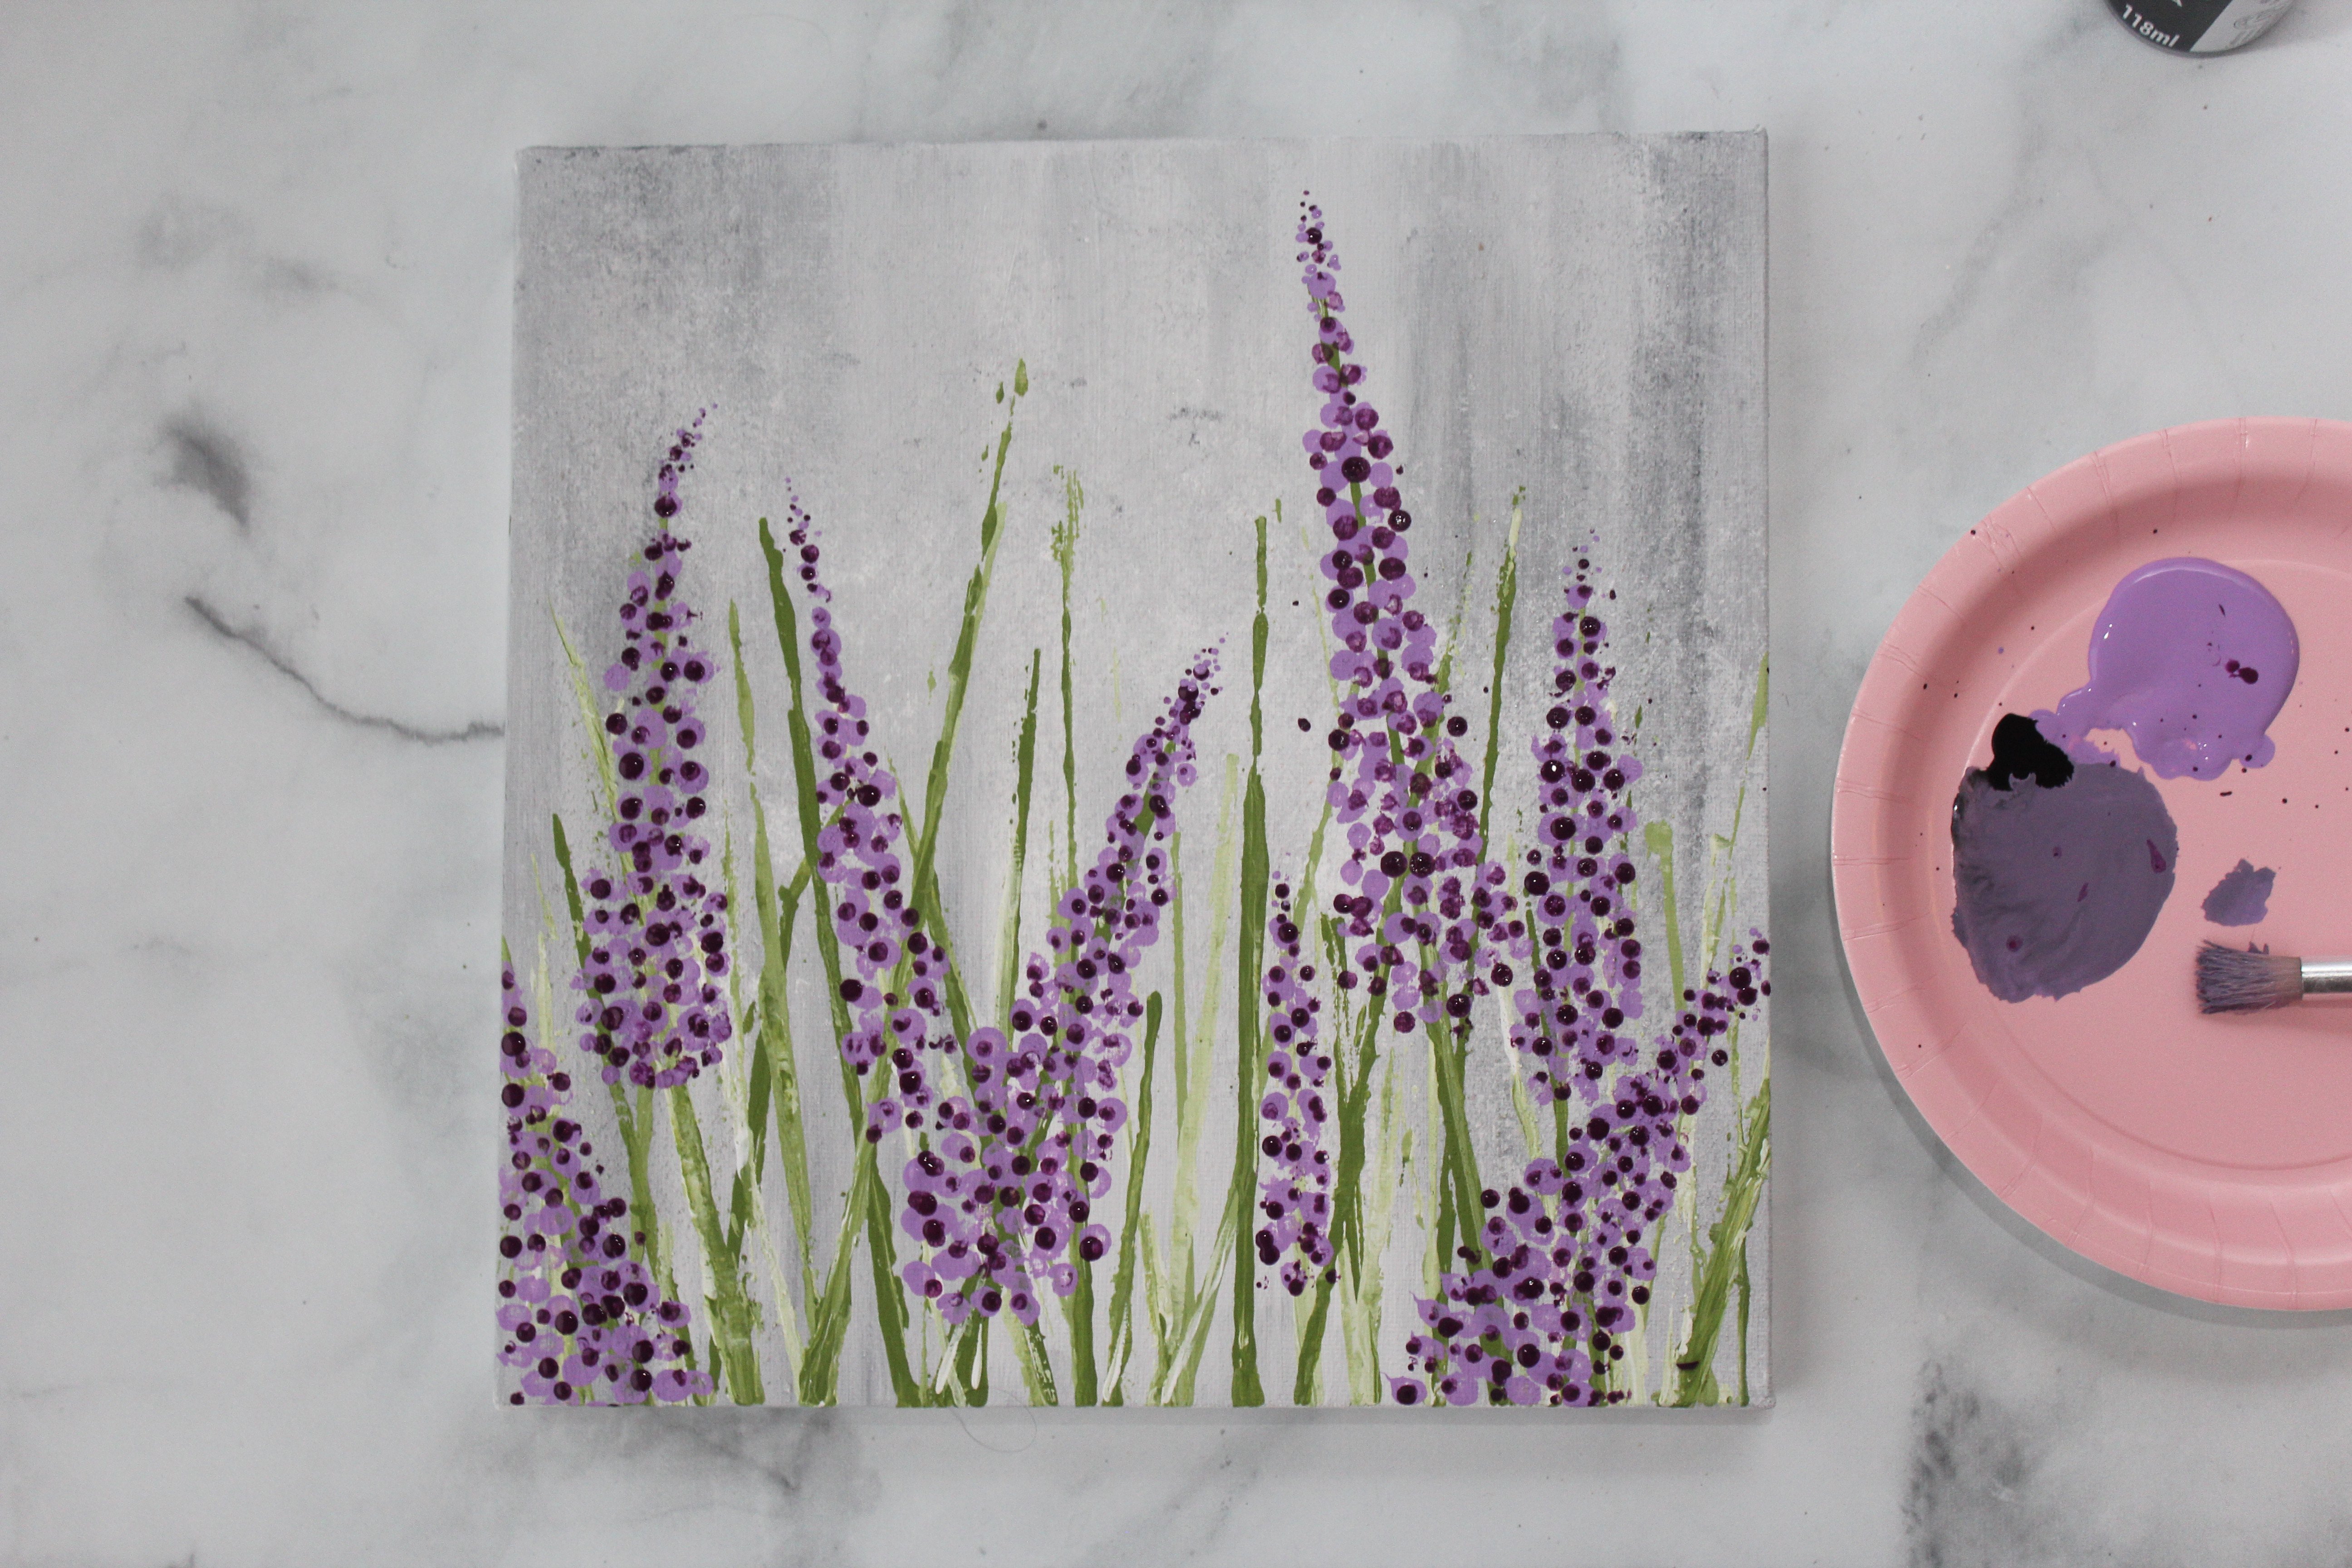
Now your going to create a lighter purple tint for your highlights as follows: Take some of the light purple paint and mix it in with equal amount of white paint. This will create a very light purple paint which will be great as a highlight on the petals. Using a clean cotton swab, dab this highlight color on the lavender flower petals.
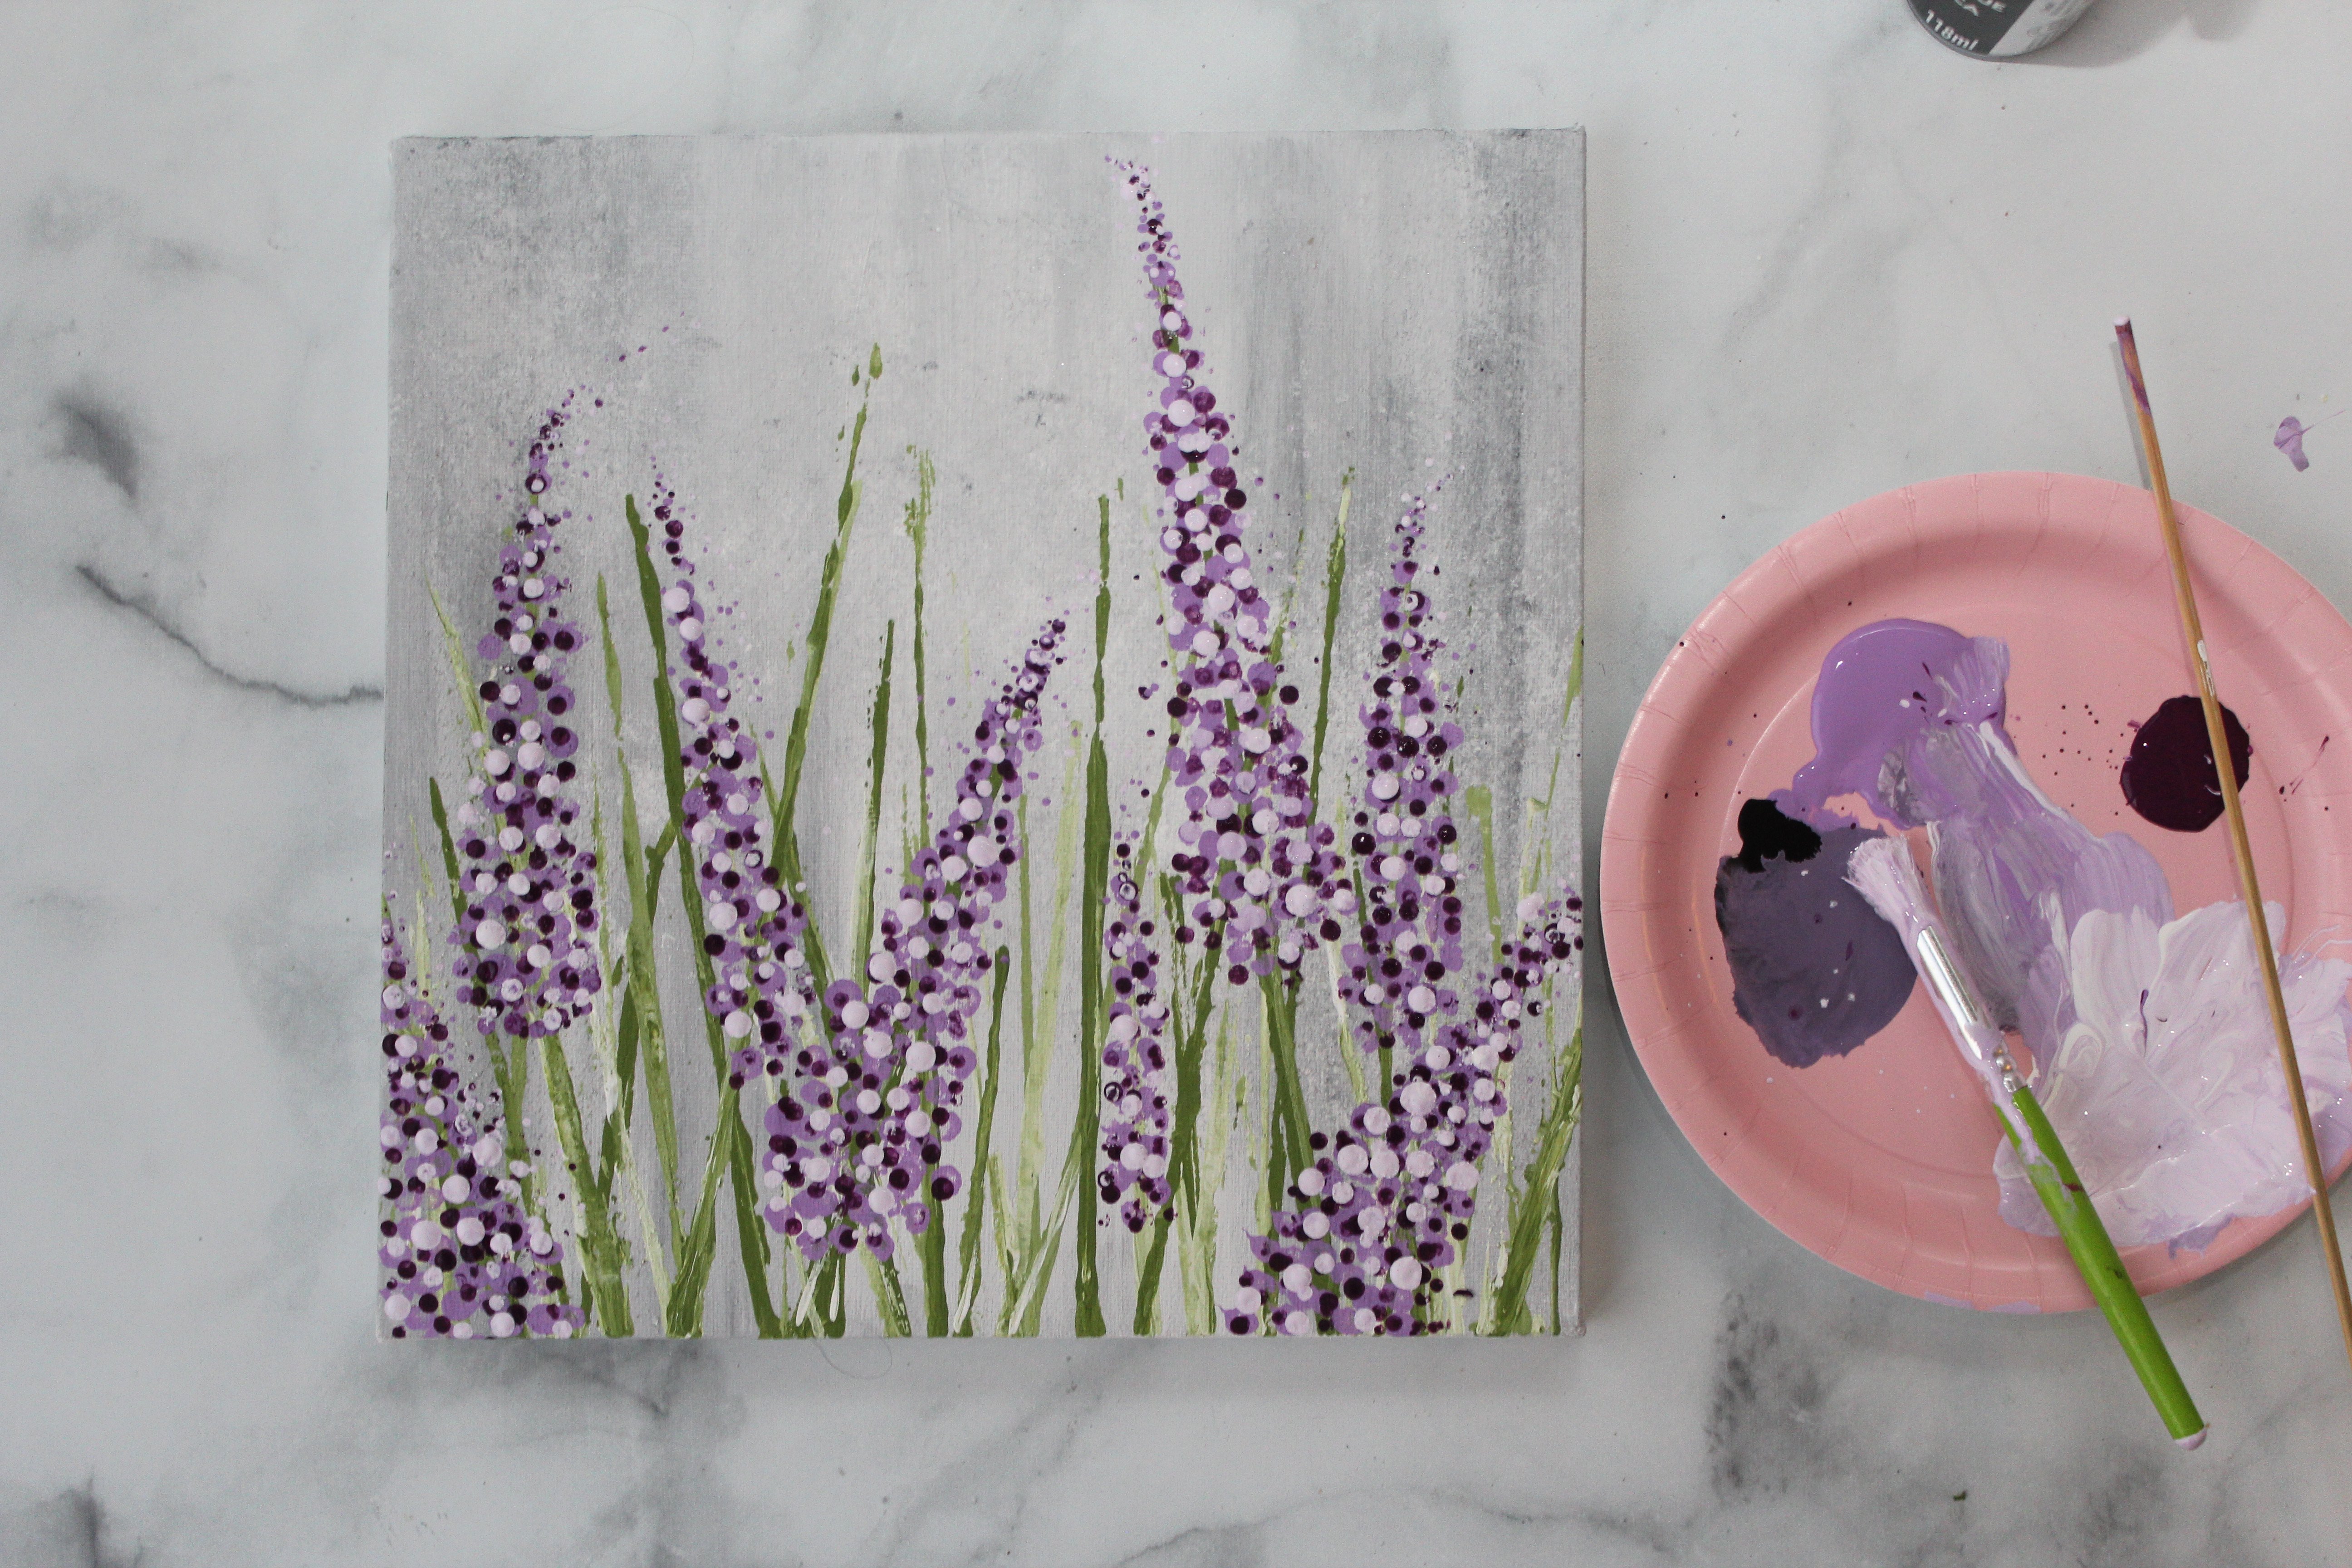
Let your painting dry and your done!
And don't forget...After all your hard work, sign your painting! And make sure you pat yourself on the back for a job well done! Your gorgeous, tranquil masterpiece is complete, and you have learned some acrylic techniques and color mixing tricks to boot! You're rockin those acrylics- can't wait to see what you create next!
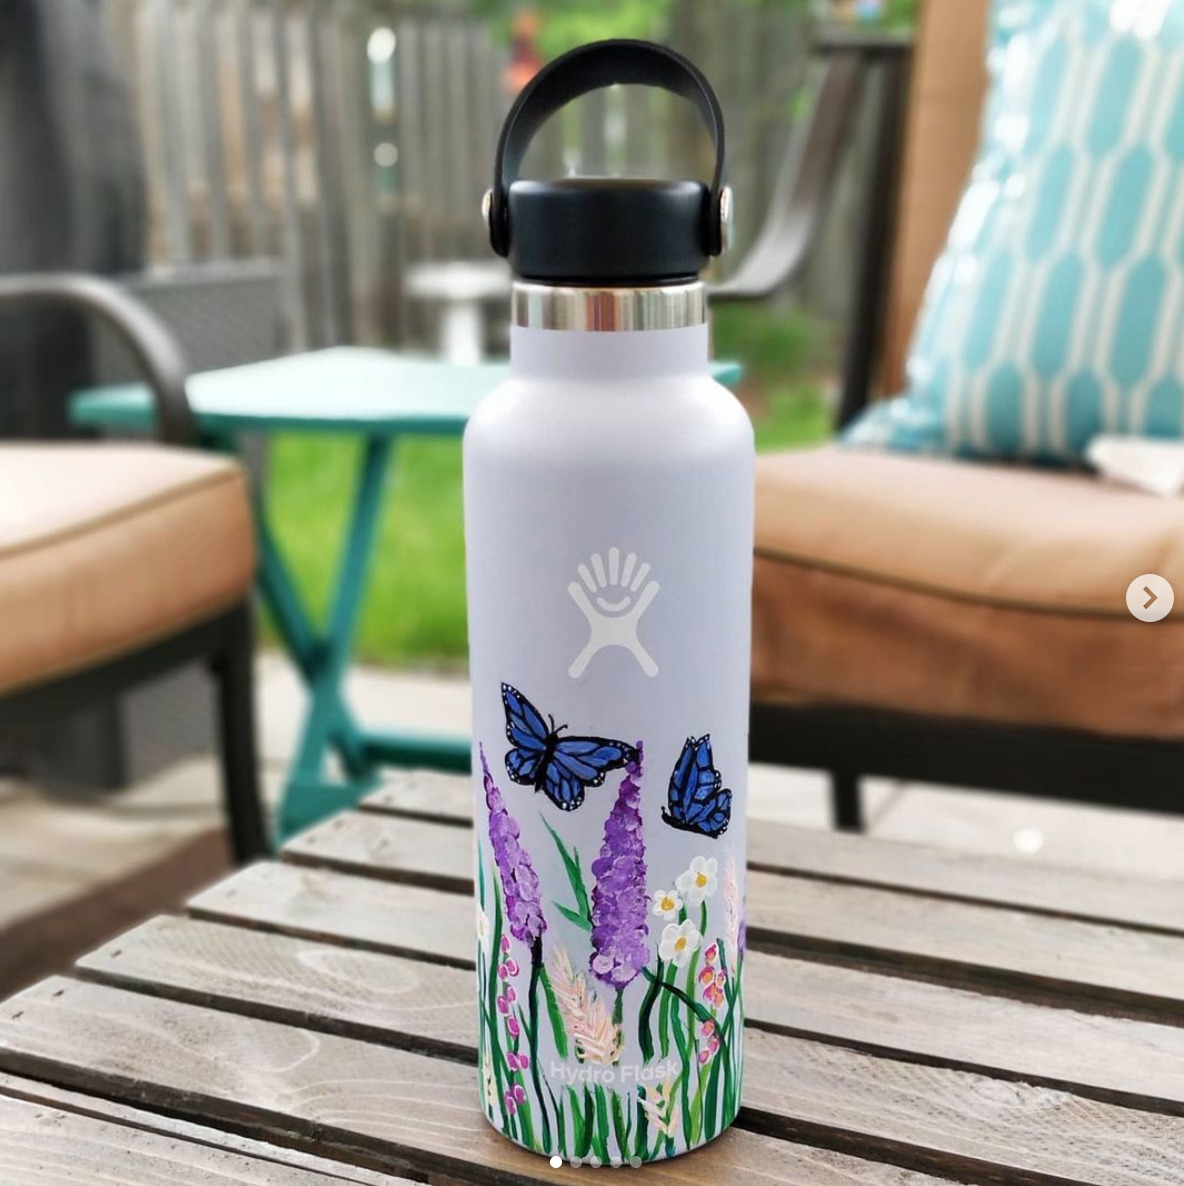
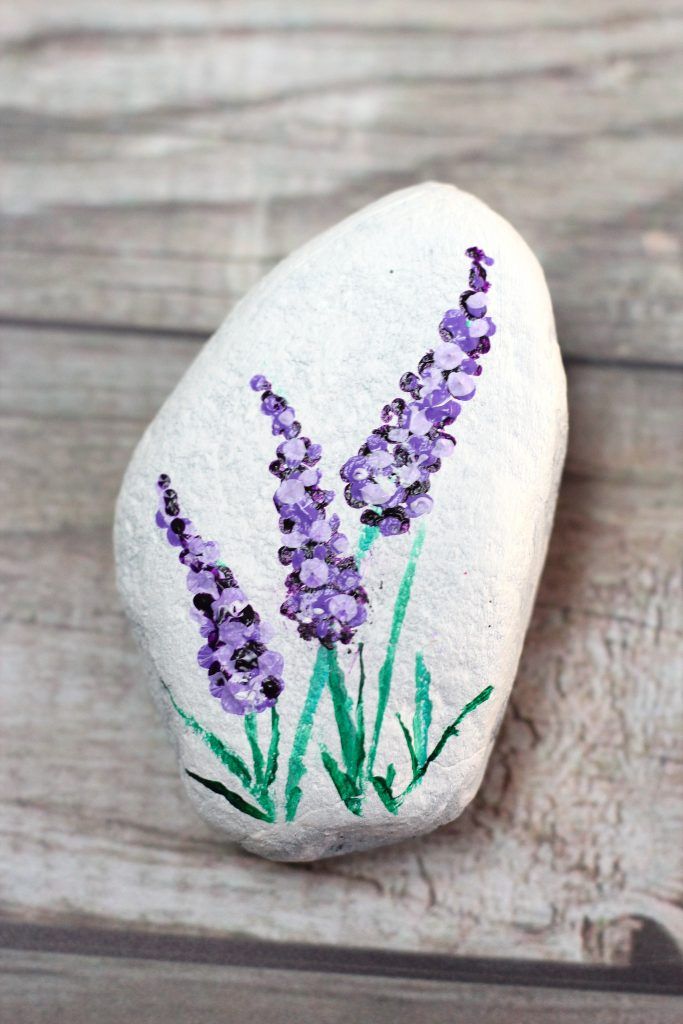
The beauty with this lavender painting technique is you can use it on a variety of surfaces like on these glass mason jars, Hydro Flask water bottles, painted rocks, and even pottery projects like mugs.
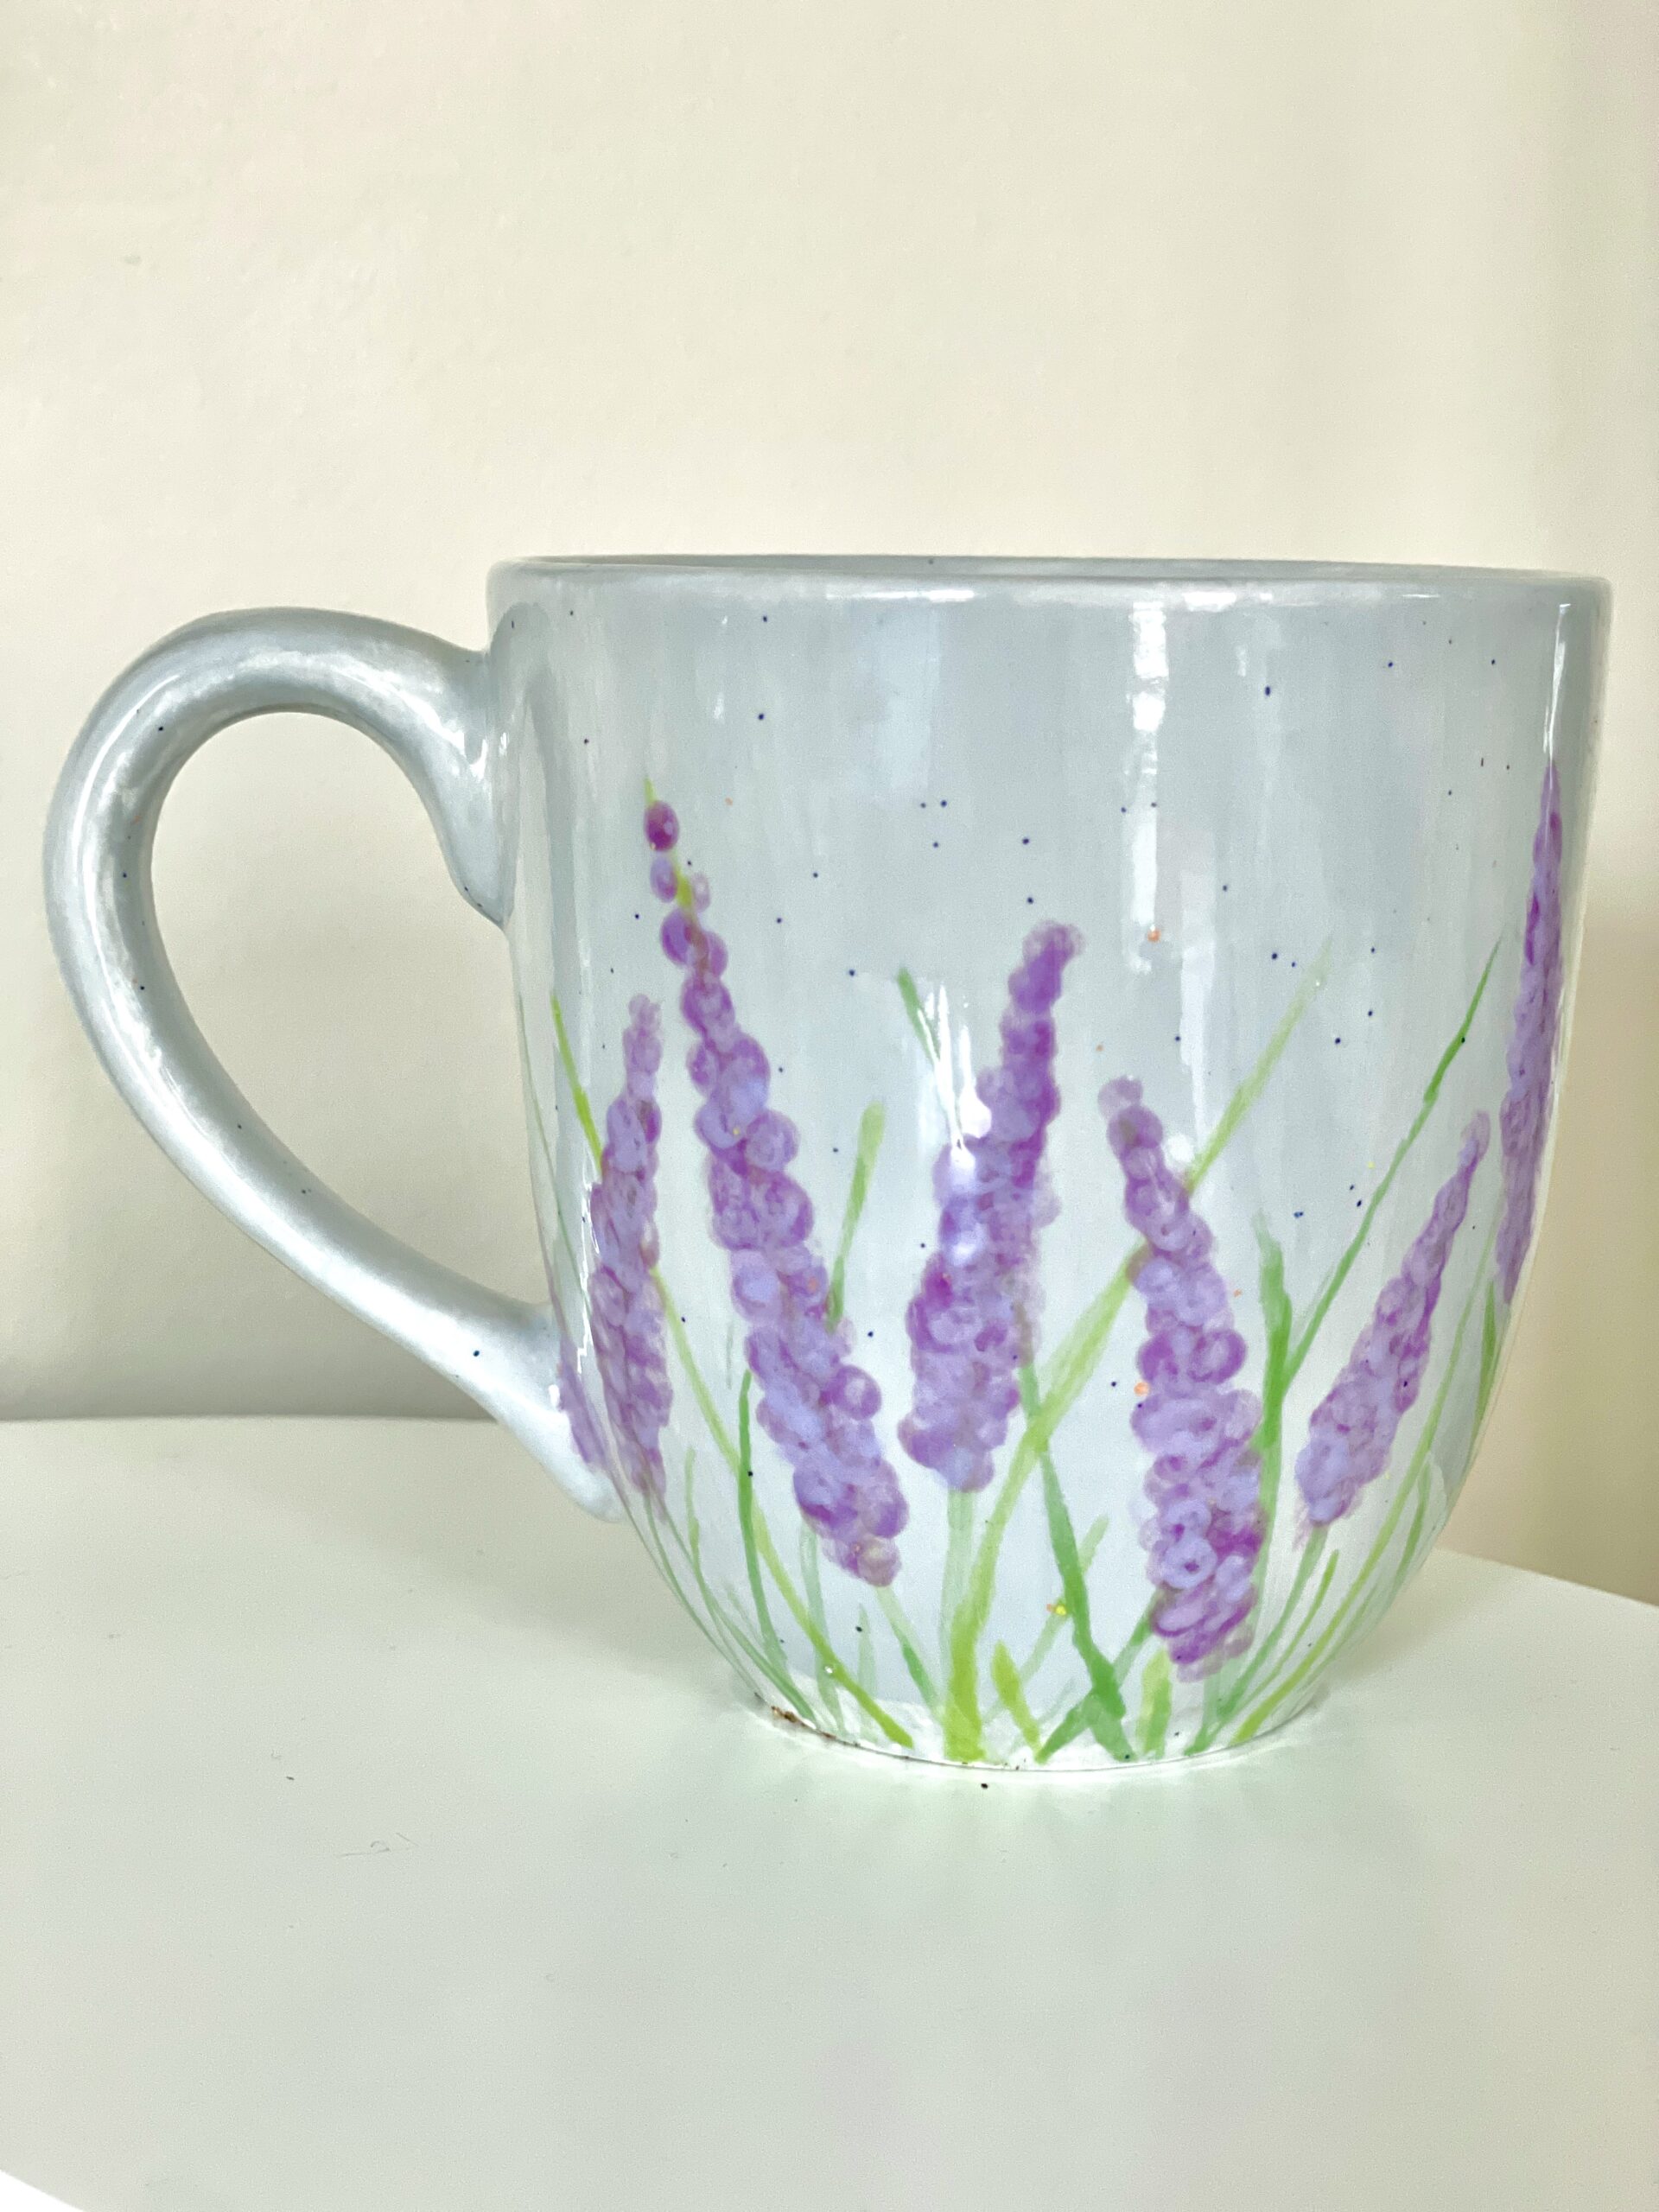
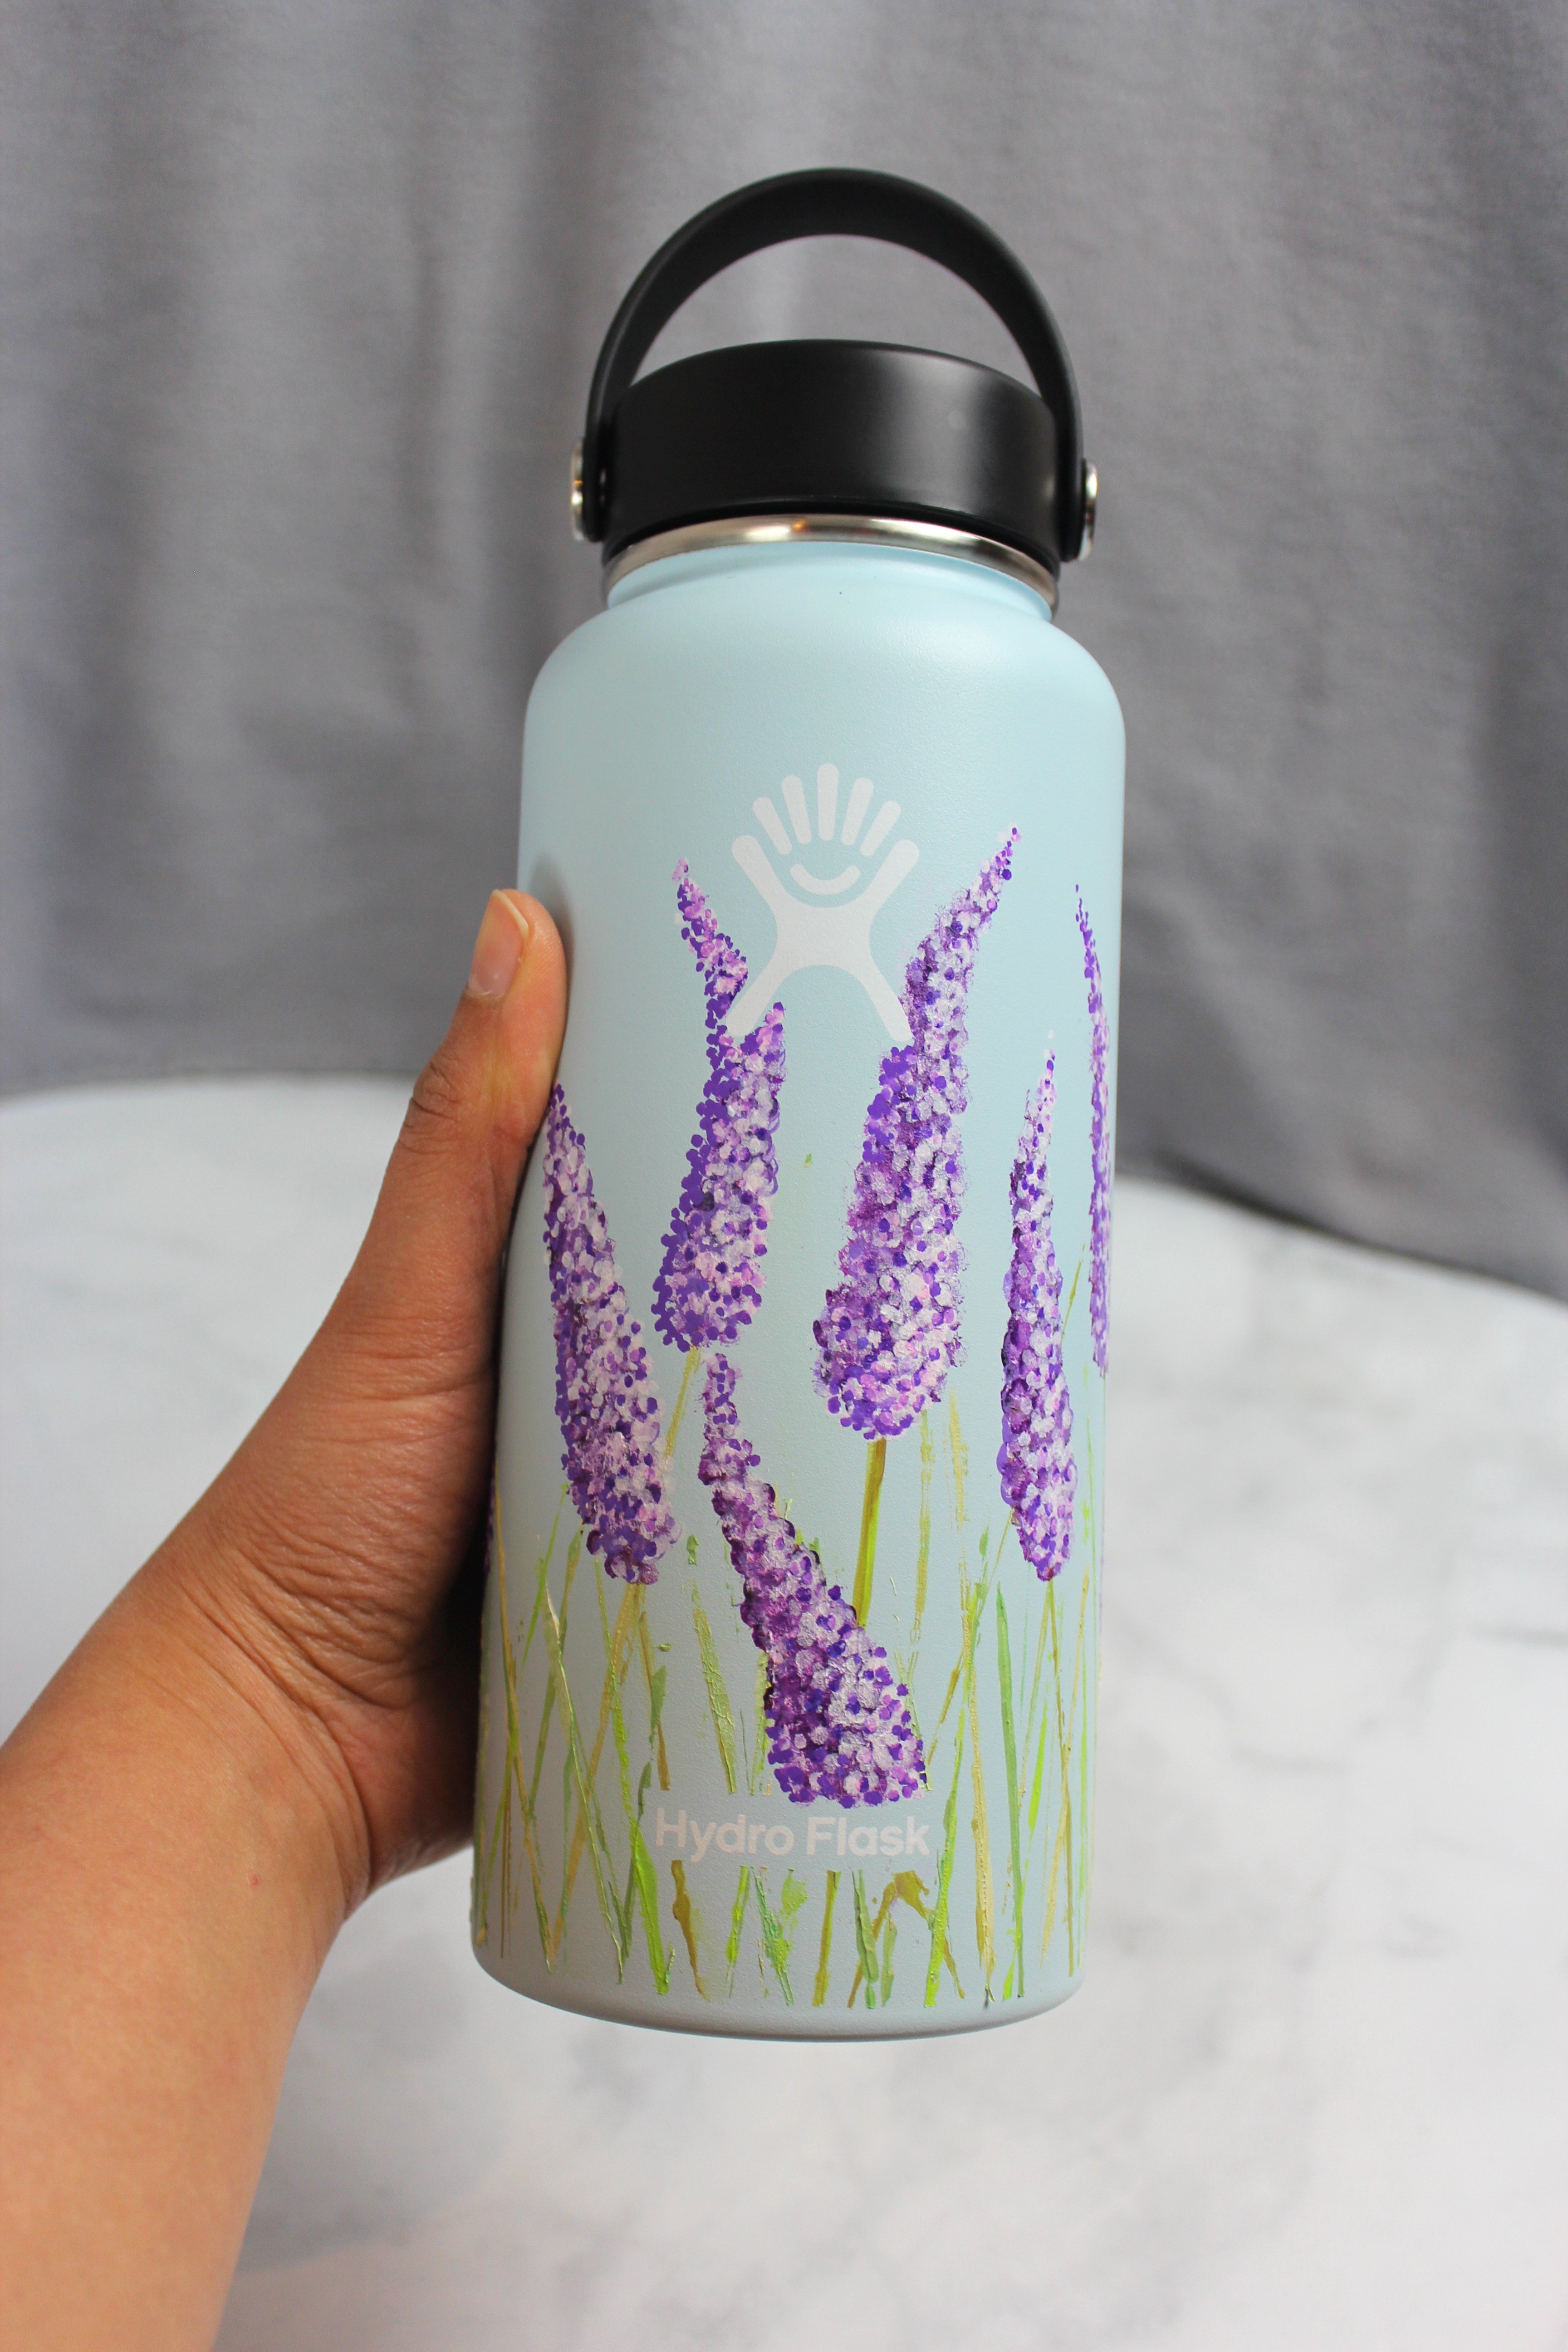

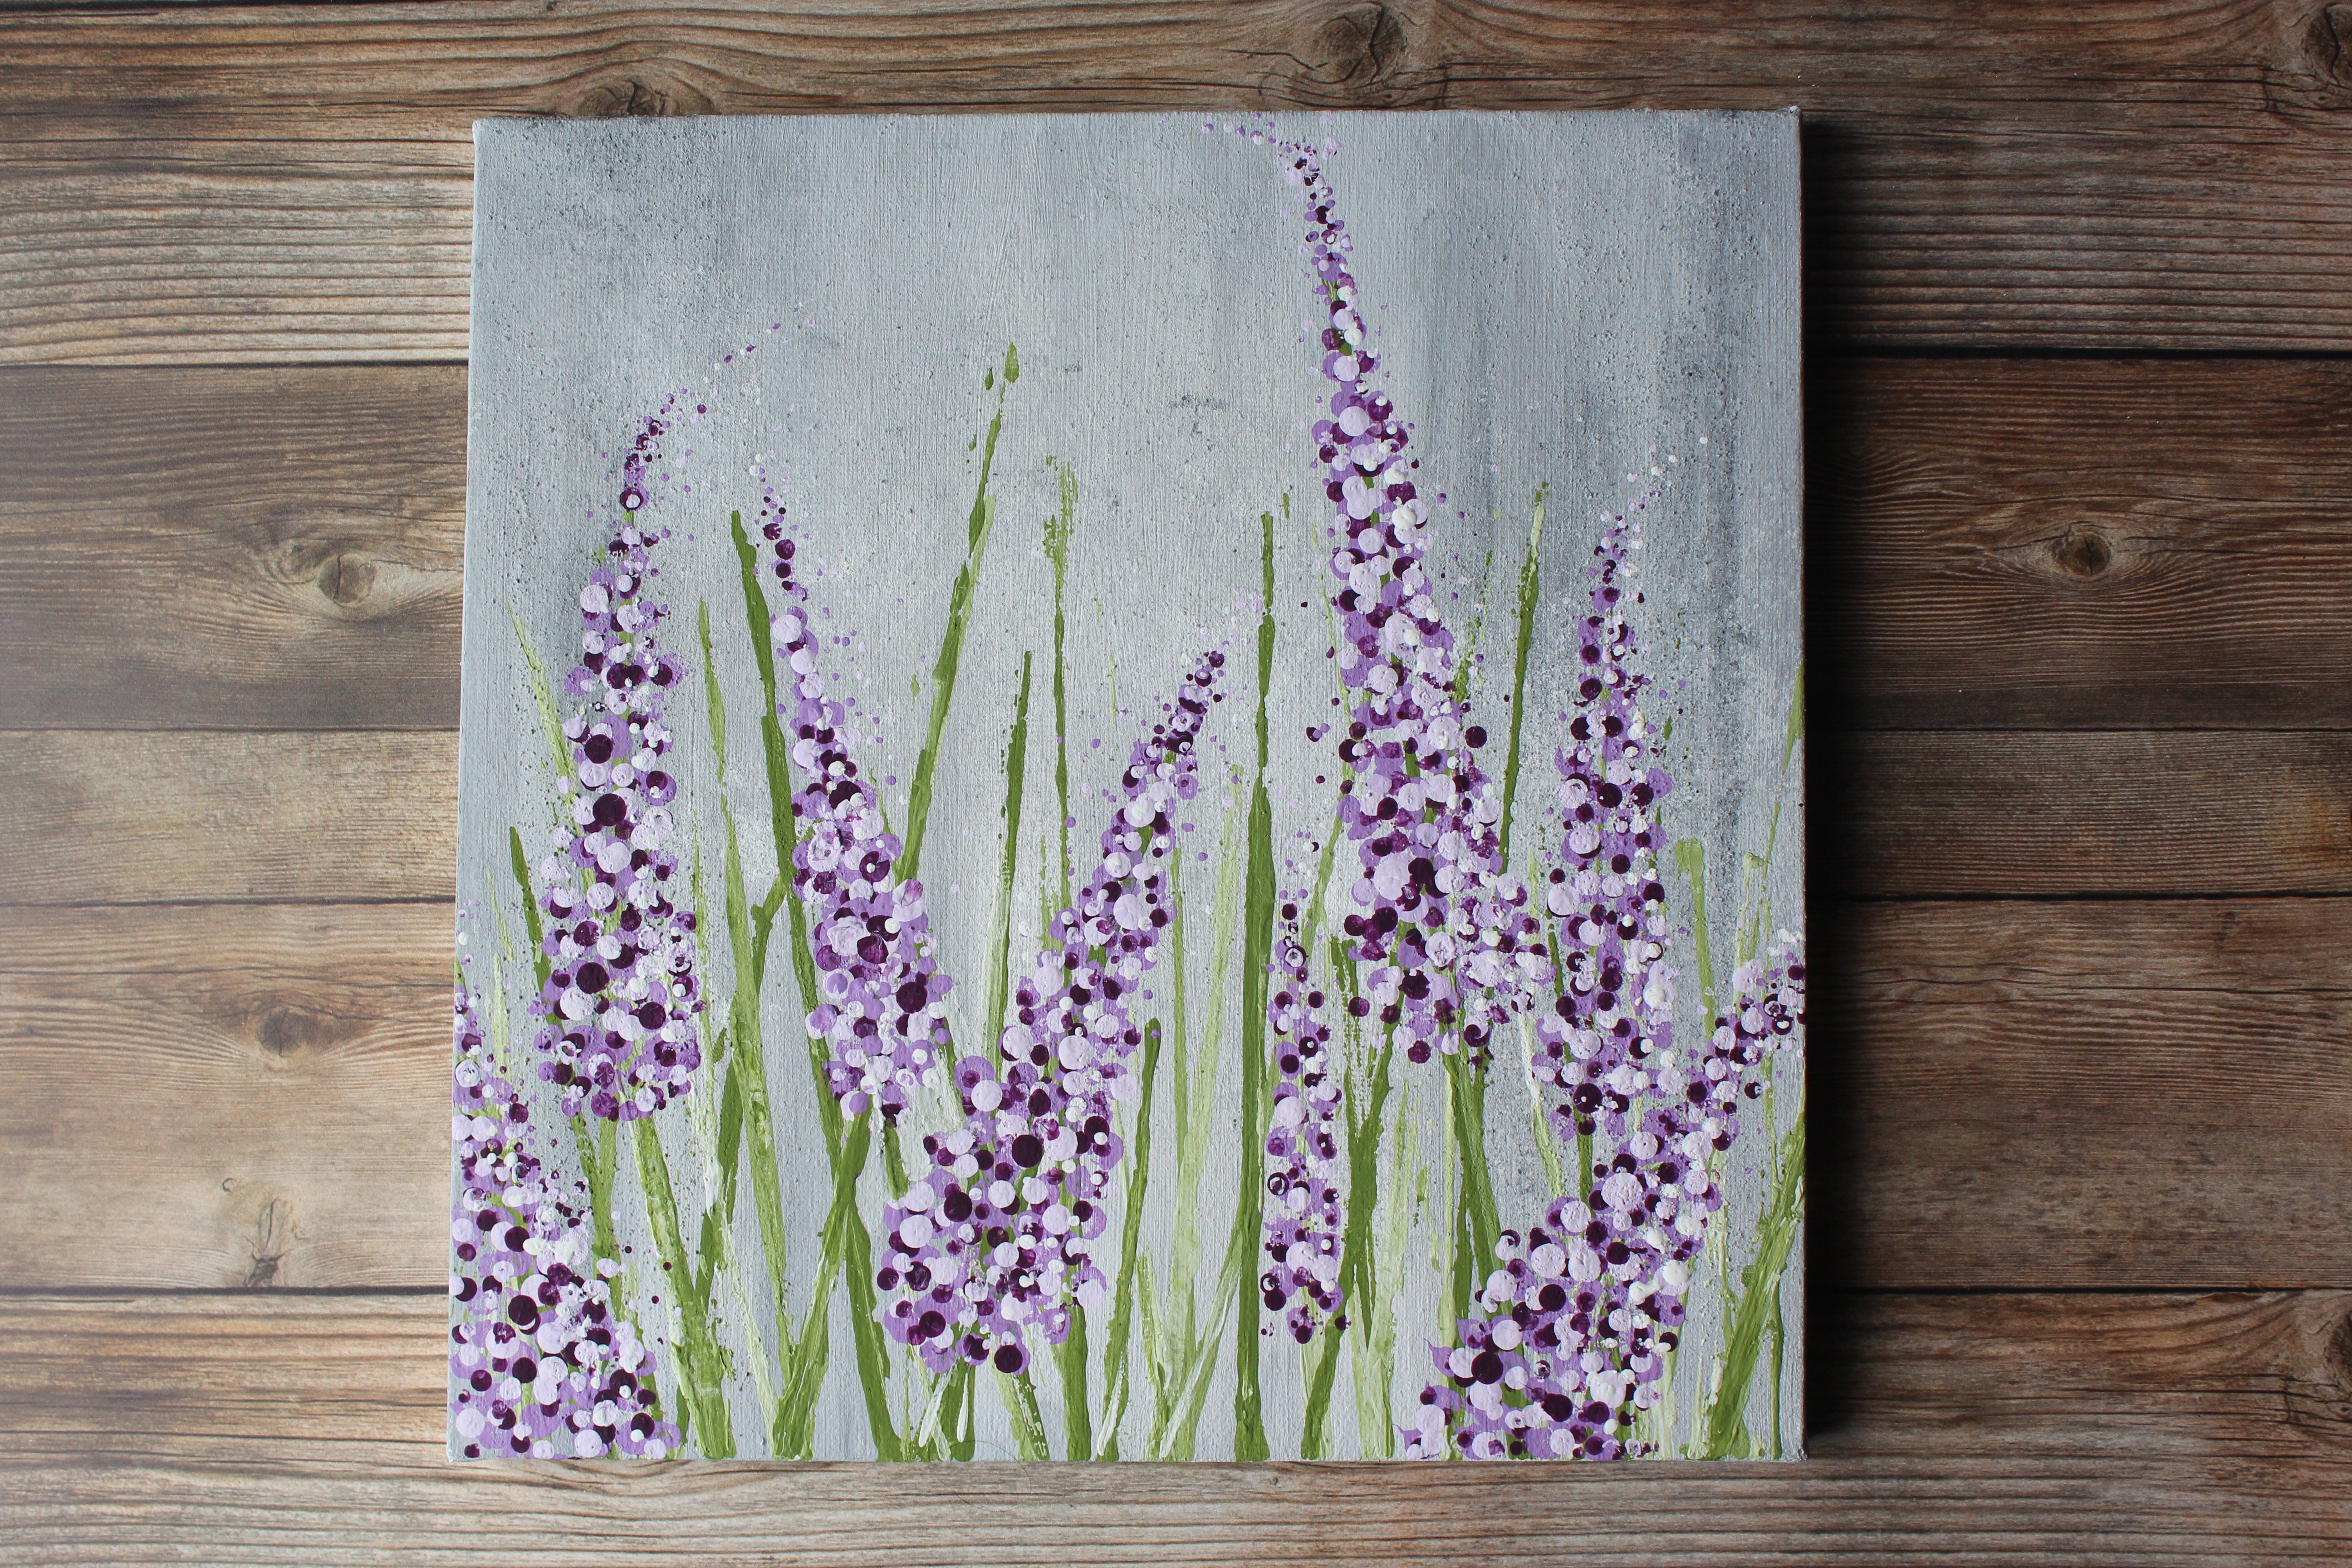
Here's some extra pictures of the finished piece, hope you enjoyed this tutorial!
I would absolutely love to see your lavender painting, so if you'd like to share, pop on over to my Facebook group and post your art!
And, until next time, stay nifty & creative!
<3
Jasmine
If you liked this tutorial, please pin it!


I am a beginner artist and found the lavender tutorial easy to follow I look forward to seeing more tutorials to help me find my own style of painting
So happy you liked the tutorial Tina! And you are right, finding your own style of painting will come, the more you do! Very excited for you 🙂
What’s up, I would like to subscribe for this website to get latest updates, thus where can i do it please help.|
Hi Jasmine,
Thanks for the lovely tutorial. I painted mine and it turned out pretty!
Hamidha
So happy you enjoyed painting it Hamidha!! And you're most welcome for the tutorial, makes me happy when I hear stories like yours 🙂
Thanks Jasmine for such a simple ides for painting lavender flowers.
Simple and pleasing results.
Pat. P
Glad you liked the lavender painting tutorial Pat!
Cheers,
Jasmine
First, thanks Jasmine. It was so fun and so easy to do. I had an old shelf that I wanted to use in my sewing/craft room, but it was ugly. I painted it white and then put a cherry tree on the side and now I love it.. Photo - Google Photos https://swky.co/Rpn94m
That's such a cool idea Jamie- thank you for sharing! I tried to click on the link and it doesn't work for me - would love to see it. You can email it to me directly at contact@feelingnifty.com if it's easier.
I love seeing how everyone applies their acrylics- very exciting!
Cheers,
Jasmine
oh thank you so much for these wonderful tutorials☺ I'm no artist but used to make cards and just got into art journaling and especially love working with acrylic paints. your tutorials are so concise from start to finish you include every single step of the process making it easy for me to follow, which I haven't found with any other tutorials...from what to put as base layer on card colours to use and mixing all fantastic...definitely the queen of tutorials for beginners!😘
Thank you so much Kate for your kind words😊 That makes me so happy to hear the detail in the tutorials help you- love to hear that! And that's wonderful that you're using acrylics in your card making - it excites me to hear how everyone uses their acrylics. Let me know if there is anything in particular you're wanting to learn in terms of tutorials.
Cheers,
Jasmine
What if I don't have all of the supplies needed? I have to have this done in like 2 days for it to be ready for Mother's Day.
Hi Ariah,
Sorry for the late reply, hope you ended up painting it! And you can always improvise with any painting. If you don't have all the supplies like paint colors etc., just use what you have at home and it will work. Hope that helps!
Cheers,
Jasmine
Hi Jasmine, stumbled upon your tutorial while checking out acrylic painting tips for my daughter. Very detailed explanations. Thanks.
One doubt....have you used any varnish at the end? What kind do we use?
Thank you Usha!
You can seal your painting with a gloss varnish like this one: https://www.michaels.com/liquitex-gloss-varnish/
It helps make sure your colors don't fade over time with sunlight and protects your painting. Many artists who sell their art varnish them to maintain color long term.
Cheers,
Jasmine
Are your tutorials copyrighted?
Can we paint them and sell them?
Thanks!
Shirley
spinks06@gmail.com
Hi Shirkey,
Painting the tutorial and selling your finished painting is fine. Enjoy and thank you for asking 🙂
Cheers,
Jasmine
I am new to painting with acrylics and I find your tutorials inspiring, fun, and easy to follow. Thank you for sharing your talent!
Thank you so much Kathleen! And so glad you're enjoying the painting tutorials 🙂
So much fun did this for Mother’s Day with my friends.
So glad you enjoyed the painting Laurel!!
Cheers,
Jasmine
I painted it on a small canvas and it turned out awesome!
That's so awesome to hear Taylor!! Thank you for taking the time to let me know 🙂
Cheers,
Jasmine
Loving your tutorials! Already did the sunflower and I just love it! Next one is going to be this one but I'm still looking at possibilities for other colors for the background... blue, yellow? So many choices! Thank you+!
You don't even know how much that means to me Patricia <3 Thank you so much for taking the time to not only paint the tutorials but sharing your experience with me. This lavender painting is very special and meant to signify the love of moms. It personally reminds me of the best moms I've had the fortune to have in my life. I can tell you are a true artist, so very proud of you! As for the color backgrounds, the artist inside you knows. Both are wonderful colors, you could paint with both of them as an idea.
keep painting and much love,
Jasmine
Can you pdf these as I take them down to art place and teach IHC students. using a screen won't work with them.
Hey Michelle,
Thank you for your suggestion. I will make a PDF for the lavender painting soon, good to know they help!
Cheers,
Jasmine
This turned out pretty good. I used Epsom salt for my texture component. The flowers, to me, look much more like lupins than lavender, but the technique is fun and gives a reasonably realistic impression -- at least for an amateur!
Hey Liv!
That's an excellent idea about the Epsom salt!! And I agree with you on the shape, I have it on my list to "redo" lavender with an authentic shape. Thanks so much for sharing your experience with the painting- and so glad you had fun!!
Cheers,
Jasmine