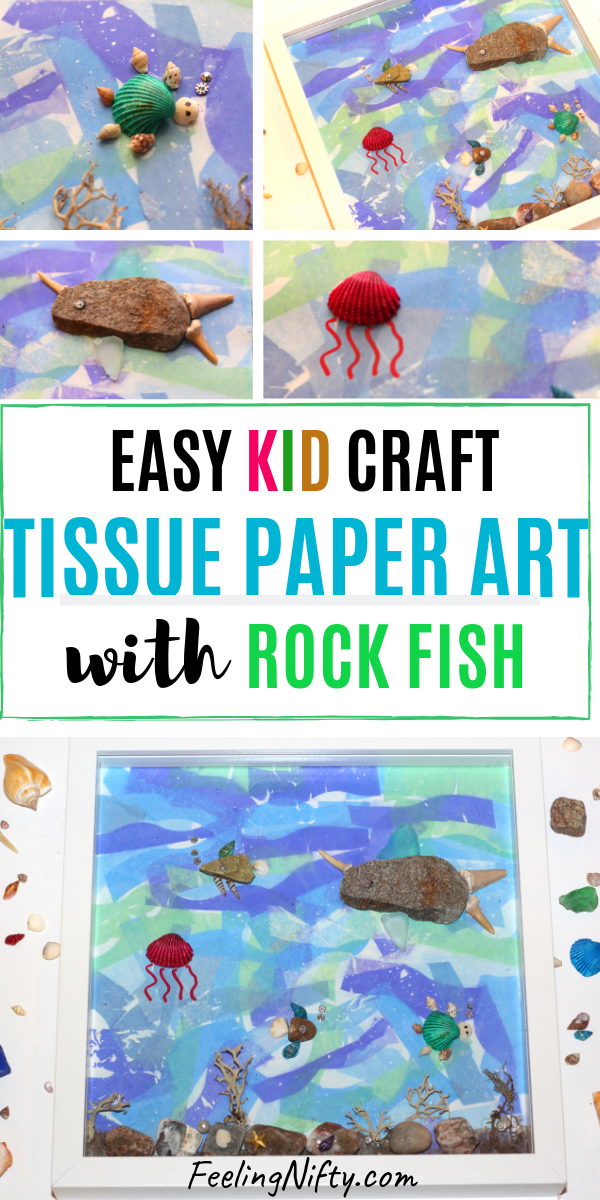
Tissue Paper Art and Rock Fish Craft
An easy tissue paper art project for the kids. They can also let their imaginations run wild with this fun fish craft using rocks or pebbles from your yard!
The kids will love making this easy and cute tissue paper art and fish craft. It's a great craft for encouraging creative thinking. The kids get to pick rocks and seashells (optional) and are challenged to make different under the sea creatures with them. You'll be surprised with what they come up with!
I'll show you how to make this craft with your kids, and also an easy way to frame it so it's ready to hang (if you wish).
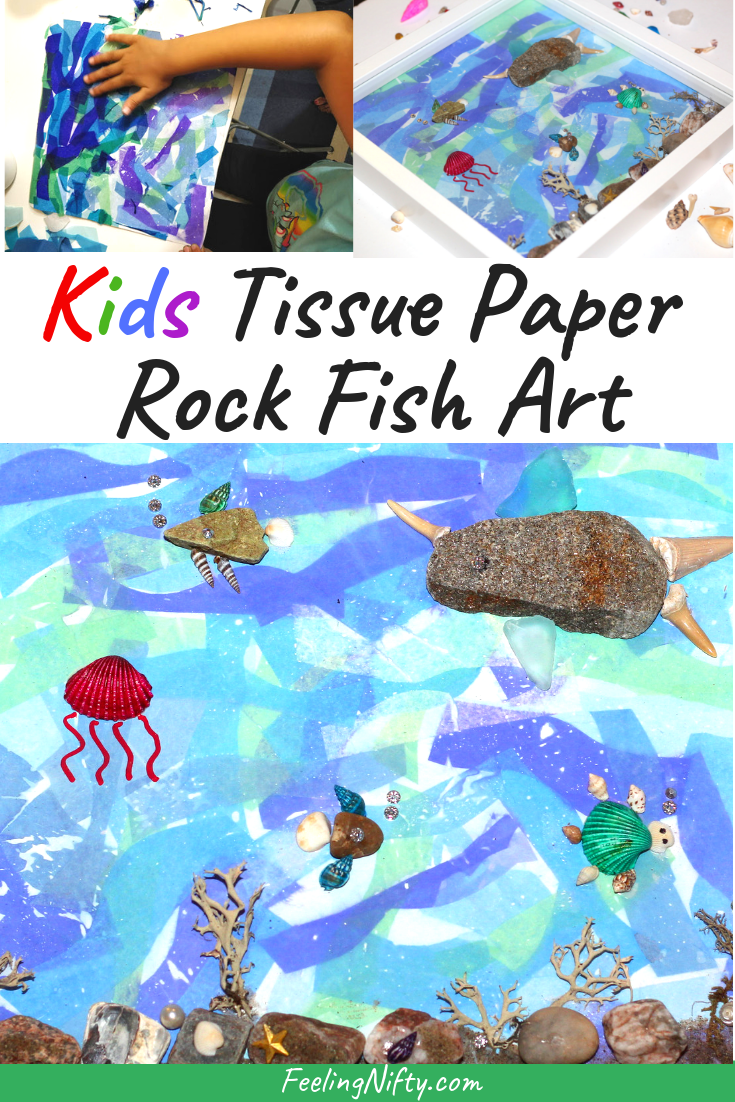
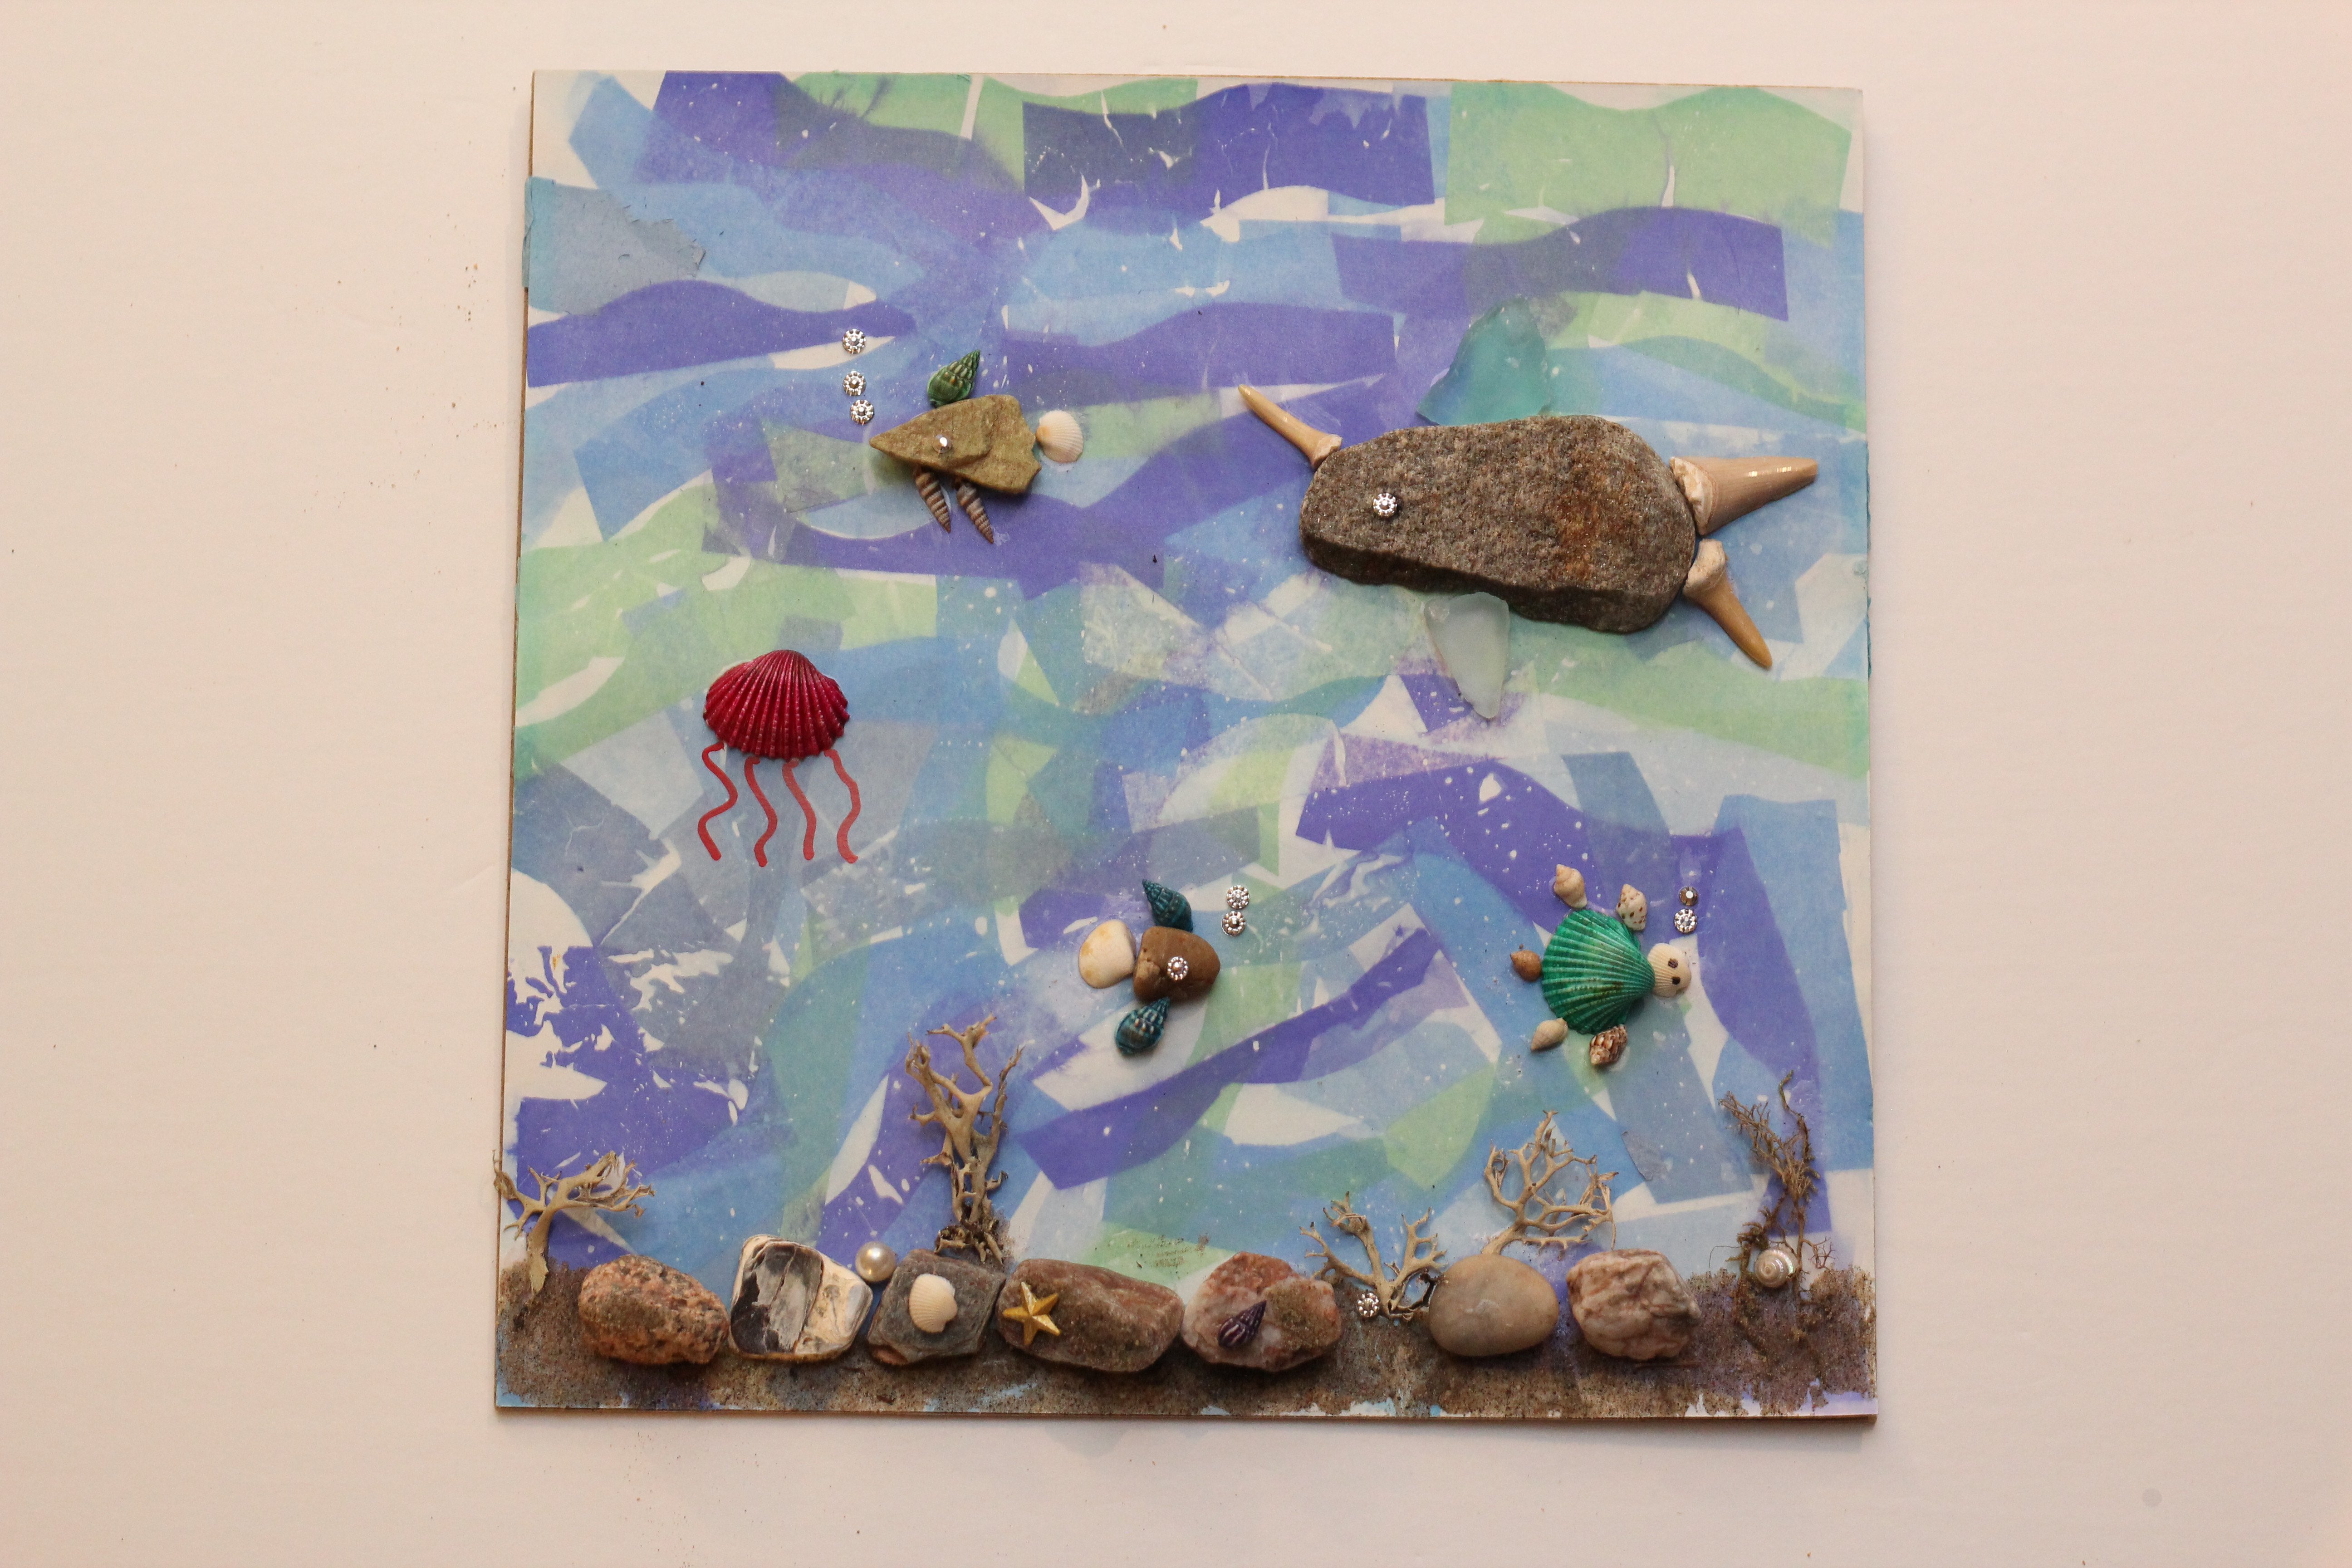
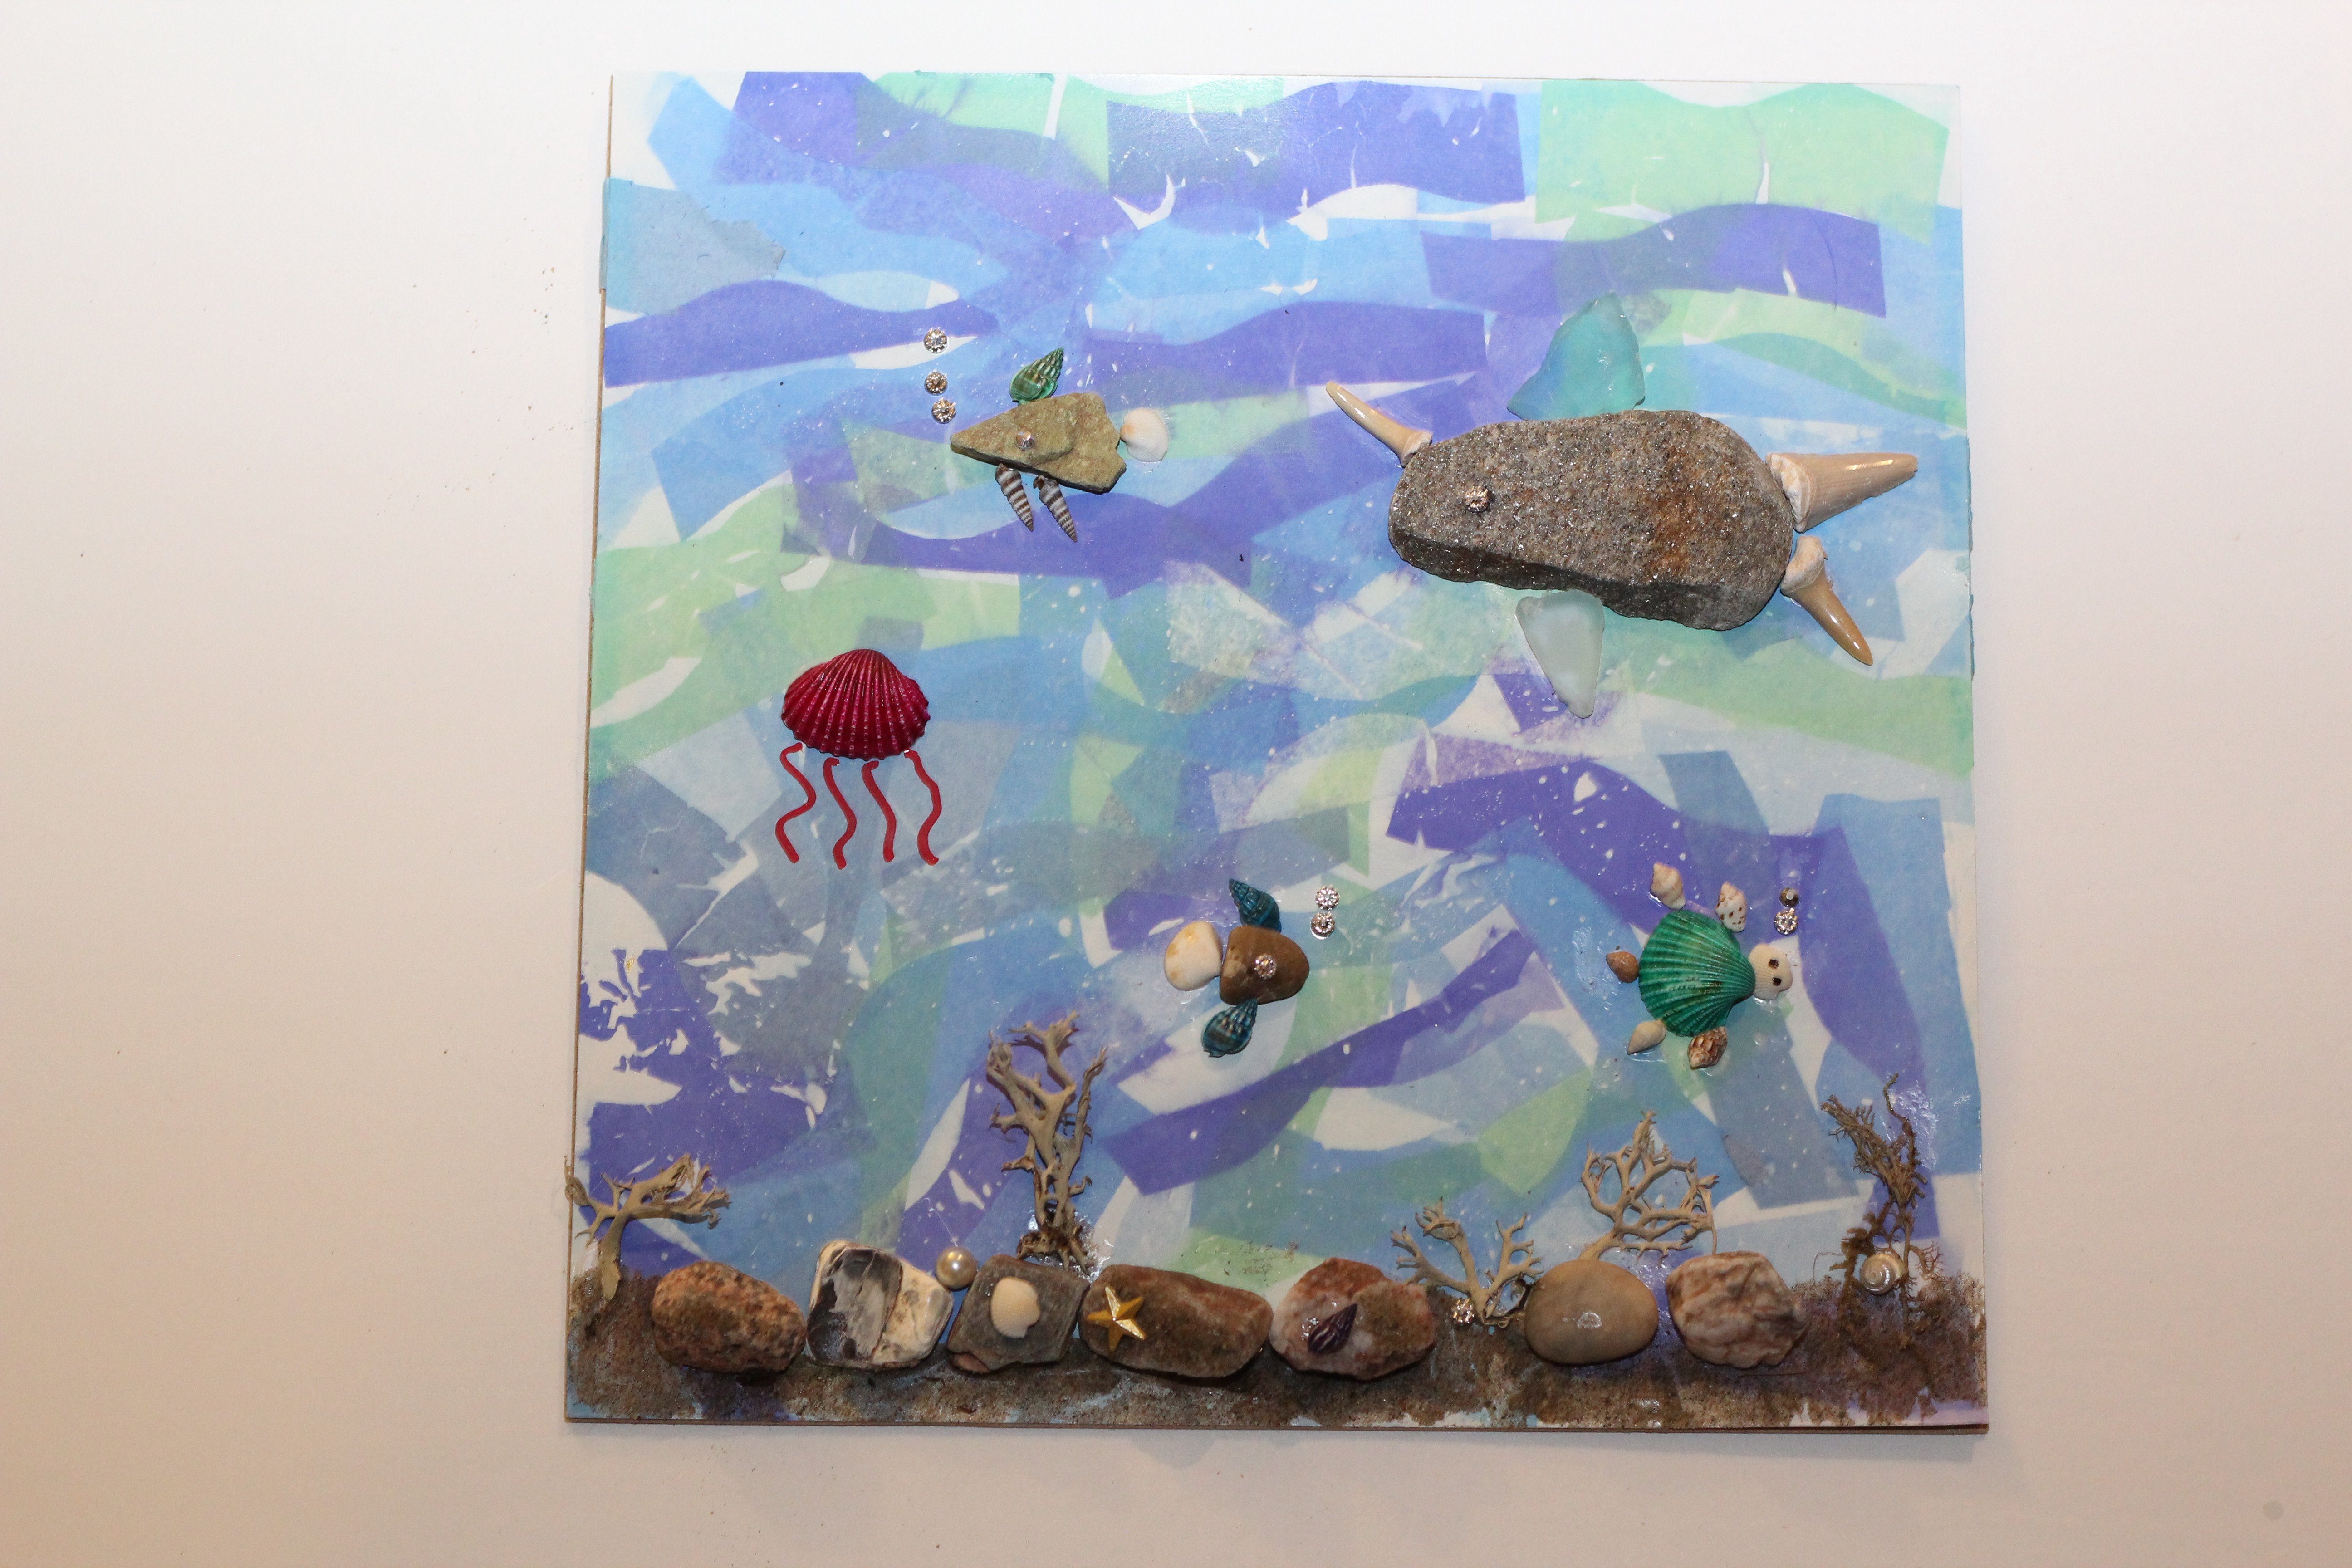
My daughter wanted to make her own version of pebble art after watching me created this pebble art tree. She wanted to use some fun colours, so she decided to make an under the sea scene.
We used the same tissue paper art techniques that I used creating my tissue paper bleeding art tutorial. I'll show you below how easy it is to do - and it's super fun for the kids!
If you're looking for a fun and easy underwater scene to paint with acrylics, check out this "how to paint a sea turtle" underwater scene tutorial.
Lets start with the supplies you'll need for this tissue paper wall art
Supplies for Tissue paper Art
Tissue paper that bleeds when wet
Combining water and a good quality tissue paper will make it "bleed" or give off it's color. We used this technique to get the cool ocean wave background in this craft.
A common question many people have with tissue paper art techniques, is " does all tissue paper bleed ?" The answer is yes and no.
They will all bleed (or give off color) to a certain extent. We tested different types and found that the cheaper Dollarstore variety didn't work well for us.
The Celebrate It! art tissue paper at Michaels, worked the best for us (its used in this project). I've researched other tissue papers and this tissue paper on amazon is suppose to work even better.
I'll show you in the tutorial below, how to make tissue paper bleed and give off color.
The Best Type of Frame
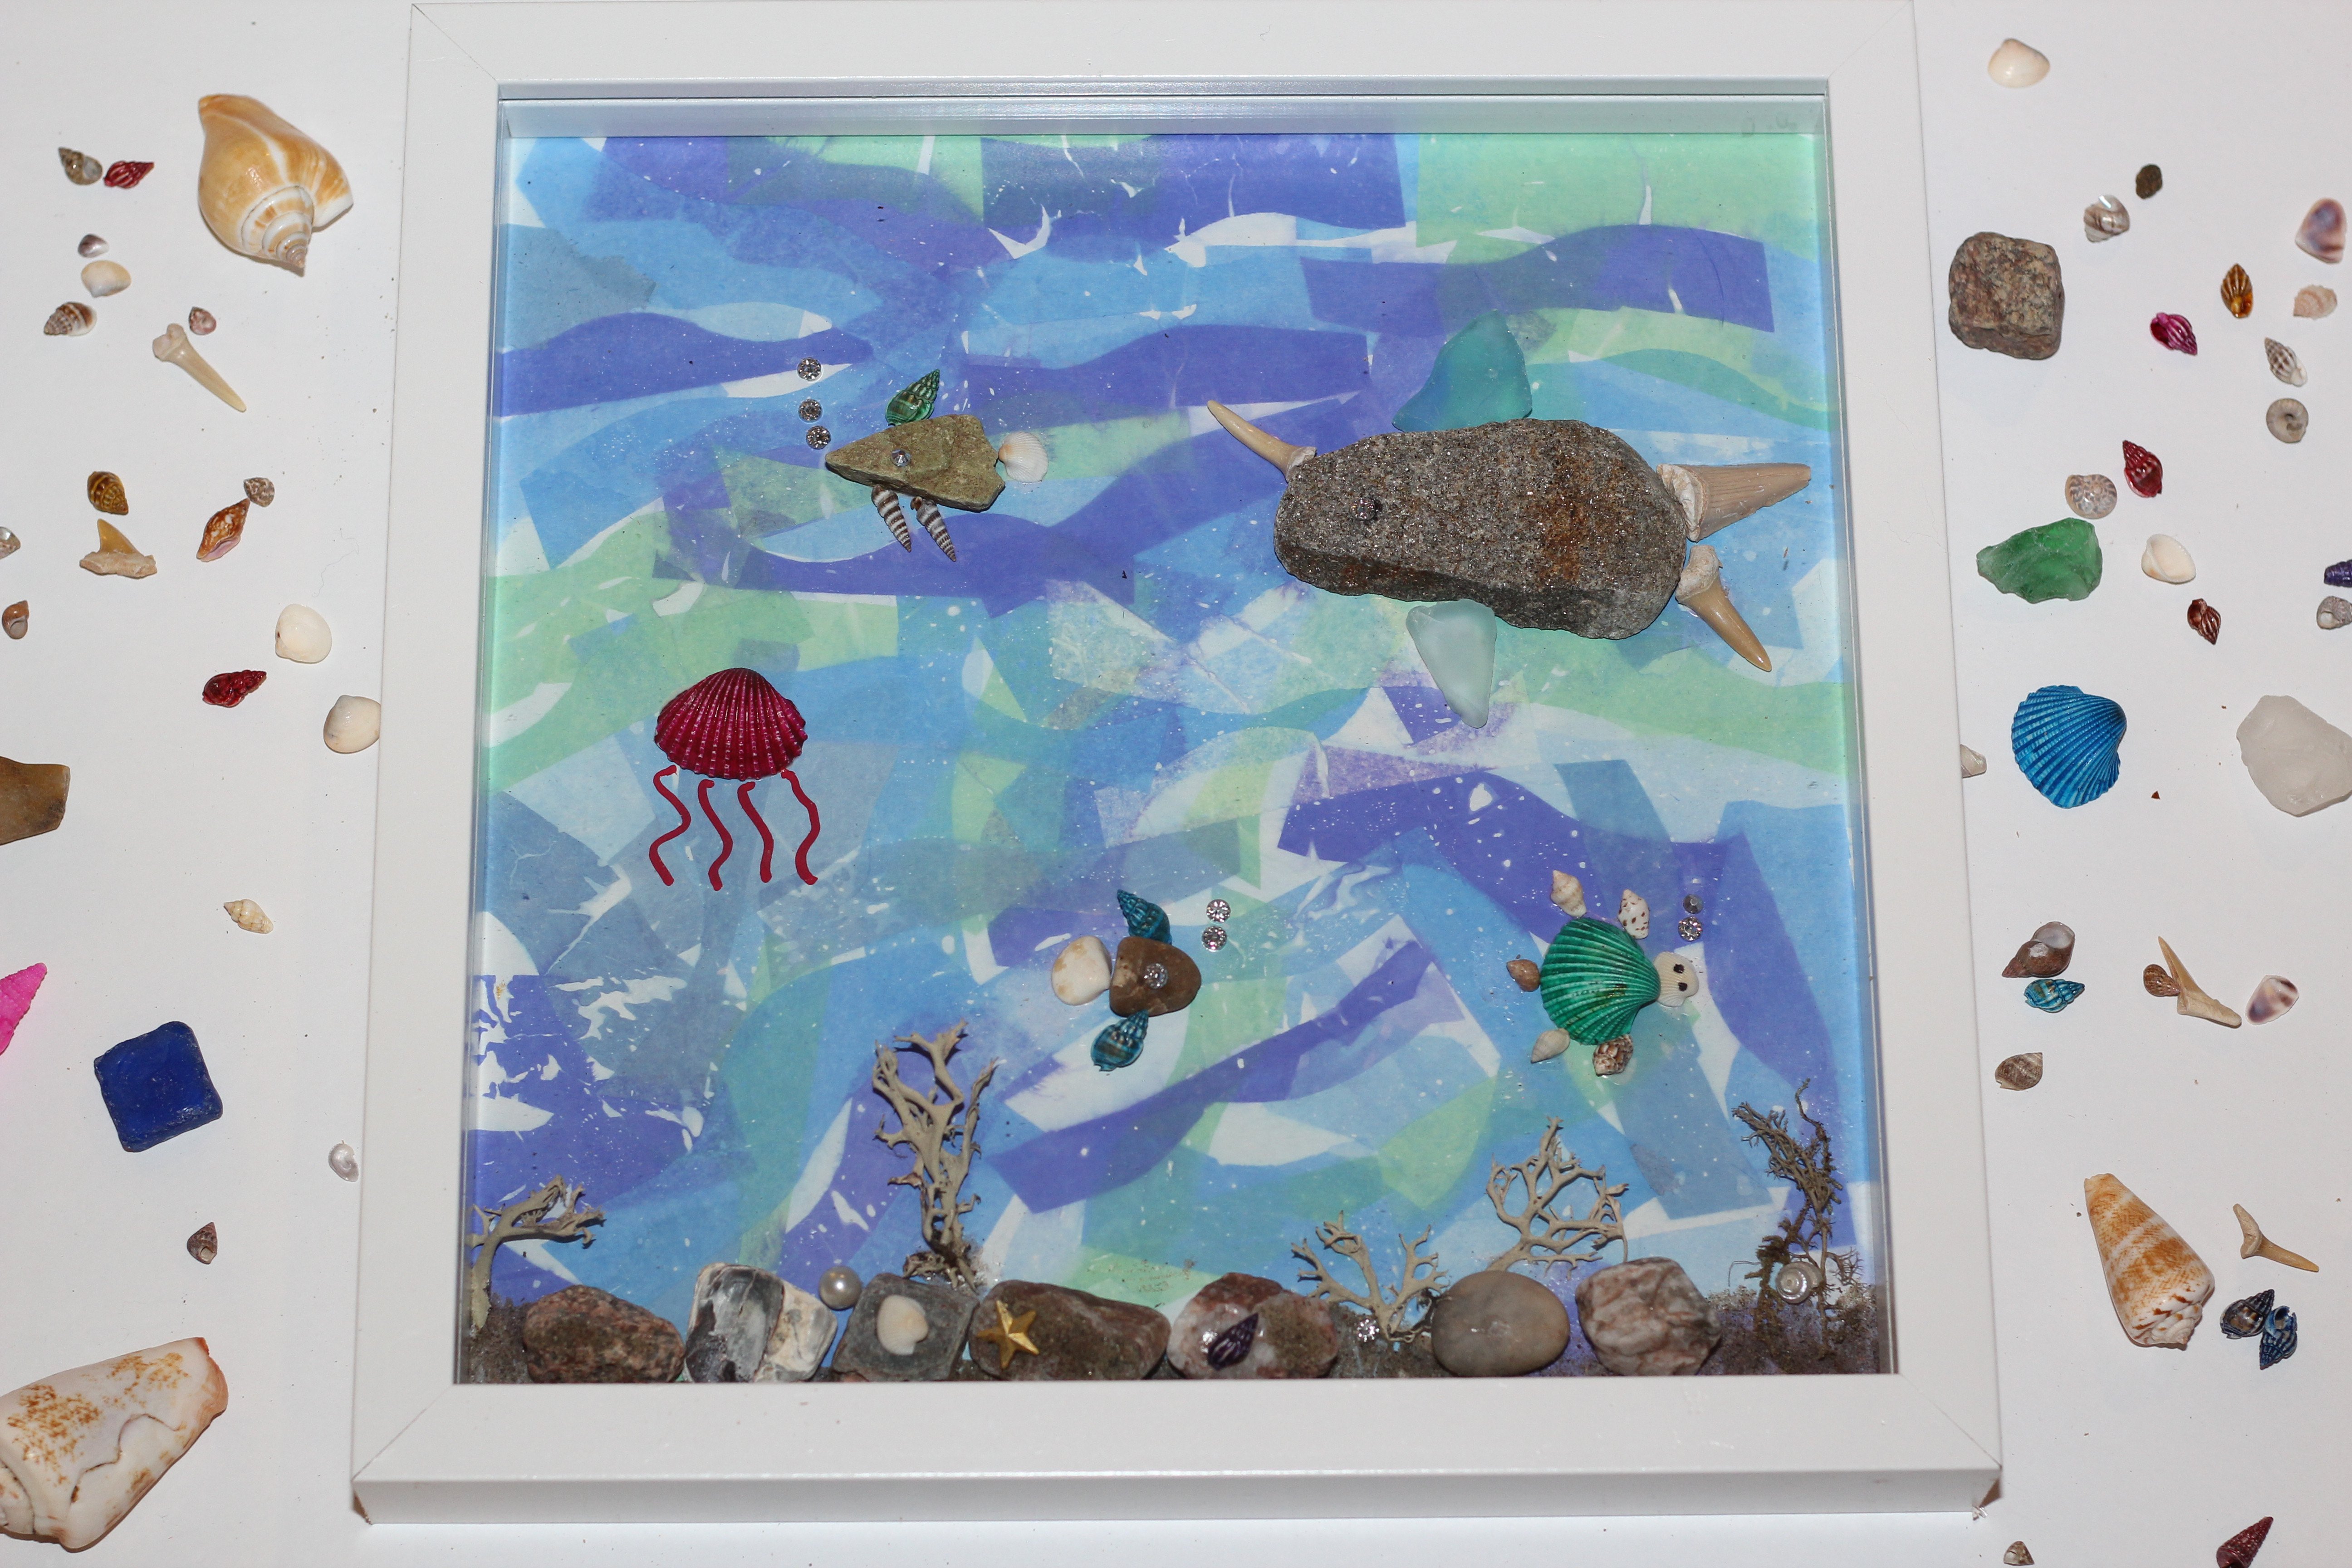
To make this tissue paper artwork ready to hang, you'll need a picture frame or a shadow box frame.
The shadow box frame allows for bigger objects like rocks and seashells to be glued to the backing and still be able to frame the art behind glass.
We got our shadow box frame from the Dollarstore, but you can checkout the Ikea-Ribba frame (which is a great cheap shadow box frame option), and even amazon for some shadow box frames.
Best glue for rock crafts -kid friendly version
You'll need some strong glue for the fish rock art portion. The rocks and pebbles are heavy so you'll need a strong bonding glue to stick them to the cardstock paper.
We used Aleene's glue since it's non toxic and works really well with the rocks-AND it's kid friendly! I even used this glue for my own DIY rock art projects!
Where to Find Rocks for the Fish Craft
You can look in your yard or a local park , beach or nature trail for some interesting rocks.
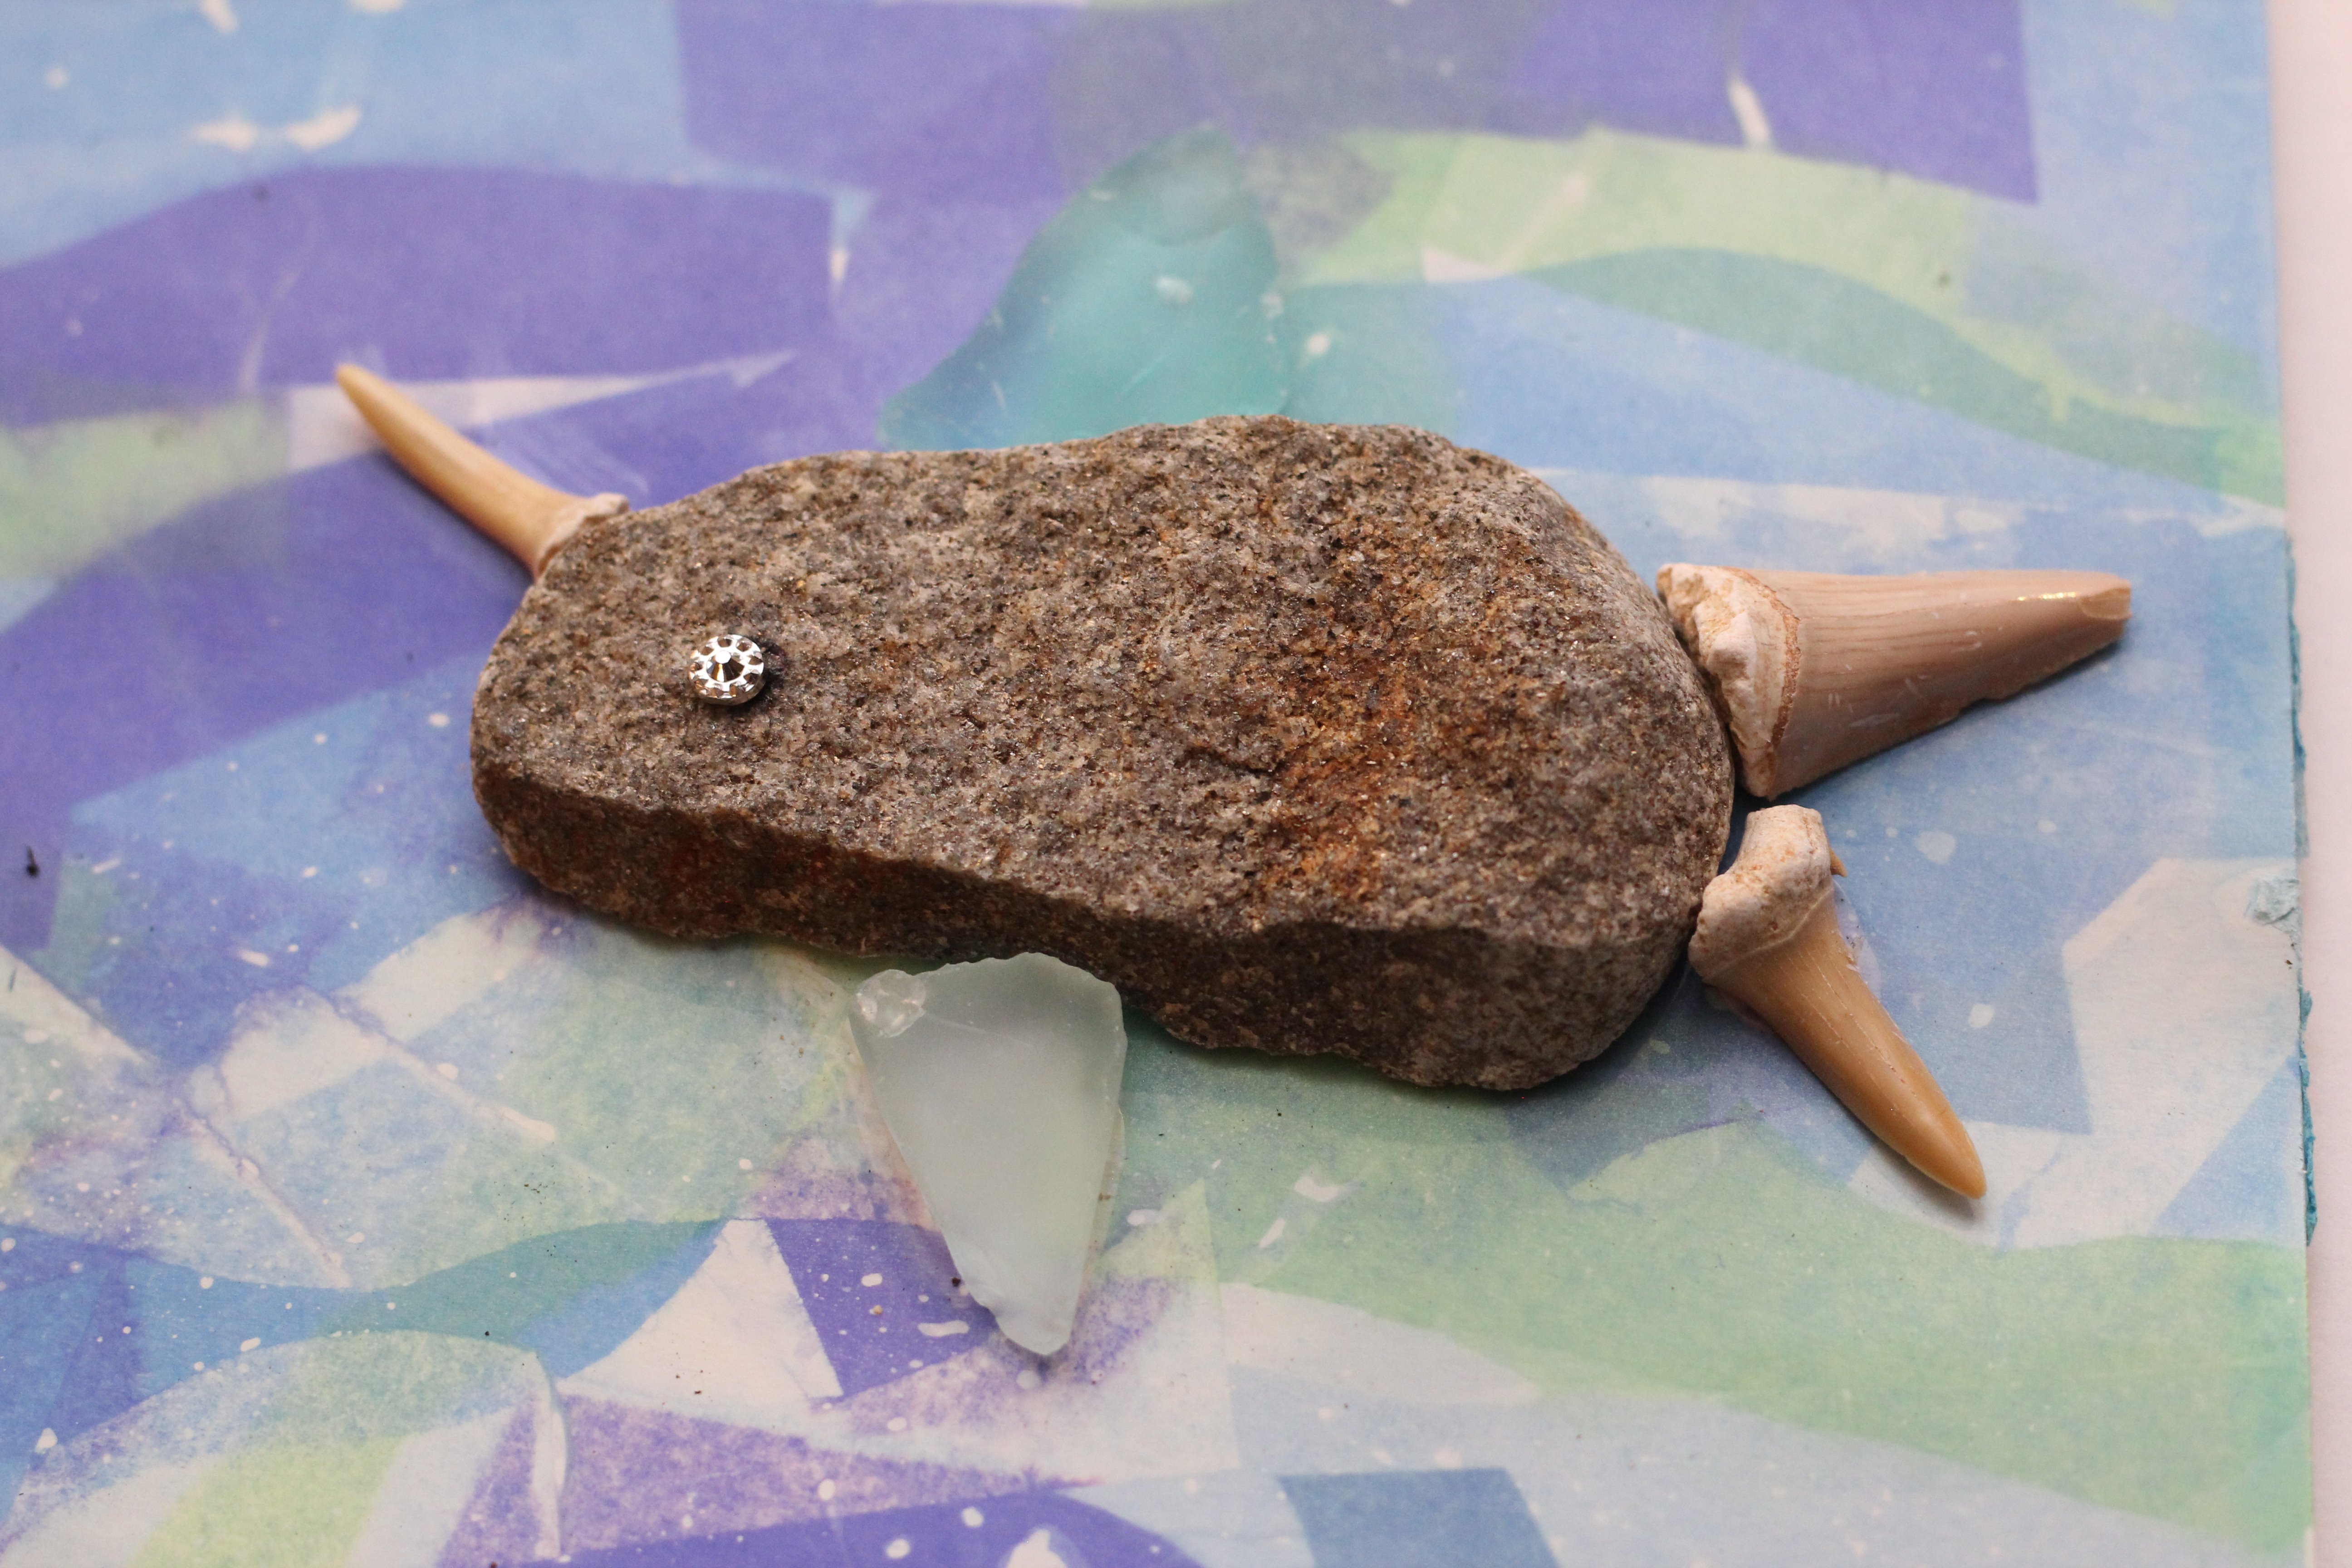
You can make it fun, by asking your kids to collect rocks that they think look like fish, sea turtles, sharks, whales and other sea creatures.
This will help them create the art piece later on it's also a fun activity (kind of like finding shapes in clouds!).
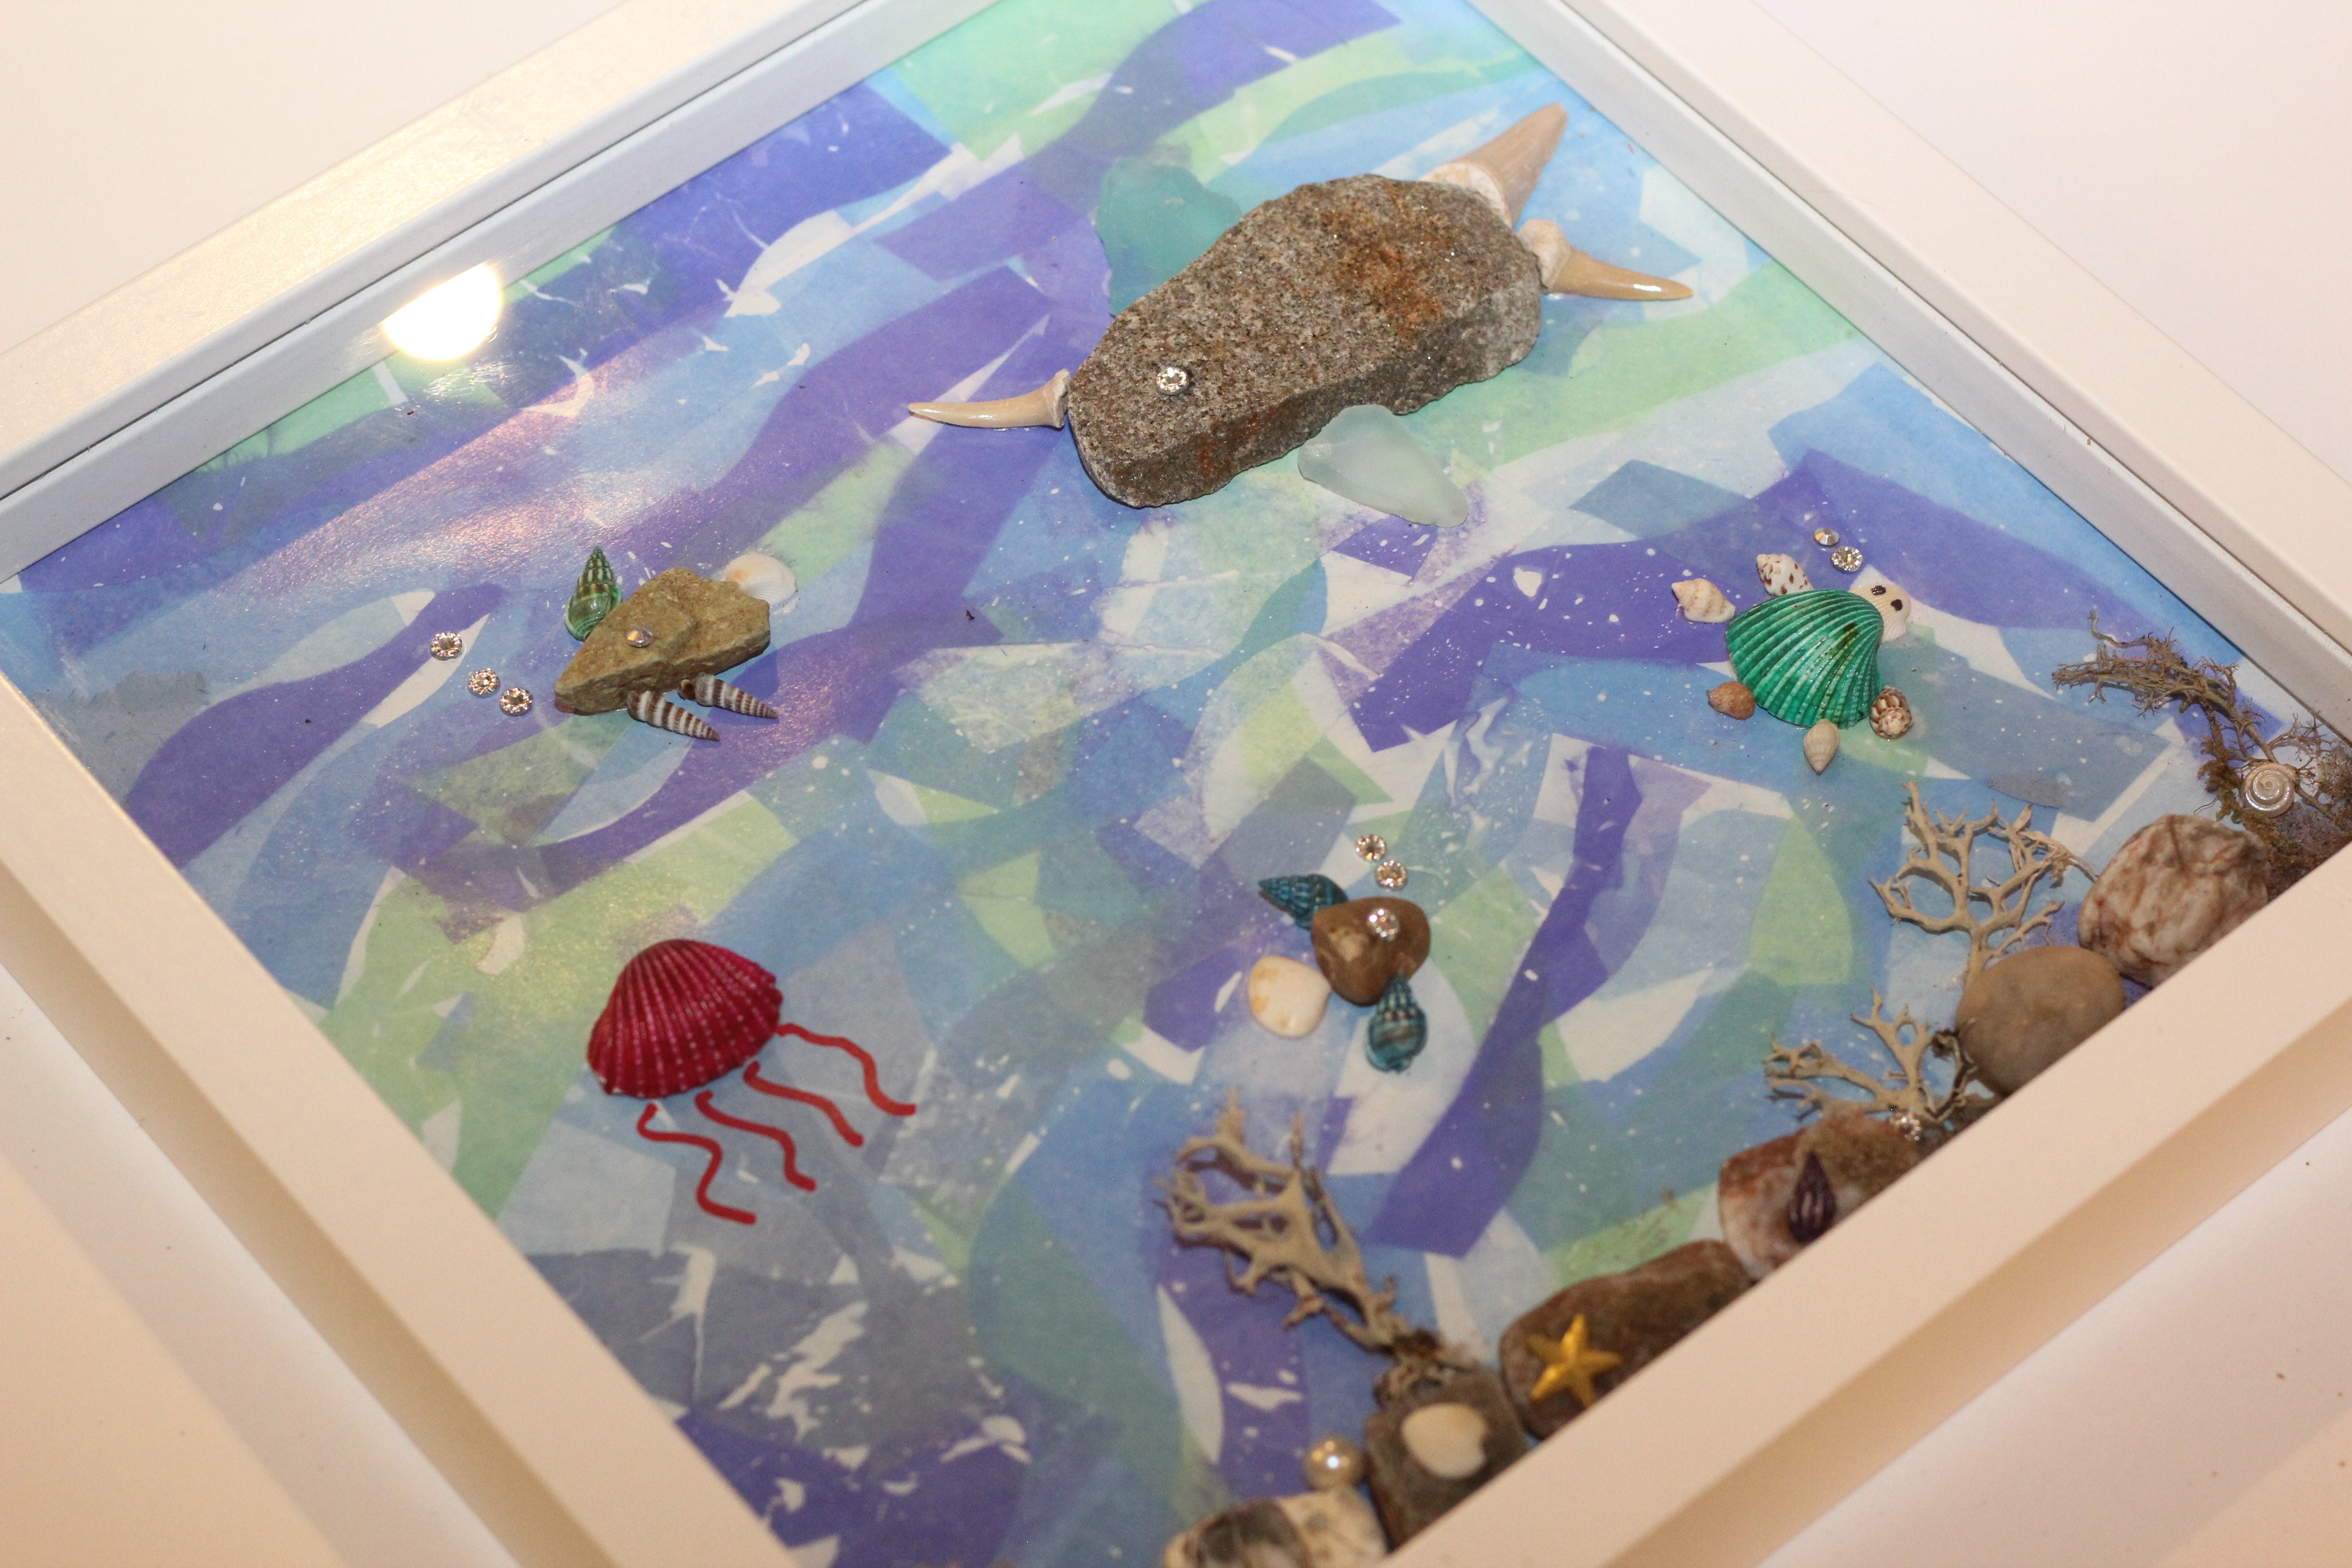
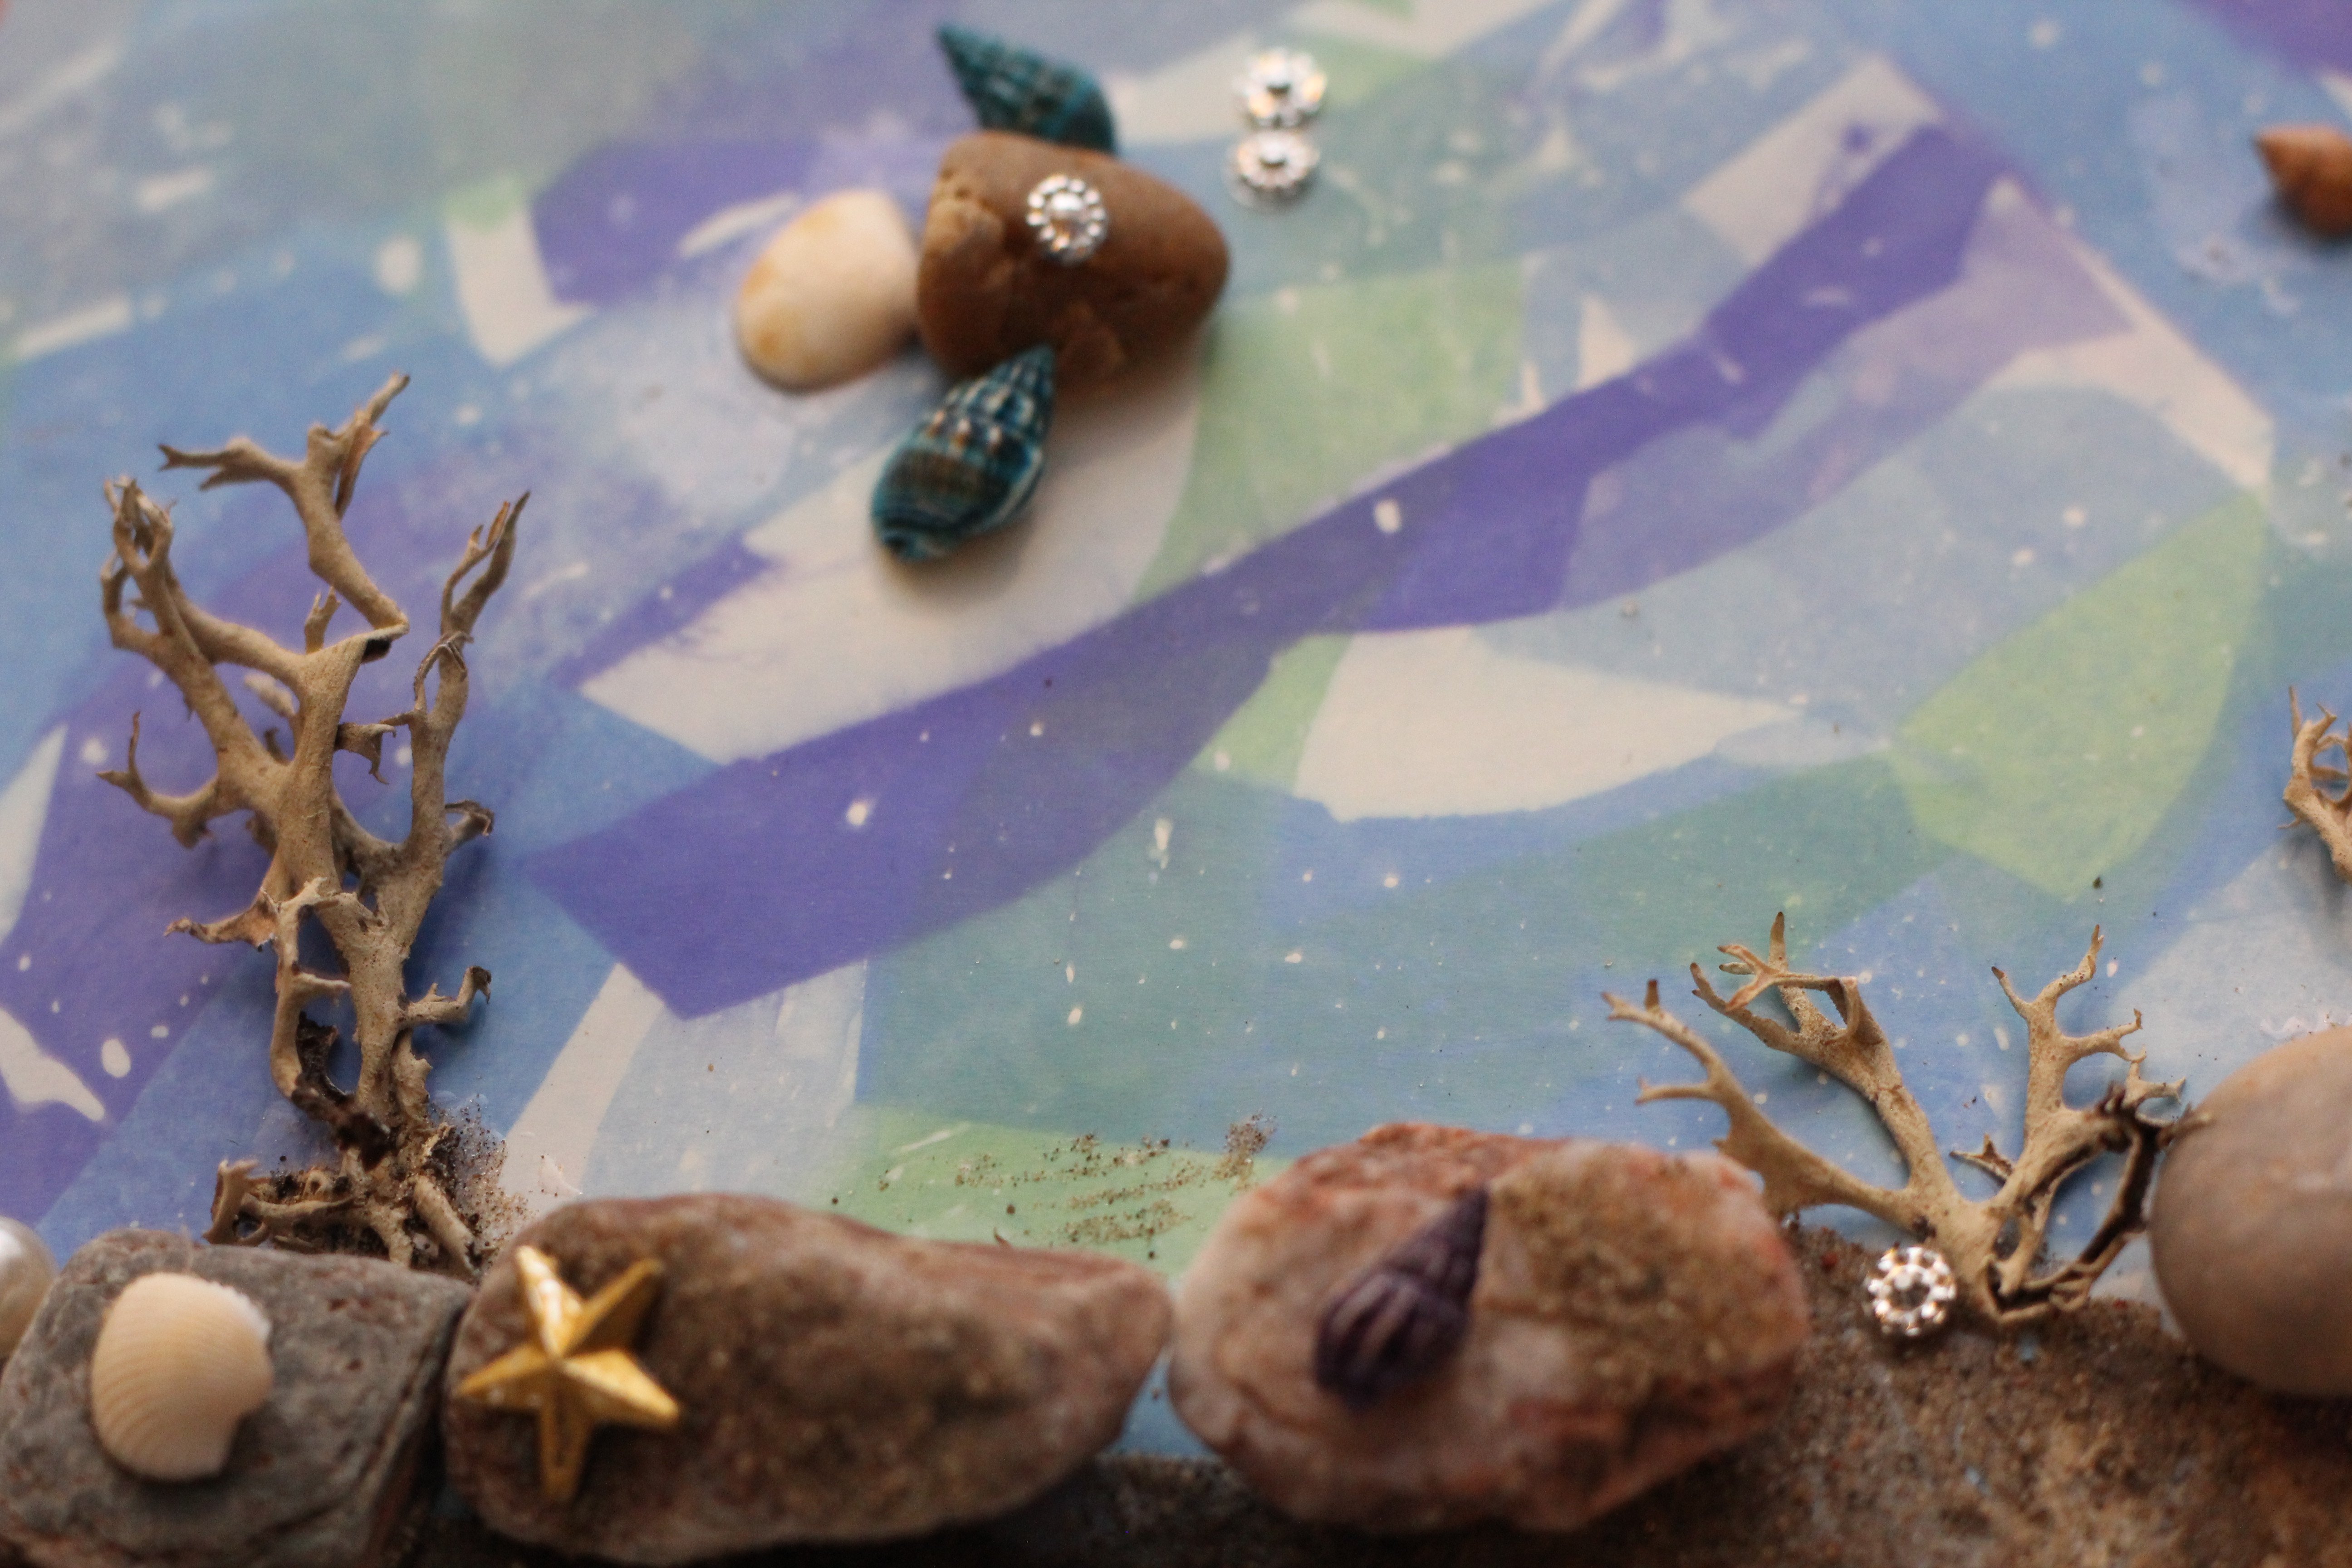
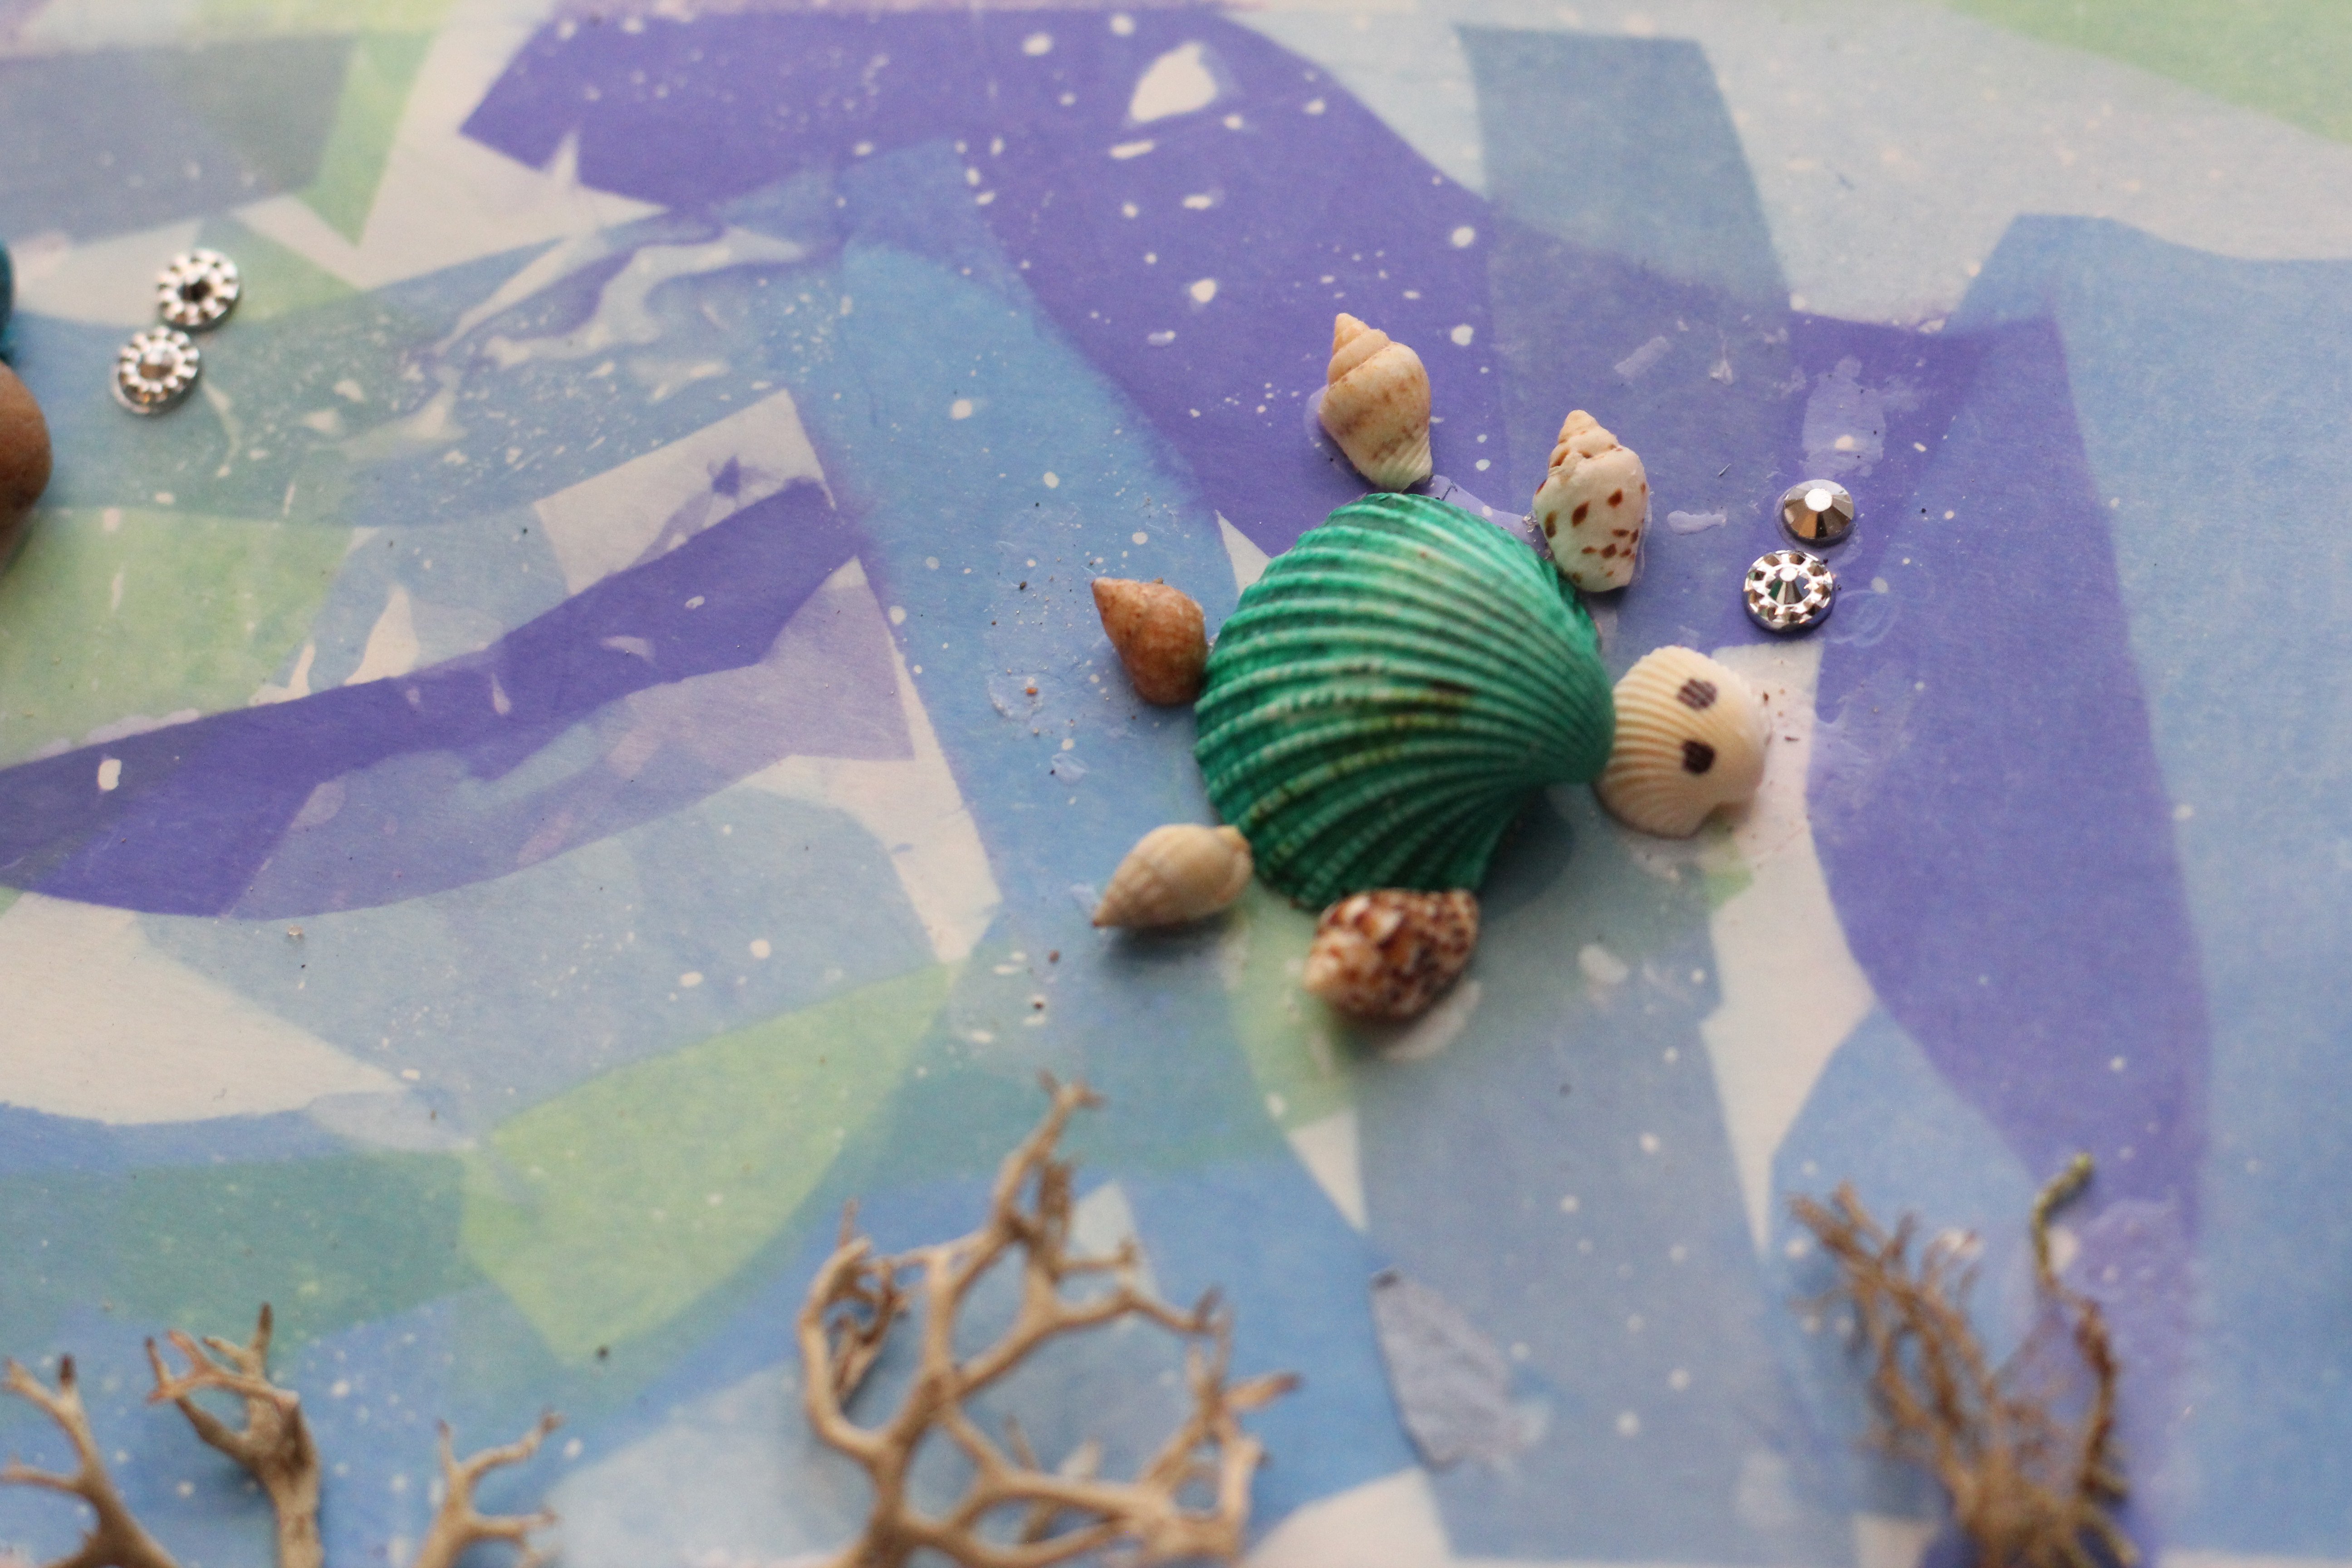
Along with the rocks, we also used some leftover seashells from my seashell heart wall art. The painted seashells made great sea turtles and jellyfish. You can check out the Dollarstore or amazon if you don't have access to a beach.
Tissue Paper Art Fish Craft Tutorial
Materials
- Art Tissue Paper (that bleeds)
- Shadow Box Frame or Ikea-Ribba Frame
- White Cardstock
- Glue (that's strong enough for rocks to bond)
- Rocks or pebbles
- Foam brush
- Optional: seashells and sand
- Optional: round silver rhinestone stickers For the fish eyes and air bubbles
Instructions
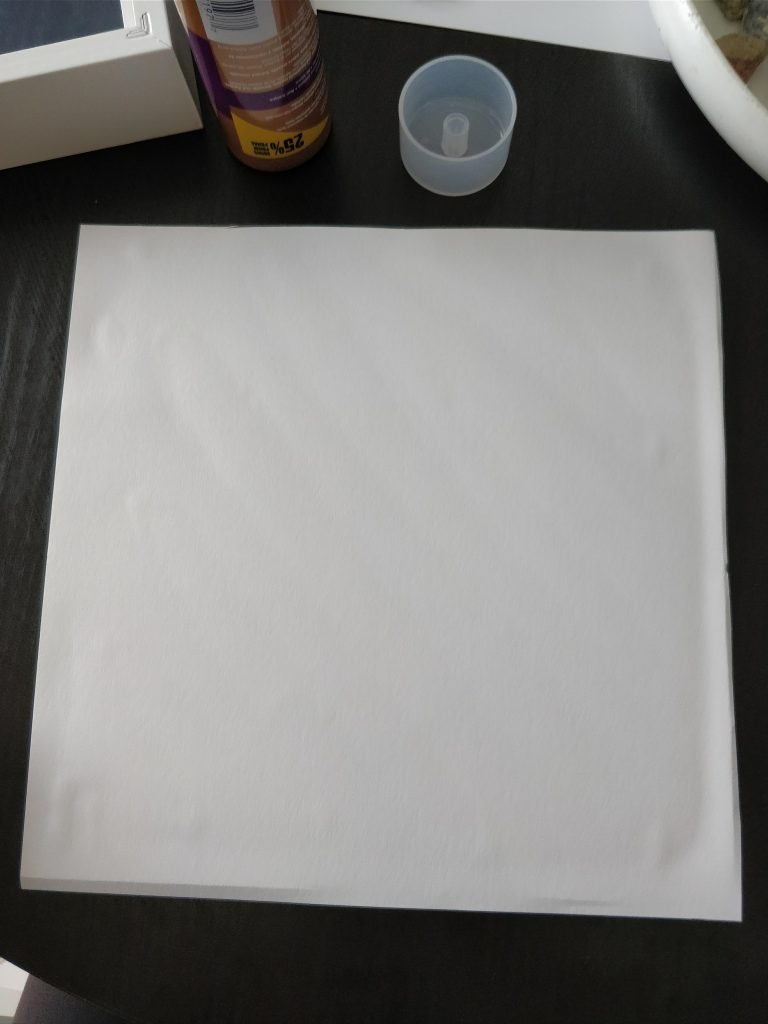
1. Cut your white cardstock to the same size of the backing of your frame (you will glue it to the backing in a later step)
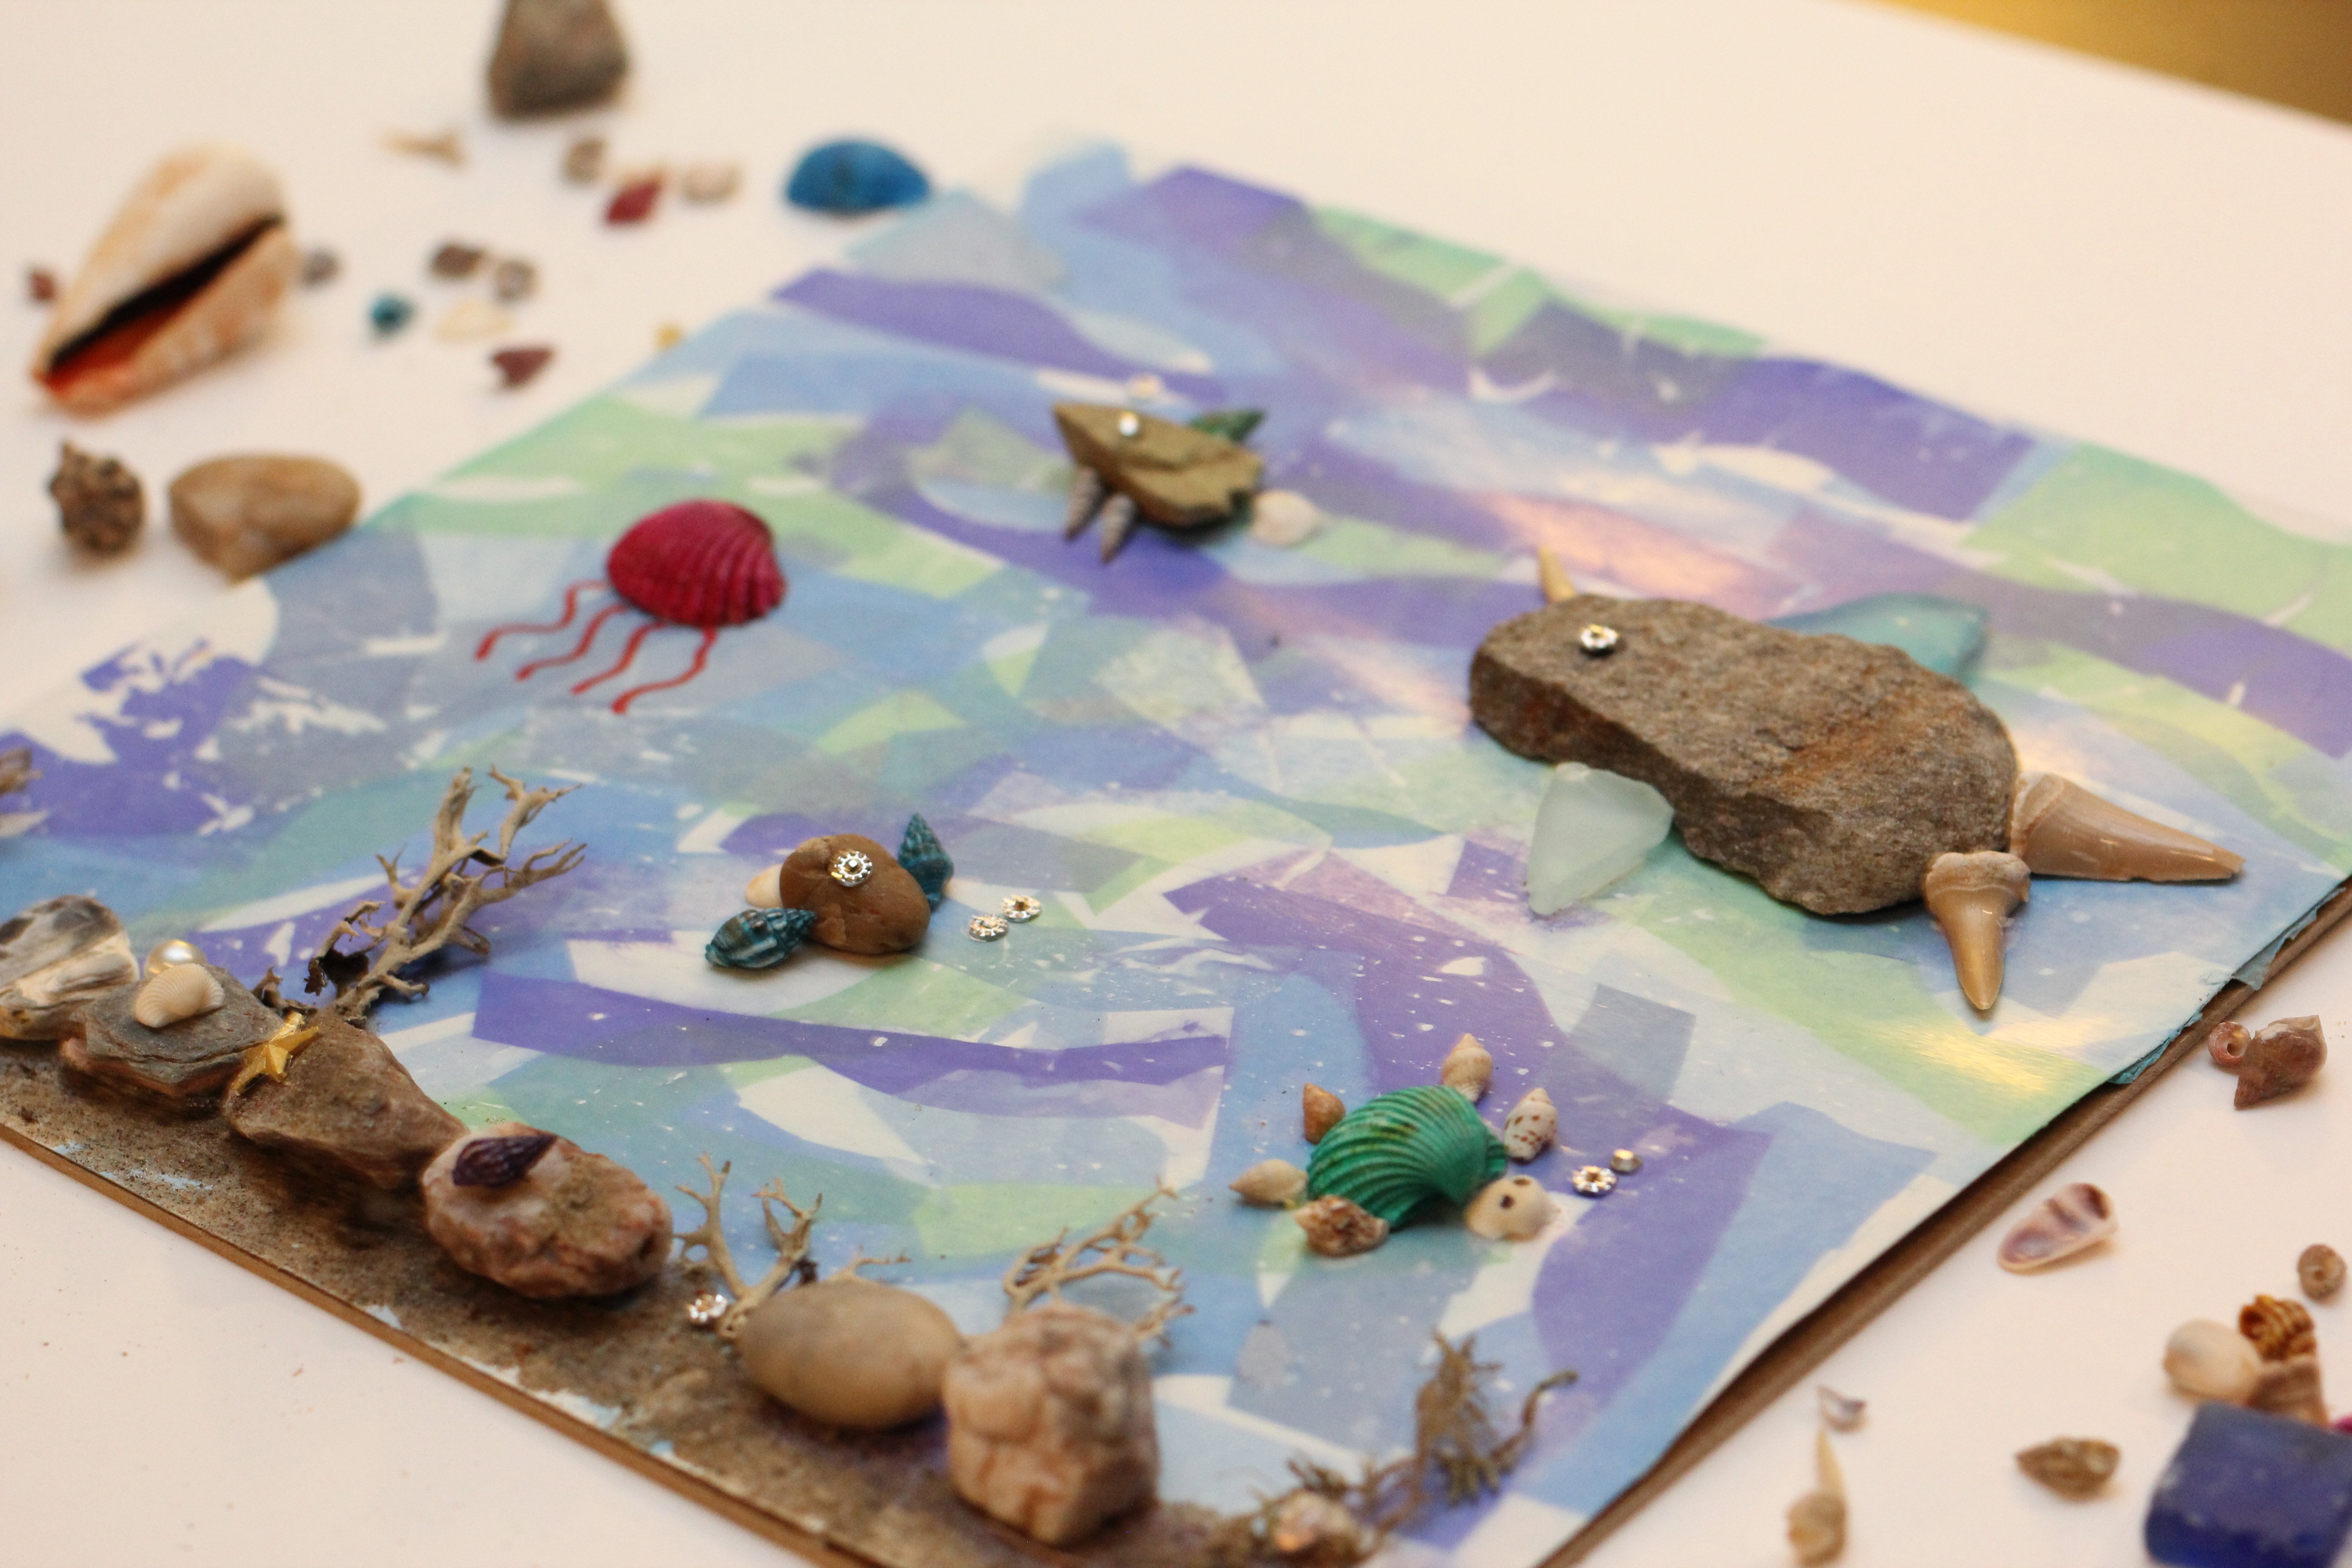
2. Cut your tissue paper into wave like shapes (they don't have to be perfect wave shapes, as you can see!). We used different shades of blue, and a sea foam green.

3. Have the kids lightly wet the cardstock with some water using the foam paint brush.
4. While the cardstock is wet, get the kids to put the pieces of tissue paper on it, and fill up the whole page - however they like.
Once the cardstock is covered, ask the kids to add another thin layer of water over top the tissue paper using the foam brush. Kids love doing this step! This makes sure all the tissue is wet and will bleed nicely.
TIP: don't use TOO much water with the tissue paper art, for some reason it gives off less color the more water you use! A thin even layer of water works best

5. Now the hard part. You have to wait bit and let it dry. Ideally you should let the tissue paper fully dry to get the most vibrant color. We only waited 5 minutes and still got some pretty colors.
To remove the tissue paper, the kids can gently rub them off with their fingers (if still wet). If dry, the tissue paper should peel off pretty easily.
Underneath the tissue you should be left with some gorgeous colors on your cardstock.

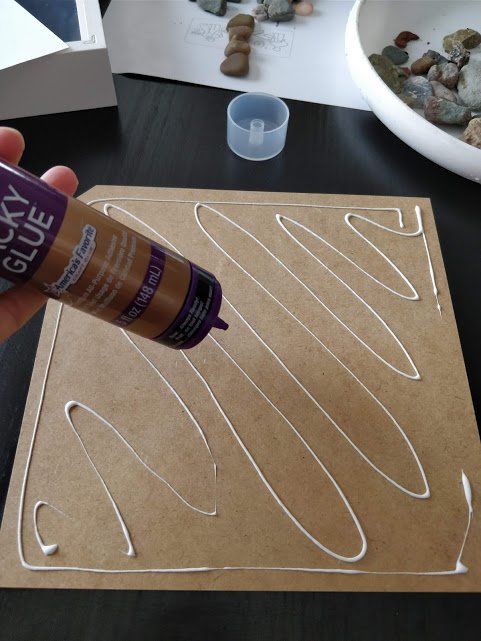
6. Once the ocean background on the cardstock is fully dry, glue it to the backing of the shadow box frame.
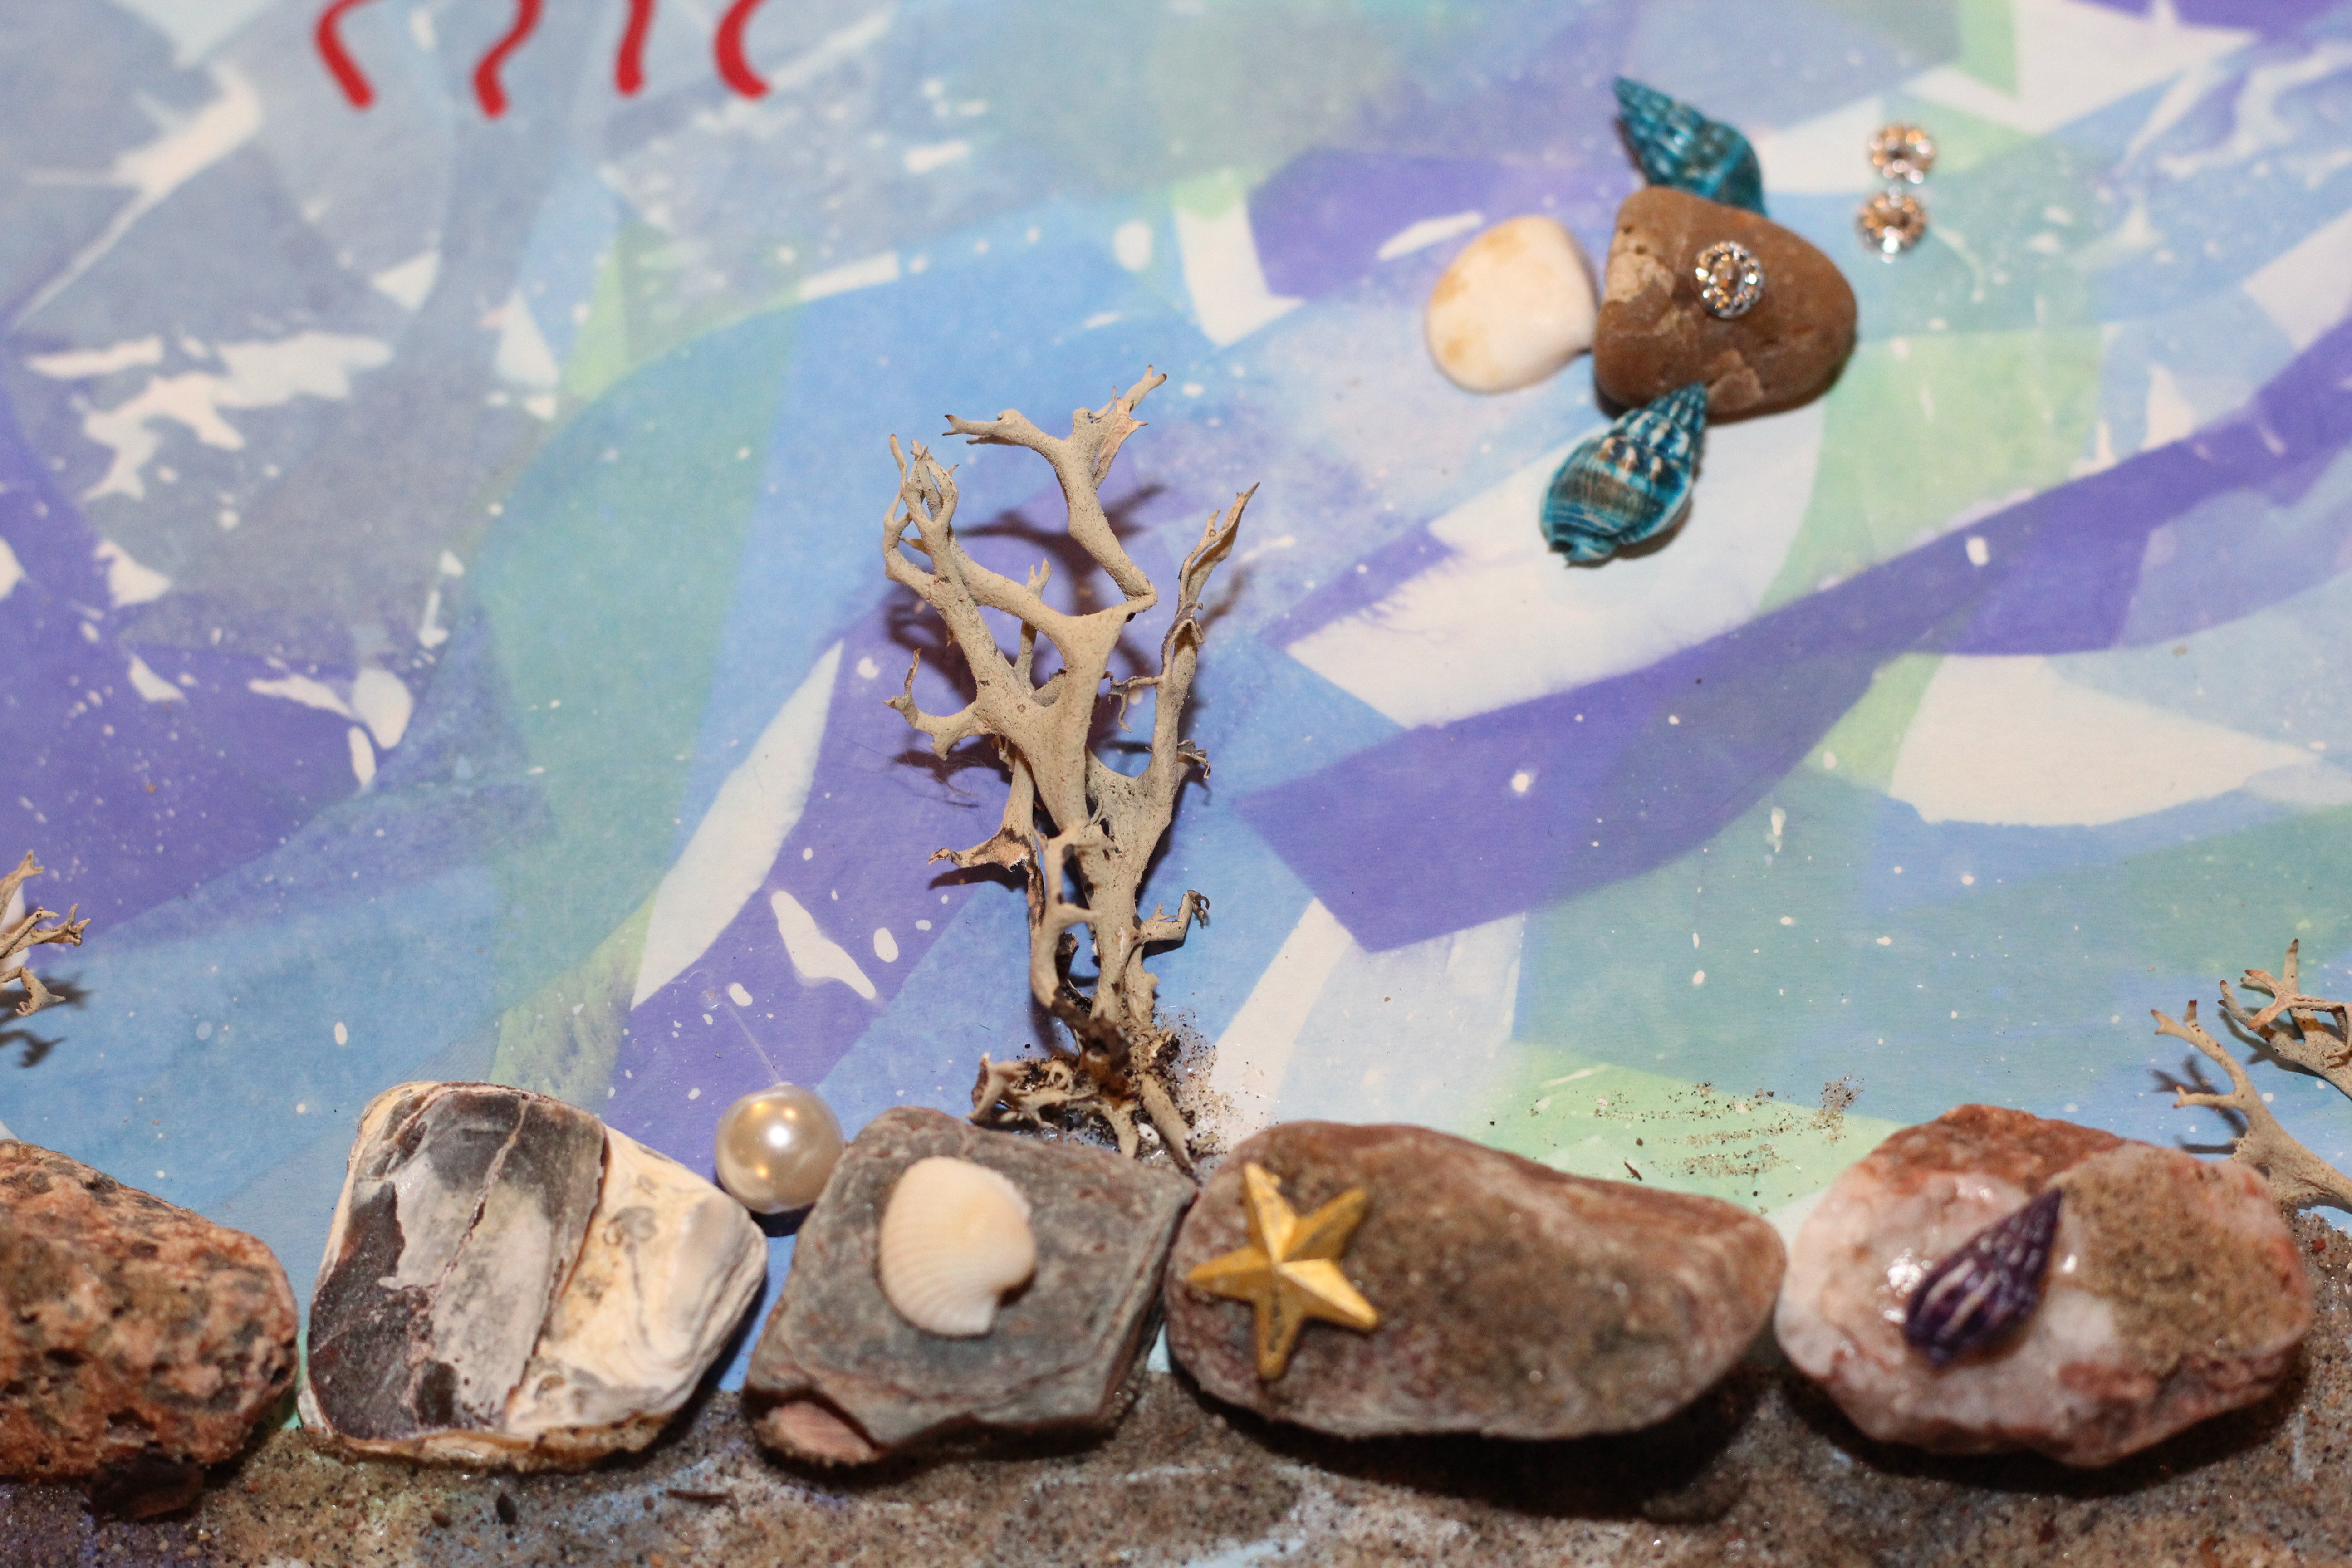
7. Now for some fun rock art and fish crafts fun! The kids can take the rocks and shells they collected, and glue them to the under the sea background. To make the rocks look more like fish they can take a sharpie/marker to draw on eyes, fins, and other details. Or even paint them with an acrylic paint.
To create the air bubbles we used some self adhesive rhinestones we had at home. Another idea is to use a marker to draw the air bubbles in. Or you could leave them out entirely.


8.Optional: my daughter wanted to create a sea floor, so we got some sand from the park to create it. She used her foam brush to paint on a thin layer of glue to the bottom of her picture, then sprinkled some sand over top the glue to make the sea floor.
We then let it dry. She added a couple more rocks and some fake moss we bought at the Dollarstore to complete her sea floor.
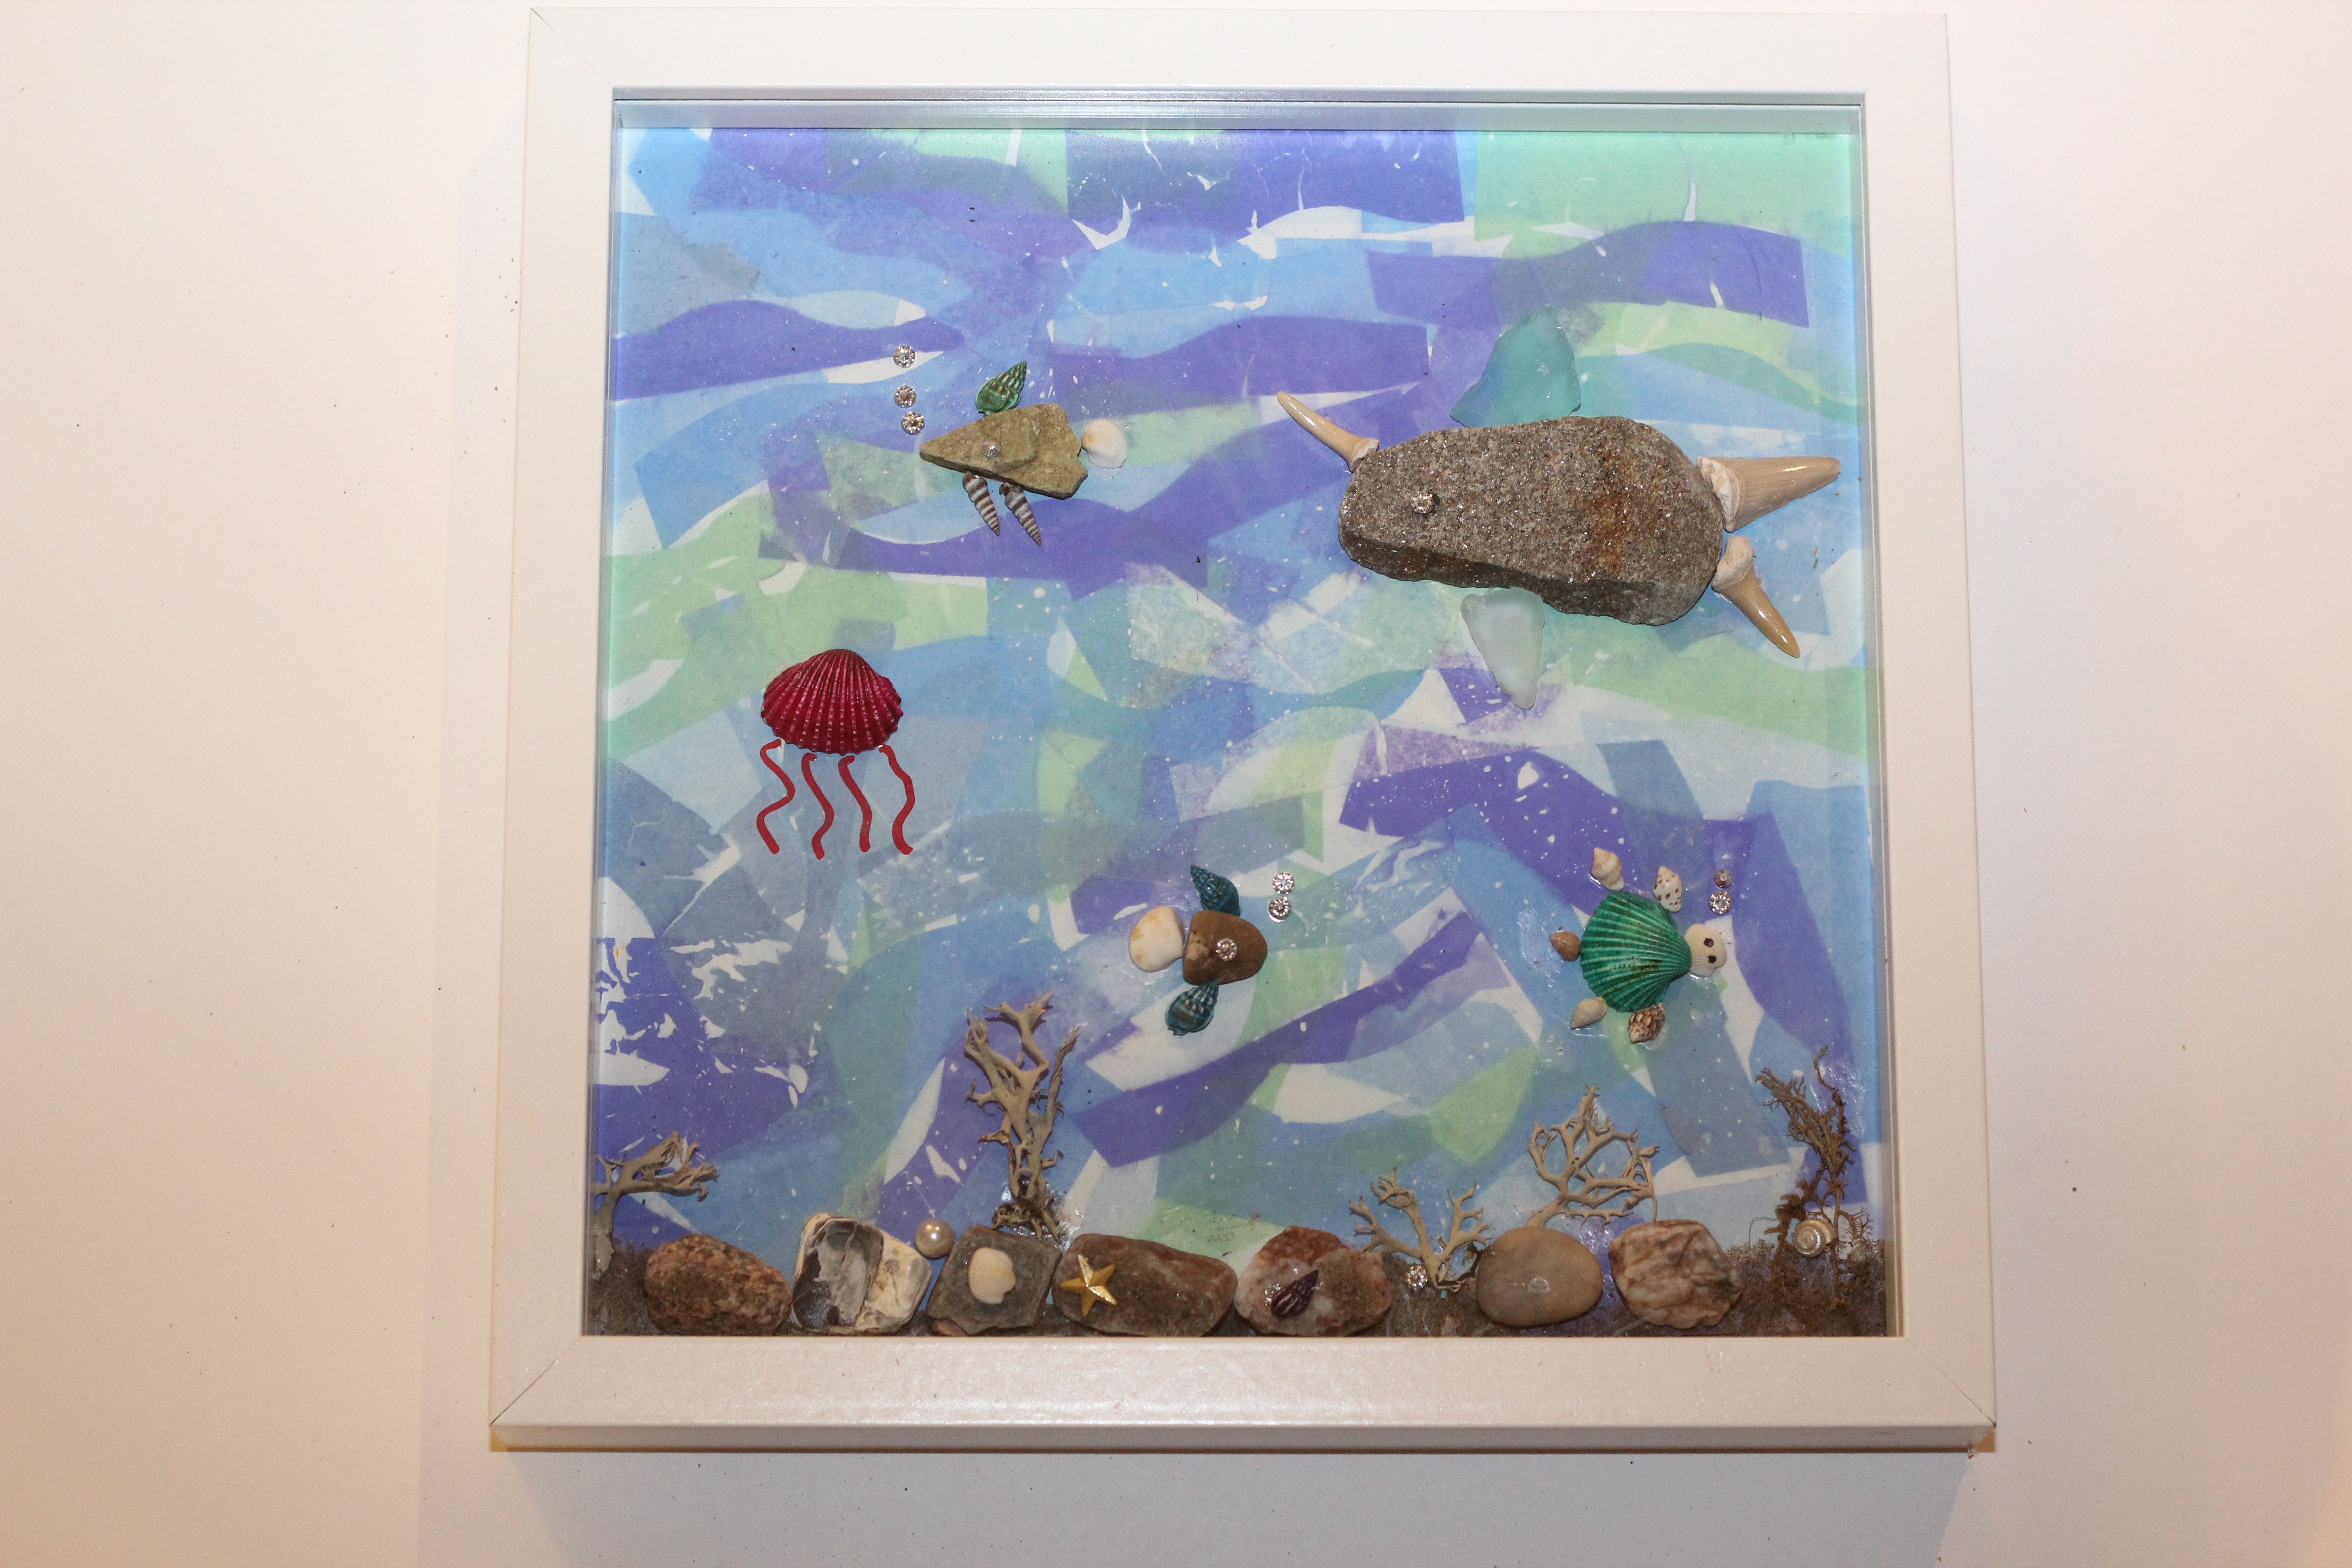
9, Once the kids are happy with their masterpiece, let the glue fully dry. Once dry, slip the backing into the frame. It's now ready to hang on the wall.

Here's a few more pictures of the tissue paper art fish craft


You might like these other beach inspired crafts:
If you liked this craft, please pin it!
Until next time, stay Nifty!